Fresh

Fresh tulips and hyacinths

Since yesterday was the first day of Spring, and the SNOW came back to Mars (thankfully only briefly), I bought some fresh flowers to bring Spring indoors!

Nothing says Spring to me like the smell of tulips and hyacinths.

This week’s WordPress Weekly Photo Challenge is “Fresh,” so the fresh flowers that are the centerpiece on my kitchen table are my submission this week.  I thought this was a fun angle with a different perspective.

Happy Spring!

Cheers & Hugs,
Jodi

Hello There in Watercolor Bokeh

hello there bokeh 1

Hello There Friends!  It’s Friday!  Thanks for visiting today.

For this week’s Friday card, I had fun experimenting with an abstract watercolor and bokeh technique Diane Dimich featured recently here. 

For the blues/greens, I mixed some stamp reinkers with water, and I used some watercolor paint for the red/oranges – just to try a couple different ways.  Once I decided on my color palettes, I brushed my watercolor paper with some clear, clean water using a water brush, then began randomly dabbing the colors all over covering the entire surface.

watercolor bokeh 2

Once it dried, I daubed white inked circles in multiple layers overlapping from a template I created using a piece of acetate cut with the Stampinup Circle Framelits to give the bokeh effect I love so much in photography.

watercolor bokeh 3

Once I was pleased with the effect, I mounted it onto cardstock with a white border, stamped the Hello There greeting in black and embellished with a few simple rhinestone gems.

hello there bokeh 1

I haven’t finished the rest of the painted sheets yet.   I think I will save them for when I need a particular card that I can add just the right greeting and message to.

So here’s to Friday, the weekend, creativity, sharing, and all the wonderful things to enjoy at life in between.

Cheers & Hugs,
Jodi

Soft Pretzels stuffed with Bacon, Spinach & Artichoke Dip

stuffed soft pretzels

Imagine if steamy, fresh baked, salty soft pretzels had a love child with ooey gooey, creamy, cheesy bacon spinach artichoke dip…….

stuffed soft pretzels 3 filling

Can you E V E N imagine the gloriousness?

And then maybe kick up that pretzel bread dough with just enough beer to make it magical…

Look no further!  Here is the most amazing appetizer/snack/meal in a pretzel ever created!  Are you ready for the deliciousness?

stuffed soft pretzels 4

Though this is not a difficult recipe, it is definitely a bit time consuming.   But….  It is so worth it!

stuffed soft pretzels 5

If you are looking for a WOW factor treat to make and share, look no further.   Get your apron on and get ready to rock your socks!

stuffed soft pretzels 6

My son, Nick, originally found this recipe on an amazing food blog, Half Baked Harvest, and asked if I was up for “attempting these.”  Are you kidding?!?!  I live for this stuff!

Thank you Tieghan for sharing!  I tweaked it up just a bit – you know…. maybe just a bit more bacon (have you ever heard of using only two slices of bacon?!?) and always more garlic!  🙂 , but this is pretty true to Tieghan’s amazing recipe.

stuffed soft pretzels 2

Oh…. and besides going amazing well with a great draft beer, these go amazingly well with (yep – you guessed it…. a great red wine!)  🙂

Soft Pretzels Stuffed with Bacon, Spinach & Artichoke Dip

  • Servings: 8 Giant Stuffed Pretzels
  • Print

Pretzel Dough Ingredients:

  • 1/2 cup warm waterstuffed soft pretzels
  • 2 Tbsp light brown sugar
  • 1 pkg (2 1/4 tsp) active dry yeast
  • 1 cup beer
  • 1 stick butter, melted
  • 1 1/2 tsp salt
  • 2 1/2 cups all-purpose flour
  • 2 cups whole wheat flour
  • 2/3 cup baking soda (for boiling pretzels)
  • 1 egg, beaten
  • Coarse sea salt

Spinach and Artichoke Dip Filling Ingredients:

  • 6 slices thick-cut bacon, chopped
  • 1 Tbsp butter
  • 3 cloves minced garlic
  • 1 Tbsp flour
  • 1/2 cup milk
  • 1 oz. cream cheese
  • 1/2 cup shredded mozzarella cheese
  • 1/2 cup grated Parmesan cheese
  • 1/2 cup Greek yogurt
  • 1 tsp coarsely ground black pepper
  • 1 box frozen chopped spinach, thawed and squeezed dry
  • 1 8 oz. can marinated artichoke hearts, chopped

Instructions:

Pretzel dough:  Combine water, brown sugar and yeast in the bowl of a stand mixer and mix with the dough hook until combined. Let sit for 5 minutes.

Add melted butter, beer, salt, and flour to the mixture.  Mix on low speed until combined. Increase to medium speed and continue kneading until the dough is smooth and begins to pull away from the sides of the bowl, about 3 – 4 mins.  Remove dough from bowl and knead into a ball with your hands.

Coat a large bowl with oil, add dough and turn to coat with the oil. Cover with a clean towel and place in a warm spot until the dough doubles in size.

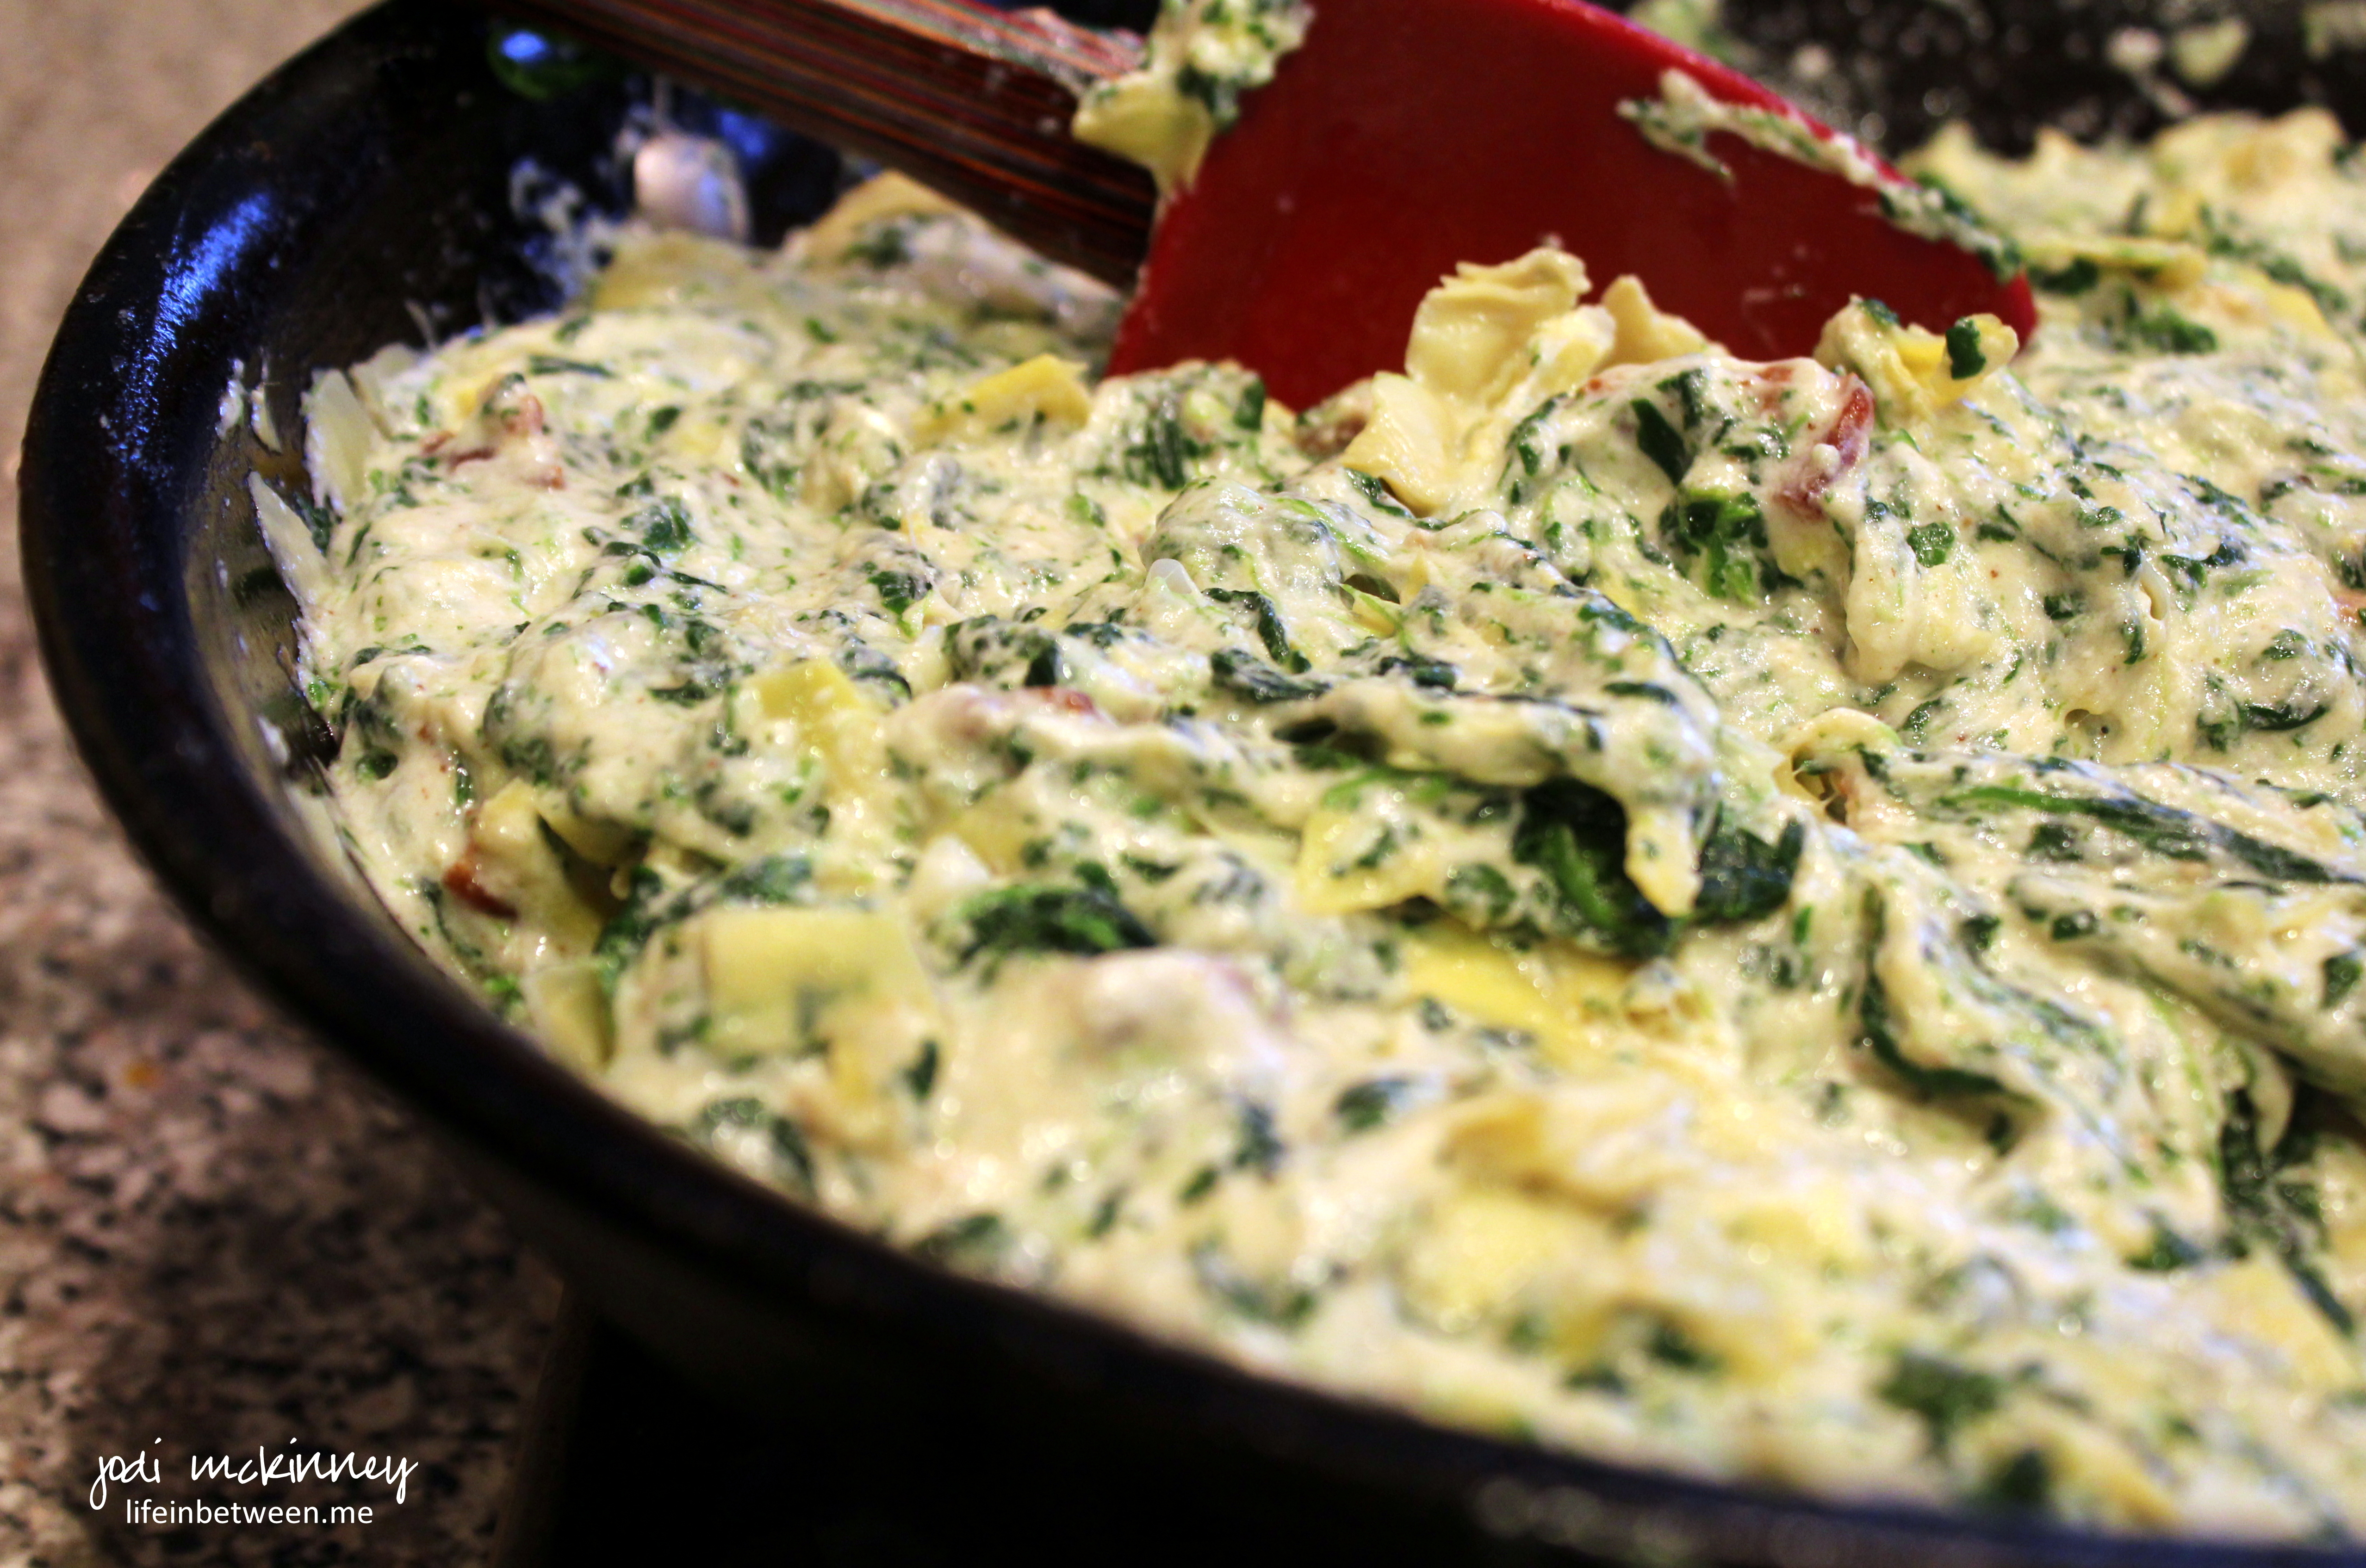
In the meantime, make the filling:  Fry bacon until crispy.  Remove with a slotted spoon and drain on paper towels.  In the same skillet, melt  butter, add garlic, and cook for a couple of minutes. Whisk in flour until it makes a paste. Cook over medium-low heat for 1-2 mins, then pour in milk. Stir and cook 1 more minute.

Add cream cheese, mozzarella, Parmesan and black pepper. Stir until cheeses are melted. Stir in yogurt until smooth. Add chopped artichokes, spinach, and bacon, and stir to combine.

Preheat the oven to 425 degrees F. Bring a large pot of water to a boil.

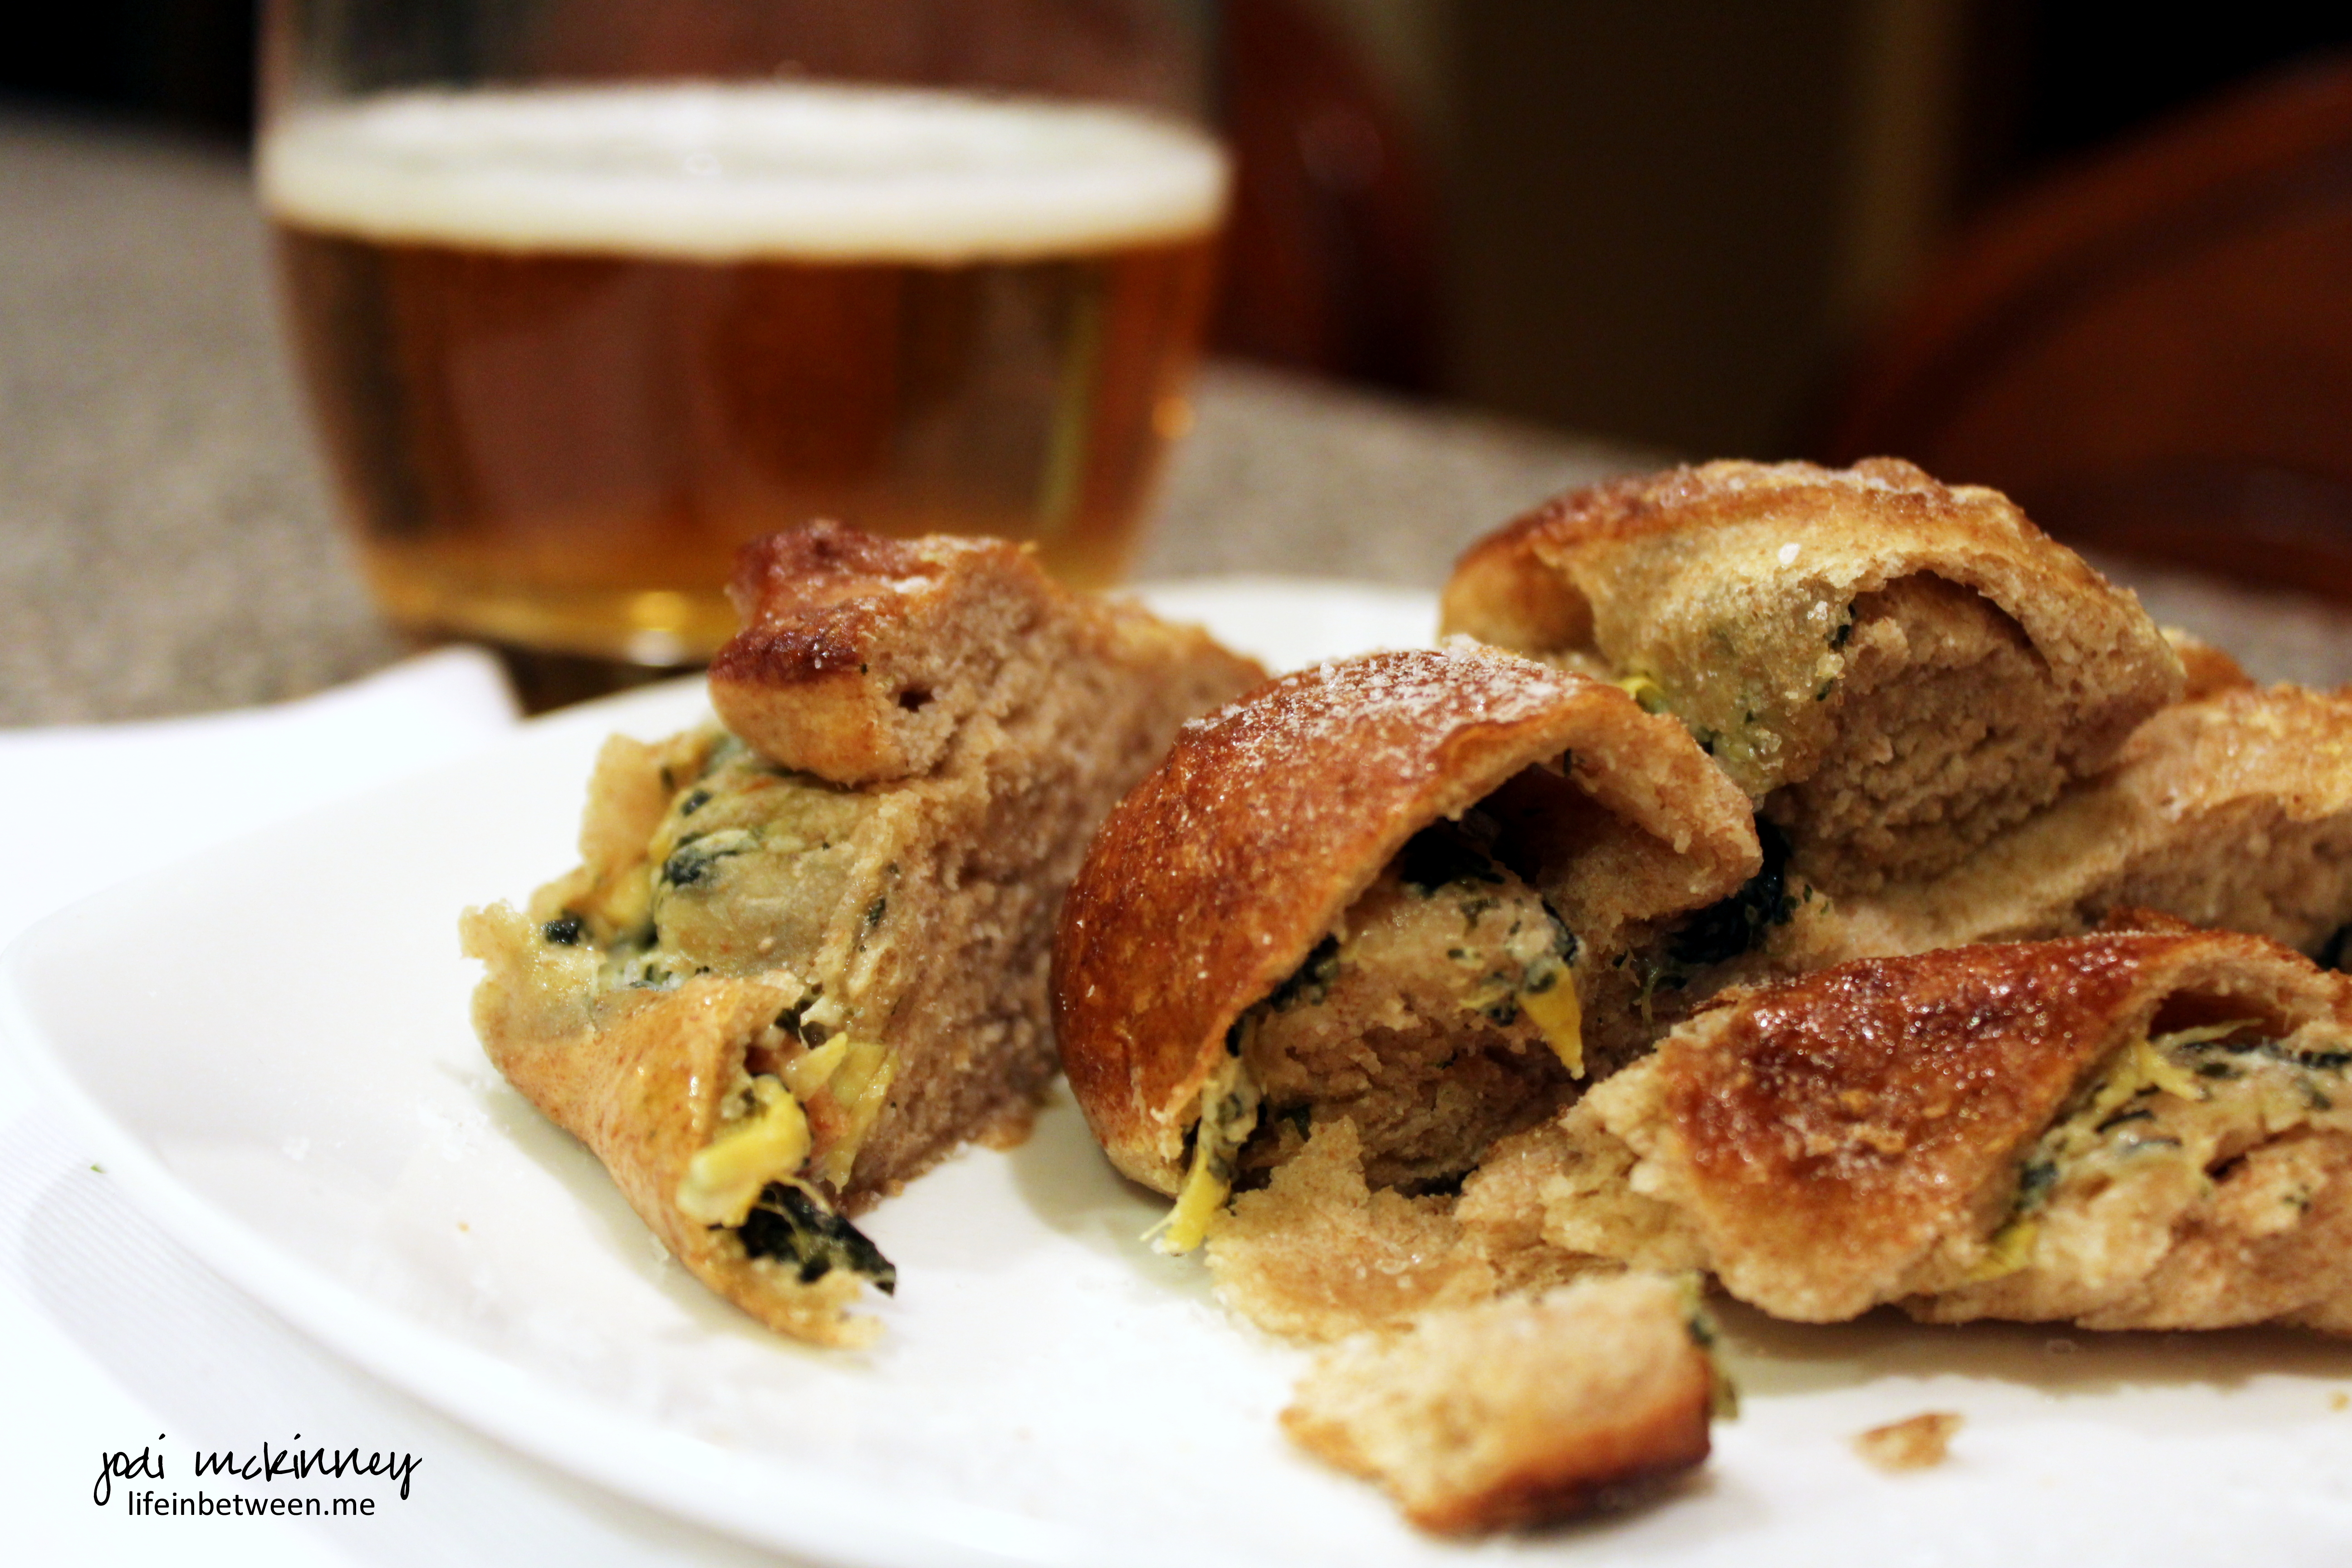
When pretzel dough has doubled, punch down and divide into 8 equal balls.  Roll each out into a 11×3 inch rectangle.  Spread about 2 Tbsp dip filling along the length of each piece. Roll the dough up into a log, enclosing the filling inside. Pinch the seams together and then very gently roll the dough with your hands to form an even cylinder and fully enclose the filling.  Form into a pretzel shape, and press to seal.

Slowly add the baking soda to the boiling water. Boil the pretzels in the water solution, 2 at a time for 1 minute, splashing the tops with the warmed water using a spoon. Remove with a large flat slotted spatula.

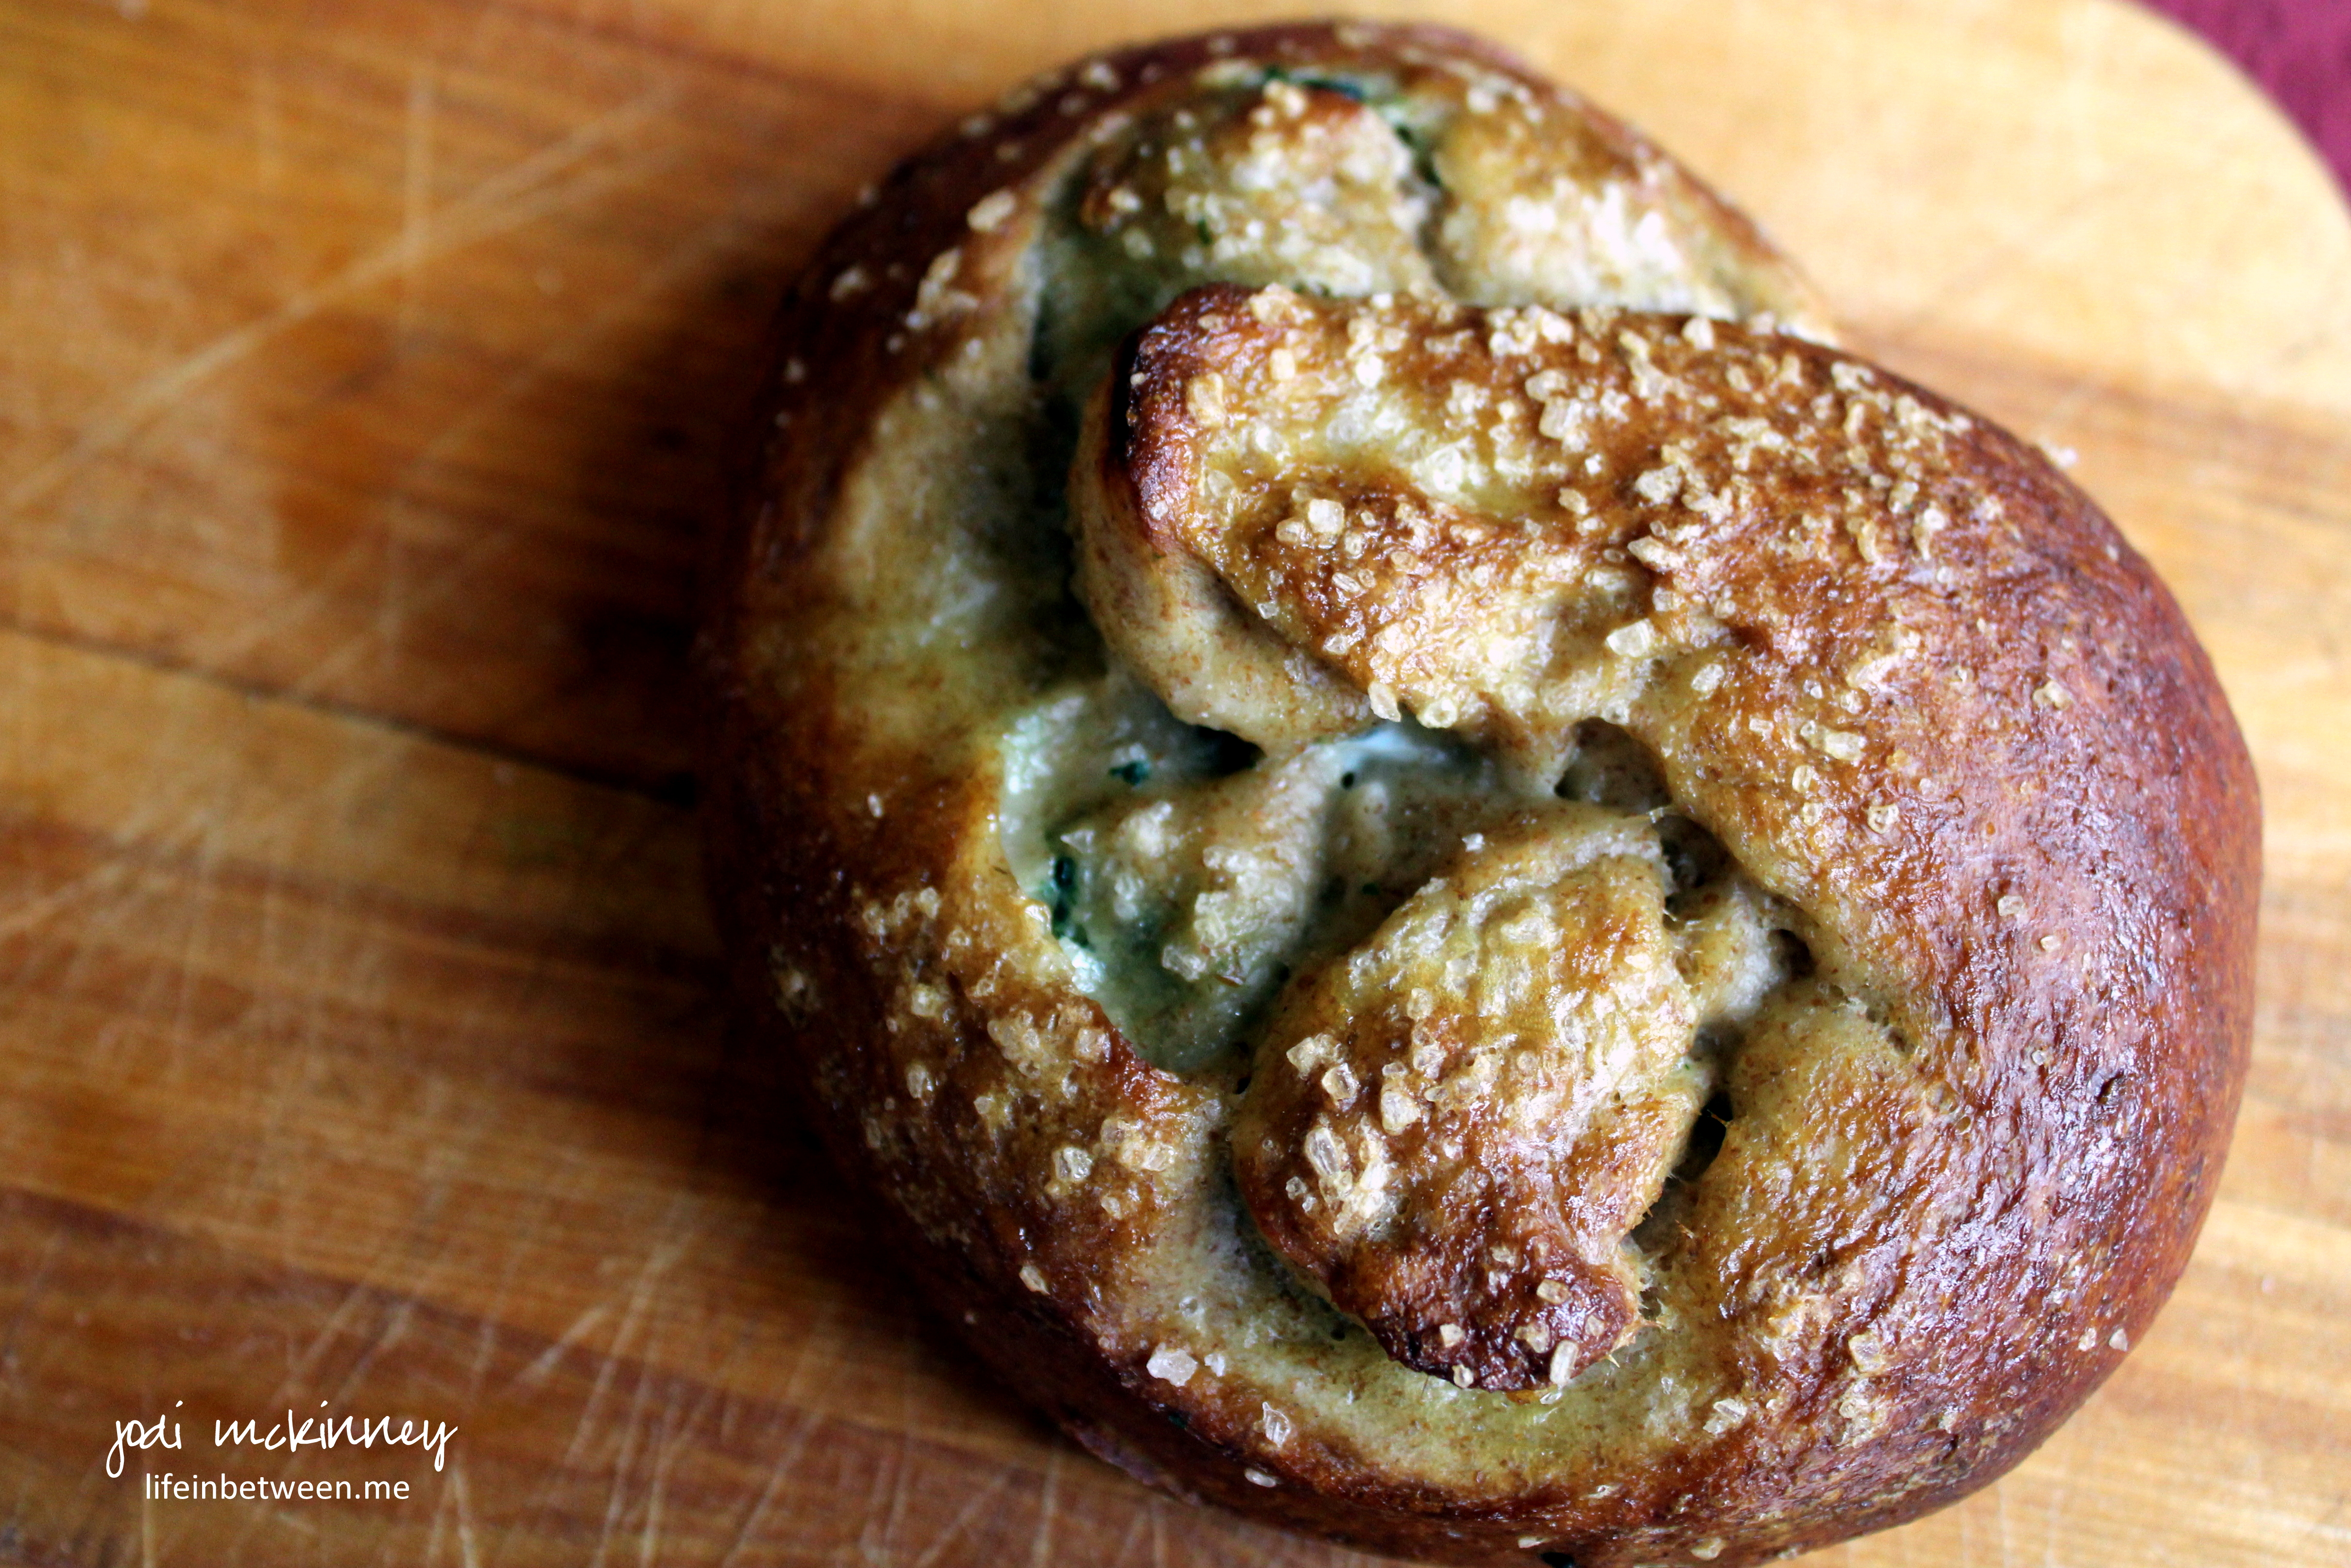
Place pretzels on baking sheet about 2 inches apart.  Brush tops with beaten egg and season liberally with sea salt.

Bake for 15 to 18 minutes or until pretzels are golden brown.

Remove pretzels from oven and let cool five minutes.

If made ahead, you can reheat the pretzels at 350 degrees F. for 15 minutes or until warm.  (But they are BEST fresh out of the oven!)

Cheers & Hugs,
Jodi

If only these walls could talk

stone wall north park

If only these walls could talk,
What stories would they tell?
What secrets do they hold?
What challenges have they seen?
What joy did they provide?
What future will they meet?

I was driving through a local park recently and practically slammed on my car brakes when I spied this old structure out of the corner of my eye.  I had my camera with me and had to stop and photograph it.

Wishing you moments that stop you  in your tracks today!

Cheers & Hugs,
Jodi

This is my submission for this week’s WordPress Weekly Photo Challenge: Walls.

Just Sayin’

Just Sayin Blended Bloom and Crazy about You 3

Just Sayin’…

I’m ready for Spring.

I’m ready for flowers.

I’m ready for sunshine.

So when I saw this week’s Paper Player’s Challenge (PP236) was to make a “Clean and Simple Floral” card, I couldn’t wait to play along!

 My Card Recipe:  I heat embossed the StampinUp Blended Bloom floral image in black onto Whisper White card stock.  Using a sponge dauber, I sponged Crushed Curry ink in the middle, then light to dark shades of “orange” (Crisp Cantaloupe, Tangelo Twist, Tangerine Tango).  For some extra pizazz, which is so hard to capture in the photos, I added a light brush of Wink of Stella on the petals.  I then “fussy” cut the flower out and adhered it to another white layer using an antique brad (to which I stamped the image with Memento Black ink underneath just for some extra dimension).  I used my favorite new Lil’ Inkers Stitched Rectangle Border Die Cuts to create the edge of the white piece and to the front of the Tangerine Tango card stock base.  I adhered the white to the orange using foam tape to add extra dimension.  The final step was to stamp “Just Saying” in Memento Black ink using the Crazy About You Stamp set.

I love this simple stamp and how this card turned out, and I can’t wait to share it with someone.

Just Sayin Blended Bloom and Crazy about You 2

So today, I’m “just sayin'”…

Happy St. Patrick’s Day!

Happy Spring!

Happy Birthday #25 Nick!  Thanks for bringing such joy to my life and making every March 17th one of my favorite days of the year!

Cheers & Hugs,
Jodi

Roasted Cabbage Slices with Garlic

roasted cabbage

O. M. G. I am becoming obsessed with roasting vegetables!  And this one is another winner!

Cabbage has NEVER tasted better!  Nor has it ever been easier!

roasted cabbage before

I’ve seen a variety of versions of this recipe floating around, but when I saw this simple version with roasted garlic that you smear on top of the cabbage slices after roasting, I had to try.  And it so delivered!

How can something so stinking simple end up tasting so luscious?  It is truly magical… and so wonderful to eat food in its purist state with just a little olive oil, salt, pepper and garlic that tastes like this.

roasted cabbage before 1

You can use green or purple cabbage.  Slice it, drizzle it generously with pure olive oil, and sprinkle it generously with coarse sea salt and fresh cracked black pepper.  Add a few cloves of peeled garlic drizzled with olive oil to roast along side.  Throw it in a 425 degree F oven for about 30 minutes, and get ready to rumble!

roasted cabbage after

This is a great accompaniment to most any meal.  SO DELISH!  I’ll bet this would make a cabbage loving fan out of ANYone!

Try it TODAY!

Roasted Cabbage with Garlic

Ingredients:
1 head cabbageroasted cabbage after
6 large cloves garlic
Olive Oil
Salt and Pepper

Directions:
Preheat oven to 425 degrees F.
Carefully slice cabbage into 6 thick slices, and lay on a shallow baking stone or baking dish.
Drizzle both sides of each slice with olive oil.
Generously sprinkle coarsely ground sea salt and freshly ground cracked pepper on top of each slice.
Peel garlic cloves and add to dish. Drizzle with olive oil.
Roast for approximately 30 minutes.
When done, smash garlic cloves and spread one on top of each cabbage slice.

ENJOY!

jodimckinney @lifeinbetween.me

Can’t wait to hear if you try it and like it!

Cheers & Hugs,
Jodi

Chocolate Pretzel Shamrock Pops

Chocolate Pretzel Shamrock Pops

It will soon be St. Patrick’s Day, and I couldn’t let it pass without making a fun treat.  These Chocolate Pretzel Shamrock Pops are about as easy and cute as it comes.  I simply placed three mini pretzels and a cookie pop stick on a piece of parchment paper, spooned about a teaspoon of melted chocolate in the center, and placed a green Mint Dark Chocolate M&M in the center.  Let it cool/dry for about 5-10 minutes, and voila – a fun St. Patrick’s day treat.

Chocolate Pretzel Shamrock Pops. 2jpg

I originally saw a photo of what I thought was the same thing here created by Amy @ MomAdvice. (Amy has an awesome blog, Pinterest boards, and Instagram BTW!)  But then I realized, after actually going back to find the post to give credit, that Amy actually used Rolo candies in the center of hers!  How yummy does that sound?!  SCORE!  And it would have been even EASIER!

I should have read it first, but these became my version, and they are yummy and festive!

Chocolate Pretzel Shamrock Pop

When I ran out of sticks, and knowing my daughter-in-law was coming over and how much she loves white chocolate, I made a small batch of pretzels without a stick, but with a dot of white chocolate and an M&M.

white chocolate pretzel M&M st patricks day

Here’s my recipe (if you can even call this a recipe!) for this simple, festive treat:

Chocolate Pretzel Shamrock Pops

Ingredients:
1 Bag Mini Pretzel TwistsChocolate Pretzel Shamrock Pops
1 Bag Mint Dark Chocolate M&M’s (you could also just use green plan M&Ms or any other favorite flavor)
6-8 oz. Melting Chocolate (whatever is your favorite)
20 Cookie Pop Sticks
Parchment Paper

Directions:
Lay down 3 pretzels in the shape of a shamrock and cookie pop stick on parchment paper.
Repeat with as many as you have.
Melt chocolate in small bowl in microwave for 1 minute at 50% power, stir. Continue at 30 second intervals until completely melted.
Using a teaspoon, place a spoonful of chocolate in the center of the pretzel “shamrock.”
Push together gently if it pushes apart when you spoon the chocolate on top.
Place an M&M in the center.
Let cool/dry for 5-10 minutes.
ENJOY!  (And P.S. – you will have plenty of leftover M&M’s and pretzels to munch on too!)

jodi mckinney @lifeinbetween.me

Wishing you the luck of the Irish this week!

Cheers & Hugs,
Jodi

I Still Find Each Day Too Short…

john burroughs quote

Wishing you time for thoughts, walks, books, and friends.

Happy Weekend!

Cheers & Hugs,
Jodi

Celebrate Today

Happy Birthday Nick Celebrate Today

Celebrate today!

Celebrate every day!

Hey – it’s Friday…

and it’s a birthday weekend around here!

My “baby” turns 25 in a few days.  How did that happen when I am only like (ahem)….  Hey – I just realized as I am typing this I am the exact reverse number…. 

In my current “clean and simple” (CAS) mode, I made this card using the StampinUP Celebrate Today stamp set.  It is so fun and festive!

After stamping the birthday balloons in Pear Pizazz and Marina Mist, I heat embossed the stars inside the balloons, as well as the birthday greeting, with silver glitter.  A few star sequins and some white baker’s twine for the balloon strings finished off this card.

I am so looking forward to spending time together with my family and celebrating.  I’m not sure how I got so lucky having two wonderful sons, an amazing daughter-in-law and a dear girlfriend, and a hubby that puts up with my shenanigans… but I’ll take it and run with it!

Cheers & Hugs,
Jodi

Roasted Caramelized Garlic Carrots

roasted carrots after

Are you often looking for new ways to prepare and serve veggies?  I’ve got another delicious, nutritious orange food for you today.  This time in the form of beautiful, fresh roasted, caramelized, garlicky carrots.  Nom Nom!  I find so many vegetables are best when roasted.  Flavor and nutrients are retained and the flavor is hard to beet.  (pun intended)

roasted carrots before

Lots of fresh garlic, thyme, parsley, olive oil, and balsamic vinegar sprinkled onto fresh young carrots creates a wonderful veggie to complement almost any meal.

roasted carrots plated

We had ours with an herb marinated pork tenderloin and tiny roasted golden Yukon potatoes.

Here is the recipe as I made it.  I was inspired by another great recipe Chungah posted on Damn Delicious.  Measurements are guesstimates.  Make it how you enjoy.  That is the true JOY of cooking.

Roasted Caramelized Garlic Carrots

Ingredients:
15 fresh new carrots with stems trimmed, no need to peel
4 cloves garlic, coarsely minced
1 Tbsp dried thyme or 2 Tbsp fresh thyme
1 Tbsp dried parsley or 2 Tbsp fresh parsley
1 tsp. coarse sea salt
1 Tbsp. coarse ground black pepper
Approximately 1/4 cup olive oil
Approximately 1/4 cup balsamic vinegar

Directions:
Preheat oven to 375 degrees F.
Wash carrots and lay in a single layer on a baking stone or baking dish.
Drizzle with olive oil.
Liberally sprinkle with garlic, thyme, parsley, salt and pepper to your taste and liking.
Drizzle all with balsamic vinegar.
Toss to coat.
Roast for 30-40 minutes – turning once or twice during cooking.

I daresay even kids will enjoy these carrots that turn out so sweet and delicious.  I found them almost addicting!

Enjoy!

Cheers & Hugs
Jodi