Sunny Sunflower

sunflower2

I found some time to splash in puddles this long holiday weekend….  Puddles of paint that is, because the sun was a shinin’ most of the weekend!

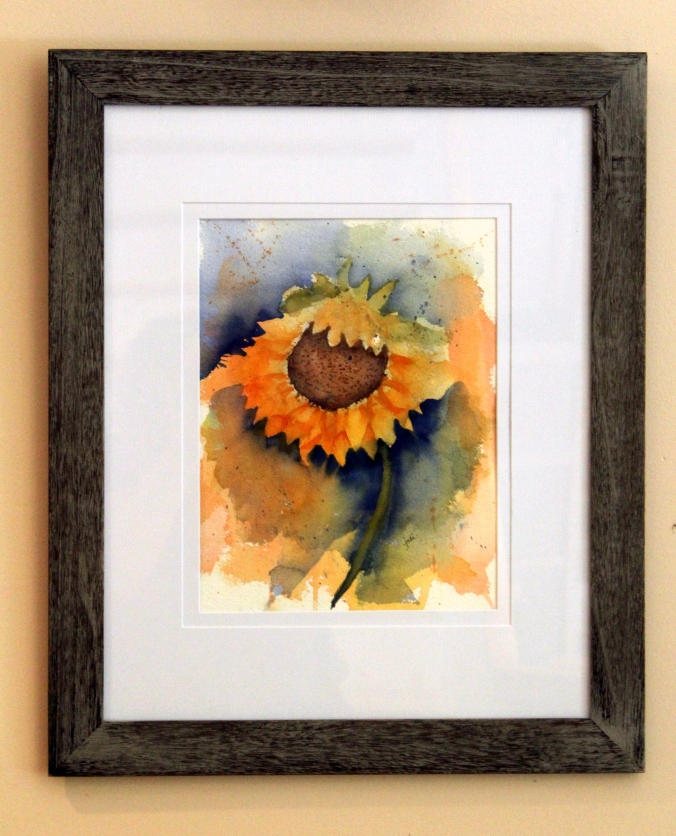
I watched a video on painting sunflowers done by Joanne Thomas, who is a queen of loose splashy watercolor.  I’ve really admired her style ever since I started watercolor painting about a year ago, so I decided to give her sunflower a try.

I painted it on a 10 x 14 sheet of Arches 300 lb cold press.  I put it in a matted frame to see what it would look like.  Such a difference it makes when you mat and frame a painting – eh?

Sunny Sunflower Original Watercolor 10 x 14 Arches 300 lb Cold Press

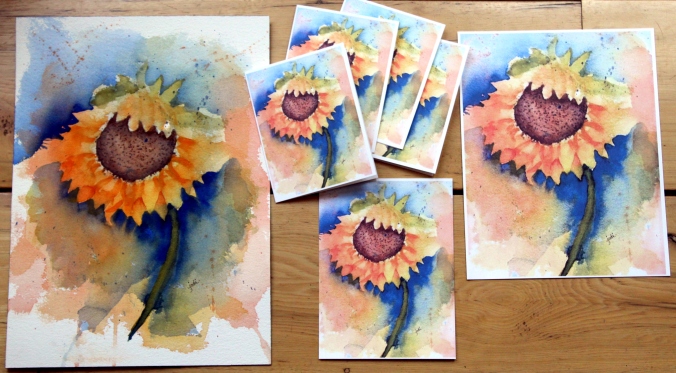
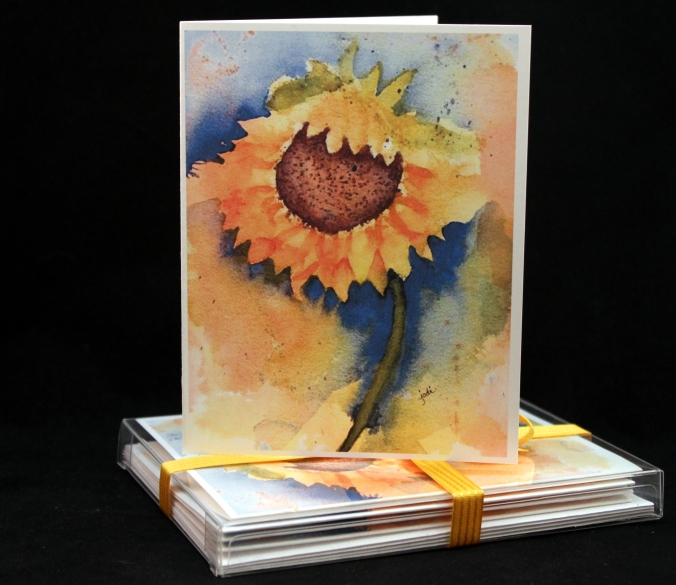
Sunny sunflowers is going in our McKinneyx2Designs Etsy Shop – the original painting, prints and greeting cards.

Sunny Sunflower All

Fluttering my “artist” wings, and enjoying the sunny, sunshiny summertime weather!

Sunny Sunflower Greeting Card Set

Happy Tuesday and short work week for many of us.

Cherish the moments.

Cheers & Hugs,
Jodi

Rainy Sundays

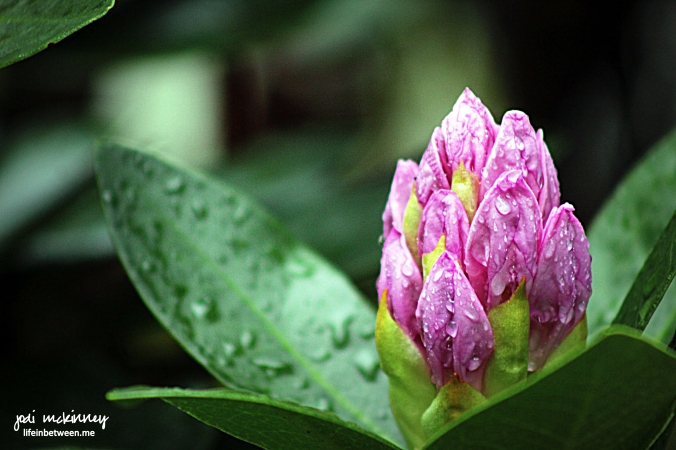
purple rhododendrum bud after the rain

Rainy Spring Sunday Rhododendron Blossom – 5/22/16

Rainy days

cancelled plans
messy beds
messier hair
muddy paws
dampened feathers
thunder cracking

steaming coffee
comfy jammies
old movies
new books
paint splashing
afternoon naps

nourishing the plants
feeding the streams
brightening the green
slowing us down
refueling our engines
washing the world clean


Cheers & Hugs,
Jodi


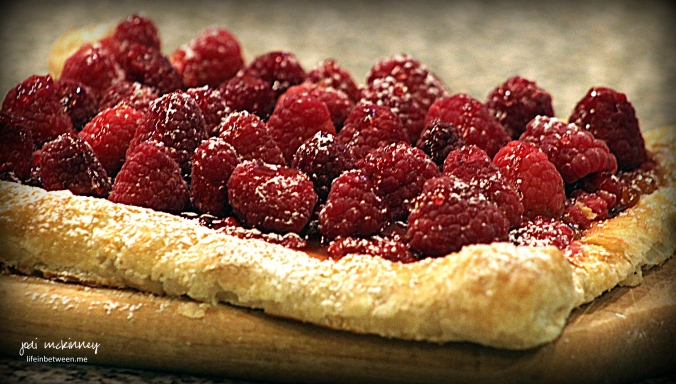
Fresh Red Raspberry Puff Pastry Tart

red raspberry puff pastry tart 1

If you are looking for a fresh, light, simple, yet surprisingly impressive dessert to take to a holiday picnic or serve for a simple weekend dinner party, I’ve created this quick, but scrumptious and beautiful fresh red raspberry puff pastry tart using fresh fruit combined with the convenience of frozen puff pastry.

red raspberry puff pastry tart

For the Memorial Day holiday weekend (or Fourth of July or Labor Day), you could use some blueberries in this one too for a red, white, blue theme.

red raspberry puff pastry tart 2

Here’s my easy peasy recipe that is bound to to get rave reviews!

Fresh Red Raspberry Puff Pastry Tart

Ingredients:red raspberry puff pastry tart 1

  • I pint fresh red raspberries
  • 1/4 cup apricot or raspberry or your favorite jam (I used apricot, because it is what I had, and it made a nice combination of flavors)
  • 1 sheet Pepperidge Farms Frozen Puff Pastry (thawed 40 mins. at room temperature)
  • 1 Tbsp Honey
  • Powdered Sugar for Garnish

Directions:

Unfold and place sheet of puff pastry on baking stone or baking sheet and turn up edges on all sides to create a crust edge.  Poke center with fork 6-8 times to prevent center from raising up too high.  Bake at 400 degrees F for approximately 15 minutes or until golden brown.

While still warm, spread jam on bottom of baked puff pastry. Place half of fresh raspberries on top and mash with a fork.  Allow to cool completely.

Once cooled, place whole fresh red raspberries on top.  Drizzle with honey, and sprinkle with powdered sugar.

To serve, cut into 6 pieces and garnish with a dollop of whipped cream or vanilla ice cream.  

Hope you enjoy!

Cheers & Hugs,
Jodi

My Watercolor Journey

Capture


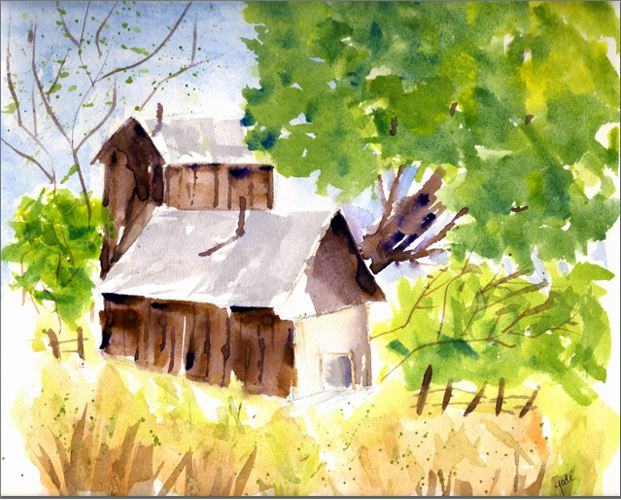
I really enjoyed watching a watercolor blending and shadowing tutorial recently on ArtistNetwork.TV by Sterling Edwards.  For someone who never studied art or even took a high school art class, what a great way to learn this is!

After experimenting and playing with watercolor for a about a year so far now, I still have so much to learn, and I learn something new every time I watch a video, read a blog or book, or chat with other artists.  (Charlie O – did you catch that?  I said “other” artists 🙂 )

At the recommendation of my artist blogging buddy, Laura @ CreateArtEveryday, I checked out ArtistNetwork.TV mainly with the goal of watching some great abstract pastel videos by Debora Stewart (and wowza – did she ever blow me away!).  I was then compelled to check out some watercolor videos when I came across a great exercise in color blending and shadowing called Color Techniques for Expressive Watercolors by Sterling Edwards.

In the above exercise, I did a quick sketch of the two old barn-type buildings on a 10″ x 12″ sheet of Arches 140 lb Cold Press Paper.  Then, in about 20 minutes using only four colors of watercolor paint, (Raw Sienna, Windsor Violet, Azo Yellow, and Cobalt Blue), I  blended these colors to create many shades of colors (a yellow and purple to make brown, various combos of yellows and blue to make greens, dropping in purple onto the newly created brown to create depth!) and shadowy neutrals for this simple scene.

I feel like you can really see the light and life in this painting.  It’s certainly not perfect and was only meant to be a practice, but I rather like how it turned out and really learned a lot about blending, creating neutrals, working with a flat brush, and the all important white space.

If you are looking for a way to self-learn, I surely recommend ArtistNetwork.TV.  I watched the tutorial one evening and did the painting the next.  I can’t wait to find time to watch and learn more!  Does anyone else wish there were more hours in the day to do all the fun things we want to do?

Cheers & Hugs,
Jodi

I almost missed you

first purple iris

First Purple Iris – May 2016 – Mars, PA

You showed up
in your regal purple cloak
and delicate golden tassels
on the other side of the house.

I almost missed you.
Your hours were numbered
until you gracefully retreated
and made room for the others.

Thank you for the reminder
that beauty is everywhere
and often fleeting
and often in places we rarely look.

Thank you for the reminder
that we must open our eyes
and open our hearts
and take the time to simply look.

Cheers & Hugs,
Jodi

Charlie and the Chipmunk

charlie and the chipmunk

It all started out as fun and games….   really!

We were just playing hide and seek – the little chipmunk and me.

I think I might have caught him one too many times though…

So I carried  him around the yard all afternoon so we could rest in the shade of the cool grass until he felt well enough to play again.

I was really worried about him, so I snuck him in the house through my doggie door  (where I had a feeling Mom and Dad didn’t want him) and took him into their bed with me for a more comfy rest under the ceiling fan and on the soft comforter.

But then they caught us….

First my brother Nick, who called Mom in, who called Dad  in.

Then everything became a blur!

Mom distracted me with my toy donut while Dad picked up my friend, and the next thing I knew “Chippy” was gone.

Sorry, Buddy.  It sure was fun while it lasted.

And I don’t know why Mom felt the need to take the comforter off the bed and throw it in the wash.  It was so soft and comfy and smelled like my friend….

Springtime in Mars…. It’s a dog’s life… It’s a great life…  It’s my life.

Woofs & Wags,
Charlie

PS  Please don’t be mad at me.  It really started out as fun and games…

Tiny Glow Watercolor

tiny glow yellow lily original watercolor

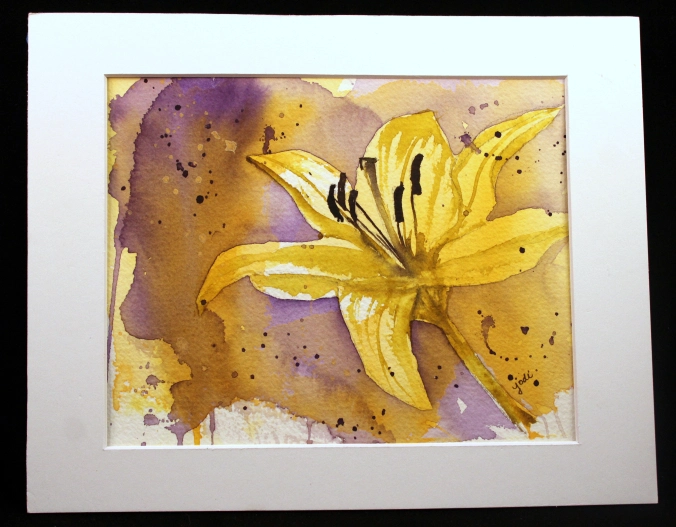
Tiny Glow yellow lily original watercolor – 6″ x 8″ matted to 8×10

My sweet artist blogging friend, Sharon Mann gave me a friendly challenge to paint my recent Tiny Glow Yellow Lily I got for Mother’s Day from my son, Jake.

I’ve been experimenting with some abstract techniques that I used for this painting which I’m showing here in it’s original format above, printed on cards below, and the scanned print lastly.

tiny glow yellow lily photo of cards

Tiny Glow yellow lily watercolor print greeting cards

I painted a random background wash first using Naples Yellow and a bit of New Gamboge.  After it dried, I lightly and loosely drew the lily on top.  I then negatively painted around the lily with Winsor Violet and splashed some more in the background.  Lastly I used some Green Gold to add a bit of shadowing to the flower and for the stems and a touch of Burnt Umber for the little pods.

tiny glow yellow lily print 2

Tiny Glow yellow lily watercolor print

Check out Sharon’s MASTERPIECES here!  She is a REAL artist and her lily truly glows!  I love it!

And the best part is, we’ve agreed to exchange, so she is sending me one of hers, and I am sending her one of mine.

We all have our own styles and levels of ability and experience, but what a joy it is to share here through WordPress with so many wonderful artistic blogger friends.  They have encouraged me and taught me so much in my journey into watercolor this past year.  I am so grateful for them!

Wishing you all moments to cherish and the opportunity to glow today.

Cheers & Hugs,
Jodi
Sprinkle Birthday Cake

sprinkle birthday cake

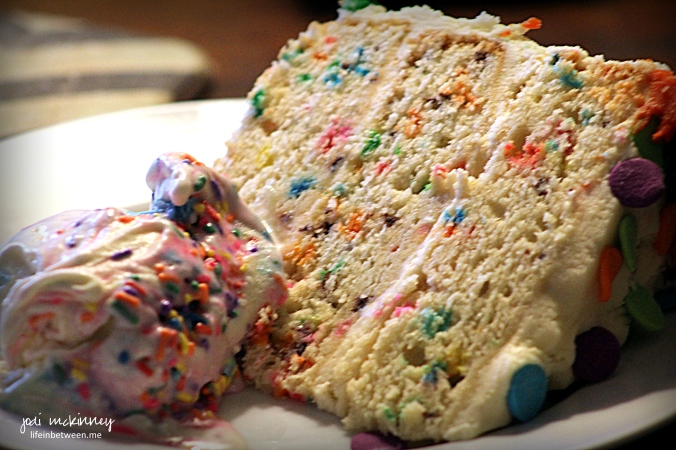
Oh the sprinkles were plentiful this past weekend as we celebrated our daughter-in-law, Colleen’s birthday.  Here is the wonky cake I made that I mentioned yesterday when I posted my sprinkle birthday cake watercolor card I made.

sprinkle birthday cake cut

It might have been a bit wonky, but it was soooo yummy!  This white, vanilla cake filled with colorful, celebratory sprinkles is really worth the extra effort to make from scratch!

sprinkle birthday cake slice

And serve it with some fresh churned birthday cake ice cream (like we can get around here from Bruster’s Ice Cream), and you will really be sparkling!

Sprinkle Birthday Cake*

Cake Ingredients:Sprinkle Birthday Cake thumbnail

  • 3 and 3/4 cups (431g) all-purpose flour
  • 3/4 tsp baking powder
  • 3/4 tsp baking soda
  • 1 tsp salt
  • 1 1/2 cups (3 sticks; 345g) butter, softened
  • 1 3/4 cups (350g) granulated sugar
  • 4 large eggs
  • 2 large egg whites
  • 3 tsp. (15ml) vanilla
  • 1 1/2 cups (360ml) buttermilk (or buttermilk substitute:  1 1/2 cups milk mixed with 1 1/2 Tbsp vinegar)
  • 3/4 cup (142g) rainbow sprinkles

Vanilla Frosting Ingredients:

  • 1 1/4 cups (2.5 sticks; 287g) butter, softened
  • 5 cups (580g) confectioners’ sugar
  • 1/3 cup (80ml) heavy cream or half and half or milk (all work)
  • 3 tsp (15ml) vanilla
  • 1/8 tsp salt
  • Additional sprinkles or other decorations

Directions:

  1. Preheat oven to 350°F (177°C). Grease and lightly flour three 9-inch cake pans.
  2. Whisk flour, baking powder, baking soda, and salt together in a large bowl. Set aside. Mix butter on high speed of mixer until smooth and creamy – about 1 minute. Add sugar and beat on high for 5 more minutes.  On medium-high speed, add 1 whole egg at a time, beating well after each addition until all 4 whole eggs are mixed in.   Beat in vanilla.
  3. With the mixer on low speed, add the dry ingredients in three additions alternating with the buttermilk, beginning and ending with the dry ingredients, and mixing each addition just until incorporated. Do not overmix. The batter will be smooth, velvety, and slightly thick.
  4. In a separate mixing bowl, beat the 2 additional egg whites until thick, foamy, and soft peaks form- about 3 minutes. Gently fold into the batter. Finally, gently fold sprinkles in.
  5. Pour batter evenly into each cake pan.  Bake for approximately 25 minutes or until a toothpick inserted in the center comes out clean.   Allow cakes to cool completely in the pans set on a wire rack.
  6. To make frosting, beat the butter on medium speed in mixer until creamy – about 2 minutes. Add confectioners’ sugar, cream, vanilla, and salt with the mixer on low. Increase to high and beat for 3 minutes. Add more confectioners’ sugar if frosting is too thin, more cream if frosting is too thick, or a pinch more of salt if frosting is too sweet.
  7. To assemble:  Place one cake layer on serving plate. Evenly cover the top with frosting. Top with second and third layers and repeat. Spread remaining frosting on sides.   You can tint small portions of the frosting to make decorations or use decorator frosting and decorate with additional sprinkles.  

Jodi’s Cake Tip:  If at all possible, I always try to bake my cake at least one day ahead of time or even the night before serving so that it can be frozen.  I bake the layers, cool, and then place each un-frosted layer in a large Ziploc bag and freeze.  For one thing, this makes the cake much easier to frost.  But secondly, and most importantly, freezing the cake, even if only for a few hours overnight, makes for a much moister cake.  I learned this by accident when I used to always make cakes fresh the day of serving thinking that was best, and then had to do ahead one time years ago because of time constraints.  It was the first time everyone ooooohhhed and awwwwhhed over the cake.  I’ve frozen ahead ever since.

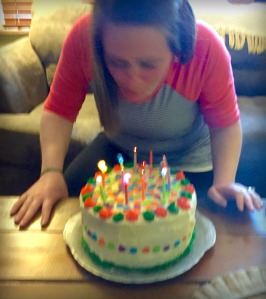
And here is the birthday girl blowing out the candles.  A bit blurry, but a quick snap with my iPhone after we sang.  I love doing special things for this special girl!

colleen sprinkle birthday cake

Cheers & Hugs,
Jodi

*FULL Credit for this recipe goes to Sally’s Baking Addiction Funfetti Cake.

A Birthday Cake Card for Colleen

birthday cake abstract impressionistic birthday card

Abstract Impressionistic Watercolor Birthday Cake Card

Yesterday was our dear daughter-in-law, Colleen’s birthday, so along with the Sprinkle Cake I made for her, I thought I’d paint an abstract, impressionistic sprinkle birthday cake card in watercolor.

I’m not sure which one I had more fun doing… baking the cake or painting the card.

Hubby noticed my cake was a bit crooked, and it was a bit wonky…  that’s how you know it’s homemade – right?!  Well – I guess it’s an impressionistic cake too!

Not matter what – I enjoyed doing both because they were for a special young lady who I love a lot!

Cheers & Hugs,
Jodi