
Feel.
“Poetry
is what happens
when
your mind
stops working…
and all you do
is
feel.”
-Atticus
Take
some time
today
to
just
feel.
Make
poetry
happen.
Cheers & Hugs,
Jodi
Feel.
“Poetry
is what happens
when
your mind
stops working…
and all you do
is
feel.”
-Atticus
Take
some time
today
to
just
feel.
Make
poetry
happen.
Cheers & Hugs,
Jodi

Crazy Colorful Pineapple Crown Watercolor 11×14 140 Saunders Waterford
Crazy Colorful Pineapple Crown.
Because it’s Friday…
Because it’s been that kind of week…
Because I needed to just cut loose…
Because why not?
A crazy colorful pineapple crown!
Cheers & Hugs,
Jodi

Reach High.
Reach high,
for stars
lie hidden
in your soul.
Dream deep,
for every dream
precedes
the goal.
-Pamela Vaull Starr
Are you reaching?
Are you stretching?
Are you seeking?
those stars that lie hidden in your soul?
those dreams that make you smile?
those dreams that bring you joy?
Keep reaching.
Keep dreaming.
Create your joy!
Cheers & Hugs,
Jodi
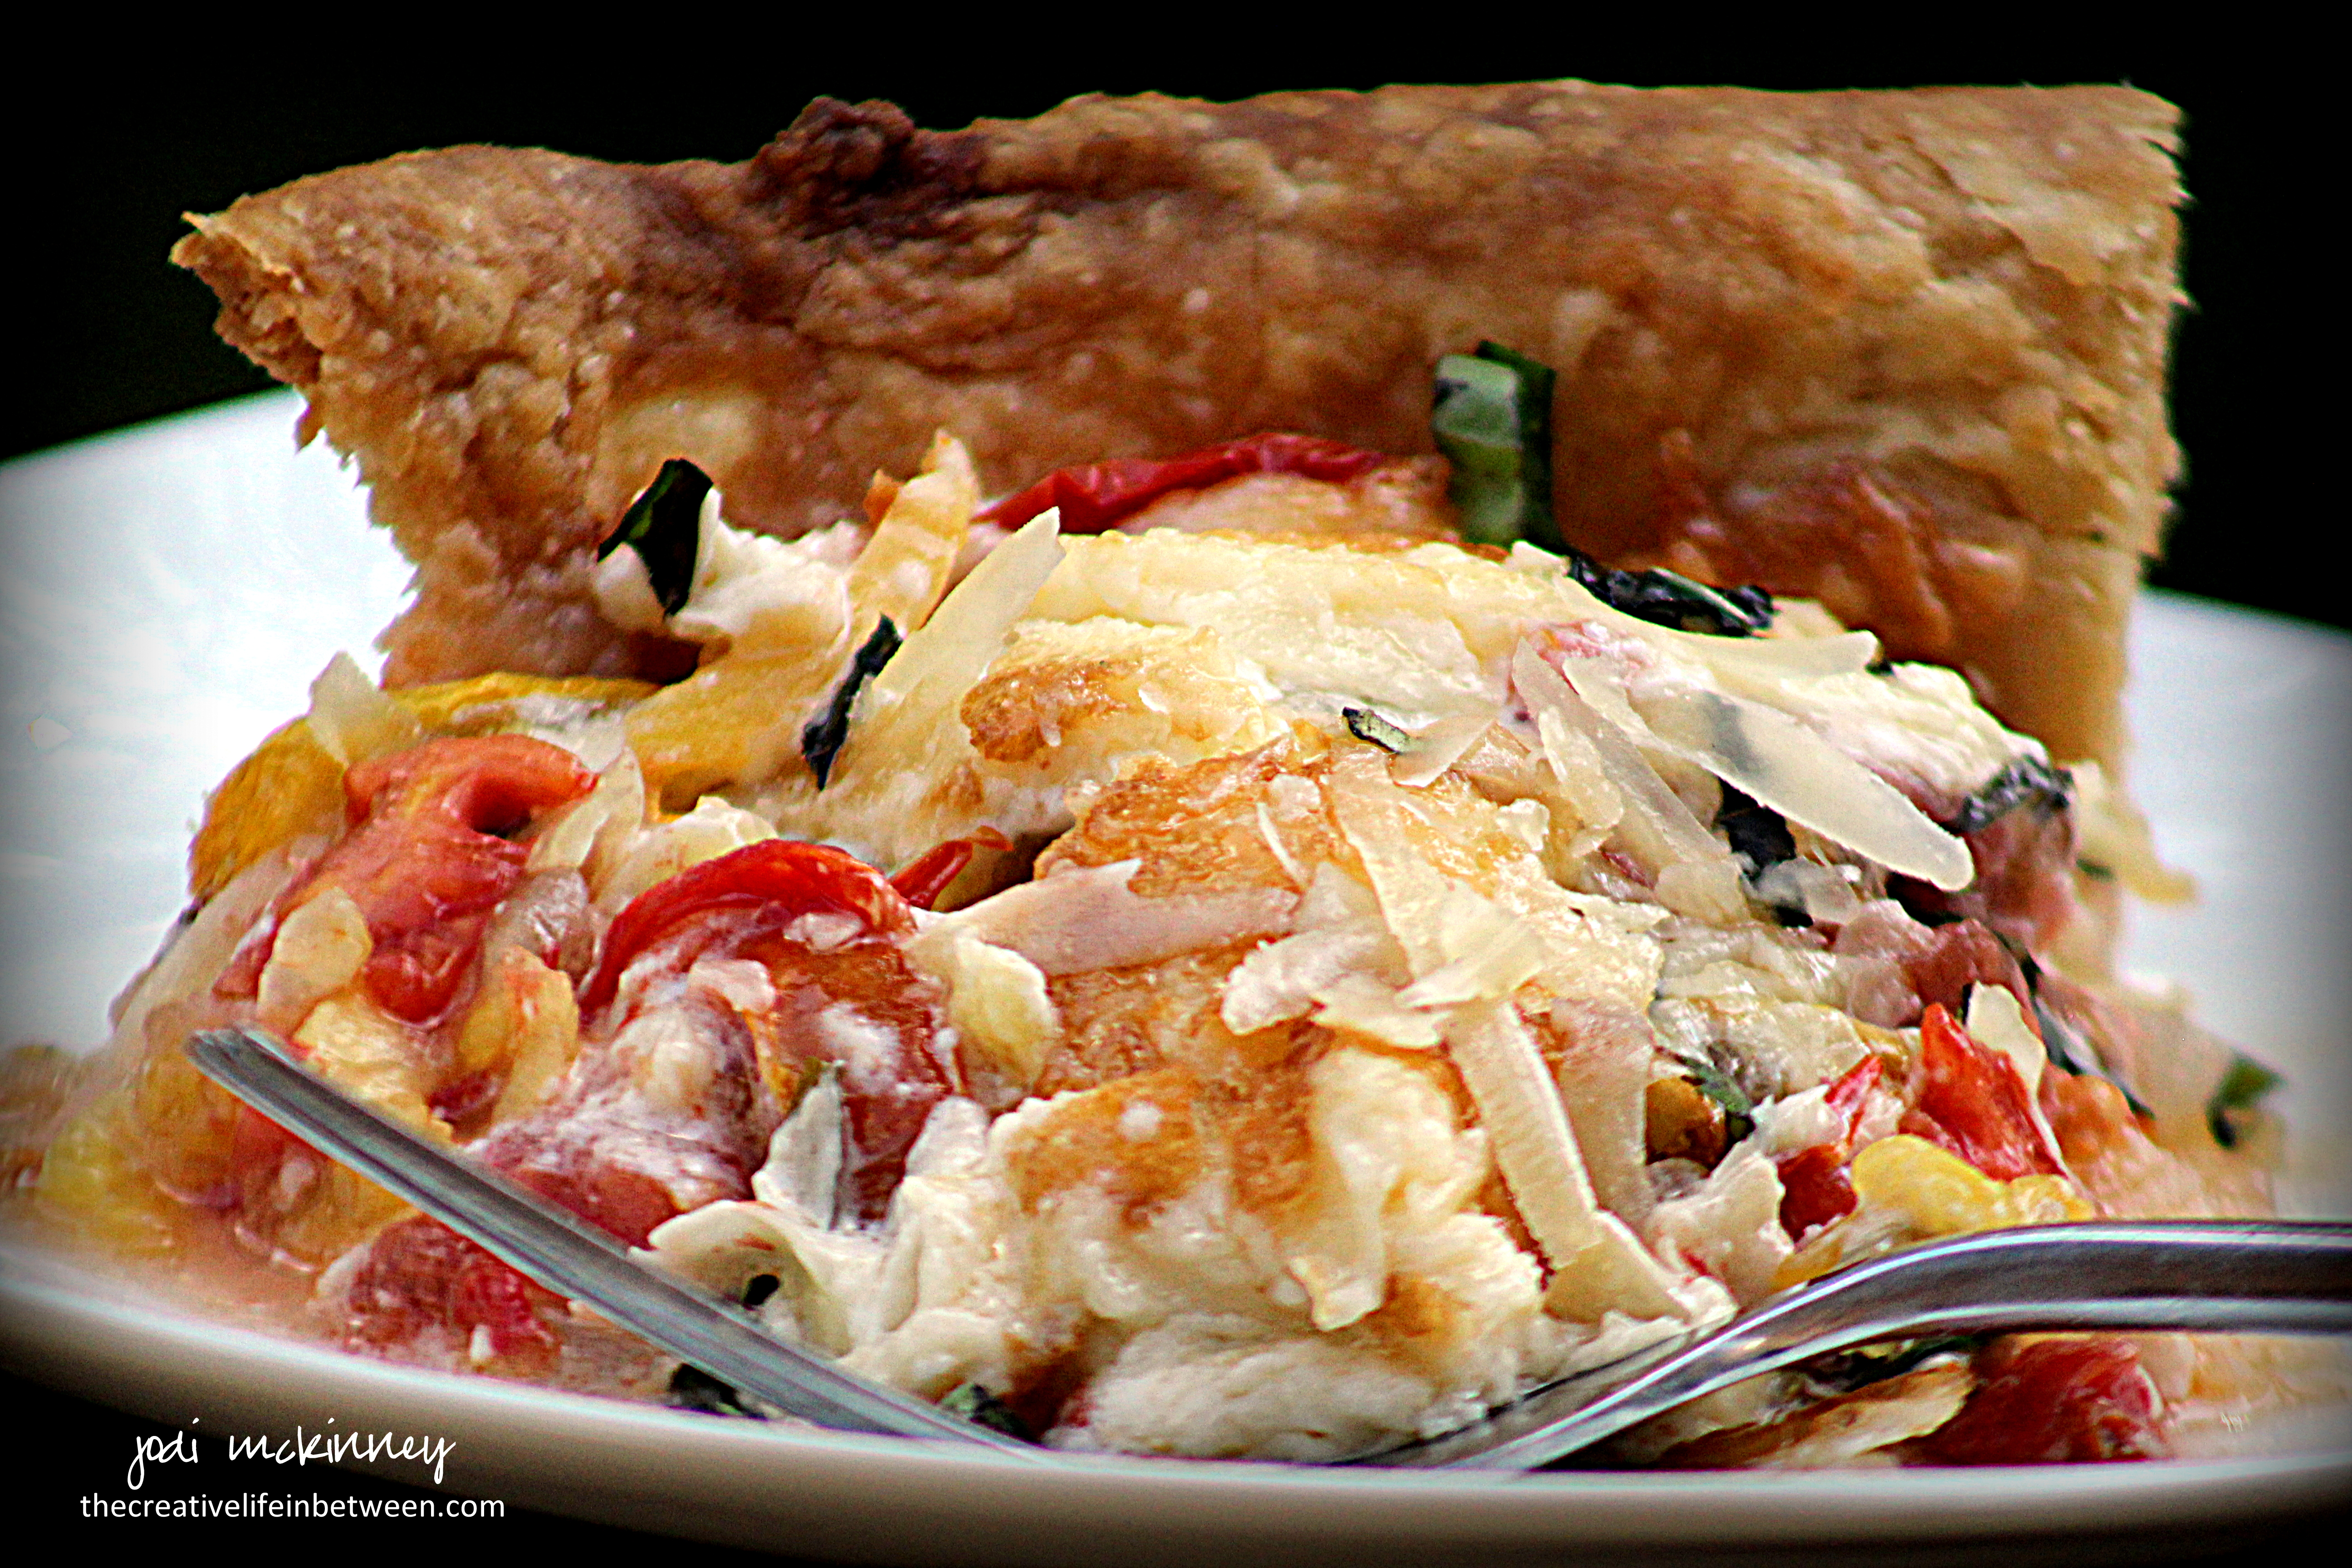
Old-Fashioned Tomato Pie.
Looking for something to do with the abundance of fresh, juicy, sweet, beautiful tomatoes in your garden or available this time of year?

How about an old-fashioned tomato pie?!

It’s like a deep dish pizza in an old-fashioned crust….
Layers of tomatoes, onions, garlic, basil and parsley… topped with cheesy yumminess.

Make one, and enjoy it hot, warm, room temperature, or even cold. It is a wonderful treat to celebrate the end of summer’s bounty and the delight of vine-ripened tomatoes.
Ingredients
Directions
Preheat oven to 425 degrees F.
Prepare pie crust by blending flour, shortening and salt with a pastry blender to create coarse crumbs. Add cold water, and mix until just combined. Do not overwork (this is the secret to flaky pie crust). Roll out dough on floured surface and line a 9″ pie plate with dough – folding overhanging dough under itself along rim to create rustic edge.
Line piecrust with aluminum foil and fill with dried beans (or pie weights) to keep crust in place. Bake for 20 mins. Cool completely.
To prepare filling, place thinly sliced tomatoes on paper towels, and sprinkle with salt. Let stand 10 mins. Pat dry with another layer of paper towels.
While tomatoes are resting, saute onion and garlic, sprinkled with salt and pepper, in olive oil for 3-4 minutes until tender.
Layer tomatoes, then onion/garlic mixture, and a sprinkle of freshly chopped herbs into pie crust. Continue layering until all tomatoes, onions, and herbs are used.
Combine shredded cheese and mayonnaise. Spread over top of tomato pie.
Bake at 350 degrees F for 30 minutes or until lightly browned, shielding edges with foil or pie shield (the GREATEST invention ever for pie bakers!) to prevent excessive browning.
Serve hot, warm, or at room temperature, whichever you prefer.
Enjoy!
Cheers & Hugs,
Jodi
Recipe adapted slightly from Myrecipes.com.
![]()
A Yellow Canary Named Terry.
Today’s post is a collaboration with my friend, Gary, from Spearfruit, in honor of our beloved Terry.
Gary wrote this lovely little poem late one night and shared it with me, so I knew I had to create a Terry canary as beautiful as I could, so we could share this little story and our love for a great man named Terry.
———
There once was a yellow canary named Terry
who had a good friend named Gary.
Terry lived in a birdhouse high in a tree in the city of Tampa
close to his good friend’s camper.
Terry was so full of life with vigor and glee
as he continued to blog in his house in the tree.
Then early one day, Terry became very sick
and from that point forward his health went down quick.
No matter the pain, no matter the grief
Terry always felt better and a little relief
when he blogged to his friends who provided him love
no matter his struggles or thoughts from above.
Then one day when Terry was perched in his tree,
he got a sweet gift from his good friend Jodi.
The gift was a yellow flower that was painted with love
to remind Terry that things are much better above.
From that point forward Terry raised his head high
and did his very best to hold back his cry.
Terry knew it would soon be time to let out his last chirp
so he got himself ready to depart this dear earth.
Although Terry is no longer here perched in his tree
his friends all know that his spirit is with me
always…
Love his best friend, Gary.
Cheers & Hugs,
Jodi
—–
If you would like a 5×7 or 8×10 print of this painting or a box of greeting cards, you can order at McKinneyX2Designs on ETSY by clicking here or by stopping by Berry Vine Gifts in BradfordWoods, PA.

The flowers of Fall
are the beautiful leaves
that in the summer
produced the forest’s shade.
The emerald and olive and mossy greens
turn to persimmon and crimson and gold.
The joy of Autumn
is in the cool, crisp breeze.
that carries the memory
of warmth and life and growth.
A breath of air inhaled
full of brisk, invigorating possibilities.
Cheers & Hugs,
Jodi

Chewy Pumpkin Spice Chocolate Chip Cookies.
Is anything really better than a good old-fashioned homemade chocolate chip cookie? Well, this time of year, there sure is!
After all, it’s pumpkin and spice time.
So why not make Pumpkin Spice Chocolate Chip Cookies?!

This cookie is a crispy on the outside, chewy on the inside version – unlike most pumpkin cookies, which are more cake-like (and wonderful too!)

Feel free to vary the spices to your liking. No need to add nutmeg or ginger if you don’t have or don’t like. Feel free to adjust the amount of cinnamon to your taste. Some might like milk chocolate chips in these, but I prefer semi-sweet. Milk chocolate chips seem almost too sweet to me.
I found a recipe at Chelsea’s Messy Apron, and tweaked it up to my liking. Here is how I made them.
Ingredients
Directions
Soften butter in a large bowl in microwave until just melted. Stir in sugars and completely combine. Whisk in egg yolks. Stir in vanilla and pumpkin. Add salt, spices, and baking soda, and stir well. Add flour and stir until all is combined and a soft dough forms. Finally, stir in 3 cups of the chocolate chips, reserving 1/2 cup for decorating tops at end. (If you prefer, you can just add them all at this time.)
Cover bowl with saran wrap and refrigerate for at least 4 hours or overnight.
When dough is fully chilled, and you are ready to bake, preheat oven to 350 degrees F.
Roll dough into golf ball-sized balls. Place on baking stone or cookie sheet, and bake 9-12 minutes until lightly brown on top. Decorate tops with 3-5 chocolate chips after removing from oven, but still leaving on baking stone/cookie sheet. Remove from baking stone/cookie sheet after 5-7 minutes, and cool completely on cooling rack.
Once cool, place in large gallon-size Ziploc freezer bags and store in freezer. Cookies thaw quickly and taste delicious right out of the freezer.
Enjoy!
Cheers & Hugs,
Jodi

Klaus the Mouse and his friends have become a Book!
Some of you who have been hanging around here for a while at TheCreativeLifeinBetween may remember Klaus the Mouse, who lived in a teeny tiny house.
You might also recall Hedy the Hedgehog who didn’t like to go to bedy.

Then there’s Chuck the Duck and Pam the Lamb. There’s an Otter named Potter and Mig the Pig.
Adele the Gazelle has a smell that casts a magic spell, and what a phenomenon is a Fawn named John!
Chippy the Chipmunk, Rooty the Rooster, Hal the Colorful Cow, a Bumble Bee Named Buzz, and Gail the Snail.
They all joined together in this sweet little collection of watercolors and silly rhyming tales.
Thanks to so many of you who encouraged me along the way. You helped make it happen!
My first published book! A collection of silly tales for children 3-103.
If you would like to purchase, here is a link: KLAUS THE MOUSE.
Happy Reading, Happy Sharing, Happy Laughing.
Cheers & Hugs,
Jodi
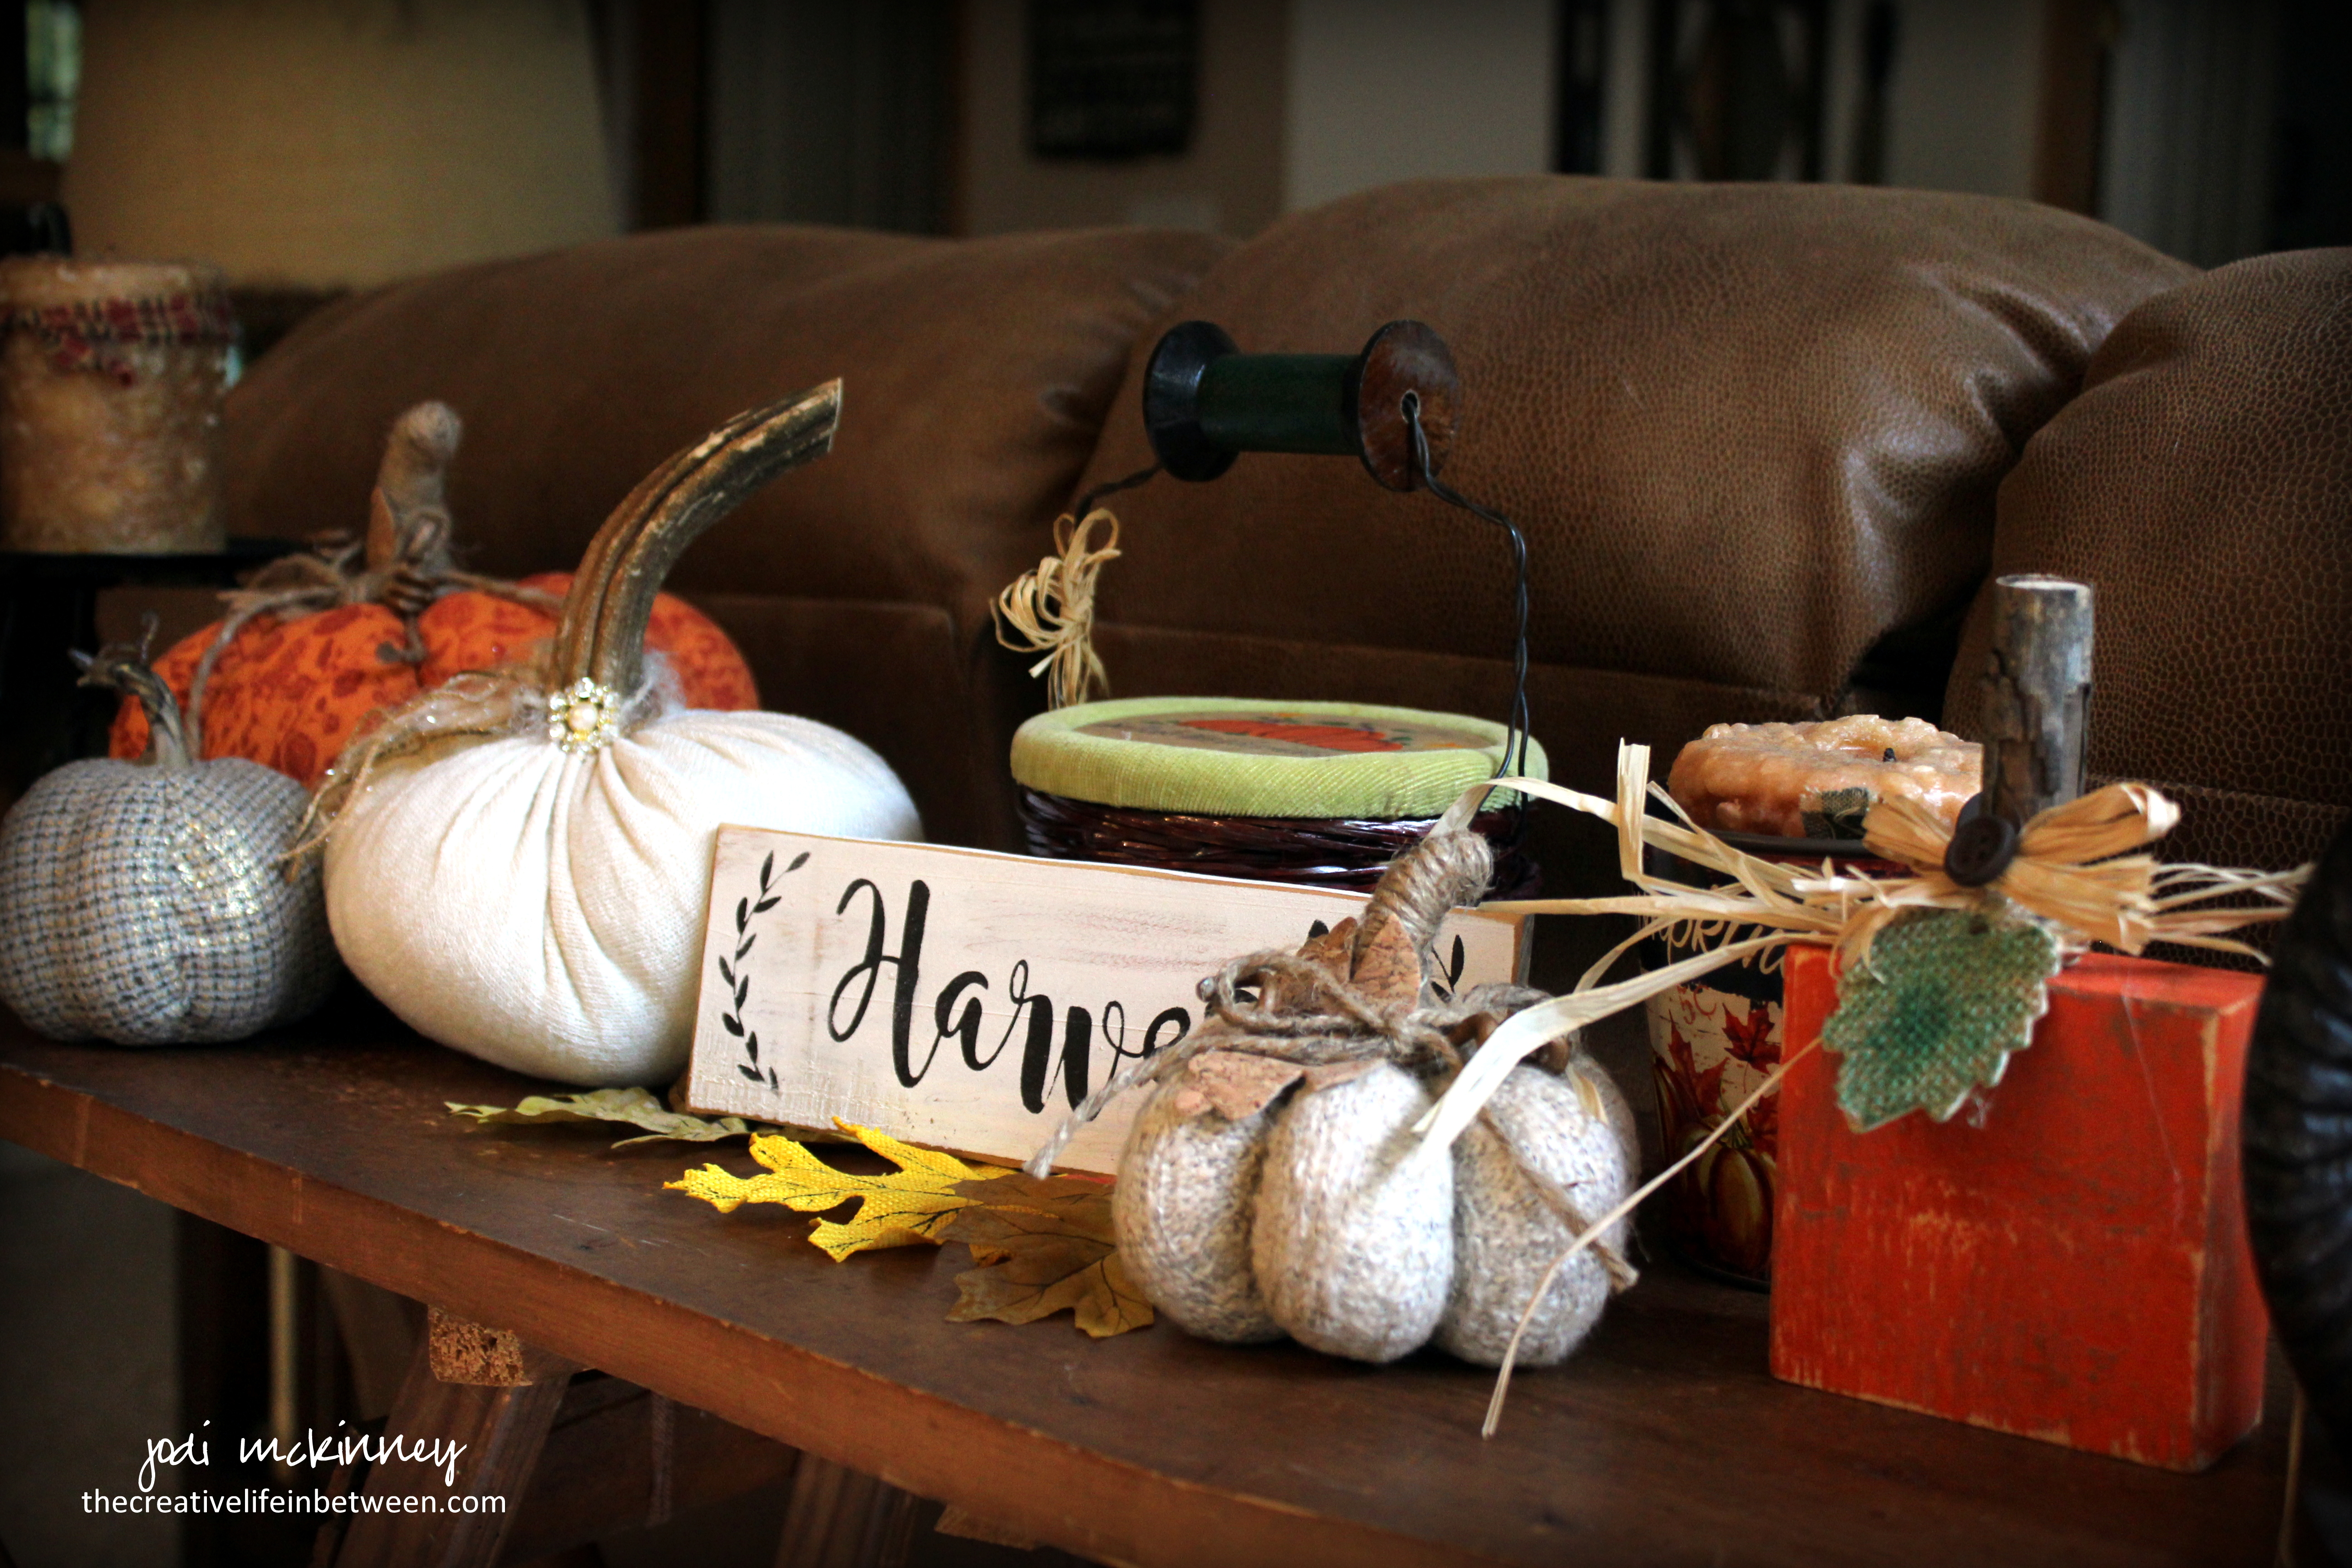
Pumpkin’ It Up for Fall.

Happy First Day of Fall!
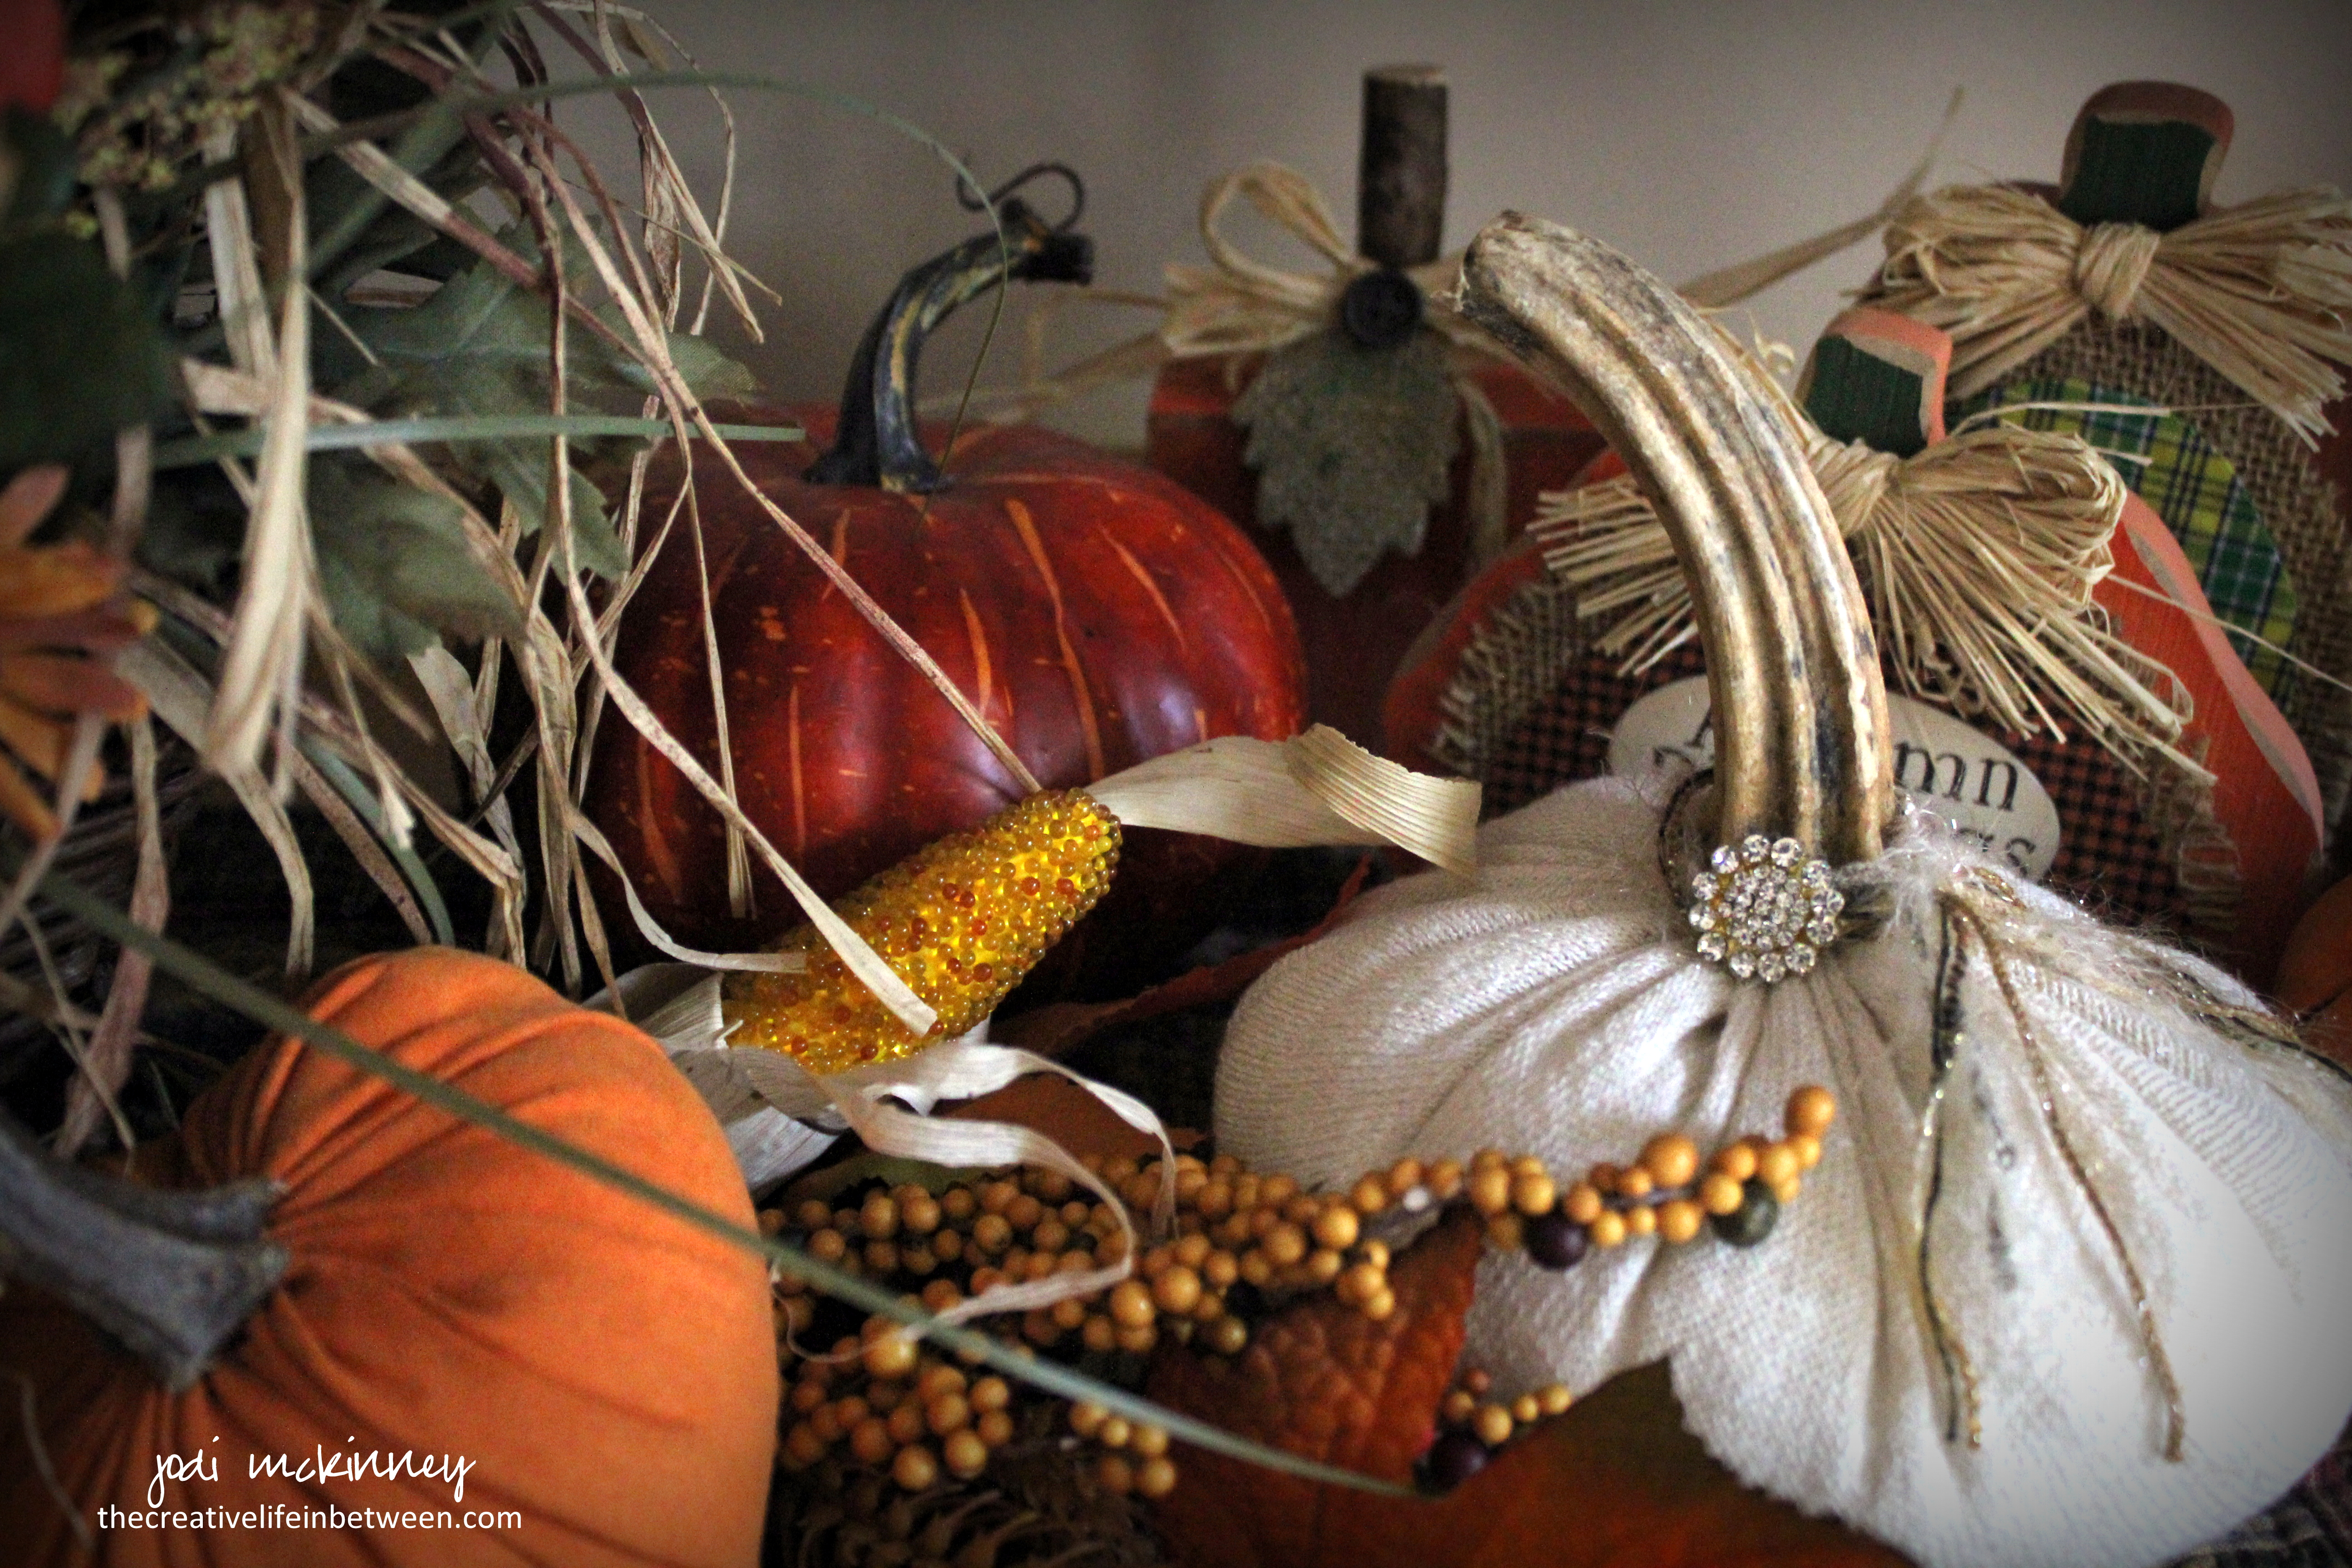
Happy First Day of Autumn!
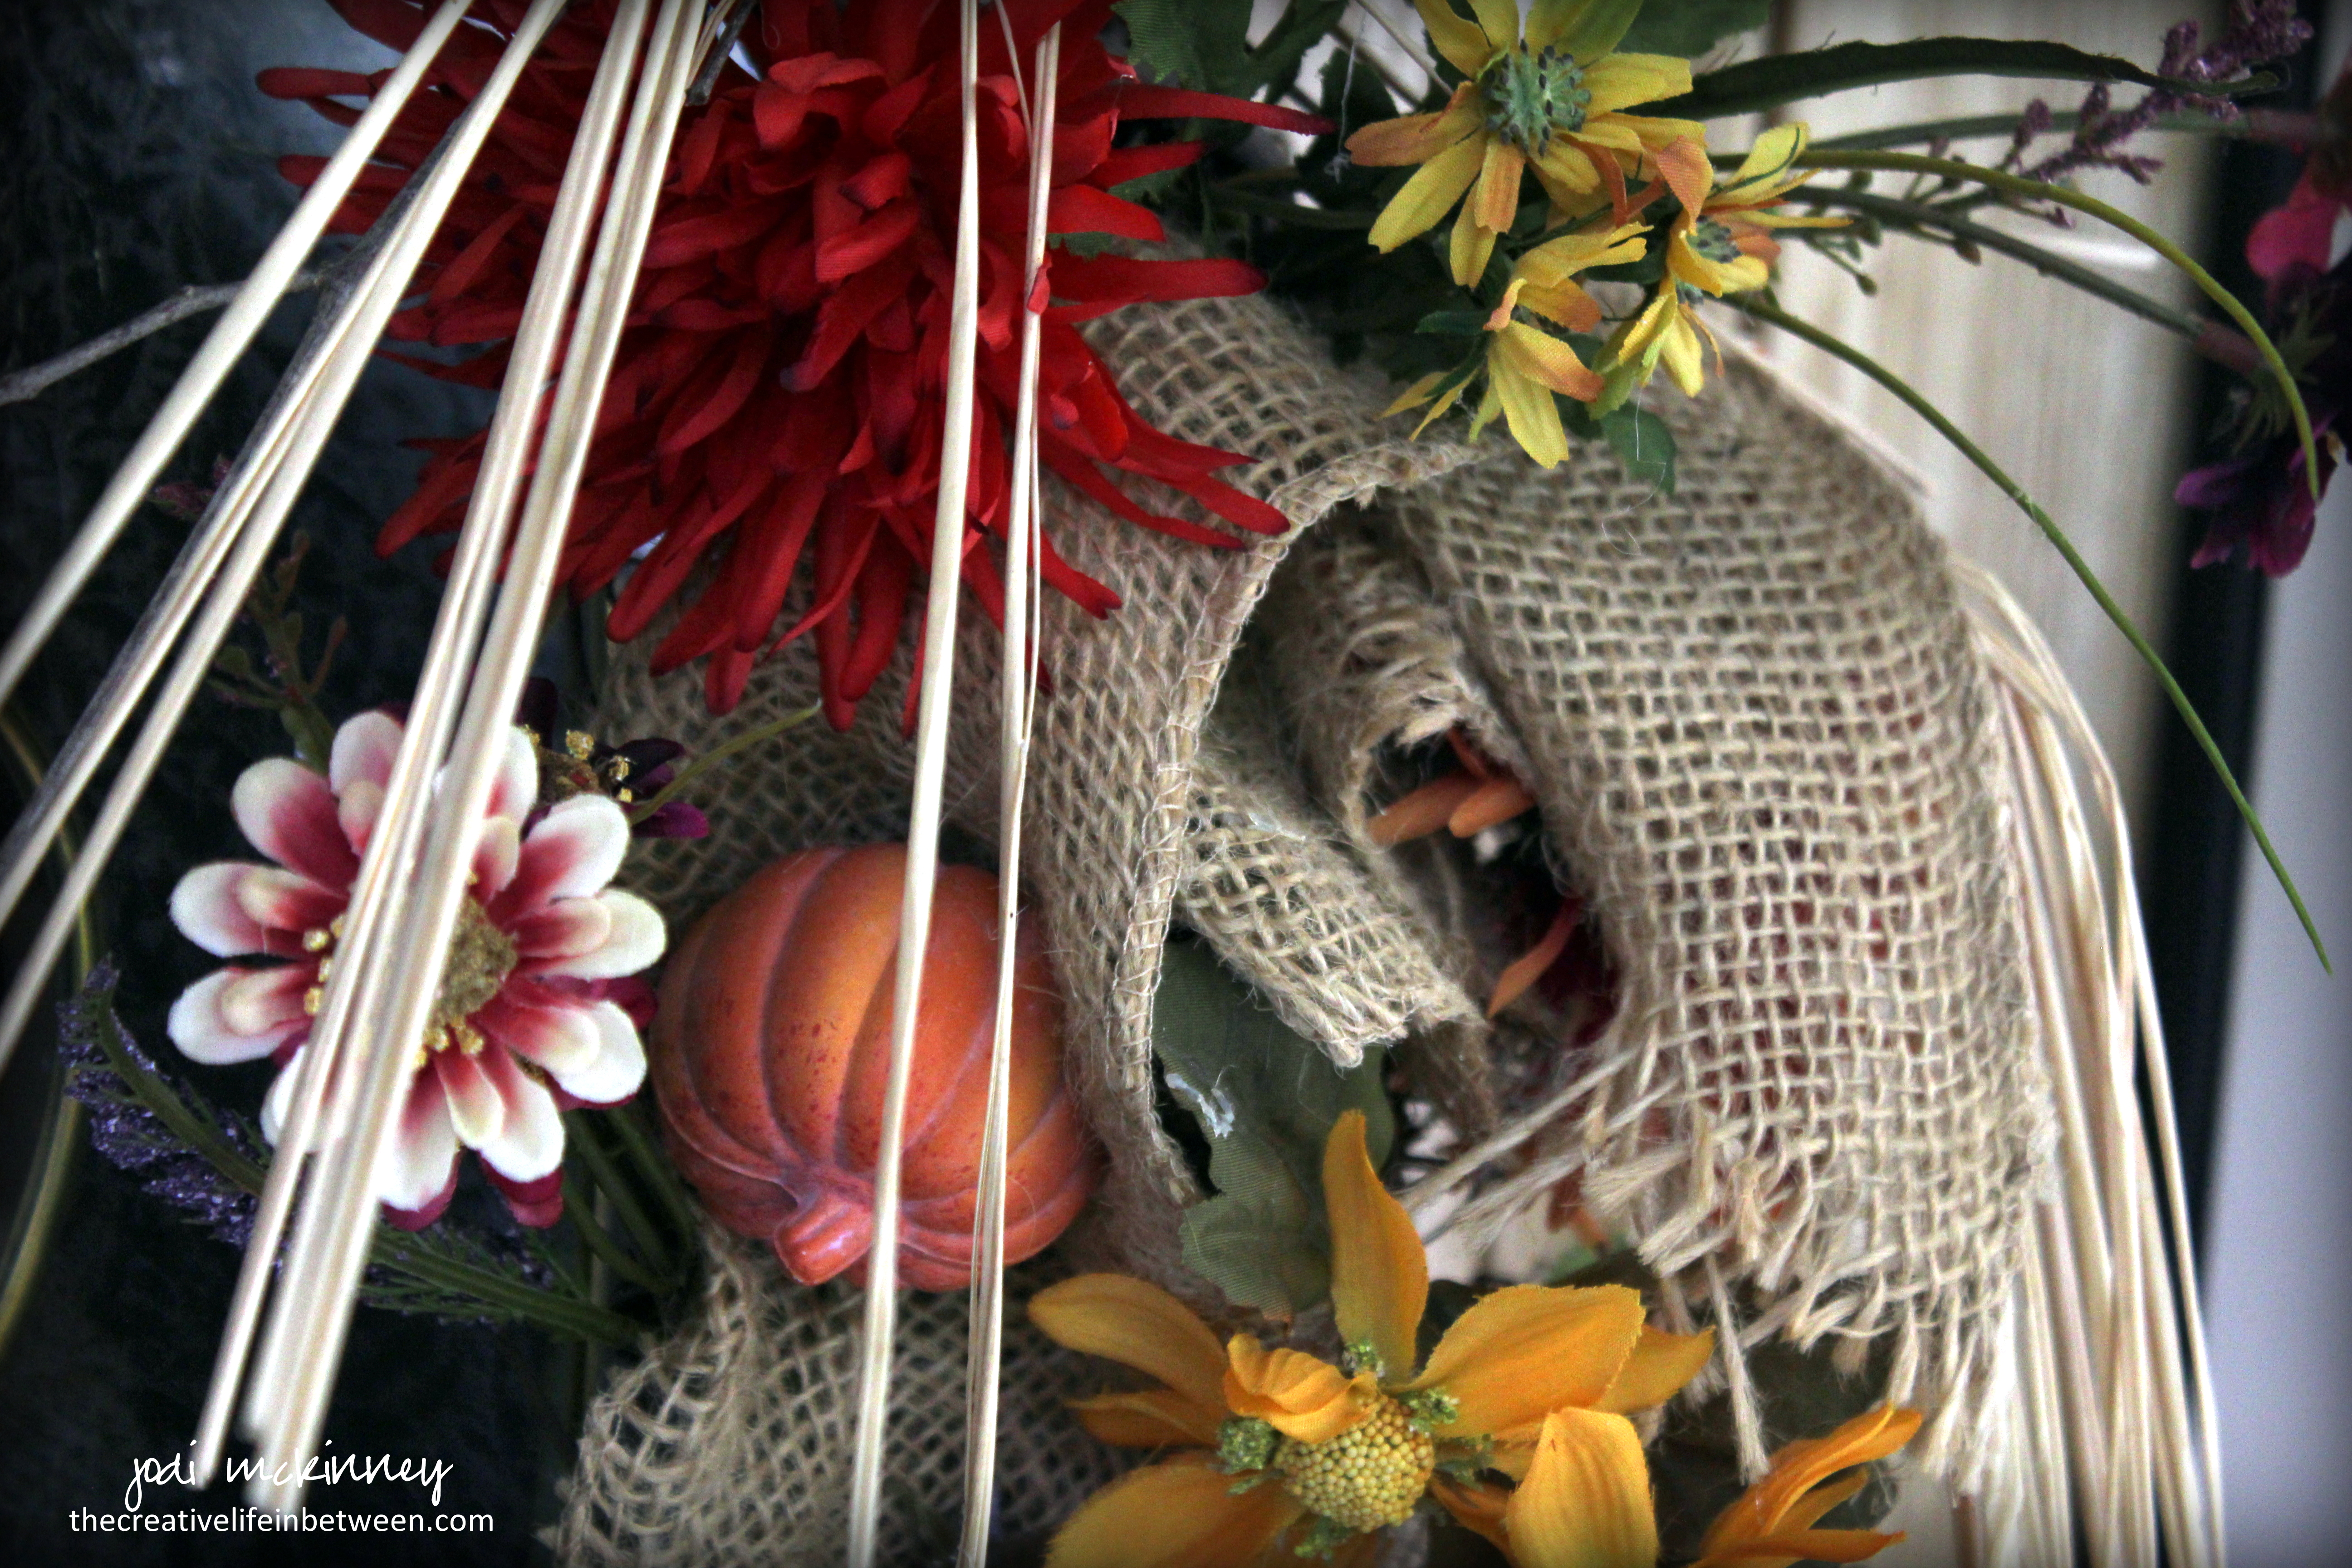
Happy First day of Pumpkin Season!
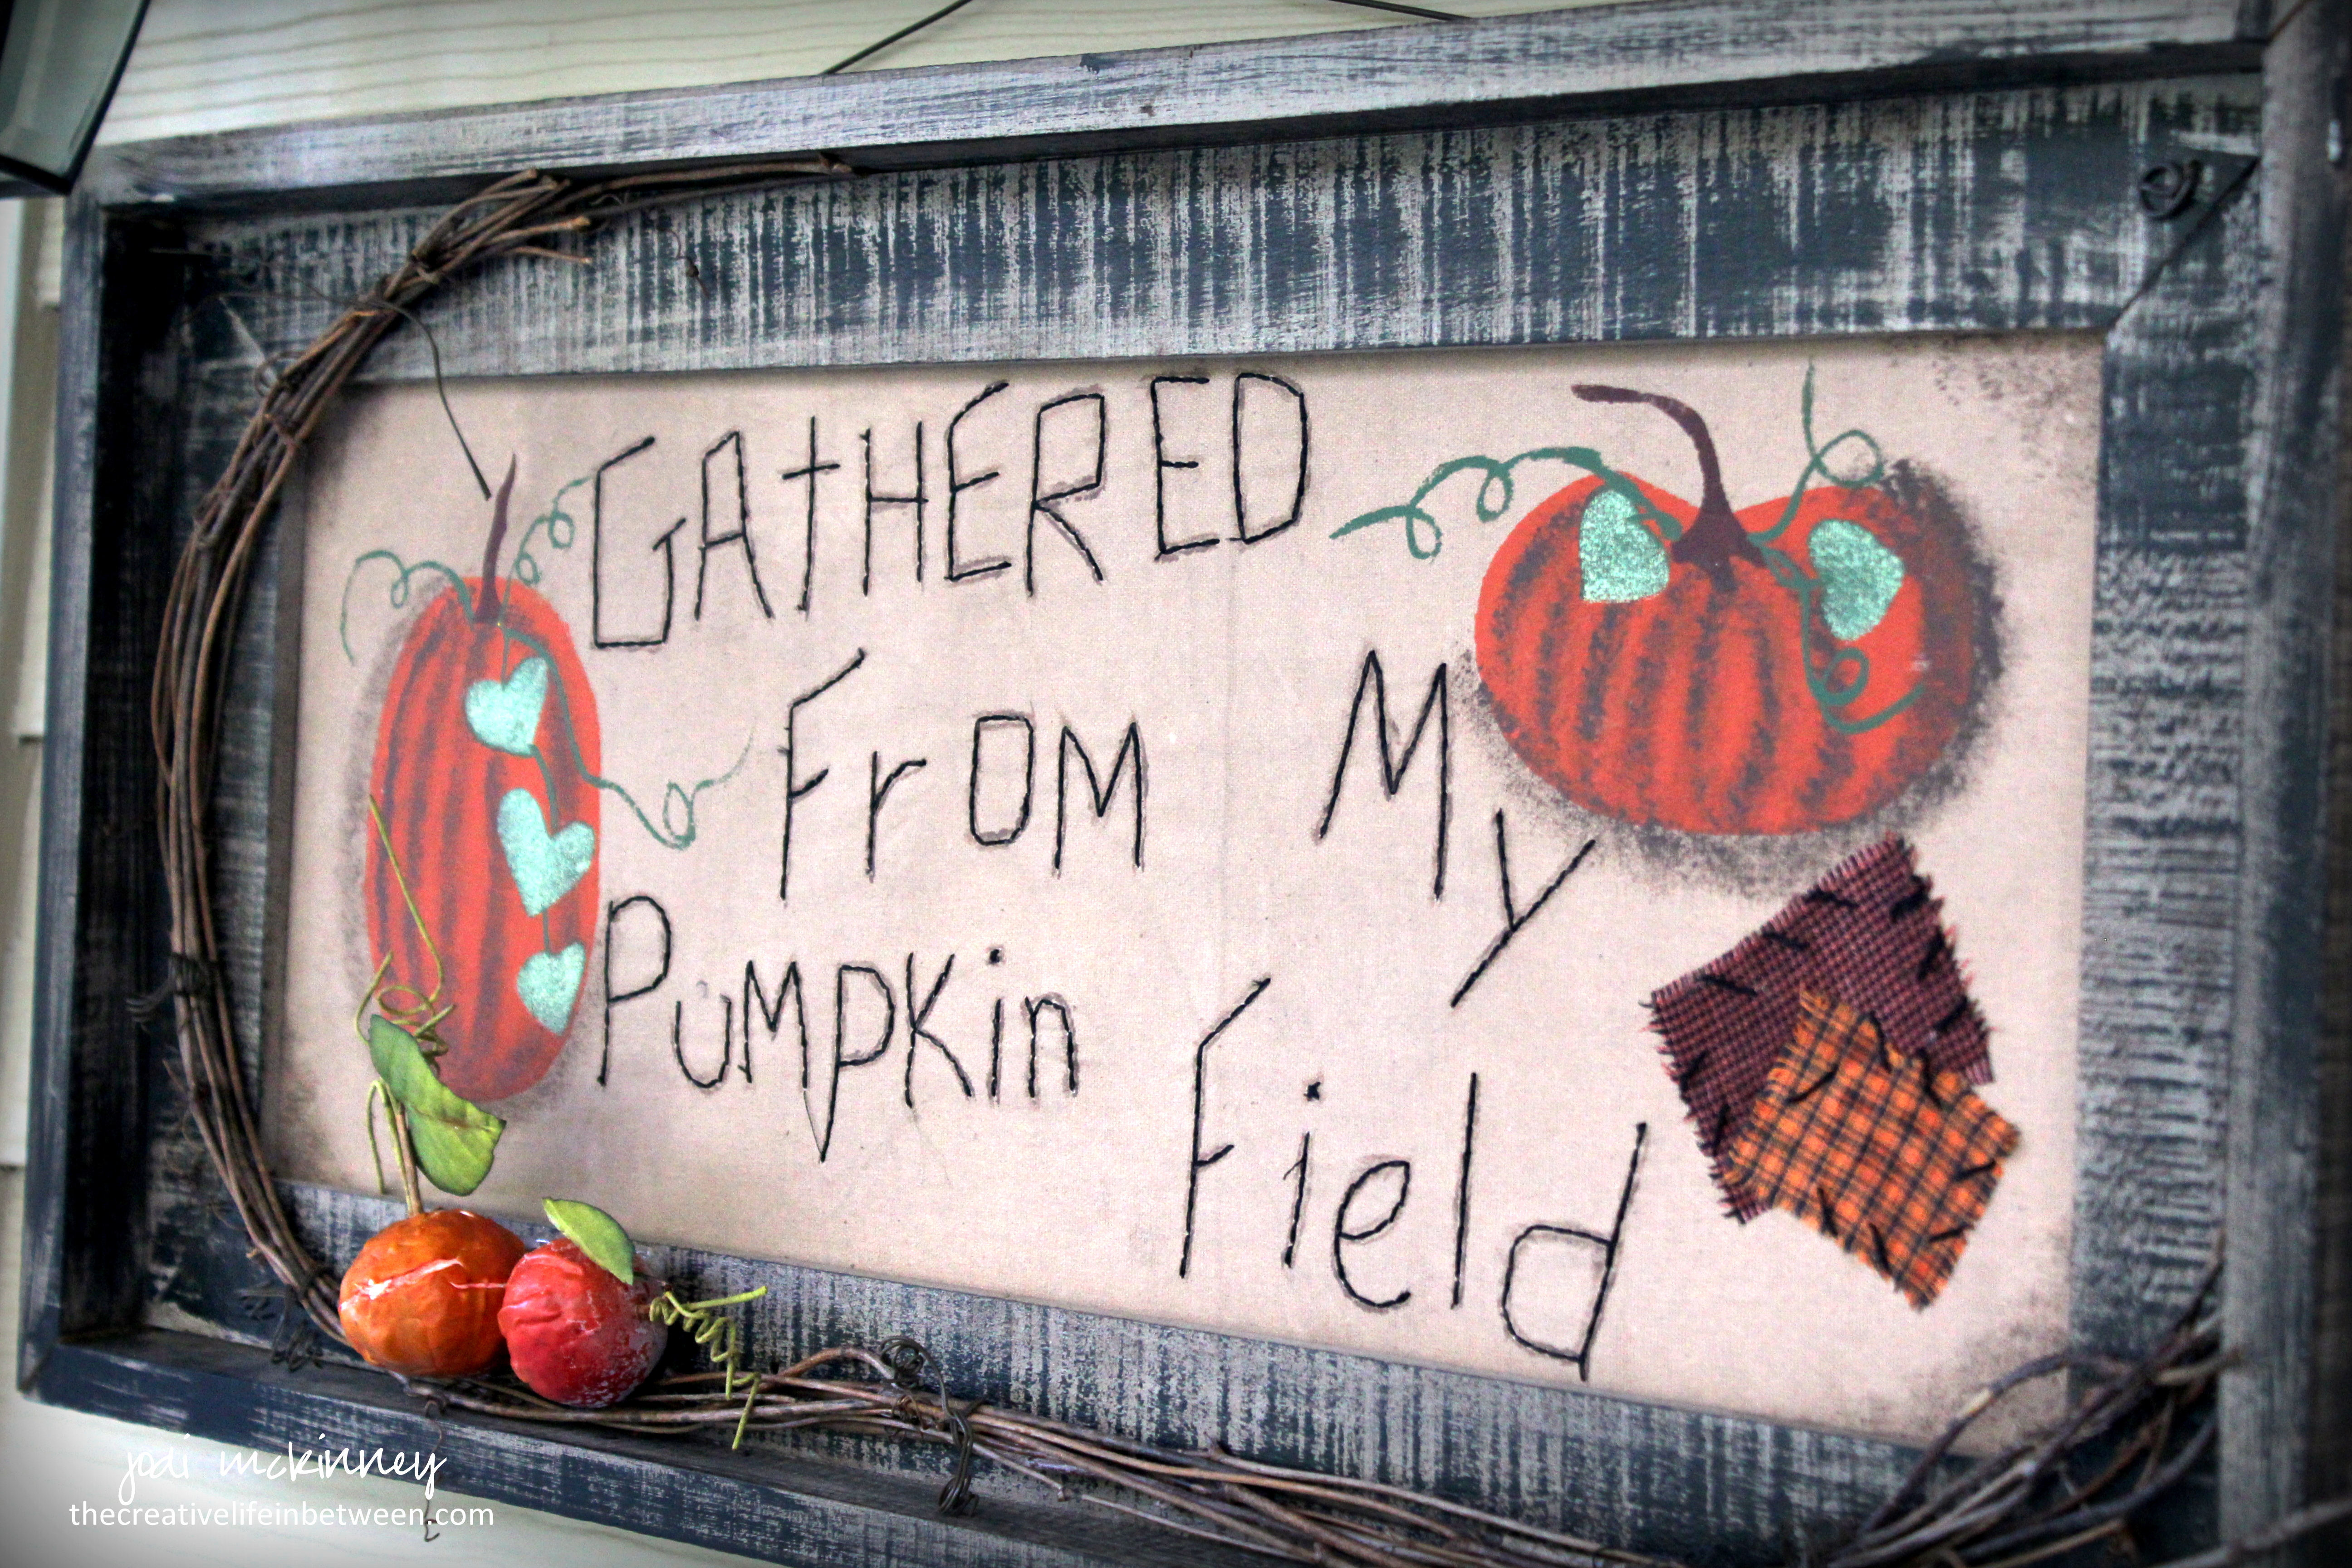
I may have a slight obsession….

with all things pumpkin.

Can you ever have too many pumpkins…
to celebrate
Fall?
Cheers & Hugs,
Jodi

When I have a head cold, nothing makes me feel better than the smell and taste of good old-fashioned chicken noodle soup.
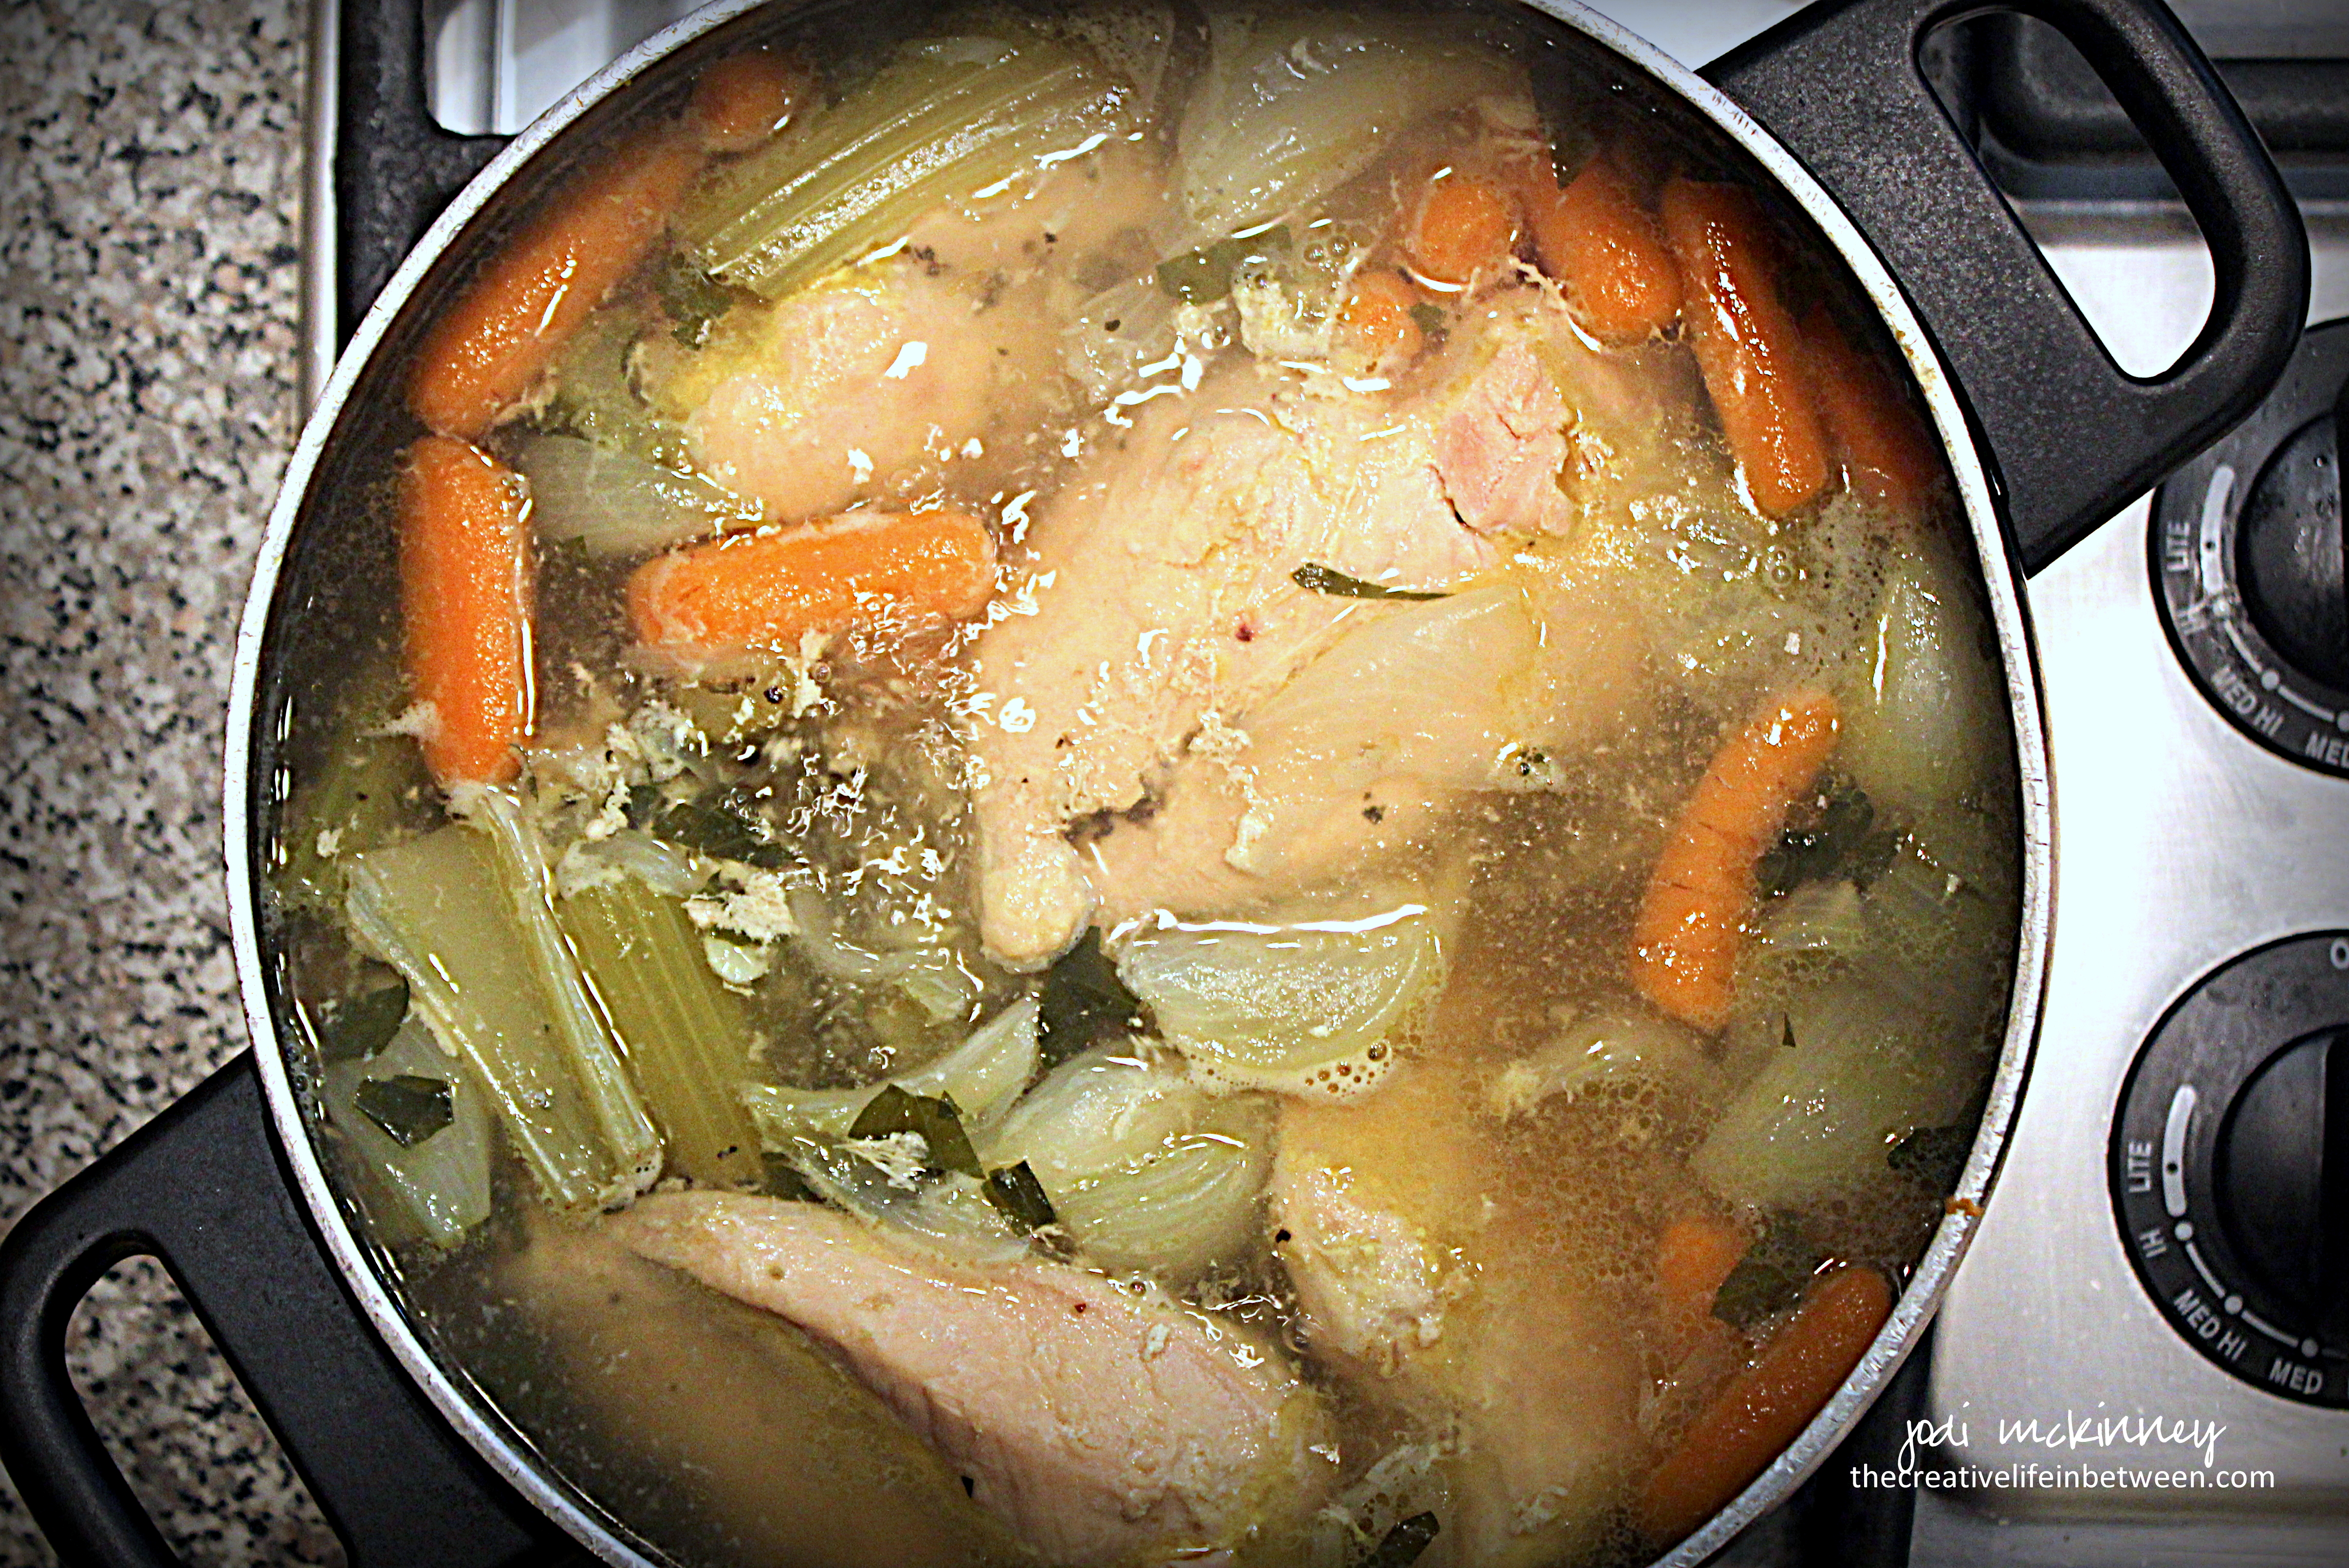
So when my throat started aching, nose started running, cough began croaking, ears felt like they were stuffed with cotton, and head began pounding this week, I knew I had to get a pot of soup on.

Not only does the smell comfort me and remind me of Grandma’s house and love, but the steam clears up the stuffed nose and the warm broth soothes my sore throat.
When other foods lose their flavor when your head is congested, nothing tastes as good as homemade chicken soup.
If you are a beginner cook, I hope you will find this recipe easy to follow. It is made from staple ingredients I almost always have in my kitchen, and though it takes a couple hours to simmer, you can throw it together quickly and forget about it during that time – enjoying the aroma and anticipation of comfort.
Here is how I make it.
Ingredients
Directions:
Place frozen chicken breasts in large soup pot. Cover with 12 cups cold water. Add celery, carrots, chicken base, whole garlic cloves, onions, parsley, and pepper. Cover and bring to a rolling boil.
Once boiling, reduce heat and simmer with lid tilted slightly so it is not tight fitting, but allows steam to escape. Simmer for approximately 2 hours or until broth level reduces 1/2 – 1 inch. You can tell this by looking at the side of the pot where a line will be formed where soup started. This will allow the broth to build depth of flavor.
When soup is almost done, boil noodles in a separate pot, cooking 2-3 minutes less than directions. Drain and rinse well with cold water. Set aside.
When soup broth is done, pour through strainer into a larger pot. The broth will go into the pot, and the chicken and vegetables will remain in the strainer.
When cool enough to handle, chop chicken and vegetables into bite-sized pieces. Add back to broth, then add drained and rinsed noodles. Stir to incorporate all.
Your soup is now ready to enjoy. This soup keeps well for up to a week in the refrigerator and also freezes well.
Beginner’s sidenotes/tips: You can certainly use a whole chicken or chicken parts, but it is a lot more work to clean the chicken from the bone, and remove the skin and fat after cooking to cut up for the soup. Using chicken breasts also eliminated the need to allow the broth to cool and fat to rise to top to skim off as there is little to no fat in the chicken breasts. Chicken breasts also allow for a heartier soup with big chunks of tender chicken. Buying a better grade and organic chicken will give you better flavor and better food value. I’ve found with cheaper brands of chicken, there is fat and gristle that needs removed as well as ligaments that need cut out.
You can certainly use whole raw carrots, but the convenient short-cut carrots save the need for peeling and cutting down carrots into manageable pieces.
While dried herbs are always good to have on hand in a pinch, nothing will make your recipes better than using fresh herbs. Fresh parsley as opposed to dried will really add a whole new sophisticated level to your soup.
Always cook your noodles separately, and drain and rinse well in cold water. This will remove the starch that cooks off the pasta from being in your soup and “muddying up” the broth’s texture and flavor. Rinsing in cold water will stop the “cooking” that still continues in food like pasta while it is still hot.
Cook noodles 2-3 minutes less than directions say to avoid soggy, mushy noodles in your soup. As they sit in the soup, they will soften and plump even more, so no need to over-cook.
Do not add oil or salt to the noodles when boiling. There is plenty of salt in the soup base that will make the broth. It is almost impossible to “unsalt” soup, but additional salt can always be added for individual taste or preference. If you over-salt, add more water to broth or consider boiling a whole peeled potato in the broth. The potato will absorb some of the salt. You can then throw the potato out, hopefully salvaging your broth.
Enjoy!
Cheers & Hugs,
Jodi

