Iced Orange Cookies

Iced Orange Cookies.

Summer baking calls for bright, citrusy flavors; and ever since painting my lemons last week, I have had citrus on the brain!

I found a great old-fashioned cookie recipe for these cakey iced orange cookies from Taste of Home.   I had just bought a bag of clementines, so I knew they would work great for this.

I gave some to my Dad for Father’s Day and served some to our kiddos at our Father’s Day brunch for Hubby.

Be sure to use freshly squeezed orange juice and zest for the best flavor.  These cookies freeze well and taste amazing right out of the freezer on a hot summer day!

Iced Orange Cookies

  • Servings: 2 1/2 dozen
  • Print

Ingredients:

  • 1/2 cup Butter Crisco shortening
  • 1 cup sugar
  • 2 eggs
  • 1/2 cup freshly-squeezed orange juice
  • 1 Tbsp freshly-grated orange zest
  • 2 1/2 cups flour
  • 1 1/2 tsp baking powder
  • 1/2 tsp salt
  • Icing
    • 2 cups confectioner’s sugar
    • 1/4 cup freshly-squeezed orange juice
    • 2 Tbsp butter, melted

Directions:

Preheat oven to 350 degrees F.

In an electric mixer, cream shortening and sugar until light and fluffy.  Add eggs, one at a time, beating well after each addition.  Beat in orange juice and zest.  Add baking powder, salt and then flour to creamed mixture until well combined.

Drop by tablespoon or cookie scoop onto baking stone or ungreased cookie sheet about two inches apart.   Bake for approximately 10 minutes or until edges just begin to brown.  Cool on wire racks.

In a small bowl, combine icing ingredients until smooth.  Drizzle generously over cooled cookies.

TIP:  I refrigerated the cookie dough for a couple hours making it easier to work with and hold its shape.  

Enjoy!

Cheers & Hugs,
Jodi

Lemon Blueberry Zucchini Cake

Lemon Blueberry Zucchini Cake.

This is NOT your momma’s zucchini bread recipe!

Are you overloaded with zucchini and looking for new recipes to use up the abundance you have this time of year?

You have to try this amazing cake!  A co-worker made this to share for a recent celebration at work, and I knew I had to make it.

I modified it slightly from the recipe he found at I Am Baker by cutting the frosting in half, and it was absolutely amazing.

Go bake this!

Lemon Blueberry Zucchini Cake

Ingredients:

  • 2 cups shredded zucchini
  • 3 eggs
  • 1 cup vegetable oil
  • 3 tsp pure vanilla extract
  • Zest of 1 lemon
  • 2 1/4 cup sugar
  • 3 cups flour
  • 1 tsp salt
  • 1 tsp baking powder
  • 1/2 tsp baking soda
  • 1 pint fresh blueberries
  • Lemon Buttercream Frosting
    • 1/2 cup butter, room temperature
    • 1 3/4 cup powdered sugar
    • Juice of 1/2 lemon (1 Tbsp)
    • 1 tsp pure vanilla extract
    • Dash salt

Directions:

Preheat oven to 350 degrees F.  Grease and flour two 8-inch round cake pans.

Shred zucchini and spread out on a clean dish towel.  Roll up and squeeze gently to drain a bit of the excess water.  Set aside 2 cups of shredded zucchini.

Beat together eggs, oil, vanilla, sugar, and lemon zest with electric mixer.  Gently fold in the zucchini.

Add flour, salt, baking powder, and baking soda.  Stir until incorporated.  Gently fold in the blueberries.

Pour half of batter into each cake pan.

Bake approximately 40 minutes or until knife inserted in center comes out clean.

Cool 20 minutes in pans, then turn out onto cooling racks to cool completely.

Prepare lemon butter cream frosting by beating butter, sugar, salt, lemon juice and vanilla with electric mixer until creamy.

Spread on top of each layer, leaving sides “naked.”

Decorate with additional fresh blueberries, lemon zest, zucchini blossoms, and powdered sugar if desired.

Refrigerate.

Enjoy!

Cheers & Hugs,
Jodi
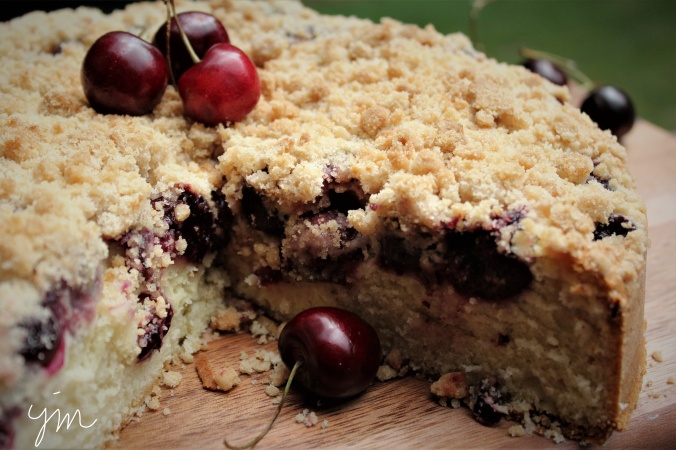
Dark Sweet Cherry Crumb Cake

Dark Sweet Cherry Crumb Cake.

I am a complete sucker for crumb cake.  It is most likely my Achilles heel.  I will say I don’t want a piece but will sliver slices away and pick off crumb topping until the whole cake somehow seems to disappear.

When I had a huge bag of sweet dark cherries lingering in the refrigerator one Sunday a week or so ago and the desire to bake something, I knew I found “IT” when I came across this recipe I slightly tweaked from Laura at Tutti Dolce who described the cake like this:

The best kind of cherry crumb cake is a plush buttermilk cake, scented with almond and vanilla, and topped with a scattering of sweet dark cherries. Piled high with buttery crumbs and baked until beautifully golden, this is the cherry cake your summer needs.

Laura had me at “plush!”

Here is this divine crumb cake recipe.  This IS the cake of your summer needs!

Dark Sweet Cherry Crumb Cake

Ingredients:

Cake:

  • 10 Tbsp butter, room temperature
  • 1 1/4 cups sugar
  • 2 eggs
  • 1 cup buttermilk (or 1 cup milk plus 1 Tbsp vinegar let set for 5 min)
  • 1 tsp pure almond extract
  • 1tsp pure vanilla extract
  • 1 tsp baking powder
  • 1/2 tsp salt
  • 2 1/2 cups flour
  • 1 1/2 lbs dark sweet cherries, pitted

Crumb Topping:

  • 2/3 cup flour
  • 1/2 cup sugar
  • 1 tsp cinnamon
  • 1/4 tsp salt
  • 1/4 cup butter, melted
  • 1/2 tsp pure almond extract

Directions:

Preheat oven to 350 degrees F.  Grease and flour 10 in. springform pan.

Prepare crumb topping by combining flour, sugar, cinnamon, and salt in a small bowl.  Add melted butter and extract and toss with a spoon or your fingers until crumbly.

Prepare cake batter by beating butter and sugar with electric mixer until light and fluffy.  Beat in eggs one at a time.  Add baking soda and salt.  Combine buttermilk and extracts.  Then alternately add buttermilk and flour in three additions just until incorporated.

Pour batter into prepared springform pan.  Top with an even layer of pitted cherries, pressing lightly into batter.  Sprinkle with crumb topping.

Bake 70 minutes or until a toothpick inserted in center comes out clean.  Cool 15 mins. in pan.  Remove springform side, and cool completely.  

Enjoy!

Cheers & Hugs,
Jodi
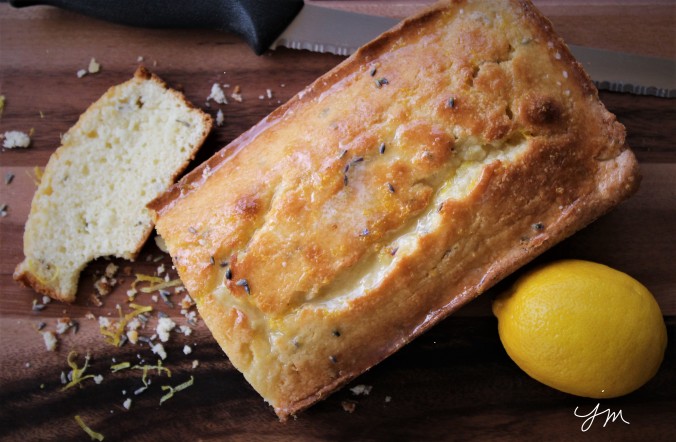
Lemon Lavender Loaf

Lemon Lavender Loaf.

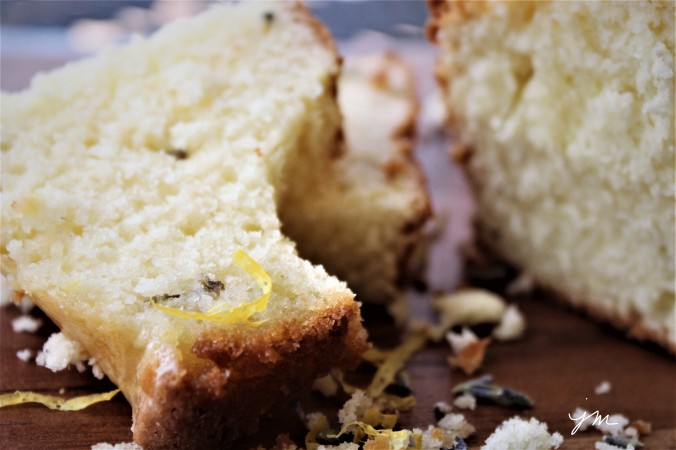
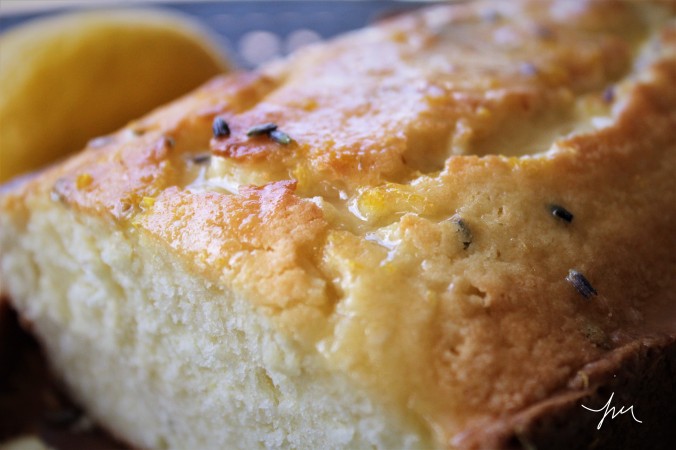
Fresh, bright, tart lemon zest and juice mixed with sweet, flowery, fragrant dried lavender buds in a beautifully glazed loaf.

I couldn’t decide if this should be considered a bread or a cake, so I am simply calling it loaf.     Plus I love the alliteration of a name where all the words start with the same Lovely Letter!

A dear friend gifted me a bag of dried lavender recently, and I have been dying to use it.  I finally found some time early Sunday morning to bake this beautiful loaf to enjoy on a beautiful Spring day.

It is light and soft and such a perfect Springtime treat.

Here is how I made it.

Lemon Lavender Loaf*

Ingredients:

  • 1 cup (2 sticks) salted butter, softened
  • 2 cups white sugar
  • 3 cups all purpose flour
  • 4 large eggs
  • 1 cup buttermilk (or use 1 cup milk with 1 Tbsp white vinegar let set 5 min)
  • 1/2 tsp salt
  • 1 tsp baking soda
  • 1 large lemon, zested and juiced
  • 1 Tbsp dried lavender buds
  • Glaze:
    • 1 cup powdered sugar
    • 1 Tbsp milk
    • 1 large lemon, zested and juiced
    • 1/2 tsp dried lavender buds

Directions:

Prepare two loaf pans with shortening and flour.  Preheat oven to 325 degrees F.

Cream butter and sugar in electric mixer until light and fluffy.  Add eggs one at a time, and continue mixing until mixture looks like buttercream frosting.

Gently mix in salt and baking soda.

Add lemon zest and juice to buttermilk, and set aside.

To batter, alternate adding flour and lemon buttermilk in three additions, and mix just until incorporated.  Stir in lavender.

Pour into prepared pans and bake approximately 45 minutes until toothpick inserted in center comes out clean.  Cool loaves 10 minutes in pans.  Remove and cool completely.

Once cool, prepare glaze by mixing powdered sugar, milk, lemon zest and juice, and lavender.  Pour over loaves.

Enjoy!

Cheers & Hugs,
Jodi
*Original recipe slightly adapted from FudgeRipple

Extreme Chocolate Cake

Extreme Chocolate Cake.

For those times….
you know them…
when you just need chocolate cake.

I recently saw a question that made me think.

If you had to live without one of the following for the rest of your life, which would you choose?

  • Coffee
  • Cheese
  • Chocolate
  • Wine

For me, it would be chocolate.  Though I adore baking and enjoy chocolate (and even crave it sometimes), if I had to give up one of these four, it would be the chocolate.

I can’t imagine not having coffee in the morning.  A world without cheese?!  I’m just not sure that is a world worth living in.  And oh how I enjoy my glass or two of red wine in the evening.

How about you?

Now even though I would choose chocolate if I HAD to make the choice…. THANKFULLY I do not!

So here’s a chocolate cake I made recently (which is slightly adapted from this one I found at AllRecipes) – just because…

Because sometimes life is worth celebrating with chocolate cake!

Extreme Chocolate Cake

Ingredients:

  • 2 cups sugar
  • 1 3/4 cups flour
  • 3/4 cup unsweetened cocoa powder
  • 1 1/2 tsp baking soda
  • 1 1/2 tsp baking powder
  • 1 tsp salt
  • 2 eggs
  • 1 cup milk
  • 1/2 cup vegetable oil
  • 2 tsp vanilla extract
  • 1 cup boiling water
  • Frosting
    • 1 cup softened butter
    • 2 cups unsweetened cocoa powder
    • 6 cups powdered sugar
    • 1 cup milk
    • 1 tsp vanilla

Directions:

Preheat oven to 350 degrees F.  Grease and flour three 8-9″ round cake pans.

In a large mixing bowl, stir together sugar, flour, cocoa, baking soda, baking powder, and salt.  Add eggs, milk, oil, and vanilla.  Mix for 3 minutes with electric mixer.  Slowly stir in boiling water by hand with wooden spoon until fully incorporated.  Pour batter evenly into the three prepared pans.

Bake for approximately 20 minutes or until toothpick inserted in center comes out clean.  Cool for 15 minutes in pans, then remove to cooling rack to cool complete.

Prepare frosting by beating butter with electric mixer until light and fluffy.  Stir in the cocoa powder and powdered sugar, then milk and vanilla.  Beat until fluffy and spreading consistency.

Spread frosting on each layer of cake stacked on top of each other and decorate as desired.

I shaved dark chocolate on top using a vegetable peeler from a large bar of Trader Joe’s 72% Cocoa Dark Chocolate and placed halved strawberries around the perimeter of the top.  

Enjoy!

Cheers & Hugs,
Jodi


Buttermilk Pound Cake

Buttermilk Pound Cake.

I am a total sucker for pound cake!

So Friday – after a long, difficult week – I decided to do some baking therapy and teach my 16-month old granddaughter how to bake her first cake.  It was so fun to put her sweet little apron on for the first time that was a baby gift from a kind friend who knew it would surely get a lot of use.

We made this AMAZING pound cake from a recipe recently shared with me by a dear blog-following friend, Dena, who originally found it from Taste of Home.

The original recipe called for using 1 teaspoon of vanilla.  Dena changed it up by using almond  and lemon extract.  I tweaked it a smidge further by using fresh lemon zest and lemon juice.  Dena makes hers in two loaf pans (which you surely can too – and adjust the baking time to 40-50 mins), but we made ours in a fluted Bundt pan and enjoyed with some fresh strawberries.

This recipe is so wonderful.  It is not super heavy like many pound cakes.  In fact, it is almost a bit light and airy.  But it is also dense enough to be super moist.  I love the way the edges turned out a bit crispy and the center moist and tender.

My granddaughter loved it too, so she got to take half of it home to share with Mommy and Daddy.

It snow flurried most of the day and was so cold, so it was the perfect day for us to hang out, have the oven on for an hour, and enjoy the aroma and taste of this delicious, comforting cake.

Thanks so much for sharing Dena!  This recipe is a real winner!

Buttermilk Pound Cake

  • Servings: approx. 16
  • Print

Ingredients:

  • 1 cup (2 sticks) butter, softened
  • 2 1/2 cups sugar
  • 4 eggs
  • 1 tsp almond extract
  • Lemon – zest of whole, juice of half (approx. 1 Tbsp.)
  • 1/4 tsp baking soda
  • 3 cups flour
  • 1 cup buttermilk (or 1 cup milk + 1 Tbsp white vinegar left to sit for 5 min.)
  • Powdered sugar for dusting on top

Directions:

Cream butter and sugar in electric mixer until light and fluffy.  Add eggs, one at a time, beating well.  Beat in almond extract, zest of 1 fresh lemon, and juice of half of a fresh lemon (approx. 1 Tbsp).  Add baking soda and 1 1/2 cups flour.  Mix just until incorporated.  Pour in half of milk, and beat just until combined.  Gently beat in remaining 1 1/2 cups flour followed by second half of milk.

Pour batter into greased and floured 10″ fluted tube (Bundt) pan.  Bake for approximately one hour or until toothpick inserted into the center comes out clean.  Cool in pan 15 mins, then remove to wire rack to cool completely.  Dust with powdered sugar.

Enjoy!

Cheers & Hugs,
Jodi


Best Ever Apple Fritter Cake

Best Ever Apple Fritter Cake.

So… this happened the other day…. this absolutely amazing “cake” that is like a pan full of apple fritters.

O M G!

It might not be the healthiest or quickest or easiest to make….

but it is sooo worth it!

With all the snow and colds and flu and healing going on around here…. we needed some serious comfort food.  We needed the house to feel warm and smell wonderful.
We needed some sweetness.  We needed some yummy for our tummy.

Everyone I’ve shared this with pretty much moaned with delight.

And I am right now trying to ignore it calling me from the fridge!  (Eat me…. you know you want me…)


If you are in the mood to treat yourself….

Or need to treat yourself…

Look no further!

Here is the recipe that I slightly tweaked from Cookies and Cups.

Best Ever Apple Fritter Cake

Ingredients:Fillings:

  • 2 cups peeled and diced apples (I used 2 large Gala – use your favorite!)
  • 1/3 cup granulated sugar
  • 1 tsp. cinnamon
  • 2 Tbsp. cornstarch
  • 2 tsp. water
  • 1/2 cup brown sugar + 1 tsp cinnamon

Cake:

  • 1/3 cup butter, room temperature
  • 3/4 cup granulated sugar
  • 3/4 cup chunky applesauce
  • 2 tsp. vanilla
  • 2 eggs
  • 2 1/4 cup flour
  • 1 tsp. baking powder
  • 1 tsp. baking soda
  • 1/2 tsp salt
  • 1 tsp cinnamon
  • 1 cup Greek yogurt (or you can use sour cream)

Glaze:

  • 2 cups powdered sugar
  • 1/3 cup milk
  • 1 tsp. vanilla

Directions:

Fillings:

Combine apples, granulated sugar, cinnamon, cornstarch, and water in a medium saucepan.  Heat on medium-high heat for approximately 5 minutes until apples soften and a syrup forms.  Set aside.

Mix the brown sugar and cinnamon in a small bowl, and set aside as well.

Cake:

Preheat oven to 350 degrees F.

Blend butter and sugar for 3 minutes with electric mixer until fluffy.  Add applesauce, vanilla, and eggs, and mix until combined.  Gently mix in baking powder, baking soda, salt, and cinnamon.  Finally, add flour and Greek yogurt in alternating parts (flour, yogurt, flour, yogurt).  Mix until just combined.

Spread half of the cake in an Deep Dish Baking Stone (or your favorite 10-12 inch round or square or 11×13 rectangle baking dish).  Top with all of apple filling to cover batter.  Sprinkle with 2/3 of the brown sugar/cinnamon mixture.  Add remaining cake batter and top with remaining 1/3 brown sugar/cinnamon.

Bake approximately 30 minutes until center of cake is set, but do not overbake.

Glaze:

While cake is baking, prepare glaze by mixing powdered sugar, milk and vanilla in a medium bowl until smooth.

As soon as cake is removed from oven, poke holes using a butter knife or wooden spoon handle all over the cake – 20-30 pokes.  Pour glaze over the top, spreading to cover completely and allowing to soak in the holes and edges.

Allow glaze to set approximately 20 minutes, and cake is ready to serve warm.  Also very good refrigerated cold – just depends on your preference.  (In our case, hubby likes it warm, and I adore it cold!)

Enjoy!

Cheers & Hugs,
Jodi

Grandma’s Old Fashioned Poppy Seed Cake

Grandma’s Old-Fashioned Poppy Seed Cake.

One of the things I love to do around my birthday is bake Grandma’s Old-Fashioned Poppy Seed Cake.

Having a birthday so close after Christmas, when everyone is really “over” sweets, Grandma made this simple cake for my birthday every year for as long as I can remember until she passed away.

May sound kind of strange that I like to bake my own cake these days, but I really do.  For me, it’s more than baking.  It’s reminiscing.  It’s sweet, loving memories.  It’s kind of a tribute to my Stella Star.

I use Grandma’s old tin measuring cup as I measure out the flour and sugar.  I grease and flour the pan – a square tube pan – because that is the way Grandma did it.   I crack eggs and stir and think of conversations Grandma and I had in the kitchen while she cooked and baked.  I put it in the oven and wait for the smell…. That smell that takes me right there to her kitchen.  Right back to that feeling of comfort and peace and unconditional love.

So yep – baking my cake gives me almost as much joy as eating it!

I love the way the outside is crisp and crunchy, and the inside is tender and moist and just a little sweet, but packed full of flavor.

This is a very basic cake.  A cake likely made in times when ingredients were simple, money was tight, and everything was made from scratch with love.  And I love it!

Do you have a recipe like this that is just as much of a memory as it is something to eat?  Something that is a ritual of love?

Here is our recipe:

Grandma's Easy Poppy Seed Cake

  • Servings: One Yummy Cake
  • Print

INGREDIENTS:
3 cups flour
2 cups sugar
1/2 tsp baking soda
1/2 tsp salt
4 eggs
1 tsp vanilla
1 cup vegetable oil
1 can evaporated milk
1/4 cup poppy seeds
DIRECTIONS:
Preheat oven to 350 degrees F.  Grease and flour 10 inch tube or bundt pan.
In a large bowl, mix dry ingredients.
Make a well in the center and add eggs, vanilla, oil, and milk.  Mix well.
Fold in poppy seeds.
Pour into prepared pan, and bake for 1 hour or until toothpick inserted into cake comes out clean.
Cool 10 minutes in pan, then turn onto rack to cool.

When cool, sprinkle generously with sifted powdered sugar.

Enjoy!
Cheers & Hugs,
Jodi

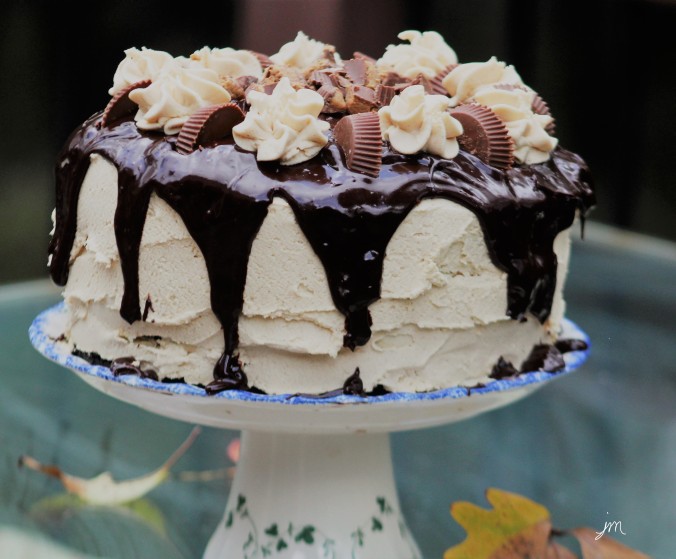
Peanut Butter Chocolate Triple Layer Cake

Peanut Butter Chocolate Triple Layer Cake.

Our family is pretty much huge fans of Reese’s peanut butter cups and all things peanut butter and chocolate.

So when it came time to celebrate one of my son’s birthdays recently, I was excited to try this Peanut Butter Chocolate Triple Layer Cake recipe I found at Life, Love, and Sugar.

Disappoint it did not!!! Oh the chocolately peanut buttery amazingness!

Want to see it a little closer?!

This cake is not for the faint of heart….  yes -it is only for the most serious of chocolate and peanut butter addicts!

Want to see what a slice of it looks like?

Yep – that is three heavenly layers of moist chocolate cake separated only by a fluffy peanut butter frosting and chopped up Reese’s peanut butter cups!

Can you even stand it??!!

As much as we all love our peanut butter cups, we decided this cake would be just as delicious or possibly even better with half the frosting, so that is how I will likely make it next.

You decide – half the frosting or all…. but I’m betting you are going to be somebody’s super hero if you make and serve this cake!

Here is how I made it.

Peanut Butter Chocolate Triple Layer Cake

  • Servings: 1 large cake
  • Print

Ingredients:

Chocolate Cake:

  • 1 3/4 cup flour
  • 2 cups sugar
  • 3/4 cup unsweetened cocoa
  • 2 1/2 tsp baking soda
  • 1/2 tsp baking powder
  • 1 tsp salt
  • 1 cup half and half
  • 1/2 cup canola (or vegetable) oil
  • 2 tsp pure vanilla extract
  • 2 eggs
  • 1 cup hot water

Peanut Butter Frosting:

  • 2 cups butter, softened
  • 1 1/4 cups creamy peanut butter
  • 9 cups powdered sugar
  • 6-8 Tbsp half and half

Chocolate Ganache:

  • 1 cup semi sweet chocolate chips
  • 1/2 cup heavy whipping cream

Garnish:

Directions:

Preheat oven to 350 degrees F.

Prepare three 9″ cake pans by spraying them with Pam Non-Stick Cooking Spray then placing a parchment circle on the bottom.

Combine flour, sugar, cocoa, baking soda and powder, and salt in a bowl.

Combine milk, oil, vanilla, and eggs in an electric mixing bowl.

Add dry ingredients to wet ingredients in mixing bowl, and mix until well combined.

Slowly add the hot water to the batter, and mix on low speed until well incorporated.

Pour the batter evenly between the three prepared pans, and bake for 20 – 25 minutes until toothpick inserted comes out clean.

Remove pans from oven, and allow cake to cool in pans for 3-4 minutes, then remove to a cooling rack.   When completely cool, wrap in plastic wrap and freeze for several hours, overnight or for several days or weeks.

When ready to assemble cake, prepare frosting by combining the butter and peanut butter with electric mixer until smooth and creamy.  Slowly add half the powdered sugar until incorporated.  Add half of the half and half and combine.  Add remaining powdered sugar, then remaining half and half, and combine until smooth and fluffy frosting is formed.

Place first layer of cake on a serving plate.  Top with frosting and 3 chopped Reese’s peanut butter cups.

Add the next cake layer and repeat frosting and peanut butter cups.

Add the final cake layer and frost top and sides of cake, reserving 1 cup of frosting for piping decorations if desired.

Make chocolate ganache by heating 1/2 cup heavy whipping cream in microwave for 1 minute.  Add one cup of chocolate chips.  Let set for a couple minutes, then stir until smooth ganache is created.  Pour on top of cake allowing some to drip down sides.

Decorate top of cake with chopped and halved Reese’s peanut butter cups and piped florets of frosting.

Enjoy!

Cheers & Hugs,
Jodi

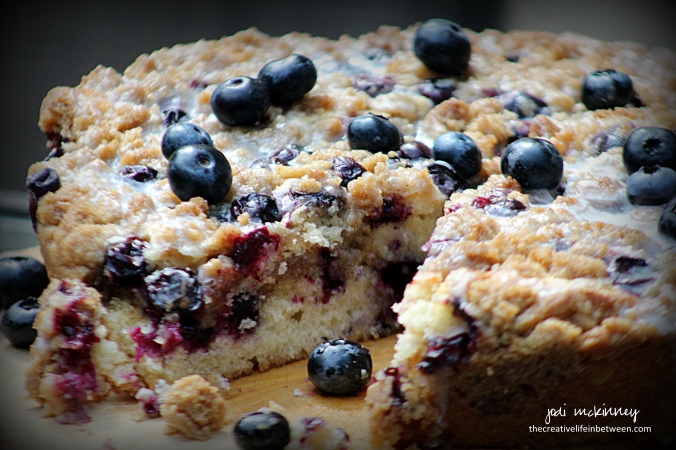
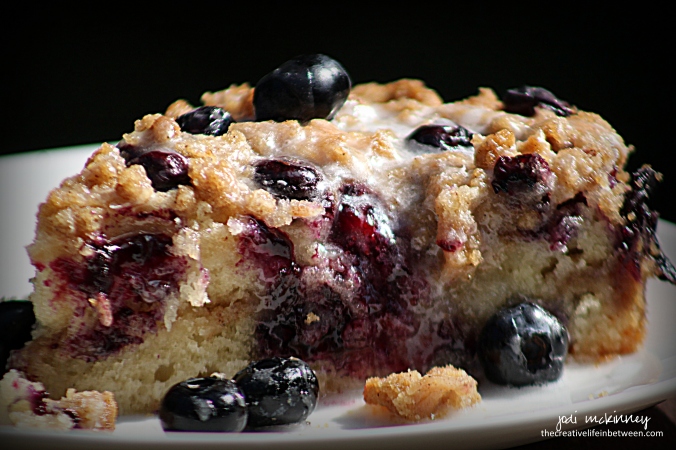
Blueberry Streusel Coffee Cake

Blueberry Streusel Coffee Cake.

What is a girl to do when a bestie friend comes home after a long time away?!

Well…. run over and visit and hug as soon as possible!  Right?!

But you can’t go empty handed!

So – what to bake to take?  I needed something quick, but yummy, that my sweet friend Janet and her Mom and Dad would enjoy…

I had some amazing fresh blueberries in the fridge I had recently bought at a local farm market, so I decided to make a blueberry cake.

And OH was it yummy!  (I know because I kept half for hubby and me and took half to them.  She is that kind of friend!  The best kind – that you can take half a cake to – LOL!)

I arrived just in time to serve it to them for dessert!

Oh the joy of friendship!  Oh the joy of baking and sharing!

Make this for yourself!  Make this to give away!  But make this amazing Blueberry Streusel Coffee Cake today!  (oh dear – am I still rhyming?! )

Welcome home sweet Janet!  Looking forward to our time together.

Here is the recipe I made as I adapted from LifeLoveandSugar:

Blueberry Streusel Coffee Cake

Ingredients:

Streusel:

  • 3/4 cup flour
  • 3/4 cup packed brown sugar
  • 1 tsp. cinnamon
  • 6 Tbsp. salted butter, melted

Cake:

  • 1/2 cup white sugar
  • 6 Tbsp. salted butter, room temperature
  • 1/4 cup sour cream (light sour cream works fine)
  • 1/4 cup milk (I used Skim)
  • 1 large egg
  • 1 1/2 tsp. vanilla
  • 1 1/2 tsp. baking powder
  • 1 cup all-purpose flour
  • 2 cups fresh blueberries

Glaze:

  • 1/2 cup powdered sugar
  • 1 Tbsp. milk

Directions:

Preheat oven to 350 degrees F.

Prepare an 8-9 inch cake pan by greasing bottom and sides with shortening and then placing a circle of parchment paper in the bottom.

Prepare streusel by combining ingredients in a medium bowl with a fork.  Set aside.

Prepare cake batter by beating sugar and butter in electric mixer for 3-4 minutes until light and fluffy.  Add sour cream and milk  until well incorporated.  Add egg and vanilla.  Finally, add baking powder, then flour just until thoroughly combined.

Spread half of the batter in prepared pan.  Top with half of the streusel mixture, then  3/4 cup blueberries.  Repeat batter, streusel, then 1 cup blueberries.

Bake for approximately 35 minutes or until toothpick inserted comes out clean.

Cool in pan for 20 minutes, then remove from pan.

Prepare glaze by  by combining powdered sugar and milk until a glaze consistency is achieved.  Add more powdered sugar or milk as needed.

Drizzle cooled cake with glaze, and top with remaining 1/4 cup fresh blueberries.

Serve warm or cold – plain or with a scoop of ice cream or whipped cream!

Enjoy!

Cheers & Hugs,
Jodi