
Comfort.
Sometimes we need
to be comforted.
Sometimes we need
to give comfort.
Both are
equally important.
We need to be both
a giver and a receiver
of Comfort.
Cheers & Hugs,
Jodi
Comfort.
Sometimes we need
to be comforted.
Sometimes we need
to give comfort.
Both are
equally important.
We need to be both
a giver and a receiver
of Comfort.
Cheers & Hugs,
Jodi

Old-Fashioned Beef Stew.
The weather has turned blustery here, and we are “turkeyed” out from Thanksgiving, so the other day, I made a comforting pot of bubbling, thick, hearty, old-fashioned beef stew.
I finally made a trip to a local pantry I’ve been longing to visit in the quaint town of Zelienople, PA (not far from Mars) – Penn Pantry, where I purchased some local, organic grass-fed beef (amongst many other wonderful treasures) that seemed to be made just for stewing.
I also had an abundance of fresh vegetables from my latest Misfit Market shipment that I knew would work perfectly in a stew – potatoes in sweet, red and white, carrots, parsnips, and onions.
So a stewing I did, and oh how we enjoyed!
Here is how I made ours. Shake it up with your favorite ingredients, but feel the warmth and comfort in this great classic recipe.
Ingredients:
Directions:
Combine flour, seasoned salt, and black pepper in a small bowl. Add beef cubes, and toss to coat.
Heat oil in a large pot. Add coated beef cubes and brown on all sides.
Remove beef from pot, and add vinegar and wine to oil and beef drippings in pot. Stir and scrape browned bits from bottom of pan until all combined and boiling. Add beef back in, followed by beef broth, tomato paste, bay leaves, thyme, rosemary, and sage. Bring back to a boil, then reduce to simmer for about a half hour to an hour – until beef is tender. (Timing will depend on the cut and quality of beef.)
Add onions, potatoes, carrots, and celery, and continue simmering until vegetables are tender and broth thickens – approximately one hour.
Ladle into bowls and serve with fresh, crusty bread to soak up every bit of gravy goodness to comfort your appetite and warm you from the inside out.
Enjoy!
Cheers & Hugs,
Jodi

Buttermilk Pound Cake.
I am a total sucker for pound cake!
So Friday – after a long, difficult week – I decided to do some baking therapy and teach my 16-month old granddaughter how to bake her first cake. It was so fun to put her sweet little apron on for the first time that was a baby gift from a kind friend who knew it would surely get a lot of use.

We made this AMAZING pound cake from a recipe recently shared with me by a dear blog-following friend, Dena, who originally found it from Taste of Home.

The original recipe called for using 1 teaspoon of vanilla. Dena changed it up by using almond and lemon extract. I tweaked it a smidge further by using fresh lemon zest and lemon juice. Dena makes hers in two loaf pans (which you surely can too – and adjust the baking time to 40-50 mins), but we made ours in a fluted Bundt pan and enjoyed with some fresh strawberries.
This recipe is so wonderful. It is not super heavy like many pound cakes. In fact, it is almost a bit light and airy. But it is also dense enough to be super moist. I love the way the edges turned out a bit crispy and the center moist and tender.
My granddaughter loved it too, so she got to take half of it home to share with Mommy and Daddy.
It snow flurried most of the day and was so cold, so it was the perfect day for us to hang out, have the oven on for an hour, and enjoy the aroma and taste of this delicious, comforting cake.
Thanks so much for sharing Dena! This recipe is a real winner!
Ingredients:
Directions:
Cream butter and sugar in electric mixer until light and fluffy. Add eggs, one at a time, beating well. Beat in almond extract, zest of 1 fresh lemon, and juice of half of a fresh lemon (approx. 1 Tbsp). Add baking soda and 1 1/2 cups flour. Mix just until incorporated. Pour in half of milk, and beat just until combined. Gently beat in remaining 1 1/2 cups flour followed by second half of milk.
Pour batter into greased and floured 10″ fluted tube (Bundt) pan. Bake for approximately one hour or until toothpick inserted into the center comes out clean. Cool in pan 15 mins, then remove to wire rack to cool completely. Dust with powdered sugar.
Enjoy!
Cheers & Hugs,
Jodi
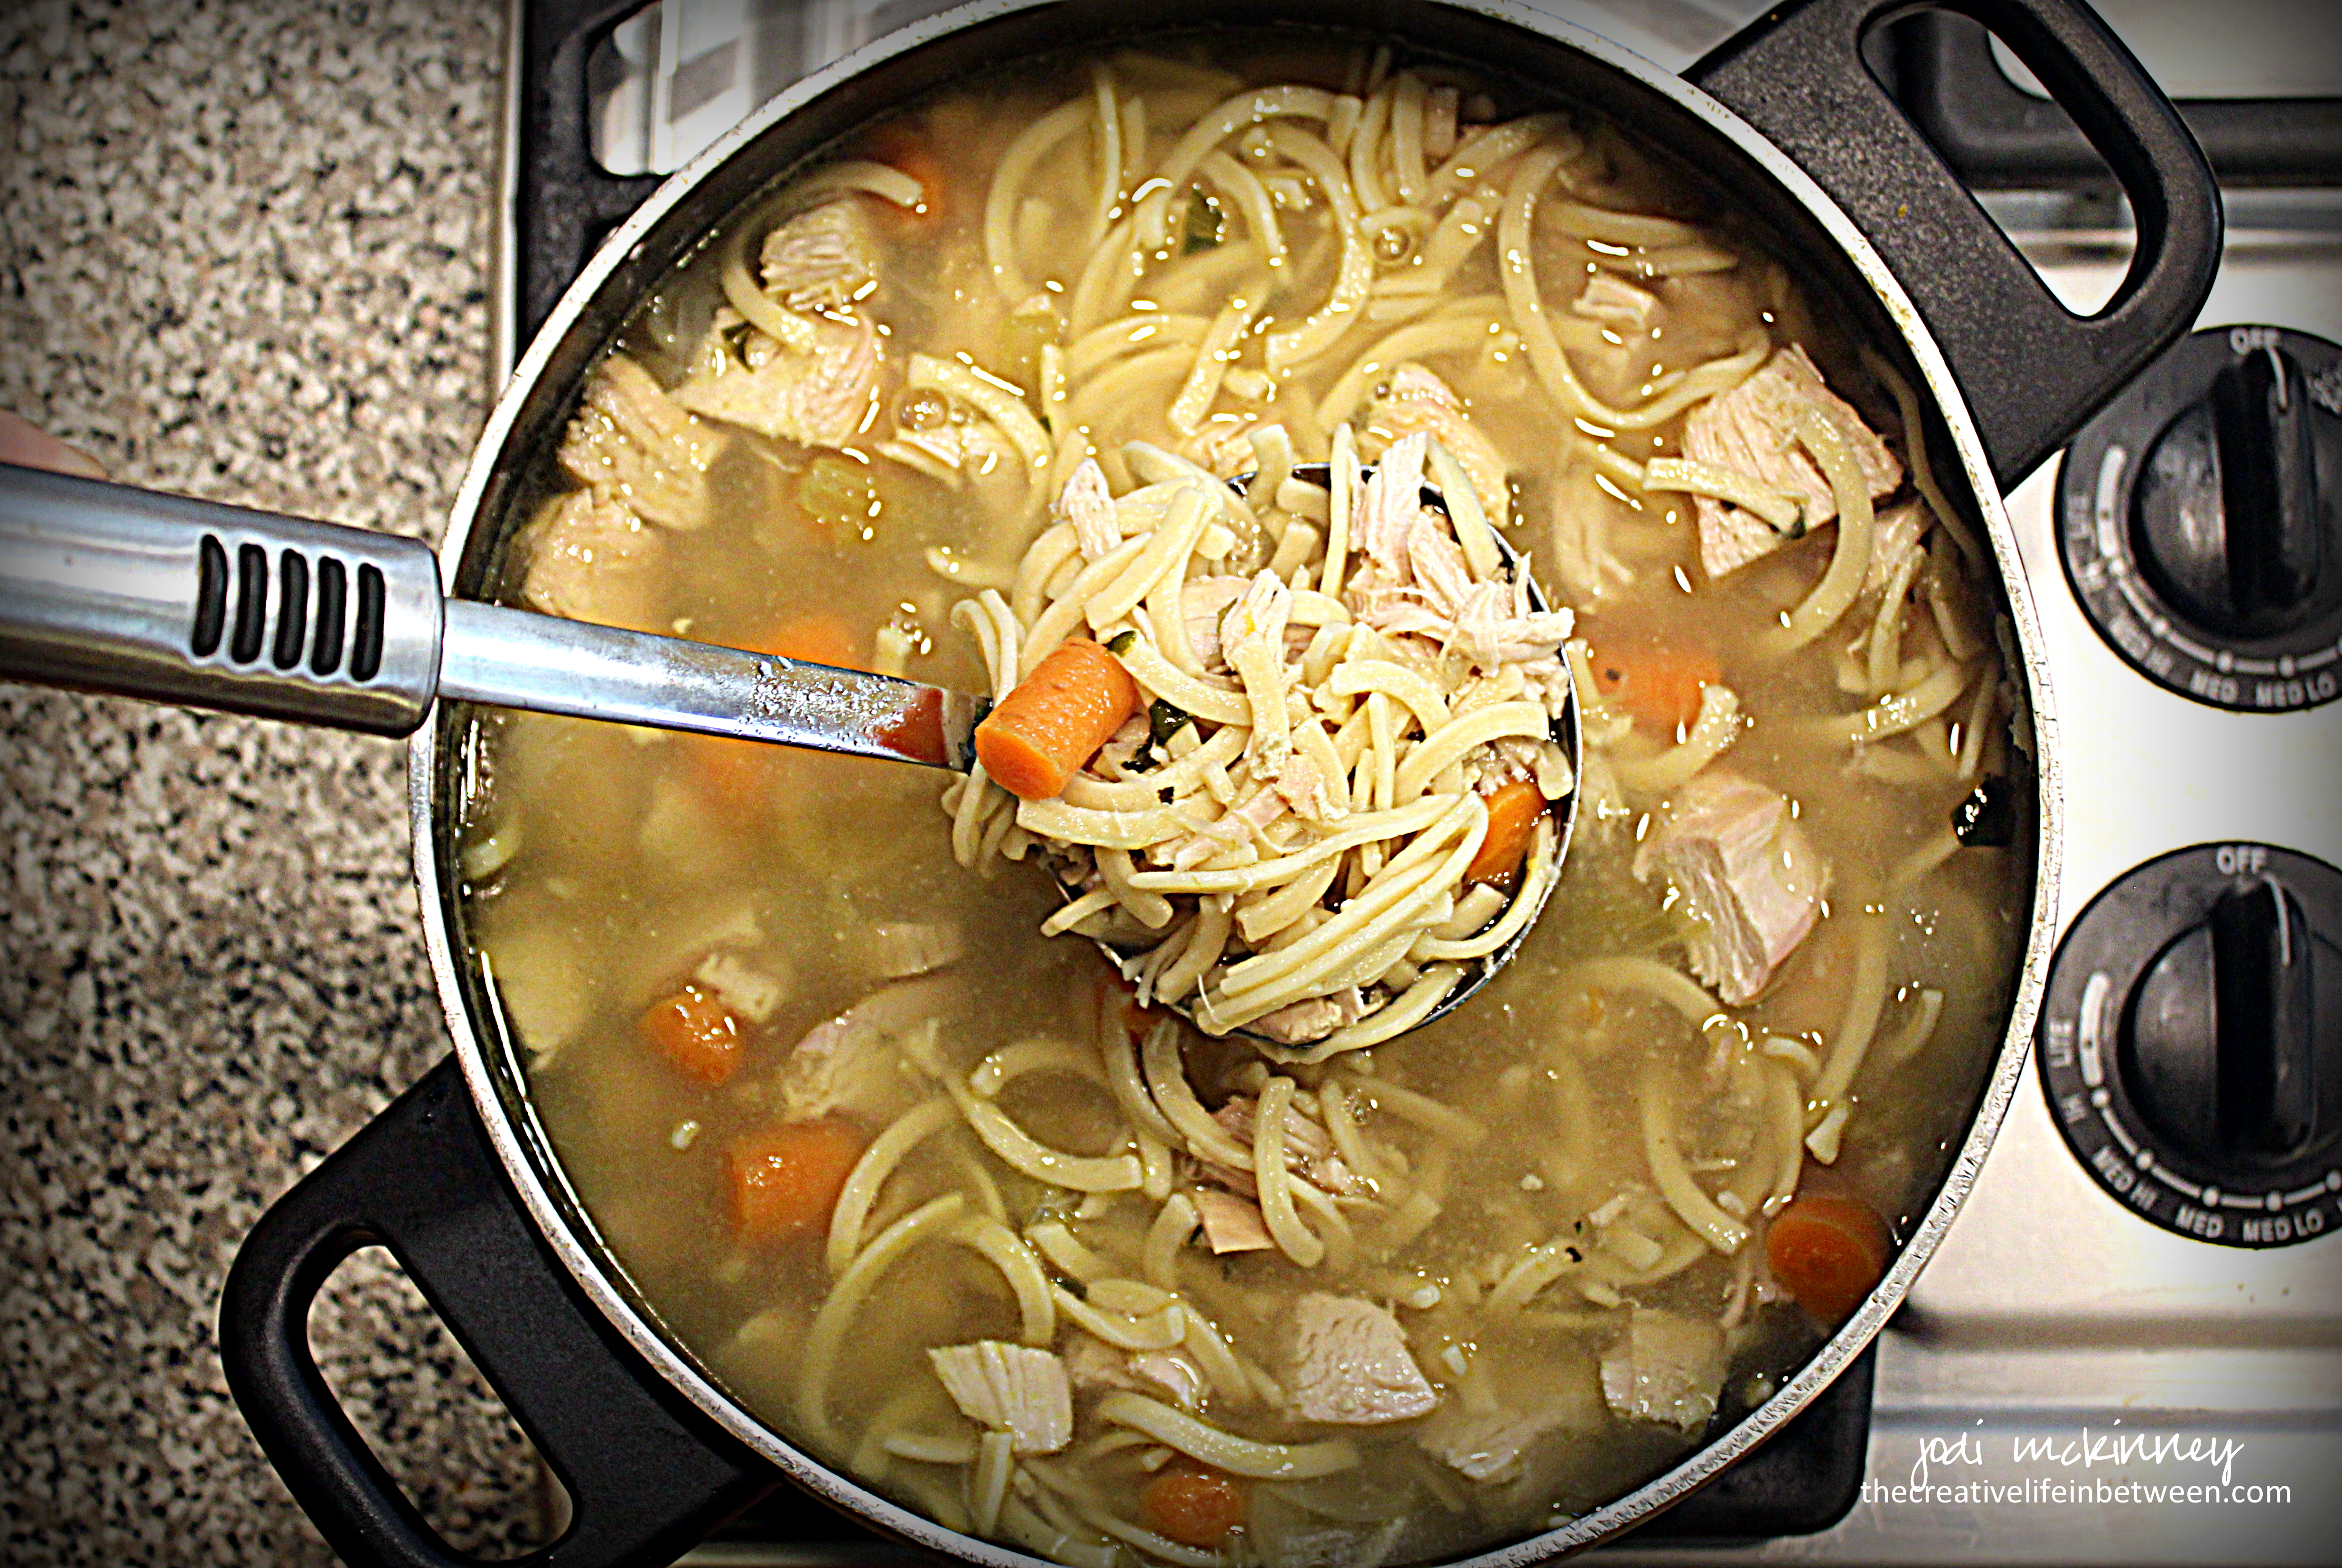
When I have a head cold, nothing makes me feel better than the smell and taste of good old-fashioned chicken noodle soup.
So when my throat started aching, nose started running, cough began croaking, ears felt like they were stuffed with cotton, and head began pounding this week, I knew I had to get a pot of soup on.

Not only does the smell comfort me and remind me of Grandma’s house and love, but the steam clears up the stuffed nose and the warm broth soothes my sore throat.
When other foods lose their flavor when your head is congested, nothing tastes as good as homemade chicken soup.
If you are a beginner cook, I hope you will find this recipe easy to follow. It is made from staple ingredients I almost always have in my kitchen, and though it takes a couple hours to simmer, you can throw it together quickly and forget about it during that time – enjoying the aroma and anticipation of comfort.
Here is how I make it.
Ingredients
Directions:
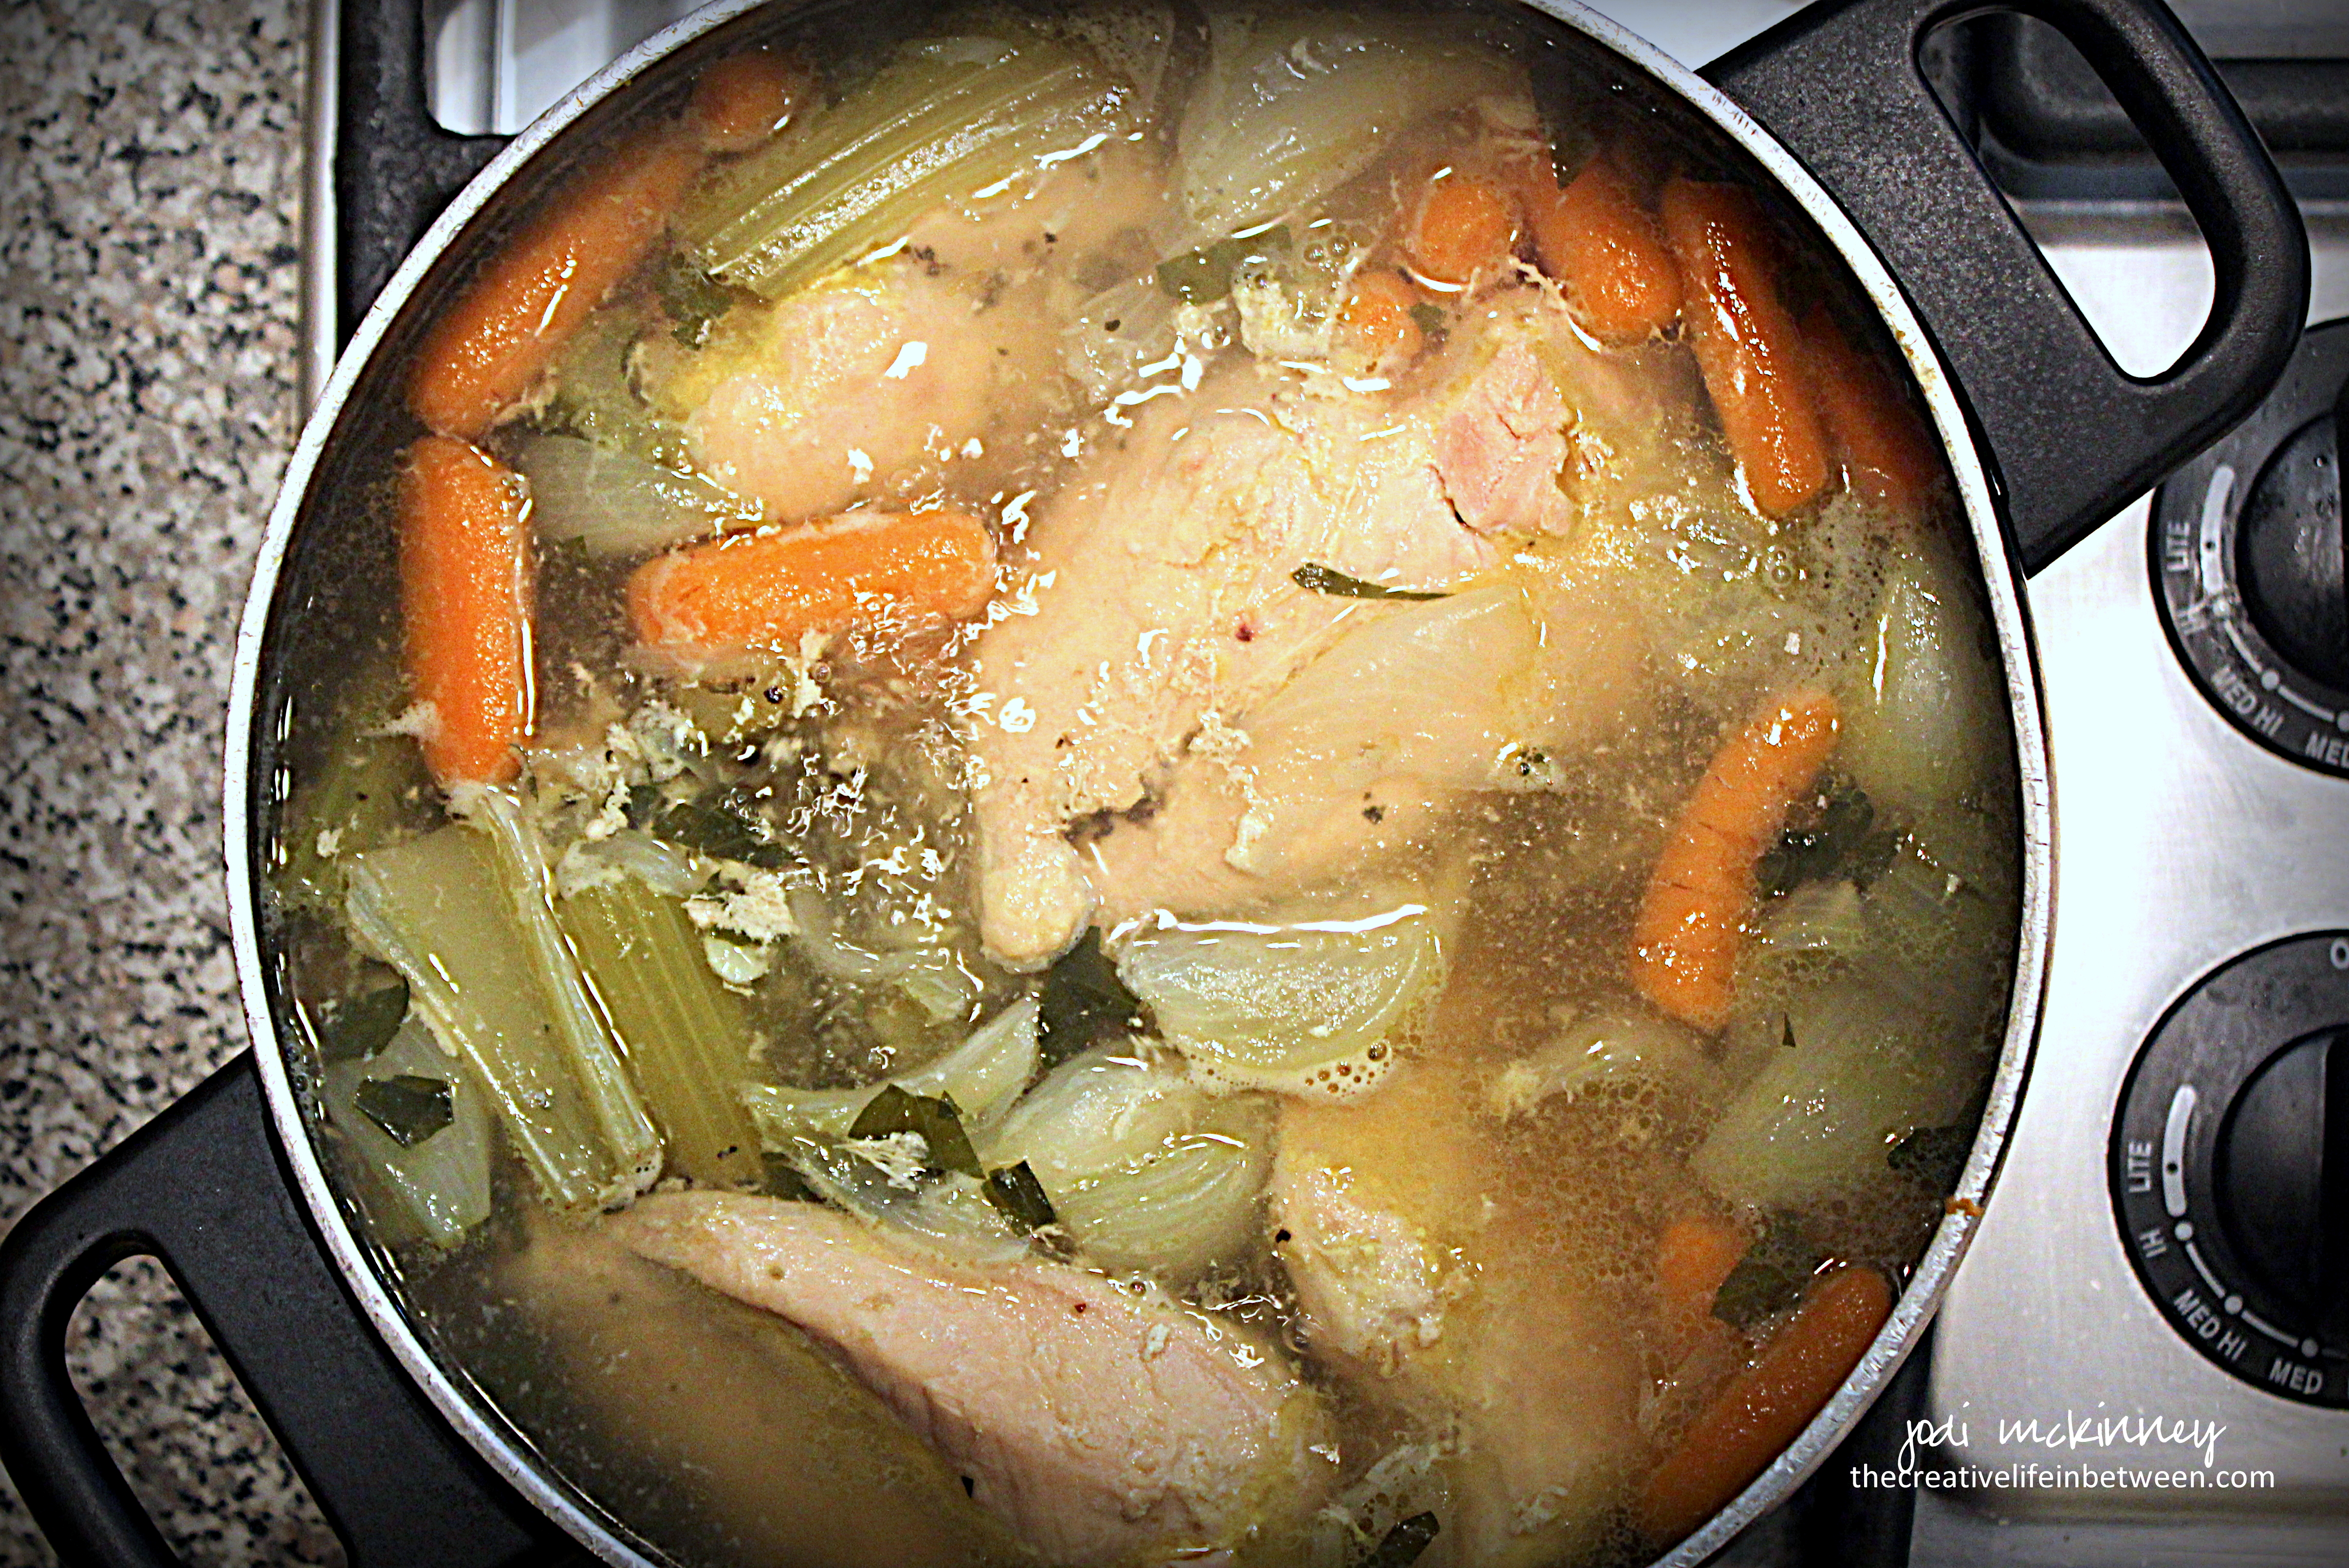
Place frozen chicken breasts in large soup pot. Cover with 12 cups cold water. Add celery, carrots, chicken base, whole garlic cloves, onions, parsley, and pepper. Cover and bring to a rolling boil.
Once boiling, reduce heat and simmer with lid tilted slightly so it is not tight fitting, but allows steam to escape. Simmer for approximately 2 hours or until broth level reduces 1/2 – 1 inch. You can tell this by looking at the side of the pot where a line will be formed where soup started. This will allow the broth to build depth of flavor.
When soup is almost done, boil noodles in a separate pot, cooking 2-3 minutes less than directions. Drain and rinse well with cold water. Set aside.
When soup broth is done, pour through strainer into a larger pot. The broth will go into the pot, and the chicken and vegetables will remain in the strainer.
When cool enough to handle, chop chicken and vegetables into bite-sized pieces. Add back to broth, then add drained and rinsed noodles. Stir to incorporate all.
Your soup is now ready to enjoy. This soup keeps well for up to a week in the refrigerator and also freezes well.
Beginner’s sidenotes/tips: You can certainly use a whole chicken or chicken parts, but it is a lot more work to clean the chicken from the bone, and remove the skin and fat after cooking to cut up for the soup. Using chicken breasts also eliminated the need to allow the broth to cool and fat to rise to top to skim off as there is little to no fat in the chicken breasts. Chicken breasts also allow for a heartier soup with big chunks of tender chicken. Buying a better grade and organic chicken will give you better flavor and better food value. I’ve found with cheaper brands of chicken, there is fat and gristle that needs removed as well as ligaments that need cut out.
You can certainly use whole raw carrots, but the convenient short-cut carrots save the need for peeling and cutting down carrots into manageable pieces.
While dried herbs are always good to have on hand in a pinch, nothing will make your recipes better than using fresh herbs. Fresh parsley as opposed to dried will really add a whole new sophisticated level to your soup.
Always cook your noodles separately, and drain and rinse well in cold water. This will remove the starch that cooks off the pasta from being in your soup and “muddying up” the broth’s texture and flavor. Rinsing in cold water will stop the “cooking” that still continues in food like pasta while it is still hot.
Cook noodles 2-3 minutes less than directions say to avoid soggy, mushy noodles in your soup. As they sit in the soup, they will soften and plump even more, so no need to over-cook.
Do not add oil or salt to the noodles when boiling. There is plenty of salt in the soup base that will make the broth. It is almost impossible to “unsalt” soup, but additional salt can always be added for individual taste or preference. If you over-salt, add more water to broth or consider boiling a whole peeled potato in the broth. The potato will absorb some of the salt. You can then throw the potato out, hopefully salvaging your broth.
Enjoy!
Cheers & Hugs,
Jodi

Five-Minute Homemade Rustic Artisan Bread.
Aren’t these loaves beautiful?! I recently found this recipe that makes homemade bread so easy!

You can mix this dough together in five minutes. Then it just needs to rest for two hours while you go about doing something… anything else. After that, throw it in the fridge – for up to 14 days! Whenever you want a fresh loaf of bread, grab a hunk of dough, and bake it. Super simple, super delicious!

So… disclaimer… you obviously can’t make it from start to finish in five minutes, but that really is all the longer the dough takes to mix together, and there is no kneading, so it really is a simple way to make warm, fresh, delicious homemade bread quickly and easily with just a few simple staple ingredients!
Ingredients:
Directions:
Pour water in large bowl. Sprinkle with yeast and salt, and mix until dissolved. Add flour all at once, and mix until completely incorporated. That’s it! Five minutes. No kneading.
Place a clean kitchen towel over the bowl and let it sit for two hours.
After two hours, cover bowl with saran wrap (but not too tight as it needs a little vent for gases to escape), and throw it in the fridge.
Your dough is ready to use at anytime in the next 14 days.
When you are ready to bake a loaf, preheat oven to 450 degrees F. Grab a hunk of dough with floured hands. Do not punch it down, and do not knead or overwork it. Gently shape as desired into a ball, loaf, rolls – whatever you like. Place on a baking stone. (I bake absolutely EVERYthing on baking stones – cookies, bread, roasted vegetables, meatloaf, french fries – they are all I use in the oven – and the results are awesome!) You can let it rest for 30-40 minutes or bake right away – depending on the density you desire. Dust top of dough with flour (and salt if desired). Slash a few cuts in the dough with a serrated knife.
Place an empty metal broiler pan on bottom rack of oven and fill with warm water right before placing dough in oven.
Bake for 20-30 minutes until the crust is a rich brown color and firm to the touch. Remove from oven and cool on wire rack.
Enjoy!
Cheers & Hugs,
Jodi
*original recipe found at Leite’s Culinara

It was so cold this past Sunday and hunkering in was the order of the day. While watching football playoffs (our Pittsburgh Steelers won!), I wanted a no fuss, but warm and comforting dinner to eat afterwards.
Beef chuck roasts are so versatile and cook so tender and juicy in the crockpot. I make them a variety of ways, but wanted to try something new and different, and this Cuban Shredded Beef was just the ticket! So yummy over a bed of rice with beans! We’ll surely be eating them wrapped in tortillas this week too.
A tiny bit of a spicy kick and tons and tons of flavor make this easy recipe a new winner in my book. And if you can’t get warmed up on the outside, this one will warm you up from the inside out!
I adapted this recipe slightly from Little Spice Jar.
Ingredients
Directions:
Make 3 deep “x” cuts into the chuck roast. Insert 3 whole garlic cloves into the cuts. Season both sides of the meat with salt and pepper. Heat oil in a large, deep skillet. Add the chuck roast and fry on each side for 5 minutes to sear. Don’t cover the pan as the meat will end up steaming rather than searing.
Chop the remaining 3 cloves of garlic, and add to crockpot along with all the remaining ingredients except for the lime. Cover and let cook on the low setting for 7-8 hours or high for 4-5 hours. When the beef falls apart easily when pulled with two forks, it’s done. Shred the beef with the forks and stir.
Serve over a bed of rice with beans on the side topped with additional cilantro and a few lime wedges. You can also use the shredded beef for burritos, quesadillas or tacos.
Enjoy!
Cheers & Hugs,
Jodi

I thought I had discovered the best ever banana bread recipe (which is ULTRA amazing!) – but then…. I discovered…
are you ready??…..
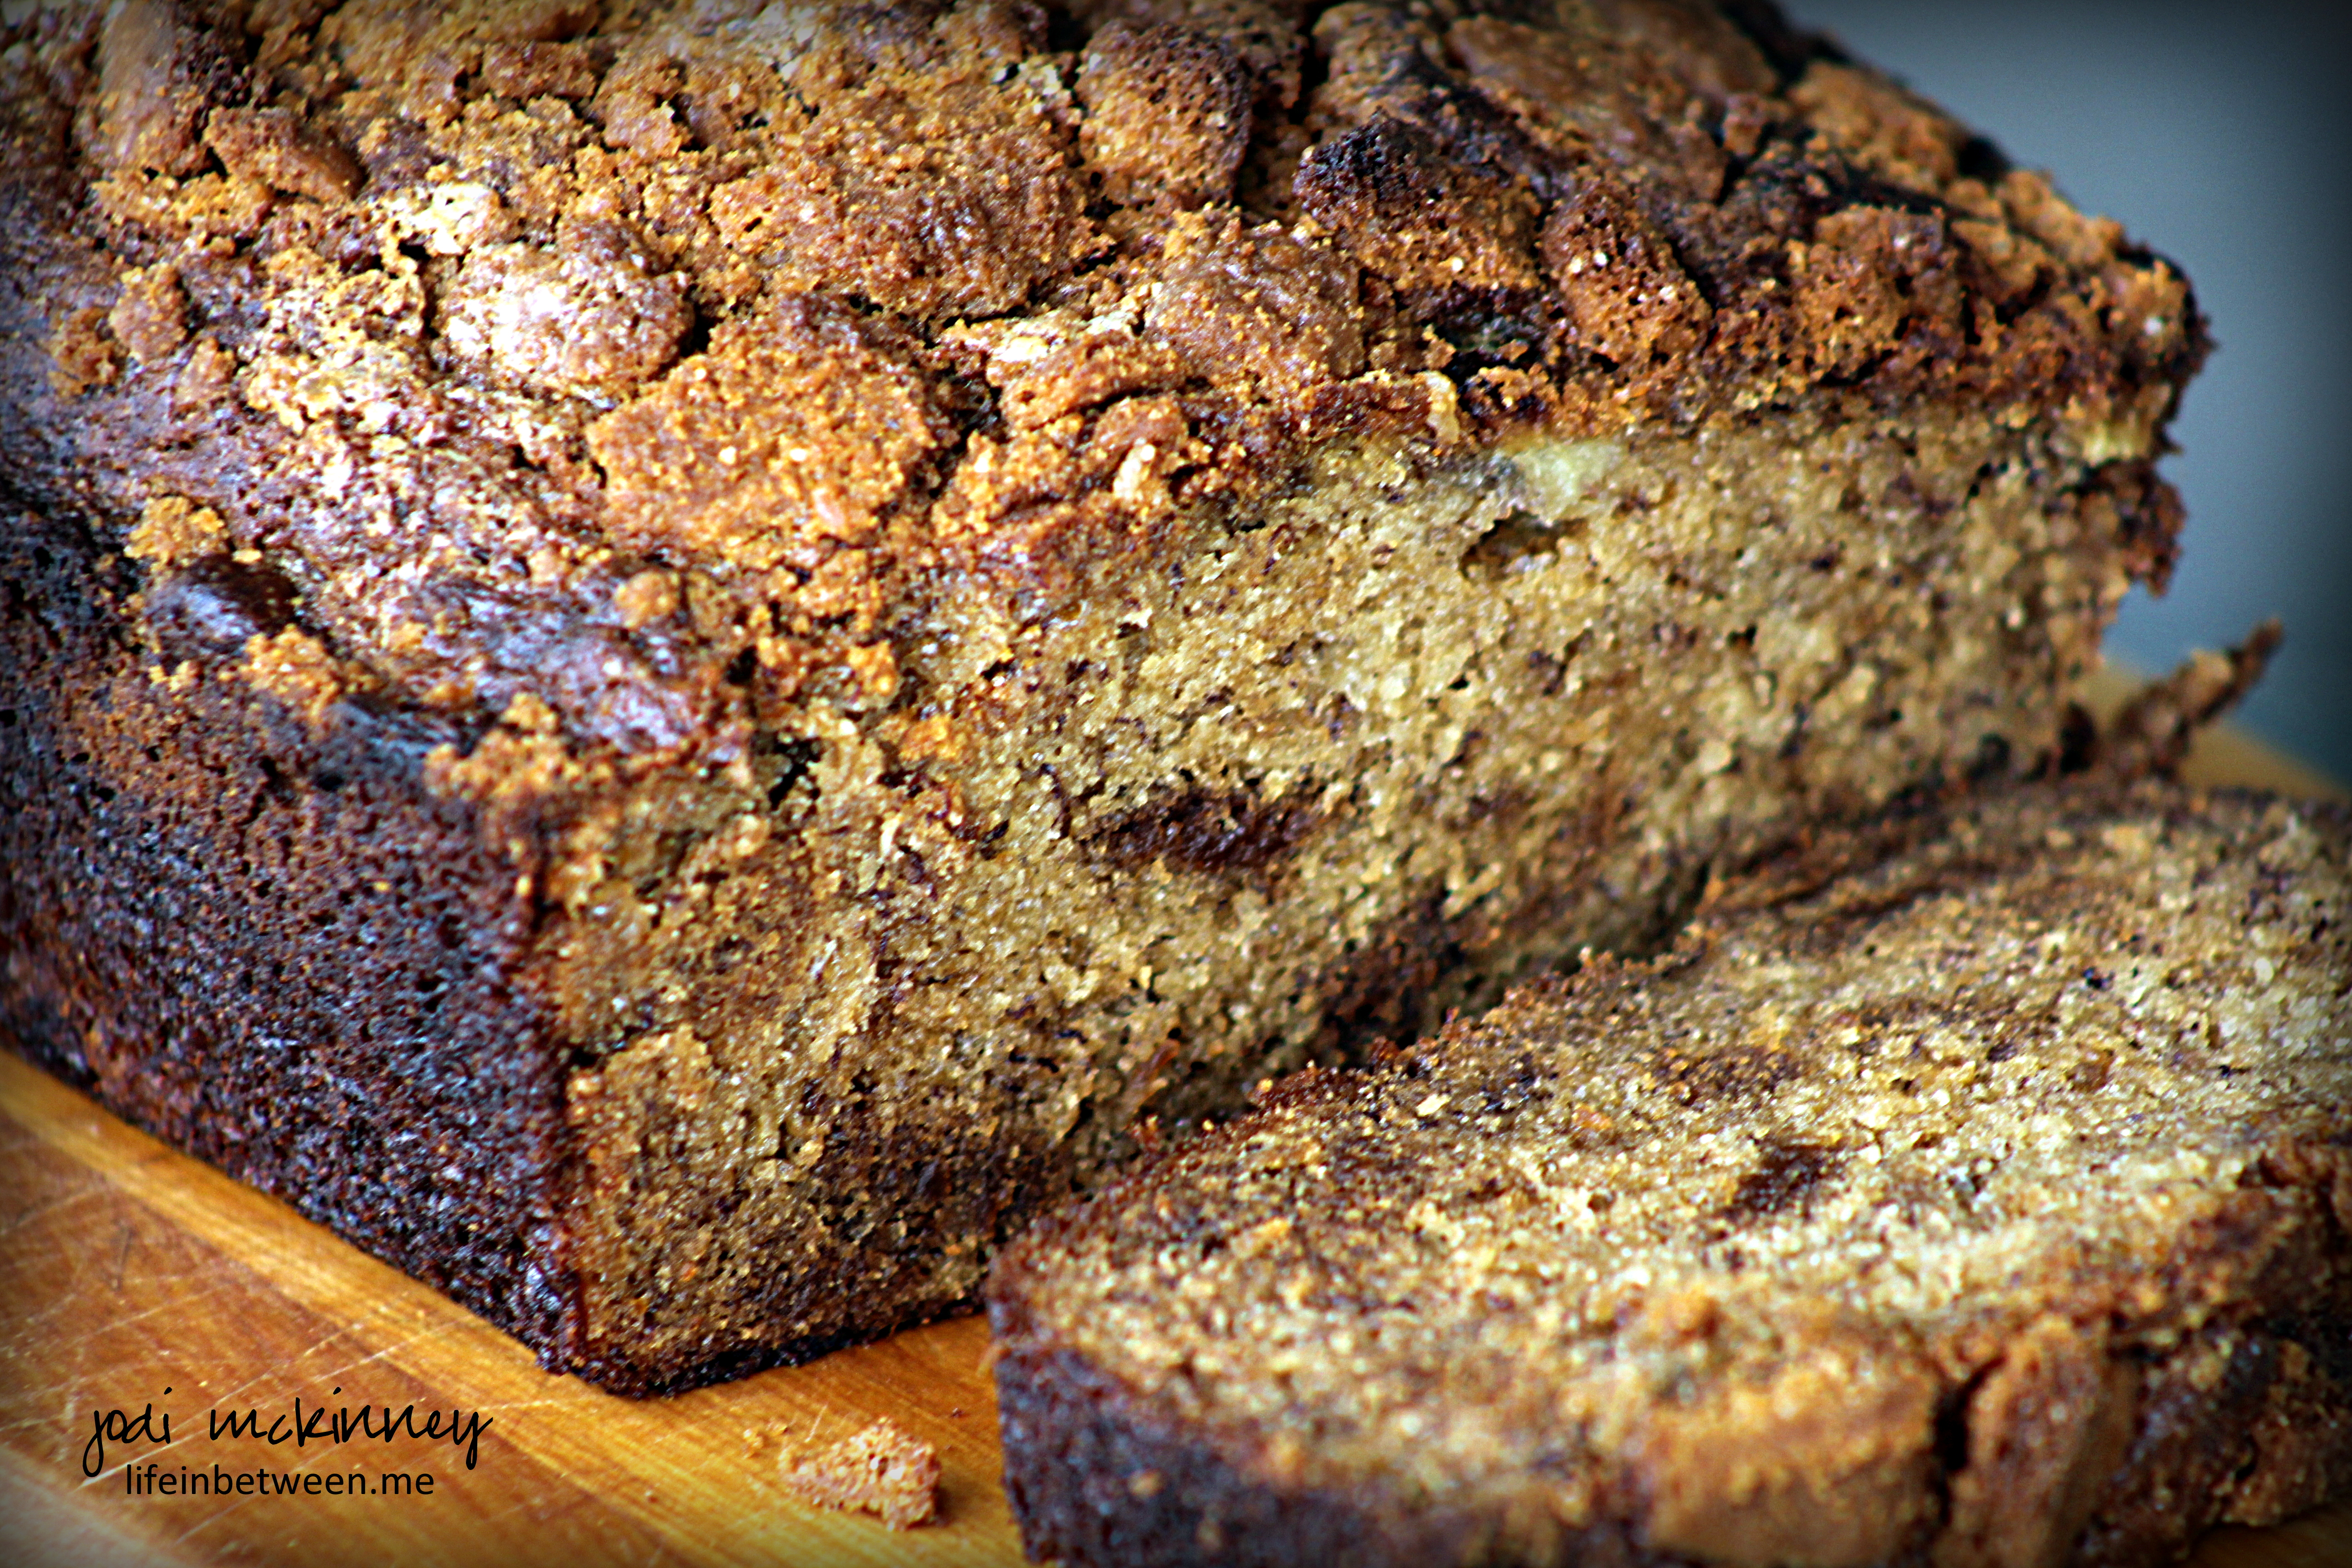
BISCOFF BANANA BREAD!

Oh Goodness Gracious – the YUMMMMiness of Biscoff Spread, crunchy Biscoff cookies, and sweet, moist banana bread. It is pretty much the ultimate deliciousness – especially for this time of year when we just crave comforting foods!
My guys loved it!
In fact, when I gave Nick his “sample,” I asked if it was a thumbs up.
His reply:
“2”
Score!
No oil in this bread either. It is made with Greek yogurt.
The original recipe, which I have shared below from Table for Two, calls for plain Greek yogurt.
I used vanilla.
Yum!
And I added about one more tablespoon of butter, which I added in dabbles on top of the crushed up Biscoff cookies on top, just to make them a bit crisper and crunchier. (I can never just leave well enough alone!)
3 ripened bananas, peeled and mashed 1. Preheat oven to 350 degrees. Grease a 9×5 loaf pan and set aside. 2. Combine the first five ingredients and mix until well blended. 3. In a large bowl, combine the sugar, flour, baking soda, salt, and cinnamon. 4. Add the dry ingredients to the wet ingredients and mix until combined. 5. Gently fold in 3/4 of the crushed Biscoff cookies with a spatula. 6. Pour the batter into loaf pan and top with the remaining 1/4 crushed Biscoff cookies. 7. Bake for 1 hour or until toothpick inserted in the middle comes out clean. 8. Let cool completely before removing from pan and slicing. Biscoff Banana Bread
From: Table for Two
1/3 cup plain Greek yogurt
1/2 cup Biscoff spread
3 tbsp. butter, melted
2 eggs
1/2 cup granulated sugar
3/4 cup all purpose flour
3/4 tsp. baking soda
1/2 tsp. salt
1/2 tsp. ground cinnamon
18 Biscoff cookies, crushed
ENJOY!
Cheers & Hugs,
Jodi
