Stuffed Butternut Squash

Stuffed Butternut Squash.

I wanted to do something new and creative with butternut squash for dinner one day this past week.  I absolutely love butternut squash and have shared several recipes through the years here at The Creative Life In Between on how I enjoy preparing it.

The most simple is yummy, but easy Roasted Butternut Squash.

Another fabulous way to serve it is Roasted Butternut Squash and Spinach Lasagna – OOOO LA LA!!

Or how about Penne with Goat Cheese and Butternut Squash?  Such a delight with crunchy toasted walnuts!

But how about a meaty version?

I had a fresh package of grass-fed ground beef in the fridge, so after googling beef and butternut squash, I found some ideas and tweaked up a favorite found at Civilized Caveman Cooking.

This full-flavored, meaty, and paleo version was DELISH!

Another winner of a way to serve Butternut Squash!

Here is how I made it.  Hope you’ll give it a try.

Stuffed Butternut Squash

Ingredients:

  • 1 butternut squash
  • 1 lb. ground beef (grass-fed organic if possible) or ground turkey
  • 6 slices bacon, chopped
  • 2 sweet onions, sliced and coarsely chopped
  • 1 stalk celery, diced
  • 1 Tbsp fresh minced rosemary
  • 1/2 tsp cinnamon
  • 1/4 tsp thyme
  • salt and pepper to taste
  • 1 Tbsp balsamic vinegar

Directions:

Preheat oven to 400 degrees F.

Cut butternut squash in half lengthwise.  Scoop out seeds.  Place flesh down in glass 9×13 baking dish.  Pour 1/2 inch of water into baking dish.  Roast in oven for 30-40 minutes or until a fork can be easily inserted through skin into soft flesh.

While squash is roasting in the oven, saute sliced strips of bacon in a large skillet over medium-high heat until crispy.  Set aside and pour off all but about a tablespoon of bacon drippings.  Saute onions (reserving 1/4 for topping) and celery in same skillet for 2-3 minutes.  Add beef, rosemary, cinnamon, thyme, salt and pepper.  Stir and saute until beef is cooked through.

When squash is done, remove from oven, and reduce oven temperature to 350 degrees F.

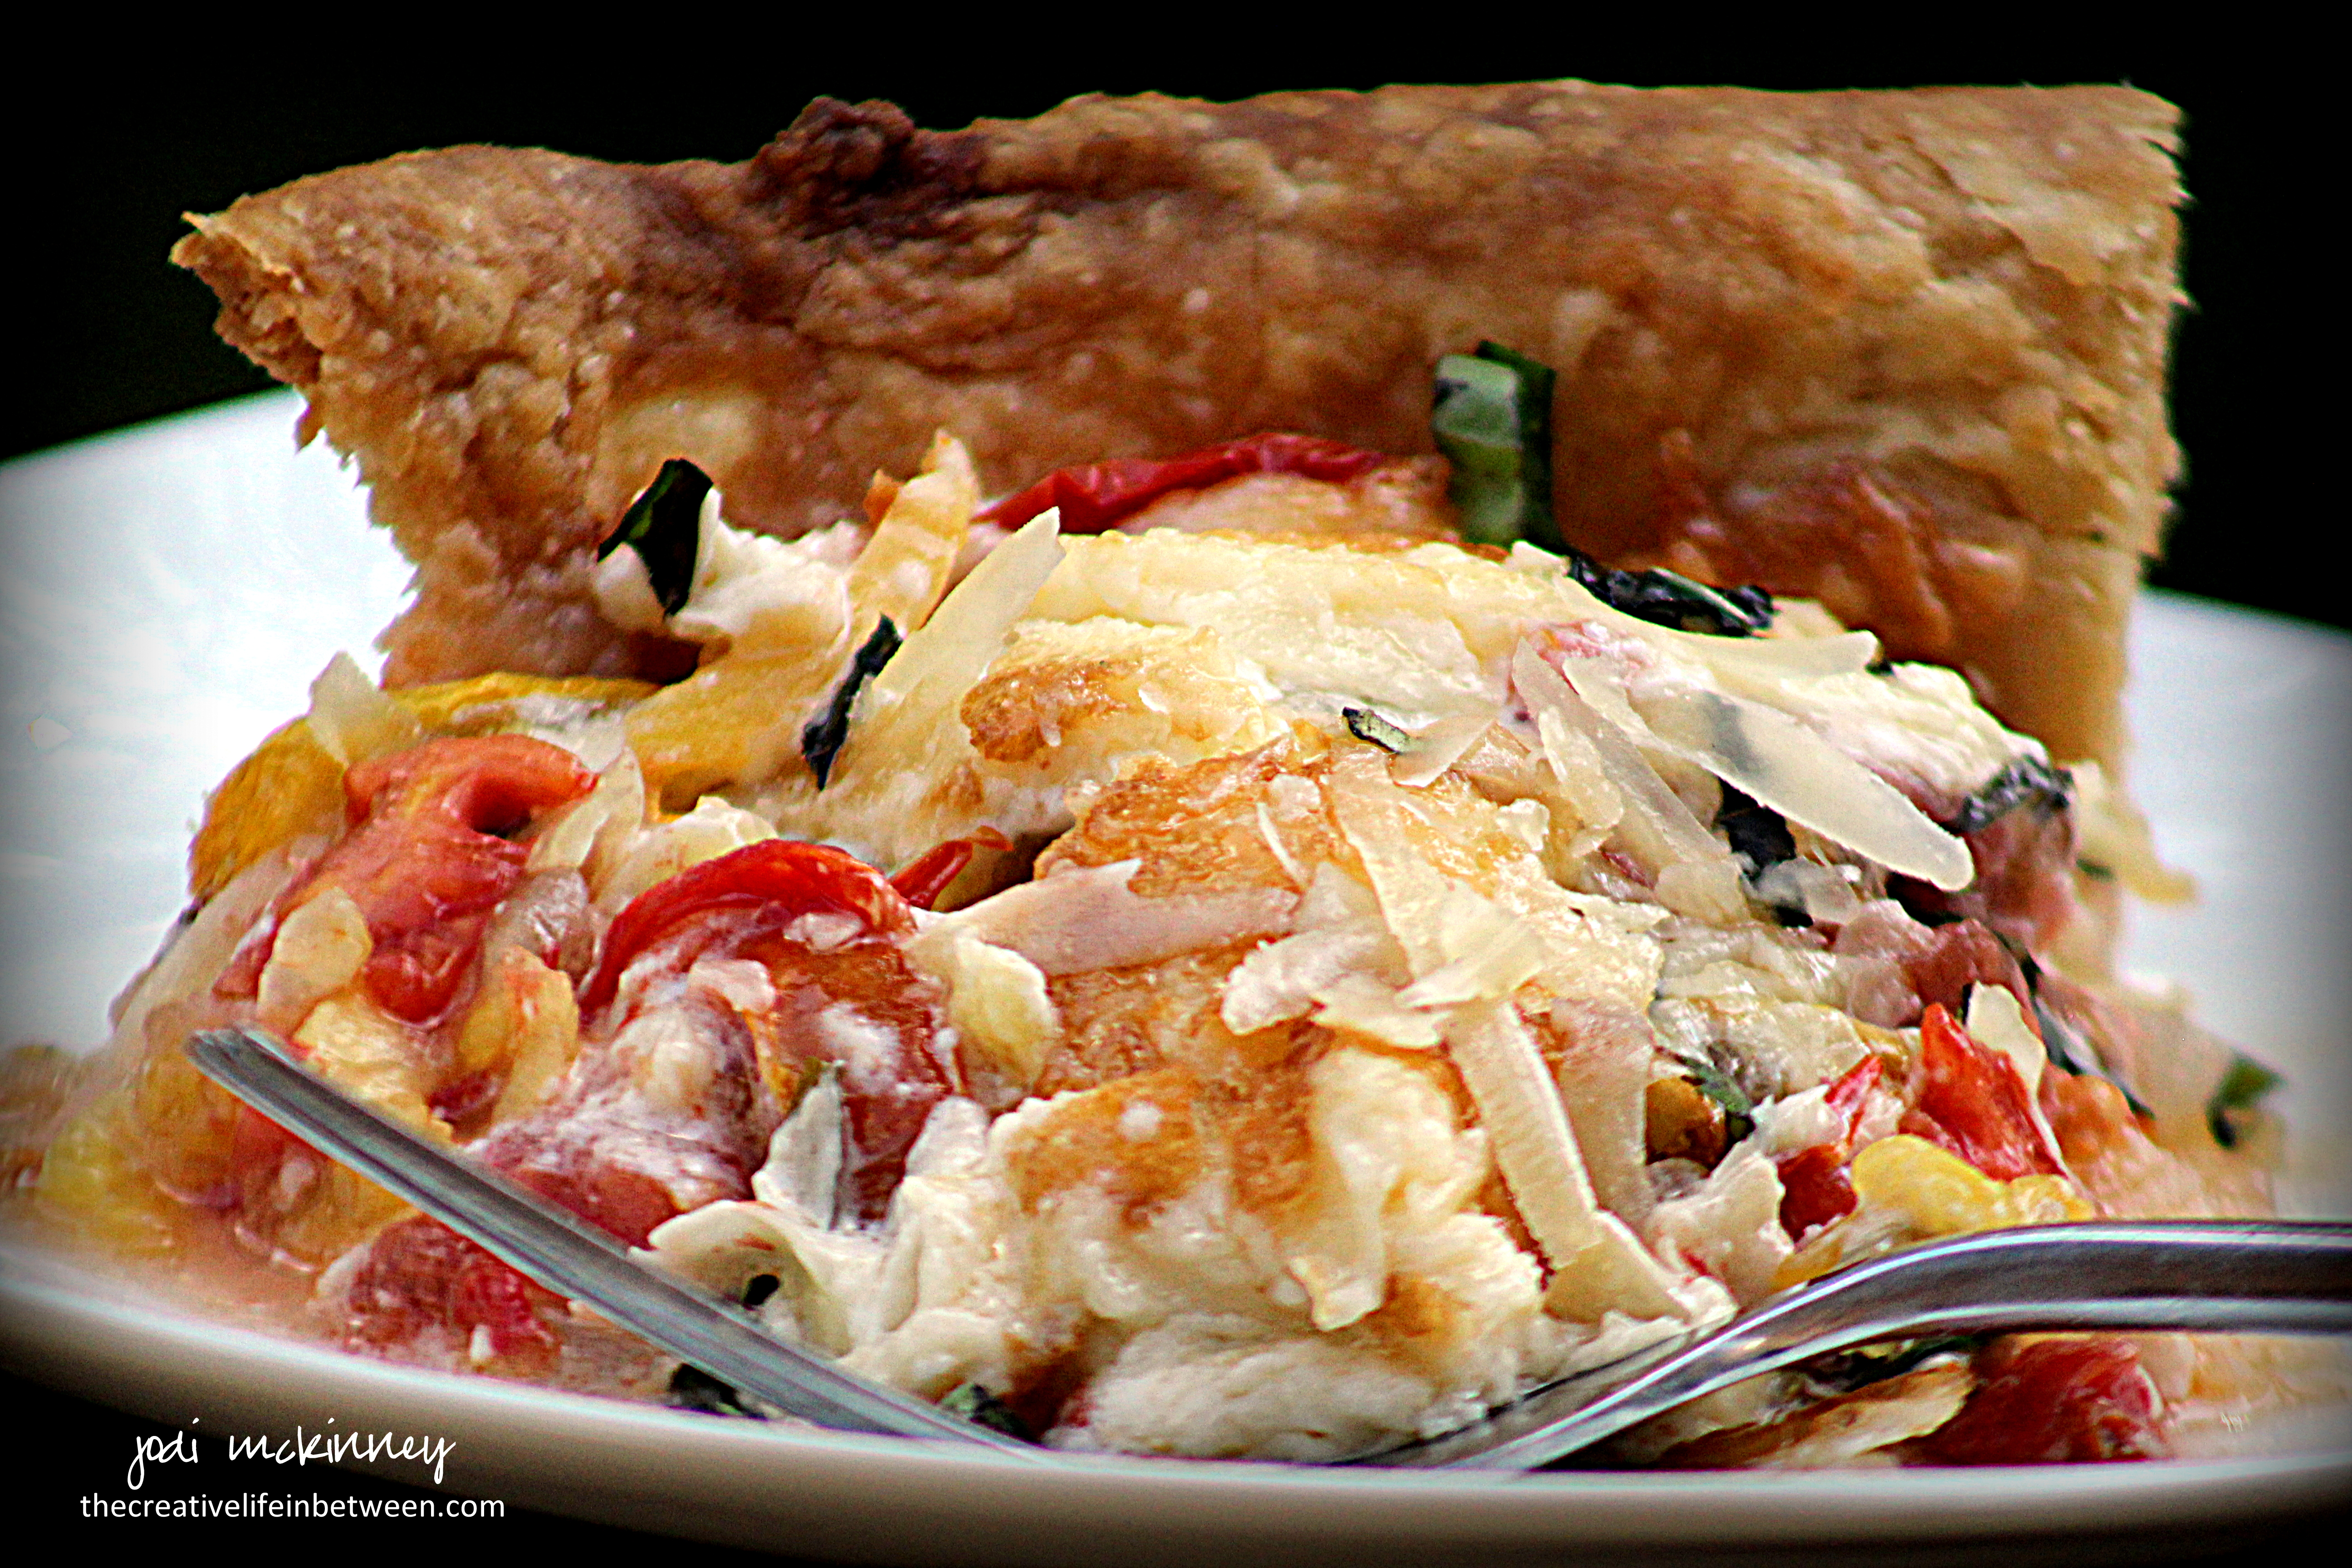
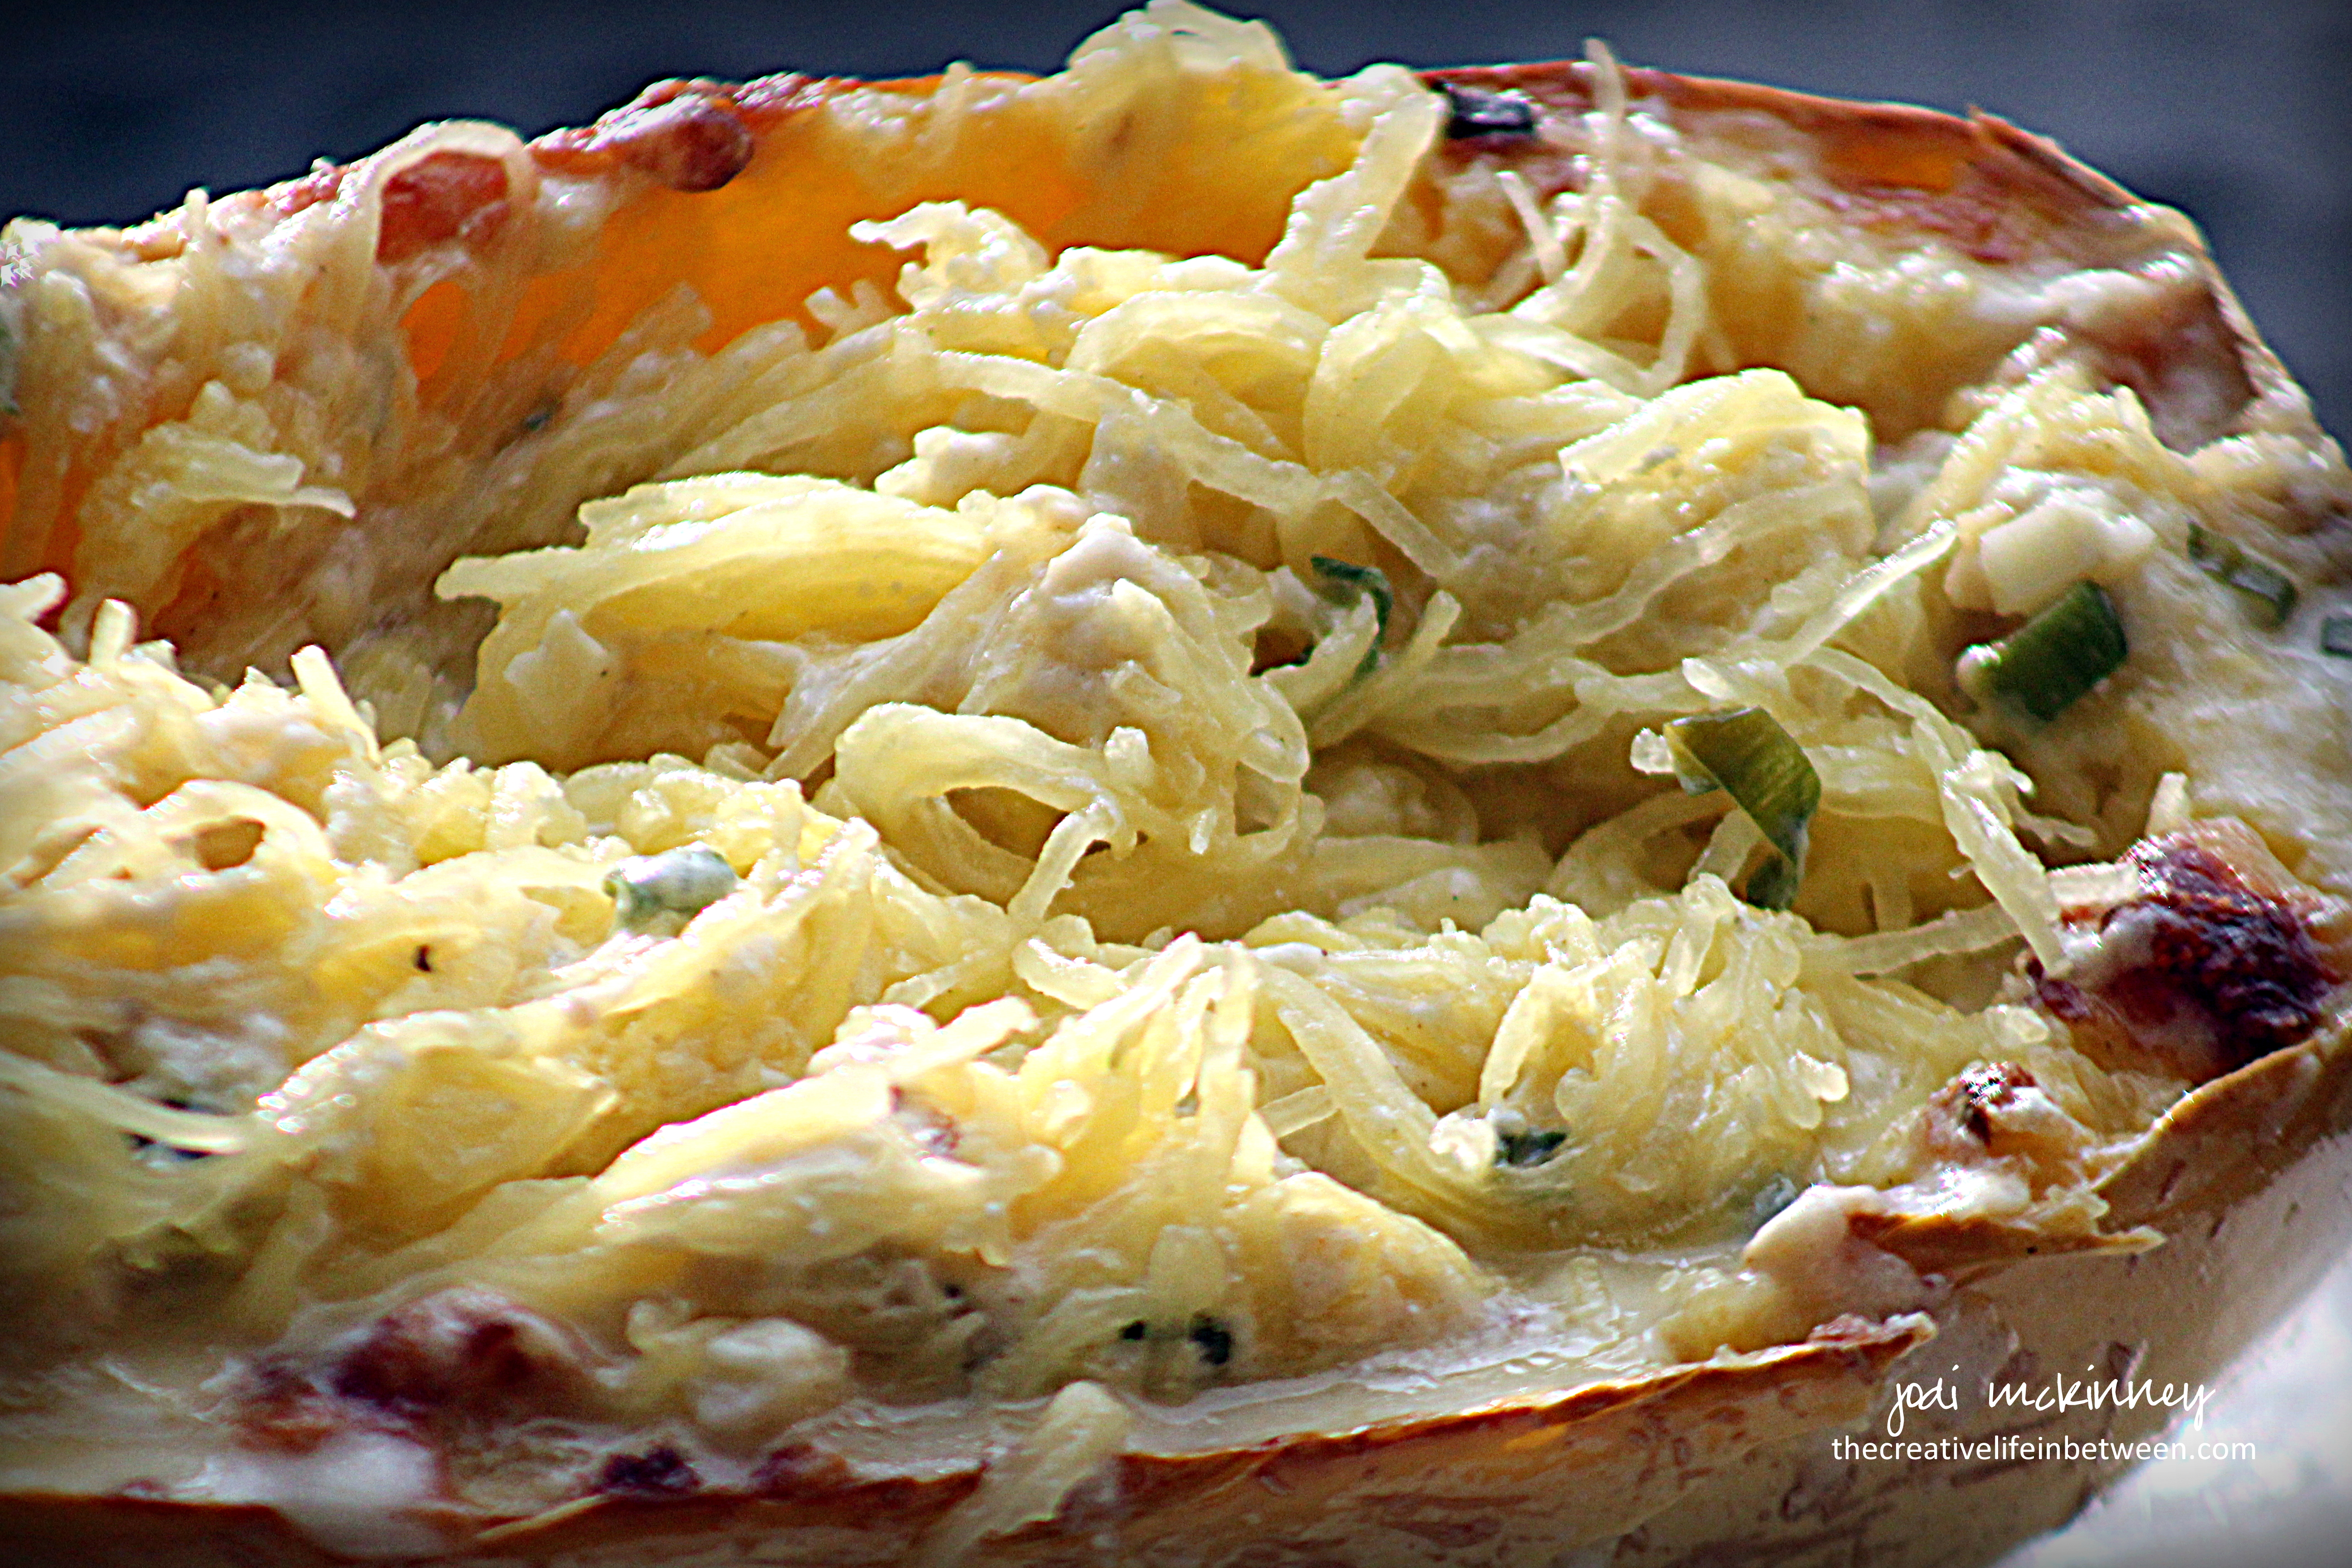
Scoop out all but about 1/4 inch of flesh from squash halves.  Add mashed squash and crispy bacon (reserving 1 Tbsp. for topping) to meat mixture .  Stir to completely combine.  Fill both butternut squash shells with meat and squash filling.  Return to oven in same baking dish for 10-15 minutes.

Saute remaining 1/4 chopped onion with balsamic vinegar until caramelized.

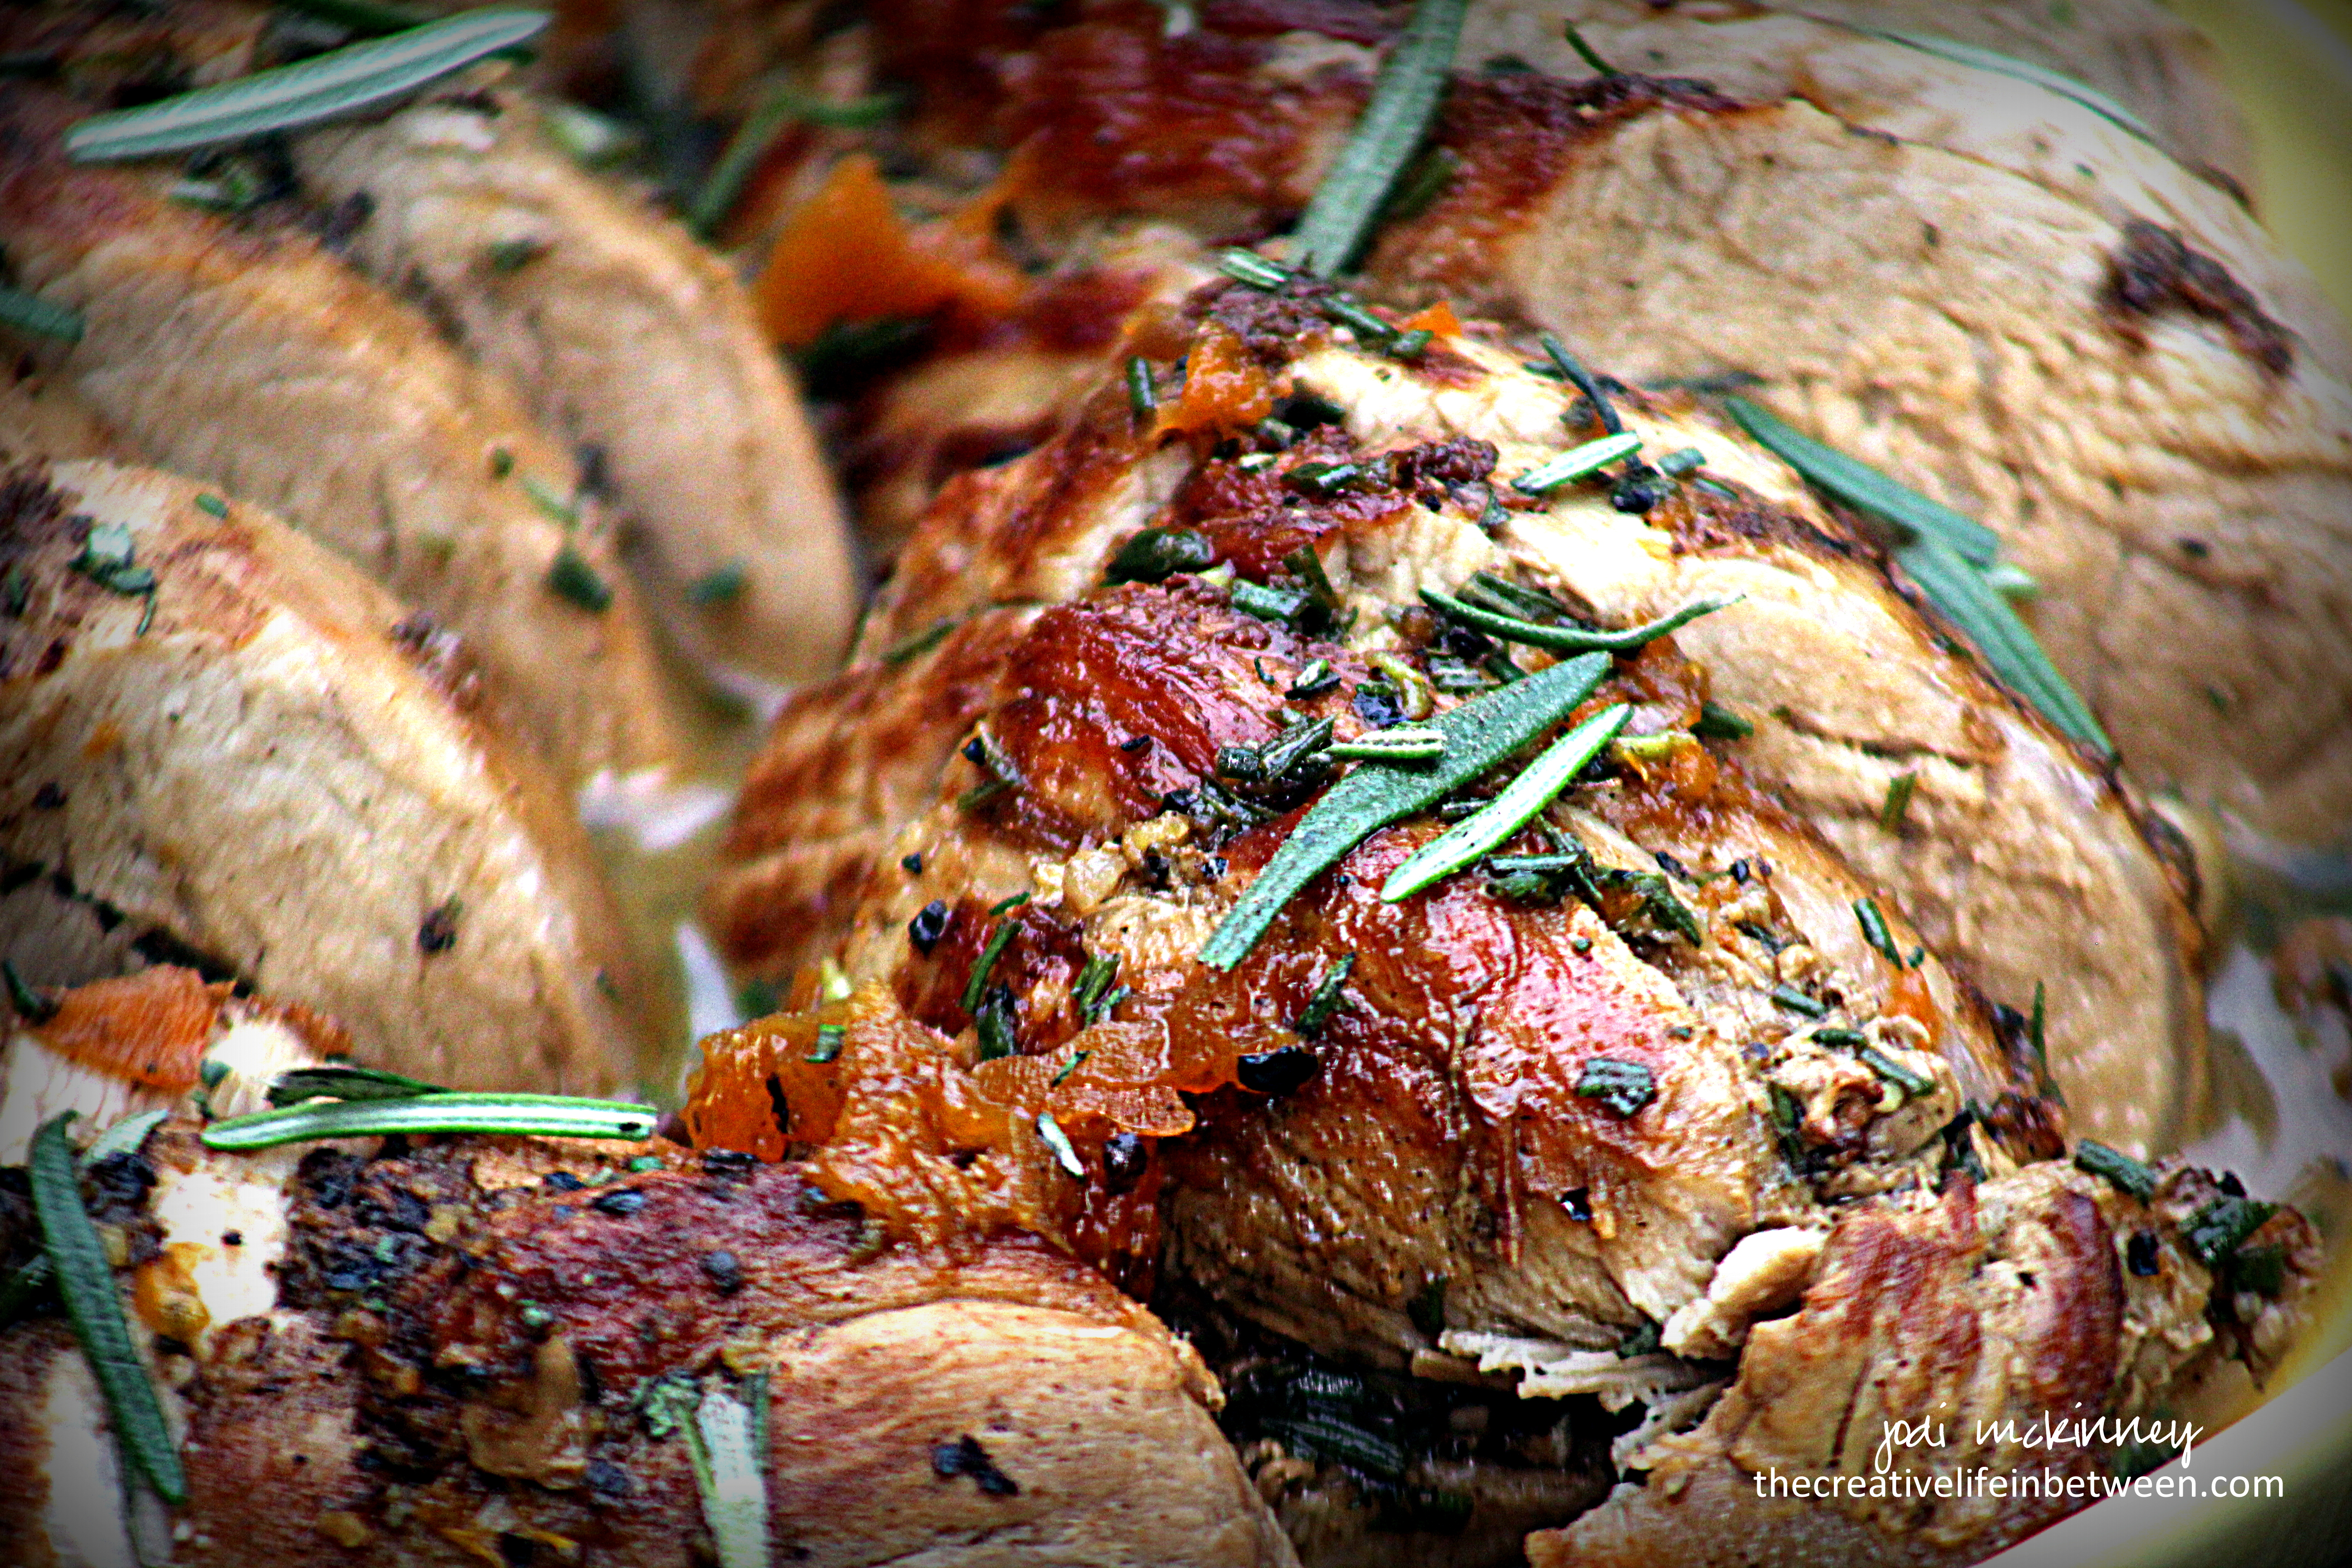
Remove stuffed squash from oven.  Top with balsamic caramelized onions and reserved bacon.  Cut each squash half in half to create 4 servings.

Enjoy!

Cheers & Hugs,
Jodi


Old-Fashioned Tomato Pie

Old-Fashioned Tomato Pie.

Looking for something to do with the abundance of fresh, juicy, sweet, beautiful tomatoes in your garden or available this time of year?

How about an old-fashioned tomato pie?!

It’s like a deep dish pizza  in an old-fashioned crust….

Layers of tomatoes, onions, garlic, basil and parsley… topped with cheesy yumminess.

Make one, and enjoy it hot, warm, room temperature, or even cold.  It is a wonderful treat to celebrate the end of summer’s bounty and the delight of vine-ripened tomatoes.

Old-Fashioned Tomato Pie

Ingredients

  • Single Pie Crust
    • 1 cup flour
    • 1/3 cup Crisco shortening
    • Dash of salt (6 shakes)
    • 1/3 cup cold water
  • Filling
    • 2-3 lbs tomatoes, thinly sliced (I used a variety of red and yellow heirloom tomatoes)
    • 1 sweet onion, coarsely chopped
    • 3 cloves garlic, chopped
    • 2 Tbsp olive oil
    • 1/2 cup chopped fresh basil and parsley
    • salt and pepper to taste
    • 1/2 cup freshly shredded Parmigiano Reggiano cheese
    • 1/2 cup freshly shredded Gruyere cheese
    • 1/8-1/4 cup cup mayonnaise

Directions

Preheat oven to 425 degrees F.

Prepare pie crust by blending flour, shortening and salt with a pastry blender to create coarse crumbs.  Add cold water, and mix until just combined.   Do not overwork (this is the secret to flaky pie crust).  Roll out dough on floured surface and line a 9″ pie plate with dough – folding overhanging dough under itself along rim to create rustic edge.

Line piecrust with aluminum foil and fill with dried beans (or pie weights) to keep crust in place.  Bake for 20 mins.  Cool completely.

To prepare filling, place thinly sliced tomatoes on paper towels, and sprinkle with salt.  Let stand 10 mins.  Pat dry with another layer of paper towels.

While tomatoes are resting, saute onion and garlic, sprinkled with salt and pepper, in olive oil for 3-4 minutes until tender.

Layer tomatoes, then onion/garlic mixture, and a sprinkle of freshly chopped herbs into pie crust.  Continue layering until all tomatoes, onions, and herbs are used.

Combine shredded cheese and mayonnaise.  Spread over top of tomato pie.

Bake at 350 degrees F for 30 minutes or until lightly browned, shielding edges with foil or pie shield (the GREATEST invention ever for pie bakers!) to prevent excessive browning.

Serve hot, warm, or at room temperature, whichever you prefer. 

Enjoy!

Cheers & Hugs,
Jodi

Recipe adapted slightly from Myrecipes.com.

Old-Fashioned Homemade Chicken Soup for Beginners

When I have a head cold, nothing makes me feel better than the smell and taste of good old-fashioned chicken noodle soup.

So when my throat started aching, nose started running, cough began croaking, ears felt like they were stuffed with cotton, and head began pounding this week, I knew I had to get a pot of soup on.

Not only does the smell comfort me and remind me of Grandma’s house and love, but the steam clears up the stuffed nose and the warm broth soothes my sore throat.

When other foods lose their flavor when your head is congested, nothing tastes as good as homemade chicken soup.

If you are a beginner cook, I hope you will find this recipe easy to follow.  It is made from staple ingredients I almost always have in my kitchen, and though it takes a couple hours to simmer,  you can throw it together quickly and forget about it during that time – enjoying the aroma and anticipation of comfort.

Here is how I make it.

Old-Fashioned Homemade Chicken Soup for Beginners

  • Servings: approx. 12
  • Print

Ingredients

  • 2 lbs Boneless, Skinless Chicken Breasts (I like to use Trader Joe’s Frozen Organic Boneless & Skinless Chicken Breasts)
  • 12 cups water
  • 6 sticks celery cut into 4-5 inch pieces
  • 1 cup shortcut carrots
  • 5-6 tsp. chicken soup base (I like Bell-View)
  • 2 large cloves garlic
  • 2 large sweet onions, halved
  • 1/4  cup fresh chopped parsley (or 1 Tbsp dried parsley)
  • 1 Tbsp ground pepper
  • 12 oz. pkg Kluski egg noodles (I like Pennsylvania Dutch brand)

Directions:

Place frozen chicken breasts in large soup pot.  Cover with 12 cups cold water.  Add celery, carrots, chicken base, whole garlic cloves, onions, parsley, and pepper.  Cover and bring to a rolling boil.

Once boiling, reduce heat and simmer with lid tilted slightly so it is not tight fitting, but allows steam to escape.  Simmer for approximately 2 hours or until broth level reduces 1/2 – 1 inch.  You can tell this by looking at the side of the pot where a line will be formed where soup started.  This will allow the broth to build depth of flavor.

When soup is almost done, boil noodles in a separate pot, cooking 2-3 minutes less than directions.  Drain and rinse well with cold water.  Set aside.

When soup broth is done, pour through strainer into a larger pot.  The broth will go into the pot, and the chicken and vegetables will remain in the strainer.

When cool enough to handle, chop chicken and vegetables into bite-sized pieces.  Add back to broth, then add drained and rinsed noodles.   Stir to incorporate all.

Your soup is now ready to enjoy.  This soup keeps well for up to a week in the refrigerator and also freezes well.

Beginner’s sidenotes/tips:  You can certainly use a whole chicken or chicken parts, but it is a lot more work to clean the chicken from the bone, and remove the skin and fat after cooking to cut up for the soup.  Using chicken breasts also eliminated the need to allow the broth to cool and fat to rise to top to skim off as there is little to no fat in the chicken breasts.  Chicken breasts also allow for a heartier soup with big chunks of tender chicken.  Buying a better grade and organic chicken will give you better flavor and better food value.  I’ve found with cheaper brands of chicken, there is fat and gristle that needs removed as well as ligaments that need cut out.

You can certainly use whole raw carrots, but the convenient short-cut carrots save the need for peeling and cutting down carrots into manageable pieces.

While dried herbs are always good to have on hand in a pinch, nothing will make your recipes better than using fresh herbs.  Fresh parsley as opposed to dried will really add a whole new sophisticated level to your soup.

Always cook your noodles separately, and drain and rinse well in cold water.  This will remove the starch that cooks off the pasta from being in your soup and “muddying up” the broth’s texture and flavor.  Rinsing in cold water will stop the “cooking” that still continues in food like pasta while it is still hot.

Cook noodles 2-3 minutes less than directions say to avoid soggy, mushy noodles in your soup.  As they sit in the soup, they will soften and plump even more, so no need to over-cook.

Do not add oil or salt to the noodles when boiling.  There is plenty of salt in the soup base that will make the broth.  It is almost impossible to “unsalt” soup, but additional salt can always be added for individual taste or preference.  If you over-salt, add more water to broth or consider boiling a whole peeled potato in the broth.  The potato will absorb some of the salt.  You can then throw the potato out, hopefully salvaging your broth.

Enjoy!

Cheers & Hugs,
Jodi

Four Cheese Garlic Spaghetti Squash

Four Cheese Garlic Spaghetti Squash.

I have always enjoyed spaghetti squash, but now that I have discovered this recipe…….. well…. now I LOOOVVVEE spaghetti squash!

This is absolutely the most amazing way to eat it!

Imagine a version of mac ‘n cheese without the macaroni carbs or calories and replaced with healthy spaghetti squash “noodles.”  (Macaroni carbs 78g/cup vs. Spaghetti Squash carbs 7g/cup – Macaroni calories 221/cup vs. Spaghetti Squash calories 31/cup!)

But…… it also has the most amazing flavor, you won’t even miss your macaroni!

When I saw a recipe at Eatwell101 for this amazingness, I knew I had to try.  I tweaked it up a bit, and here is how I made it.

Hope you will give it a try!  You won’t be sorry!

Four Cheese Garlic Spaghetti Squash

Ingredients

  • 1 large spaghetti squash
  • Freshly ground pepper
  • 1 1/2 cups Half and Half
  • 5 cloves garlic, minced
  • 1 tsp. chicken base or 1 chicken bouillon cube, crushed
  • 1/2 tsp dried thyme (or 1 Tbsp. fresh thyme)
  • 1/4 cup finely chopped scallions or green onions
  • 1 cup freshly shredded cheese – I used the following combination:
    • 1/4 cup Mozarella
    • 1/4 cup White Cheddar
    • 1/4 cup Parmesan
    • 1/4 cup Gruyere

Directions

Preheat oven to 400 degrees F.

Cut both ends off of spaghetti squash and cut in half lengthwise.  Scrape out seeds.  Place both halves in a 9×13 baking dish flesh side up.  Sprinkle with freshly ground pepper.

Combine half and half, garlic, chicken base (or bouillon), thyme, and scallions in a small bowl.

Sprinkle half of shredded cheese in the cavities of each halved squash.  Pour half of cream mixture into each squash half.  Top with remaining shredded cheese.

Roast for 40 mins, or until squash flesh is tender when poked with a fork.

Remove from oven and carefully scrape squash from skin with a fork creating spaghetti “noodles.”  Mix well with cheese and cream, and serve immediately.

Enjoy!

Cheers & Hugs,
Jodi

Spinach & Goat Goat Cheese Stuffed Pork Chops

Spinach and Goat Cheese Stuffed Pork Chops.

It is taking me a while to learn to cook for just two since becoming “empty” nesters.  Lately, it seems, we order in, go out, eat simple, or eat leftovers for days and days and days when I do cook.

I still try to make a nice meal on Sunday, even if it is just the two of us.  This past Sunday, I decided to make stuffed pork chops with a pack of (just two!) beautifully thick, center cut Iowa Chops I had picked up.

Instead of the usual bread stuffing, though, I wanted to do something different.  So after perusing the web and finding a number of interesting combinations, I came up with a combination of fresh iron-rich spinach, creamy goat cheese, garlic to kick it up, and ruby red roasted red peppers for their beautiful color and flavor.


It made a beautiful, delicious, and healthier stuffing for our chops, and I served them on a bed of zoodles (spiral cut zucchini noodles).

How do you like to stuff your chops?!  Hope you’ll give this version a try.  Simply double or triple depending on how many you are cooking for if you are fortunate enough to be serving a crowd.

Spinach and Goat Cheese Stuffed Pork Chops

Ingredients

  • 2 thick boneless Pork Chops (I used Iowa Chops*)
  • 1 Tbsp. Olive Oil
  • 1 Tbsp. Butter
  • 2 cups fresh Spinach
  • 1 Roasted Red Pepper, chopped
  • 1/3 cup goat cheese
  • 2 cloves garlic, minced
  • 1/2 cup Panko bread crumbs
  • 1/2 tsp. dried basil
  • 1/2 tsp. dried oregano
  • 1/2 tsp. dried parsley
  • 1/2 tsp. seasoned salt


Directions

Steam spinach in microwave with 1 Tbsp. water for 1 minute on High until wilted.  Drain, and squeeze water out.  Add chopped roasted red peppers, minced garlic, and goat cheese.  Stir to combine.

Cut a slit in each pork chop to create a pocket, being careful not to cut through to other side.

Spoon half of spinach mixture into the pocket of each pork chop.

Mix breadcrumbs, basil, oregano, parsley, and seasoned salt in shallow dish.  Press stuffed pork chops  on both sides into the bread crumb mixture to coat.

Heat oil and butter in skillet over medium/high heat.  Add pork chops, and cook 4-5 minutes until nicely browned.  Flip over and brown on other side until now longer pink in the middle.  (If chops are extremely thick, you may want to put chops in preheated 375 degree oven for an additional 10 minutes once browned.)

*Iowa Chops:  The notorious “Iowa Chop” is a seriously thick and succulent pork chop cut from the lower back of the hog just behind the rib.   The thickness (1.25-1.5 inches) of this chop led it to be coined “The Iowa Chop” in the 1980’s by the Iowa Pork Producers Association.

Enjoy!

Cheers & Hugs,
Jodi

(P.S. If you are a subscriber and seeing this twice, sorry for the inconvenience!  I somehow scheduled it to publish in an incomplete state last evening, so have updated.  Thanks for reading!)

Pan Seared Lemon and Garlic Mahi Mahi

Pan Seared Lemon and Garlic Mahi Mahi.

I adooooore seafood!

When eating out, I will likely order seafood 80% of the time.

Chilean Sea Bass… Salmon…Lobster… Shrimp… Scallops…  Tuna…  Fish Sandwiches…  Fish and Chips… Fish Tacos!

And then there is Mahi Mahi!  Ohhhh  the light, mild, delicate flavor of heavenly deliciousness…..  no wonder you have to say it TWICE!

I don’t often cook seafood at home as Hubby is not nearly the fan that I am, but I snuck this yumminess in last night for dinner.  A couple of wonderful wild caught Mahi Mahi fillets pan seared with onions, garlic, thyme and lemon zest – this recipe is quick as a wink, healthy as all get out (did you know a 3-4 ounce serving of Mahi Mahi has 20 grams of protein, contains all the amino acides you need to survive, and is under 100 calories?!), and melts in your mouth better than butter!

Here is how I made it thanks to the inspiration from ChicFitChef:

Pan Seared Lemon and Garlic Mahi Mahi

Ingredients:

  • 2 3-4oz Mahi Mahi fillets, patted dry
  • 2 lemons, zested and juice reserved
  • 1 tsp dried thyme or 1 Tbsp. freshly minced thyme (fresh is always preferred if possible)
  • salt and pepper to taste
  • 1/2 large sweet onion, sliced
  • 3 cloves garlic, minced
  • Olive oil

Directions:

Heat olive oil in skillet until searing hot!

Meanwhile, combine lemon zest, thyme, salt and pepper.   Coat patted-dry fish fillets on both sides with this seasoning.

Add onion slices to hot skillet.  Once onions are golden brown (about 2-3 minutes), add fish to sear for 3-4 minutes (without moving).

Turn fish fillets over with a spatula, and let sear for another 3-4 minutes on other side.

Lower heat, and add minced garlic and lemon juice.  Cover pan, and cook fish another 3-4 minutes.

Remove from heat and serve.

Enjoy!

Cheers & Hugs,
Jodi

The BEST Summer Sammie

Fresh Tomato and Basil Sandwich - Best Summer Sammie

Fresh Tomato and Basil Sandwich – Best Summer Sammie

The BEST Summer Sammie.

My tomatoes
are FINALLY
ripening!

We planted
a bit late
this year.

But
it was well worth
the wait.

I can now
eat my FAVORITE
summer sammie…

For breakfast,
lunch,
or dinner!

Fresh tomato slices,
fresh sweet basil,
and toasted ciabatta slathered with mayo.

Who needs a burger?
Who needs a dog?
When these rubies and golds have finally arrived!

Cheers & Hugs,
Jodi


Avocado Toast

Avocado Toast with Spicy Pico de Gallo

Avocado Toast with Spicy Pico de Gallo

Avocado Toast.

My latest obsession.

Skip the butter.
Skip the jam.

A perfectly ripe,
creamy avocado half
spread on toast.

Topped with a spoonful
of fresh pico de gallo
with a slight kick
and a dash of salt.

O M Geee!

When only using a half of an avocado, I’ve found a way to keep the other half fresh until the next day.  Leave the pit in and cover tightly with plastic wrap to keep out any bit of air that could touch it and turn it brown, then refrigerate.  I don’t refrigerate avocado before they are cut, but if you only eat half, I think it best to refrigerate the cut one.

Leaving the pit in is key too.  A friend whose son works in a restaurant that makes fresh guacamole shared this life-changing tip with me recently.  When making fresh guacamole, throw one of the pits in.  It keeps the guac from turning brown.  It really works!

How do you like your avocado toast?

Cheers & Hugs,
Jodi

Zucchini & Broccoli Galette

Zucchini and Broccoli Galette.

So you know yesterday was #SneakSomeZucchiniIntoYourNeighborsPorchDay – right?

Of course you did!

So after picking three zucchinis from our garden, I snuck one to our neighbor on the right…

and one to our neighbor on the left.

Then I decided to use the third zucchini to make a revised version of Jenna from the Painted Apron’s recipe for Zucchini Galette.

Fresh zucchini, broccoli, caramelized onions, roasted garlic, and freshly grated Parmesan cheese all wrapped up in a golden, flaky crust……..

is surely a glorious way to celebrate this zucchini lover’s day!

How did you celebrate?

Zucchini & Broccoli Galette

Ingredients:

  • 1 medium zucchini, sliced
  • 1 sweet onion, sliced
  • 2 Tbsp butter, divided
  • 1 Tbsp olive oil
  • 2 cups fresh broccoli florets
  • 1 tube Pillsbury Crescent rolls
  • 1 head of garlic, roasted*
  • 4 oz freshly grated Parmesan cheese
  • 1 egg, beaten
  • Salt and Pepper

Lay zucchini slices out on a paper towel and sprinkle with salt.  Let sit for 15-30 minutes.  Pat dry, then turn over and repeat on new dry towels.  This will help remove some of the excess water that naturally occurs during cooking of zucchini.

Caramelize sliced onion by cooking over medium-high heat in 1 Tbsp butter and 1 Tbsp olive oil for 10-15 minutes, stirring occasionally, until soft and brown.  Add broccoli and  the other 1 Tbsp butter, and cook for 5 more minutes.  Lay out crescent roll triangles in a circle on a baking stone or baking sheet, pressing together and flattening with rolling pin. Squeeze out roasted garlic and spread over dough, leaving a 1 inch border.  Sprinkle with 1/3 of the cheese.  Top with 1/2 of onion and broccoli mixture and half of zucchini.  Repeat layers.  Top with cheese.  Fold dough up and over filling around the edge. Brush dough with an egg wash and bake at 375 degrees F for approximately 30 minutes or until golden and melted.  Cut into 6 wedges to serve.

*Roasted Garlic:  Cut top off top of garlic head exposing the cloves.  Place on a piece of foil and drizzle with olive oil.  Wrap up and bake at 400 degrees F for approximately 1 hour.  This can be done ahead of time and refrigerated.

Enjoy!

Cheers & Hugs,
Jodi

Apricot Glazed Pork Tenderloin

Apricot Glazed Pork Tenderloin.

Pork lovers get ready to swooooon!  This might be the most delicious way I have ever prepared pork tenderloin!

I made this yummy recipe earlier this week to go with the Roasted Brussels Sprouts with Bacon and Apples I featured HERE.

It was like a match made in Yum Yum Heaven!  I have to admit I moaned a few times eating it!

Hope you give it a try!

Apricot Glazed Pork Tenderloin*

Ingredients

  • 1 pork tenderloin (approx. 1 1/2 lbs)
  • Salt and pepper
  • 1 Tbsp dried thyme
  • 2 Tbsp butter
  • Olive Oil
  • 1/2 cup white wine
  • 1/2 cup chicken broth/stock
  • 1 Tbsp minced fresh rosemary
  • 2 Tbsp apricot preserves (heaping)
  • 1 Tbsp Dijon mustard
  • 2 Tbsp low-sodium soy sauce (as much as I LOVE salt, I always recommend low-sodium soy sauce)
  • 1 Tbsp Worcestershire sauce

Directions:

Preheat oven to 350 degrees F.

Melt butter and a drizzle of olive oil in a large oven-safe skillet.  When hot, add tenderloin(s).  Liberally season pork with salt and pepper and dried thyme.   Sear the pork on all sides.

When pork is beautifully seared and browned all over, add wine and chicken broth/stock to the skillet.  Cover and place in preheated oven for 15-20 minutes or until internal temperature reaches 140 degrees F.

Remove pork and place on cutting board.  Cover with aluminum foil, and let rest for 5 minutes.

In skillet, add apricot jam, Dijon mustard, soy sauce, Worcestershire sauce and rosemary.  Cook over low heat for 4-5 minutes allowing the glaze to thicken.

Slice pork tenderloin and drizzle glaze over top.

Enjoy!

Cheers & Hugs,
Jodi

*Original recipe found at AGoudaLife.com.