Milk Chocolate Caramel-Filled Chip Cookies

Milk Chocolate Caramel Filled Chip Cookies Stacked

If you give a mouse a cookie….

He’s going to ask for a glass of milk.

Milk Chocolate Caramel Filled Chip Cookies and Milk 2

And then he’ll probably want a straw.

Milk Chocolate Caramel Filled Chip Cookies

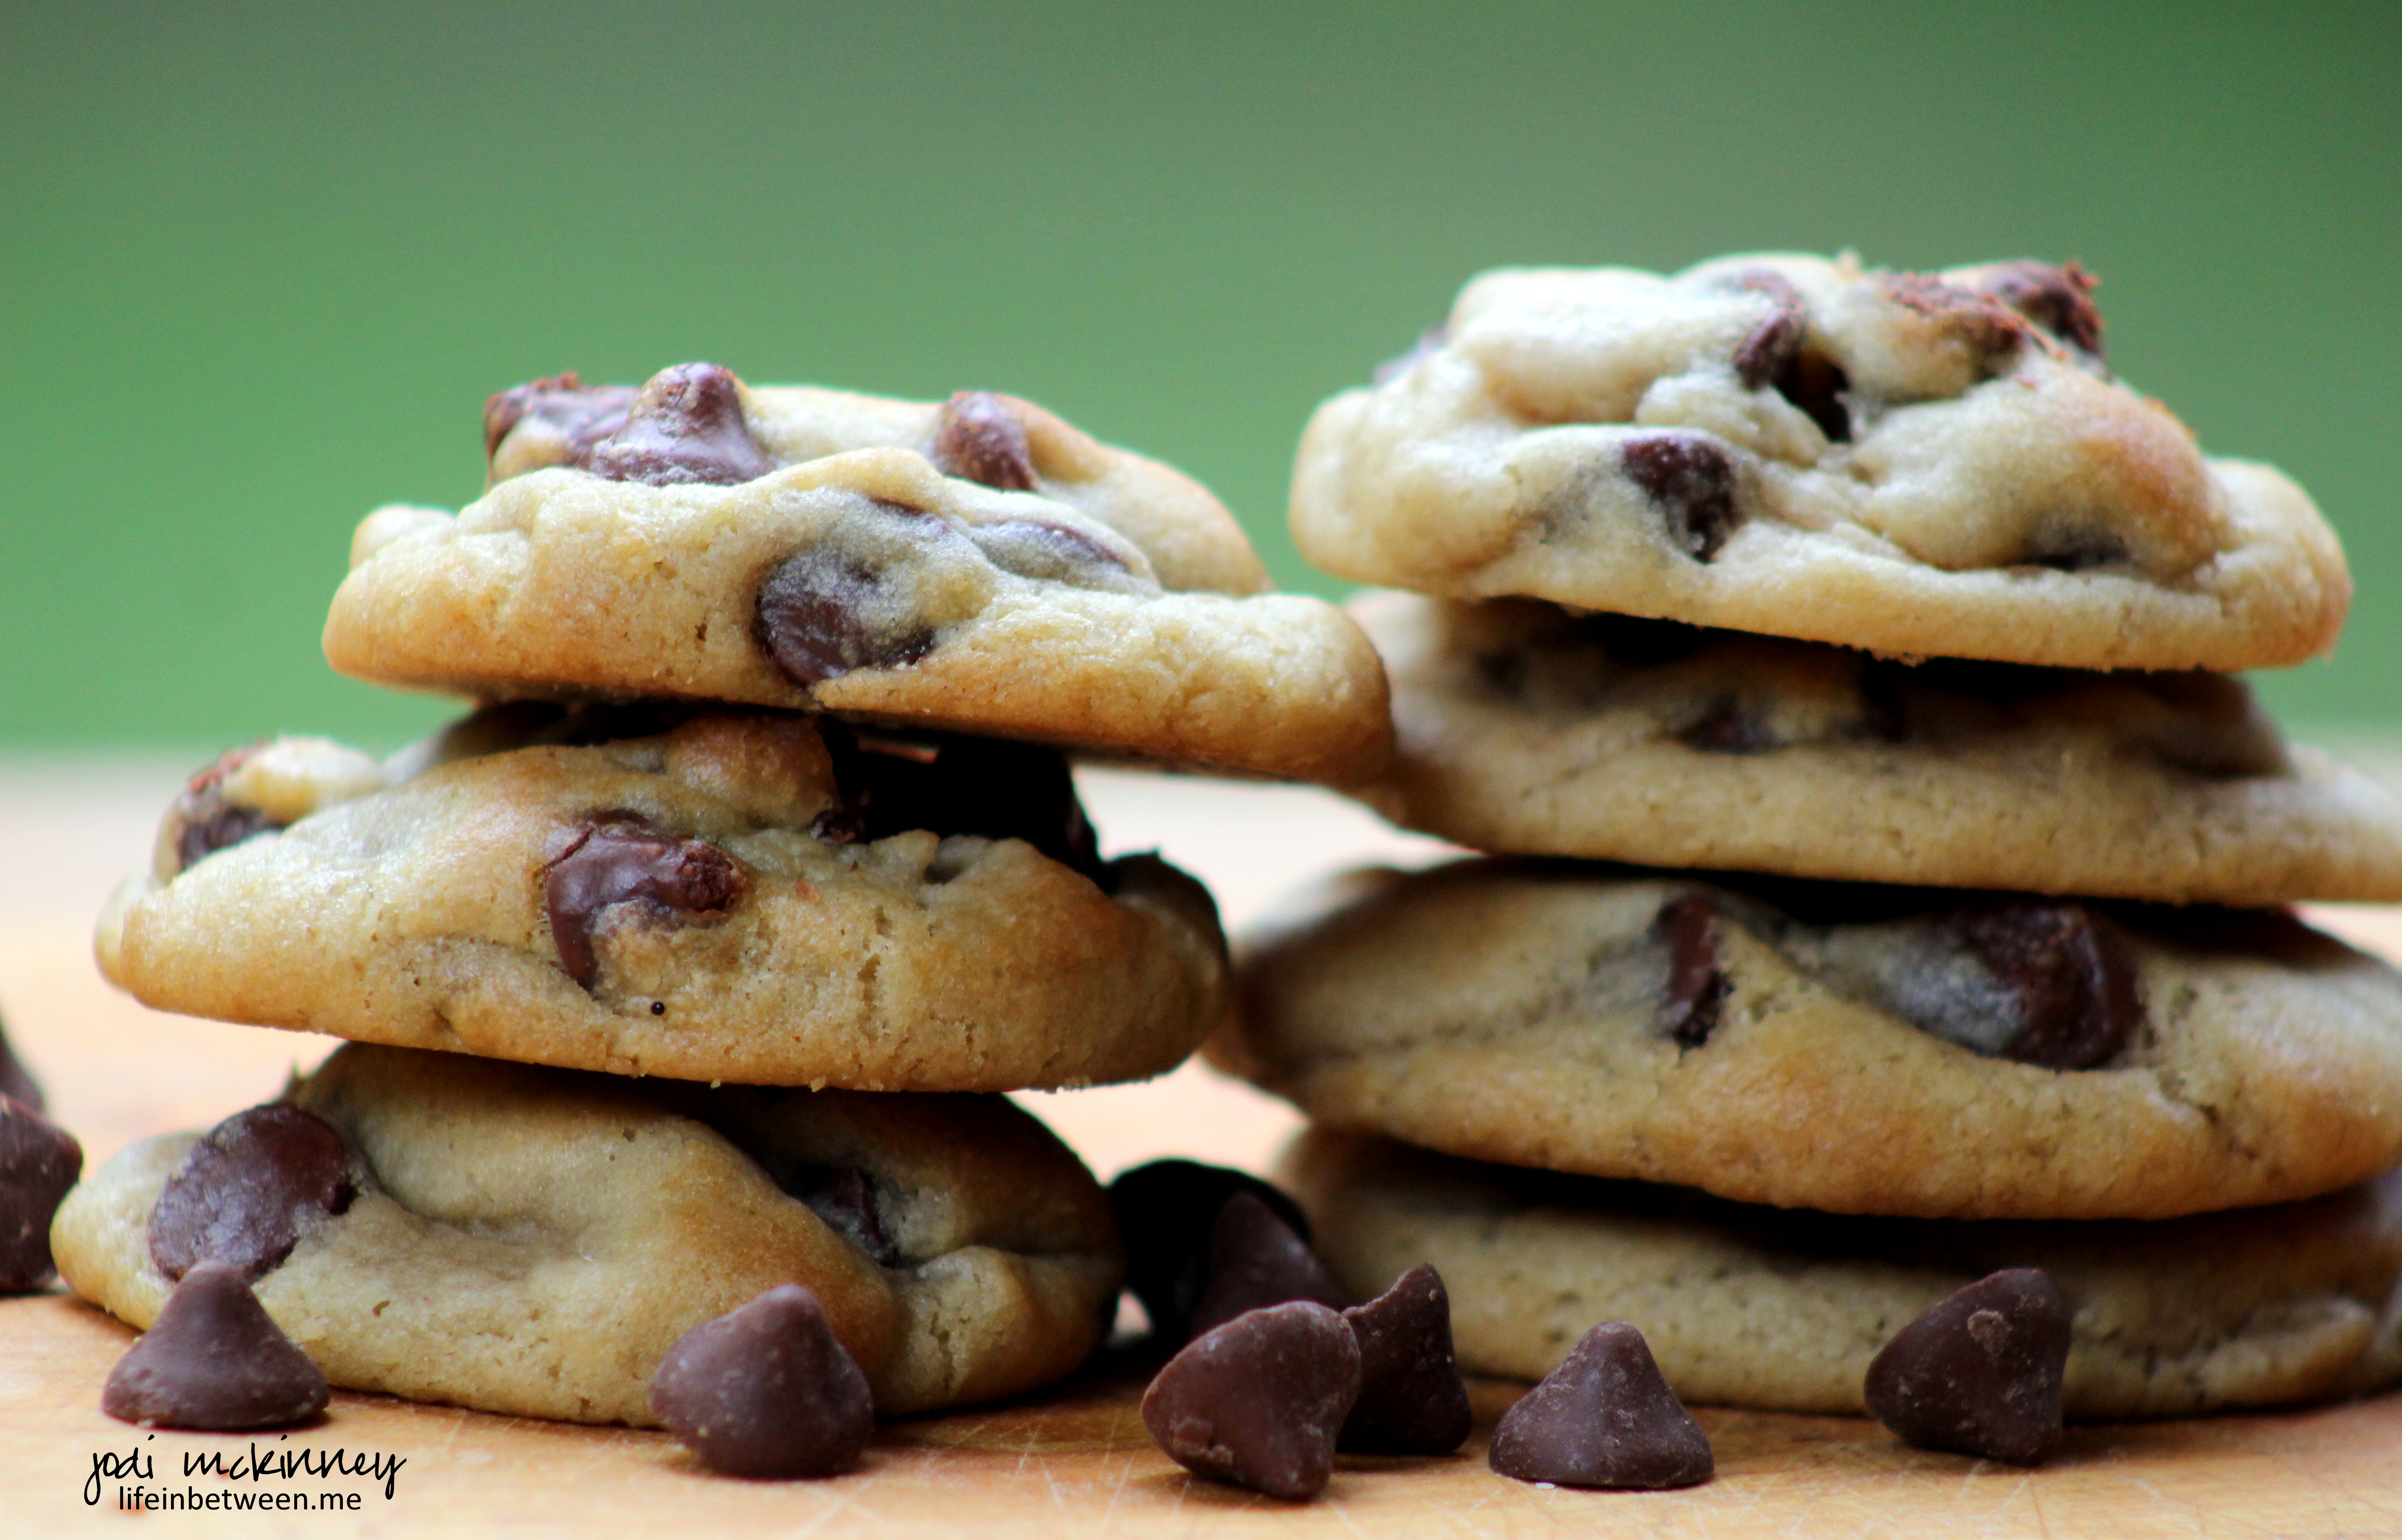
As I was looking at these shots of my latest twist on chocolate chip cookies, I couldn’t help but be reminded of that fun children’s book.

Milk Chocolate Caramel Filled Chip Cookies Stacked 2

Especially after this stack – I kept thinking… more – More – MORE!

Milk Chocolate Caramel Filled Chip Cookies and Milk

I bake chocolate chip cookies A  LOT.

I’m kinda known for it.

Especially with our sons’ friends.

And I love the joy it brings – the smiles they create – the happy tummies – the grateful hugs.

But I get bored with the same old thing, so I am always looking for a way to change them up a bit – as you may have noticed if you’ve been hanging out here at LifeinBetween.me for any length of time…  (Fresh Raspberry Chocolate Chips, Girl Scout Thin Mint Cookies, Peanut Butter White Chocolate Chip…)

This latest version was a BIG HIT!

Instead of semi-sweet morsels, I used the new Nestle Toll House Delightfulls Caramel Filled Morsels.

Could you just die?!!?

Milk Chocolate Caramel Filled Chips in a cookie!!

I used my tried and true chocolate chip cookie recipe – subbing these DELIGHTFULL morsels for the regular chocolate chips.

Easy Peasy – and guaranteed to be a Big Hit with whoever you decide to share these with!

And PS – I had forgotten how amazing a chocolate chip cookie tastes dunked in milk!     I have not done that in ages, but sampled a bite after this “photo shoot.”

Grab a glass of cold milk – even if it is Skim – and DUNK!

Pure delight!

Kicked Up Milk Chocolate & Caramel Chip Cookies

Ingredients:Milk Chocolate Caramel Filled Chip Cookies Stacked 2

4 sticks butter, softened
1 1/2 cups packed brown sugar
1 1/2 cups white granulated sugar
2 tsp vanilla
4 eggs
2 tsp baking soda
2 tsp salt
5 cups all purpose flour
2 9-oz bags Nestle Toll House Delightfulls Milk Chocolate Caramel Filled Morsels

Directions:

With electric mixer, beat butter and sugar together until completely incorporated. Add vanilla and eggs, and beat until light and fluffy. Add baking soda and salt, and mix another minute. Gradually add flour and beat until well incorporated, but do not overbeat.

Fold in chocolate caramel morsels. Refrigerate dough for at least 2 hours or up to 2 days.

When ready to bake, preheat oven to 375 degrees F. With your hands, form a cookie dough ball about 1-1/2 inches in diameter.  Place on baking stone. Bake for 8-10 minutes. Do not overbake. Allow to cool on baking stone for 2-3 minutes, then remove to cooling rack to cool completely.

Cheers & Chocolatey Caramely Hugs,

Jodi

Chicken Caprese Penne Pasta

chicken caprese penne pasta

I had a rotisserie chicken in the refrigerator that I purchased grocery shopping a day or two earlier.  I knew it would be good to have on hand for picking at or making a quick dinner.

foodie dice chicken caprese penne pasta

Looking for some inspiration, I thought I’d bring out the Foodie Dice and see what creativity I could stimulate for dinner.

fresh chopped tomatoes

I have to admit I cheated and made the chicken dice happen.  But when I rolled, tomatoes, garlic, basil, and pasta….

fresh basil

Caprese came to mind and came to dinner plate.

goat cheese

I didn’t have any fresh mozzarella on hand, but I did have some yummy goat cheese that makes a glorious quick and easy creamy pasta sauce.

rotisserie chicken

And the rotisserie chicken became the star of the evening.

chicken caprese penne pasta
This was so quick and easy, but SO SO SO SO SO to die for delicious.  I have to admit I sort of moaned (and bragged!) while eating it….

Though quick and easy, I must say this dish could be served for company – and I just may do that.

If you don’t have a rotisserie chicken on hand or available, you could simply roast a chicken or saute some chicken breasts and/or thighs to use.

Thanks to the roll of the Foodie Dice for this yummy dinner.

Chicken Caprese Penne Pasta

Ingredients:chicken caprese penne pasta

  • 1 rotisserie chicken, skinned and chopped
  • 1 lb penne pasta
  • 5-6 campari tomatoes, diced
  • 1 cup fresh basil, chopped
  • 4 large cloves garlic, minced
  • 3 Tbsp olive oil
  • 8 oz. goat cheese, crumbled
  • 1/4 cup freshly grated Parmesan cheese
  • salt and pepper to taste

Directions:

  • Cook penne pasta in salted water for 8-10 minutes.  Drain, reserving 1 cup of water.
  • Saute garlic in olive oil, then stir in chicken.
  • To drained pasta, add crumbled goat cheese and reserved cup of pasta water.  Stir to incorporate and melt cheese.
  • Add chicken and garlic, fresh tomatoes, and basil.  Toss to combine.
  • Sprinkle with Parmesan cheese, and salt and pepper to taste. 

Enjoy!

Cheers & Hugs,

Jodi

Sometimes Simple is the Sweetest

memorial day birthday cake red raspberries and blackberries
Did you ever notice how fancy and fussy doesn’t always equal most delicious?

Take birthday cake for example, I have spent hours and fortunes on fancy cakes with fondant decorations or “secret” expensive ingredients.

But, as I can attest from this past weekend’s Memorial Day/DIL Birthday cake, my family absolutely and totally went gaga over a simple Betty Crocker Supermoist Party Rainbow Chip Cake Mix baked in a 13×9 pan with white frosting and fresh fruit on top.

For the frosting, I mixed half a tub of Duncan Hines Fluffy White Frosting Mix and half of a large container of Cool Whip.  Canned frosting alone is way too sweet.  Cool Whip alone just doesn’t hit the mark.  Together, though, they are a marriage made in heaven!  AMAZING Frosting!  Try it – I’ll bet you get raves!

And to really rock it out, a scoop of Birthday Party ice cream doesn’t hurt either!  (Hagan Parlor Favorites makes a yummy Birthday Party flavor that has confetti chips and CHUNKS of birthday cake in the ice cream!)

Even those of you who don’t consider yourselves “Kitchenistas” can be Rock Stars with this easy combo!

Birthday party ice cream

Sometimes simple is the sweetest.

Cheers & Hugs,

Jodi

Easy Rustic Apple Tart

apple tart

We had some friends and family over yesterday for a winter “picnic.”

So often we have people over for the holidays and then don’t get together much until Spring and Summer because of the cold, snowy weather.

Well – heck with that.  I say celebrate it.

So while the snow fell to the tune of another 6 inches or more, we lit a fire, Marty plowed the driveway, and I made a big pot of creamy loaded potato soup, some fresh baked bread, and this super easy rustic apple tart.

We had a great time enjoying simple food and sharing stories of love and friendship.  Such cherished memories!

apple tart 2
If you are looking for a quick and easy, but beautiful dessert, here’s the recipe:

Easy Rustic Apple Tart

Ingredients:

1 Sheet Frozen Puff Pastry, thawed
2 large apples, cored and sliced paper thin (with a mandolin is easiest)
1/2 lemon, juiced
1/2 cup brown sugar
1/2 tsp cinnamon

Directions:
Preheat oven to 415 degrees F.
In a bowl, mix together sliced apples, lemon juice, sugar and cinnamon. Let set for 5-10 minutes.
Place puff pastry on baking stone (or baking sheet).
Curl up edges a bit and for circle (or simply leave in rectangular shape.
Place apples on top and bake for 18-20 minutes until puffed and golden brown.
Immediately remove to serving platter.
Sprinkle with powdered sugar, and serve plain or with whipped cream, ice cream, and or drizzle with caramel sauce.
Enjoy!

Happy Monday friends!

Cheers & Hugs,
Jodi

Shrimp & Vegetable Lo Mein

Lo Mein

Anyone who has followed along here at LifeinBetween.me for any length of time might be wondering what an ole’ Hunky Polish chick that loves baking cookies and cakes and breads and makes halupkis and haluski and pierogies is doing trying her hand at Chinese comfort food….

Well – why not?!

And oh YUMMMM!

Lo Mein 2

Who knew how easy and healthy it could be without buying it from the local Chinese take-out?

And is there anything more versatile?!

The sky is seriously the limit with all the things you can mix into this!

Change up the protein from shrimp to chicken or pork or even beef.

Almost any vegetable works too!

Can’t find Lo Mein Noodles at your local grocery?  Spaghetti noodles work just fine!

lo mein prep

I used inspiration from the real experts like the gang at The Woks of Life and  Chungha at Damn Delicious.

Here’s my version.

Homemade Lo Mein

  • Servings: Enough for a Hungry Family
  • Print

 Ingredients:

1 – 1.5 lbs Thin Spaghetti (or Lo Mein noodles) – cooked al dente
1 lb Cooked, Deveined Shrimp, Tails removed (or chicken or pork or beef)
5 cups spinach leaves
1 cup shredded julienne carrots
1 cup diced celery
1 cup sliced mushrooms
1 cup thin asparagus tops
1 cup green onions, cut into 2 inch lengths
1 cup sugar snap peas
2 red peppers, cut into strips
2-3 cloves minced garlic
3 tsp. Olive Oil
Sauce:
5 Tbsp. Soy Sauce
1 Tbsp. Sesame Oil
2 Tbsp Sugar dissolved in 2 Tbsp hot water
1 tsp Salt-Free Asian Spice Seasoning
1 Tbsp freshly minced ginger
1 tsp Siracha Sauce

Directions:

Heat olive oil in large wok or skillet. Add garlic and cook for 1 minute. Add rest of vegetables, except spinach (any of the above or any that you like) and cook for 4-5 minutes. Stir frequently. Add cooked shrimp (or protein of your choice or simply keep vegetarian). Cook 2-3 more minutes. Add spinach and cook 1-2 more minutes. Stir in noodles and sauce mixture. Gently toss.

Serve and enjoy!

Need to see it again?

Lo Mein 2

Cheers & Hugs,
Jodi

Breakfast Energy Bars – Getting Back in the Groove

breakfast energy bars cover

My glorious two-week holiday “vacation” has come to an end, and it is time to get back to work – – – and back in the groove – of a structured work schedule – and a better eating and exercising habit too after a month or so of glutenous indulgence!

So yesterday, I made a batch of breakfast energy bars to have a go-to breakfast or protein and energy-packed snack.  I have made a similar version of these before and blogged about.  The beauty of this recipe is you can use whatever you have on hand (within reason) to create a unique bar each time.

I received several gorgeous sets of measuring utensils as Christmas gifts, so I was excited to get to use some of them for photographing below.  (Really don’t need to measure these things precisely…. but it made for a fun photo to share 🙂 ).  I gathered some creamy peanut butter, coconut oil, honey, oats, shredded coconut, a variety of seeds (pumpkin and sunflower), dried cranberries, and chopped some dates and some beautifully healthy English walnuts.

breakfast energy bars ingredients

To begin, melt the peanut butter, coconut oil, and honey in a good size saucepan.

breakfast energy bars saucepan

When melted, remove from heat and add your chosen dry ingredients.

breakfast energy bars saucepan and dry ingredients

Mix all ingredients until incorporated.


breakfast energy bars saucepan mix

Then spread in a 13 x 9 pan and chill for several hours until firm.

breakfast energy bars pan

Once completely chilled, cut into bars.

breakfast energy bars cut

I packed them in pairs in Ziploc bags and placed in the freezer – ready to grab for a quick breakfast at home…

breakfast energy bars home

or on the go…

breakfast energy bars on the go

Here is the recipe you can use to tweak with the ingredients you like:

Breakfast Energy Bars

1 cup peanut butter
1/2 cup honey
1/2 cup coconut oil (solid form)
2 1/2 cups oats
1 cup shredded coconut
1/2 cup chopped walnuts
1/2 cup chopped dried dates
1/3 cup dried cranberries
1/3 cup pumpkin seeds
1/3 cup sunflower seeds

Melt peanut butter, honey, and coconut oil in a saucepan.
Remove from heat and stir in remaining ingredients.
Spread in a 13 x 9 pan.
Refrigerate approximately 2 hours.
Cut into bars and wrap or bag individually.
Return to refrigerator or freeze.

Feel free to substitute other dried fruits (golden raisins, dried blueberries or cherries) or nuts (slivered or chopped almonds, cashews, pecans, peanuts) or even chocolate chips (milk, semi-sweet, white, peanut butter, butterscotch).

I am going to share this recipe as my first at Fiesta Friday #49.  Fiesta Friday is an online ‘party’, where bloggers share posts in a link up.  Everyone ‘brings’ (shares) a recipe, photograph, craft, memorable story, etc. to the party  I have been hearing about it from several others and decided to join the party this year.  Gotta love a good party – right?  🙂

Groovy Cheers & Hugs,
Jodi

DIY Scrabble Coasters

scrabble coasters bundled

I had a ball trying to think of fun four-letter words with Scrabble tiles to make these DIY Scrabble coasters as Christmas gifts for family and friends.

I really wanted to share them before Christmas, but I didn’t want to spoil the surprise for the recipients.

scrabble coasters

They would also be cute birthday, Valentine’s, new home, and anniversary gifts too!

I simply purchased a couple of sheets of cork tile, glued Scrabble tiles in a 4×4 pattern onto them with E6000 glue, hit them with a spray of clear polyurethane spray, then trimmed with a utility knife.  Voila!  Cute handmade gift!

scrabble coasters coffee mug

I bought bags of Scrabble tiles at Amazon, but if you have time, you can start scouring Goodwill, second hand shops, and garage sales for used Scrabble games cheap to get the tiles.  You might also just find yourself wanting to play this classic game again, too!

Cheers & Hugs
Jodi

PS.  If you want to make these and need further directions, there are some great Youtube videos or other DIY sites you can check out by simply searching Scrabble Coasters.

Homemade Rustic Crusty Bread

br 3

Do you think computers, iPads, smartphones will ever have scratch ‘n sniff available?  Perhaps “smell-a-vision,” “smell-a-phone,” “smell-a-computer?”

Oh how I wish you could SMELL this homemade rustic crusty bread!

And you know what is even better?!?!?!  It is SOOOO simple!

Seriously!

I have been having bread-making envy from a couple of folks I know (ahem – Oh Rob and Nancy), who have been talking so much about baking bread, I couldn’t take it anymore – I HAD TO BAKE SOME BREAD!

But, alas, I am not a bread baker, so I searched for the simplest rustic crusty bread to start with – thinking – is there such a thing?!??

THERE IS!  Thank you Mel – from Mel’s Kitchen Café for this amazing recipe that was apparently adapted from a New York Times article  about “Artisan Bread in Five Minutes a Day,” by Jeff Hertzberg and Zoë François (Thomas Dunne Books, 2007).

br

There are THREE ingredients.  That’s it!  Well – ok – four – if you count tap water.

It is simply:

Ingredients

  • 1 1/2 tablespoons instant yeast (equivalent of 2 envelopes)
  • 1 tablespoon salt
  • 6 1/2 cups unbleached, all-purpose flour

Talk about easy – talk about cheap!

This recipe does NOT require a mixer, does NOT require a bread machine, does NOT even required kneading.  I was skeptical, but thought it was worth a try.  I had time while I was doing other things to let it sit, so what the heck!

br 2

Here are the instructions I adapted from Mel:

Directions

  1. In a large bowl mix yeast and salt into 3 cups lukewarm water (about 100 degrees). Stir in flour, mixing until there are no dry patches. Dough will be quite loose. Cover lightly with a kitchen towel but don’t seal the bowl airtight. Let the dough rise at room temperature 2-5 hours until doubled.
  2. Divide the dough in half to form two loaves (or you can make 3-4 smaller round loaves if you prefer).  Turn the dough in your hands to lightly stretch the surface, creating a rounded top and a lumpy bottom. Put the dough on floured baking stone, and let it rest for another 40 minutes at room temperature.
  3. After the dough has rested and is ready to bake, dust the dough lightly with flour, slash the top with serrated or very sharp knife three times, and sprinkle with a little bit of coarse sea salt if desired.
  4. Preheat oven to 450 degrees F.  Place a broiler pan on the bottom rack of the oven.  Pour one cup of hot water into the pan and shut the oven quickly to trap the steam.
  5. Bake the bread until well browned and it sounds a bit “hollow” when you knock on it –  about 20-28 minutes depending on your oven.  (Mine is an electric convection oven and only took about 20 minutes.)
  6. Slice when cooled and ENJOY!

br w pepWe enjoyed ours for Sunday dinner with spicy sausage stuffed banana peppers from my garden.  It was perfect for cutting the heat and soaking up the juice.

I think I’ll be baking some more of this soon, and maybe branching out to try some others.

br 3

Homemade bread that is easy and inexpensive, has no preservatives, and tastes OUT OF THIS WORLD!

You are going to want to try this!

Cheers & Hugs,

Jodi