Roasted Brussels Sprouts with Bacon and Apples

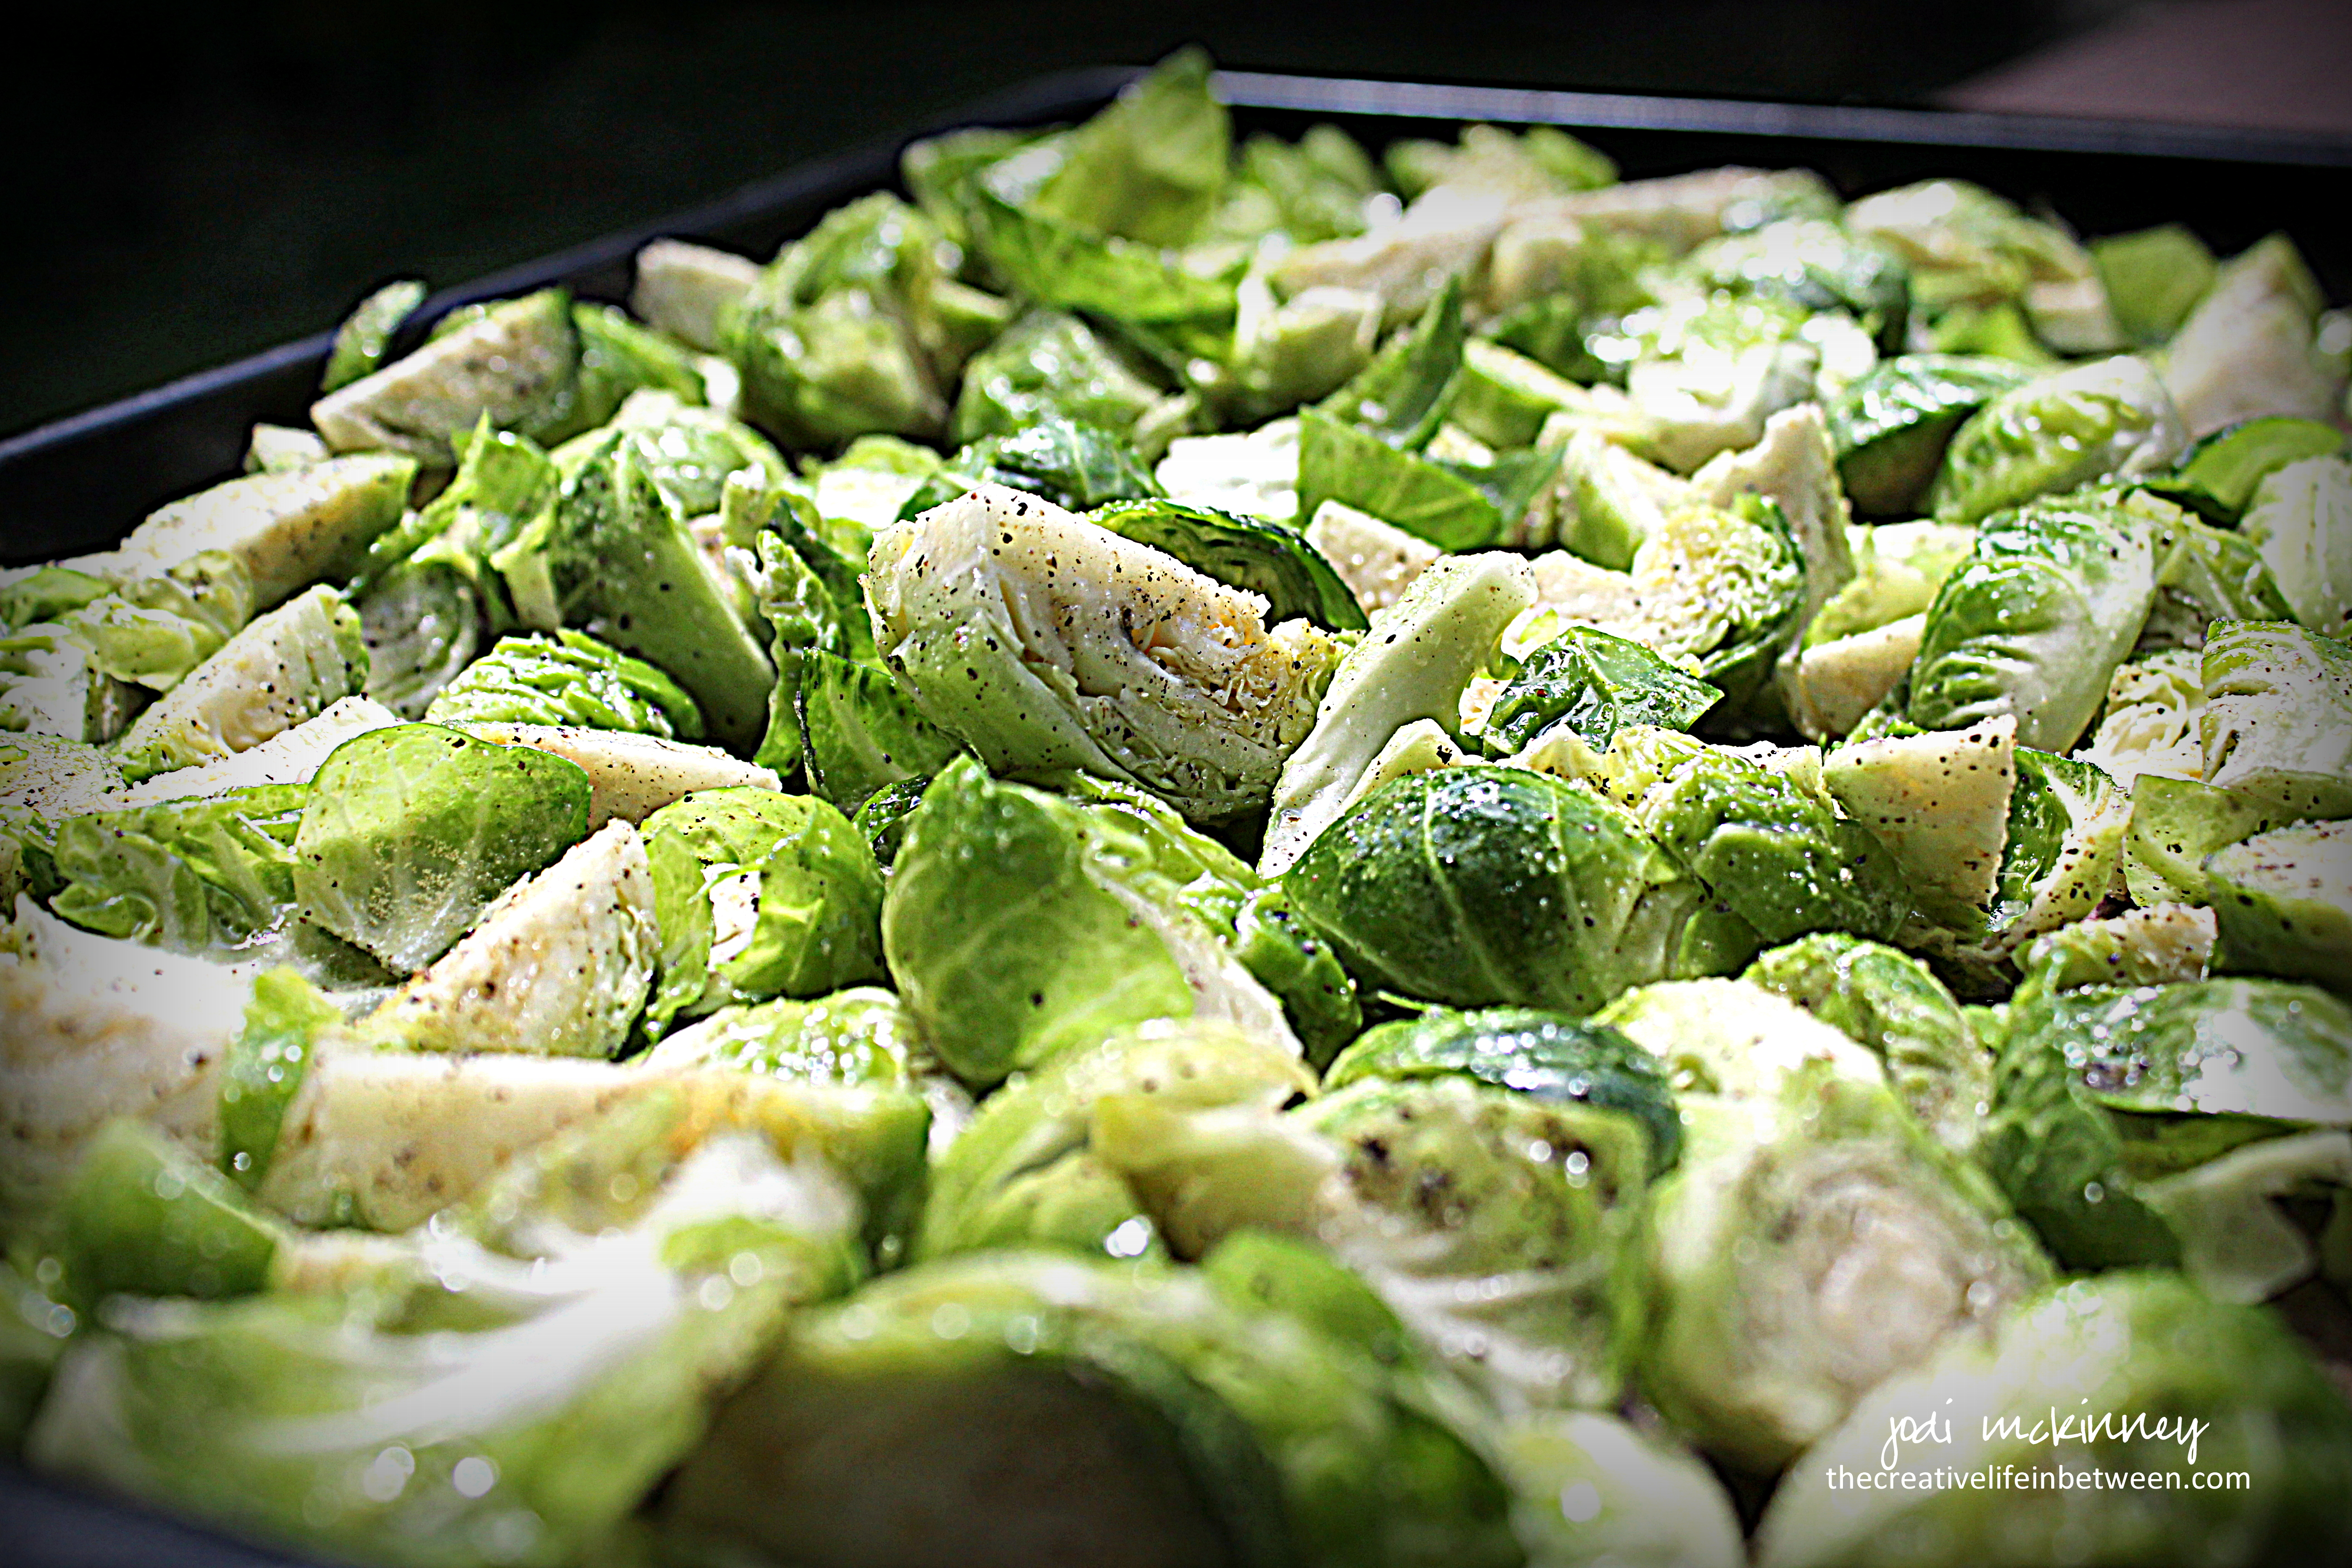
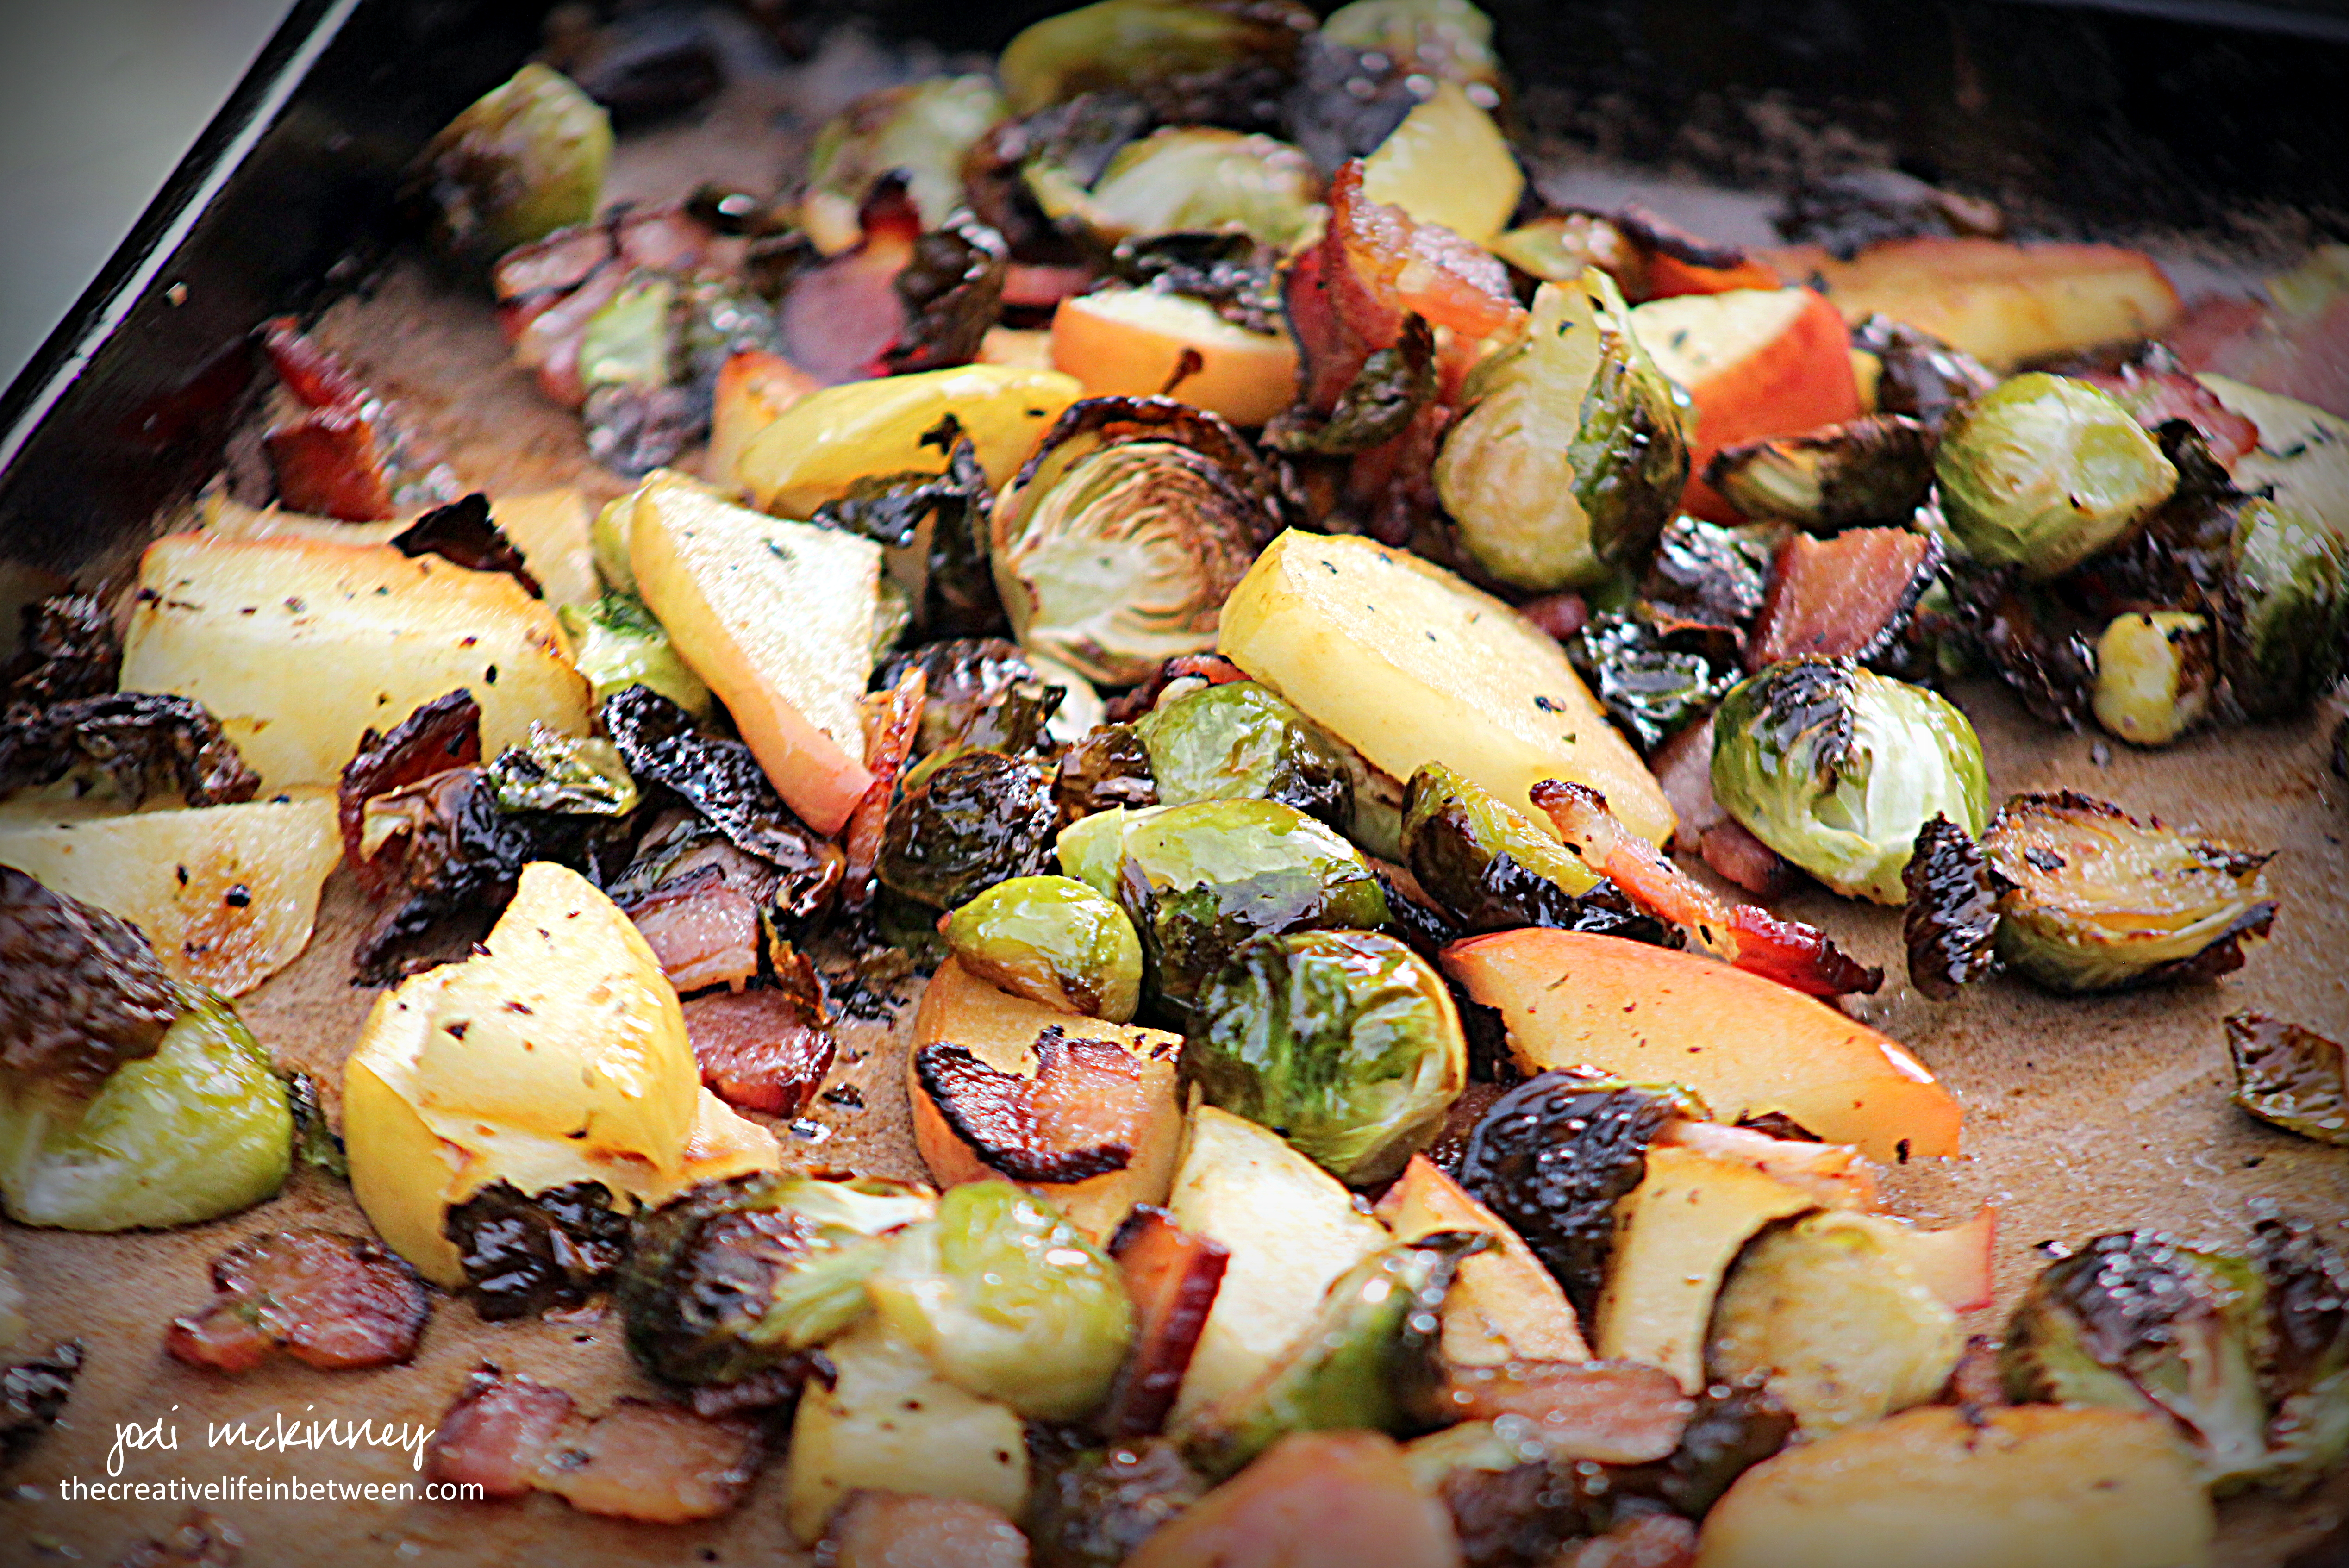
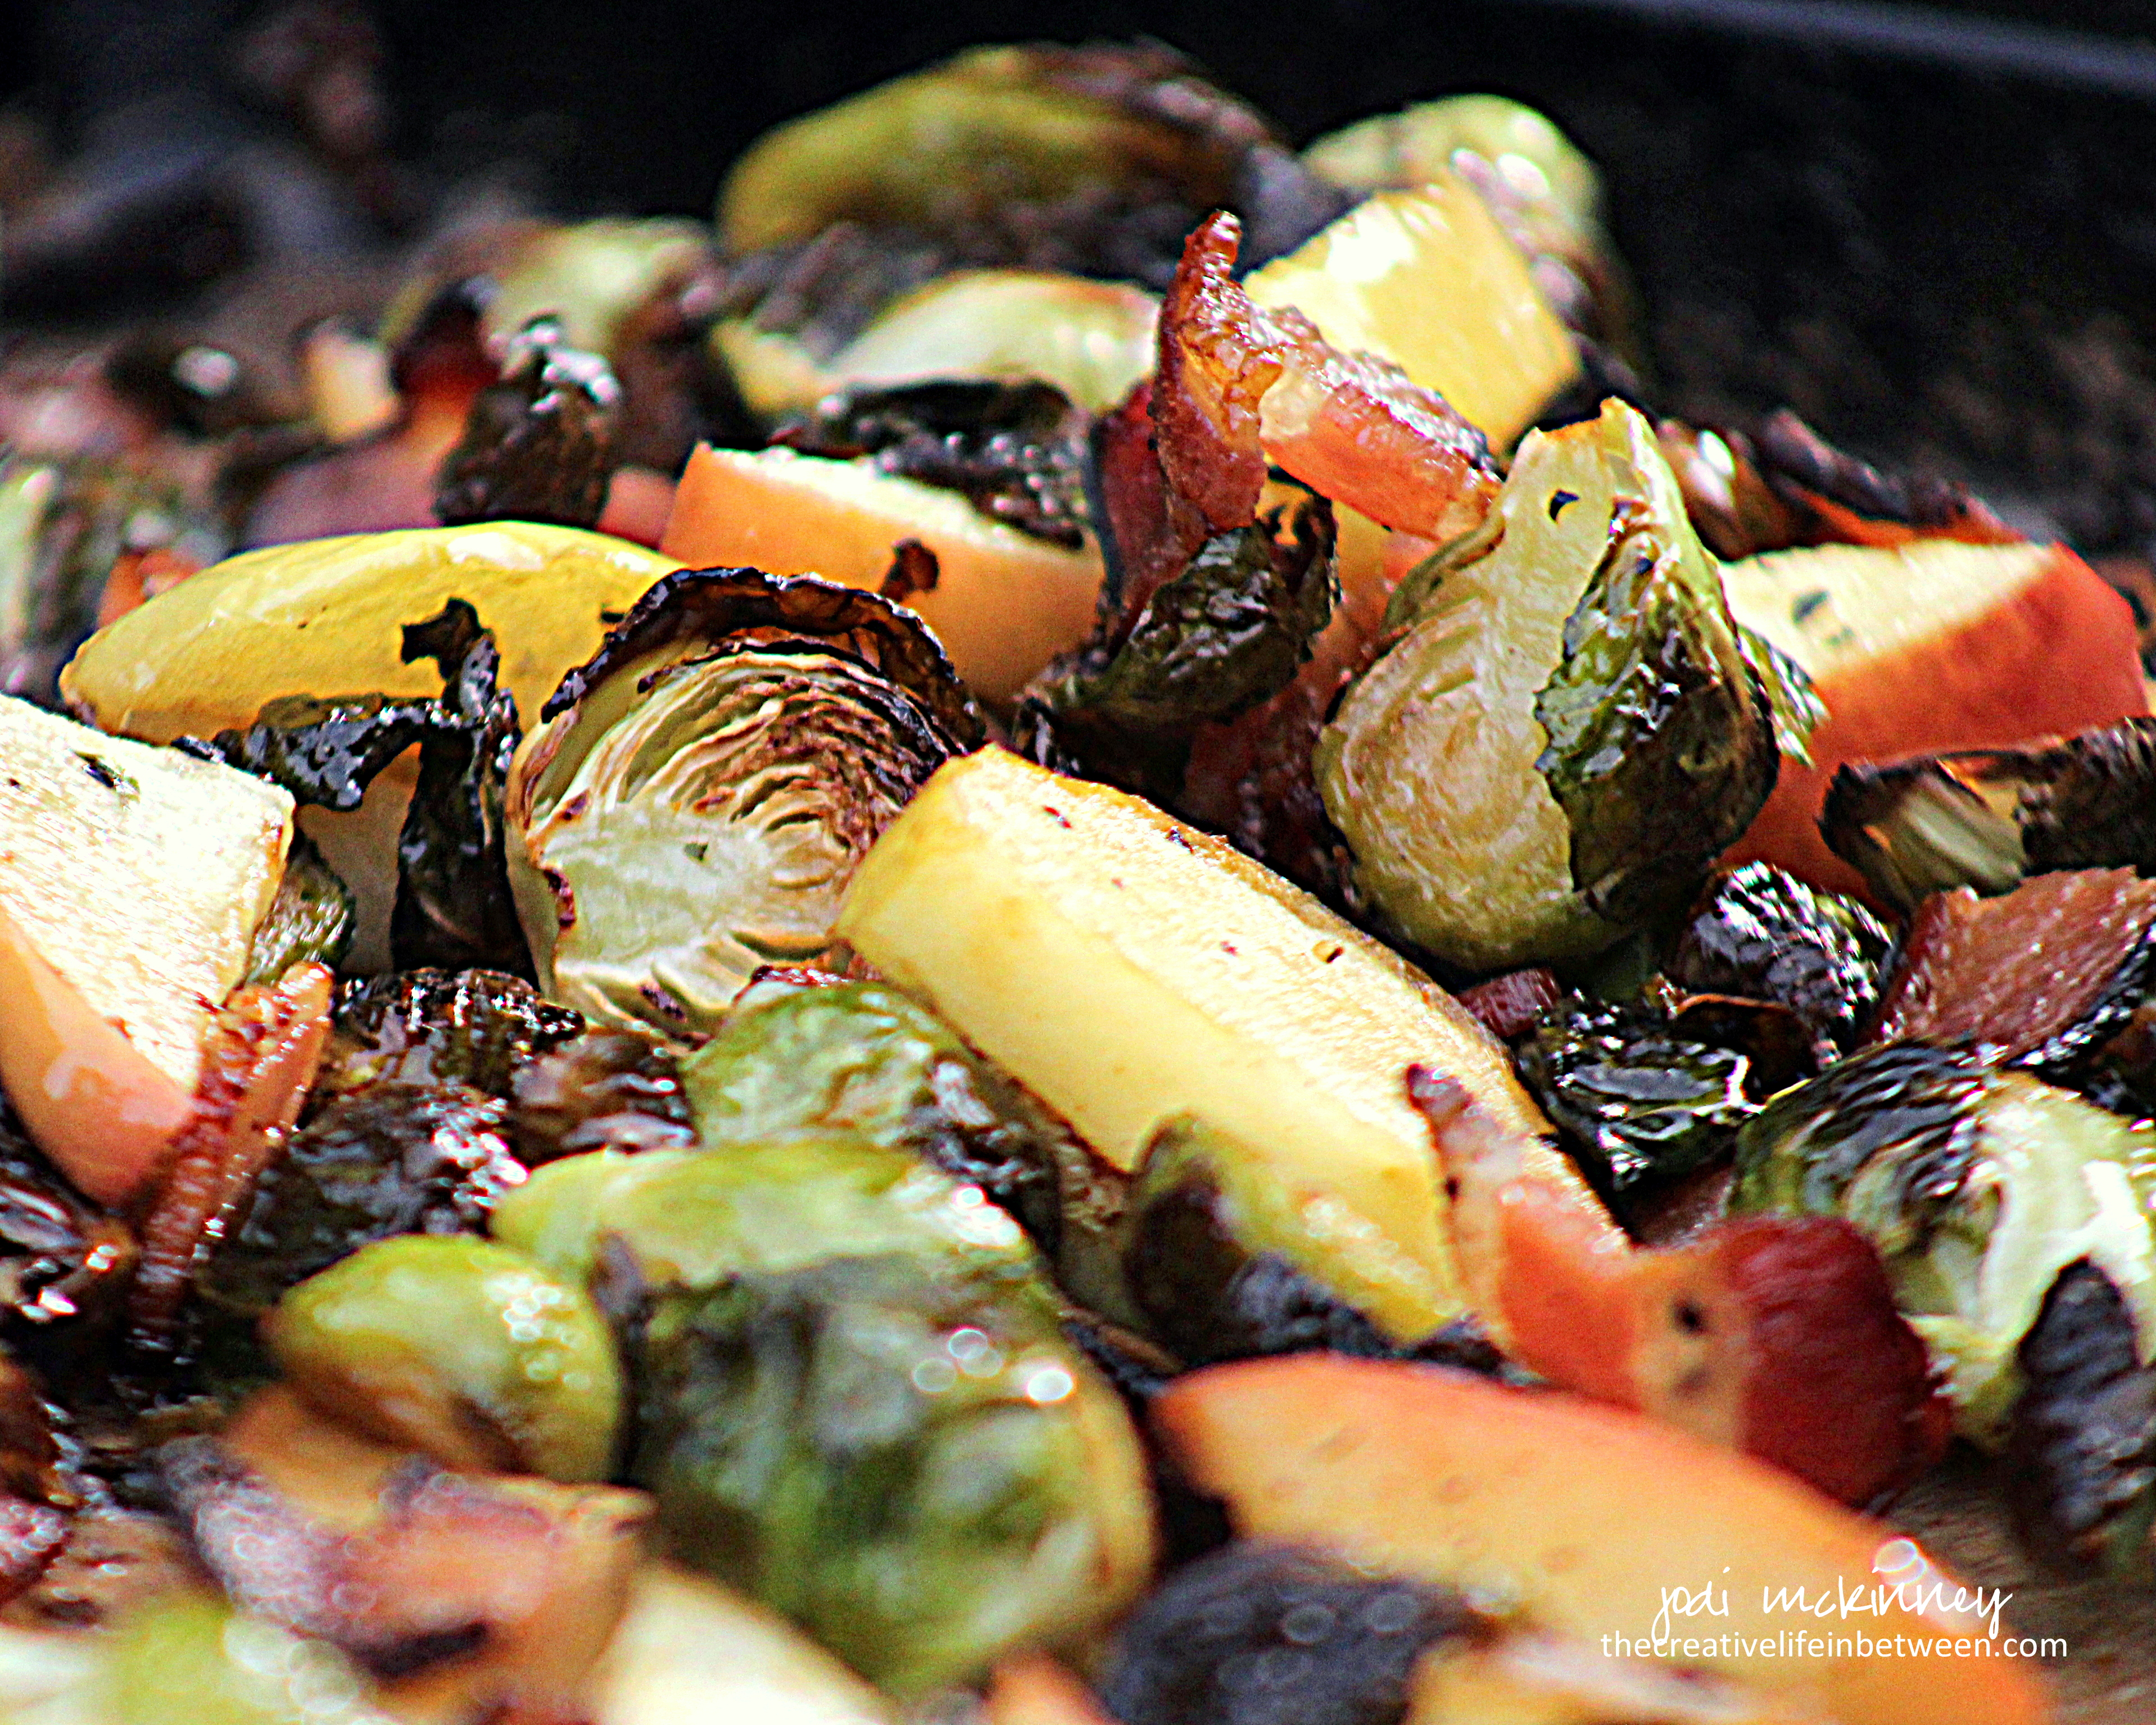
Roasted Brussels Sprouts with Bacon and Apples.

When my friend, Janet shared a recipe yesterday on Facebook for Roasted Brussels Sprouts with Bacon and Apples by Mary from BarefeetintheKitchen, I knew I was making this for dinner last night.

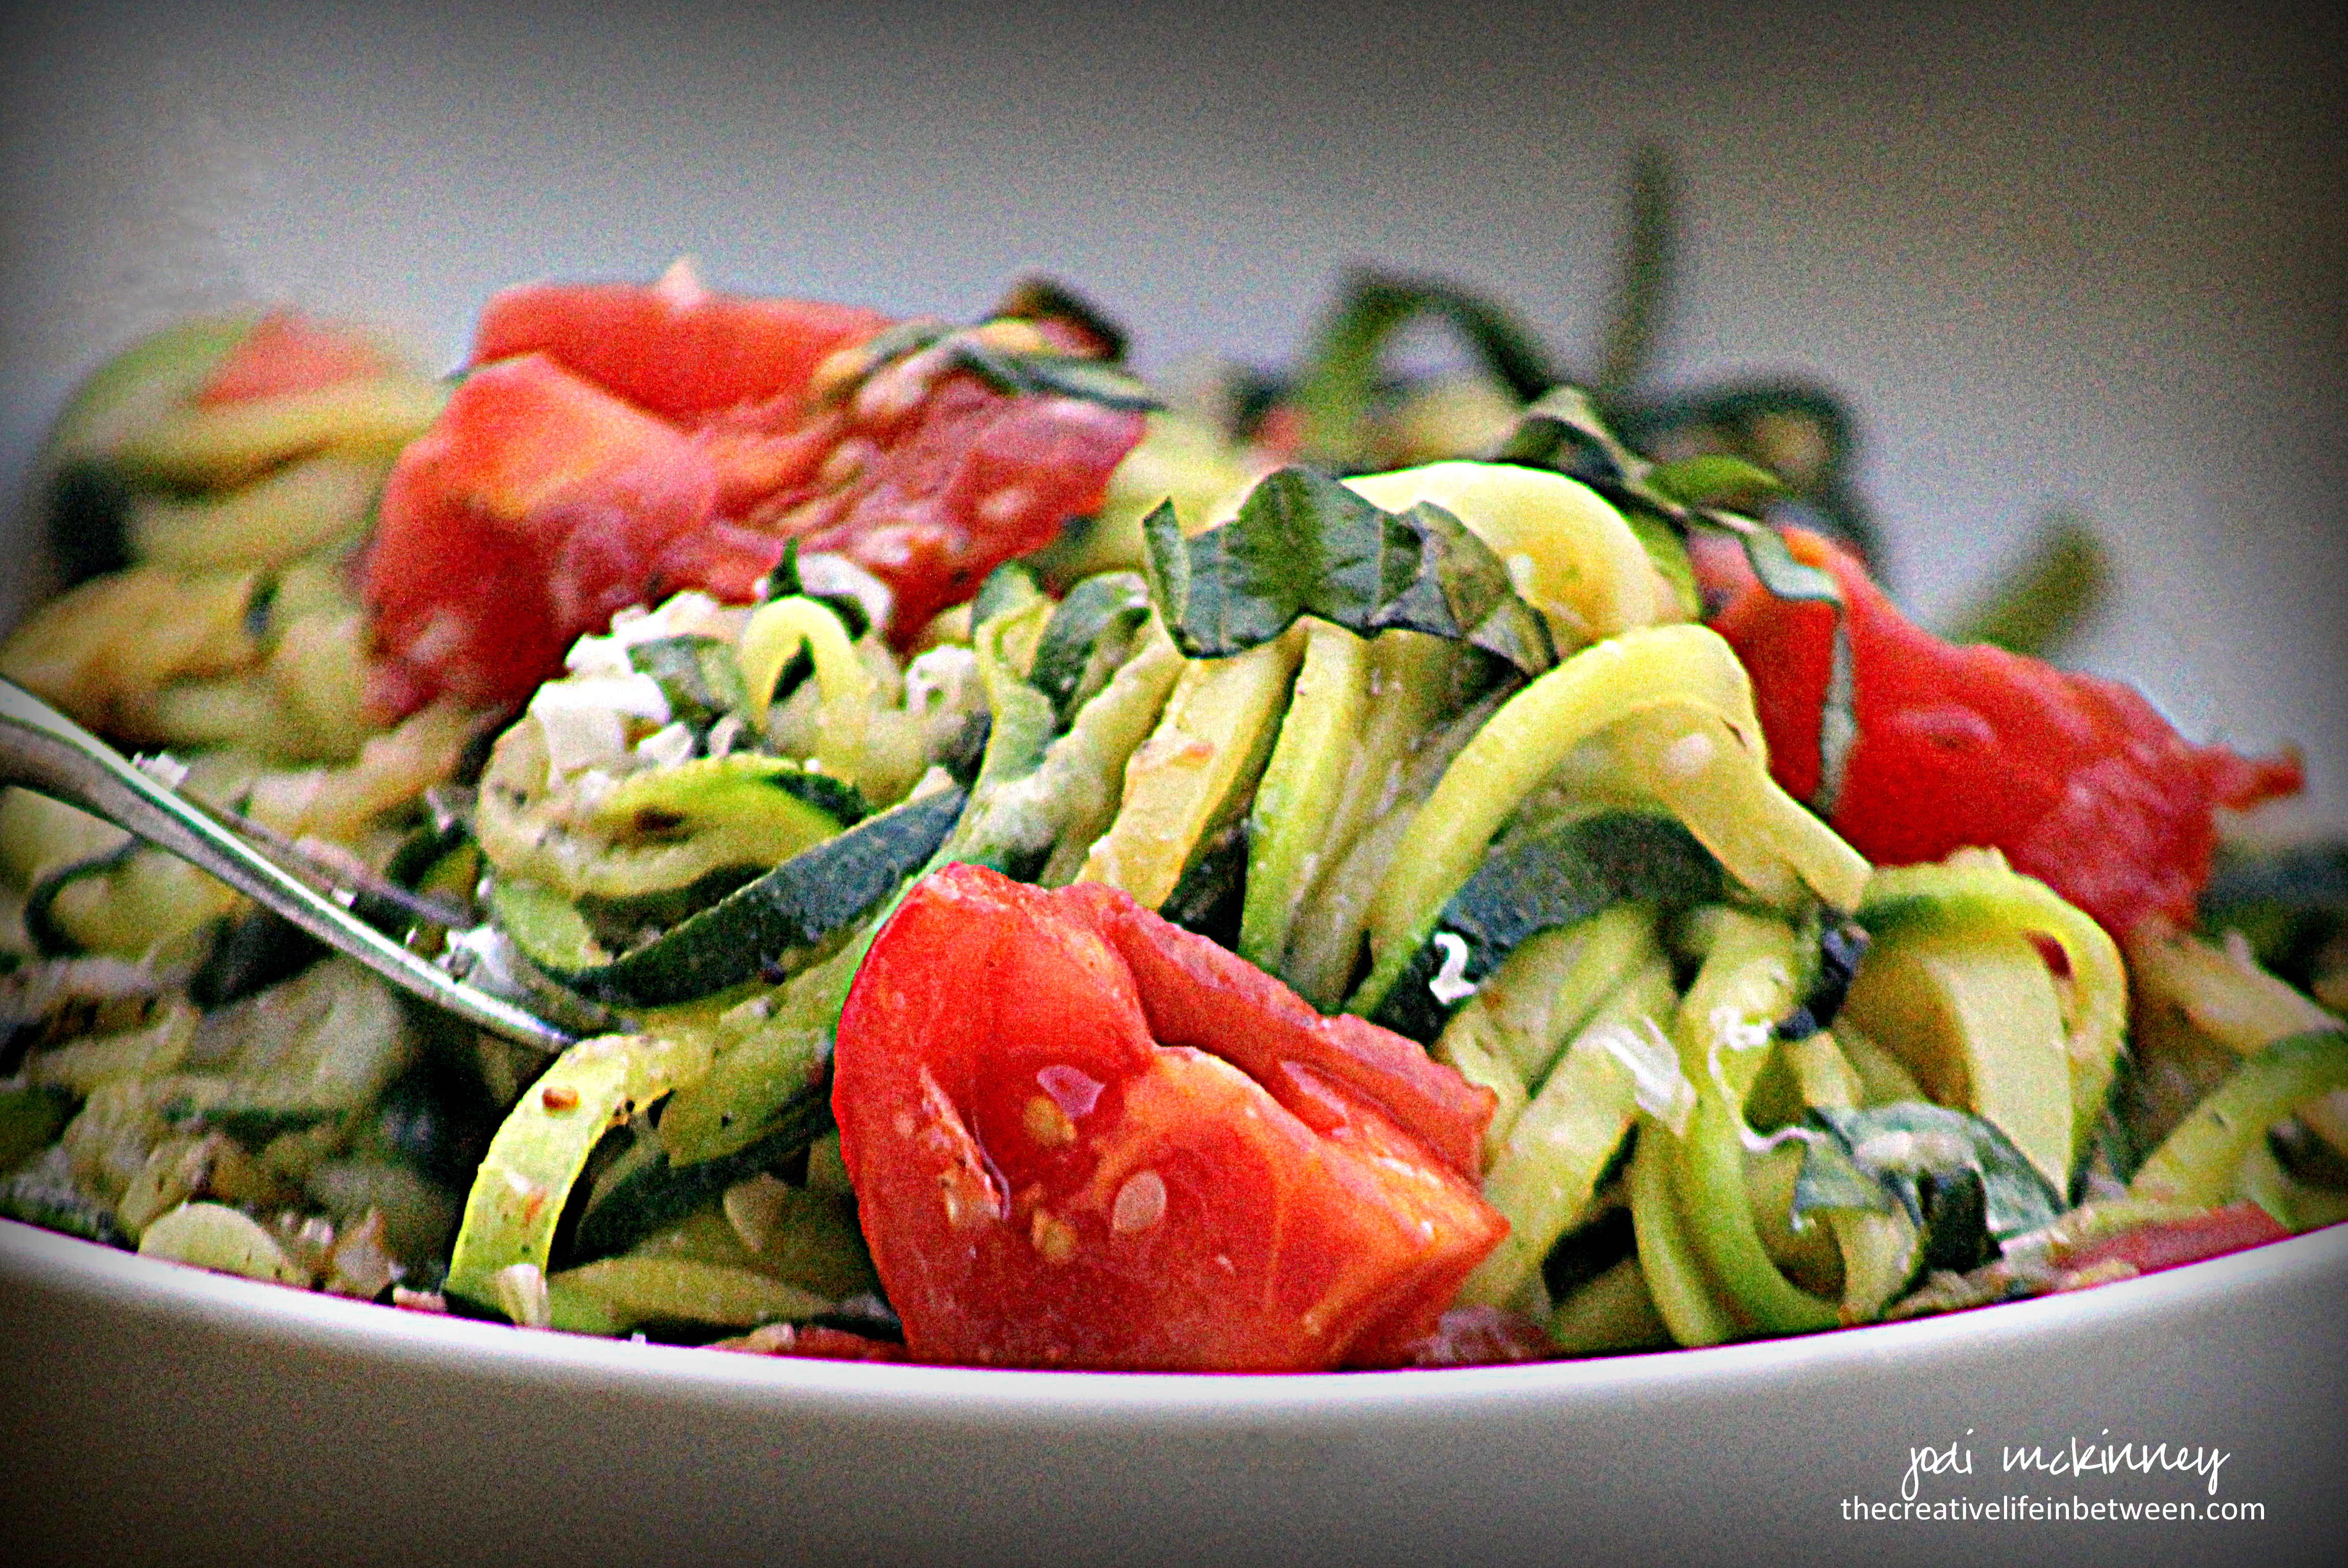
I had just bought some fresh tiny, tender brussels sprouts, and I had bacon in the freezer and apples in the crisper.

And oh am I glad I tried this!  It was absolutely amazing!  A veggie side dish easy enough for an every night dinner as well as being delicious and “special” enough to serve to guests for a special occasion is perfection in my book!

Here is how I made it!  Please let me know if you try and how you like it.

Roasted Brussels Sprouts with Bacon and Apples

Ingredients:

  • 6 slices bacon, cut into 1 inch pieces
  • 1 lb fresh Brussels sprouts, trimmed and cut in half
  • 1 apple, cut into bite-sized pieces
  • Salt and Pepper
  • 1 Tbsp. Red Wine Vinegar

Directions:

Preheat oven to 400 degrees F.

Place bacon in a single layer on stoneware baking pan or shallow baking sheet.  Roast 10 minutes.   Remove bacon from pan and set aside.

Place Brussels sprouts in pan and toss thoroughly in bacon drippings.  Sprinkle generously with salt and pepper.  Roast for 10 minutes.

Remove pan from oven, and add apple pieces and bacon to Brussels sprouts in pan.  Toss to incorporate.  Roast an additional 10 minutes or until Brussels are browned and apples become tender.

Remove from oven, and sprinkle red wine vinegar on top of all.  Toss, and serve immediately.

Enjoy!

Cheers & Hugs,
Jodi


Honey Garlic Roasted Carrots

Honey Garlic Roasted Carrots.

Are you looking for a quick, easy, beautiful, AND delicious vegetable to prepare for an any-night dinner that is fit for company too?

These beautiful, colorful carrots are just the ticket.  They are as delicious and nutritious as they are beautiful.

Grab a bag of carrots and roast them up.

I hope you love them as much as we did!

Honey Garlic Roasted Carrots

Ingredients:

Directions:

Preheat oven to 400 degrees F.

Peel and cut carrots.  Place in shallow baking stone or pan.  Drizzle with olive oil.  Sprinkle with salt and pepper.  Drizzle with honey.  Top with rosemary and garlic.

Toss gently and roast for 20-30 minutes, stirring every 10 minutes.

Enjoy!

Cheers & Hugs,
Jodi

Blueberry Streusel Coffee Cake

Blueberry Streusel Coffee Cake.

What is a girl to do when a bestie friend comes home after a long time away?!

Well…. run over and visit and hug as soon as possible!  Right?!

But you can’t go empty handed!

So – what to bake to take?  I needed something quick, but yummy, that my sweet friend Janet and her Mom and Dad would enjoy…

I had some amazing fresh blueberries in the fridge I had recently bought at a local farm market, so I decided to make a blueberry cake.

And OH was it yummy!  (I know because I kept half for hubby and me and took half to them.  She is that kind of friend!  The best kind – that you can take half a cake to – LOL!)

I arrived just in time to serve it to them for dessert!

Oh the joy of friendship!  Oh the joy of baking and sharing!

Make this for yourself!  Make this to give away!  But make this amazing Blueberry Streusel Coffee Cake today!  (oh dear – am I still rhyming?! )

Welcome home sweet Janet!  Looking forward to our time together.

Here is the recipe I made as I adapted from LifeLoveandSugar:

Blueberry Streusel Coffee Cake

Ingredients:

Streusel:

  • 3/4 cup flour
  • 3/4 cup packed brown sugar
  • 1 tsp. cinnamon
  • 6 Tbsp. salted butter, melted

Cake:

  • 1/2 cup white sugar
  • 6 Tbsp. salted butter, room temperature
  • 1/4 cup sour cream (light sour cream works fine)
  • 1/4 cup milk (I used Skim)
  • 1 large egg
  • 1 1/2 tsp. vanilla
  • 1 1/2 tsp. baking powder
  • 1 cup all-purpose flour
  • 2 cups fresh blueberries

Glaze:

  • 1/2 cup powdered sugar
  • 1 Tbsp. milk

Directions:

Preheat oven to 350 degrees F.

Prepare an 8-9 inch cake pan by greasing bottom and sides with shortening and then placing a circle of parchment paper in the bottom.

Prepare streusel by combining ingredients in a medium bowl with a fork.  Set aside.

Prepare cake batter by beating sugar and butter in electric mixer for 3-4 minutes until light and fluffy.  Add sour cream and milk  until well incorporated.  Add egg and vanilla.  Finally, add baking powder, then flour just until thoroughly combined.

Spread half of the batter in prepared pan.  Top with half of the streusel mixture, then  3/4 cup blueberries.  Repeat batter, streusel, then 1 cup blueberries.

Bake for approximately 35 minutes or until toothpick inserted comes out clean.

Cool in pan for 20 minutes, then remove from pan.

Prepare glaze by  by combining powdered sugar and milk until a glaze consistency is achieved.  Add more powdered sugar or milk as needed.

Drizzle cooled cake with glaze, and top with remaining 1/4 cup fresh blueberries.

Serve warm or cold – plain or with a scoop of ice cream or whipped cream!

Enjoy!

Cheers & Hugs,
Jodi


Easy Grilled Sweet Corn on the Cob

Easy Grilled Sweet Corn on the Cob.

It is Fresh Sweet Corn on the Cob Season in our part of the world!

Corn is a vegetable we rarely eat – except in the heat of summer when it is fresh and sweet and bought the same day it was picked from a local farm stand.

After being in Arizona for a week recently, where it seemed everything we ordered had grilled or roasted corn in it (even a delicious deconstructed Caesar Salad), I had corn on the brain.

We had always boiled our sweet corn on the cob, but I fell in love with the magically charred kernels we experienced on our Southwest trip, so we decided to grill it this time.

O.M.G!  We LOVED it!  Oh how easy!  Keep the heat outside by using the grill.  And save clean up time with no pots of boiling hot water.

When I buy corn on the cob, even though is only the two of us now, I buy a full dozen.  We usually only eat about half of it, so we cut the rest off the cob and either freeze it in Ziploc bags for a fresh corn treat in the winter or save it for using in other recipes or reheating another day that week.

Here is how we did it.  Quick, easy, and oh so delicious!

By the way – I think the mistake many people make with corn on the cob is OVERcooking it.  Sweet corn on the cob truly tastes its best when you just cook it long enough to heat, but retain its wonderful sweetness, crunch and flavor.  Also, don’t look for the biggest ears of corn.  They could likely be tough.  Look for smaller, young, tender ears, and buy them from the farm or farm market – not the grocery store, where it could be several days old.  There is nothing like eating corn the day it is picked!

Roll it in some butter and sprinkle with salt and pepper for even more yumminess, but when you get fresh, sweet, seasonal corn, it barely needs anything else!

Here is how we made it.

Easy Grilled Sweet Corn on the Cob

Ingredients:

  • 1 dozen fresh ears of corn on the cob

Directions:

Heat grill to approximately 450 degrees F.

Husk corn, and clean of the silks as best you can.  Rinse under cold water.

Place cleaned ears of corn directly on grill for 5 minutes.  Turn and grill for another 5 minutes.

Serve immediately with sweet butter, salt, and pepper.

Enjoy!

Cheers & Hugs,
Jodi


Homemade Old-Fashioned Glazed Donuts

Homemade Old-Fashioned Glazed Donuts!

Seriously…….
could anything be more decadently delish?!

A tender ring of fried sweet dough
drenched in a glorious glaze?

I couldn’t resist making these,
and they did not disappoint.

Every once in a great while,
I allow myself to be treated to a donut….
a wickedly wonderful waste of calories.

But since it is only Hubby and me at home,
a dozen donuts AND holes
are way too much sugary goodness!

So after enjoying one each
(and a few holes – which are completely calorie free  – right?)
I shared the rest.

That really is my joy in baking…
giving it away.

Hopefully creating a brief smile…
a tiny treat or surprise for a loved one or friend.

These are soooooo worth making!
They are easy and quick to make.

I hope you will treat yourself and those you love!

Homemade Old-Fashioned Glazed Donuts

Ingredients:

  • 2 1/4 cup  cake flour  (no cake flour?  no problem!  make it easily by the cupful – take one level cup of all-purpose flour, remove two tablespoons, and then add two tablespoons of cornstarch back in)
  • 1 1/2 tsp. baking powder
  • 1 tsp. salt
  • 1/2 tsp. ground nutmeg
  • 1/2 cup  sugar
  • 2 Tbsp. butter, room temperature
  • 2 large egg yolks
  • 1/2 cup  sour cream or Greek yogurt
  • Canola oil, for frying

For the glaze:

  • 3 1/2 cup  powdered sugar
  • 1 1/2 tsp. corn syrup
  • 1/4 tsp. salt
  • 1/2 tsp. vanilla extract
  • 1/3 cup hot water

Directions:

In a bowl, combine flour, baking powder, salt, and nutmeg.

In the bowl of a stand mixer, beat butter and sugar together until sandy. Add egg yolks, and mix until light and thick. Add dry ingredients to the mixing bowl in 3 additions, alternating with the sour cream, ending with the flour.  Cover with plastic wrap and chill for 1 hour.

On a floured surface, roll dough out to about 1/2 inch thickness. Use a donut cutter to cut out approximately 12 donuts and holes.

Pour 2 inches of canola oil into a heavy bottomed pot with a thermometer attached. Heat to 325°F.  Fry donuts a few at a time, being careful not to overcrowd the pot. Fry on each side about 2 minutes, being careful not to let them burn. Let drain on a paper bag to soak up the excess grease.

For the glaze:

Mix all ingredients in a bowl with a whisk until smooth.  Dip each donut into the glaze. Place on a wire rack above a sheet of waxed paper to catch any excess glaze. Let sit for 20 minutes until glaze is set.

Best served the day they are made, but may be stored in an air tight container at room temperature for a few days.

Cheers & Sugary Sweet Hugs,
Jodi

Recipe found at:  Huffington Post’s “The Greatest Homemade Doughnut Recipes You’ll Ever Find.


Roasted Potatoes and Fennel

Roasted Potatoes and Fennel

Recipes like this one I am sharing today are ones where I really wish I had the ability to share “smell-a-blogavision!”

The amazing aroma that filled my kitchen and nose when I roasted this fennel and potato recipe is too divine for words.  Seriously!

So after the euphoria of the fragrance faded, and I began typing this post, I was trying to find a word worthy to describe it.  It was THAT amazing!

In my “research,” I found that fennel is actually used as an essential oil and  in aromatherapy.  Well…. there you have it!  I was not kidding about how awesome it smelled!  Apparently, sweet fennel essential oil helps nourish and restore an optimal mind and outlook. It is believed to bring strength and courage in the face of adversity.

Have you cooked much with fennel?  Besides smelling like heaven, it has great health benefits too.  It is wonderfully crunchy and sweet when served raw  in salads or silky and succulent when roasted or braised.  It has an interesting licorice-like flavor.

Now… before those of you who are not licorice fans skip over this recipe….. STOP!  You have to give it a try!

When you roast this amazing celery-like root vegetable…. O. M. G!    I don’t have the words for the amazingness.

Mixed with some simple sliced potatoes and seasoning, it makes for a simply glorious addition or highlight to your dinner.

We had ours with some grilled chicken and a simple cucumber and tomato vinaigrette salad one day last week.

I will be making this again and again.  I adore it!  Hope you do too!

Roasted Potatoes and Fennel

Ingredients:

  • 4-6 small/medium potatoes (I used Yukon golds), sliced into 1/4 inch slices
  • 1 large fennel bulb, cut in half and sliced into 1/4 inch slices
  • 2 Tbsp olive oil
  • Salt and freshly ground pepper to taste
  • 2 Tbsp finely chopped fresh rosemary

Directions:

Preheat oven to 425 degrees F.  Spread sliced potatoes and fennel in an even layer on a stoneware baking dish or baking pan.  Drizzle with the olive oil, and season with salt, pepper and rosemary.  Roast approximately 40 minutes, tossing 2-3 times during roasting, until golden brown and tender.

Enjoy!

Cheers & Hugs,
Jodi

Roasted Brussels Sprouts & Chicken Salad

Roasted Brussels Sprouts & Chicken Salad.

On warm Summer days, salads are so great for dinner!

And there are so many fresh ingredients available to mix and match.

I had some fresh Brussels Sprouts and thought they might work great in a dinner salad.

They are so delicious roasted simply with olive oil, garlic powder, salt and pepper.

Then all you have to do is add your favorite greens to a bowl and top with some yummy, healthy additions of fruit and nuts and cheese and protein and more veggies.

The grand finale topping is the roasted Brussels sprouts and a drizzle of balsamic vinaigrette.  It is a full meal deal covering all the  bases!

Here’s the recipe for the way I made it, but feel free to mix and match and tweak it up to how you like.   Roasted Brussels sprouts are a great addition to any salad!

Roasted Brussels Sprouts & Chicken Salad

Ingredients:

  • 1 lb. Brussels sprouts
  • 2 Tbsp. olive oil
  • 1 tsp garlic powder
  • Salt & Pepper to taste
  • Chopped Romaine lettuce or your favorite mixed greens
  • 1/4 cup chopped carrots
  • 1/4 cup chopped walnuts (or almonds or pecans)
  • 1/4 cup golden raisins (or dried cranberries or cherries)
  • 1/4 cup shredded Parmesan cheese (or your favorite)
  • 1 grilled chicken breast, sliced
  • Balsamic Vinaigrette Dressing (or your favorite)

Directions:

Preheat oven to 400 degrees F.

Cut stems off Brussels sprouts, then cut into quarters.  In mixing bowl, combine Brussels sprouts, olive oil, garlic powder, salt, and pepper.  Pour into baking pan and roast approximately 25 minutes, stirring occasionally.

In a bowl, add lettuce.  On top of lettuce, add carrots, nuts, raisins, cheese, and chicken.  Top with a half cup of Roasted Brussels sprouts (or as many as you like – leftovers are always delish too!)

Pour dressing on top, then mix.

Enjoy!

Cheers & Hugs,
Jodi2

Creamy Avocado Pasta

Creamy Avocado Pasta.

One day this week, I was in the mood for a creamy pasta with grilled chicken and broccoli.

At first I grabbed a jar of Alfredo sauce from the pantry – thinking hubby would enjoy that – and then I thought…. “Wait!  Isn’t there a healthier way to make a creamy pasta sauce?”

I had a few avocados on hand and wondered how they might work to make a creamy sauce.  After doing a little research on the web, I found this is kind of a “thing,” and I couldn’t wait to try.

I created this recipe by researching and combining ideas from several versions of recipes I found, and I have to admit- it was seriously flippin’ amazing!

Pasta covered in a creamy, dreamy, full flavored but HEALTHY sauce!!  What could be better?!

Goodbye Alfredo sauce.

Goodbye Mac’n Cheese.

Hello amazingly divine Creamy Avocado Pasta Sauce!

I steamed some fresh broccoli, and we grilled some marinated chicken breasts.  Putting these on top of a cup of Creamy Avocado Pasta made for a full and satisfying dinner.

You’ve got to try this!  Here’s my recipe.

Creamy Avocado Pasta

Ingredients:

  • 1 lb pasta of your choice
  • 2 ripe avocados
  • 2 cloves garlic, minced
  • 1/4 cup chopped fresh basil
  • 1/4 cup chopped fresh cilantro
  • 1 large or 2 small limes, juiced
  • 1/4 cup olive oil
  • 1/2 cup Greek yogurt or light sour cream
  • 1/2 tsp salt
  • 1 tsp freshly ground pepper

Directions:

Cook pasta in boiling salted water to al dente.  Reserve 1 cup pasta water, then drain and set pasta aside.

Cut avocados in half, remove the pit, and scoop out out the green flesh from the skin with a spoon.  Discard skin.  Put avocado in blender or food processor.  Add minced garlic, chopped fresh basil and cilantro, lime juice, olive oil, Greek yogurt or light sour cream, olive oil, salt and pepper, and 1/2 cup pasta water.  Blend/puree into a creamy sauce.  Add more pasta water as needed for desired consistency.

Toss with warm pasta, and serve immediately.

You can top with vegetables of your choice like cherry tomatoes and sweet corn, peas, asparagus, broccoli, green onions, pine nuts, or whatever you like.  You can also add a protein if you like – chicken, shrimp, crab meat, lobster, pork.  Sprinkle with a bit of freshly grated Parmesan for a bit of salty, nutty zip.  Or – you can just enjoy as is.  

Can’t wait to hear from those who try and what you think of it!  I’m a total fan!

Cheers & Hugs,
Jodi


Easy Skinny Zucchini Pasta Caprese

Easy Skinny Zucchini Pasta Caprese.

I bought a few zucchini recently itching to use my Spiralizer again, and I created this super easy, wicked fast, uber healthy, gloriously delicious lunch that came together in 10 minutes.   Seriously!

I spiralized two small/medium zucchini to create the “pasta” and tossed them in a skilled with some minced garlic and a dash of red pepper flakes sizzling in olive oil.  After just a few minutes. I tossed in some chopped fresh basil, chopped campari tomatoes, and some grated Parmesan cheese.

After I poured it from the skillet to my bowl, I sprinkled it with some fresh black pepper and flaked sea salt.    That’s it!

And it was absolutely amazing!  You will seriously question if you are eating fresh pasta!   I can’t wait to make it again and again this summer when I am able to pick the fresh produce right from my yard.

Here’s the simple recipe I came up with:

Easy Skinny Zucchini Pasta Caprese

  • Servings: 1 as main course, 2 as side dish
  • Print

Ingredients:

  • 2 small/medium zucchini, spriral sliced
  • 1 Tbsp. olive oil
  • 2 cloves garlic, minced
  • Dash red pepper flakes
  • 3-4 Campari tomatoes, chopped
  • 1/3 cup chopped fresh basil
  • 1/3 cup freshly grated Parmesan cheese
  • Salt & Pepper to taste

Directions:

Spiralize zucchini.

Heat olive oil in stir fry skillet.  Add minced garlic and red pepper flakes.  After about a minute when oil begins to sizzle around garlic, add zucchini.  Cook for 3-4 minutes, tossing every minute or so.  Add chopped tomatoes, basil, and Parmesan.  Cook and toss for about 2 more minutes.

Pour into bowl or on plate.  Sprinkle with salt and pepper to taste.  Serve immediately.

Enjoy!

Cheers & Hugs,
Jodi


Lemon Butter Scallops

Sizzling Lemon Butter Scallops in Skillet

Sizzling Lemon Butter Scallops in Skillet

Lemon Butter Scallops.

If you are looking for a super quick and easy and even more super delicious scallop recipe, I’ve got a winner for you!

I picked up a 12oz bag of “Specially Selected Premium Jumbo Scallops” at Aldi the other day to make something a little different for dinner for hubby and me.

As a quick side note – I am such a super fan of Aldi.  I am a bit late to the game and was really not sure about it at first, but now…. every time I go, I love it more!  I swear it costs half of what I pay at our other local supermarkets. I am always astonished when I walk out with a cart full of food for $100 or so.  And not only is it so greatly priced, but the quality is amazing.  The produce is fresh, the selection is nice, and I feel like I am being environmentally conscientious when I pack my own bags instead of coming home with 20 more plastic bags.

These scallops were absolutely delicious, and if I recall correctly, they were less than $10.  I didn’t realize what a great source of protein they are.  A 4-ounce serving has 19 grams of protein, 100 calories and 1 gram of fat (0 saturated fat).

So here is the way I made them.  (Enough rambling – right??!!) Simple yet delectable.  We had them with some butternut squash risotto (which I also picked up at Aldi) and a fresh green salad.  (And no I am not being paid by Aldi – though I should inquire! wink!)

Lemon Butter Scallops

Ingredients:

  • 12 oz. Jumbo Scallops
  • 2 Tbsp. olive oil
  • 3 garlic cloves, finely minced
  • Salt & pepper
  • 3 Tbsp. butter
  • 1 lemon, juiced
  • 1 Tbsp. freshly minced rosemary

Directions:

Heat 2 Tbsp. olive oil in a 12-inch skillet, add garlic and cook 1 minute.  Add scallops in a single layer to hot oil in skillet.  Sprinkle generously with salt and pepper.  Brown 1-2 minutes and then turn.  Sprinkle with additional salt and pepper.  Add butter and allow to melt.  Add lemon juice, and flip scallops again to coat with lemon, butter, and garlic.  Sprinkle with freshly minced rosemary, and serve immediately.

Enjoy!

Cheers & Hugs,
Jodi