Roasted Yukon Gold Potatoes with Garlic & Rosemary

roasted-rosemary-and-garlic-yukon-gold-potatoes

There aren’t many meals potatoes don’t go wonderfully with in my opinion.  I do love potatoes no matter what way they are prepared.

roasted-rosemary-and-garlic-yukon-gold-potatoes-2

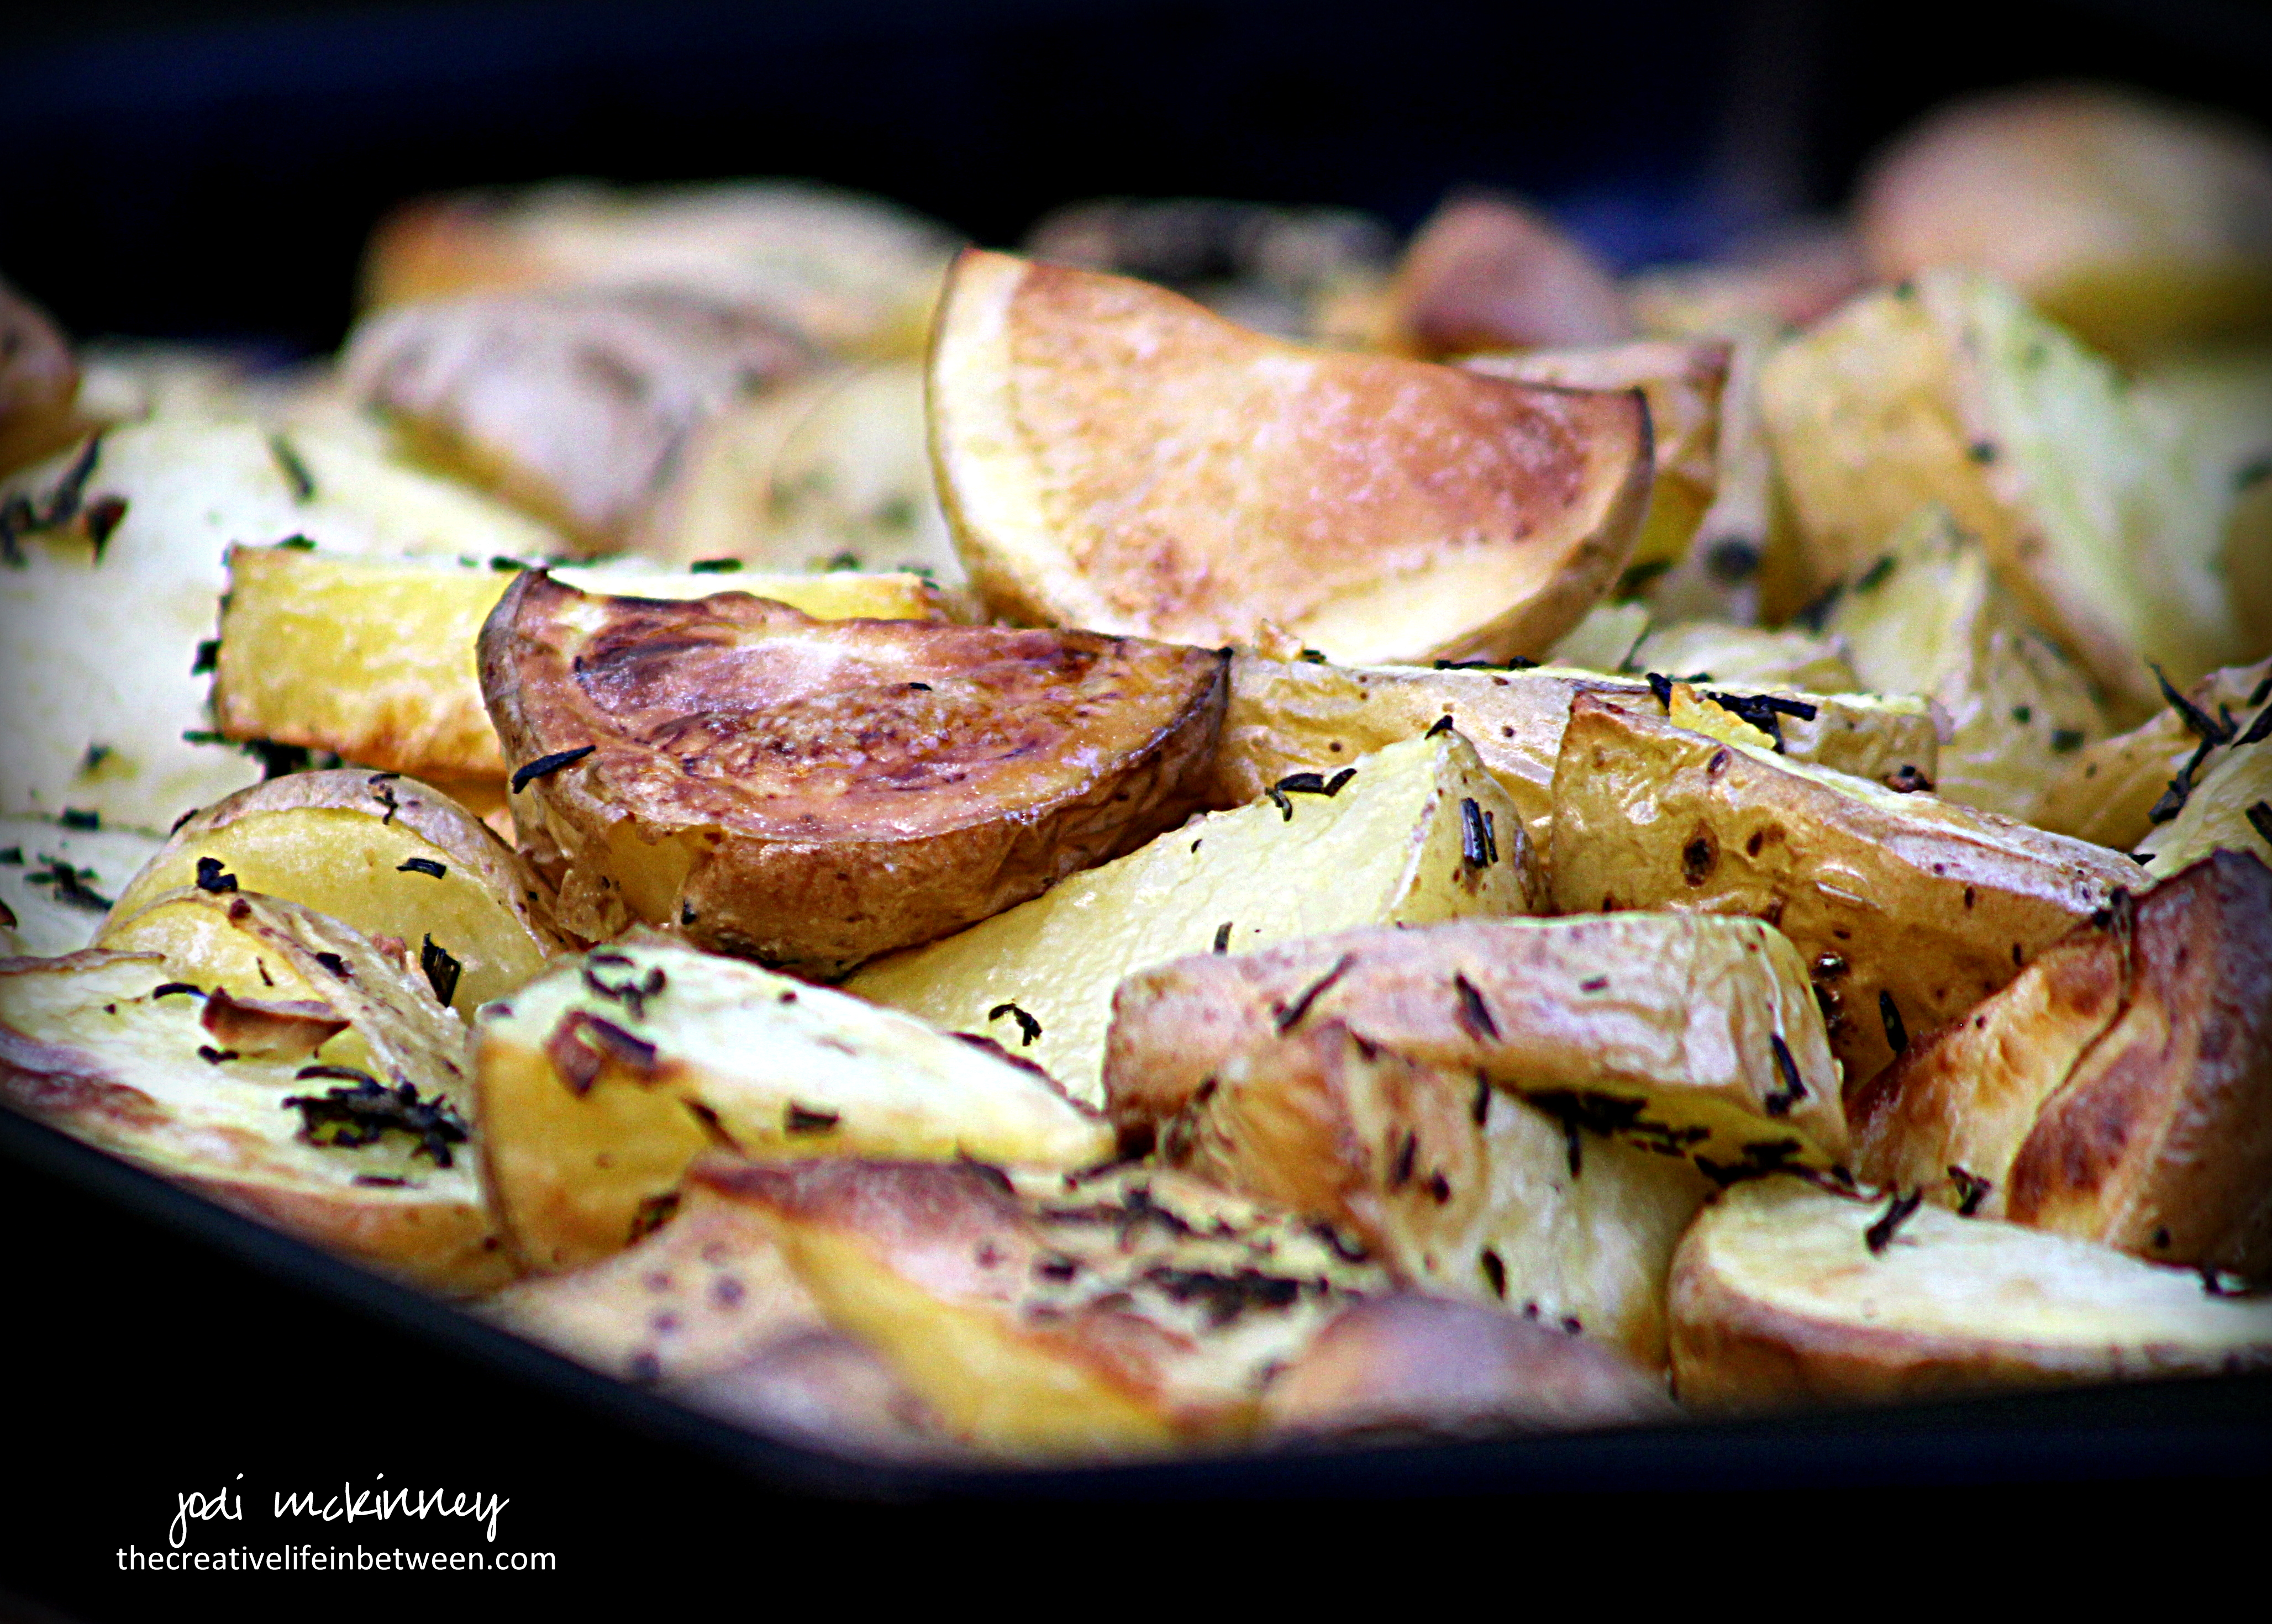
One of my favorite ways to make them is to roast them.  Add some garlic, fresh rosemary, a dash of salt, and a drizzle of olive oil, and I’m pretty much in heaven.

roasted-rosemary-and-garlic-yukon-gold-potatoes-3

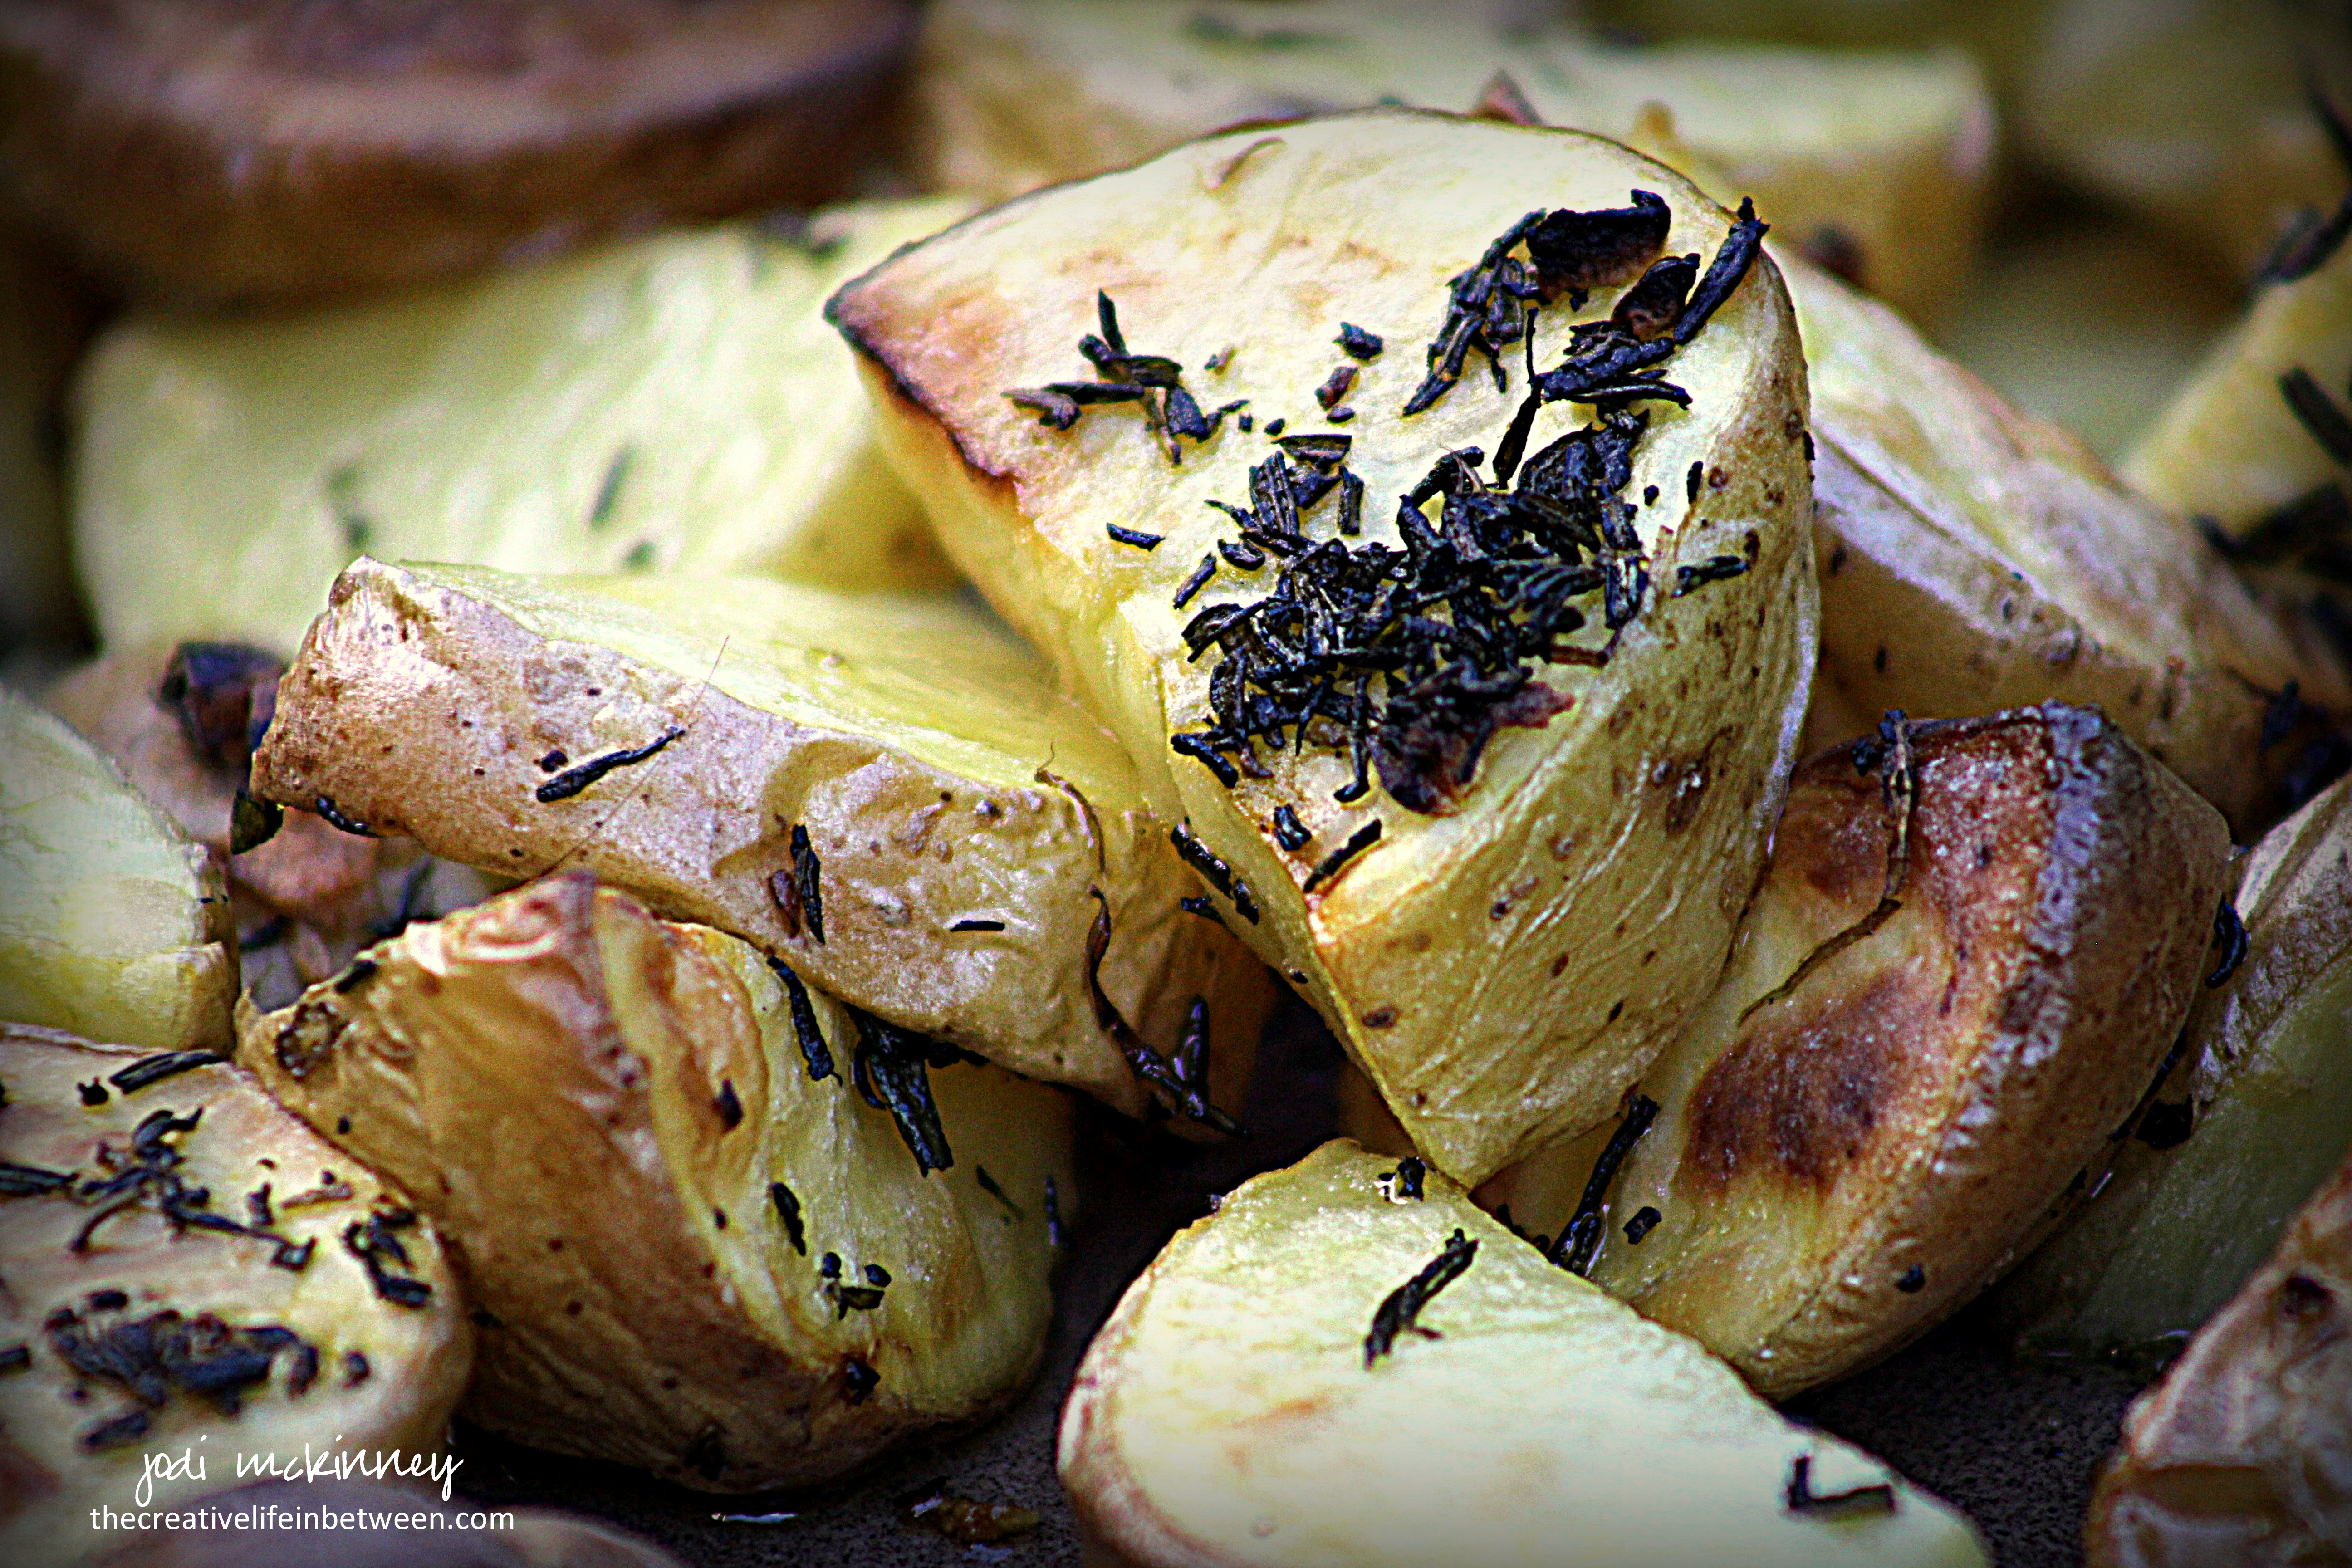
And Yukon Golds have become one of my favorite varieties to roast.  They crisp up beautifully on the outside and remain tender and flavorful on the inside.

This recipe is simple, but so delicious and complimentary to most any meal.  They go great with chicken, beef, pork, and even eggs (and are great reheated for breakfast “home fries”).  Sprinkle some cheese on top if you like – parmesan, cheddar, swiss,  or muenster.  Dunk them in ketchup or barbecue or hot sauce.  Dip them in ranch dressing or honey mustard.  Or just enjoy them plain.

Here is how I make them.  Hope you will give them a try.

Roasted Yukon Gold Potatoes with Garlic & Rosemary

Ingredients:roasted-rosemary-and-garlic-yukon-gold-potatoes-2

  • 6 medium Yukon Gold Potatoes
  • 3 large cloves garlic, minced
  • 3 Tbsp minced fresh rosemary
  • 3 Tbsp olive oil
  • 1 tsp salt

Directions:

Preheat oven to 450 degrees F.

Wash and cut potatoes (leaving skin on) into bite-sized chunks.

Spread potatoes evenly in single layer onto a baking stone with sides (stoneware bar pan) or aluminum jelly roll sized pan.  Drizzle with half of the olive oil.  Sprinkle with minced garlic, minced rosemary, and salt.  Drizzle remaining olive oil over top.

Roast for 20-30 minutes until golden brown – tossing with a spatula halfway through cooking time.  Serve immediately.  

Enjoy!

Cheers & Hugs,
Jodi

Chunky Homemade Granola

Chunky Homemade Granola 0

I was itching to get back in the kitchen and make something after almost a week away.

Chunky Homemade Granola 1

And after a week of indulging, I thought I’d make something a bit healthy, but yummy to have on hand for the coming week.

chunky homemade granola 3

Homemade granola it was, and oh how yummy too!  Made with healthy ingredients like oats and nuts and dried fruits and held together with raw local honey and coconut oil, this recipe is delish just as is, but also delicious as a cereal with some extra fresh fruit like blueberries,

chunky homemade granola 4

or on top of Greek yogurt with some fresh fruit like blackberries!

chunky homemade granola 5

It also makes a lovely hostess or nice “thinking of you” gift in a clear bag with a pretty bow.

chunky homemade granola 2

It’s as simple as mixing everything together, packing it into a baking sheet, and baking.

Hope you’ll give it a try.  Enjoy!

Chunky Homemade Granola

  • Servings: a large batch!
  • Print

Ingredients:Chunky Homemade Granola 0

  • 1/3 cup raw local honey
  • 1/4 cup pure maple syrup
  • 2 Tbsp brown sugar
  • 4 tsp pure vanilla extract
  • 1/2 tsp salt
  • 1/2 cup coconut oil
  • 5 cups old-fashioned rolled oats
  • 1 cup walnuts, chopped
  • 1 cup raw cashews or almonds, chopped (I used cashews)
  • 1 1/2 cups dried fruit of your choice
    • I used:
      • 1/2 cup dried cranberries
      • 1/2 cup dried blueberries
      • 1/2 cup dried tart cherries
    • You could also use:  raisins, dates, apricots, goji berries, coconut, or any other dried fruit you like

Directions:

Preheat oven to 325 degrees F.

Whisk honey, maple syrup, brown sugar, vanilla, salt, and oil in a large bowl.

Add the oats and nuts, and stir until well coated and incorporated.  Add dried fruit and combine well.

Pour and spread mixture evenly onto a jelly roll sized  baking stone or parchment-lined baking sheet and pack down to compress.

Bake for 30 minutes until lightly browned.  Cool at least one hour in pan.

Break into pieces of your desired size, and store in airtight container.

Cheers & Hugs,
Jodi

*recipe adapted from Foolproofliving

Lemon Butter Chicken

Lemon Butter Chicken 2

We found yet another way to make an easy and oh so delicious chicken dinner this past week.  My son, Nick, actually made this from a recipe he found and we adapted slightly.

lemon butter chicken

He’s been practicing cooking more, and is getting really good (at breakfast and chicken at least!).

He will soon be moving out, and I am trying very hard not to be sad.  I am trying to focus on the fact that we have done a great job in raising our boys to be independent, competent men who have found wonderful partners to share their lives with.

Both of my boys know how to cook and are very handy.  They are smart and kind and generous.  (I’m not partial at all – right?!)   They both have found amazing women who are just right for them, and who we love dearly.

I digress….

Back to the point….   Chicken!

Here is another Winner Winner Chicken Dinner we hope you will try.

Lemon Butter Chicken

Ingredients:Lemon Butter Chicken 2

  • 2 lbs boneless skinless chicken breasts and/or thighs
  • 1 stick butter
  • 4-6 cloves garlic, finely minced
  • Juice of 3 lemons
  • Zest of 1 lemon
  • 1/2 cup Half and Half, Milk, or Cream
  • 1 pt cherry tomatoes, halved
  • 1/4 cup fresh basil, chopped
  • Salt & Lemon Pepper to taste
  • 2-3 Tbsp olive oil
  • Cooked Rice to serve with it (I love Jasmine)

Directions:

Season chicken with salt and lemon pepper.  Heat olive oil in large skillet.  Add chicken and sear until golden and cooked through, about 5-7 mins. per side depending on thickness.  Transfer chicken to a plate and make the sauce.

Add butter to pan drippings and let melt.  Add garlic and stir until fragrant, about 1 minute.  Add lemon juice and zest and half and half.  Bring to a simmer.  Add cherry tomatoes and basil.  Simmer until thick, about 5 minutes.  Add chicken back to sauce and coat.   Serve over rice.

Enjoy!
I’m sure we will be making this one again.

Cheers & Hugs,
Jodi

Summer Vegetable Tart

Summer Vegetable Tart Baked

My sweet friend Janet found a recipe for this amazing summer vegetable tart, and I told her she had to come over so we could make it together and enjoy.

And that we did one evening this week.

Besides being so great to see her and spend time in the kitchen slicing and chopping and chatting….

O. M. G. –  this turned out so delish!

Summer Vegetable Tart Before Baked

With summer coming to an end and the abundance of zucchini and red-ripe tomatoes and eggplant and squash, this recipe is a must-do for a hot August evening dinner or Sunday lunch or brunch – or anytime really!

Summer Vegetable Tart Before Baked with Cheese

Anything smothered with Parmegiano Regianno is a winner in my book, but this savory summer vegetable tart is seriously a new favorite.  Dare I admit I had 4 pieces?!

I think you are going to want to try this, so here is the recipe.

Summer Vegetable Tart

Ingredients:Summer Vegetable Tart Baked

  • 1 medium zucchini squash, thinly sliced
  • 1 medium yellow squash, thinly sliced
  • 1 medium eggplant, thinly sliced
  • 2 large tomatoes, thinly sliced
  • 1 sheet frozen puff pastry, thawed (or pie crust or crescent rolls)
  • 1/4 cup tomato or pizza sauce
  • 1 cup freshly grated Parmegiano Reggiano Parmesan cheese
  • Olive Oil
  • Salt

Directions:

Preheat oven to 400 degrees F.  Roll out puff pastry or pie crust or crescent rolls on a baking stone or cookie sheet to rectangle or circle to form “pizza” tart crust.

Thinly slice vegetables with mandolin or sharp knife.  Lay out on parchment paper or paper towel.  Sprinkle with salt, and let set for 15 minutes.  Pat dry with paper towel to absorb excess moisture.

Spread tomato sauce on pastry.  Layer with vegetables.  Drizzle with olive oil.  Top with Parmesan cheese.

Bake for 30-40 minutes until crust is golden brown, vegetables are tender, and cheese is melted and browned.  Let set for 5-10 minutes, cut, serve, and enjoy!

Happy Eating!

Cheers & Hugs,
Jodi

Creamy Cauliflower Risotto and Garlic Rosemary Lamb Chops

Creamy Cauliflower Rissoto and Lamb Chops

Last Sunday, I was in the mood to be creative in the kitchen, so I decided to tackle the rack of lamp chops I recently purchased and do something interesting with a head of cauliflower I had.

For the lamb chops, I rubbed them with a simple mixture of fresh rosemary, garlic, salt and pepper and marinated them for 4 hours in the fridge.  When we were ready to eat, I simply pan seared them about 2 minutes on each side in a hot skillet with olive oil.  They turned out amazing!

lamb chops and creamy cauliflower risotto

Here is the recipe for the Creamy Cauliflower Risotto.  I have to say… I absolutely LOVED it!  A little more work than simply roasting cauliflower or mashing russet potatoes, but if you have the time and the inclination, it is SOOOO worth it!

Add some fresh greens, and you have a meal fit for royalty!

Hope you will give this a creative cauliflower recipe a try!  You won’t be sorry.

Creamy Cauliflower Risotto

  • 1 head cauliflower, cut into florets
  • 3 Tbsp. olive oil
  • 1 large onion, chopped
  • 1/2 cup chopped sweet red, yellow, and/or orange peppers
  • 4 cloves garlic, minced
  • 1/3 cup white wine
  • 1 cup chicken stock
  • 4 Tbsp. butter
  • 1 cup freshly grated Parmigiano Reggiano parmesan cheese
  • 1/4 cup Greek yogurt or sour cream
  • Salt and pepper to taste

Directions:

Finely chop cauliflower florets until it reaches approximate size and texture of rice.  (You can use a food processor if you like, but I did not.)  Set aside.

Heat olive oil in a large sauce pan.  Saute onions, peppers and garlic until caramelized.

Add white wine, and cook for 1 minute.  Add cauliflower “rice” and chicken stock.  Cover and cook on medium for about 10 minutes.

Add butter, and continue to cook for another 5 minutes without lid, allowing some of the liquid to evaporate.  Stir occasionally.

Once the cauliflower “rice” has thickened, stir in the Parmigiano Reggiano cheese.  (There really is no substitute for this BEST Parmesan cheese!)  Remove from heat and add Greek yogurt or sour cream and salt and pepper to taste.  Blend with immersion blender to desired creamy consistency.

Enjoy!

Cheers & Hugs,
Jodi

*Recipe slightly adapted from GlutenFreeFix

Friday Night is Pizza Night

pizza 2

Friday night is often pizza night at our house, and although we often order in, sometimes we make our own homemade pizza.  It really is a fun way to get the whole gang engaged in the kitchen, and allows everyone to make their pizza just they way they like it.

pizza 1

This is a great, quick and easy fool-proof recipe for dough that you can top with any toppings you like.  It can be made ahead or right when you are ready to eat.

pizza3

One of my favorites is to spread roasted garlic on the dough, top with fresh mozzarella, fresh basil, and fresh tomatoes.  Sometimes simple is the best.

Other times, we spread with tomato sauce and top with pepperoni, crispy crumbled bacon, sauteed onions and peppers, mushrooms, banana pepper rings, and/or black olives.

The only rule is the cheese MUST be fresh sliced mozzarella – no pre-packaged, shredded cheese allowed.  There simply is no comparison.

What is your favorite pizza topping?

Homemade Quick & Easy Pizza Crust

Ingredients:pizza 1

  • 1 (.25 oz) pkg active dry yeast
  • 1 tsp white sugar
  • 1 cup warm water (approx. 110 degrees F)
  • 2 1/2 cups all purpose flour
  • 3 3/4 tsp. baking powder
  • 3/4 tsp. salt
  • 2 Tbsp olive oil
  • 1 Tbsp corn meal

Directions:

Dissolve yeast and sugar in warm water.  Let stand 10 min.

Stir in flour, baking powder, salt, and oil.  Combine well by kneading until smooth.  Let set for at least 5 min., or up to several hours.

If you have let the dough rise, punch down.  Stretch and toss or roll dough out onto baking stone or pizza dish sprinkled with corn meal.

Spread with desired toppings and bake in preheated 450 degree F oven over for 15 -20 minutes.

Enjoy!

Cheers & Hugs,
Jodi

If you Carrot All…

watercolor carrots

Watercolor Carrots 5×7 Arches 140lb Arches Rough

Today’s painting for #WorldWatercolorMonth is a quick and simple one celebrating the glorious carrot.

It was fun to create the leafy greens by gently rubbing the side of a rigger brush across the rough watercolor paper in random strokes.

Carrots are a beautiful, healthy vegetable that is equally delicious raw and cooked.

For a yummy version of roasted carrots, check out my recipe for Roasted Caramelized Garlic Carrots here.

Cheers & Hugs,
Jodi

Spinach Blueberry Salad & a Blueberry Botanical

blueberry watercolor 5x7 arches 140lb rough prussian blue panes gray green gold

Blueberry watercolor 5×7 arches 140lb rough prussian blue panes gray green gold

For today’s #WorldWatercolorMonth Painting, I present:   Blueberries in Prussian Blue.  This is a “botanical” painting of sorts and possibly one of my more “realistic” paintings.  A bit of a diversion for me.

And while we are on the subject of blueberries – the yummy, nutrient-packed fruit of the gods,  here is a recipe for a spinach salad I made last week with blueberries in it.  DIVINE!

Spinach blueberry salad

I tossed some fresh spinach with blueberries and blue cheese (but you could use feta or goat or any other cheese you like), toasted walnuts, and green onions, and then drizzled with balsamic vinaigrette for a really fresh, yummy salad.

Spinach blueberry salad 2

Some other favorite blueberry recipes I’ve shared in the past you might want to check out are my “almost famous” to-die-for Blueberry White Chocolate Chip Cookies and melt-in-your-mouth  Fresh Peach and Blueberry Streusel Muffins.  Maybe not quite as healthy, but very delish!

ENJOY!

Spinach & Blueberry Salad

Ingredients:

  • 1 lb Spinach
  • 1 pint blueberries
  • 4 green onions, sliced
  • 1 cup toasted and sugared walnuts*
  • 1/2 cup crumbled blue cheese
  • 1/3 cup Balsaimic Vinaigrette

Combine fresh, clean spinach, blueberries, green onions and walnuts and drizzle with balsamic vinaigrette.  Top with crumbled blue cheese and serve immediately.

*Melt 1 Tbsp butter in skillet over medium heat.  Add walnuts, and sprinkle with sugar.  Saute over medium heat for approximately five minutes until sugar has melted and walnuts have browned.  Cool completely.

Cheers & Hugs,
Jodi


Fish Tacos (Burritos)

fish tacos with pineapple blueberry salsa red cabbage and avocado

Piling fresh, healthy ingredients on top of protein-rich fish before wrapping for fish tacos

On Monday, I shared a recipe for Pineapple Blueberry Salsa and told you how I used it to make Fish Tacos for dinner Sunday.

fish tacos with pineapple blueberry salsa red cabbage and avocado 2

They turned out SO DELISH!  And they actually are more like burritos than tacos because we had burrito-sized four tortillas.  You could certainly make them smaller by using smaller tortilla shells and cutting the fish into smaller pieces.

Pineapply Blueberry Salsa 2

I’m still pretty obsessed with the Pineapple Blueberry Salsa, and think it would be great with grilled chicken too.

I decided to lightly bread and pan fry the fish for our fish tacos because that is the way Hubby likes fish best, but you could surely grill the fish too without breading.

It did add a nice crunch and was complemented by the creamy avocado, crunchy red cabbage, and sweet and zippy salsa.

This is a winner winner of a fish dinner.  Hope you’ll give it a try!

Fish Tacos

Ingredients:fish tacos with pineapple blueberry salsa red cabbage and avocado 2

  • 4 5-oz Hake Loins (or cod, haddock or your favorite fish)
  • 1 egg
  • 1/2 cup flour
  • 1/2 tsp salt
  • 1/2 tsp lemon pepper
  • 1 1/2 cup Panko bread crumbs
  • 1/4 cup olive oil
  • 1 cup shredded red cabbage
  • 1 ripe avocado
  • 4 flour tortilla shells
  • 1 cup fresh Pineapple Blueberry Salsa

Directions:

Prepare three shallow bowls with flour, salt and pepper combined in one, egg and 1/4 cup water whisked together in second, and panko bread crumbs in the third.

Heat olive oil in 12 inch skillet over medium-high heat.

While oil is heating up.  Dredge each Hake Loin first in flour, then in egg, and lastly in Panko  bread crumbs.

Pan fry two at a time in hot oil for approximately 2-3 minutes on each side until Panko coating is browned and crispy.

Remove from skillet to paper towel lined plate to absorb any excess oil.

On a flour tortilla, please Hake loin in center.  Top with 2-3 slices of fresh avocado followed by 1/4 cup shredded red cabbage and topped with 1/4 cup Pineapple Blueberry Salsa.

Fold and roll burrito-style.  Slice in half diagonally.  Serve immediately.

Enjoy!

Cheers & Hugs,
Jodi

Pineapple Blueberry Salsa

Pineapply Blueberry Salsa

It was HOT here in Mars this past weekend, so Sunday supper called for something light and fresh.  I rarely make fish as Hubby is a bit skeptical about it, but I had some frozen Hake loin filets in the freezer that needed to be used.

Pineapple Blueberry Salsa on Whole GrainTostitos Scoop

I was still OOGLING the amazing Fish Tacos I had the night before at Breakneck Tavern – O M G – and thought I’d try some type of version at home.

Pineapply Blueberry Salsa 2

So I made this super yummy, bright, fresh, fruity and savory (with just a touch of heat) Pineapple Blueberry Salsa to accompany the fish, but it also tastes AMAZING on tortilla chips.  I had some Tostitos Wholegrain Scoops, and they were just the ticket to balance out the flavors and allow for a healthy scoop of fruit and veggies in every bite!

This salsa and chips would be a great company or party snack to go with white wine spritzers or some white sangria (and everything goes with Gin and Tonics in the summertime!).

Here is the recipe.  Hope you’ll give it a try, and let me know what you think.

Pineapple Blueberry Salsa*

  • Servings: approx. 4 cups
  • Print

Ingredients:Pineapply Blueberry Salsa

  • 2 cups diced fresh pineapple
  • 1 cup fresh blueberries
  • 1 cup chopped sweet red and/or orange peppers
  • 1/2 cup chopped green onions
  • 1/4 cup chopped fresh cilantro
  • 1 fresh lime, juiced (or lemon)
  • 1 Tbsp balsamic vinegar
  • 1 tsp salt
  • 1 small jalapeno pepper, seeded and chopped or 1/4 tsp. red pepper flakes (for a bit of heat)
  • 1/4 tsp ginger
  • 1/4 tsp cumin

Combine all ingredients and serve with tortilla chips (especially yummy with Frito Lay Whole Grain Tostitos Scoops, or alongside chicken or fish for a fresh and light, summery accompaniment.

Tastes bests when chilled for several hours to allow flavors to fully blend.

Enjoy!

Cheers & Hugs,
Jodi

*slightly adapted from Jen @ CarlsbadCravings