Peaches & Cream Pretzel Pie

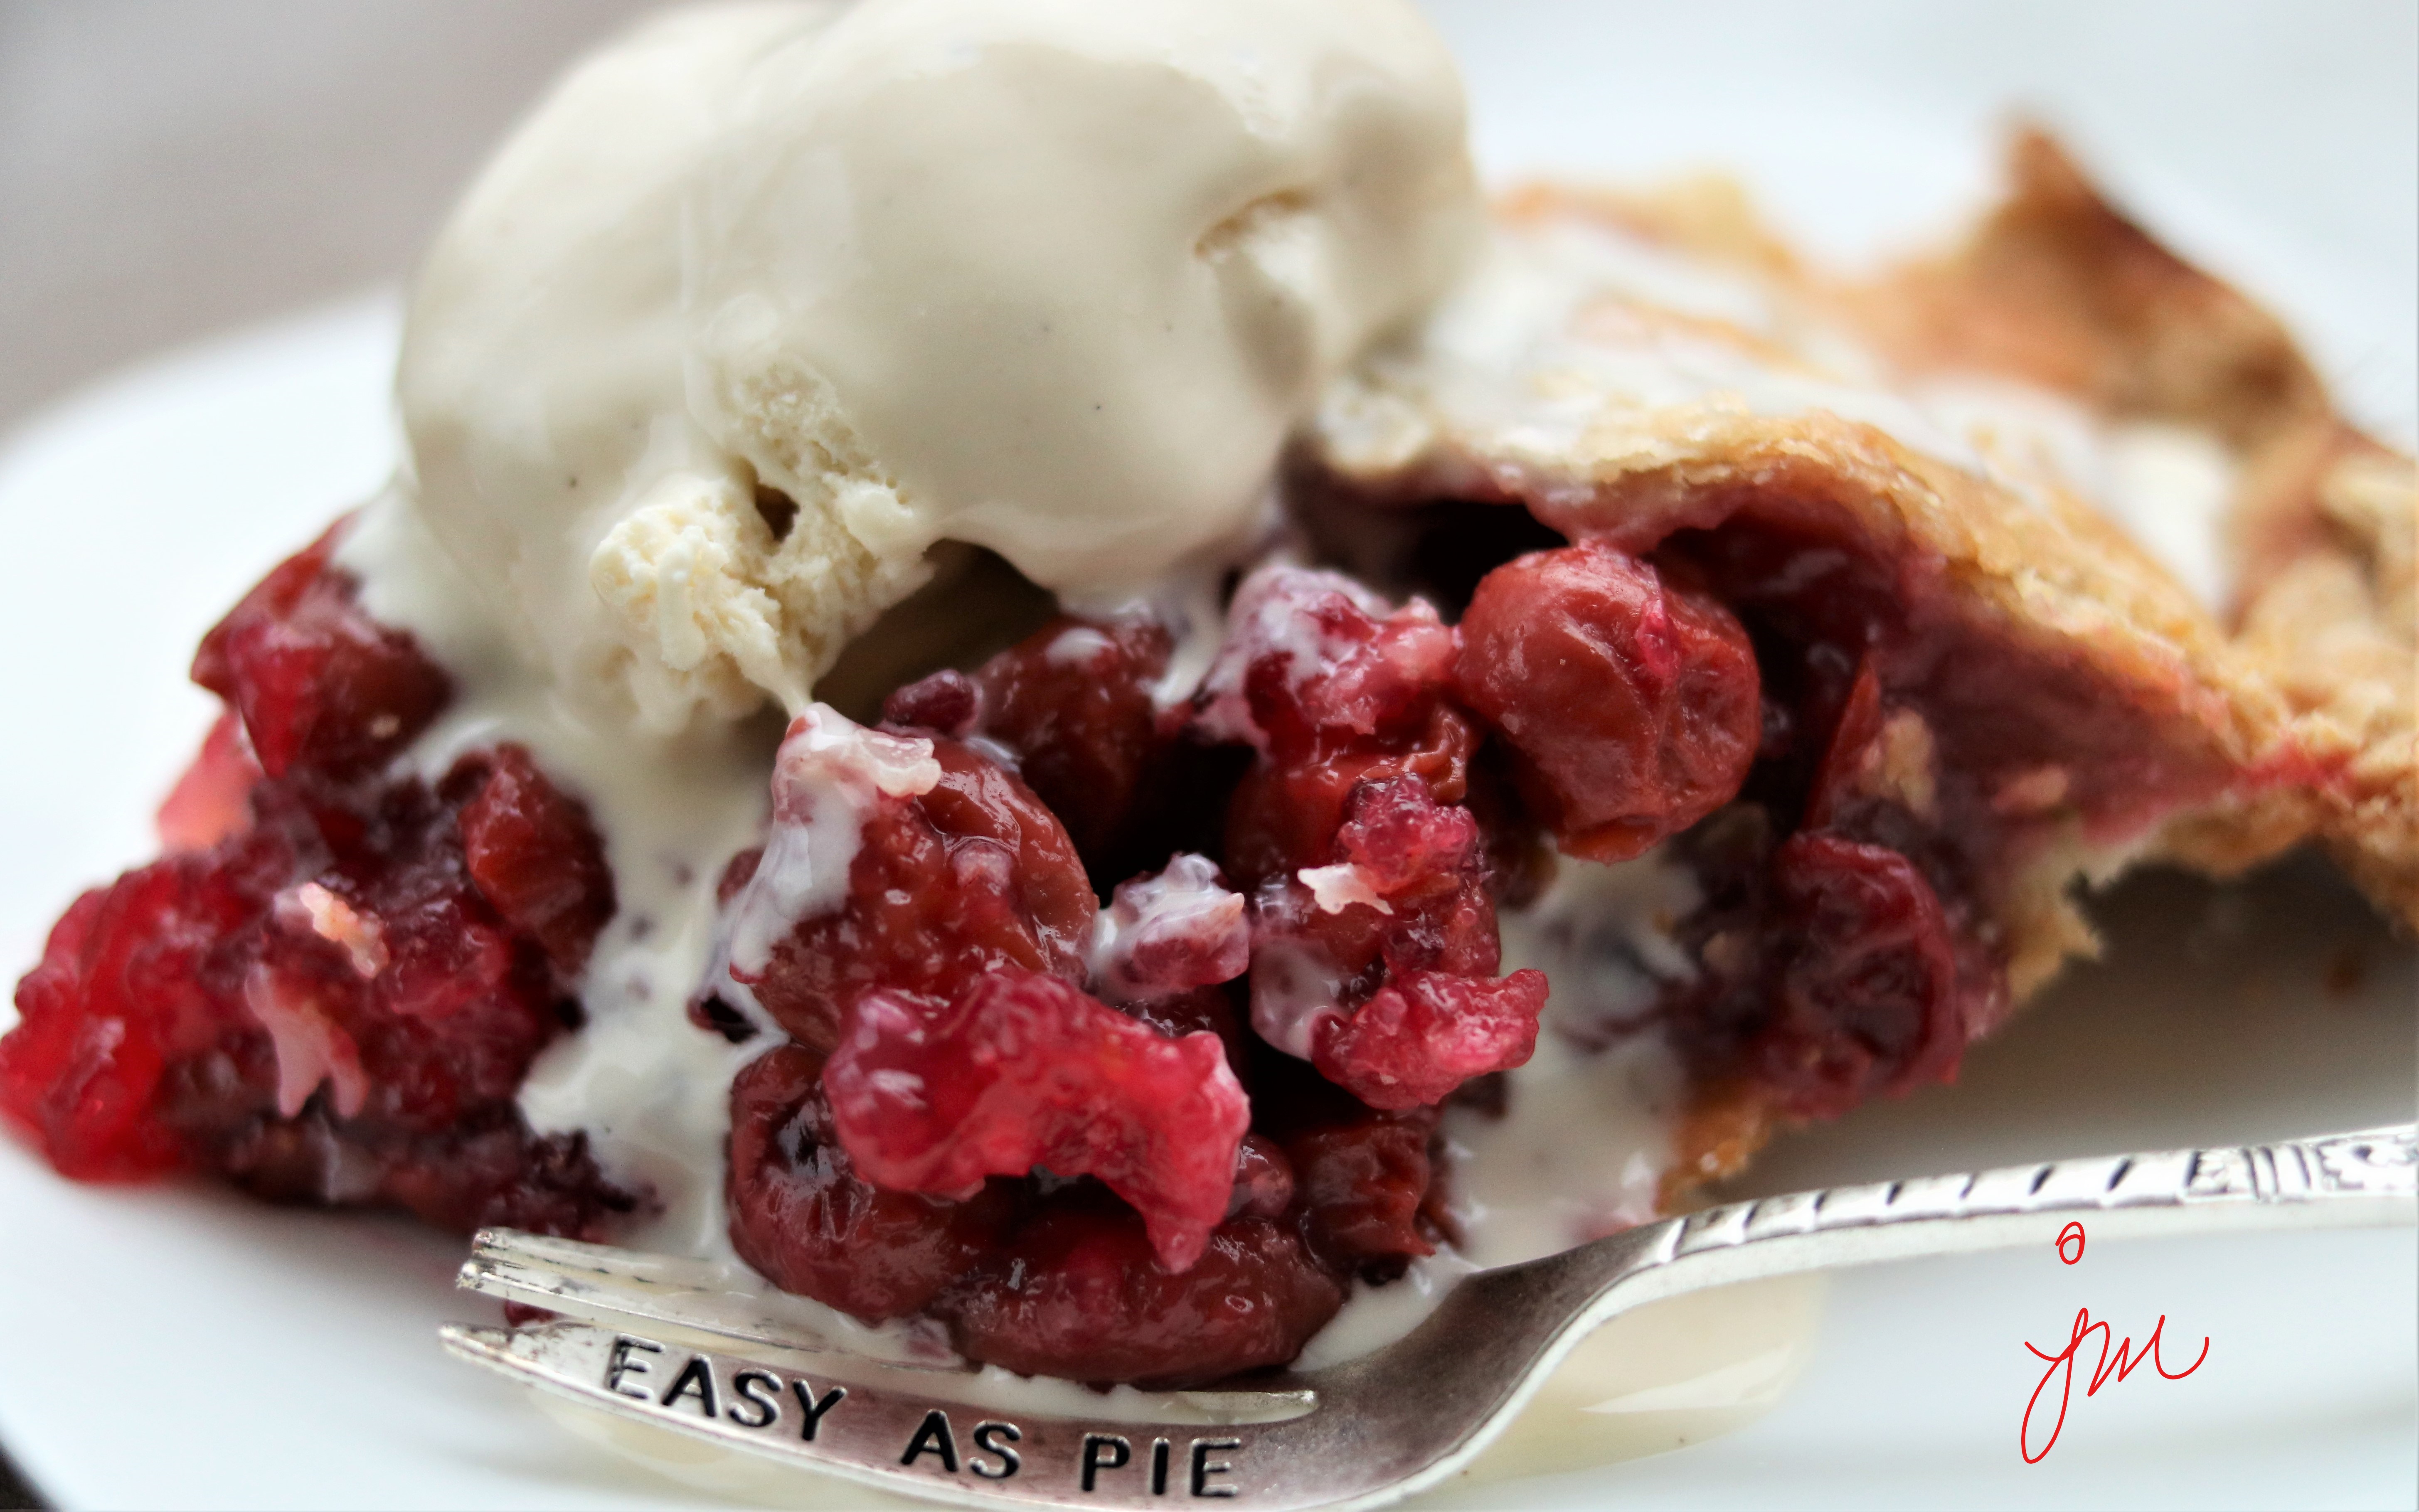
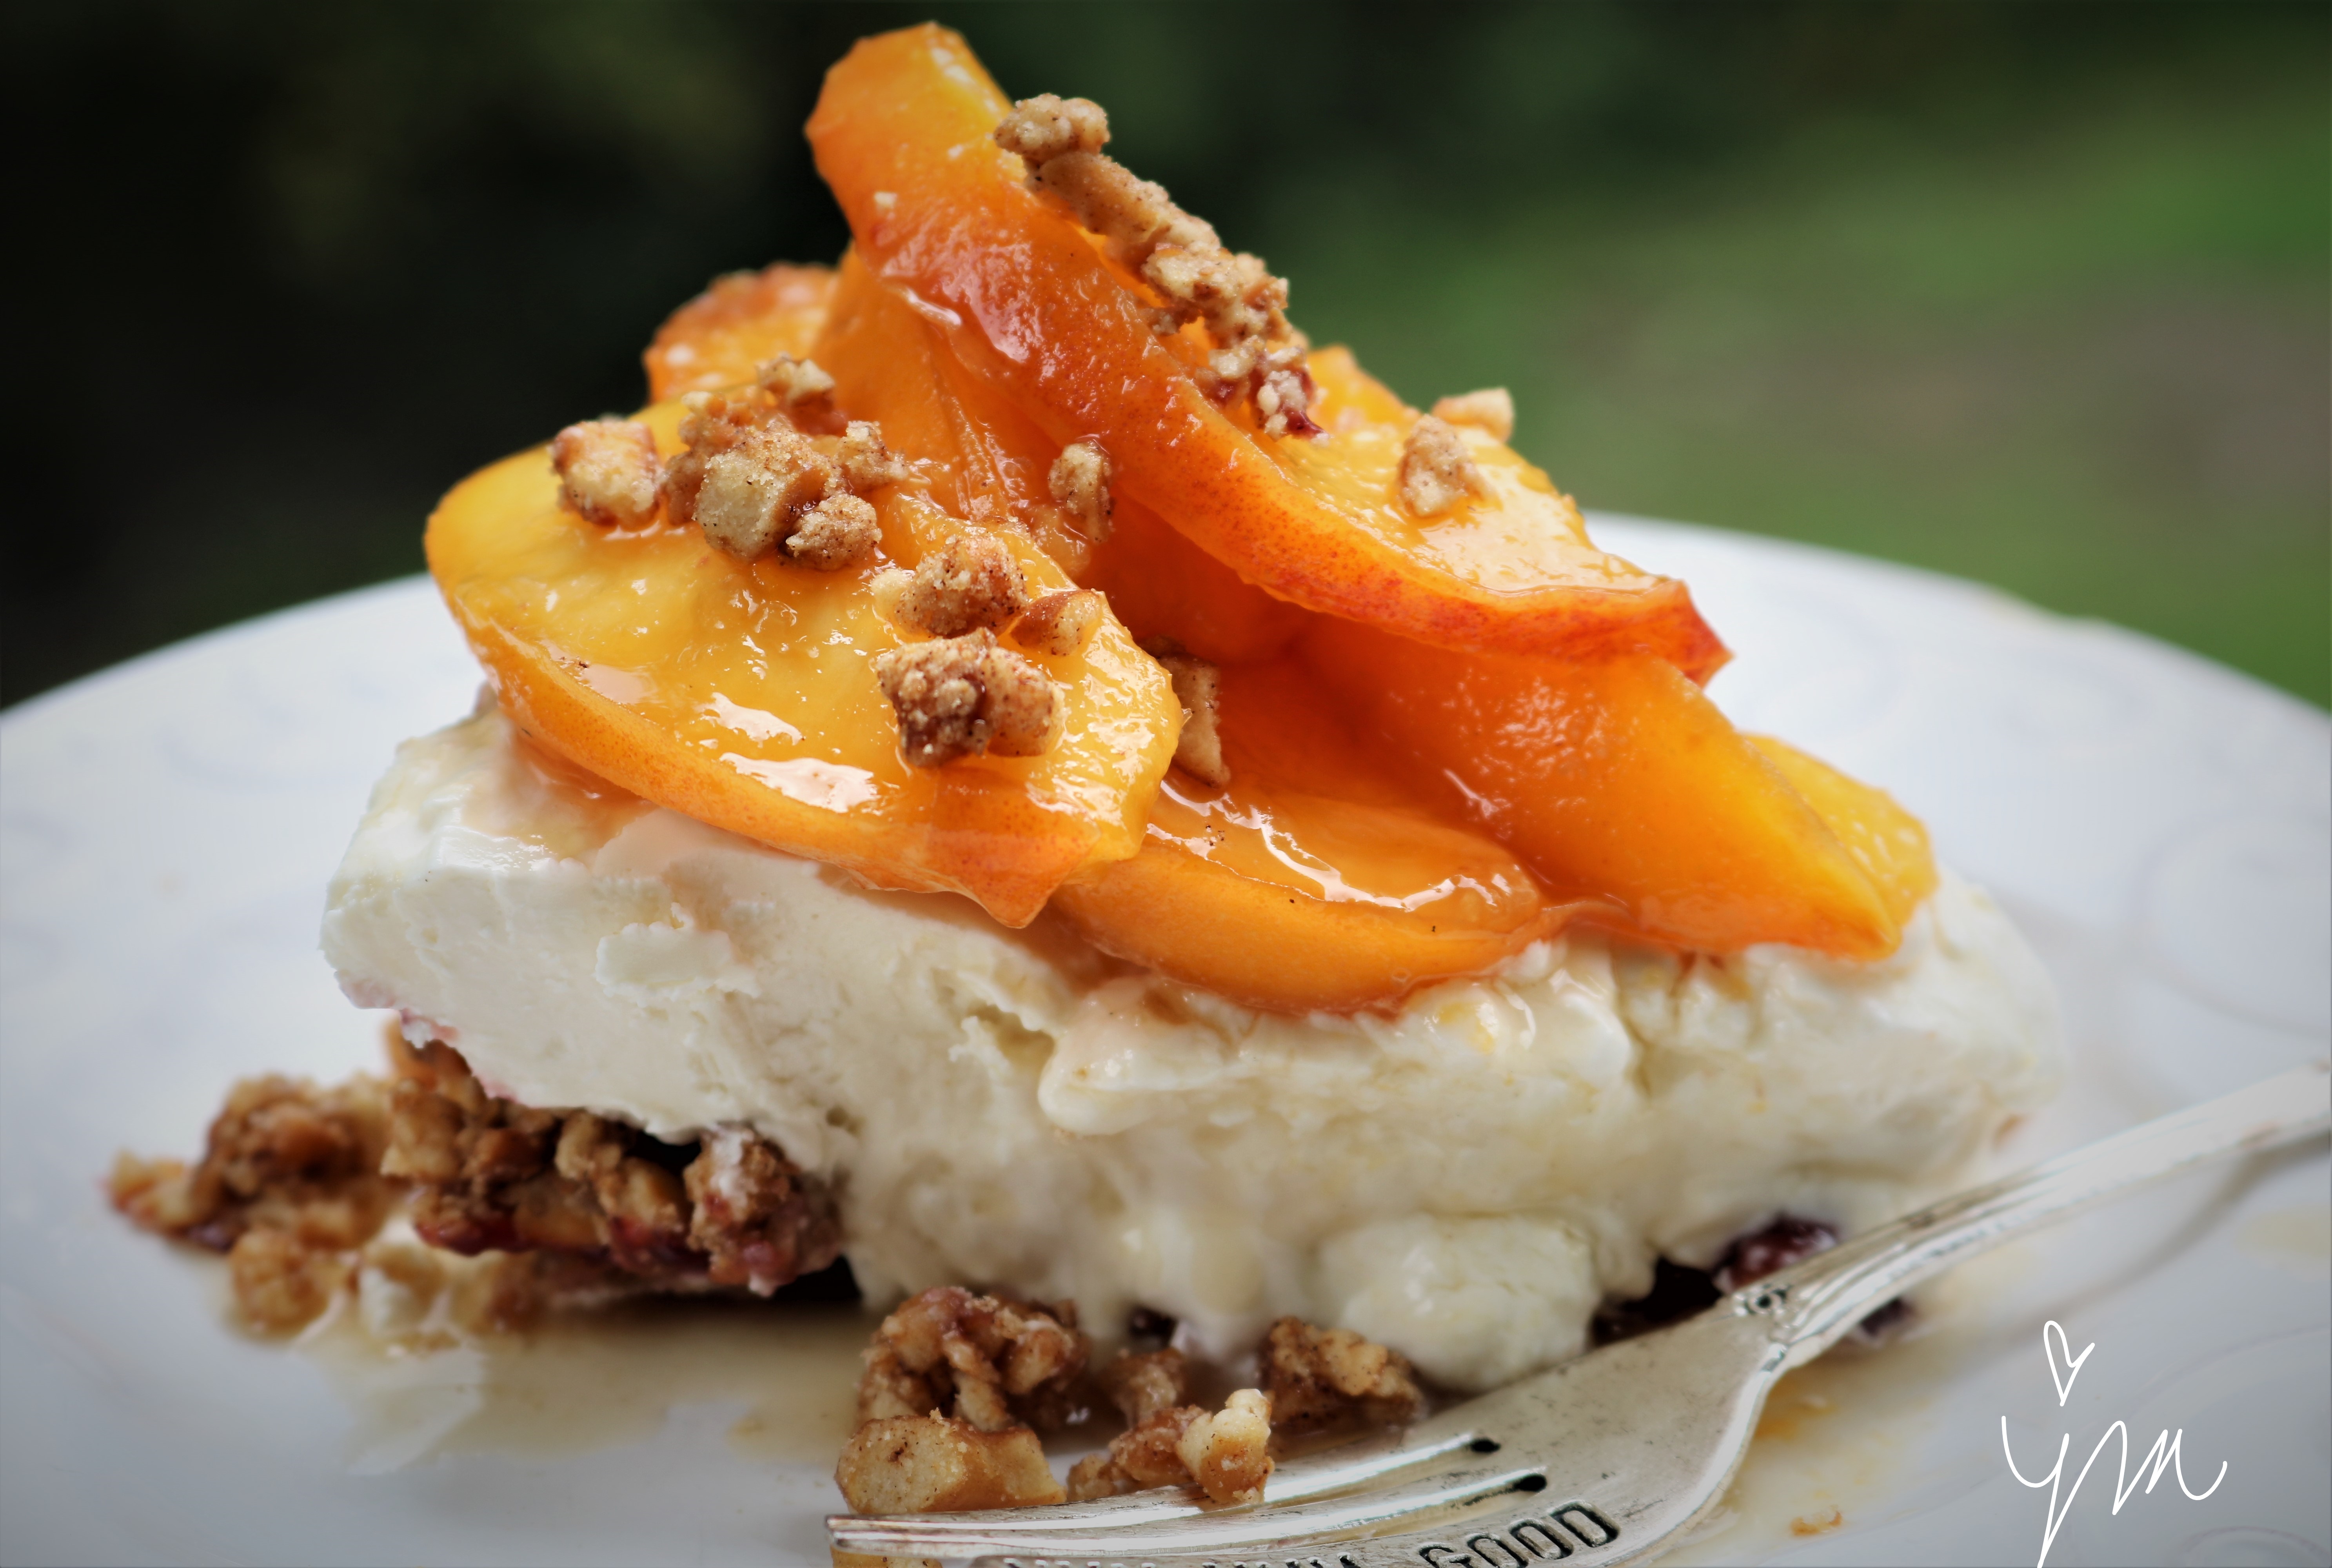
Peaches & Cream Pretzel Pie.

Oh My Goodness Friends!  This Pie!!!

I think it might be my favorite thing I’ve made in a long time!

As many of you know, I love to bake.  It brings me such joy to see the people I share with enjoying the “fruits” of my labor of love.  But, I can usually pass on dessert.  I am more of a salty, savory girl than a sweet one.

But this pie!!!!!!!  I cut a piece to photograph and was only going to take a bite to taste it.  Thirty seconds later, it was somehow all gone as I literally moaned and squealed with delight eating it!

The cream filling is lusciously light and fluffy and so perfect…..  especially on top of the salty, crunchy, buttery pretzel crust with a hint of cinnamon………. and then the glorious topping of sweet juicy honeyed peaches….   It’s just so divine!

I couldn’t wait to share it!  Hubby loved it, and I shared it with a sweet friend and her family for the recent holiday.

I originally saw this recipe at Half Baked Harvest and tweaked it up ever so slightly.

I cannot wait for you all to try this!  Please do while peaches are so perfect right now and let me know what you think.

Thank you Tieghan for such a great recipe!

Peaches & Cream Pretzel Pie

Ingredients:

Pretzel Crust:

  • 2 cups finely ground salted pretzel crumbs
  • 1 stick (8 Tbsp.) + 3 Tbsp salted butter, melted
  • 3 Tbsp. honey
  • 1 tsp. cinnamon

Filling/Topping:

  • 1 1/2 cups heavy whipping cream
  • 2 tsp. vanilla
  • 8 oz. cream cheese, softened to room temperature
  • 4 Tbsp. powdered sugar
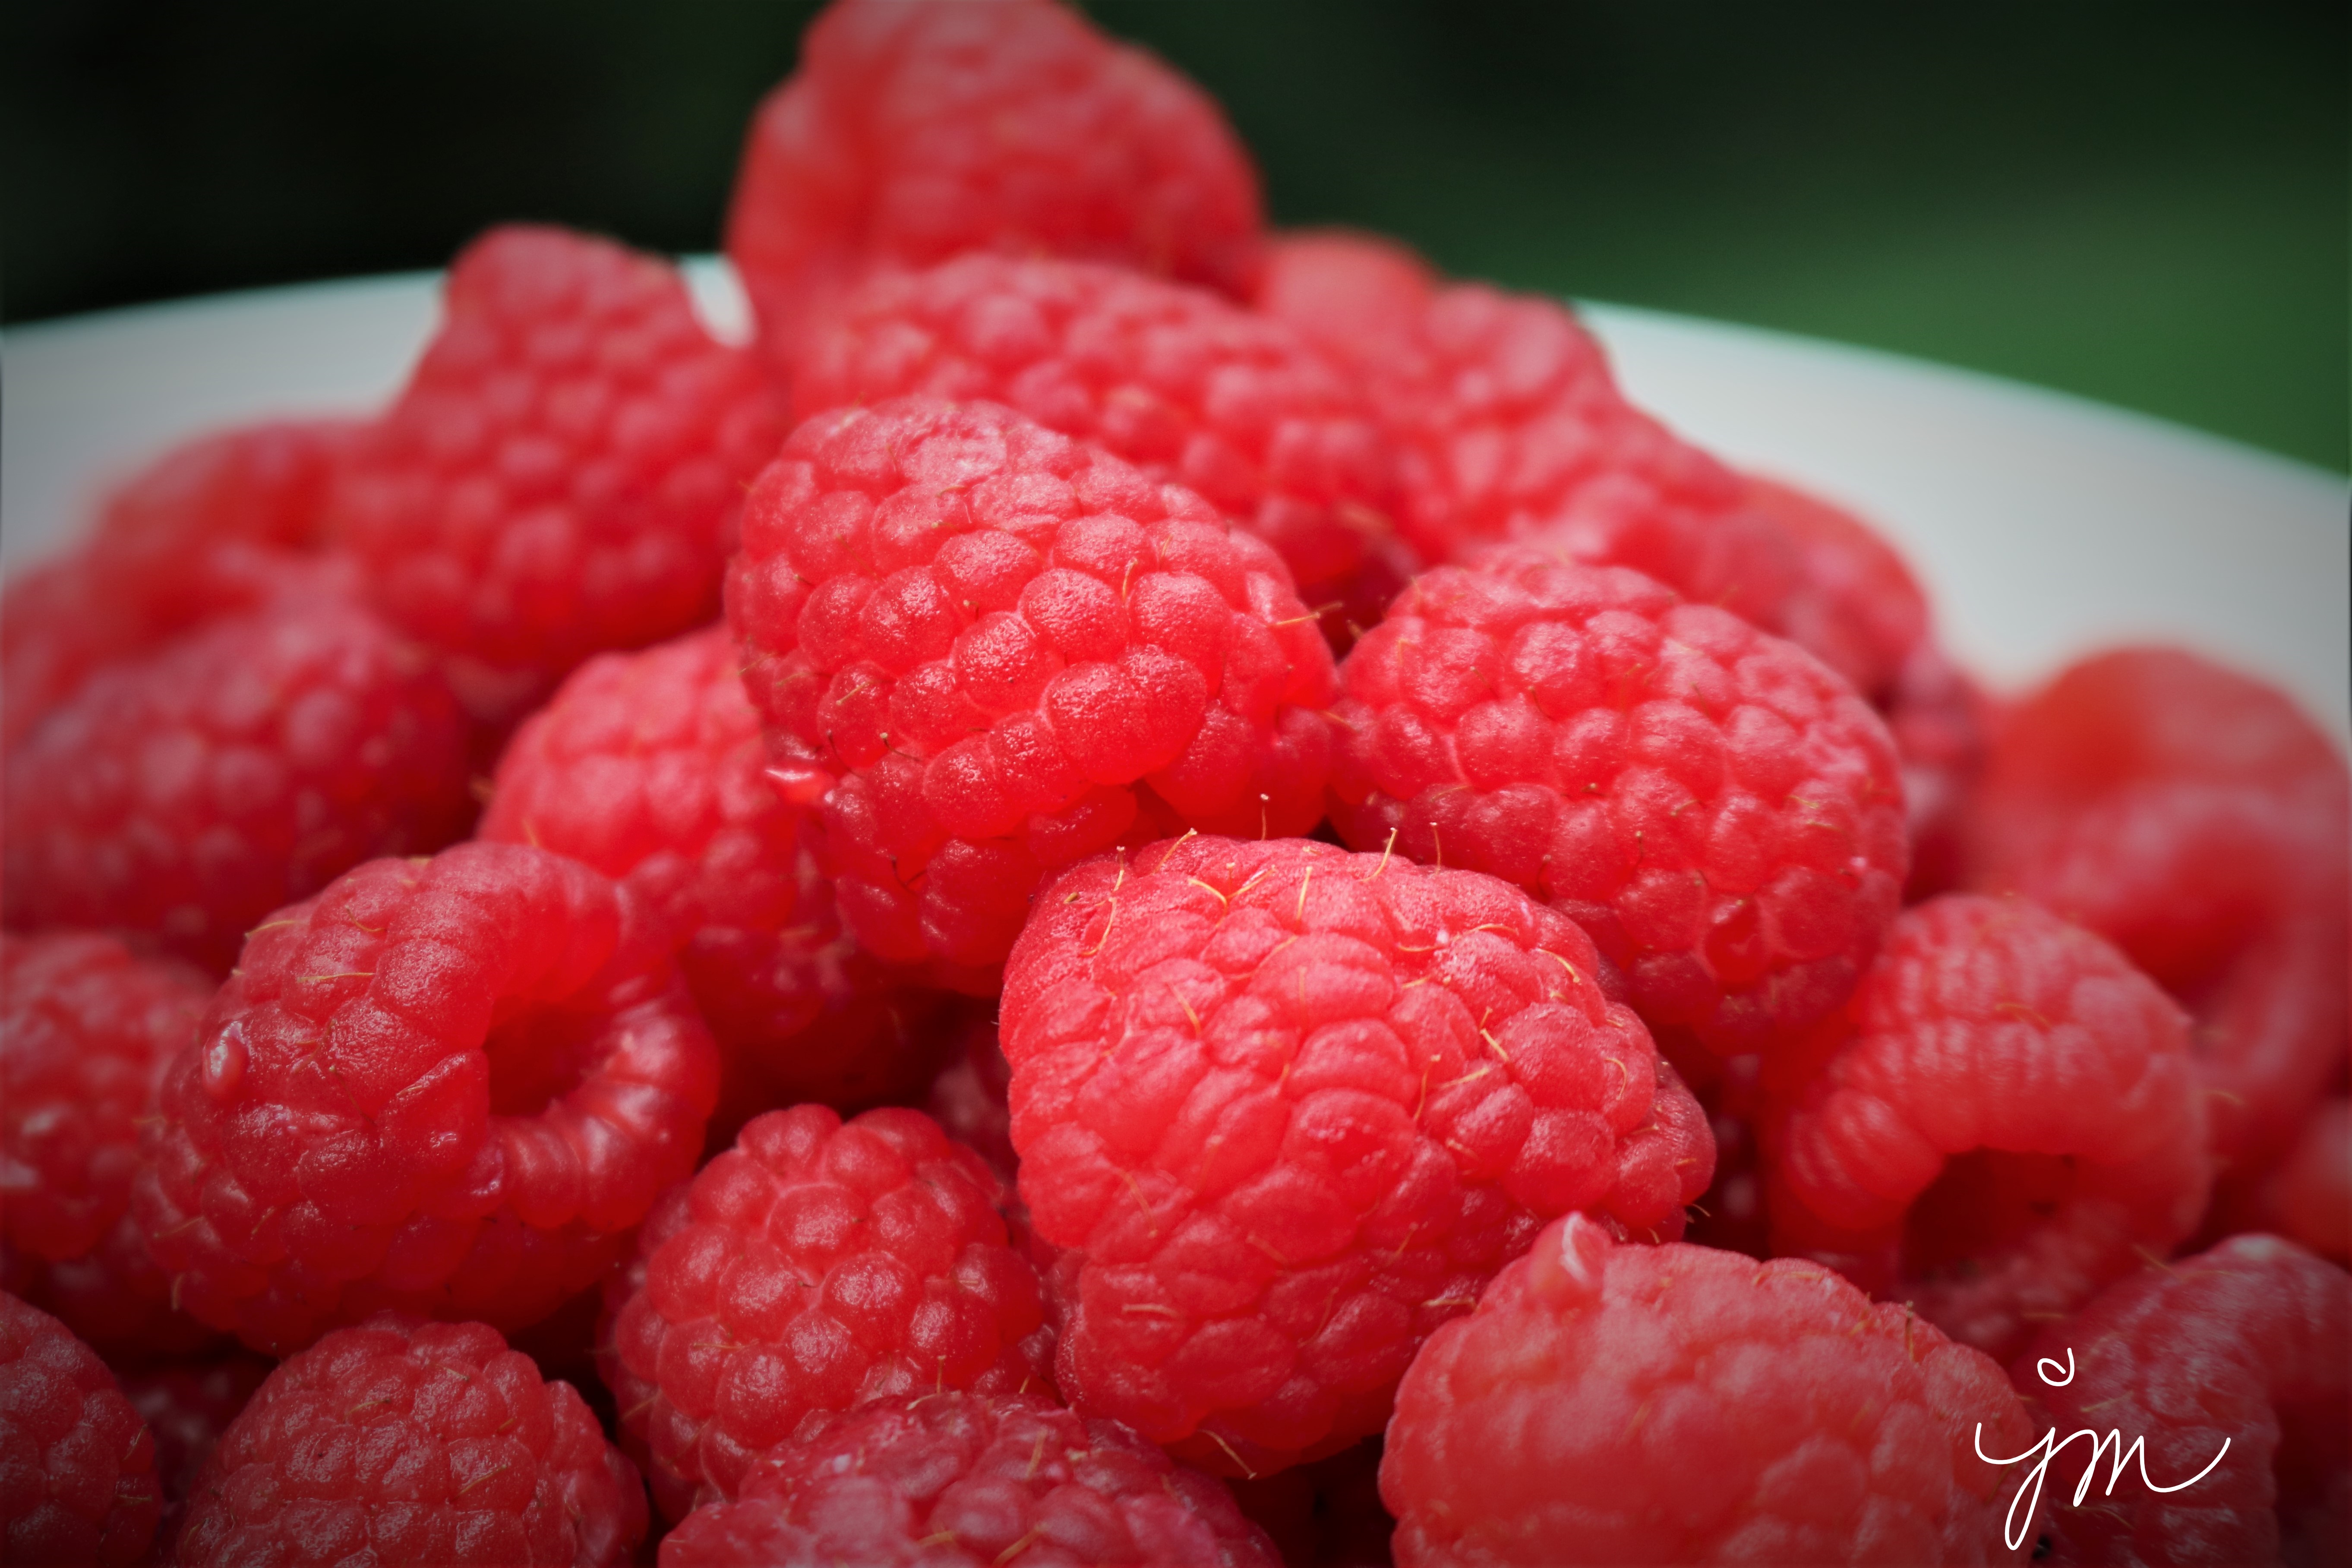
  • 3 Tbsp. raspberry preserves
  • 1/2 cup honey
  • 4 ripe, but firm peaches, sliced

Directions:

Preheat oven to 350 degrees F.

Make pretzel crumbs using food processor.  Add crumbs to medium bowl and combine with melted butter, honey, and cinnamon.  Reserve 2-3 Tbsp. of crumb mixture (for topping) and place in small baking dish.  Press remaining into 8-9 inch pie plate.  Put both in oven for 8 minutes and bake until toasted.  Cool completely before filling.

Beat heavy cream and vanilla on medium high with electric mixer until soft peaks form (about 2-3 minutes).  Add the cream cheese and powdered sugar and beat until incorporated (about another minute).  Place in refrigerator to chill until ready to use.

Bring 1/2 cup honey to a low boil in a medium saucepan, and simmer for one minute.  Remove from heat and stir in sliced peaches (I did not remove skin).  Let sit for at least 10 minutes to cool.

Spread red raspberry preserves into bottom and up sides of cooled pretzel crust.  Fill crust with cream.  Refrigerate for at least 3-4 hours or overnight.

When ready to serve, top with honeyed peaches and sprinkle with additional pretzel crumb mixture.  You could also top with fresh red raspberries for an extra treat!

This pie can also be frozen for up to two weeks.

ENJOY!

Cheers & Hugs,
Jodi


Toffee Coffee Oatmeal Cookies

Toffee Coffee Oatmeal Cookies.

It’s been a little while since I posted a cookie recipe here at The Creative Life in Between. 

I tried to focus on watercolor painting for most of July in honor of #WorldWatercolorMonth – being an Ambassador and all.   < curtsy bows 😉 >

But those that know me well know that I almost always have some kind of fresh baked cookies in the house – for “just in case!

In fact…. I’m kinda known  – – in some very small, insignificant circles – –  for my creative culinary cookie craftiness.

This and my fluent grasp of the Ubby Dubby language are the talents I always say I would use if I were in the Miss America Pageant – HA!!!!

Well – I’ve been saving up and have a couple really good recipes to share!  So this week is going to be cookie recipe week.

I made this cookie recipe for a recent party at my house, and they were a huge hit!

This cookie is a wonderful chewy, but crisp on the edges dream of milk chocolate, toffee, oatmeal, and a hint of coffee for good measure!  O….  M….  G….  !!!

Get ready for a new addiction!  This is one I have trouble passing up and is dangerous to keep in my house!  Bake them if you dare!

Toffee Coffee Oatmeal Cookies*

Ingredients:

  • 1 1/3 cup firmly packed brown sugar
  • 1 cup (2 sticks) softened butter
  • 1 egg
  • 1/4 cup strong coffee (cooled)
  • 2 tsp. vanilla
  • 3 cups Quaker oatmeal (either quick or old-fashioned, uncooked)
  • 1 1/2 cups all-purpose flour
  • 1 tsp. salt
  • 1 tsp. baking soda
  • 2 8-oz. packages milk chocolate toffee bits
  • 1 cup coarsely crumbled sugar ice cream cones (about 5 cones)

Directions:

In large bowl with electric mixer, beat sugar and butter until creamy.  Add egg; beat well.  Beat in coffee and vanilla.  Add salt, baking soda, and flour until combined.  Remove from electric mixer and stir in 3 cups oatmeal with wooden spoon.  Stir in toffee bits and crumbled sugar cones just until well incorporated.  Refrigerate dough for several hours or overnight to chill.

When ready to bake, preheat oven to 350 degrees F.  Roll tablespoons full of dough into round balls (golf ball sized) and place on baking stone or parchment lined cookie sheet.  Bake 12-14 minutes just until golden brown.  Allow to cool on baking stone for additional 5-10 minutes.  Transfer to cooling wire racks to cool completely.  Freeze well.

Enjoy!

Cheers & Hugs,
Jodi

*slightly adapted straight from the Quaker Oats recipe!

Iced Orange Cookies

Iced Orange Cookies.

Summer baking calls for bright, citrusy flavors; and ever since painting my lemons last week, I have had citrus on the brain!

I found a great old-fashioned cookie recipe for these cakey iced orange cookies from Taste of Home.   I had just bought a bag of clementines, so I knew they would work great for this.

I gave some to my Dad for Father’s Day and served some to our kiddos at our Father’s Day brunch for Hubby.

Be sure to use freshly squeezed orange juice and zest for the best flavor.  These cookies freeze well and taste amazing right out of the freezer on a hot summer day!

Iced Orange Cookies

  • Servings: 2 1/2 dozen
  • Print

Ingredients:

  • 1/2 cup Butter Crisco shortening
  • 1 cup sugar
  • 2 eggs
  • 1/2 cup freshly-squeezed orange juice
  • 1 Tbsp freshly-grated orange zest
  • 2 1/2 cups flour
  • 1 1/2 tsp baking powder
  • 1/2 tsp salt
  • Icing
    • 2 cups confectioner’s sugar
    • 1/4 cup freshly-squeezed orange juice
    • 2 Tbsp butter, melted

Directions:

Preheat oven to 350 degrees F.

In an electric mixer, cream shortening and sugar until light and fluffy.  Add eggs, one at a time, beating well after each addition.  Beat in orange juice and zest.  Add baking powder, salt and then flour to creamed mixture until well combined.

Drop by tablespoon or cookie scoop onto baking stone or ungreased cookie sheet about two inches apart.   Bake for approximately 10 minutes or until edges just begin to brown.  Cool on wire racks.

In a small bowl, combine icing ingredients until smooth.  Drizzle generously over cooled cookies.

TIP:  I refrigerated the cookie dough for a couple hours making it easier to work with and hold its shape.  

Enjoy!

Cheers & Hugs,
Jodi

Homemade Cherry Pie

Homemade Cherry Pie.

On a recent visit to an awesome new grocery store that opened up near us called Fresh Thyme, I discovered they carried big 2.5 lb bags of red sour pie cherries.  I was so excited!  This is something hard to find where we live.  You can find dark sweet cherries everywhere, and they are delicious for eating, but to make a good old-fashioned homemade cherry pie, you have to have the sour cherries.

I snagged a couple bags and was excited to get to make a cherry pie for hubby for Valentine’s Day last week.

If you are lucky enough to find sour cherries, here is the simple, old-fashioned recipe I use to make a classic cherry pie.

Bake a little love!

Cherry Pie

Ingredients:

Directions:

Preheat oven to 400 degrees F.

In a large bowl, combine cherries, sugar, tapioca, and almond extract.  Mix well, and let sit while preparing pie crust.

Prepare crust and place bottom layer in pie plate.  Fill with cherry mixture.  Top filling with dabs of butter followed by top crust, being sure to cut slits or a shape to allow bubbling and steam to escape.  Spread a small amount of milk or water on top crust, and sprinkle with an additional tablespoon of sugar if desired.

Place pie in oven.  Cover loosely with foil to prevent over browning.  Bake approximately one hour.  Remove foil and continue baking until filling bubbles out of top and crust is beautifully browned.

Allow to cool completely to set.  Serve with scoop of vanilla ice cream.

Enjoy!

Cheers & Hugs,
Jodi


Homemade Apple Fritters

Homemade Apple Fritters.

Last Sunday, Hubby had to get up very early – really the middle of the night – to work during a winter weather event in our area.

Missing Sunday breakfast, I wanted to make him a special treat for when he returned home.

With some wonderful Misfits Market apples in the crisper, I thought I’d try my hand at homemade apple fritters.

Who can resist a fresh apple fritter??!!

A couple tips from a first-time apple fritter maker:

  • Don’t heat the oil too hot.  Be patient and use a medium heat.  Better to fry them a little longer and get a golden brown than to overcook the outside and undercook the inside with high heat.  (Which, by the way, is what I did with the first batch of three, resulting in us only having three total!)
  • Spread them a little flatter than I did so you get more icing in each bite as the dough itself only contains a small amount of sugar. (This was hubby’s suggestion!)
  • Use a sweeter, less firm apple for best results.  I would not recommend Granny Smith.  The recipe calls for 3 medium apples, but you could really add another apple, which I will do next time.

Let me know if you try and/or if you have made and have any of your own tips.  We sure enjoyed these on a cold, snowy, comfort food, stay-in kind of day.

Here is the recipe I very slightly adapted from I am Baker‘s blog.

Homemade Apple Fritters

Ingredients:

  • 3 medium apples, peeled, cored, and diced
  • Juice of half a lemon
  • 2 Tbsp. sugar
  • 2 eggs
  • 1 cup all-purpose flour
  • 2 tsp. baking soda
  • 1 tsp. cinnamon
  • 1/2 tsp. salt
  • 1/4 cup milk
  • Canola or Vegetable Oil  for frying
  • Glaze
    • 1 1/2 cups powdered sugar
    • 1/2 tsp. vanilla
    • 4 tsp. water (or enough for best consistency)

Directions:

In a small bowl, drizzle lemon juice over diced apples.  Stir to coat.  Set aside.

In electric mixer, beat sugar and eggs on medium-high speed until combined.  Reduce speed to low, and add flour, baking powder, cinnamon, and salt.  Mix until combined.  Add milk, and mix until incorporated.  Fold in apples with spatula.

Fill a frying pan halfway full with oil.  Heat over medium heat to 375 degrees F.

Drop three 1/4-1/3 cup portions of batter into the oil.  Let fry for a few minutes until golden brown.  Flip and fry until other side is golden brown.  Test for doneness by inserting a small knife in center.  If uncooked batter remains, fry longer.

Remove fritters from oil with slotted spoon to wire rack layered with paper towels or napkins to drain.  Allow to cool.

Repeat with remaining three portions of batter.

Prepare glaze by combining powdered sugar, vanilla, and water.  Drizzle over cooled fritters on cooling rack.  When glaze has set, turn to coat other side with glaze that dripped through, if desired.

Enjoy!

Cheers & Hugs,
Jodi

Red Raspberry Dark Chocolate Puff Pastry Tarts

Red Raspberry Dark Chocolate Puff Pastry Tarts.

Phew!  That name is a mouthful….

But it really does say it all!

And I’m betting you would love a mouthful of these simple, but elegant and amazingly delicious treats!

I made these this past weekend for a Sunday family football dinner.

Would you believe me if I told you there are only three ingredients?!?!

Well – four if you count the powdered sugar you sprinkle on top.

Puff Pastry is such a dream to work with!

Keep these ingredients on hand and this recipe up your sleeve when you need a quick, but fabulous dessert or treat.

I’m betting you won’t be sorry. 😉

Red Raspberry Dark Chocolate Puff Pastry Tarts

Ingredients:

Directions:

Preheat oven to 375 degrees F.

Roll out one sheet of puff pastry, and cut into 9 squares approximately 3 1/2 x 3 1/2 inches.  Place a teaspoon of raspberry jam in center of each square.  Top with a piece of dark chocolate.  Pull all four corners to center and pinch to seal.

Bake for 15-18 minutes on baking stone or cookie sheet until puffed and lightly browned.    Remove to cooling rack.  Sprinkle with powdered sugar.

Serve warm or cold.  

Enjoy!

Cheers & Hugs,
Jodi

Pumpkin Spice Sugar Cookies

Pumpkin Spice Sugar Cookies.

It’s that time of year…

Time for baking things with pumpkin and spice and everything nice!

Though I almost always have my “almost-famous” chocolate chip cookies in the freezer,
these cookies just suit this time of year so perfectly.

Our gang loved them!  Hope you will too.

Here is the recipe as I very slightly adapted from the beautiful blog:  A Family Feast:

Pumpkin Spice Sugar Cookies

Ingredients:

  • 2 sticks butter, softened
  • 1 cup white sugar
  • 1/3 cup dark molasses
  • 1 egg
  • 1 cup pureed pumpkin
  • Dash salt
  • 2 tsp baking powder
  • 1 Tbsp pumpkin pie spice
  • 2 Tbsp cinnamon
  • 3 cups all purpose flour
  • 1 1/2 cups Sugar in the Raw Turbinado Cane Sugar

Directions:

Cream butter, sugar, and molasses with electric mixer 3-4 minutes until fluffy.  Add egg, followed by pumpkin, beating until mixed.

Slowly add in salt, baking powder and flour on low speed just until incorporated.

Divide dough into four logs, approximately 8 inches long.  Wrap with plastic wrap, and refrigerate several hours or overnight.

When ready to bake, preheat oven to 325 degrees F.

Pour Turbinado cane sugar into a shallow dish or pie plate.

Unwrap one log of dough at a time.

Roll log into sugar to coat.

Cut log into quarters.  Then cut each quarter into thirds.

Put cookie slices in sugar, coating both sides.

Place sugared cookie slices on baking stone or cookie sheet, and bake for approximately 12 minutes.

Remove from oven, and allow cookies to cool on baking stones/cookie sheets for 10 minutes before transferring to cooling racks to cool completely. 

Enjoy!

Cheers & Hugs,
Jodi

Fresh Red Raspberry Pie

Fresh Red Raspberry Pie.

Before we fully embrace all things pumpkin and apple and cinnamon and spice for Fall, I decided to slide in one  last “Summery” pie for the season a week or so ago when my youngest son and his wife came over for dinner (knowing this is one of his faves).

Fresh red raspberries are such a treat all by themselves, but baked to overflowing  with a bit of tapioca inside a tender flaky pastry crust is pretty close to heaven.

Fresh red raspberries used to be a rare find in our part of the world, but they are quite prolific in the grocery stores year-round now.  Buying enough for a pie can be a bit pricey, but worth it for a treat every once in a while.

Grandma always said the only way to know when a berry pie is done is when it bubbles over into the oven, so that is how I gauge the time too!

Here is my simple, old-fashioned recipe.

Fresh Red Raspberry Pie

Ingredients:

Pie Crust:

  • 2 cups all purpose flour
  • Heaping 2/3 cup Crisco shortening
  • 2 dashes of salt (12 shakes)
  • Approx. 1 cup cold water

Filling:

  • 5 cups fresh red raspberries
  • 1 cup white sugar
  • 3 Tbsp tapioca
  • 1 Tbsp lemon juice
  • 1 dash salt

Directions:

Preheat oven to 425 degrees F.

Prepare filling by blending raspberries, sugar, tapioca, lemon juice, and salt in a bowl.  Let sit while you prepare crust.

Prepare crust by blending flour, Crisco, and salt in a large bowl with a pastry blender until crumbly.  Add cold water and gently mix just until able to form a ball.  Divide dough in half, and put one half on floured surface to roll out.

IMPORTANT:  Do not overwork the dough.  It is not bread dough that needs kneaded.  The more you “work” pie crust, the tougher it will become.  The less you play with it, the more tender and flaky it will be.

Roll out first half using heavy floured marble rolling pin into a circle large enough to fill 9″ pie pan.  Lift it from the surface to your pie pan by folding it into quarters, then unfold it in the pan letting it hang over edges.

Roll out other half of dough into rectangle and cut into 8 strips to weave into a lattice topping.

Pour filling into bottom crust.  Top with 4 strips going same direction.  Weave by lifting two alternating and place one the opposite direction, the lifting the other two, and repeating.  Pinch top to bottom doughs together all around edges.

A nice finishing tough is to brush crust with some water and sprinkle with coarse sugar.

Cover edges of the pie with strips of aluminum foil or a pie crust shield (the most GENIUS invention ever in my baking opinion!)

Bake in 425 degree oven for 15 minutes.  Reduce heat to 375 degrees F, and bake until crust is golden and filling is bubbly, about 30 minutes more.

Serve warm or cold topped with a scoop of vanilla ice cream!

Enjoy!

Cheers & Hugs,
Jodi


White Chocolate Coconut Macadamia Nut Cookies

White Chocolate Coconut Macadamia Nut Cookies.

Last weekend we went to a Hawaiian Lua Party and Pig Roast.

Hubby “signed me up” to bring a dessert.

I had fun searching for a new cookie creation that could tie into the theme.

I found a recipe at Delightfulemade that included coconut and macadamia nuts that I slightly adapted.

Not only did they suit the theme, they were DELISH!

Not wanting to go to the grocery store, I needed to improvise on white chocolate chips.  I happened to have some White Chocolate Cupcake Hershey’s Kisses left over from something, so I chopped them up for the white chocolate chips.  YUM!!!

Next time I make these, I might try toasting the coconut first to step it up even one more notch.  (Let me know if you make and try toasting the coconut first!)

I know coconut is one of those things people typically LOVE or HATE.

Haters can hate, but lovers…. you’re gonna wanna make!

Here is the recipe:

White Chocolate Coconut Macadamia Nut Cookies

Ingredients:

  • 1 cup (2 sticks) salted butter, softened
  • 2 8-oz. blocks cream cheese, softened
  • 2 cups brown sugar
  • 1 cup white sugar
  • 4 eggs
  • 2 tsp vanilla
  • 1 tsp coconut extract
  • 1 tsp salt
  • 2 tsp baking soda
  • 5 cups flour
  • 2 1/2 – 3 cups chopped white chocolate or white chocolate chips
  • 2 cups sweetened, flaked coconut
  • 1 cup macadamia nuts, chopped

Directions:

Cream butter and cream cheese with electric mixer.  Add sugars, and beat until fluffy.  Add eggs, vanilla, and coconut extract mixing until combined.

Add salt and baking soda, followed by flour, mixing until combined.  Add white chocolate, coconut and macadamia nuts to the batter, and mix until incorporated.

Chill dough for several hours or overnight.

Preheat oven to 350 degrees F.

Make golfball-sized balls of cookie dough.  Place on baking stone or cookie sheet, and bake for 10-12 minutes.  Remove from oven when beginning to turn golden brown.  Press down on each cookie lightly to flatten.  Cool for 10 minutes on baking stone before removing to wire rack to cool completely.

Aloha!

Cheers & Hugs,
Jodi

P.S.  I am nuts about this adorable kitchen sign my DIL made for our McKinneyX2designs shop!  Such a sweet gift for the bakers in your life!

Lemon Blueberry Zucchini Cake

Lemon Blueberry Zucchini Cake.

This is NOT your momma’s zucchini bread recipe!

Are you overloaded with zucchini and looking for new recipes to use up the abundance you have this time of year?

You have to try this amazing cake!  A co-worker made this to share for a recent celebration at work, and I knew I had to make it.

I modified it slightly from the recipe he found at I Am Baker by cutting the frosting in half, and it was absolutely amazing.

Go bake this!

Lemon Blueberry Zucchini Cake

Ingredients:

  • 2 cups shredded zucchini
  • 3 eggs
  • 1 cup vegetable oil
  • 3 tsp pure vanilla extract
  • Zest of 1 lemon
  • 2 1/4 cup sugar
  • 3 cups flour
  • 1 tsp salt
  • 1 tsp baking powder
  • 1/2 tsp baking soda
  • 1 pint fresh blueberries
  • Lemon Buttercream Frosting
    • 1/2 cup butter, room temperature
    • 1 3/4 cup powdered sugar
    • Juice of 1/2 lemon (1 Tbsp)
    • 1 tsp pure vanilla extract
    • Dash salt

Directions:

Preheat oven to 350 degrees F.  Grease and flour two 8-inch round cake pans.

Shred zucchini and spread out on a clean dish towel.  Roll up and squeeze gently to drain a bit of the excess water.  Set aside 2 cups of shredded zucchini.

Beat together eggs, oil, vanilla, sugar, and lemon zest with electric mixer.  Gently fold in the zucchini.

Add flour, salt, baking powder, and baking soda.  Stir until incorporated.  Gently fold in the blueberries.

Pour half of batter into each cake pan.

Bake approximately 40 minutes or until knife inserted in center comes out clean.

Cool 20 minutes in pans, then turn out onto cooling racks to cool completely.

Prepare lemon butter cream frosting by beating butter, sugar, salt, lemon juice and vanilla with electric mixer until creamy.

Spread on top of each layer, leaving sides “naked.”

Decorate with additional fresh blueberries, lemon zest, zucchini blossoms, and powdered sugar if desired.

Refrigerate.

Enjoy!

Cheers & Hugs,
Jodi