Fresh Red Raspberry Pie

Fresh Red Raspberry Pie.

Before we fully embrace all things pumpkin and apple and cinnamon and spice for Fall, I decided to slide in one  last “Summery” pie for the season a week or so ago when my youngest son and his wife came over for dinner (knowing this is one of his faves).

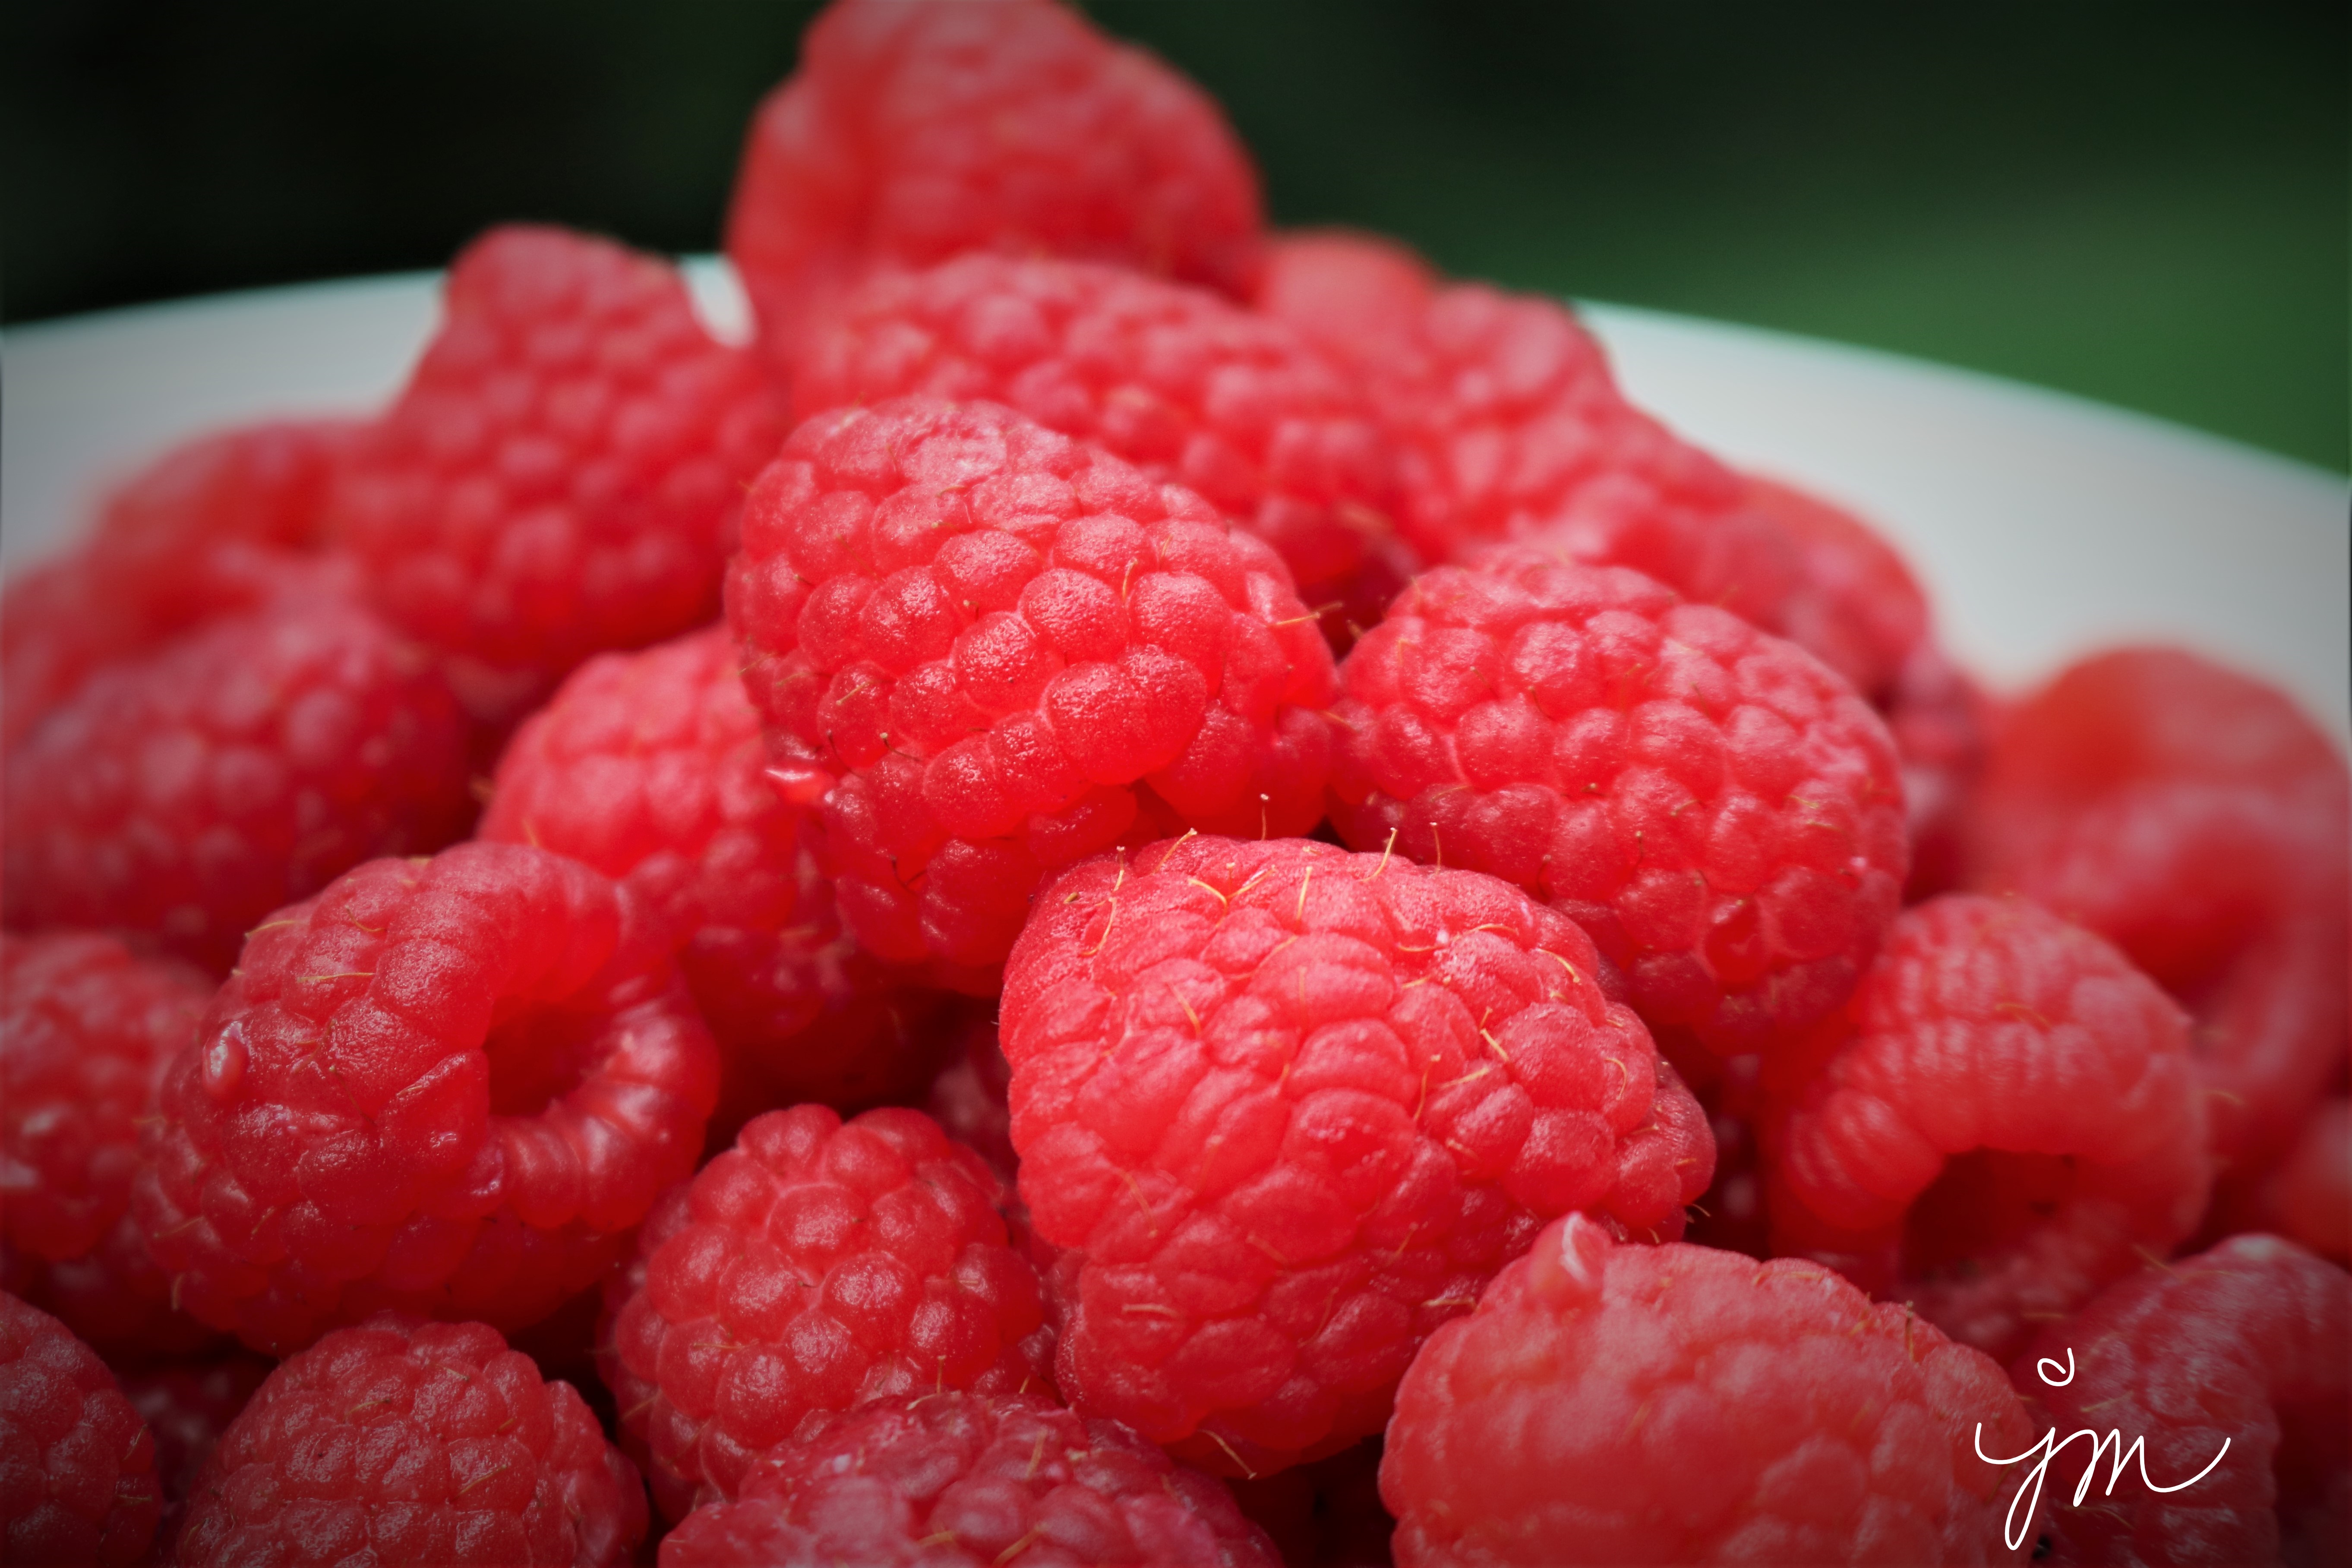
Fresh red raspberries are such a treat all by themselves, but baked to overflowing  with a bit of tapioca inside a tender flaky pastry crust is pretty close to heaven.

Fresh red raspberries used to be a rare find in our part of the world, but they are quite prolific in the grocery stores year-round now.  Buying enough for a pie can be a bit pricey, but worth it for a treat every once in a while.

Grandma always said the only way to know when a berry pie is done is when it bubbles over into the oven, so that is how I gauge the time too!

Here is my simple, old-fashioned recipe.

Fresh Red Raspberry Pie

Ingredients:

Pie Crust:

  • 2 cups all purpose flour
  • Heaping 2/3 cup Crisco shortening
  • 2 dashes of salt (12 shakes)
  • Approx. 1 cup cold water

Filling:

  • 5 cups fresh red raspberries
  • 1 cup white sugar
  • 3 Tbsp tapioca
  • 1 Tbsp lemon juice
  • 1 dash salt

Directions:

Preheat oven to 425 degrees F.

Prepare filling by blending raspberries, sugar, tapioca, lemon juice, and salt in a bowl.  Let sit while you prepare crust.

Prepare crust by blending flour, Crisco, and salt in a large bowl with a pastry blender until crumbly.  Add cold water and gently mix just until able to form a ball.  Divide dough in half, and put one half on floured surface to roll out.

IMPORTANT:  Do not overwork the dough.  It is not bread dough that needs kneaded.  The more you “work” pie crust, the tougher it will become.  The less you play with it, the more tender and flaky it will be.

Roll out first half using heavy floured marble rolling pin into a circle large enough to fill 9″ pie pan.  Lift it from the surface to your pie pan by folding it into quarters, then unfold it in the pan letting it hang over edges.

Roll out other half of dough into rectangle and cut into 8 strips to weave into a lattice topping.

Pour filling into bottom crust.  Top with 4 strips going same direction.  Weave by lifting two alternating and place one the opposite direction, the lifting the other two, and repeating.  Pinch top to bottom doughs together all around edges.

A nice finishing tough is to brush crust with some water and sprinkle with coarse sugar.

Cover edges of the pie with strips of aluminum foil or a pie crust shield (the most GENIUS invention ever in my baking opinion!)

Bake in 425 degree oven for 15 minutes.  Reduce heat to 375 degrees F, and bake until crust is golden and filling is bubbly, about 30 minutes more.

Serve warm or cold topped with a scoop of vanilla ice cream!

Enjoy!

Cheers & Hugs,
Jodi


Easy Fresh Homemade Salsa

Easy Fresh Homemade Salsa.

I LOVE salsa!

And this time of year when tomato plants in our gardens are overflowing with more tomatoes than we can eat, it is the perfect time to make fresh salsa.

It is so easy to make and so healthy and versatile for snacking or cooking.  I love dipping tortilla chips in it for snack.  It is also my favorite baked potato topping.  Skip the butter and sour cream for me, and pile on the salsa!  Throw frozen skinless, boneless chicken breasts in a crockpot on low, top with a pint of salsa, and ignore it for 8 hours.  Return for a delicious, nutritous main course of Salsa Chicken.

There are gajillion ways to make salsa.  You can add corn and black beans for a heartier twist.  You can add chopped peaches or mango for a sweeter twist.  You can add jalapenos or your favorite spicy, hot peppers if heat is your style!

What are your favorite ways to enjoy salsa?

Here is how I made it this past weekend.

Fresh Homemade Salsa

  • Servings: approx. 6 cups
  • Print

Ingredients:

  • 4-6 Ripe Tomatoes, quartered
  • 1 10 oz. can Rotel Diced Tomatoes & Green Chiles
  • 1/2 Large Vidalia Sweet Onion, quartered
  • 2-3 cloves garlic, peeled and cut in half
  • Fresh Cilantro (or dried) to taste
  • 3 green onions, cut into pieces
  • Juice of a fresh Lime
  • 1/2 tsp chili powder
  • 1/4 tsp cumin
  • 1 Tbsp Maldon Sea Salt Flakes or your favorite salt

Directions:

Combine all ingredients in a food processor.  Pulse several times until desired chopped consistency.  Serve immediately or store in a jar or airtight container in refrigerator for up to several weeks.

Enjoy!

Cheers & Hugs,
Jodi


Roasted Spiral Butternut Squash “Noodles” with Garlic, Rosemary & Browned Butter

Roasted Spiral Butternut Squash “Noodles” with Garlic, Rosemary, and Browned Butter.

O. M. G!

Where have you been all my life spiralized butternut squash?

Many of us have been spiralizing our zucchini squash into beautiful noodles, but am I one of the last on the bandwagon for spiralized butternut squash??!!

So simple…
So quick…
So DELICIOUS!!!

I happened to come across a package of fresh spiral-cut butternut squash at my local Aldi Grocery Store recently.

I thought about pan frying it in butter and garlic, but then chose to roast it like I typically do with cut butternut squash, and WOWZIE PaZOWzie was I pleased!
And so was hubby!

What a quick, easy, delicious, and nutritous treat!

Here is the super simple, yet amazingly delicious way I prepared it.

Roasted Spiral Butternut Squash with Garlic, Rosemary, and Browned Butter

Ingredients:

  • 1 10-oz package of prepared spiral cut butternut squash “noodles” (or spiral cut your own)
  • 2 Tbsp. salted butter, browned
  • 2 large garlic cloves, minced
  • 1 large sprig fresh rosemary, minced
  • 1 Tbsp. flaked sea salt

Directions:

Preheat oven to 400 degrees F.  Brown butter in skillet.  Watch closely so it doesn’t burn.  Once browned, remove from heat and stir in garlic.

Spread spiral-cut butternut squash “noodles” onto a stoneware bar pan or your favorite shallow baking pan.

Sprinkle with salt.  Drizzle with garlic-enhanced browned butter.  Top with minced rosemary.  Toss to coat all.

Roast for 7-9 minutes.

Serve immediately.

Enjoy!

Cheers & Hugs,
Jodi

Lightened Up Vinaigrette Broccoli Salad

Lightened Up Vinaigrette Broccoli Salad.

I love broccoli  – cooked or raw.
And I love broccoli salad.

The traditional version has a creamy mayonnaise-based dressing, and it is delicious!

But I was looking for a way to “lighten it up” a bit when making dinner one day this week, so I tried it with a vinaigrette dressing instead.

And it is DELISH too!

It is lighter and fresher tasting, and it is about half the calories of the traditional version!

This really is a nice twist on a classic that is healthier and just as yummy.

Here is how I made it.

Lightened Up Vinaigrette Broccoli Salad

Ingredients:

  • 4 cups fresh fresh broccoli florets, cut into bite-sized pieces
  • 1/4 thinly sliced, chopped sweet onion
  • 1/2 large sweet red pepper, thinly sliced and cut into bite-sized pieces
  • 1/3 cup golden raisins
  • 1/4 cup raw sliced almonds
  • 1/4 cup shredded cheddar cheese
  • 3 slices bacon, diced and cooked
  • Vinaigrette:
    • 2 Tbsp apple cider (or your favorite – red wine, white, etc.) vinegar
    • 2 Tbsp sugar
    • 2 Tbsp olive oil
    • 1 tsp salt
    • 2 Tbsp freshly ground pepper

Directions:  Combine first seven ingredients in large bowl.  Whisk together vinaigrette ingredients in a small bowl.  Pour over salad and toss to coat well.  Refrigerate for several hours before serving.

Enjoy!

Cheers & Hugs,
Jodi

Lemon Lavender Loaf

Lemon Lavender Loaf.

Fresh, bright, tart lemon zest and juice mixed with sweet, flowery, fragrant dried lavender buds in a beautifully glazed loaf.

I couldn’t decide if this should be considered a bread or a cake, so I am simply calling it loaf.     Plus I love the alliteration of a name where all the words start with the same Lovely Letter!

A dear friend gifted me a bag of dried lavender recently, and I have been dying to use it.  I finally found some time early Sunday morning to bake this beautiful loaf to enjoy on a beautiful Spring day.

It is light and soft and such a perfect Springtime treat.

Here is how I made it.

Lemon Lavender Loaf*

Ingredients:

  • 1 cup (2 sticks) salted butter, softened
  • 2 cups white sugar
  • 3 cups all purpose flour
  • 4 large eggs
  • 1 cup buttermilk (or use 1 cup milk with 1 Tbsp white vinegar let set 5 min)
  • 1/2 tsp salt
  • 1 tsp baking soda
  • 1 large lemon, zested and juiced
  • 1 Tbsp dried lavender buds
  • Glaze:
    • 1 cup powdered sugar
    • 1 Tbsp milk
    • 1 large lemon, zested and juiced
    • 1/2 tsp dried lavender buds

Directions:

Prepare two loaf pans with shortening and flour.  Preheat oven to 325 degrees F.

Cream butter and sugar in electric mixer until light and fluffy.  Add eggs one at a time, and continue mixing until mixture looks like buttercream frosting.

Gently mix in salt and baking soda.

Add lemon zest and juice to buttermilk, and set aside.

To batter, alternate adding flour and lemon buttermilk in three additions, and mix just until incorporated.  Stir in lavender.

Pour into prepared pans and bake approximately 45 minutes until toothpick inserted in center comes out clean.  Cool loaves 10 minutes in pans.  Remove and cool completely.

Once cool, prepare glaze by mixing powdered sugar, milk, lemon zest and juice, and lavender.  Pour over loaves.

Enjoy!

Cheers & Hugs,
Jodi

*Original recipe slightly adapted from FudgeRipple

Creamy Cauliflower Risotto with Shrimp

Creamy Cauliflower Risotto with Shrimp.

On Easter Sunday, we enjoyed an absolutely amazing buffet brunch at a local restaurant in Mars called Breakneck Tavern where they served a positively divine shrimp risotto (among a kagillion other amazing treats).  I only had about a tablespoon of it on Easter, because I wanted to try so many of the other wonderful things they had available (way more than I could sample at one sitting!), but I could not get that shrimp risotto out of my mind.  It was sooooooo good!

Well – I have also  been hearing great things about “ricing” cauliflower and have been anxious to try.

Since I had a beautiful fresh head of cauliflower in the fridge, as well as a bag of shrimp in the freezer, I decided to try a healthier version of shrimp risotto for dinner last night.

O. M. G!  This turned out almost more heavenly than the original one I had a tiny taste of on Easter.  More heavenly because it is so much healthier, but also so delish!!!

My recipe is adapted from one I found at Cafe Delites.  This recipe is a low-carbohydrate, high protein, fiber-rich, calorie-friendly plate of deliciousness!  I hope you will give it a try.

P.S.  If I was making this only for me, I would totally add fresh green peas.  What do you think?  Hubby absolutely detests peas, so I sacrificed for him, but oooohhh –  can you imagine??!!  Pea lovers out there??

Here is how I made it.

Creamy Cauliflower Risotto with Shrimp

Ingredients:

  • 1 large cauliflower
  • 12-14 oz shrimp, peeled and tails removed
  • 2 Tbsp salted butter
  • 5 cloves garlic, minced
  • 1 lemon
  • 2 Tbsp olive oil
  • 1  cup Half and Half (or cream or milk)
  • 1/2 cup chicken broth (or dry white wine)
  • 1/2 cup grated Parmesan cheese
  • 2 tsp salt
  • 1 Tbsp coarsely ground pepper
  • 1/4 cup fresh parsley, chopped
  • 1/2 cup chopped sweet red pepper (optional)

Directions:

Remove core from cauliflower and break into florets.  Working in batches of approximately 1 cup at a time, pulse cauliflower in food processor until it is the consistency of rice.  Place all in large bowl and set aside.

In a large skillet, melt butter over medium-high heat.  Add shrimp and sear them while stirring until they start to lose their color.  Add garlic and juice of half of the lemon.  Fry for an additional minute.  Add cauliflower, red pepper (if adding) and olive oil.  Fry and stir for 3-4 minutes until fully combined and coated.  Stir in the half and half (or cream or milk) and chicken broth (or white wine).  Grate Parmesan cheese over all and sprinkle with salt and pepper.  Combine.  Cover and reduce heat to low to simmer 6-8 minutes until creamy.

When ready to serve, sprinkle with fresh parsley and wedges of lemon from remaining half.  Top with additional Parmesan if desired.

Enjoy!

Cheers & Hugs,
Jodi


Apple Cider Roasted Chicken and Butternut Squash

Apple Cider Roasted Chicken with Butternut Squash.

The calendar says it’s Spring in our little corner of the world, but Mother Nature insists it’s Winter.  I guess since our Winter this year was often more like Spring, we have to deal with a bit of Winter in Spring.

The day I made this recipe last week (the second official day of Spring), we had more snow fall in one day than we have had in one day in the past eight years (approximately 8 inches).

So this super easy, healthy, delicious one pan oven-roasted meal I found at TheLemonBowl.com and tweaked slightly was a welcomed delight.

Using cinnamon as a spice for a savory meal is a surprising delight!   Don’t be afraid to use it liberally.  When combined with salt and coarse black pepper and lots of garlic, it just sings with flavor.

The original recipe called for apple cider, which I did not have, so I found a lonely bottle of Angry Orchard Hard Cider in the back of the fridge that kicked butt in this recipe!  I’m sure you could also substitute apple juice.

I was really tempted to throw in a handful of cashews or pecans (and might next time).  What do you think?

I served this with a simple salad of fresh greens, and  here is how I made it.  Hope you will give it a try.

Apple Cider Roasted Chicken and Butternut Squash

Ingredients:

  • 1 large butternut squash, peeled and cubed (approx 4 cups
  • 1 large bulb garlic (approx. 12 cloves), peeled
  • 2/3 cup apple cider (I used Angry Orchard Hard Apple Cider!)
  • 3 large boneless, skinless chicken breasts, cut in half horizontally
  • 1 Tbsp cinnamon
  • 2 Tbsp olive oil
  • 1 tsp salt
  • 1 tsp coarsely ground black pepper
  • Chopped parsley for garnish (optional)

Directions:

Preheat oven to 350 degrees F.  Place butternut squash cubes and whole peeled garlic cloves on bottom of large cast iron skillet or roasting pan.  Pour cider over all.

Place chicken breasts on top.  Drizzle with olive oil.  Season all with cinnamon, salt, and pepper.

Cover loosely with foil and bake for 45 minutes.  Remove foil and bake an additional 5 minutes or until chicken is done and butternut squash is soft.

Enjoy!

Cheers & Hugs,
Jodi

Easy Sausage & Vegetable Quiche


Easy Sausage and Vegetable Quiche.

For those days when you want a hearty, substantial supper, but don’t feel like putting a lot of time and effort into it, this simple recipe is just the ticket.

It’s full of protein and veggies and could really be eaten for breakfast, lunch or dinner!

The secret to it being easy is in the fact that you don’t have to prepare a crust.  You simply use a little bit of baking mix (like Biquick) to create an almost crust-like texture.

And the options are limitless for what you can put in for your protein and veggies.  Exchange the sausage for bacon or chicken or turkey or ground beef.   You could even leave the meat out and just add more veggies.  Throw in any favorite vegetables you have in your fridge – mushrooms, asparagus, cauliflower, spinach, kale, tomatoes…..  And use any kind of cheese you love.  Exchange the cheddar for Swiss or muenster or provolone or mozzarella or even blue cheese or feta.

You get the idea…  right?  Toss in whatever you like, and you can have a wide variety of quick and easy meals.

I was recently reminded of this recipe when I came across a version of it at The Speckled Pumpkin.  It reminded me of years ago making all of those “impossible” pies….  Impossible Cheeseburger Pie, Impossible Taco Pie, Impossible Lasagna Pie, Impossible Tuna Pie….  Anybody else remember the Impossible Pie craze?  I may be back in the mood for these!

Serve it with a salad or side of roasted potatoes or even some chunky applesauce.

Here is how I made mine for our Sunday Supper last night.

Easy Sausage and Vegetable Quiche

Ingredients:

  • 1 lb pork sausage, cooked and crumbled
  • 1/2 medium sweet onion, chopped
  • 1 red pepper, chopped
  • 1 1/2 cups chopped fresh broccoli
  • 1 cup shredded cheddar cheese
  • 4 eggs
  • 2 cups milk
  • 1 cup Bisquick baking mix (or your favorite)

Directions:

Preheat oven to 400 degrees F.

Put sausage in bottom of stoneware deep dish baker or your favorite 2-quart round casserole dish or deep dish pie pan.  Top with chopped onions, pepper, broccoli, and cheese.

In a medium bowl, beat the eggs, milk and baking mix with a wire whisk until well blended.  Pour over sausage, veggies and cheese.

Bake for approximately 40 minutes until knife inserted in center comes out clean. 

Enjoy!

Cheers & Hugs,
Jodi


Quick & Easy Egg Roll Lettuce Wraps

Egg Roll Lettuce Wraps.

I am so excited to share this recipe!

A friend on Facebook recently shared a recipe for a Sausage Egg Roll Bowl that had me so intrigued…

and so hungry….

that i couldn’t wait to try.

All the yummy ingredients of an egg roll without the deep fried wrapper in a bowl sounded divine!

But then I thought……  how about wrapping it in crisp Romaine lettuce leaves and making it into yummy, healthy, quick, and easy Egg Roll Lettuce Wraps?!

What I loved, and I think you will too, is how FAST and EASY this recipe is – especially for how DELICIOUS it is!

This is definitely a 20-minute meal from start to finish.  Who isn’t looking for one of these a few times a week?!

And there are so many possibilities for changing it up…  switch out chicken or turkey sausage for the pork sausage…  add raisins or craisins….  add walnuts or slivered almonds…  add chopped sweet red peppers or crisp celery or mushrooms…

I think the key ingredients to this recipe are the soy sauce (low-sodium!) and the sesame oil (I used Trader Joe’s Toasted Sesame Oil).

I am a salt LOVER, but I only buy low-sodium soy sauce (believe it or not).  If you want the full flavor of soy sauce without all the sodium, you will love low-sodium soy sauce.  In fact – you can add more flavor!  You can always add a dash of salt later if you really think it needs, but you can never take away too much of a salty flavor.

Here is the recipe as I slightly tweaked and made into a wrap!

I hope you will try, and I hope you love as much as I did!

Quick & Easy Egg Roll Lettuce Wraps

Ingredients1 lb bulk sausage (pork, chicken, turkey)

  • 1 14-oz bag Fresh Express Cole Slaw Shredded Cabbage & Carrots Mix
  • 4 cloves garlic, minced
  • 1 tsp ground ginger
  • 1-2 Tbsp. low-sodium soy sauce
  • 1/3 cup chopped green onions
  • 1 Tbsp sesame oil
  • 1 bunch fresh Romaine Lettuce

Directions

Cook sausage in a large stir-fry skillet over medium-high heat, stirring often to crumble, until fully cooked.

Add cabbage mix, garlic, ginger, and soy sauce.  Cook for 3-4 minutes until cabbage has softened a bit.

Remove from heat and top with green onions and drizzle with sesame oil.  Stir to combine.

Serve over a bed of fresh romaine leaves or scoop into leaves to serve.

Enjoy!

Cheers & Hugs,
Jodi

Grandma’s Old Fashioned Poppy Seed Cake

Grandma’s Old-Fashioned Poppy Seed Cake.

One of the things I love to do around my birthday is bake Grandma’s Old-Fashioned Poppy Seed Cake.

Having a birthday so close after Christmas, when everyone is really “over” sweets, Grandma made this simple cake for my birthday every year for as long as I can remember until she passed away.

May sound kind of strange that I like to bake my own cake these days, but I really do.  For me, it’s more than baking.  It’s reminiscing.  It’s sweet, loving memories.  It’s kind of a tribute to my Stella Star.

I use Grandma’s old tin measuring cup as I measure out the flour and sugar.  I grease and flour the pan – a square tube pan – because that is the way Grandma did it.   I crack eggs and stir and think of conversations Grandma and I had in the kitchen while she cooked and baked.  I put it in the oven and wait for the smell…. That smell that takes me right there to her kitchen.  Right back to that feeling of comfort and peace and unconditional love.

So yep – baking my cake gives me almost as much joy as eating it!

I love the way the outside is crisp and crunchy, and the inside is tender and moist and just a little sweet, but packed full of flavor.

This is a very basic cake.  A cake likely made in times when ingredients were simple, money was tight, and everything was made from scratch with love.  And I love it!

Do you have a recipe like this that is just as much of a memory as it is something to eat?  Something that is a ritual of love?

Here is our recipe:

Grandma's Easy Poppy Seed Cake

  • Servings: One Yummy Cake
  • Print

INGREDIENTS:
3 cups flour
2 cups sugar
1/2 tsp baking soda
1/2 tsp salt
4 eggs
1 tsp vanilla
1 cup vegetable oil
1 can evaporated milk
1/4 cup poppy seeds
DIRECTIONS:
Preheat oven to 350 degrees F.  Grease and flour 10 inch tube or bundt pan.
In a large bowl, mix dry ingredients.
Make a well in the center and add eggs, vanilla, oil, and milk.  Mix well.
Fold in poppy seeds.
Pour into prepared pan, and bake for 1 hour or until toothpick inserted into cake comes out clean.
Cool 10 minutes in pan, then turn onto rack to cool.

When cool, sprinkle generously with sifted powdered sugar.

Enjoy!
Cheers & Hugs,
Jodi