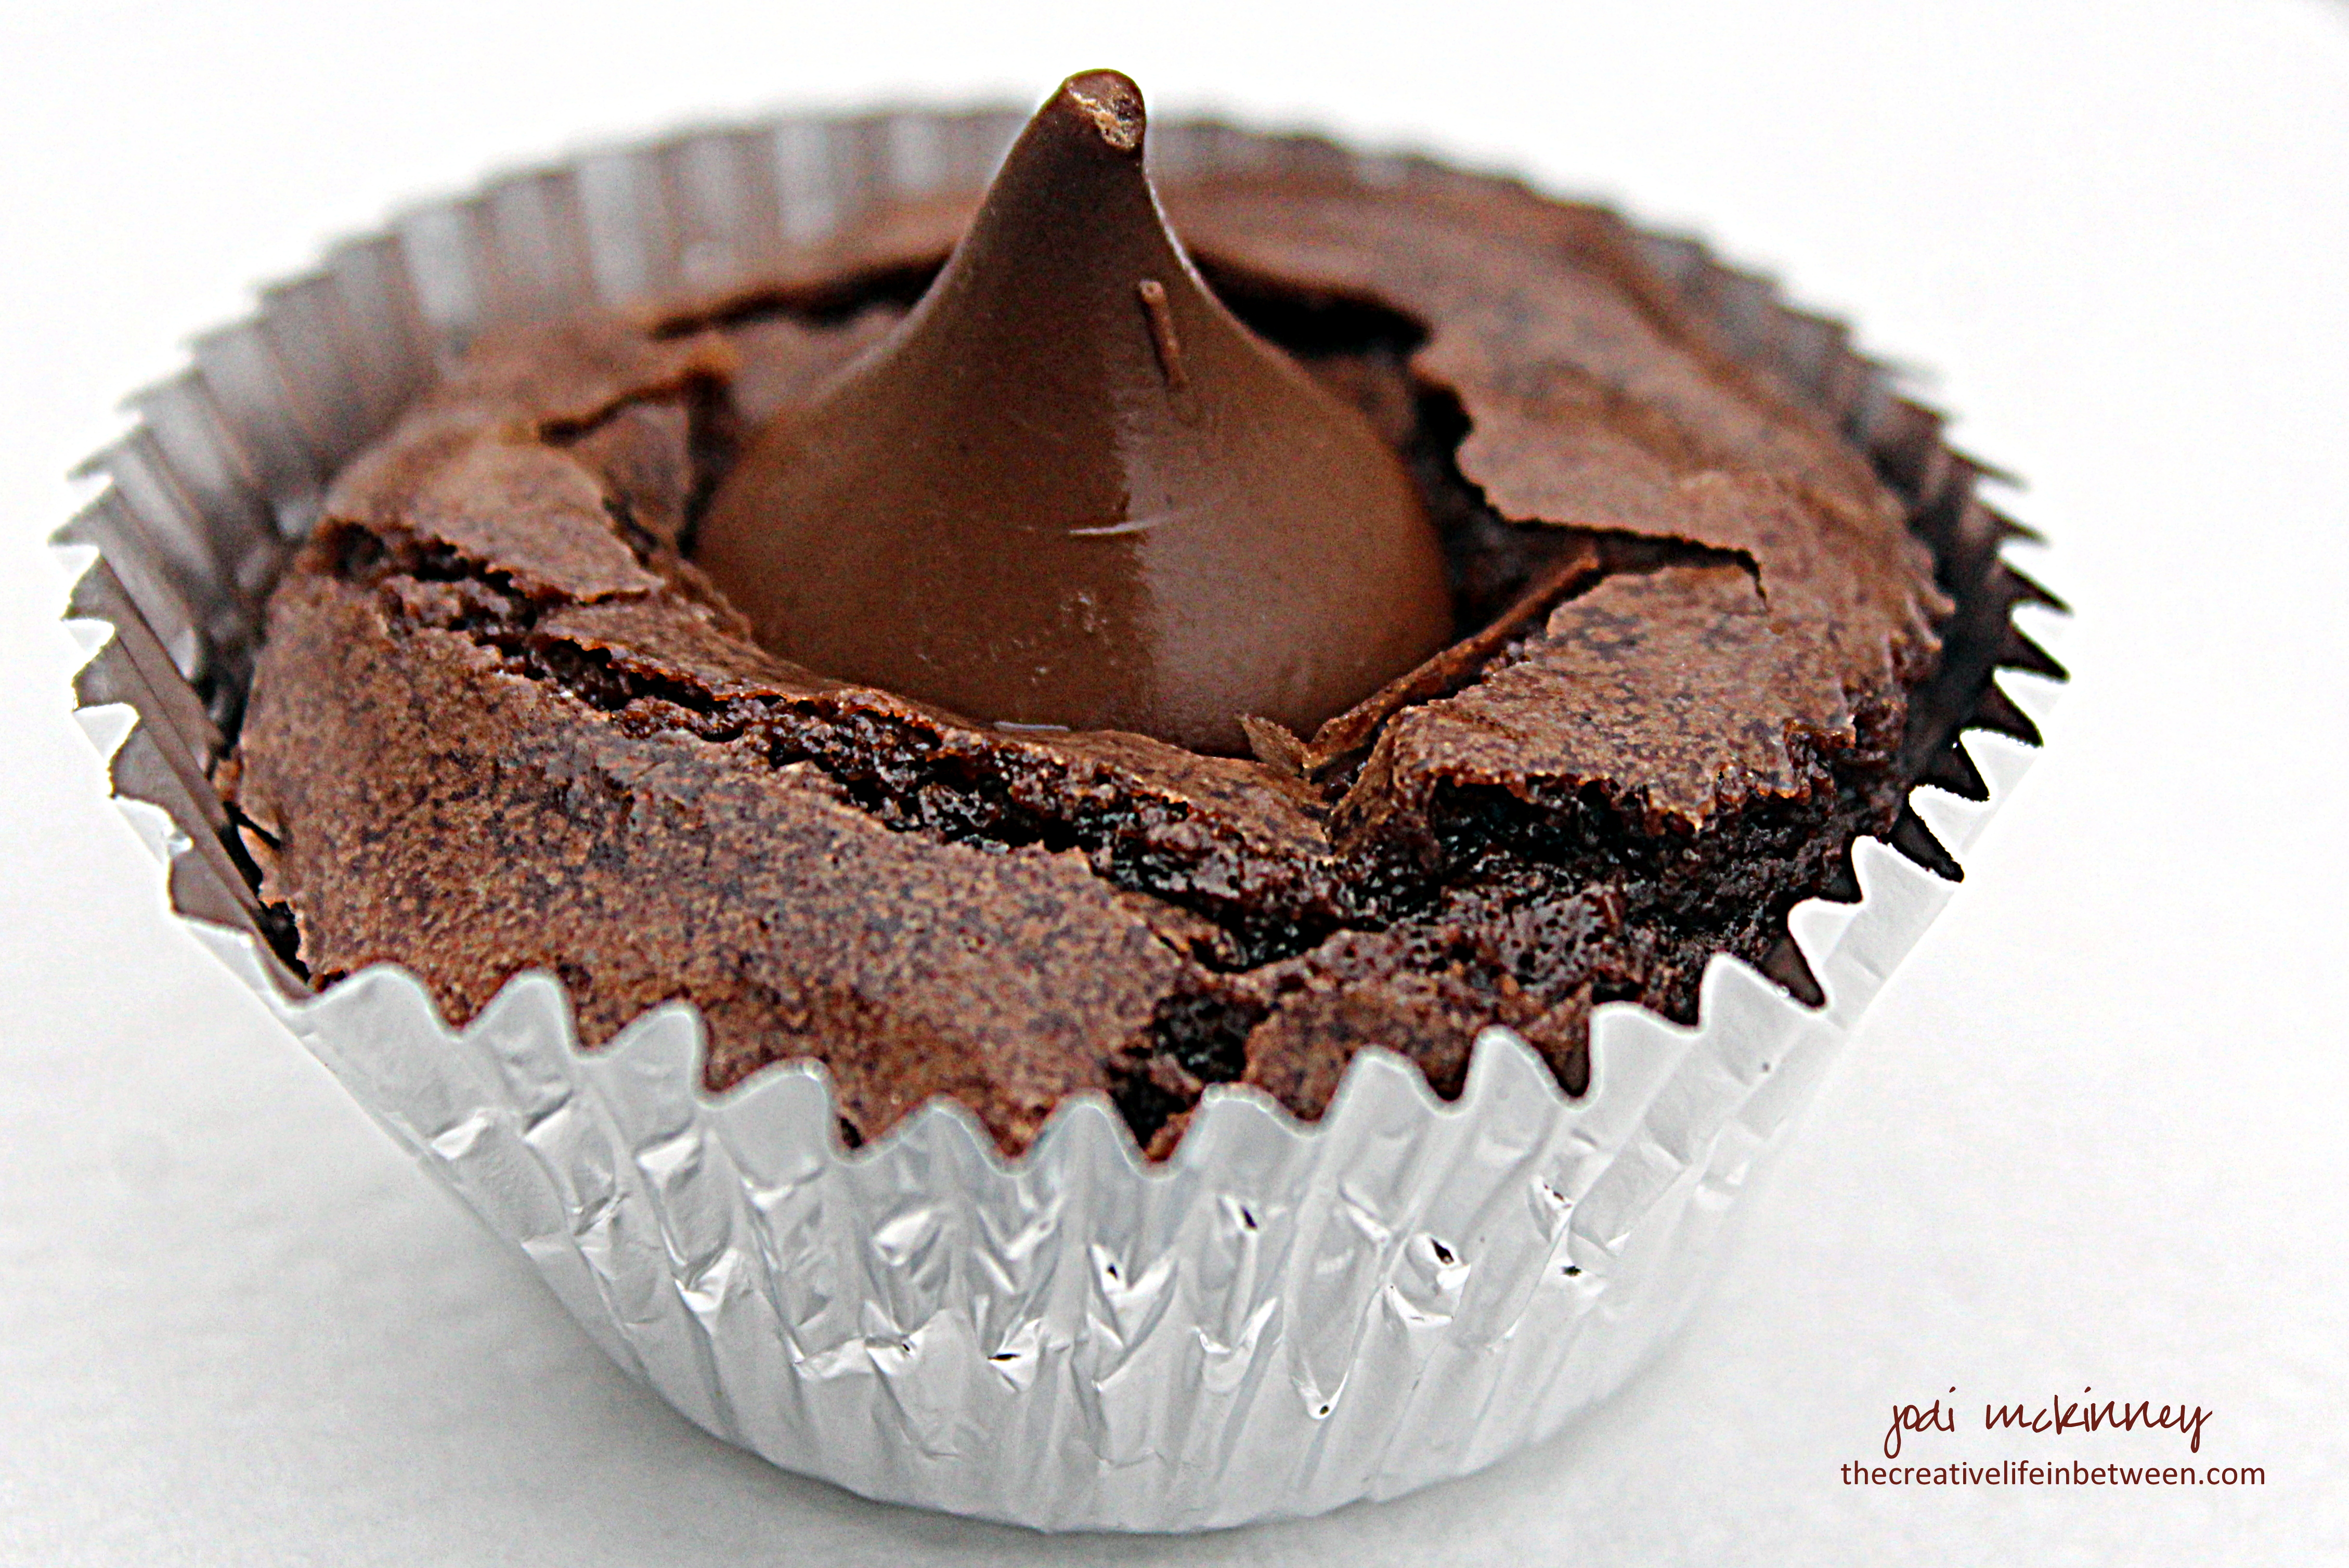
Hershey’s Kiss Brownie Bites
might just be the ultimate little treat
for the inner chocoholic in
all of us (well – 99.999999% of us… Hard as it is to believe – there is an itsy bitsy, teeny tiny population of people on this earth who do not like chocolate!)
But for the rest of us….
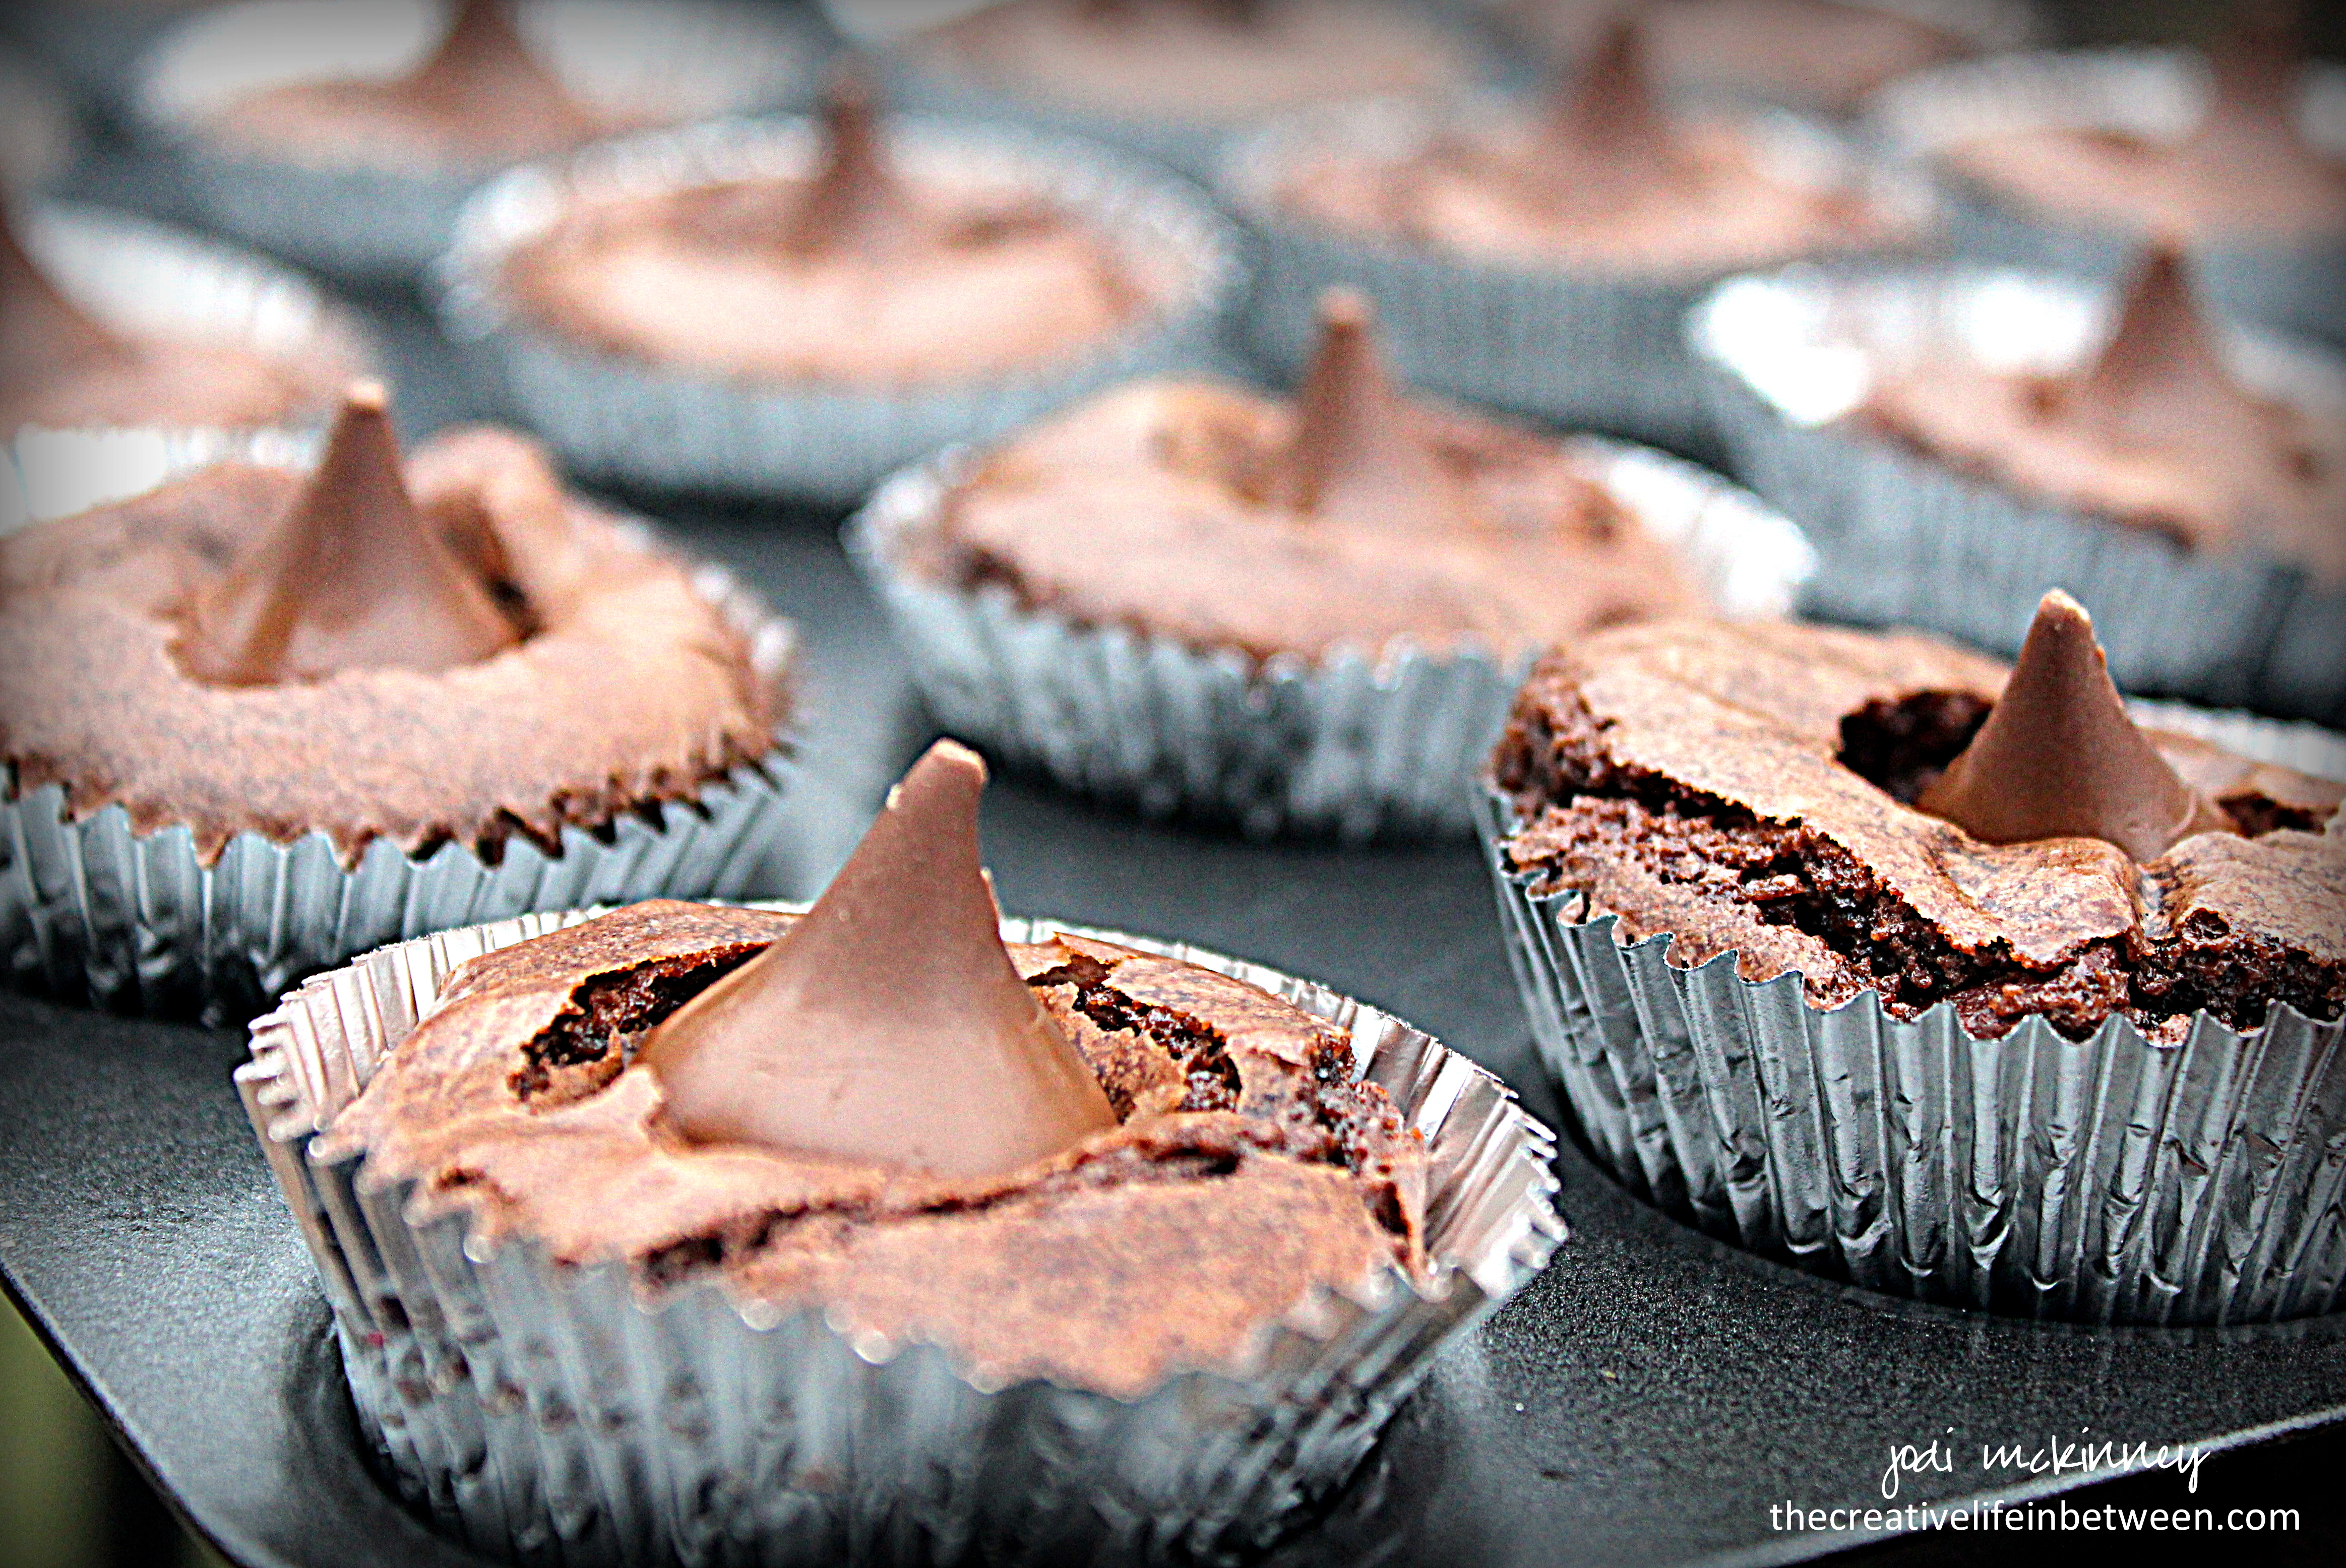
Imagine a bite-sized scoop of Ghiradelli Double Chocolate Brownie mix
baked to perfection of fudgy center with slightly hardened and cracked outside
in a mini muffin baking pan (be sure to line) and topped off with a smooth, creamy milk chocolate Hershey’s Kiss.

Not only are they sheer decadent delight, they are about as easy to make as desserts come.
I have started baking for my son’s wedding next month. We have a unique tradition in our little part of the world that requires an overflowing cookie table at weddings. The cookies are eaten for appetizers, dessert (along with wedding cake), and supplied to take home in to-go boxes. I’m happily in charge of the cookie table for the wedding, so a baking I will go.
I started with these little brownie bites and will be stocking the freezer with chocolate chips and apricot kolaches and lots more in the coming weeks!
Wedding cookie table or not, you are going to want to try these. Your friends and family will thank you, and you won’t be sorry!
Hershey's Kiss Brownie Bites
Ingredients:
- 1 18 oz. box Ghiradelli Double Chocolate Brownie Mix (or your favorite)
- 1/4 cup water
- 1/3 cup vegetable oil
- 1 egg
- 24 Hershey’s Kisses
Directions:
Preheat oven to 325 degrees F.
Line mini-muffin baking pan with foil mini-muffin liners.
Prepare brownie mix according to package directions by combining mix, water, oil, and egg. Scoop batter into foil liners to 3/4 full.
Bake for approximately 12 minutes. While brownie bites are baking, unwrap Hershey’s kisses. Remove from oven and immediately insert a Hershey’s kiss into the center of each brownie bite. Press gently. Allow to cool. The kisses take a while to set, so be careful.
Enjoy!
Cheers & Chocolate Kisses,
Jodi