One-Pan Mustard-Roasted Potatoes, Brussels Sprouts, and Sausages

One-Pan Mustard-Roasted Potatoes, Brussels Sprouts, and Sausages.

You totally have to love when your grown sons start sharing recipes with you!  I am so proud of the great cooks they have both become (and so happy for the lucky wives they have because of it!!!).

My younger son shared this recipe recently he found online at slenderkitchen.com.  I tweaked it up a bit by changing garlic salt to fresh garlic, oregano to rosemary, doubling the sausage, and zipping it up with horseradish mustard.  It is a healthy, clean eating meal that is gluten-free and Paleo as well.


But it is also super delish!

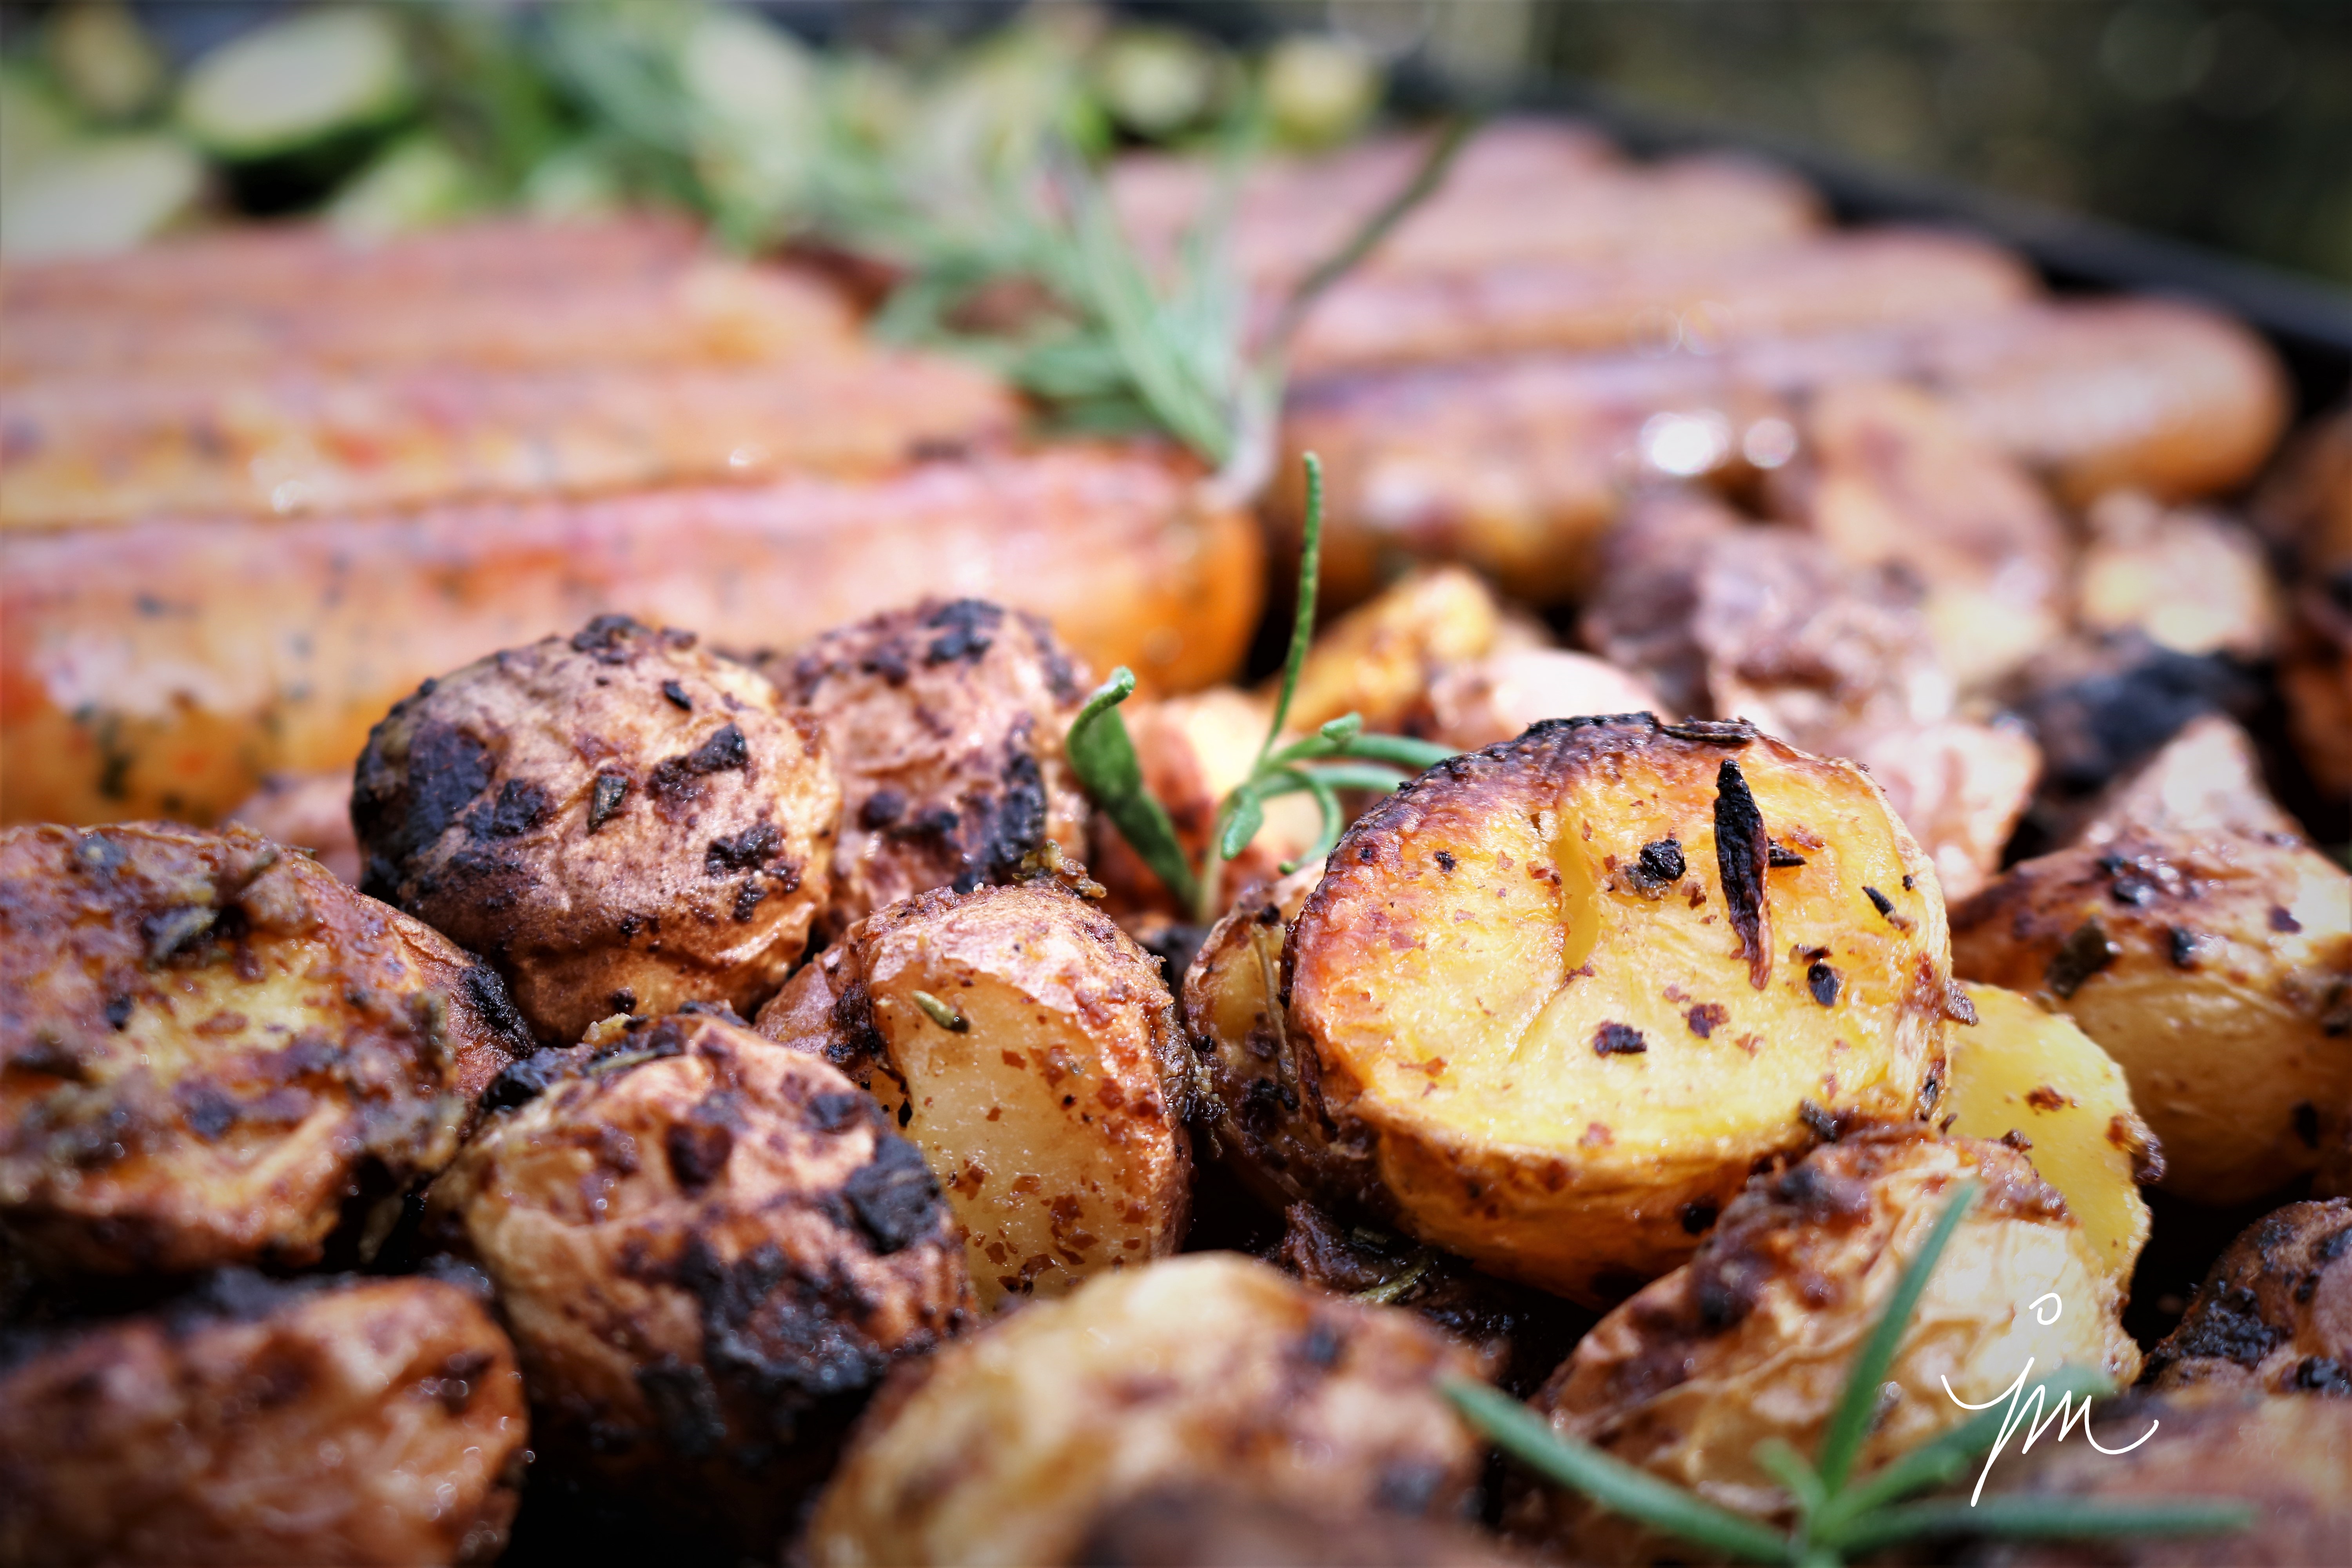
Imagine a pan full of crispy roasted potatoes coated in a mustard-garlic glaze, caramelized Brussels sprouts, and hearty sausage that only takes about 10 minutes to throw together.

One-pan meals are so awesome, and I love making something that also serves as an extra lunch or two to take the the office and dinner another night that same week.

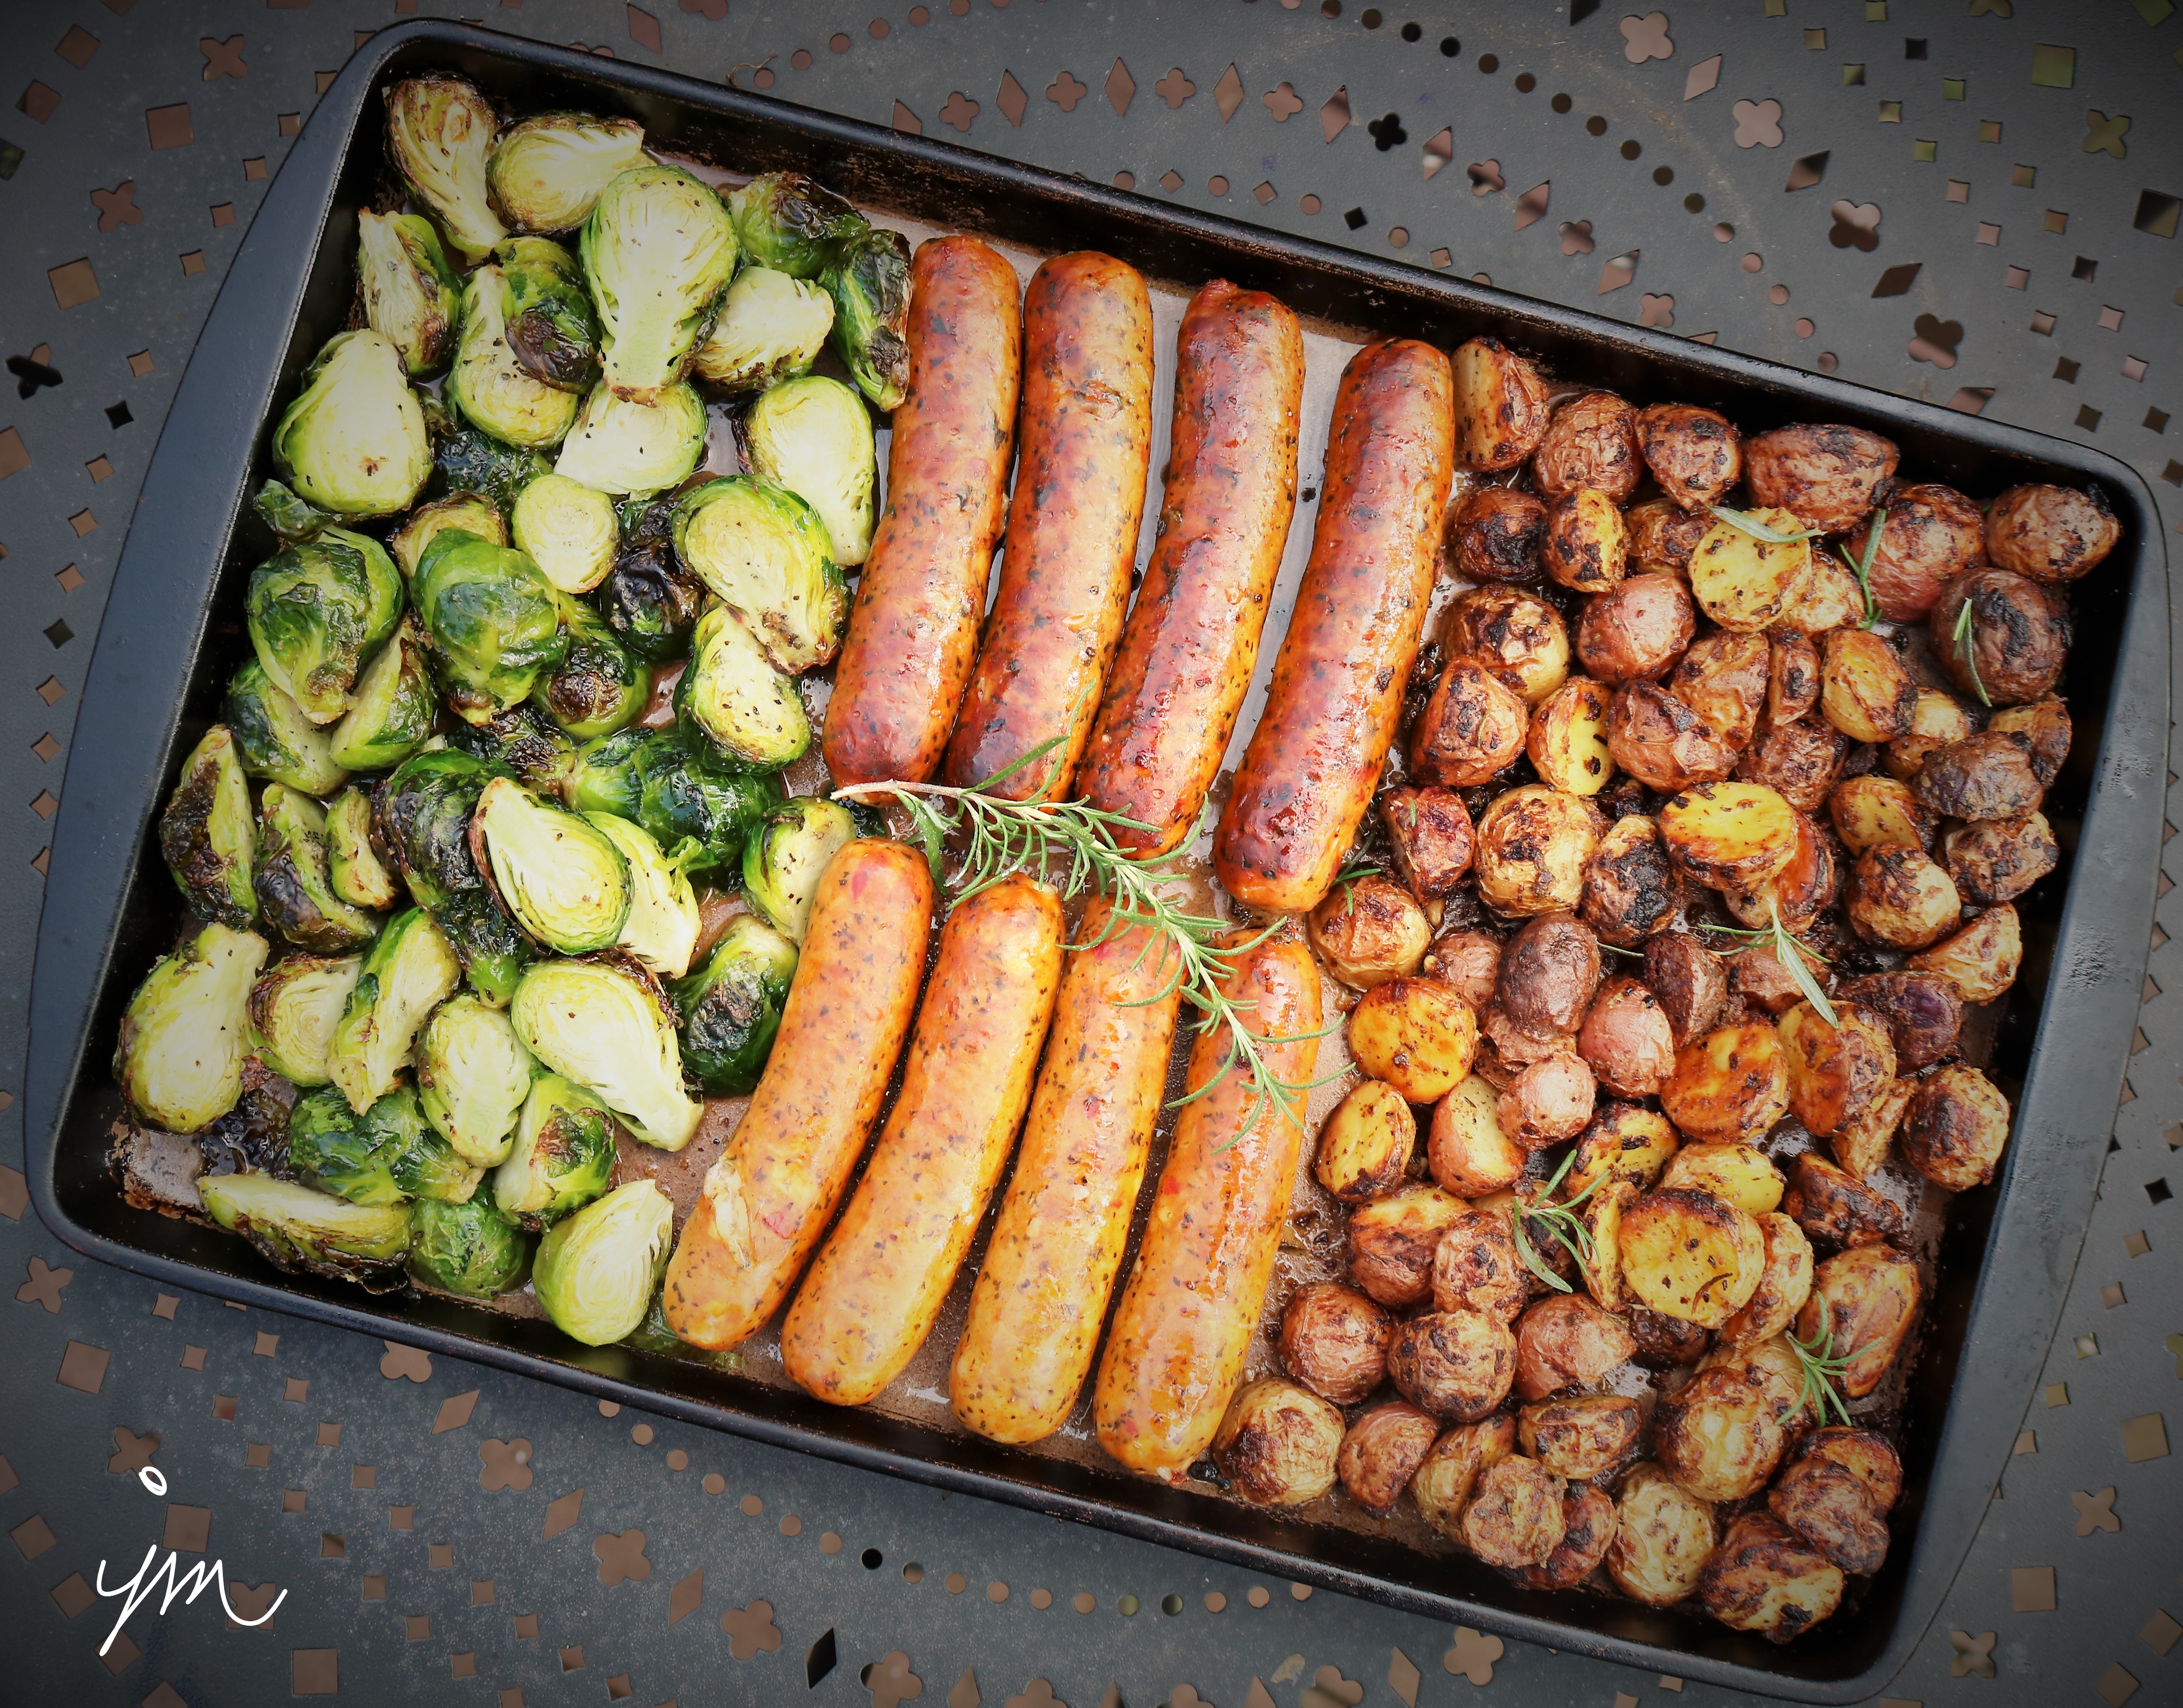
I roast it all up in my all-time favorite baking pan, the Pampered Chef Large Stoneware Bar Pan.  It is so worth the investment for how beautifully and evenly it bakes and roasts.  I use this pan at least once a week for roasting veggies or baking.  I can’t imagine my kitchen without it.

Here is the recipe for how I made it.  Tweak it up to your tastes and share your ideas!  You could use butternut squash instead of potatoes, cauliflower or carrots or green beans instead of Brussels sprouts.  The ingredients and combinations are pretty limitless.

One-Pan Mustard-Roasted Potatoes, Brussels Sprouts, and Sausages

Ingredients:

  • 1 lb potatoes, cut into bite-sized chunks (I used a bag of mixed baby potatoes in white, yellow, and purple and cut them in half)
  • 3 Tbsp. olive oil
  • 2 Tbsp. whole grain or horseradish mustard (I used horseradish – you can use your favorite!)
  • 3 cloves garlic, minced (or 1 tsp garlic powder)
  • 1 tsp. fresh rosemary, chopped (you might also like to use oregano – dried or fresh)
  • 1 1/2 lbs. chicken sausages (I used two packages of Aldi’s Never Any Brand – one Italian Sausage and one Tomato Basil)
  • 1 lb fresh Brussels sprouts (cut in half)
  • Salt and pepper to taste (I used Malton Sea Salt flakes)

Directions:

Preheat oven to 425 degrees F.

Mix together 2 Tbsp olive oil, mustard, garlic, rosemary, salt and pepper.  Toss the potatoes with the mixture, and spread out in a large baking pan.  Roast in oven for 25 minutes, tossing once or twice during roasting.

Remove pan from oven and push potatoes to one side.  Spread out Brussels sprouts on other side of pan evenly.  Drizzle with olive oil and sprinkle with salt and pepper.  Place the chicken sausages in the middle of the pan between the potatoes and Brussels sprouts.

Increase oven temperature to 475 degrees F, and place the pan back in the oven to roast for another 15 minutes.  Shake the pan once or twice during the roasting time to ensure even roasting.

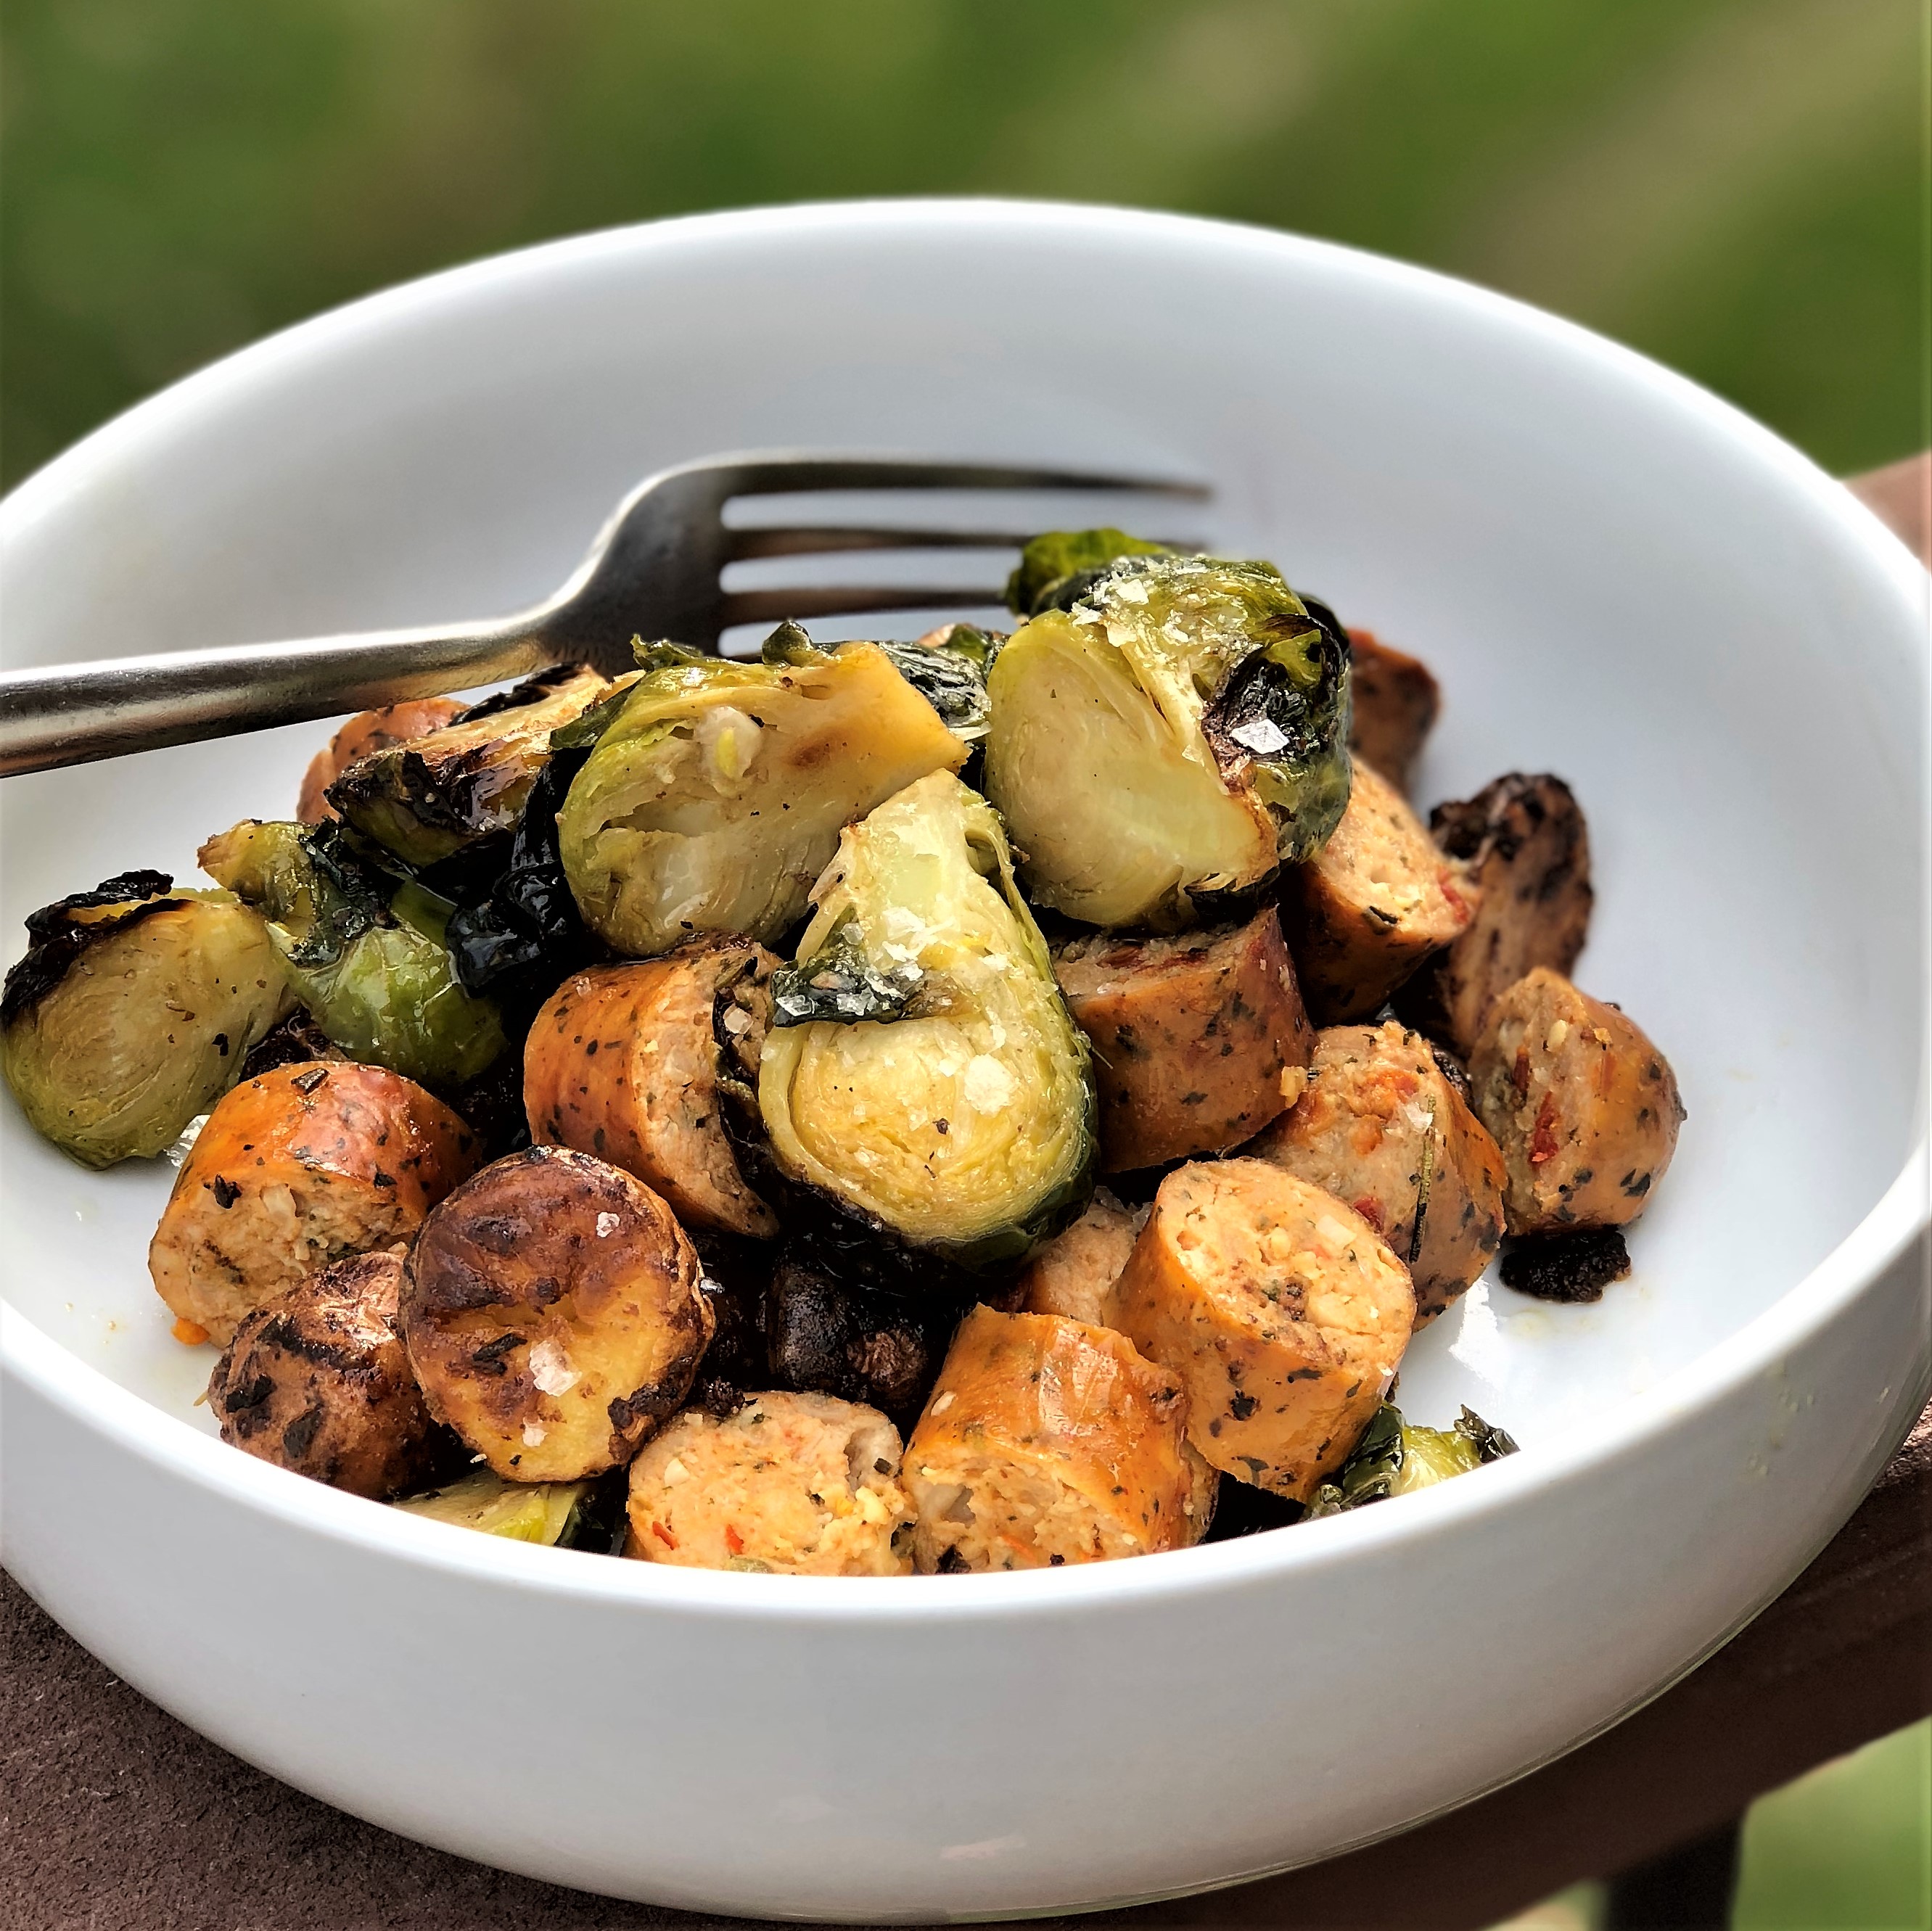
To serve, slice sausages into bite-sized pieces and toss all into a bowl.

Enjoy!

Cheers & Hugs,
Jodi

Roasted Spiral Butternut Squash “Noodles” with Garlic, Rosemary & Browned Butter

Roasted Spiral Butternut Squash “Noodles” with Garlic, Rosemary, and Browned Butter.

O. M. G!

Where have you been all my life spiralized butternut squash?

Many of us have been spiralizing our zucchini squash into beautiful noodles, but am I one of the last on the bandwagon for spiralized butternut squash??!!

So simple…
So quick…
So DELICIOUS!!!

I happened to come across a package of fresh spiral-cut butternut squash at my local Aldi Grocery Store recently.

I thought about pan frying it in butter and garlic, but then chose to roast it like I typically do with cut butternut squash, and WOWZIE PaZOWzie was I pleased!
And so was hubby!

What a quick, easy, delicious, and nutritous treat!

Here is the super simple, yet amazingly delicious way I prepared it.

Roasted Spiral Butternut Squash with Garlic, Rosemary, and Browned Butter

Ingredients:

  • 1 10-oz package of prepared spiral cut butternut squash “noodles” (or spiral cut your own)
  • 2 Tbsp. salted butter, browned
  • 2 large garlic cloves, minced
  • 1 large sprig fresh rosemary, minced
  • 1 Tbsp. flaked sea salt

Directions:

Preheat oven to 400 degrees F.  Brown butter in skillet.  Watch closely so it doesn’t burn.  Once browned, remove from heat and stir in garlic.

Spread spiral-cut butternut squash “noodles” onto a stoneware bar pan or your favorite shallow baking pan.

Sprinkle with salt.  Drizzle with garlic-enhanced browned butter.  Top with minced rosemary.  Toss to coat all.

Roast for 7-9 minutes.

Serve immediately.

Enjoy!

Cheers & Hugs,
Jodi

Gluten-Free (Flourless) Banana Oatmeal Bread

Gluten-Free (Flourless) Banana Oatmeal Bread.

When you have a bunch of bananas that ripen before you eat them – and you know nobody will eat them – they are perfect for baking.

I have a really yummy banana bread recipe, but it is not the “healthiest.”  I decided I wanted to make something with less (or no) sugar, and maybe no flour either.

I was excited when I found this super-easy and oh so yummy recipe at The Baker Mama.

It’s been very hot here, so I baked this early on a Sunday morning.  I made one loaf for my youngest son and his wife (my son loves banana bread and my daughter-in-law likes to eat healthy and gluten-free if possible) and one loaf for hubby and me.

My son mentioned that if I added some protein powder to the recipe, it would be the perfect breakfast.  I will have to try that next time.

But how simple is this recipe with five healthy, wholesome ingredients?!

Hope you will give it a try.

Gluten Free Banana Oatmeal Bread

Ingredients:

3 ripe bananas
2 cups old-fashioned rolled oats
2  eggs
¼ cup pure maple syrup
1 tsp baking soda

Directions:

Preheat oven to 350°F. Lightly grease 9×5-inch loaf pan with non-stick cooking spray.

Combine all ingredients in a food processor or blender and blend until smooth and well combined. Pour into prepared loaf pan.
Garnish the top of the batter with thinly sliced bananas or pecans or walnuts, if desired).

Bake for 25-30 minutes or until a toothpick inserted in the center comes out clean.  Do not overbake or bread will be dry tasting.

Let loaf cool completely in pan. Store in a Ziploc bag in the refrigerator,

Enjoy!

Cheers & Hugs,
Jodi

Creamy Cauliflower Risotto with Shrimp

Creamy Cauliflower Risotto with Shrimp.

On Easter Sunday, we enjoyed an absolutely amazing buffet brunch at a local restaurant in Mars called Breakneck Tavern where they served a positively divine shrimp risotto (among a kagillion other amazing treats).  I only had about a tablespoon of it on Easter, because I wanted to try so many of the other wonderful things they had available (way more than I could sample at one sitting!), but I could not get that shrimp risotto out of my mind.  It was sooooooo good!

Well – I have also  been hearing great things about “ricing” cauliflower and have been anxious to try.

Since I had a beautiful fresh head of cauliflower in the fridge, as well as a bag of shrimp in the freezer, I decided to try a healthier version of shrimp risotto for dinner last night.

O. M. G!  This turned out almost more heavenly than the original one I had a tiny taste of on Easter.  More heavenly because it is so much healthier, but also so delish!!!

My recipe is adapted from one I found at Cafe Delites.  This recipe is a low-carbohydrate, high protein, fiber-rich, calorie-friendly plate of deliciousness!  I hope you will give it a try.

P.S.  If I was making this only for me, I would totally add fresh green peas.  What do you think?  Hubby absolutely detests peas, so I sacrificed for him, but oooohhh –  can you imagine??!!  Pea lovers out there??

Here is how I made it.

Creamy Cauliflower Risotto with Shrimp

Ingredients:

  • 1 large cauliflower
  • 12-14 oz shrimp, peeled and tails removed
  • 2 Tbsp salted butter
  • 5 cloves garlic, minced
  • 1 lemon
  • 2 Tbsp olive oil
  • 1  cup Half and Half (or cream or milk)
  • 1/2 cup chicken broth (or dry white wine)
  • 1/2 cup grated Parmesan cheese
  • 2 tsp salt
  • 1 Tbsp coarsely ground pepper
  • 1/4 cup fresh parsley, chopped
  • 1/2 cup chopped sweet red pepper (optional)

Directions:

Remove core from cauliflower and break into florets.  Working in batches of approximately 1 cup at a time, pulse cauliflower in food processor until it is the consistency of rice.  Place all in large bowl and set aside.

In a large skillet, melt butter over medium-high heat.  Add shrimp and sear them while stirring until they start to lose their color.  Add garlic and juice of half of the lemon.  Fry for an additional minute.  Add cauliflower, red pepper (if adding) and olive oil.  Fry and stir for 3-4 minutes until fully combined and coated.  Stir in the half and half (or cream or milk) and chicken broth (or white wine).  Grate Parmesan cheese over all and sprinkle with salt and pepper.  Combine.  Cover and reduce heat to low to simmer 6-8 minutes until creamy.

When ready to serve, sprinkle with fresh parsley and wedges of lemon from remaining half.  Top with additional Parmesan if desired.

Enjoy!

Cheers & Hugs,
Jodi


Zucchini Pizza Casserole

Zucchini Pizza Casserole.

Are you enjoying the abundance of garden fresh zucchini squash in new and creative ways?

There are oodles of zoodles.  There are breads and brownies.  There are soups and sticks,  fries and fritters  and frico.  There are even planks and boats.

Well – here’s one that is sure to be a crowd pleaser.  It is Hubby tested and two thumbs up approved here!

A version of this recipe was recently posted by a friend on Facebook in one of those hyperlapse videos that make everything look easy.  And in this case, it was!

This is a wonderfully delicious, cheesy, gluten-free, low-carb way to get your protein and veggies all in one wonderful casserole.

Serve it with a fresh green salad, and you will be all set.

We really, really, really loved this, and it made enough that we’ll be happily enjoying it for a few days!

Give it a try, and let me know if you like it as much as we did.

Zucchini Pizza Casserole*

Ingredients:

  • 4 cups shredded zucchini (do not peel)
  • 2 eggs
  • 1 cup freshly shredded Parmesan cheese
  • 1 cup shredded cheddar cheese
  • 1 lb fresh Mozzarella cheese, sliced thinly
  • 1 lb ground beef or turkey
  • 1 medium onion, chopped
  • 2 cloves garlic, minced
  • 1 (15oz.) jar of your favorite pizza or tomato sauce
  • 1 medium sweet red, yellow, orange, or green pepper, chopped
  • Salt and Pepper
  • 2-4 leaves fresh basil, chopped

Directions:

Preheat oven to 400 degrees F.  Place grated zucchini in a colander, sprinkle with about  1 tsp salt.  Let set for 10 minutes.  Squeeze out water.

In medium bowl, combine zucchini, eggs, 1/2 cup Parmesan, and 1/2 cup cheddar cheese.  Mix well and press into a greased 13×9″ baking dish.  Top with half of the mozzarella cheese slices.  Bake for 20 minutes.

While that is baking, brown ground beef or turkey with onion and garlic, and salt and pepper in a large saucepan.  Add pizza or tomato sauce, and stir well.

Spoon meat mixture over top of baked zucchini mixture.  Top with remaining 1/2 cup Parmesan, 1/2 cup cheddar, sliced mozzarella and chopped peppers.  Sprinkle with chopped basil.  Bake for 20 more minutes until browned and bubbly.

Let stand for 5-10 minutes before serving.

Enjoy!

Cheers & Hugs,
Jodi

*Slightly adapted from Taste of Home.

Oodles of Zoodles

zoodles-2

Oodles of Zoodles.

Has anyone else joined the zoodle craze?

zoodles-1

Low carb, low calorie, gluten free, grain free, wheat free, healthy, nutritious, unprocessed, vegetarian, cheap and and easy ZOODLES!

zoodles-3

Zoodles are zucchini noodles.  Or better put, vegetable noodles made from spiral cut zucchini.  They can be used in so many ways!

I recently purchased a SpiralLife Vegetable Slicer, and couldn’t wait to give it a try.  Super inexpensive at $14.99 on Amazon, it was easy to use, easy to clean, and easy on the wallet.

I made my zoodles to accompany a light dinner of Lemon Butter Chicken this week, and we loved them.

I simply sauteed them ever so briefly in olive oil with salt and pepper and a couple cloves of minced garlic.  After about two minutes, I added a handful of halved grape tomatoes and a generous grating of fresh Parmigiano reggiano cheese.  After sauteeing another two minutes, my zoodles were ready to serve and eat.  Yum!

How are you making your zoodles?

Cheers & Hugs,
Jodi

Creamy Cauliflower Risotto and Garlic Rosemary Lamb Chops

Creamy Cauliflower Rissoto and Lamb Chops

Last Sunday, I was in the mood to be creative in the kitchen, so I decided to tackle the rack of lamp chops I recently purchased and do something interesting with a head of cauliflower I had.

For the lamb chops, I rubbed them with a simple mixture of fresh rosemary, garlic, salt and pepper and marinated them for 4 hours in the fridge.  When we were ready to eat, I simply pan seared them about 2 minutes on each side in a hot skillet with olive oil.  They turned out amazing!

lamb chops and creamy cauliflower risotto

Here is the recipe for the Creamy Cauliflower Risotto.  I have to say… I absolutely LOVED it!  A little more work than simply roasting cauliflower or mashing russet potatoes, but if you have the time and the inclination, it is SOOOO worth it!

Add some fresh greens, and you have a meal fit for royalty!

Hope you will give this a creative cauliflower recipe a try!  You won’t be sorry.

Creamy Cauliflower Risotto

  • 1 head cauliflower, cut into florets
  • 3 Tbsp. olive oil
  • 1 large onion, chopped
  • 1/2 cup chopped sweet red, yellow, and/or orange peppers
  • 4 cloves garlic, minced
  • 1/3 cup white wine
  • 1 cup chicken stock
  • 4 Tbsp. butter
  • 1 cup freshly grated Parmigiano Reggiano parmesan cheese
  • 1/4 cup Greek yogurt or sour cream
  • Salt and pepper to taste

Directions:

Finely chop cauliflower florets until it reaches approximate size and texture of rice.  (You can use a food processor if you like, but I did not.)  Set aside.

Heat olive oil in a large sauce pan.  Saute onions, peppers and garlic until caramelized.

Add white wine, and cook for 1 minute.  Add cauliflower “rice” and chicken stock.  Cover and cook on medium for about 10 minutes.

Add butter, and continue to cook for another 5 minutes without lid, allowing some of the liquid to evaporate.  Stir occasionally.

Once the cauliflower “rice” has thickened, stir in the Parmigiano Reggiano cheese.  (There really is no substitute for this BEST Parmesan cheese!)  Remove from heat and add Greek yogurt or sour cream and salt and pepper to taste.  Blend with immersion blender to desired creamy consistency.

Enjoy!

Cheers & Hugs,
Jodi

*Recipe slightly adapted from GlutenFreeFix