Homemade Cherry Pie

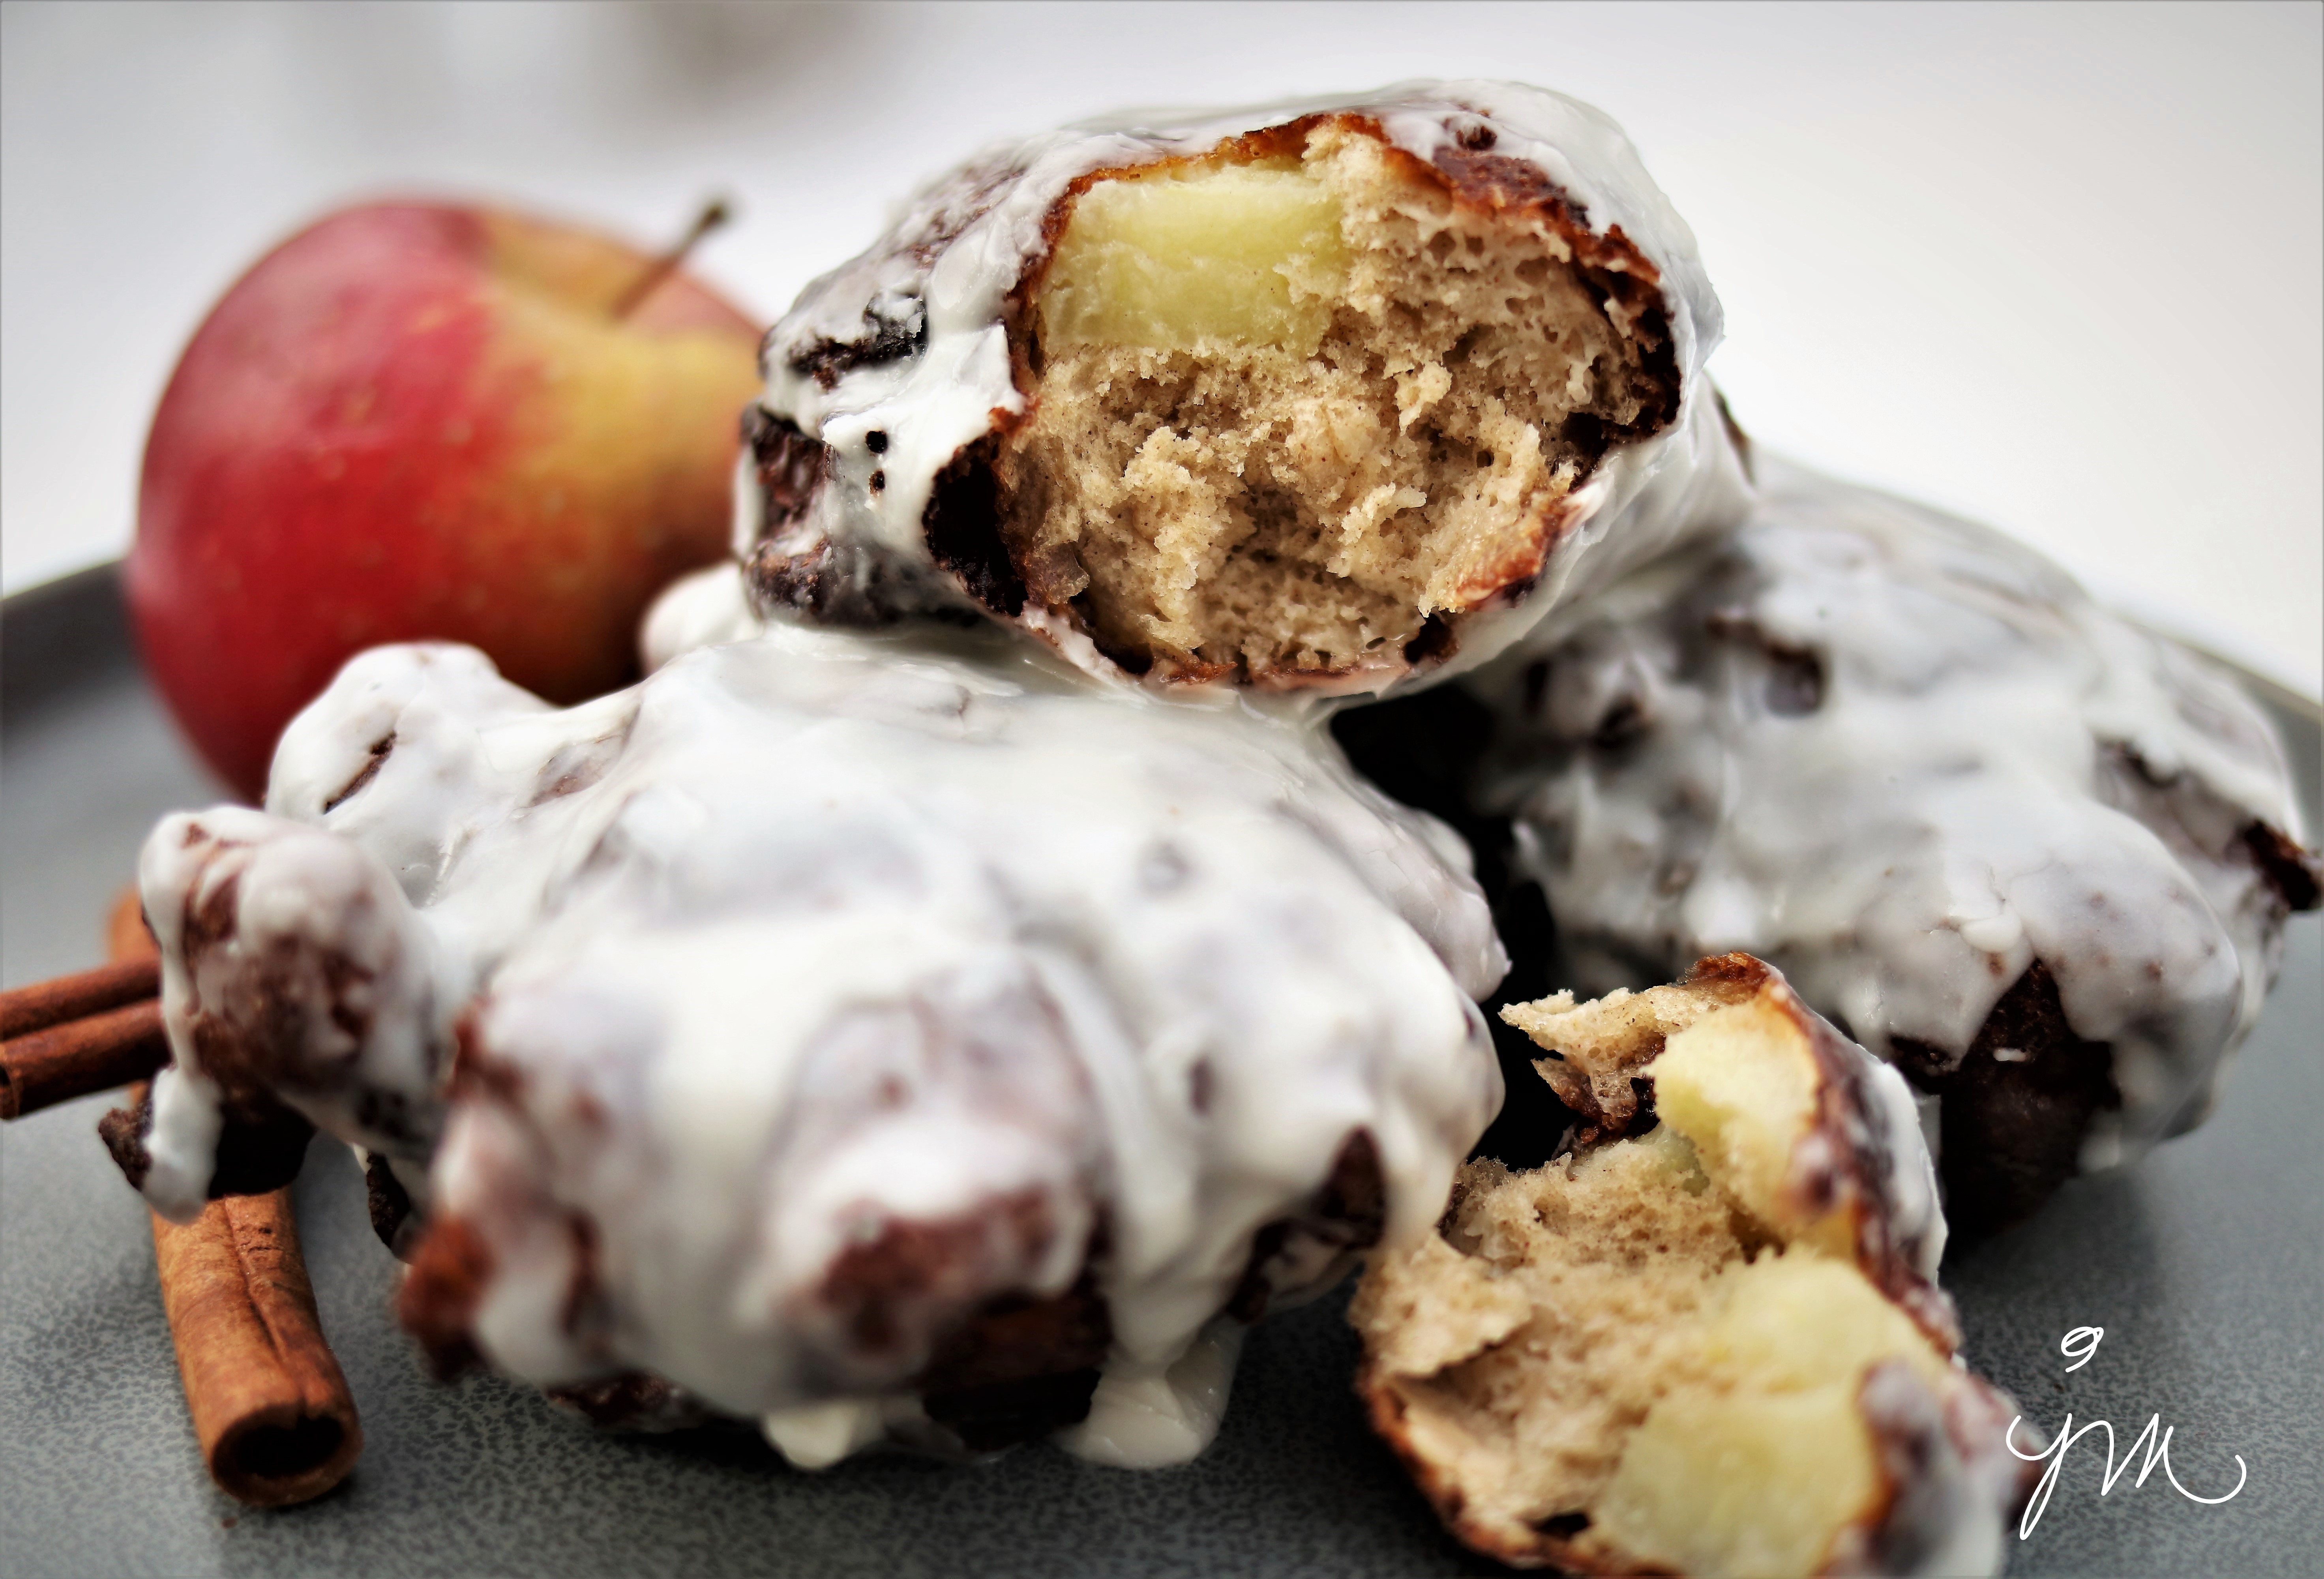
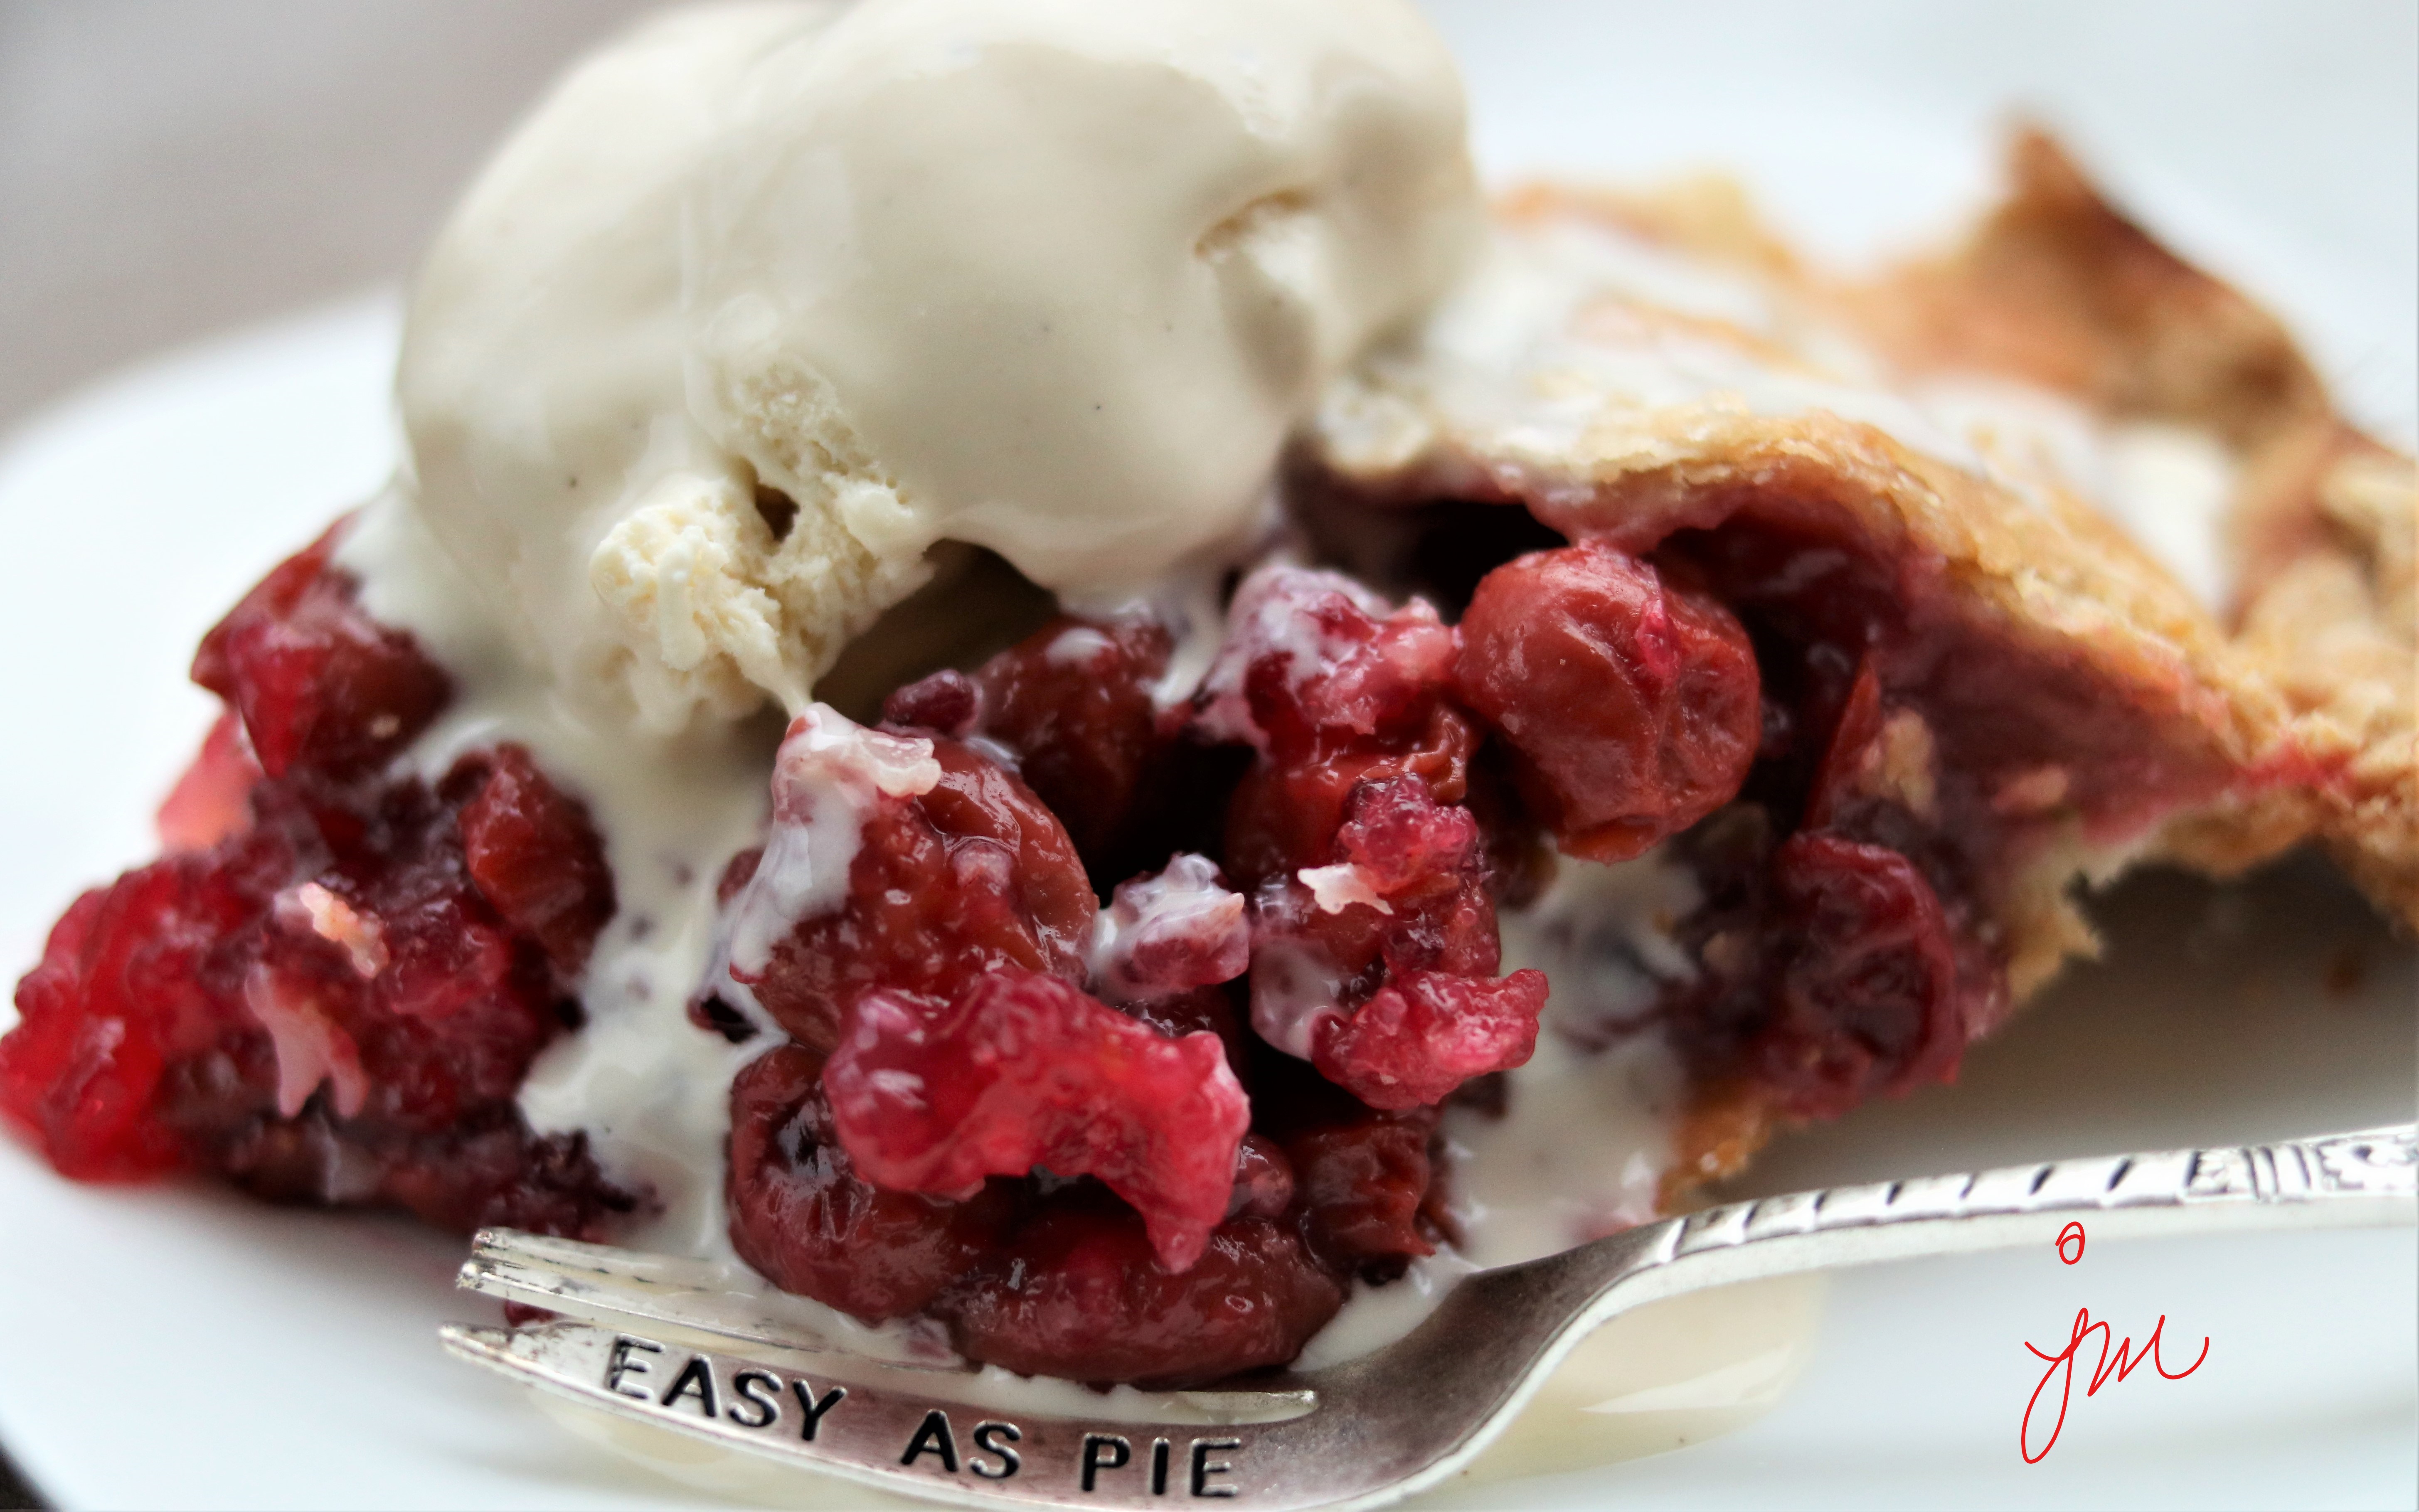
Homemade Cherry Pie.

On a recent visit to an awesome new grocery store that opened up near us called Fresh Thyme, I discovered they carried big 2.5 lb bags of red sour pie cherries.  I was so excited!  This is something hard to find where we live.  You can find dark sweet cherries everywhere, and they are delicious for eating, but to make a good old-fashioned homemade cherry pie, you have to have the sour cherries.

I snagged a couple bags and was excited to get to make a cherry pie for hubby for Valentine’s Day last week.

If you are lucky enough to find sour cherries, here is the simple, old-fashioned recipe I use to make a classic cherry pie.

Bake a little love!

Cherry Pie

Ingredients:

Directions:

Preheat oven to 400 degrees F.

In a large bowl, combine cherries, sugar, tapioca, and almond extract.  Mix well, and let sit while preparing pie crust.

Prepare crust and place bottom layer in pie plate.  Fill with cherry mixture.  Top filling with dabs of butter followed by top crust, being sure to cut slits or a shape to allow bubbling and steam to escape.  Spread a small amount of milk or water on top crust, and sprinkle with an additional tablespoon of sugar if desired.

Place pie in oven.  Cover loosely with foil to prevent over browning.  Bake approximately one hour.  Remove foil and continue baking until filling bubbles out of top and crust is beautifully browned.

Allow to cool completely to set.  Serve with scoop of vanilla ice cream.

Enjoy!

Cheers & Hugs,
Jodi


Homemade Apple Fritters

Homemade Apple Fritters.

Last Sunday, Hubby had to get up very early – really the middle of the night – to work during a winter weather event in our area.

Missing Sunday breakfast, I wanted to make him a special treat for when he returned home.

With some wonderful Misfits Market apples in the crisper, I thought I’d try my hand at homemade apple fritters.

Who can resist a fresh apple fritter??!!

A couple tips from a first-time apple fritter maker:

  • Don’t heat the oil too hot.  Be patient and use a medium heat.  Better to fry them a little longer and get a golden brown than to overcook the outside and undercook the inside with high heat.  (Which, by the way, is what I did with the first batch of three, resulting in us only having three total!)
  • Spread them a little flatter than I did so you get more icing in each bite as the dough itself only contains a small amount of sugar. (This was hubby’s suggestion!)
  • Use a sweeter, less firm apple for best results.  I would not recommend Granny Smith.  The recipe calls for 3 medium apples, but you could really add another apple, which I will do next time.

Let me know if you try and/or if you have made and have any of your own tips.  We sure enjoyed these on a cold, snowy, comfort food, stay-in kind of day.

Here is the recipe I very slightly adapted from I am Baker‘s blog.

Homemade Apple Fritters

Ingredients:

  • 3 medium apples, peeled, cored, and diced
  • Juice of half a lemon
  • 2 Tbsp. sugar
  • 2 eggs
  • 1 cup all-purpose flour
  • 2 tsp. baking soda
  • 1 tsp. cinnamon
  • 1/2 tsp. salt
  • 1/4 cup milk
  • Canola or Vegetable Oil  for frying
  • Glaze
    • 1 1/2 cups powdered sugar
    • 1/2 tsp. vanilla
    • 4 tsp. water (or enough for best consistency)

Directions:

In a small bowl, drizzle lemon juice over diced apples.  Stir to coat.  Set aside.

In electric mixer, beat sugar and eggs on medium-high speed until combined.  Reduce speed to low, and add flour, baking powder, cinnamon, and salt.  Mix until combined.  Add milk, and mix until incorporated.  Fold in apples with spatula.

Fill a frying pan halfway full with oil.  Heat over medium heat to 375 degrees F.

Drop three 1/4-1/3 cup portions of batter into the oil.  Let fry for a few minutes until golden brown.  Flip and fry until other side is golden brown.  Test for doneness by inserting a small knife in center.  If uncooked batter remains, fry longer.

Remove fritters from oil with slotted spoon to wire rack layered with paper towels or napkins to drain.  Allow to cool.

Repeat with remaining three portions of batter.

Prepare glaze by combining powdered sugar, vanilla, and water.  Drizzle over cooled fritters on cooling rack.  When glaze has set, turn to coat other side with glaze that dripped through, if desired.

Enjoy!

Cheers & Hugs,
Jodi

Easy DIY Christmas Countdown Advent Calendar


Easy DIY “Christmas Countdown” Advent Calendar.

I’ve been dreaming of making this since summer….
and I finally got busy and did it this week.

Just in time!

I was looking for a fun way for my granddaughter to count down the days until Christmas with a little surprise each day, so when I found this inexpensive Over the Door Shoe Organizer this summer, I knew just what I was going to do.

I used fabric paint to paint the numbers on each “shoe pouch” – just the right number for an advent calendar!

And it was so much fun shopping for little toys and art projects and treats and hair bows and socks and mittens to fill all 24 compartments.

I think the anticipation of Christmas is almost more fun than the day itself.  I love the whole month leading up to it.

A friend shared this Advent Calendar of Kindness recently on Facebook, and I couldn’t resist sharing it too.

Don’t let the stress of the materialism of the holiday ruin this special time.  Small gifts of anticipation and everyday acts of kindness can make all the difference!  It’s what we need more of.

Happy Holidays!!

Cheers & Hugs,
Jodi

A Krautfest Rhyme


A Krautfest Rhyme.

Once upon a time
in a neighborhood by a lake,

a group of friends gathered.
There was saurkraut to make.

500 pounds of cabbage
was cleaned and quartered and chopped.

Then young and old, expert and new,
sliced it down – they couldn’t be stopped.

Once sliced it went
to the station to be weighed.

Salt was added.
It’s how you make homemade.

Into crocks and buckets
it went to be pound.

It starts the fermentation
and keeps it safe and sound.

No krautfest could ever
be quite complete

without hugs and laughs and games
and plenty of treats to eat.

There was a tub of apples
waiting for kids to bob.

While others were pressed into juice,
which many found to be a fun job.

After working and eating and drinking
away the day,

evening arrived,
and instruments were brought out to play.

Singing with friends,
(only some truly in tune)

is surely the best way
to end a krautfest afternoon.

Cheers & Hugs,
Jodi

Thanks so much and mostest
to our amazing hosts and hostesses.

Love you Joyce and Rob and Nikole and Michael
for continuing the annual krautfest cycle!

If you would like to see previous years’ Krautfests, feel free to click HERE and HERE and HERE.  

Fresh Red Raspberry Pie

Fresh Red Raspberry Pie.

Before we fully embrace all things pumpkin and apple and cinnamon and spice for Fall, I decided to slide in one  last “Summery” pie for the season a week or so ago when my youngest son and his wife came over for dinner (knowing this is one of his faves).

Fresh red raspberries are such a treat all by themselves, but baked to overflowing  with a bit of tapioca inside a tender flaky pastry crust is pretty close to heaven.

Fresh red raspberries used to be a rare find in our part of the world, but they are quite prolific in the grocery stores year-round now.  Buying enough for a pie can be a bit pricey, but worth it for a treat every once in a while.

Grandma always said the only way to know when a berry pie is done is when it bubbles over into the oven, so that is how I gauge the time too!

Here is my simple, old-fashioned recipe.

Fresh Red Raspberry Pie

Ingredients:

Pie Crust:

  • 2 cups all purpose flour
  • Heaping 2/3 cup Crisco shortening
  • 2 dashes of salt (12 shakes)
  • Approx. 1 cup cold water

Filling:

  • 5 cups fresh red raspberries
  • 1 cup white sugar
  • 3 Tbsp tapioca
  • 1 Tbsp lemon juice
  • 1 dash salt

Directions:

Preheat oven to 425 degrees F.

Prepare filling by blending raspberries, sugar, tapioca, lemon juice, and salt in a bowl.  Let sit while you prepare crust.

Prepare crust by blending flour, Crisco, and salt in a large bowl with a pastry blender until crumbly.  Add cold water and gently mix just until able to form a ball.  Divide dough in half, and put one half on floured surface to roll out.

IMPORTANT:  Do not overwork the dough.  It is not bread dough that needs kneaded.  The more you “work” pie crust, the tougher it will become.  The less you play with it, the more tender and flaky it will be.

Roll out first half using heavy floured marble rolling pin into a circle large enough to fill 9″ pie pan.  Lift it from the surface to your pie pan by folding it into quarters, then unfold it in the pan letting it hang over edges.

Roll out other half of dough into rectangle and cut into 8 strips to weave into a lattice topping.

Pour filling into bottom crust.  Top with 4 strips going same direction.  Weave by lifting two alternating and place one the opposite direction, the lifting the other two, and repeating.  Pinch top to bottom doughs together all around edges.

A nice finishing tough is to brush crust with some water and sprinkle with coarse sugar.

Cover edges of the pie with strips of aluminum foil or a pie crust shield (the most GENIUS invention ever in my baking opinion!)

Bake in 425 degree oven for 15 minutes.  Reduce heat to 375 degrees F, and bake until crust is golden and filling is bubbly, about 30 minutes more.

Serve warm or cold topped with a scoop of vanilla ice cream!

Enjoy!

Cheers & Hugs,
Jodi


Bridal Shower Money Gift: A Champagne Bottle Wedding Dress

Bridal Shower Money Gift: A Champagne Bottle Wedding Dress.

Money is always a welcomed gift – right?

But it is also BORRRRING to give.

When going to a bridal shower, one of the main events is the gift opening, so I often try to figure out a creative presentation.

My daughter-in-law hosted a bridal shower this weekend for her sister.  What an amazing job she did, and what a beautiful day we were gifted with.

I created this champagne bottle money wedding dress as my gift.  It was so easy to do, and I had everything to make it on hand.

I took a bottle of champage and wrapped it in white tulle and lace.  I embellished it with paper flowers, pearls, and crystal gems and created a veil with additional tulle.  Everthing was glued on with a hot glue gun or Tombow glue.

I then pinned the money on with straight pins all around to form a layer of the dress.

Several years ago, I made a Happy Birthday Money Cake for one of my sons.  It has been the most popular blog post ever here at TheCreativeLifeinBetween.com.   Seems lots of folks are looking for creative ways to give gifts of money, so I hope you all enjoy this one too.

Cheers &  Hugs,
Jodi


Fresh Blueberry Scones

Fresh Blueberry Scones.

I had a friend come over Saturday morning.

HOORAY!  Excuse to bake something yummy.

I surely couldn’t know someone is coming and not have something freshly baked to share if I could help it.  Right?

Surprise visitors might not be as lucky – but are equally welcomed!   (They may just have to look beyond my make-up-less face, a potentially less than clean house, and deal with frozen cookies.)

It was so good to catch up with this friend I haven’t seen in a while – munching on these tender, buttery, lightly sweet biscuits bursting with tart blueberries and sipping on Cinnamon Dolce coffee with Italian Sweet Cream.

Sometimes it takes a guest to make us sit back and relax and truly appreciate our home.  My friend asked me how I ever get anything done with the beautiful view and comfy surroundings?

It made me think….

I need to quit apologizing for the carpet that needs replaced or the walls that need a fresh coat of paint or the old “stuff” I have.

The greatest compliment I receive is when someone tells me they feel completely comfortable and relaxed and welcome in my home.

Isn’t that what makes a house a home?   I have two signs in my home (one I bought and one made for me by my BFF who didn’t know I had bought the same sign!) that say “The thing I love best about my home is who I share it with.”

That could not be truer for me.  A house is made of wood and nails, but a home is made with love and family and friends.

And maybe fresh Blueberry Scones!

Here’s my recipe.

Fresh Blueberry Scones

Ingredients:

2 1/2  Cups Flour
1/2 cup Sugar
2 1/2 Tbsp Baking Powder
Pinch of Salt
1 tsp Cinnamon
1 1/2 Sticks Cold Butter
1 tsp Vanilla
1 Cup Buttermilk (easy substitute is 1Tbsp white vinegar added to 1 cup milk)
1 cup Blueberries
Coarse Raw Sugar for Sprinkling

Directions:

Preheat oven to 400 degrees F.

In a large bowl, mix together flour, sugar, baking powder, salt, and cinnamon.  Cut butter into small cubes and cut into dry ingredients with a pastry blender until coarse crumbs are formed.  Pour in vanilla and buttermilk, and mix with pastry blender just until incorporated.  Dump dough onto counter, gently incorporate blueberries into dough, and gently shape into a 15″ x 3″ rectangle.  Cut dough in half, then each half in half, then each quarter in half, so that you have 8 rectangles.  Cut each rectangle on the diagonal to form 16 triangular shaped scones.

Place on backing stone or cookie sheet, brush with some milk or water, and sprinkle with coarse raw sugar.  Bake at 400 degrees F for 10-15 minutes.  Cool for a few minutes on stone or cookie sheet, then remove to cooling rack to cool completely.

Enjoy!

Cheers & Hugs,
Jodi

Homemade Old-Fashioned Glazed Donuts

Homemade Old-Fashioned Glazed Donuts!

Seriously…….
could anything be more decadently delish?!

A tender ring of fried sweet dough
drenched in a glorious glaze?

I couldn’t resist making these,
and they did not disappoint.

Every once in a great while,
I allow myself to be treated to a donut….
a wickedly wonderful waste of calories.

But since it is only Hubby and me at home,
a dozen donuts AND holes
are way too much sugary goodness!

So after enjoying one each
(and a few holes – which are completely calorie free  – right?)
I shared the rest.

That really is my joy in baking…
giving it away.

Hopefully creating a brief smile…
a tiny treat or surprise for a loved one or friend.

These are soooooo worth making!
They are easy and quick to make.

I hope you will treat yourself and those you love!

Homemade Old-Fashioned Glazed Donuts

Ingredients:

  • 2 1/4 cup  cake flour  (no cake flour?  no problem!  make it easily by the cupful – take one level cup of all-purpose flour, remove two tablespoons, and then add two tablespoons of cornstarch back in)
  • 1 1/2 tsp. baking powder
  • 1 tsp. salt
  • 1/2 tsp. ground nutmeg
  • 1/2 cup  sugar
  • 2 Tbsp. butter, room temperature
  • 2 large egg yolks
  • 1/2 cup  sour cream or Greek yogurt
  • Canola oil, for frying

For the glaze:

  • 3 1/2 cup  powdered sugar
  • 1 1/2 tsp. corn syrup
  • 1/4 tsp. salt
  • 1/2 tsp. vanilla extract
  • 1/3 cup hot water

Directions:

In a bowl, combine flour, baking powder, salt, and nutmeg.

In the bowl of a stand mixer, beat butter and sugar together until sandy. Add egg yolks, and mix until light and thick. Add dry ingredients to the mixing bowl in 3 additions, alternating with the sour cream, ending with the flour.  Cover with plastic wrap and chill for 1 hour.

On a floured surface, roll dough out to about 1/2 inch thickness. Use a donut cutter to cut out approximately 12 donuts and holes.

Pour 2 inches of canola oil into a heavy bottomed pot with a thermometer attached. Heat to 325°F.  Fry donuts a few at a time, being careful not to overcrowd the pot. Fry on each side about 2 minutes, being careful not to let them burn. Let drain on a paper bag to soak up the excess grease.

For the glaze:

Mix all ingredients in a bowl with a whisk until smooth.  Dip each donut into the glaze. Place on a wire rack above a sheet of waxed paper to catch any excess glaze. Let sit for 20 minutes until glaze is set.

Best served the day they are made, but may be stored in an air tight container at room temperature for a few days.

Cheers & Sugary Sweet Hugs,
Jodi

Recipe found at:  Huffington Post’s “The Greatest Homemade Doughnut Recipes You’ll Ever Find.


I’m O-Fish-Ally Hooked on You Daddy!

I am O-Fish-Ally Hooked on You Daddy!

If you are looking for a cute and easy, creative Father’s Day Card to make from a child or grandchild to his daddy or grandpap, how about this cute little hand print fishy?  (Especially if Daddy or Pap enjoys fishing!)

My little granddaughter and I made this for her Daddy for his first Father’s Day.  On the inside, we wrote:  “You are the best daddy in the whole sea!”

A great little gift idea to go with the “theme” that we did was a gift bag full of fish:  Swedish Red Fish and Pepperidge Farm Goldfish Crackers, which come in at least a dozen different flavors ranging from Vanilla Cupcake, S’mores, and Fudge Brownie to Pizza, Chedder, Pretzel, and Honey Mustard and Pretzel Blends.

Hope all the Daddys and Grandpaps out there are o-fish-ally recognized and surrounded with love on their special upcoming day.

Cheers & Hugs,
Jodi

Idea inspired by:  gluetomycraftsblog

Five-Minute Homemade Rustic Artisan Bread

bread-5-minute-rustic-artisan-bread

Five-Minute Homemade Rustic Artisan Bread.

Aren’t these loaves beautiful?!  I recently found this recipe that makes homemade bread so easy!

bread-5-minute-rustic-artisan-bread-2

You can mix this dough together in five minutes.  Then it just needs to rest for two hours while you go about doing something… anything else.  After that, throw it in the fridge – for up to 14 days!  Whenever you want a fresh loaf of bread, grab a hunk of dough, and bake it.  Super simple, super delicious!

bread-5-minute-rustic-artisan-bread-3

So… disclaimer… you obviously can’t make it from start to finish in five minutes, but that really is all the longer the dough takes to mix together, and there is no kneading, so it really is a simple way to make warm, fresh, delicious homemade bread quickly and easily with just a few simple staple ingredients!

Five-Minute Homemade Rustic Artisan Bread

  • Servings: 4 1 lb loaves
  • Print

Ingredients:bread-5-minute-rustic-artisan-bread

  • 3 cups lukewarm water (approx. 100 degrees F)
  • 1 Tbsp active dry yeast
  • 1 1/2 Tbsp coarse salt (I love using Maldon Sea Salt Flakes)
  • 6 1/2 cups flour

Directions:

Pour water in large bowl.  Sprinkle with yeast and salt, and mix until dissolved.  Add flour all at once, and mix until completely incorporated.  That’s it!  Five minutes.  No kneading.

Place a clean kitchen towel over the bowl and let it sit for two hours.

After two hours, cover bowl with saran wrap (but not too tight as it needs a little vent for gases to escape), and throw it in the fridge.

Your dough is ready to use at anytime in the next 14 days.

When you are ready to bake a loaf, preheat oven to 450 degrees F.  Grab a hunk of dough with floured hands.  Do not punch it down, and do not knead or overwork it.  Gently shape as desired into a ball, loaf, rolls – whatever you like.  Place on a baking stone. (I bake absolutely EVERYthing on baking stones – cookies, bread, roasted vegetables, meatloaf, french fries – they are all I use in the oven – and the results are awesome!) You can let it rest for 30-40 minutes or bake right away – depending on the density you desire.  Dust top of dough with flour (and salt if desired).  Slash a few cuts in the dough with a serrated knife.

Place an empty metal broiler pan on bottom rack of oven and fill with warm water right before placing dough in oven.

Bake for 20-30 minutes until the crust is a rich brown color and firm to the touch.  Remove from oven and cool on wire rack.

Enjoy!

Cheers & Hugs,
Jodi

*original recipe found at Leite’s Culinara