Brussels Slaw

Brussels Slaw.

Who is a Brussels Sprouts fan?

Yes?  No?  Not sure?  Maybe not?

I was chatting with a friend at work last week that said she doesn’t like Brussels Sprouts, but said she wondered how they would be raw in a coleslaw like salad.  She commented that she likes cabbage in coleslaw, but not cooked cabbage.

It got me thinking…..  I am a Brussels sprout fan…. adore them roasted….  but I, too, wondered how they would be shredded and served raw in a slaw-type salad.

Then the universe poked me with a nudge, when I saw bags of  Shaved Brussels at my local Whole Foods Market!  

I bought a bag for me and a bag for my friend.

Trying to eat healthier these days, I decided on a vinaigrette slaw.  My friend made a creamy version using Marzetti slaw dressing, and she and her family loved it.


Here is the recipe for how I made mine.  Hope you will give it a try!
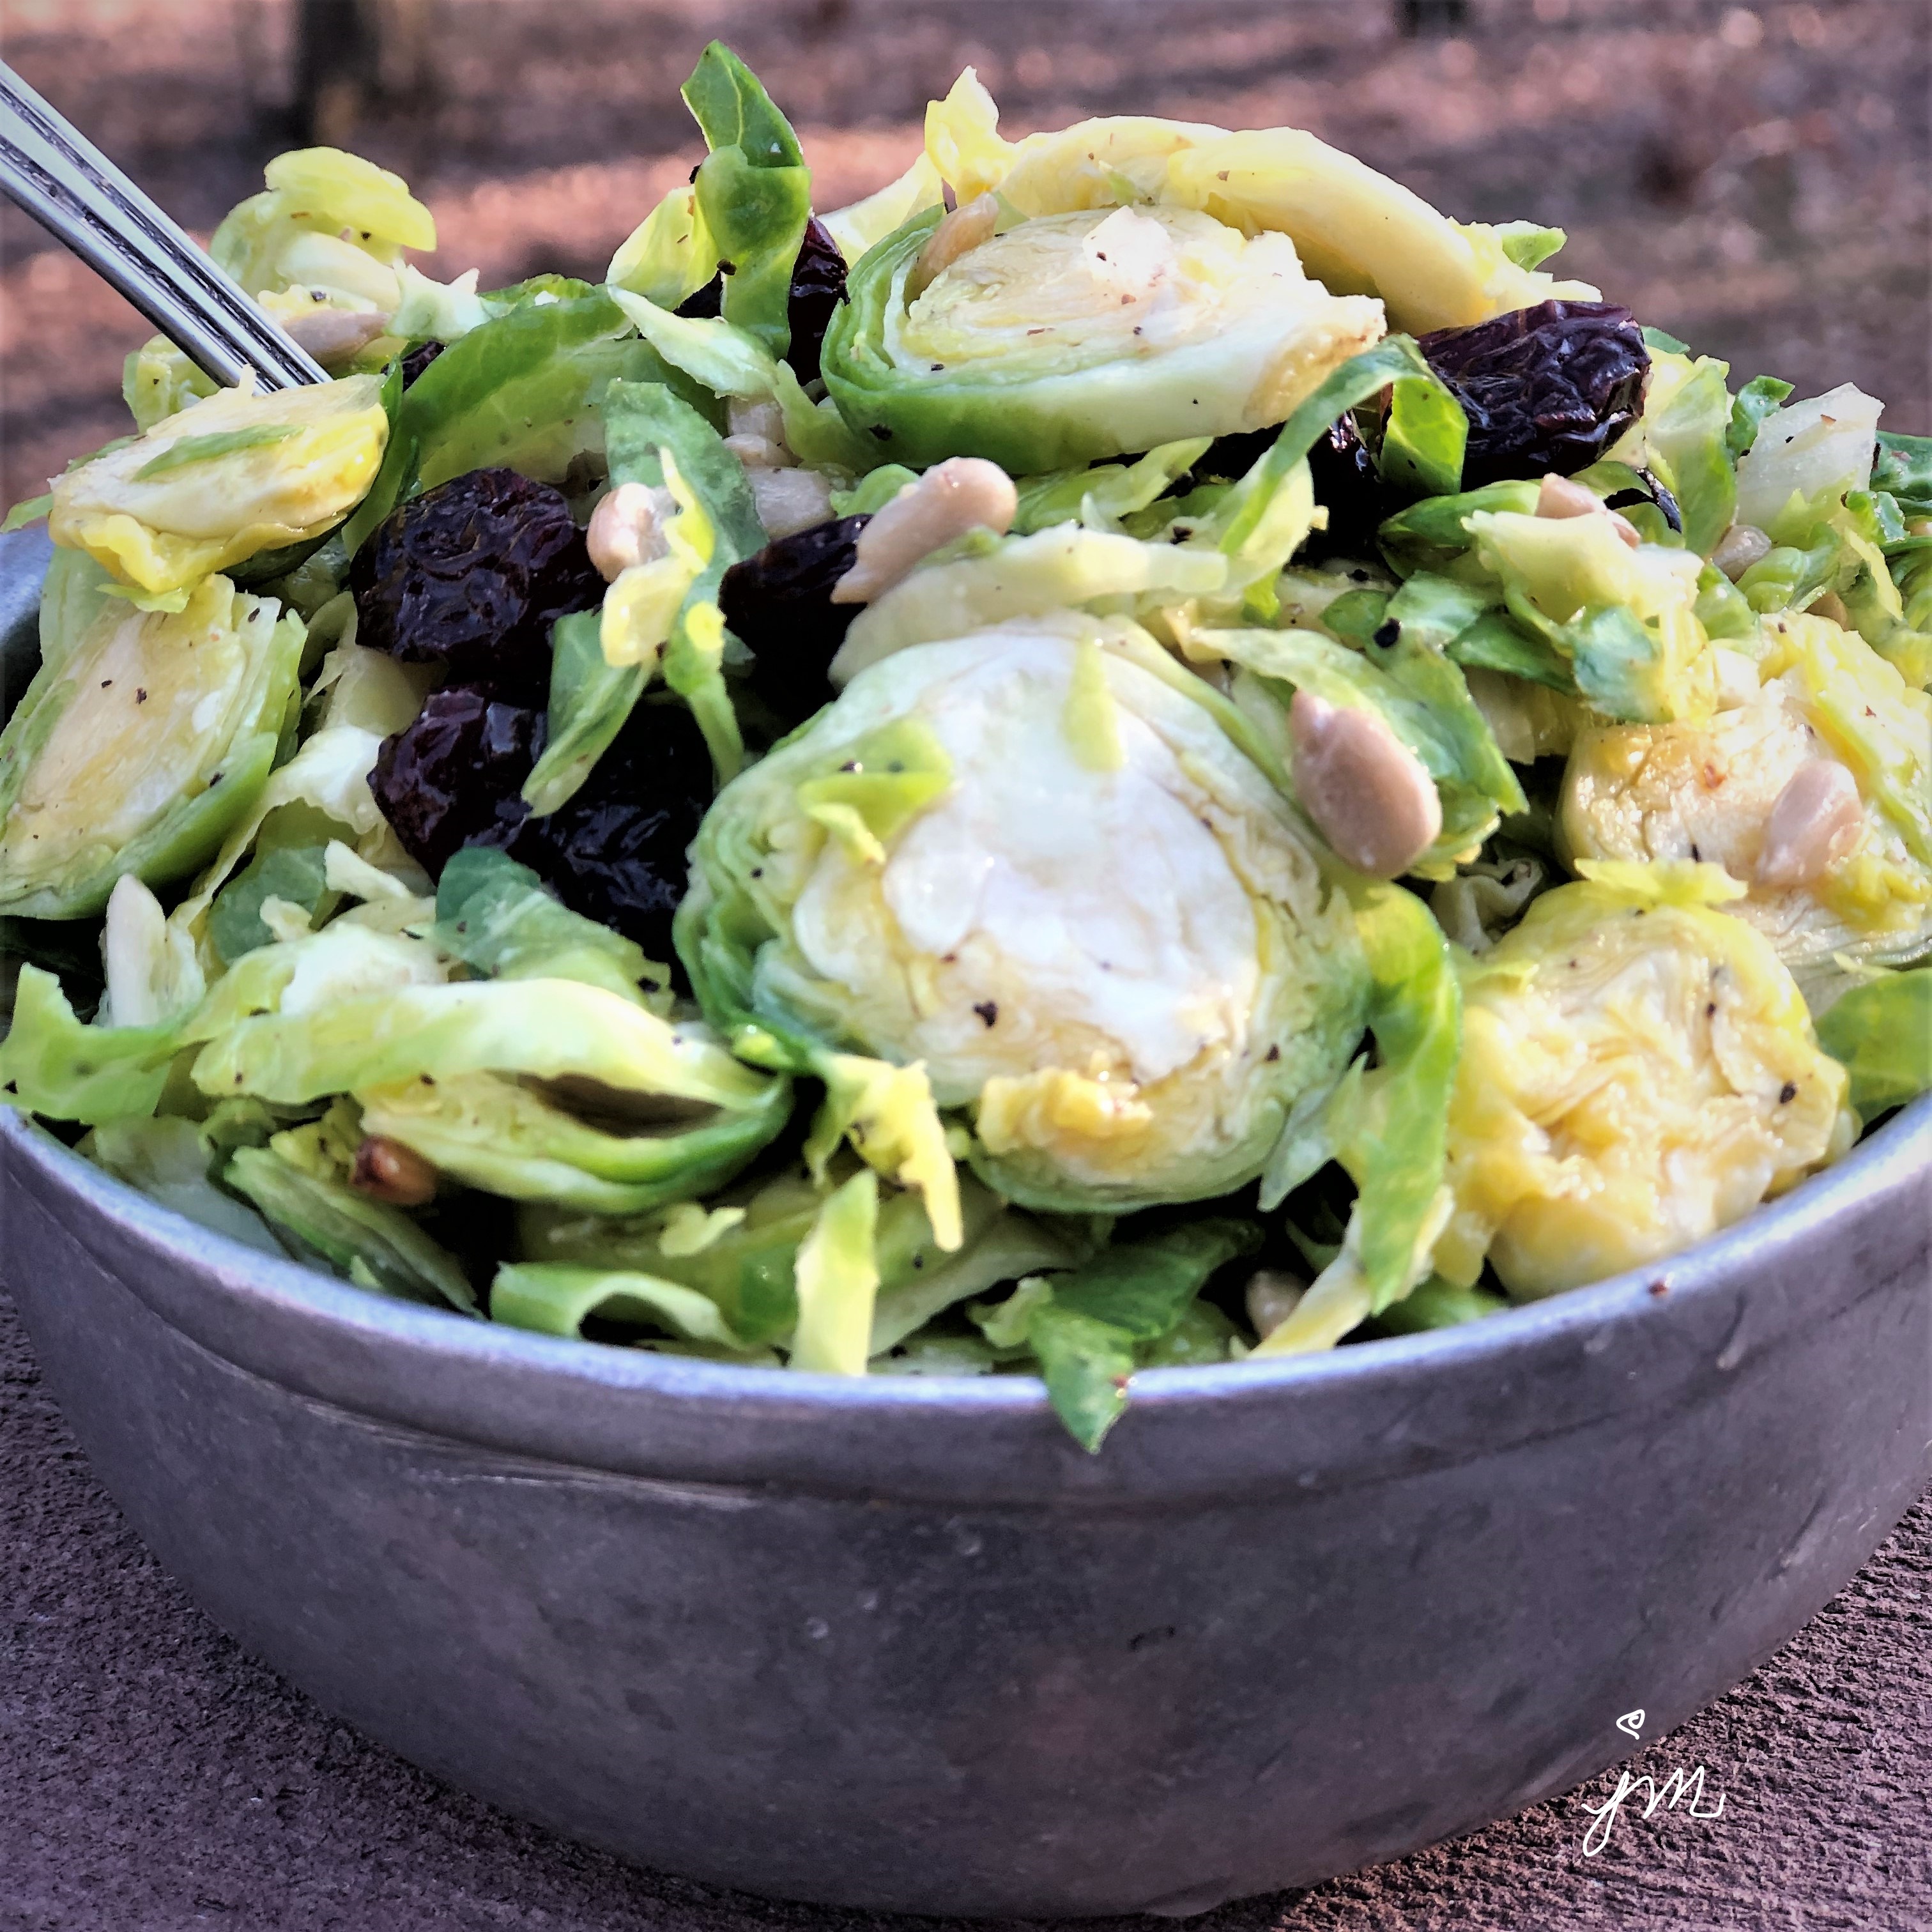
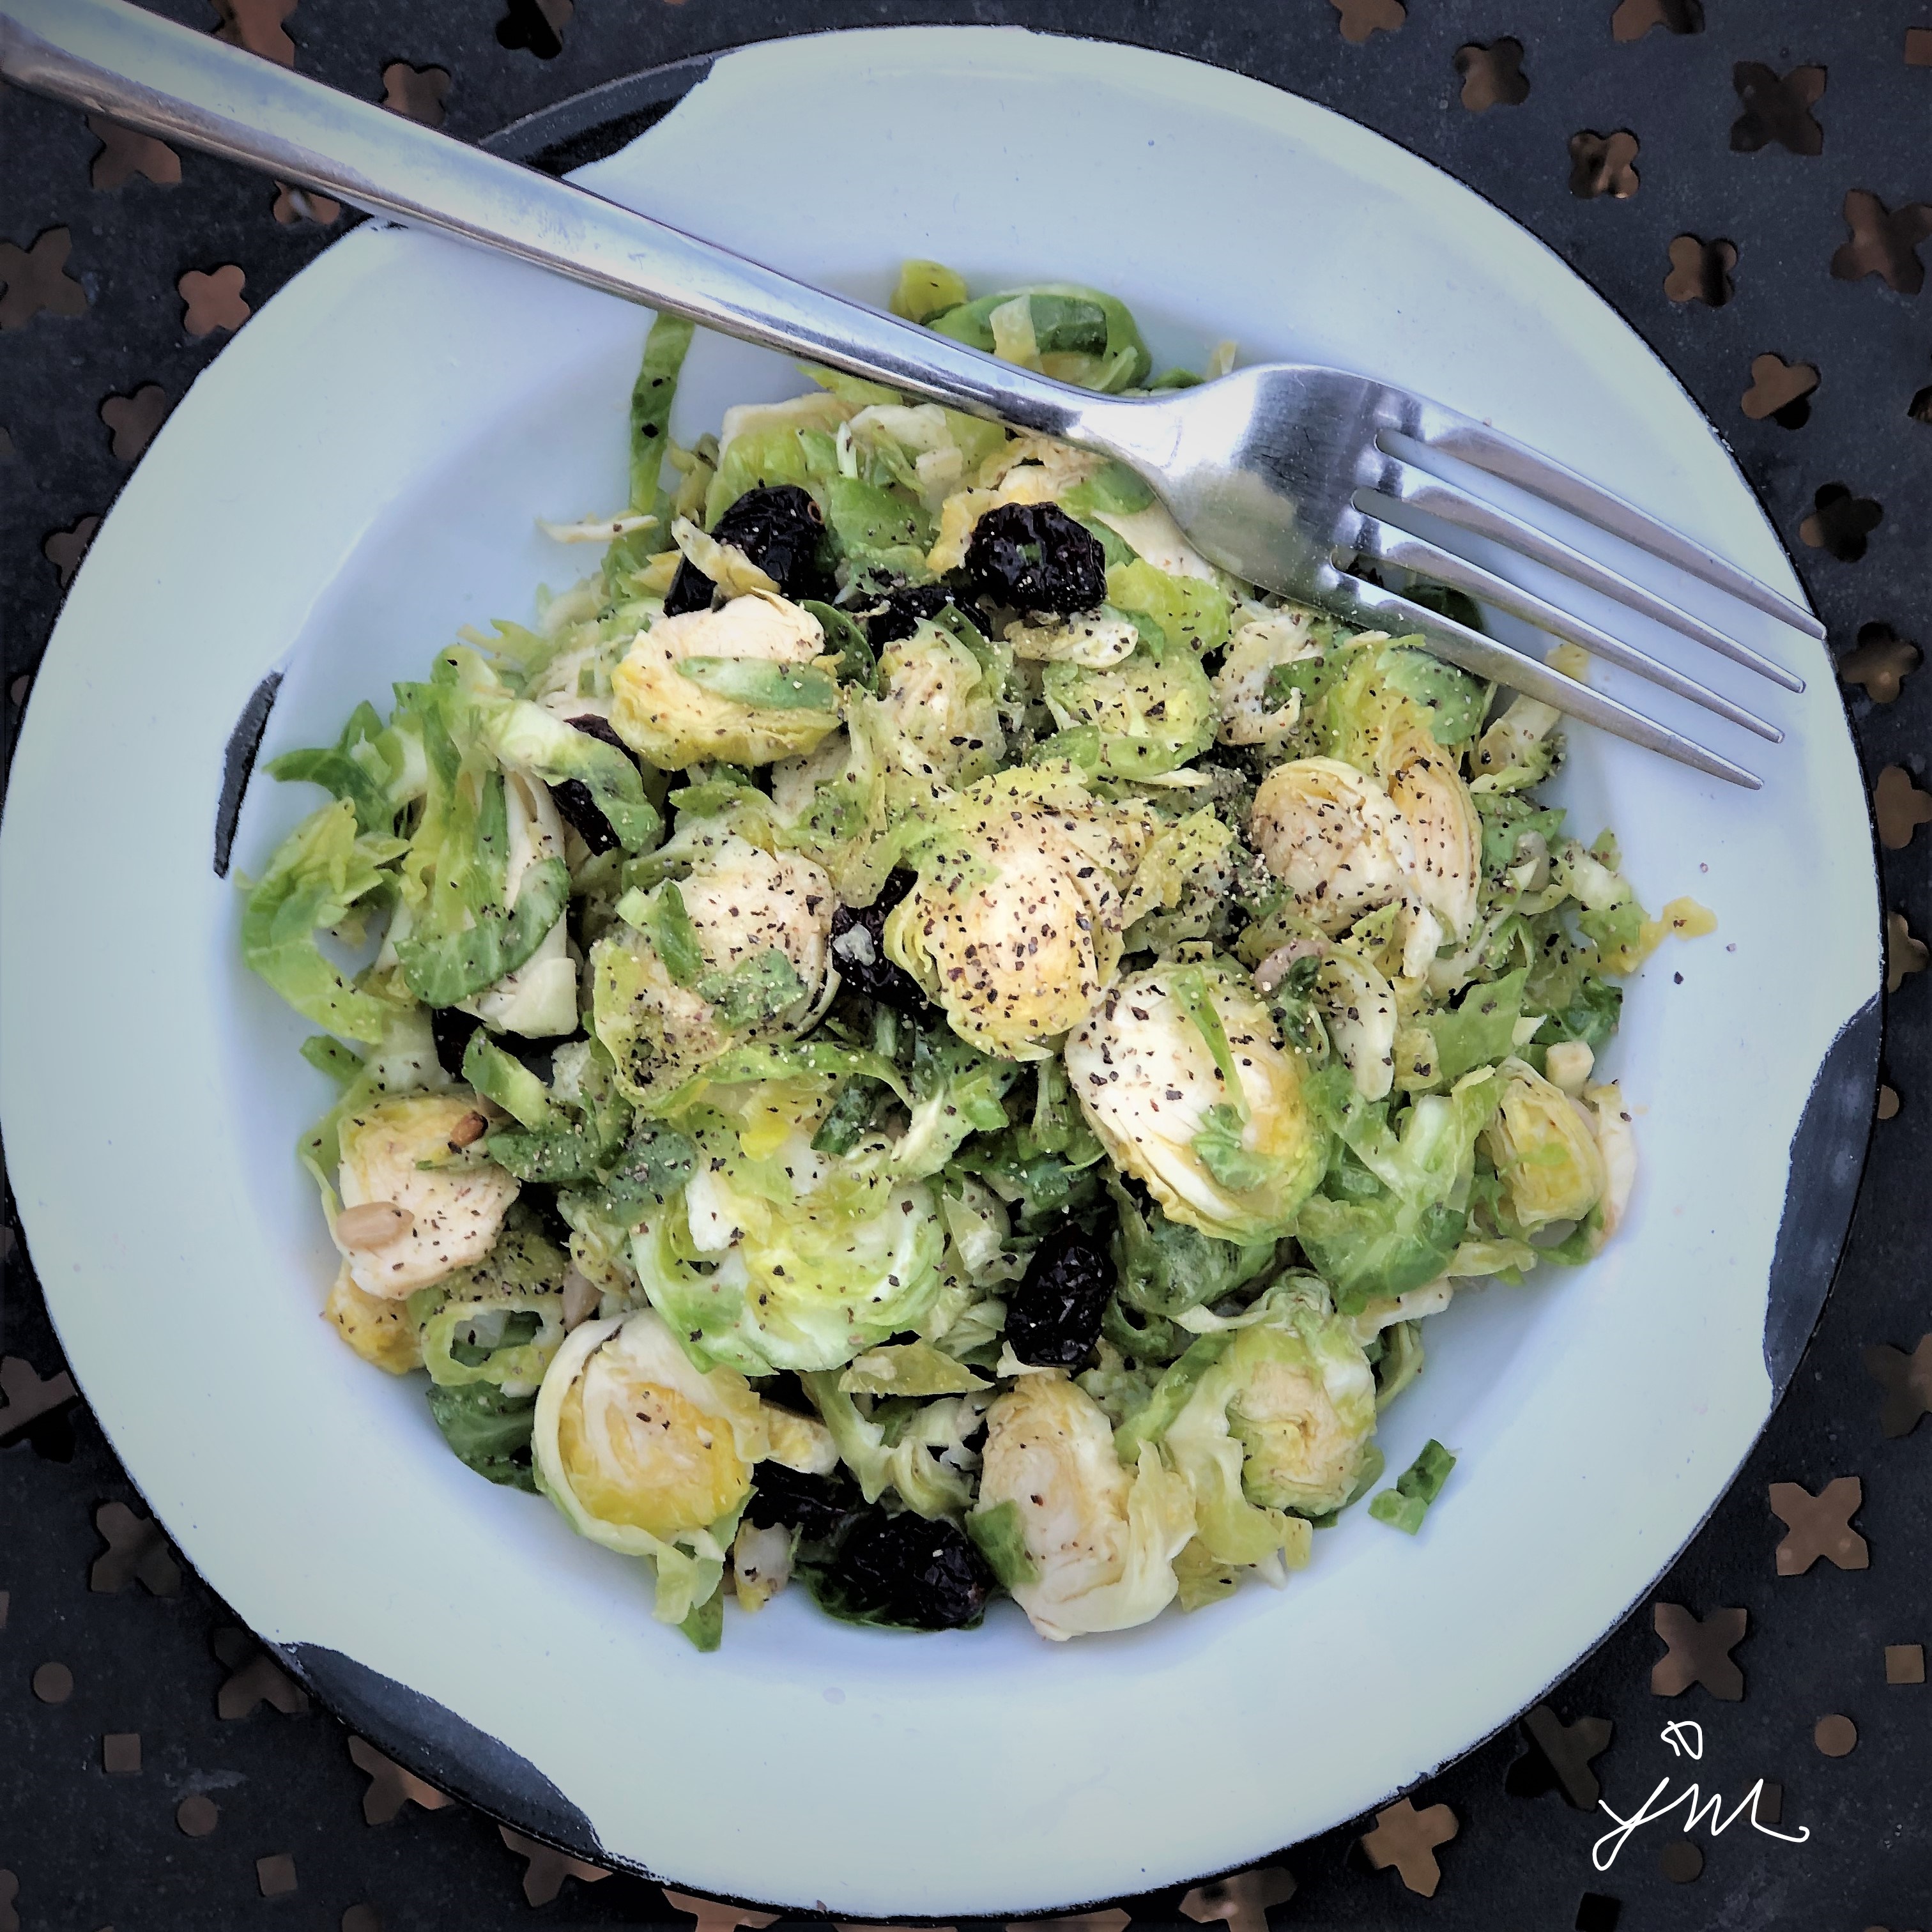
Brussels Slaw

Ingredients:

  • 1 12oz bag Shaved Brussels Sprouts (or you can slice/shave your own)
  • 1/4 cup finely minced onion
  • 1/4 – 1/3 cup dried cranberries
  • 1/4 – 1/3 cup sunflower seeds
  • 3 Tbsp. Apple Cider Vinegar
  • 3 Tbsp. Olive Oil
  • 1 tsp. Sugar (or sweetener)
  • Salt and Pepper to taste

Mix all together and let marinade in refrigerator for at least a half hour before serving.

You can change it up by adding sliced almonds or chopped apples or anything else you like.

Enjoy!

Cheers & Hugs,
Jodi


Easy Dill Pickle Focaccia Bread

Easy Dill Pickle Focaccia Bread.

Calling all bread lovers!

Calling all dill pickle lovers!

Calling all lovers of easy recipes that rock!

My cousin, who I affectionately refer to as “Oh Rob,” recently shared this recipe he made for his pickle-loving grandson.  Oh Rob loves to bake bread, and he loves his grandson even more!  This recipe was a match made in heaven for these two.

The idea really intrigued me and sounded so good. I knew I had to try it.

We are a dill pickle lovin’ family too.

And who doesn’t love bread?!

So I ever so slightly adapted the recipe and made it this past Sunday for dinner to serve along with spaghetti.  We loved it!

Give it a try, and let me know what you think.  Here is how I made it.

Easy Dill Pickle Focaccia Bread

Ingredients:

  • 3/4 cup warm water (105-110°F)
  • 1/4 cup pickle juice, warmed (105-110°F)
  • 2 tsp. granulated sugar
  • 1 (1/4-oz.) envelope active dry yeast
  • 2 3/4 cups all-purpose flour
  • 1 tsp. dried dill weed or 1 Tbsp. chopped fresh dill
  • 1 tsp. salt
  • 1 tsp. coarsely ground black pepper
  • 3 Tbsp. olive oil, divided
  • 1/2 cup Cheddar cheese, grated
  • 2 large dill pickles, sliced or chopped
  • Optional: 1 Tbsp. Maldon Sea Salt Flakes
Directions:

Combine warm water, warm pickle juice, sugar, and yeast in a medium bowl or measuring cup. Let stand 10 minutes.

Whisk together flour, dill, salt, and pepper in a medium bowl. Add pickle juice mixture and 2 tablespoons of the oil; stir until combined and dough begins to pull away from sides of bowl. Turn dough out onto a lightly floured surface, and knead until smooth and stretchy.

Drizzle 1 teaspoon of the oil in the bowl to coat; add dough, and turn to coat. Cover with towel, and let stand in a warm place until dough has doubled in size.

Preheat oven to 425°F.  Punch down dough. Place on a lightly oiled 18- x 13-inch rimmed baking stone sheet. Press and stretch dough to edges of baking sheet. Cover with towel, and let stand in a warm place 15 minutes.

Using the end of a wooden spoon, make indentions evenly over dough. Top evenly with cheese and pickles.  Bake until lightly golden and cooked through,  approximately 20 minutes.

Sprinkle top with sea salt flakes, if desired. 

Enjoy!

Cheers & Hugs,
Jodi

PS  I will be taking a holiday blogging break until after Christmas and the New Year.  Wishing you all the joy of this festive season!

Pecan Pie Thumbprint Cookies

Pecan Pie Thumbprint Cookies.

It’s December, and that means time to start Christmas cookie baking!

These cookies are a wonderful version of pecan pie in a cookie!

They are similar to Pecan Tassies, but a lot easier.

The cookie is buttery and shortbread-like, while the filling is nutty and sticky and sweet and AMAZING!

I had a little bit of extra filling left that I just couldn’t throw away, so I spread it on a sheet of crescent roll dough, rolled it up, and sliced it into 8 easier-than-pie pecan “sticky buns!”

So
worth
it!

Hope you will give these yummy cookies a try for something new on your Christmas cookie baking list.  I do believe these will become a regular in our home!

Here is the recipe I found at  Crazy for Crust, which I only slightly altered.  Thanks for a great recipe, Dorothy!

Pecan Pie Thumbprint Cookies

Ingredients:

Cookie Batter:

  • 2 cups brown sugar
  • 1 1/2 cups butter, softened
  • 2 eggs
  • 2 tsp. vanilla
  • 4 cups flour
  • 2 tsp. baking powder
  • 1/2 tsp. salt

Pecan Pie Filling:

  • 2 cups pecans, chopped
  • 1/2 tsp. coarse or flaked salt
  • 1 cup brown sugar
  • 4-5 Tbsp. Half and Half or Heavy Cream
  • 2 tsp. vanilla

Optional:  Powdered sugar for sprinkling on top of cooled cookies.

Preheat oven to 350 degrees F.

Beat brown sugar, butter, egg, and vanilla in electric mixer until creamy.   Add in baking powder, salt, and flour, and mix on low speed until well combined.

Shape dough, two tablespoons at a time, into balls, and place the balls two inches apart on a baking stone or cookie sheet.  Indent a hole in center with your thumb.

Prepare filling by stirring pecans, salt, brown sugar, and vanilla with cream until it forms a thick mixture.  Spoon approximately one teaspoonful into thumb indentation of each cookie.

Bake for 10-12 minutes.  Cool for 5 minutes on stone or cookie sheet before removing to rack to cool completely.

Sprinkle with powdered sugar if desired.

Cookies freeze well for up to a month.

Enjoy!

Cheers & Hugs,
Jodi

Easy DIY Christmas Countdown Advent Calendar


Easy DIY “Christmas Countdown” Advent Calendar.

I’ve been dreaming of making this since summer….
and I finally got busy and did it this week.

Just in time!

I was looking for a fun way for my granddaughter to count down the days until Christmas with a little surprise each day, so when I found this inexpensive Over the Door Shoe Organizer this summer, I knew just what I was going to do.

I used fabric paint to paint the numbers on each “shoe pouch” – just the right number for an advent calendar!

And it was so much fun shopping for little toys and art projects and treats and hair bows and socks and mittens to fill all 24 compartments.

I think the anticipation of Christmas is almost more fun than the day itself.  I love the whole month leading up to it.

A friend shared this Advent Calendar of Kindness recently on Facebook, and I couldn’t resist sharing it too.

Don’t let the stress of the materialism of the holiday ruin this special time.  Small gifts of anticipation and everyday acts of kindness can make all the difference!  It’s what we need more of.

Happy Holidays!!

Cheers & Hugs,
Jodi

Red Raspberry Dark Chocolate Puff Pastry Tarts

Red Raspberry Dark Chocolate Puff Pastry Tarts.

Phew!  That name is a mouthful….

But it really does say it all!

And I’m betting you would love a mouthful of these simple, but elegant and amazingly delicious treats!

I made these this past weekend for a Sunday family football dinner.

Would you believe me if I told you there are only three ingredients?!?!

Well – four if you count the powdered sugar you sprinkle on top.

Puff Pastry is such a dream to work with!

Keep these ingredients on hand and this recipe up your sleeve when you need a quick, but fabulous dessert or treat.

I’m betting you won’t be sorry. 😉

Red Raspberry Dark Chocolate Puff Pastry Tarts

Ingredients:

Directions:

Preheat oven to 375 degrees F.

Roll out one sheet of puff pastry, and cut into 9 squares approximately 3 1/2 x 3 1/2 inches.  Place a teaspoon of raspberry jam in center of each square.  Top with a piece of dark chocolate.  Pull all four corners to center and pinch to seal.

Bake for 15-18 minutes on baking stone or cookie sheet until puffed and lightly browned.    Remove to cooling rack.  Sprinkle with powdered sugar.

Serve warm or cold.  

Enjoy!

Cheers & Hugs,
Jodi

Easy Fresh Homemade Salsa

Easy Fresh Homemade Salsa.

I LOVE salsa!

And this time of year when tomato plants in our gardens are overflowing with more tomatoes than we can eat, it is the perfect time to make fresh salsa.

It is so easy to make and so healthy and versatile for snacking or cooking.  I love dipping tortilla chips in it for snack.  It is also my favorite baked potato topping.  Skip the butter and sour cream for me, and pile on the salsa!  Throw frozen skinless, boneless chicken breasts in a crockpot on low, top with a pint of salsa, and ignore it for 8 hours.  Return for a delicious, nutritous main course of Salsa Chicken.

There are gajillion ways to make salsa.  You can add corn and black beans for a heartier twist.  You can add chopped peaches or mango for a sweeter twist.  You can add jalapenos or your favorite spicy, hot peppers if heat is your style!

What are your favorite ways to enjoy salsa?

Here is how I made it this past weekend.

Fresh Homemade Salsa

  • Servings: approx. 6 cups
  • Print

Ingredients:

  • 4-6 Ripe Tomatoes, quartered
  • 1 10 oz. can Rotel Diced Tomatoes & Green Chiles
  • 1/2 Large Vidalia Sweet Onion, quartered
  • 2-3 cloves garlic, peeled and cut in half
  • Fresh Cilantro (or dried) to taste
  • 3 green onions, cut into pieces
  • Juice of a fresh Lime
  • 1/2 tsp chili powder
  • 1/4 tsp cumin
  • 1 Tbsp Maldon Sea Salt Flakes or your favorite salt

Directions:

Combine all ingredients in a food processor.  Pulse several times until desired chopped consistency.  Serve immediately or store in a jar or airtight container in refrigerator for up to several weeks.

Enjoy!

Cheers & Hugs,
Jodi


Roasted Spiral Butternut Squash “Noodles” with Garlic, Rosemary & Browned Butter

Roasted Spiral Butternut Squash “Noodles” with Garlic, Rosemary, and Browned Butter.

O. M. G!

Where have you been all my life spiralized butternut squash?

Many of us have been spiralizing our zucchini squash into beautiful noodles, but am I one of the last on the bandwagon for spiralized butternut squash??!!

So simple…
So quick…
So DELICIOUS!!!

I happened to come across a package of fresh spiral-cut butternut squash at my local Aldi Grocery Store recently.

I thought about pan frying it in butter and garlic, but then chose to roast it like I typically do with cut butternut squash, and WOWZIE PaZOWzie was I pleased!
And so was hubby!

What a quick, easy, delicious, and nutritous treat!

Here is the super simple, yet amazingly delicious way I prepared it.

Roasted Spiral Butternut Squash with Garlic, Rosemary, and Browned Butter

Ingredients:

  • 1 10-oz package of prepared spiral cut butternut squash “noodles” (or spiral cut your own)
  • 2 Tbsp. salted butter, browned
  • 2 large garlic cloves, minced
  • 1 large sprig fresh rosemary, minced
  • 1 Tbsp. flaked sea salt

Directions:

Preheat oven to 400 degrees F.  Brown butter in skillet.  Watch closely so it doesn’t burn.  Once browned, remove from heat and stir in garlic.

Spread spiral-cut butternut squash “noodles” onto a stoneware bar pan or your favorite shallow baking pan.

Sprinkle with salt.  Drizzle with garlic-enhanced browned butter.  Top with minced rosemary.  Toss to coat all.

Roast for 7-9 minutes.

Serve immediately.

Enjoy!

Cheers & Hugs,
Jodi

Creamy Cauliflower Risotto with Shrimp

Creamy Cauliflower Risotto with Shrimp.

On Easter Sunday, we enjoyed an absolutely amazing buffet brunch at a local restaurant in Mars called Breakneck Tavern where they served a positively divine shrimp risotto (among a kagillion other amazing treats).  I only had about a tablespoon of it on Easter, because I wanted to try so many of the other wonderful things they had available (way more than I could sample at one sitting!), but I could not get that shrimp risotto out of my mind.  It was sooooooo good!

Well – I have also  been hearing great things about “ricing” cauliflower and have been anxious to try.

Since I had a beautiful fresh head of cauliflower in the fridge, as well as a bag of shrimp in the freezer, I decided to try a healthier version of shrimp risotto for dinner last night.

O. M. G!  This turned out almost more heavenly than the original one I had a tiny taste of on Easter.  More heavenly because it is so much healthier, but also so delish!!!

My recipe is adapted from one I found at Cafe Delites.  This recipe is a low-carbohydrate, high protein, fiber-rich, calorie-friendly plate of deliciousness!  I hope you will give it a try.

P.S.  If I was making this only for me, I would totally add fresh green peas.  What do you think?  Hubby absolutely detests peas, so I sacrificed for him, but oooohhh –  can you imagine??!!  Pea lovers out there??

Here is how I made it.

Creamy Cauliflower Risotto with Shrimp

Ingredients:

  • 1 large cauliflower
  • 12-14 oz shrimp, peeled and tails removed
  • 2 Tbsp salted butter
  • 5 cloves garlic, minced
  • 1 lemon
  • 2 Tbsp olive oil
  • 1  cup Half and Half (or cream or milk)
  • 1/2 cup chicken broth (or dry white wine)
  • 1/2 cup grated Parmesan cheese
  • 2 tsp salt
  • 1 Tbsp coarsely ground pepper
  • 1/4 cup fresh parsley, chopped
  • 1/2 cup chopped sweet red pepper (optional)

Directions:

Remove core from cauliflower and break into florets.  Working in batches of approximately 1 cup at a time, pulse cauliflower in food processor until it is the consistency of rice.  Place all in large bowl and set aside.

In a large skillet, melt butter over medium-high heat.  Add shrimp and sear them while stirring until they start to lose their color.  Add garlic and juice of half of the lemon.  Fry for an additional minute.  Add cauliflower, red pepper (if adding) and olive oil.  Fry and stir for 3-4 minutes until fully combined and coated.  Stir in the half and half (or cream or milk) and chicken broth (or white wine).  Grate Parmesan cheese over all and sprinkle with salt and pepper.  Combine.  Cover and reduce heat to low to simmer 6-8 minutes until creamy.

When ready to serve, sprinkle with fresh parsley and wedges of lemon from remaining half.  Top with additional Parmesan if desired.

Enjoy!

Cheers & Hugs,
Jodi


Easy Sausage & Vegetable Quiche


Easy Sausage and Vegetable Quiche.

For those days when you want a hearty, substantial supper, but don’t feel like putting a lot of time and effort into it, this simple recipe is just the ticket.

It’s full of protein and veggies and could really be eaten for breakfast, lunch or dinner!

The secret to it being easy is in the fact that you don’t have to prepare a crust.  You simply use a little bit of baking mix (like Biquick) to create an almost crust-like texture.

And the options are limitless for what you can put in for your protein and veggies.  Exchange the sausage for bacon or chicken or turkey or ground beef.   You could even leave the meat out and just add more veggies.  Throw in any favorite vegetables you have in your fridge – mushrooms, asparagus, cauliflower, spinach, kale, tomatoes…..  And use any kind of cheese you love.  Exchange the cheddar for Swiss or muenster or provolone or mozzarella or even blue cheese or feta.

You get the idea…  right?  Toss in whatever you like, and you can have a wide variety of quick and easy meals.

I was recently reminded of this recipe when I came across a version of it at The Speckled Pumpkin.  It reminded me of years ago making all of those “impossible” pies….  Impossible Cheeseburger Pie, Impossible Taco Pie, Impossible Lasagna Pie, Impossible Tuna Pie….  Anybody else remember the Impossible Pie craze?  I may be back in the mood for these!

Serve it with a salad or side of roasted potatoes or even some chunky applesauce.

Here is how I made mine for our Sunday Supper last night.

Easy Sausage and Vegetable Quiche

Ingredients:

  • 1 lb pork sausage, cooked and crumbled
  • 1/2 medium sweet onion, chopped
  • 1 red pepper, chopped
  • 1 1/2 cups chopped fresh broccoli
  • 1 cup shredded cheddar cheese
  • 4 eggs
  • 2 cups milk
  • 1 cup Bisquick baking mix (or your favorite)

Directions:

Preheat oven to 400 degrees F.

Put sausage in bottom of stoneware deep dish baker or your favorite 2-quart round casserole dish or deep dish pie pan.  Top with chopped onions, pepper, broccoli, and cheese.

In a medium bowl, beat the eggs, milk and baking mix with a wire whisk until well blended.  Pour over sausage, veggies and cheese.

Bake for approximately 40 minutes until knife inserted in center comes out clean. 

Enjoy!

Cheers & Hugs,
Jodi


Quick & Easy Egg Roll Lettuce Wraps

Egg Roll Lettuce Wraps.

I am so excited to share this recipe!

A friend on Facebook recently shared a recipe for a Sausage Egg Roll Bowl that had me so intrigued…

and so hungry….

that i couldn’t wait to try.

All the yummy ingredients of an egg roll without the deep fried wrapper in a bowl sounded divine!

But then I thought……  how about wrapping it in crisp Romaine lettuce leaves and making it into yummy, healthy, quick, and easy Egg Roll Lettuce Wraps?!

What I loved, and I think you will too, is how FAST and EASY this recipe is – especially for how DELICIOUS it is!

This is definitely a 20-minute meal from start to finish.  Who isn’t looking for one of these a few times a week?!

And there are so many possibilities for changing it up…  switch out chicken or turkey sausage for the pork sausage…  add raisins or craisins….  add walnuts or slivered almonds…  add chopped sweet red peppers or crisp celery or mushrooms…

I think the key ingredients to this recipe are the soy sauce (low-sodium!) and the sesame oil (I used Trader Joe’s Toasted Sesame Oil).

I am a salt LOVER, but I only buy low-sodium soy sauce (believe it or not).  If you want the full flavor of soy sauce without all the sodium, you will love low-sodium soy sauce.  In fact – you can add more flavor!  You can always add a dash of salt later if you really think it needs, but you can never take away too much of a salty flavor.

Here is the recipe as I slightly tweaked and made into a wrap!

I hope you will try, and I hope you love as much as I did!

Quick & Easy Egg Roll Lettuce Wraps

Ingredients1 lb bulk sausage (pork, chicken, turkey)

  • 1 14-oz bag Fresh Express Cole Slaw Shredded Cabbage & Carrots Mix
  • 4 cloves garlic, minced
  • 1 tsp ground ginger
  • 1-2 Tbsp. low-sodium soy sauce
  • 1/3 cup chopped green onions
  • 1 Tbsp sesame oil
  • 1 bunch fresh Romaine Lettuce

Directions

Cook sausage in a large stir-fry skillet over medium-high heat, stirring often to crumble, until fully cooked.

Add cabbage mix, garlic, ginger, and soy sauce.  Cook for 3-4 minutes until cabbage has softened a bit.

Remove from heat and top with green onions and drizzle with sesame oil.  Stir to combine.

Serve over a bed of fresh romaine leaves or scoop into leaves to serve.

Enjoy!

Cheers & Hugs,
Jodi