Mixed Media Hug

PP277

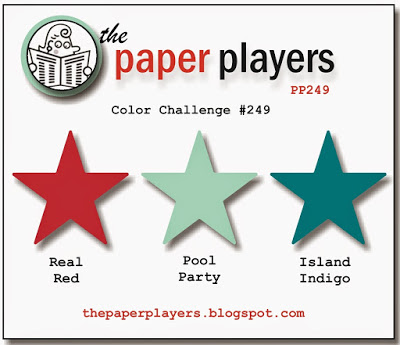
Time to join The Paper Players and play along in the color challenge Claire put out this week for all our crafting, painting, stamping friends.

I couldn’t resist participating with the fun colors this super sweet lady chose: Tempting Turquoise, Melon Mambo, and Real Red!  Oooo Laaa Laa!

I wanted to do something different and had bought some fun new stuff while shopping this past weekend with Hubby at Tuesday Morning before our movie date to see “The Revenant.”   (Did YOU see it yet?!)   I bought the corrugated papercraft cardstock paper and the Tim Holtz Alpha Parts Punch Out letters.  Combined that with some fun flowers sweet Eileen at My Creative Resolution gifted me with that just happened to exactly match “Melon Mambo,” embellished with one of my fave new dies – the pine branches from Gina Marie Designs, die cut some paper with my favorite stitched rectangle dies, added a pearl, and Voila – my Mixed Media Hug card!

It’s a bit of a quirky card, and I’m still trying to decide if I like it, but I’m guessing there will come an occasion or a person who it will end up being just right for at just the right time one of these days, so I’ll be holding onto this “hug” until then.

I sure miss being on the design team with the amazing creative Paper Players team, but it’s great to still play along!

Oh – and check out the amazing new guest designers!  WOWZA!  They have so much creativity to share!

Happy Friday!

Cheers & Hugs,

Jodi

Happy Birthday Dad!

PP249 Birthday Color Challenge

It’s time for another Paper Players Challenge Guest Designer Post.  This week’s challenge (PP249) is a color theme using Real Red and Blue Shades of Pool Party and Indigo Blue.

pp249

My Dad’s birthday is coming up in a few days, and we are going to visit him today to celebrate, so I thought I would use the opportunity to create a birthday card for him.

PP249 Birthday Color Challenge 3

Instead of using those colors in ink, I used them in creating shapes and cut-outs of some beautiful StampinUp designer series paper (DSP) with the StampinUp Star Framelits Dies.

PP249 Birthday Color Challenge 2

I wanted to give it a bit of a “vintagy” look too, so I sponged each piece with Tim Holtz Tea-Dye Distress Ink.  I popped the stars and sentiment (from Paper Smooches Sentiment Sampler) on with some dimensionals.

Looking forward to celebrating Dad’s birthday and Father’s Day with him today.

Love you Dad!

Cheers & Hugs,

Jodi


Watercolor & Painted Petals Note Card

mini watercolor painted petals

I really enjoy trying new techniques in creating handmade cards, so when I saw a tutorial done by Jill Foster for Penny Black featuring water coloring combined with stamping to create these mini watercolor creations with a clean and simple white on white background, I couldn’t  wait to make one.

mini watercolor painted petals 1

The technique includes masking off watercolor paper to create the “frame” and then watercoloring the background.  I used some golds and greens from my Sakura Koi Water Color Pocket Field Sketch Box (actually the only watercolors I own right now).  After drying, I stamped the flowers on using StampinUp’s Painted Petals stamp set by coloring them with my Stampin’ Write Markers in Rose Red, Blackberry Bliss and Mossy Meadow and then gently spritzing the stamp with water to loosen the look before stamping.

mini watercolor painted petals 2

I then used those same marker colors and added a little water to them in my watercolor tray to randomly tap splatters all over from a paint brush.  The last step involved using a Penny Black Footnotes stamp with Tim Holtz Distress Ink in “tea dye,” which I smudged for the vintage imperfect look before stamping on the top edge and corner.

mini watercolor painted petals 3

Once dry, I simply removed the masking tape (blue painter’s low-tack tape is easier to remove and less likely to lift the paper too), put some dimensional adhesive tape on the back and adhered to a white card base.

mini watercolor painted petals 4

I loved this technique and plan to try it with other colors and stamps, and I can’t wait to share this card with somebody special.

Wishing you a wonderful day and week.  Spend some time doing things you enjoy with people you love.

Cheers & Hugs,
Jodi

PS  I am submitting this card for a new challenge I just learned about at canyoucaseit.com where this week’s challenge is “Designer’s Choice.”

Designers-Choice-001

I won!  Thanks to the CYCI Designer Team for the great honor!

Winner-001

It’s a “Back to” Kinda Day…

PP226 Birthday Butterfly Basics

I gotta say, it was a great “back to” kinda day yesterday …
Back to work…
Back to the gym…
Back to the craft room in the evening… and back to The Paper Players Challenge!!
Felt so good!

I need a birthday card for a special friend, so I was excited to use the Stampin Up Butterfly Basics Stamp Set and Framelit to make it.

Butterflies remind me of renewal and hope and change and that speaks January birthday to me and also this special lady.

The Paper Players first challenge of the new year #226 is “Everything Old is New Again – create a project using a recycle or re-purposed item.  This challenge is right up my alley and just the right challenge to get me back in the stampin’ groove!

PP226

For my card, the recycled/re-purposed items are craft paper packing material from my endless Amazon Prime Christmas gift shopping packages and a touch of  burlap ribbon from my dear daughter-in-law, Colleen’s wedding shower (we both love burlap!)  🙂

PP226 Birthday Butterfly Basics

I loved creating a rustic, but fresh and renewed look with the recycled/re-purposed materials and a bright butterfly.  And I adore the ferns that are in this stamp set and how great they work for the stamping-off technique to get a variety of shades.

PP226 Birthday Butterfly Basics Inside
I only used three colors of ink for this card – SU Mossy Meadow for the ferns, Stazon Black for the sentiments and a bit of Ranger Tim Holtz Tea Dye Distress Ink for the vintagy edges.

Hope you are getting “back to” your groove after the holidays and seeking cherished moments at lifeinbetween and always.

Cheers & Hugs,

Jodi


P.S.  For my stamping friends, if you haven’t seen Deb Valder’s Youtube technique tutorial on dryer sheets for thinlits, I urge you to check it out.  Possibly life-changing for these challenging die cuts! 🙂