Macadamia Toasted Coconut Chocolate Chip Cookies

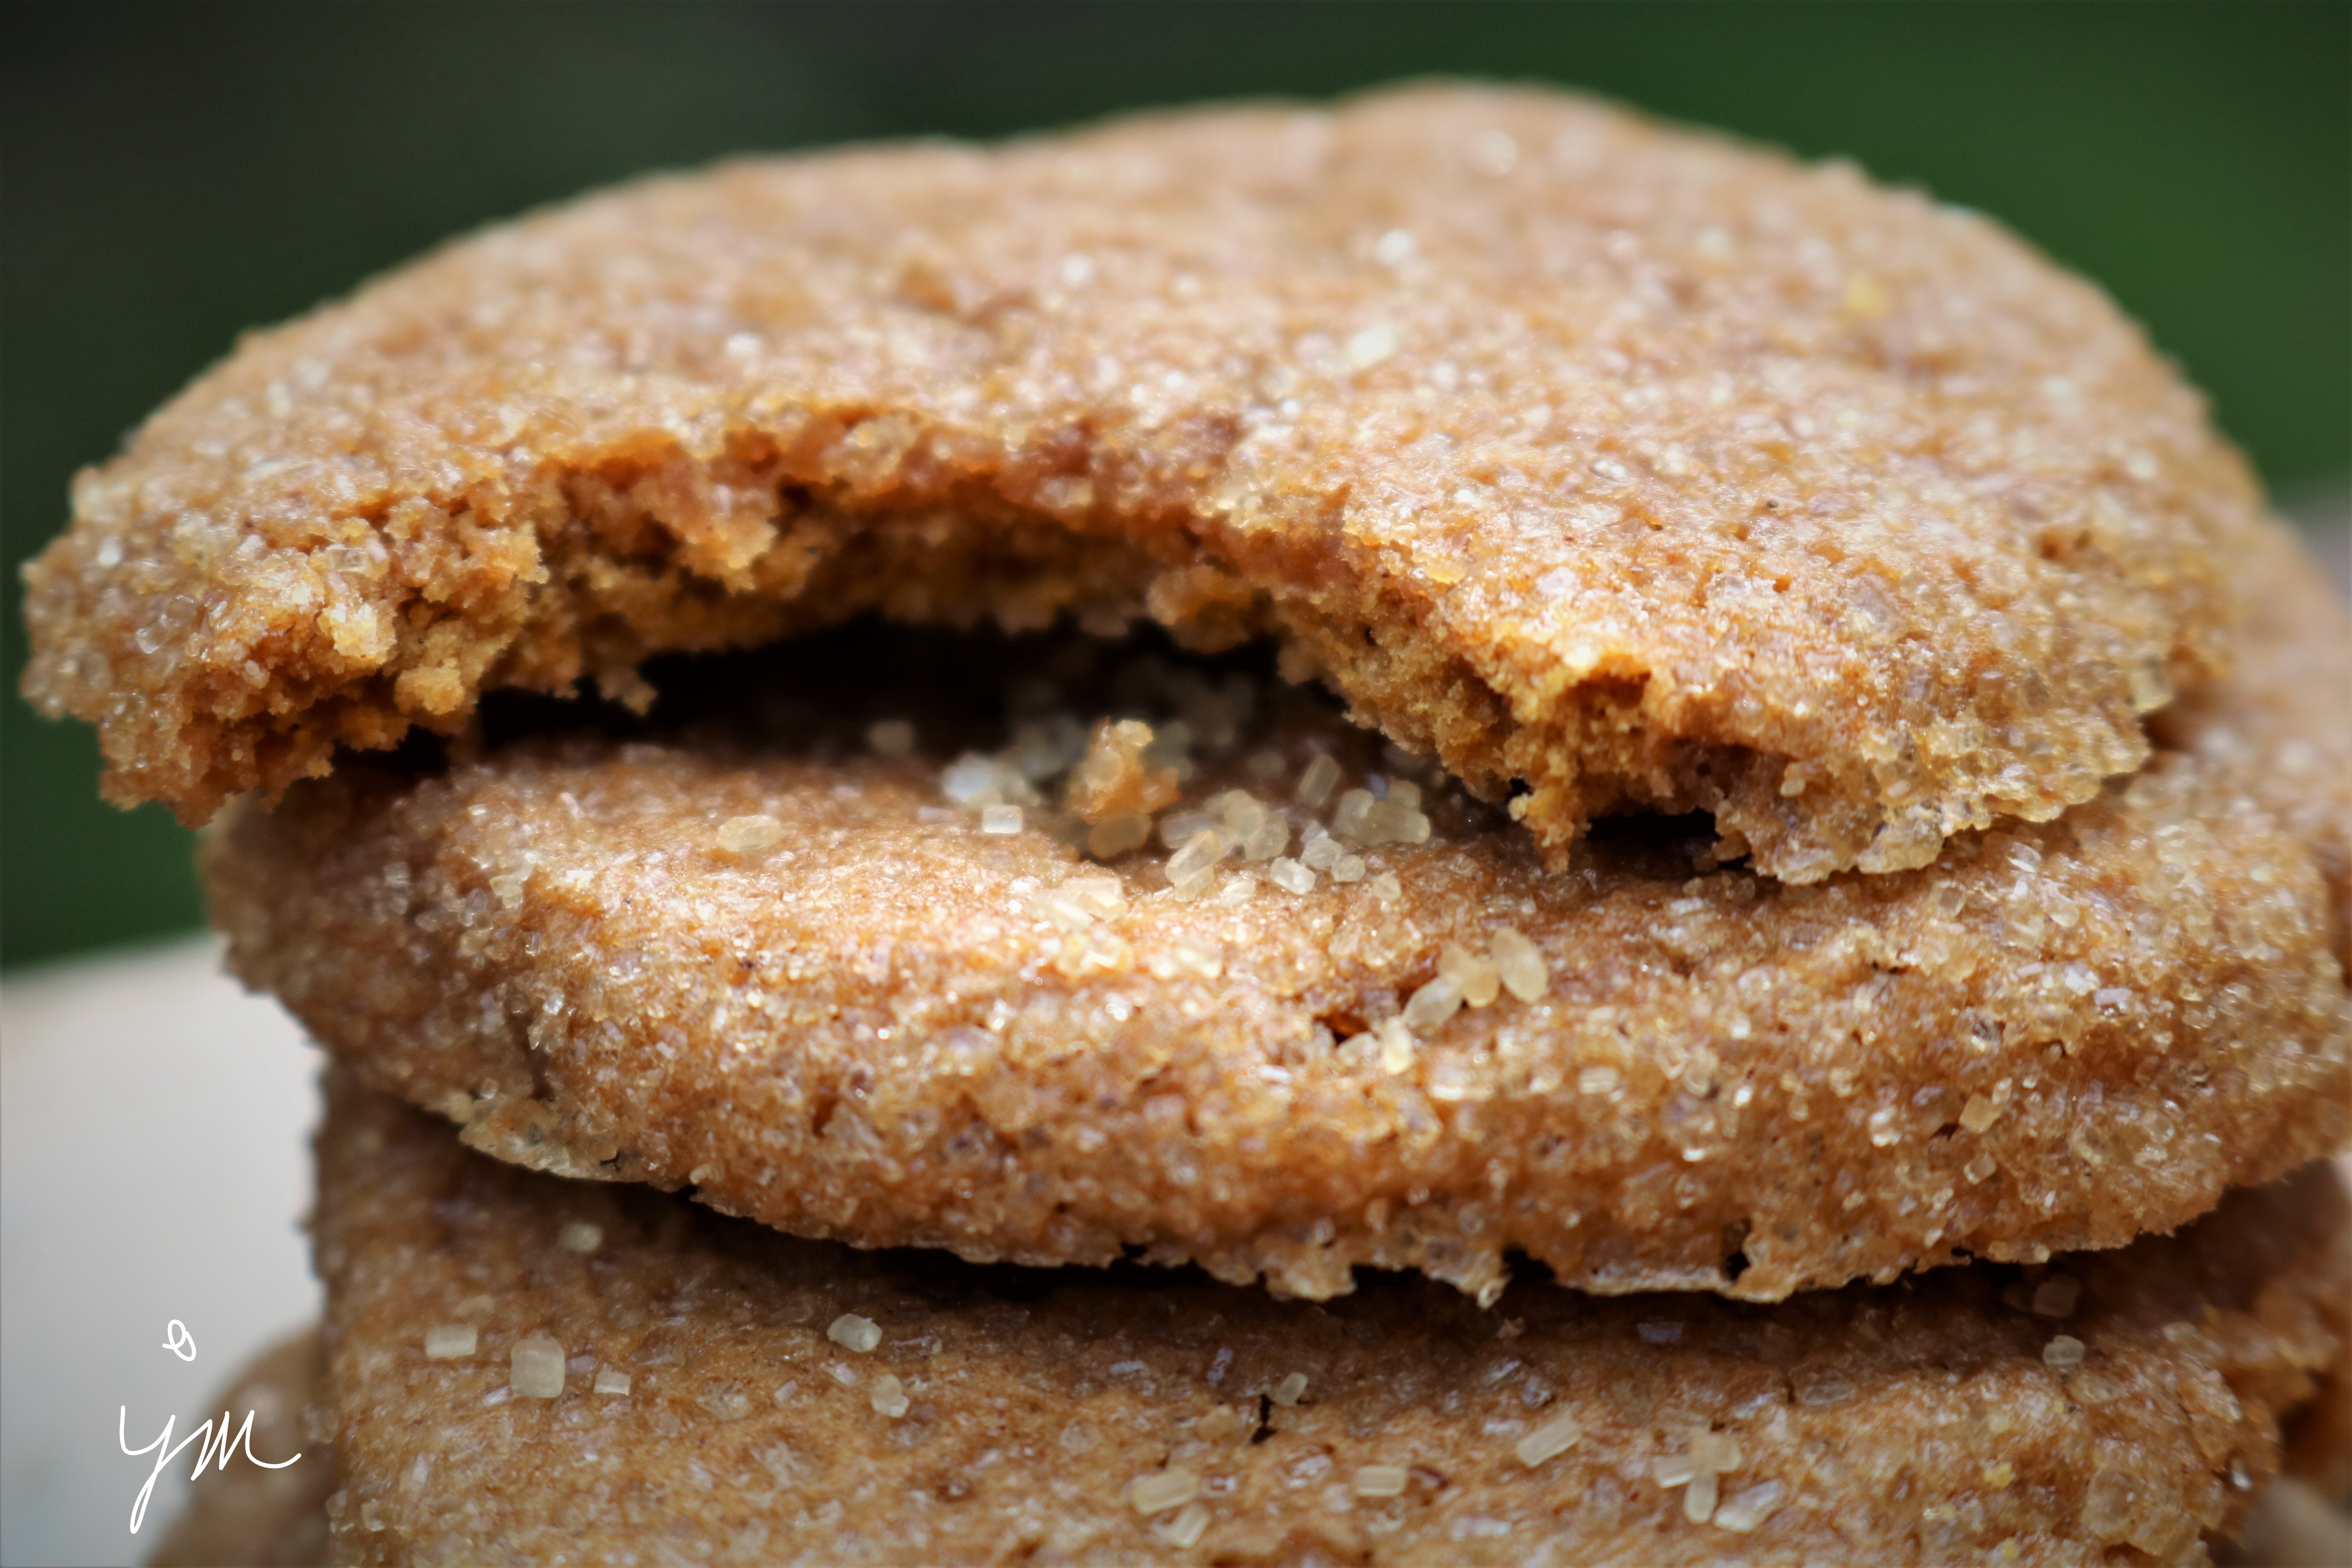
Macadamia Toasted Coconut Chocolate Chip Cookies.

Can you EVEN????

OH is this a GOOOOOD one!!!!

Toasted coconut, salty crunchy macadamia nuts, and semi-sweet gooey bits of chocolate in one cookie!

This one is rich, so when you are really in the mood, a bite into this cookie is going to be an experience you will not soon forget!

Here is how I made them.

Macadamia Toasted Coconut Chocolate Chip Cookies*

  • Servings: 5 doz large cookies
  • Print

Ingredients:

  • 2 cups (4 sticks) butter, melted
  • 1/2 cup sugar
  • 2 1/2 cups packed brown sugar
  • 2 eggs
  • 2 egg yolks
  • 4 Tbsp. milk
  • 4 tsp. vanilla extract
  • 2 tsp. salt
  • 2 tsp. baking soda
  • 5 cups all-purpose flour
  • 4 cups semi-sweet chocolate chips
  • 2 cups shredded coconut (toasted**)
  • 1 1/2 cups macadamia nuts, coarsely chopped

Directions:

Beat melted butter and sugars with electric mixer until creamy, then add eggs and egg yolks and beat until well combined.  Add milk and vanilla and beat until well combined.  Then add salt, baking soda and flour mixing just until incorporated.  Remove bowl from electric mixer stand and stir in chocolate, then toasted coconut, and macadamia nuts with a wooden spoon until evenly distributed through the dough.

Place cookie dough in refrigerator for several hours or overnight to chill completely.

When ready to bake, preheat oven to 375 degrees F.  Scoop dough out and roll into golf-ball sized balls.  Place on cookie sheet or baking stone and bake for 10 minutes.  Rotate baking stone/cookie sheet and bake for 2 more minutes.  Let cool 10 minutes before removing to wire rack to cool completely.  These freeze beautifully.

**To toast coconut, spread the coconut flakes out on a sheet pan or stoneware bar pan in a thin layer. Bake at 375 degrees F. Check the coconut every 5 minutes and stir until the coconut is your desired color. It takes about 10-15 minutes.

Enjoy!

Cheers & Hugs,
Jodi

*Recipe adapted from Mrs. Fields

Toffee Coffee Oatmeal Cookies

Toffee Coffee Oatmeal Cookies.

It’s been a little while since I posted a cookie recipe here at The Creative Life in Between. 

I tried to focus on watercolor painting for most of July in honor of #WorldWatercolorMonth – being an Ambassador and all.   < curtsy bows 😉 >

But those that know me well know that I almost always have some kind of fresh baked cookies in the house – for “just in case!

In fact…. I’m kinda known  – – in some very small, insignificant circles – –  for my creative culinary cookie craftiness.

This and my fluent grasp of the Ubby Dubby language are the talents I always say I would use if I were in the Miss America Pageant – HA!!!!

Well – I’ve been saving up and have a couple really good recipes to share!  So this week is going to be cookie recipe week.

I made this cookie recipe for a recent party at my house, and they were a huge hit!

This cookie is a wonderful chewy, but crisp on the edges dream of milk chocolate, toffee, oatmeal, and a hint of coffee for good measure!  O….  M….  G….  !!!

Get ready for a new addiction!  This is one I have trouble passing up and is dangerous to keep in my house!  Bake them if you dare!

Toffee Coffee Oatmeal Cookies*

Ingredients:

  • 1 1/3 cup firmly packed brown sugar
  • 1 cup (2 sticks) softened butter
  • 1 egg
  • 1/4 cup strong coffee (cooled)
  • 2 tsp. vanilla
  • 3 cups Quaker oatmeal (either quick or old-fashioned, uncooked)
  • 1 1/2 cups all-purpose flour
  • 1 tsp. salt
  • 1 tsp. baking soda
  • 2 8-oz. packages milk chocolate toffee bits
  • 1 cup coarsely crumbled sugar ice cream cones (about 5 cones)

Directions:

In large bowl with electric mixer, beat sugar and butter until creamy.  Add egg; beat well.  Beat in coffee and vanilla.  Add salt, baking soda, and flour until combined.  Remove from electric mixer and stir in 3 cups oatmeal with wooden spoon.  Stir in toffee bits and crumbled sugar cones just until well incorporated.  Refrigerate dough for several hours or overnight to chill.

When ready to bake, preheat oven to 350 degrees F.  Roll tablespoons full of dough into round balls (golf ball sized) and place on baking stone or parchment lined cookie sheet.  Bake 12-14 minutes just until golden brown.  Allow to cool on baking stone for additional 5-10 minutes.  Transfer to cooling wire racks to cool completely.  Freeze well.

Enjoy!

Cheers & Hugs,
Jodi

*slightly adapted straight from the Quaker Oats recipe!

Black Bean & Corn Salsa

Black Bean & Corn Salsa.

One of my favorite new healthy snacks is black bean and corn salsa.

It makes a wonderful “scoop” with tortilla chips.

It is also great all by itself as a salad or piled on top of a grilled chicken breast or fish.

It is light, healthy, crunchy, tangy, low-calorie, high-fiber, and absolutely DELISH too!

Here is how I make it, but you can surely tweak to your liking.  It would be great with a bit of fresh cilantro, which I didn’t have on hand when I made this batch on Sunday.  You could also switch it up with any other kind of bean you like or other veggies like cherry tomatoes or cucumbers.

Black Bean & Corn Salsa

  • Servings: approx. 3 cups
  • Print

Ingredients:

  • 1 15 oz. can black beans, drained and rinsed
  • 1 1/2 cups frozen or canned corn*
  • 1/2 red bell pepper, diced
  • 3 stalks celery, diced
  • 1/3 cup diced onion
  • salt and pepper to taste
  • Balsamic vinegar to taste (approx. 2 Tbsp)

Directions:

Combine all  vegetables in a bowl.  Stir to combine.  Sprinkle with salt and pepper to taste.  Drizzle with Balsamic vinegar to taste.

Serve as a salsa for tortilla chips, as a salad, or as a topping for grilled chicken or fish.

Store well in airtight refrigerator container for several days.

*TIP:  When we buy fresh corn on the cob in the summer, we always buy a full dozen, though we never eat all of that for the two of us.  We cut the leftover off the cob, throw it in a Ziploc freezer bag, and toss it in the freezer for the winter months or times when fresh corn is not available.  It is so much better than canned corn.

Enjoy!

Cheers & Hugs,
Jodi

Peanut Butter Marshmallow Fluff Thumbprint Cookies

Peanut Butter Marshmallow Fluff Thumbprint Cookies.

These cookies!
Ooooooh these cookies!

Imagine…. a peanut butter crinkle cookie loaded with a scoopful of sweet, heavenly, gooey, magical Marshmallow Fluff so that you taste it in every peanut-buttery bite.

When I saw these cookies featured on Cara Wong’s Instagram feed, I knew I had to make them.

Cara is a sweet lady who lives in McKinney, Texas with her comical, coffee-loving husband and best friend Joseph.  She loves to cook and bake almost as much as she loves her MeeMaw and Joseph.

I’ve become addicted to watching Cara’s daily adventures in search of the best coffee, burgers and meatloaf in town and daily experiments in baking and cooking.   The milkshake-sipping and singing visits with MeeMaw, Cara’s beloved grandma who played such an important role in raising Cara (much like my own Grandma) just warm my heart.  MeeMaw now lives in a memory care facility where Cara visits her regularly brightening both of their days almost as much as they do mine when they sing You are My Sunshine or Amazing Grace.

But I digress.

Back to these cookies…  these glorious nuggets of amazing deliciousness….

These may be my new personal favorite ever.

They are just such a unique combination that I cannot imagine anyone not liking.

Cara took MeeMaw’s old-fashioned peanut butter crinkle recipe and decided to try marshmallow filling.  She used Smuckers Marshmallow Topping (which I had never heard of).  I used a jar of Marshmallow Fluff, which I just happened to have on hand (who knows why?), and they turned out absolutely amazing!

Here is the recipe, shared by Cara, which I adjusted only by subbing Marshmallow Fluff for the Marshmallow topping.  I urge you to try these, and I can’t wait to hear what you think.

Peanut Butter Marshmallow Fluff Thumbprint Cookies

Ingredients:

  • 1/2 cup (1 stick) butter, softened
  • 3/4 cup creamy peanut butter
  • 1/3 cup granulated sugar
  • 1/2 cup brown sugar
  • 1 egg
  • 2 tsp pure vanilla extract
  • 1 tsp baking soda
  • 1/2 tsp salt
  • 1 2/3 cup flour
  • 1/2 cup additional granulated sugar for rolling balls in
  • 1 7.5 oz.  jar Marshmallow Fluff

Directions:

Preheat oven to 375 degrees F.

Cream butter, peanut butter, and sugars until light and fluffy.  Scrape bowl.  Add egg and vanilla extract, baking soda and salt.  Mix until well combined.  Add flour, and stir until well combined.

Roll dough into 1″ balls.  Roll balls in granulated sugar to coat.  Place on baking stone or ungreased cookie sheet about 2 inches apart.  Bake for approximately 9 minutes, until just beginning to brown.  Remove from oven, and use your thumb or a utensil to indent a “crater” for filling.  Allow to cool.

Heat up Marshmallow Fluff 10 seconds at a time just until you can stir.  No more than 20-30 seconds total.  Fill centers with Marshmallow Fluff.

Enjoy!

Cheers & Hugs,
Jodi


Easy Dill Pickle Focaccia Bread

Easy Dill Pickle Focaccia Bread.

Calling all bread lovers!

Calling all dill pickle lovers!

Calling all lovers of easy recipes that rock!

My cousin, who I affectionately refer to as “Oh Rob,” recently shared this recipe he made for his pickle-loving grandson.  Oh Rob loves to bake bread, and he loves his grandson even more!  This recipe was a match made in heaven for these two.

The idea really intrigued me and sounded so good. I knew I had to try it.

We are a dill pickle lovin’ family too.

And who doesn’t love bread?!

So I ever so slightly adapted the recipe and made it this past Sunday for dinner to serve along with spaghetti.  We loved it!

Give it a try, and let me know what you think.  Here is how I made it.

Easy Dill Pickle Focaccia Bread

Ingredients:

  • 3/4 cup warm water (105-110°F)
  • 1/4 cup pickle juice, warmed (105-110°F)
  • 2 tsp. granulated sugar
  • 1 (1/4-oz.) envelope active dry yeast
  • 2 3/4 cups all-purpose flour
  • 1 tsp. dried dill weed or 1 Tbsp. chopped fresh dill
  • 1 tsp. salt
  • 1 tsp. coarsely ground black pepper
  • 3 Tbsp. olive oil, divided
  • 1/2 cup Cheddar cheese, grated
  • 2 large dill pickles, sliced or chopped
  • Optional: 1 Tbsp. Maldon Sea Salt Flakes
Directions:

Combine warm water, warm pickle juice, sugar, and yeast in a medium bowl or measuring cup. Let stand 10 minutes.

Whisk together flour, dill, salt, and pepper in a medium bowl. Add pickle juice mixture and 2 tablespoons of the oil; stir until combined and dough begins to pull away from sides of bowl. Turn dough out onto a lightly floured surface, and knead until smooth and stretchy.

Drizzle 1 teaspoon of the oil in the bowl to coat; add dough, and turn to coat. Cover with towel, and let stand in a warm place until dough has doubled in size.

Preheat oven to 425°F.  Punch down dough. Place on a lightly oiled 18- x 13-inch rimmed baking stone sheet. Press and stretch dough to edges of baking sheet. Cover with towel, and let stand in a warm place 15 minutes.

Using the end of a wooden spoon, make indentions evenly over dough. Top evenly with cheese and pickles.  Bake until lightly golden and cooked through,  approximately 20 minutes.

Sprinkle top with sea salt flakes, if desired. 

Enjoy!

Cheers & Hugs,
Jodi

PS  I will be taking a holiday blogging break until after Christmas and the New Year.  Wishing you all the joy of this festive season!

Pecan Pie Thumbprint Cookies

Pecan Pie Thumbprint Cookies.

It’s December, and that means time to start Christmas cookie baking!

These cookies are a wonderful version of pecan pie in a cookie!

They are similar to Pecan Tassies, but a lot easier.

The cookie is buttery and shortbread-like, while the filling is nutty and sticky and sweet and AMAZING!

I had a little bit of extra filling left that I just couldn’t throw away, so I spread it on a sheet of crescent roll dough, rolled it up, and sliced it into 8 easier-than-pie pecan “sticky buns!”

So
worth
it!

Hope you will give these yummy cookies a try for something new on your Christmas cookie baking list.  I do believe these will become a regular in our home!

Here is the recipe I found at  Crazy for Crust, which I only slightly altered.  Thanks for a great recipe, Dorothy!

Pecan Pie Thumbprint Cookies

Ingredients:

Cookie Batter:

  • 2 cups brown sugar
  • 1 1/2 cups butter, softened
  • 2 eggs
  • 2 tsp. vanilla
  • 4 cups flour
  • 2 tsp. baking powder
  • 1/2 tsp. salt

Pecan Pie Filling:

  • 2 cups pecans, chopped
  • 1/2 tsp. coarse or flaked salt
  • 1 cup brown sugar
  • 4-5 Tbsp. Half and Half or Heavy Cream
  • 2 tsp. vanilla

Optional:  Powdered sugar for sprinkling on top of cooled cookies.

Preheat oven to 350 degrees F.

Beat brown sugar, butter, egg, and vanilla in electric mixer until creamy.   Add in baking powder, salt, and flour, and mix on low speed until well combined.

Shape dough, two tablespoons at a time, into balls, and place the balls two inches apart on a baking stone or cookie sheet.  Indent a hole in center with your thumb.

Prepare filling by stirring pecans, salt, brown sugar, and vanilla with cream until it forms a thick mixture.  Spoon approximately one teaspoonful into thumb indentation of each cookie.

Bake for 10-12 minutes.  Cool for 5 minutes on stone or cookie sheet before removing to rack to cool completely.

Sprinkle with powdered sugar if desired.

Cookies freeze well for up to a month.

Enjoy!

Cheers & Hugs,
Jodi

Pumpkin Spice Sugar Cookies

Pumpkin Spice Sugar Cookies.

It’s that time of year…

Time for baking things with pumpkin and spice and everything nice!

Though I almost always have my “almost-famous” chocolate chip cookies in the freezer,
these cookies just suit this time of year so perfectly.

Our gang loved them!  Hope you will too.

Here is the recipe as I very slightly adapted from the beautiful blog:  A Family Feast:

Pumpkin Spice Sugar Cookies

Ingredients:

  • 2 sticks butter, softened
  • 1 cup white sugar
  • 1/3 cup dark molasses
  • 1 egg
  • 1 cup pureed pumpkin
  • Dash salt
  • 2 tsp baking powder
  • 1 Tbsp pumpkin pie spice
  • 2 Tbsp cinnamon
  • 3 cups all purpose flour
  • 1 1/2 cups Sugar in the Raw Turbinado Cane Sugar

Directions:

Cream butter, sugar, and molasses with electric mixer 3-4 minutes until fluffy.  Add egg, followed by pumpkin, beating until mixed.

Slowly add in salt, baking powder and flour on low speed just until incorporated.

Divide dough into four logs, approximately 8 inches long.  Wrap with plastic wrap, and refrigerate several hours or overnight.

When ready to bake, preheat oven to 325 degrees F.

Pour Turbinado cane sugar into a shallow dish or pie plate.

Unwrap one log of dough at a time.

Roll log into sugar to coat.

Cut log into quarters.  Then cut each quarter into thirds.

Put cookie slices in sugar, coating both sides.

Place sugared cookie slices on baking stone or cookie sheet, and bake for approximately 12 minutes.

Remove from oven, and allow cookies to cool on baking stones/cookie sheets for 10 minutes before transferring to cooling racks to cool completely. 

Enjoy!

Cheers & Hugs,
Jodi

Cranberry Jalapeno Holiday Dip

Cranberry Jalapeno Holiday Dip.

When I was asked to bring an appetizer to my new Daughter-in-Law, Liz’s family Thanksgiving, I knew I had to make this after being told by my BFF, Jill that everyone was “jonesing it” when she made it for a party.

First I had to laugh at our 50+ year old selves using urban slang, then I had to make it and see if it was so!

Well – Yep!  It was a hit! One sister asked if the recipe was on the blog, because she wanted it (here it is Laura!), and another said she normally doesn’t like salsas, but she really liked it.

It is sweet, and it is spicy. It is crunchy, and it is creamy. All of this in a bite!

Thumbs up from all, except for hubby, who said it was… meh… He preferred the other appetizer I made – Pumpkin Pecan Baked Brie – which was pretty amazing too!

But will you make this and let me know and prove him wrong? <wink>

So secret revealed here.  I did not take pictures of the batch I made for Thanksgiving, so I made it again this past week just to get pictures <whistles and rolls eyes… not owning up to the fact that I ate a quarter of it for lunch one day…..>

And guess what else I did with it this week?  I made a leftover cold turkey sandwich and slathered some of this on the Smart Bun first.  YUM!  Who knew it would make a great turkey sandwich spread too??!!

This will be a hit at any holiday gathering, and it is so easy and pretty!  Here is the recipe as I slightly tweaked from a recipe I found through Pinterest:

Cranberry Jalapeno Holiday Dip

Ingredients:1 12oz. bag fresh cranberries

  • 1/3 cup sliced green onions
  • 1/4 cup sliced jalapeno pepper slices in a jar (or 1-2 fresh if you like it HOT!)
  • 2 Tbsp. chopped cilantro
  • Juice of 1 fresh lemon
  • 1/4 tsp salt
  • 1 cup sugar
  • 16 oz. cream cheese, softened

Directions:

Chop cranberries (I used the Pampered Chef Food Chopper, and it worked wonderfully, but you can also chop by hand.  Do not put in a food processor as they will become too mushy), and place in a medium bowl.  Add chopped green onions, jalapenos, cilantro, lemon juice, salt, and sugar, and stir gently, but well.

Cover, and let refrigerate overnight.

When ready to serve, strain or squeeze liquid from cranberry relish.

Spread cream cheese in bottom of a pie plate or serving dish.  Top with cranberry relish mixture.

Serve with crackers, tortilla chips, pita chips, celery sticks, or your favorite “dipper.”

Enjoy, and let me know if you and your friends are jonesing it too!

Cheers & Hugs,
Jodi

Four Cheese Garlic Spaghetti Squash

Four Cheese Garlic Spaghetti Squash.

I have always enjoyed spaghetti squash, but now that I have discovered this recipe…….. well…. now I LOOOVVVEE spaghetti squash!

This is absolutely the most amazing way to eat it!

Imagine a version of mac ‘n cheese without the macaroni carbs or calories and replaced with healthy spaghetti squash “noodles.”  (Macaroni carbs 78g/cup vs. Spaghetti Squash carbs 7g/cup – Macaroni calories 221/cup vs. Spaghetti Squash calories 31/cup!)

But…… it also has the most amazing flavor, you won’t even miss your macaroni!

When I saw a recipe at Eatwell101 for this amazingness, I knew I had to try.  I tweaked it up a bit, and here is how I made it.

Hope you will give it a try!  You won’t be sorry!

Four Cheese Garlic Spaghetti Squash

Ingredients

  • 1 large spaghetti squash
  • Freshly ground pepper
  • 1 1/2 cups Half and Half
  • 5 cloves garlic, minced
  • 1 tsp. chicken base or 1 chicken bouillon cube, crushed
  • 1/2 tsp dried thyme (or 1 Tbsp. fresh thyme)
  • 1/4 cup finely chopped scallions or green onions
  • 1 cup freshly shredded cheese – I used the following combination:
    • 1/4 cup Mozarella
    • 1/4 cup White Cheddar
    • 1/4 cup Parmesan
    • 1/4 cup Gruyere

Directions

Preheat oven to 400 degrees F.

Cut both ends off of spaghetti squash and cut in half lengthwise.  Scrape out seeds.  Place both halves in a 9×13 baking dish flesh side up.  Sprinkle with freshly ground pepper.

Combine half and half, garlic, chicken base (or bouillon), thyme, and scallions in a small bowl.

Sprinkle half of shredded cheese in the cavities of each halved squash.  Pour half of cream mixture into each squash half.  Top with remaining shredded cheese.

Roast for 40 mins, or until squash flesh is tender when poked with a fork.

Remove from oven and carefully scrape squash from skin with a fork creating spaghetti “noodles.”  Mix well with cheese and cream, and serve immediately.

Enjoy!

Cheers & Hugs,
Jodi

Apricot Glazed Pork Tenderloin

Apricot Glazed Pork Tenderloin.

Pork lovers get ready to swooooon!  This might be the most delicious way I have ever prepared pork tenderloin!

I made this yummy recipe earlier this week to go with the Roasted Brussels Sprouts with Bacon and Apples I featured HERE.

It was like a match made in Yum Yum Heaven!  I have to admit I moaned a few times eating it!

Hope you give it a try!

Apricot Glazed Pork Tenderloin*

Ingredients

  • 1 pork tenderloin (approx. 1 1/2 lbs)
  • Salt and pepper
  • 1 Tbsp dried thyme
  • 2 Tbsp butter
  • Olive Oil
  • 1/2 cup white wine
  • 1/2 cup chicken broth/stock
  • 1 Tbsp minced fresh rosemary
  • 2 Tbsp apricot preserves (heaping)
  • 1 Tbsp Dijon mustard
  • 2 Tbsp low-sodium soy sauce (as much as I LOVE salt, I always recommend low-sodium soy sauce)
  • 1 Tbsp Worcestershire sauce

Directions:

Preheat oven to 350 degrees F.

Melt butter and a drizzle of olive oil in a large oven-safe skillet.  When hot, add tenderloin(s).  Liberally season pork with salt and pepper and dried thyme.   Sear the pork on all sides.

When pork is beautifully seared and browned all over, add wine and chicken broth/stock to the skillet.  Cover and place in preheated oven for 15-20 minutes or until internal temperature reaches 140 degrees F.

Remove pork and place on cutting board.  Cover with aluminum foil, and let rest for 5 minutes.

In skillet, add apricot jam, Dijon mustard, soy sauce, Worcestershire sauce and rosemary.  Cook over low heat for 4-5 minutes allowing the glaze to thicken.

Slice pork tenderloin and drizzle glaze over top.

Enjoy!

Cheers & Hugs,
Jodi

*Original recipe found at AGoudaLife.com.