My Most Favorite – for 33 years!

33 anniversary card

Today, my hubby, Marty, and I celebrate 33 years of marriage.

Yep – 33 years ago today – a very young and naive 19-year old girl said “I do” for now and forever to a 23-year old boy about as different from her as Eddie and Eva on Green Acres (okay – maybe I wasn’t quite that glamorous and Marty wasn’t quite that Midwest farmer, but we were – and still are – a pretty classic example of opposites attracting.)

And you know what?

He is still my favorite!

Maybe even more so….

I tell people that are going through “stuff” in marriage, there are good days and bad days, good weeks and bad weeks, good months and bad months…

Heck – there are even tough years…

But, you know what?

Life isn’t perfect.

People aren’t perfect.

And marriage and monogamy with that one special someone is a pretty special thing.

And I am so fortunate in so many ways for so many things and so many years and so much love and safety and stability and genuineness and standbyidness….

Yep – Merv (that’s what I call the hubster) – you are STILL my MOST FAVORITE!  (and this is the card I made for him.)

I love ya,
Gert (that’s what he calls me)

I know – we are goofy!  🙂

Cheers & Hugs,
Jodi


Zucchini Lasagna

z
The Challenge:  Take a classic recipe, and make a healthier version.

That was the assignment my son, Nick’s girlfriend, Liz, had for her final assignment in a cooking class she is taking as part of her Master’s Degree Program in Nutrition.

We were excited to help her out and have her cook dinner for us last evening.

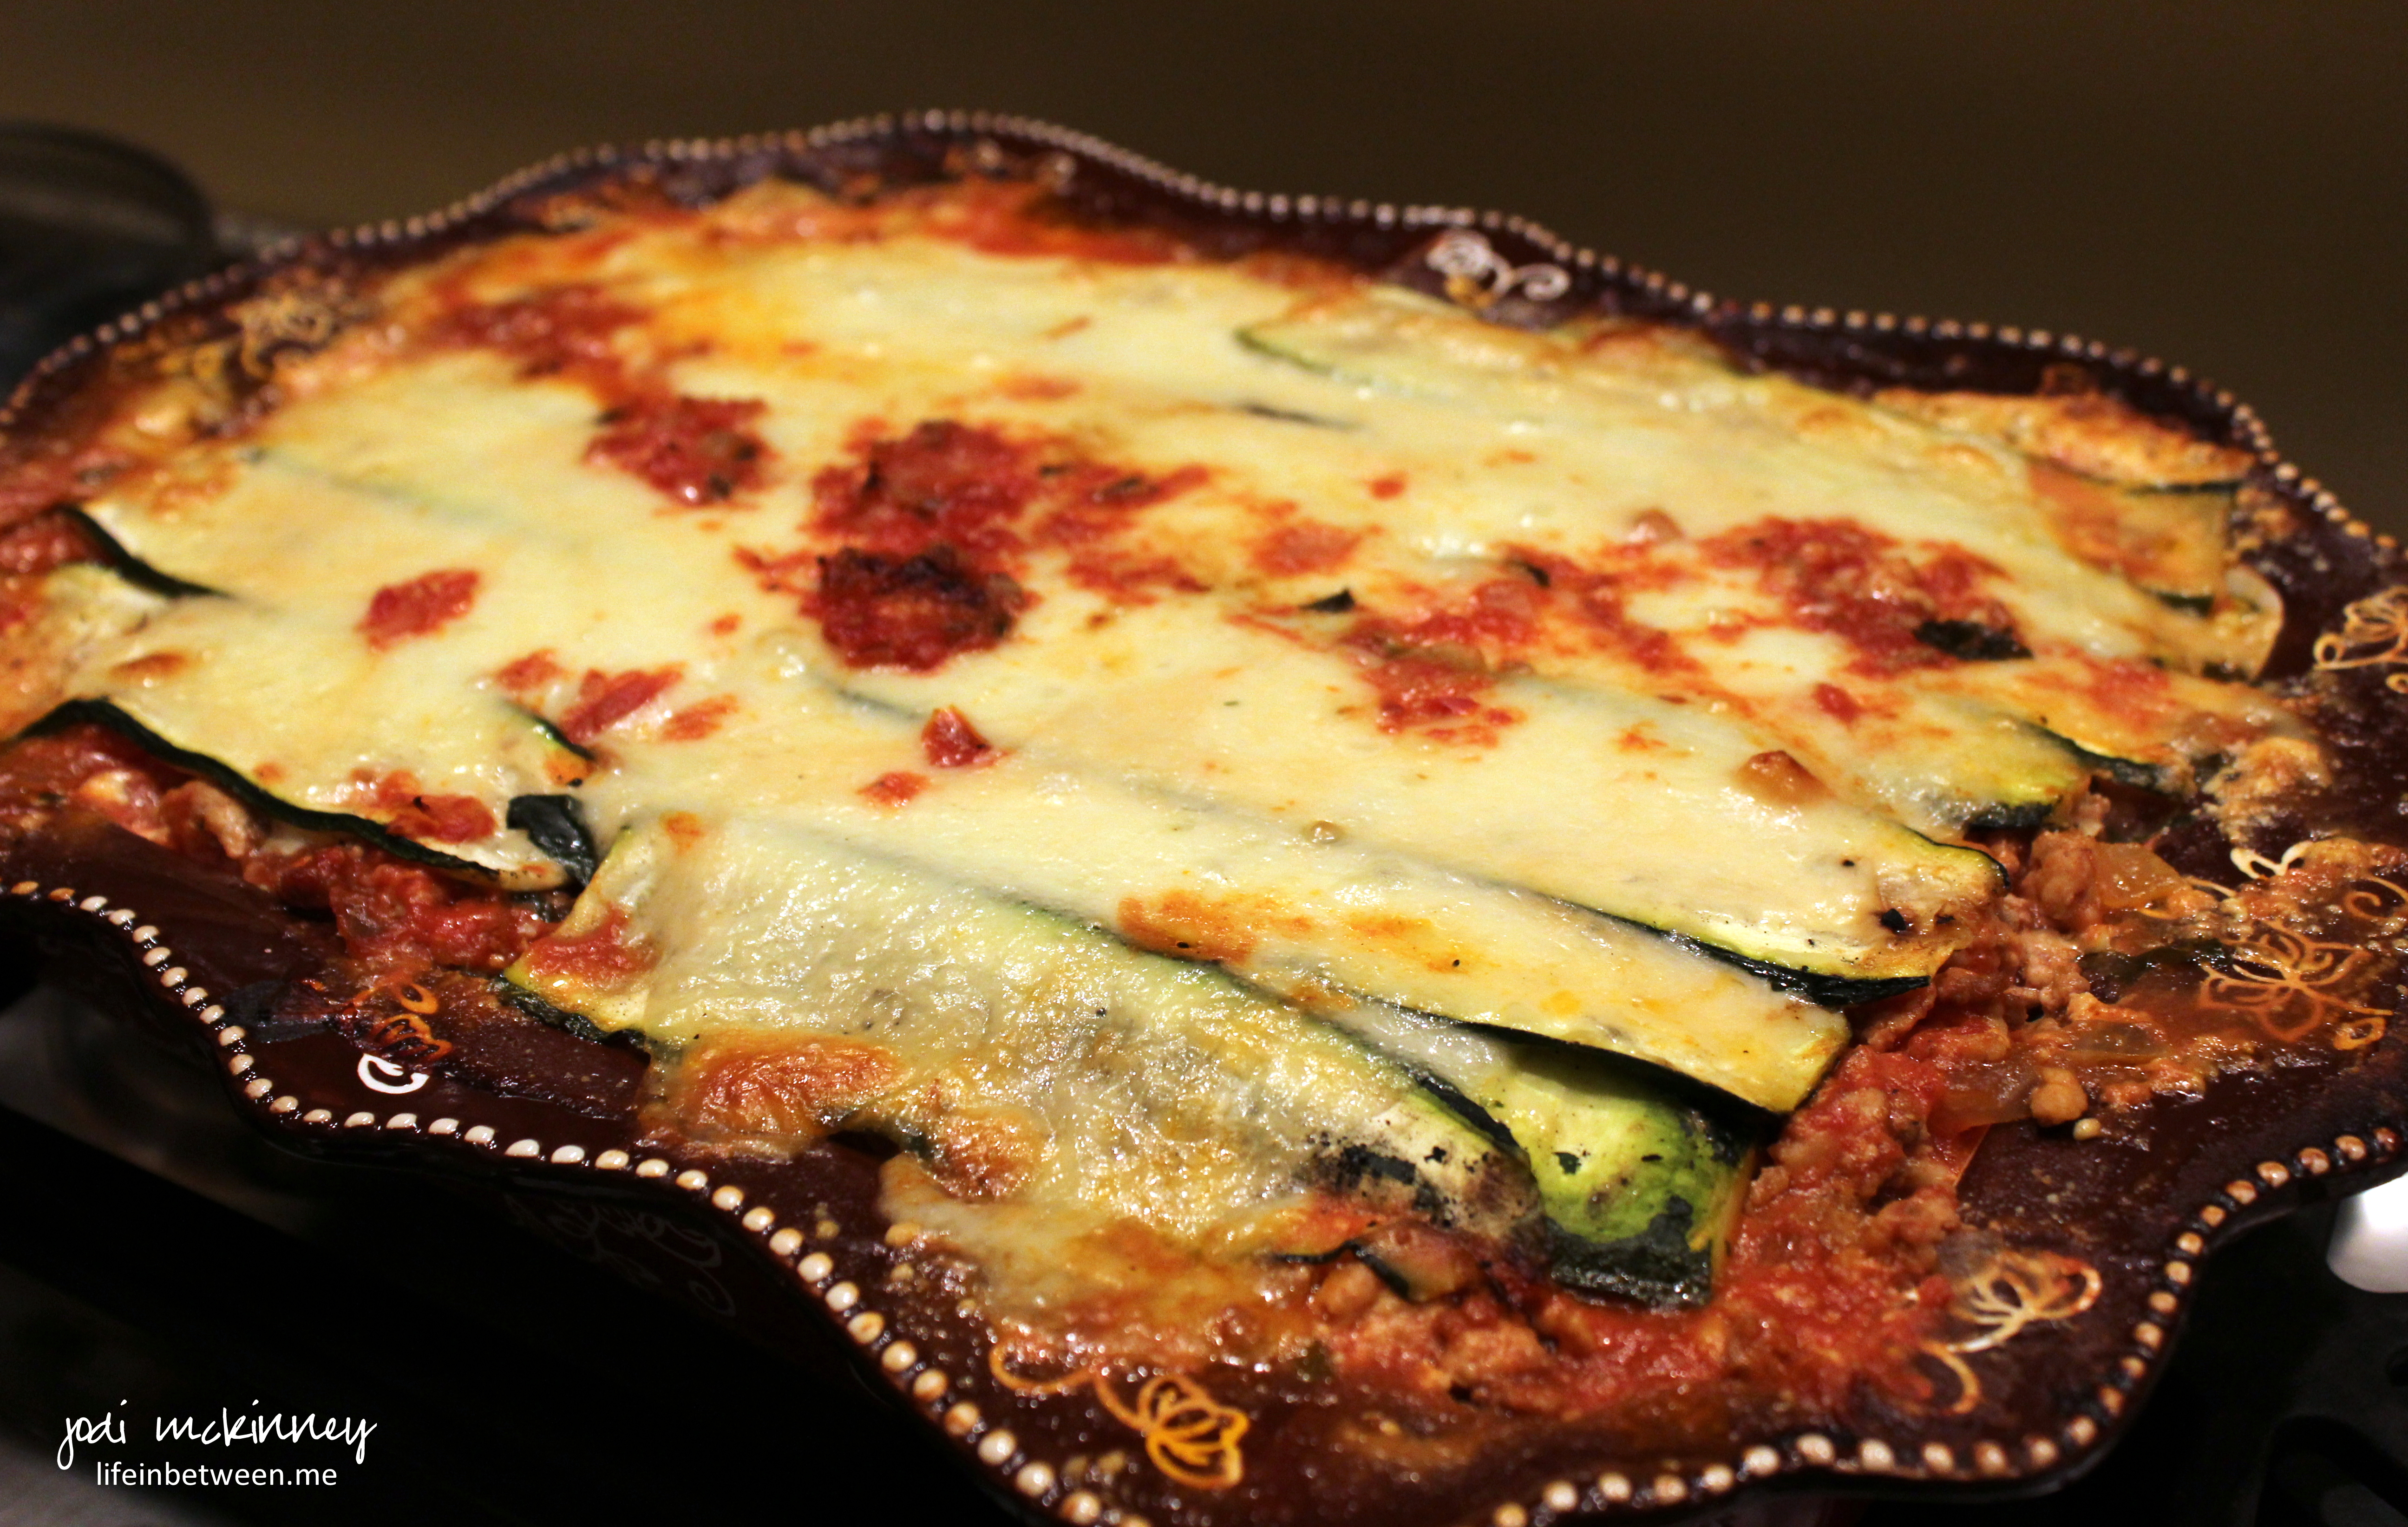
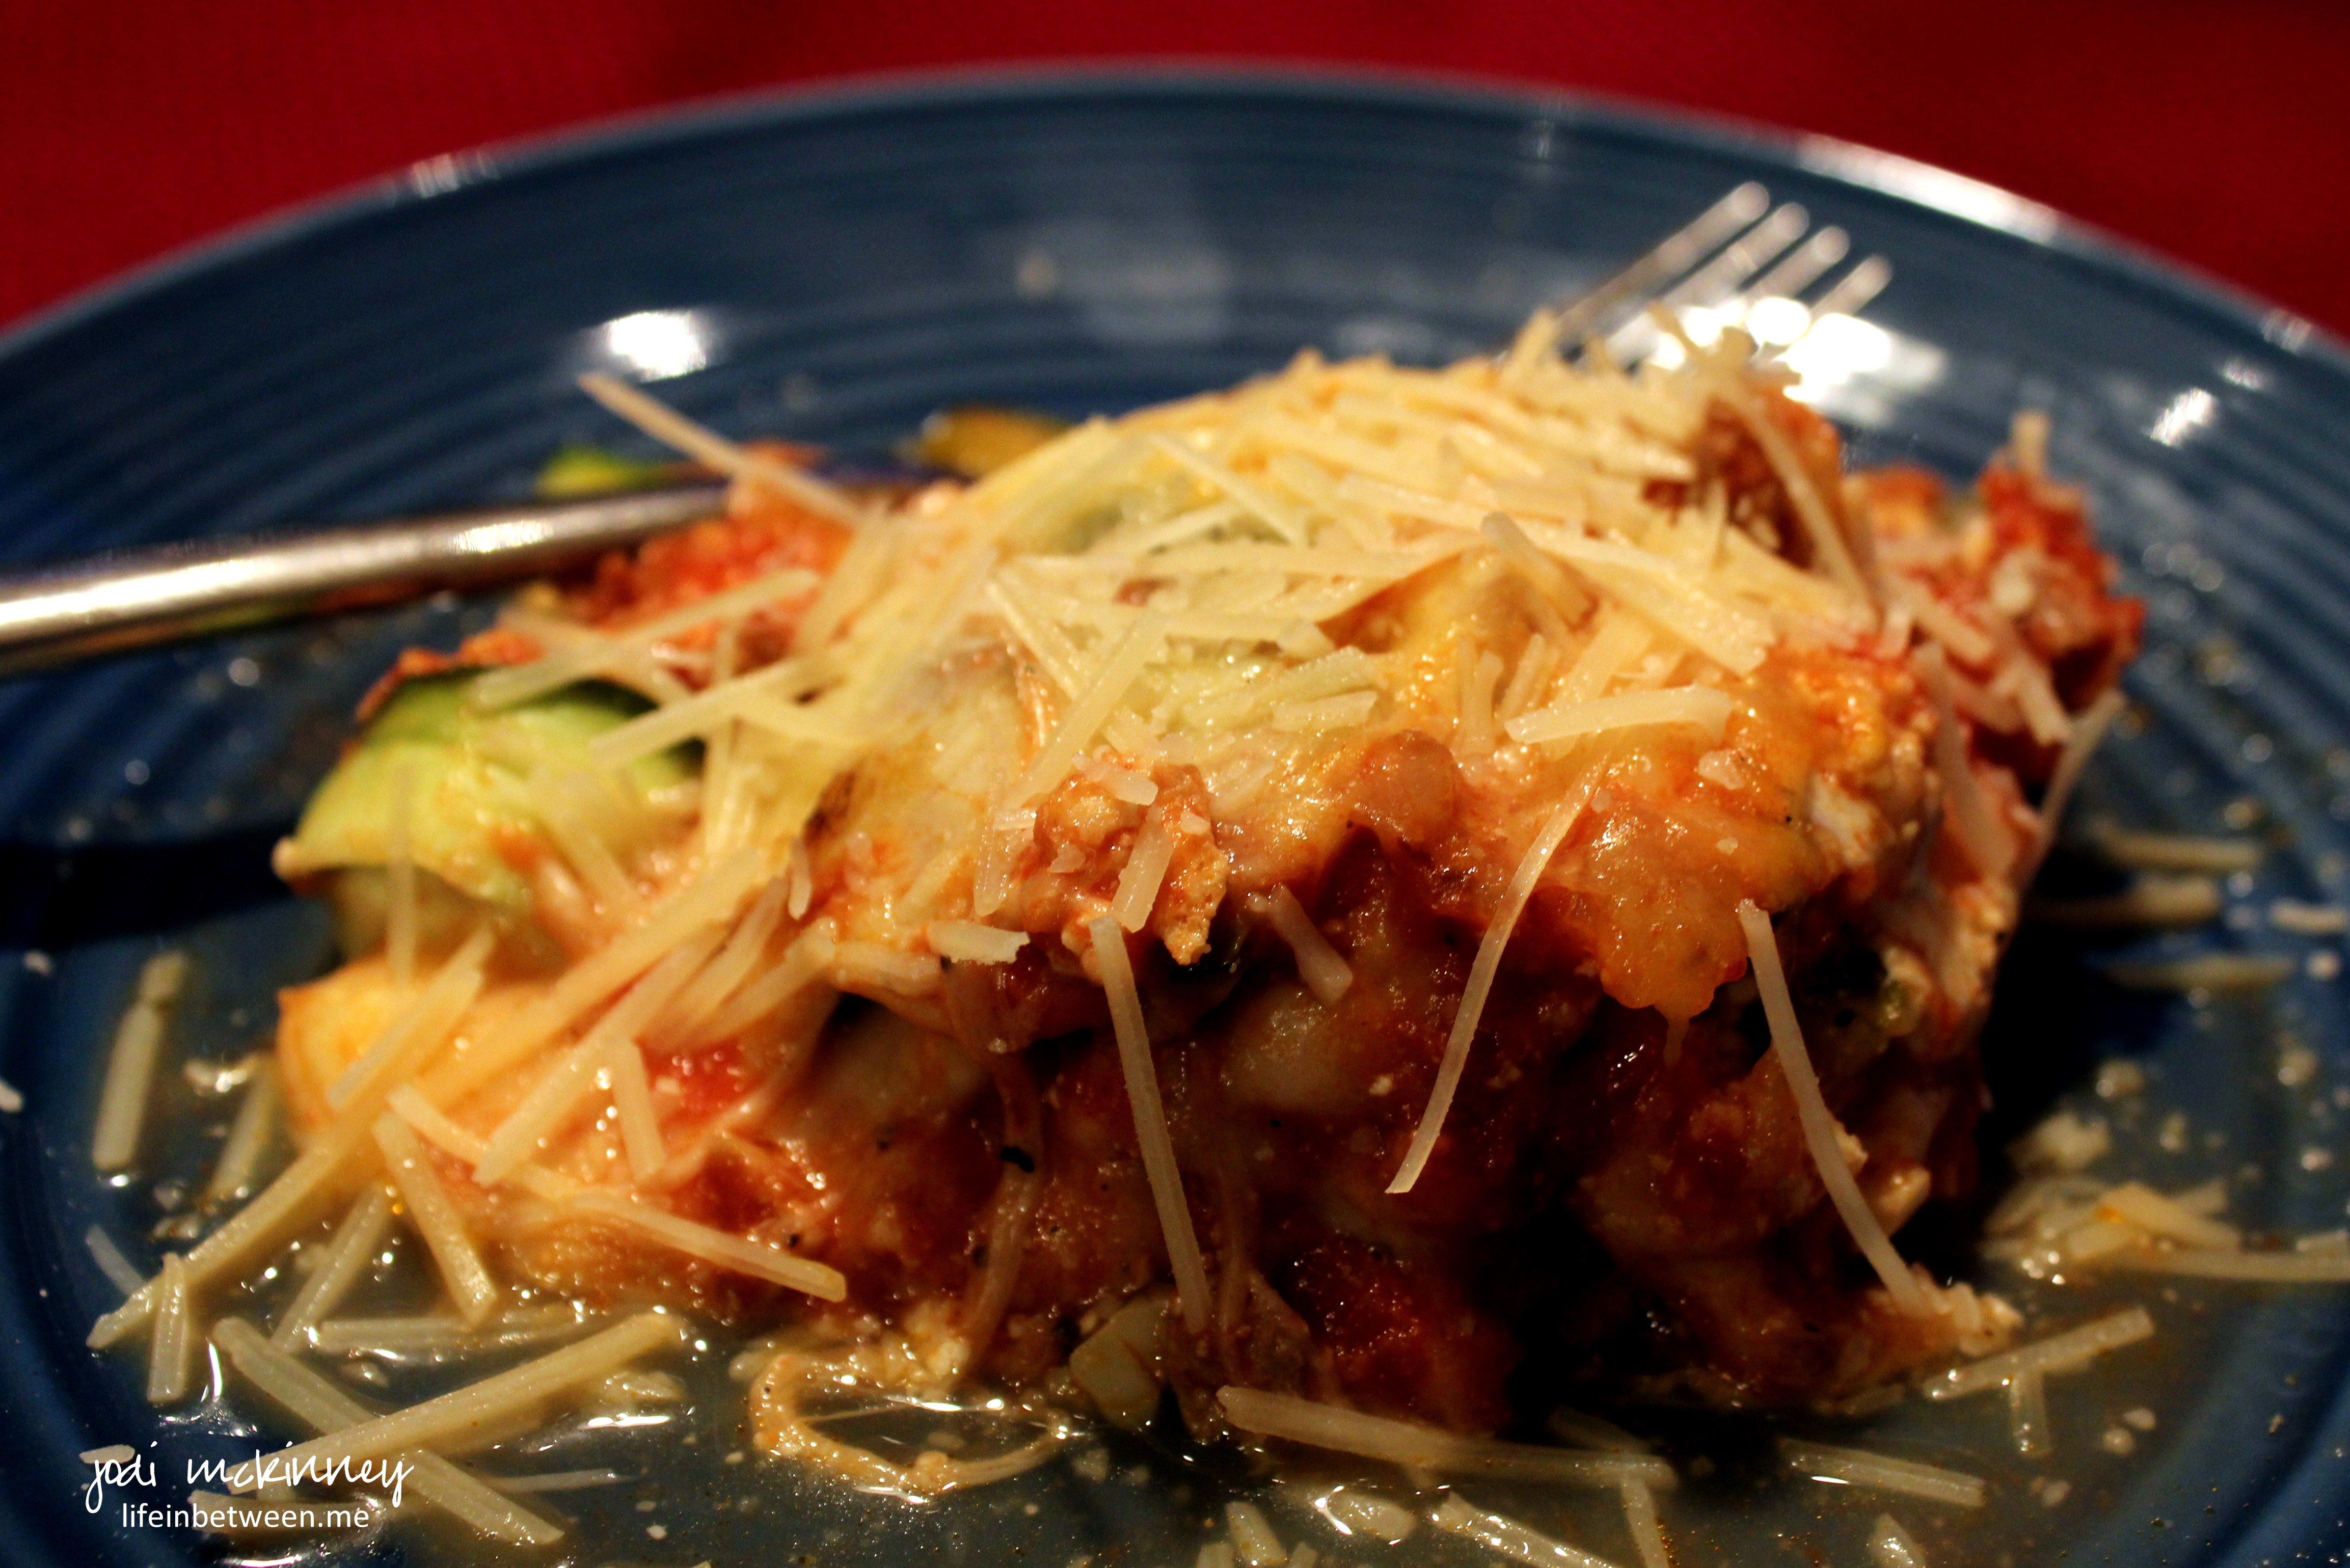
And she rocked it!  This Zucchini Lasagna recipe is a KEEPER!  I do believe I like it even better than the classic version.

Liz was sweet enough to allow me to photograph her and share the adventure and recipe here with all of you.

z1

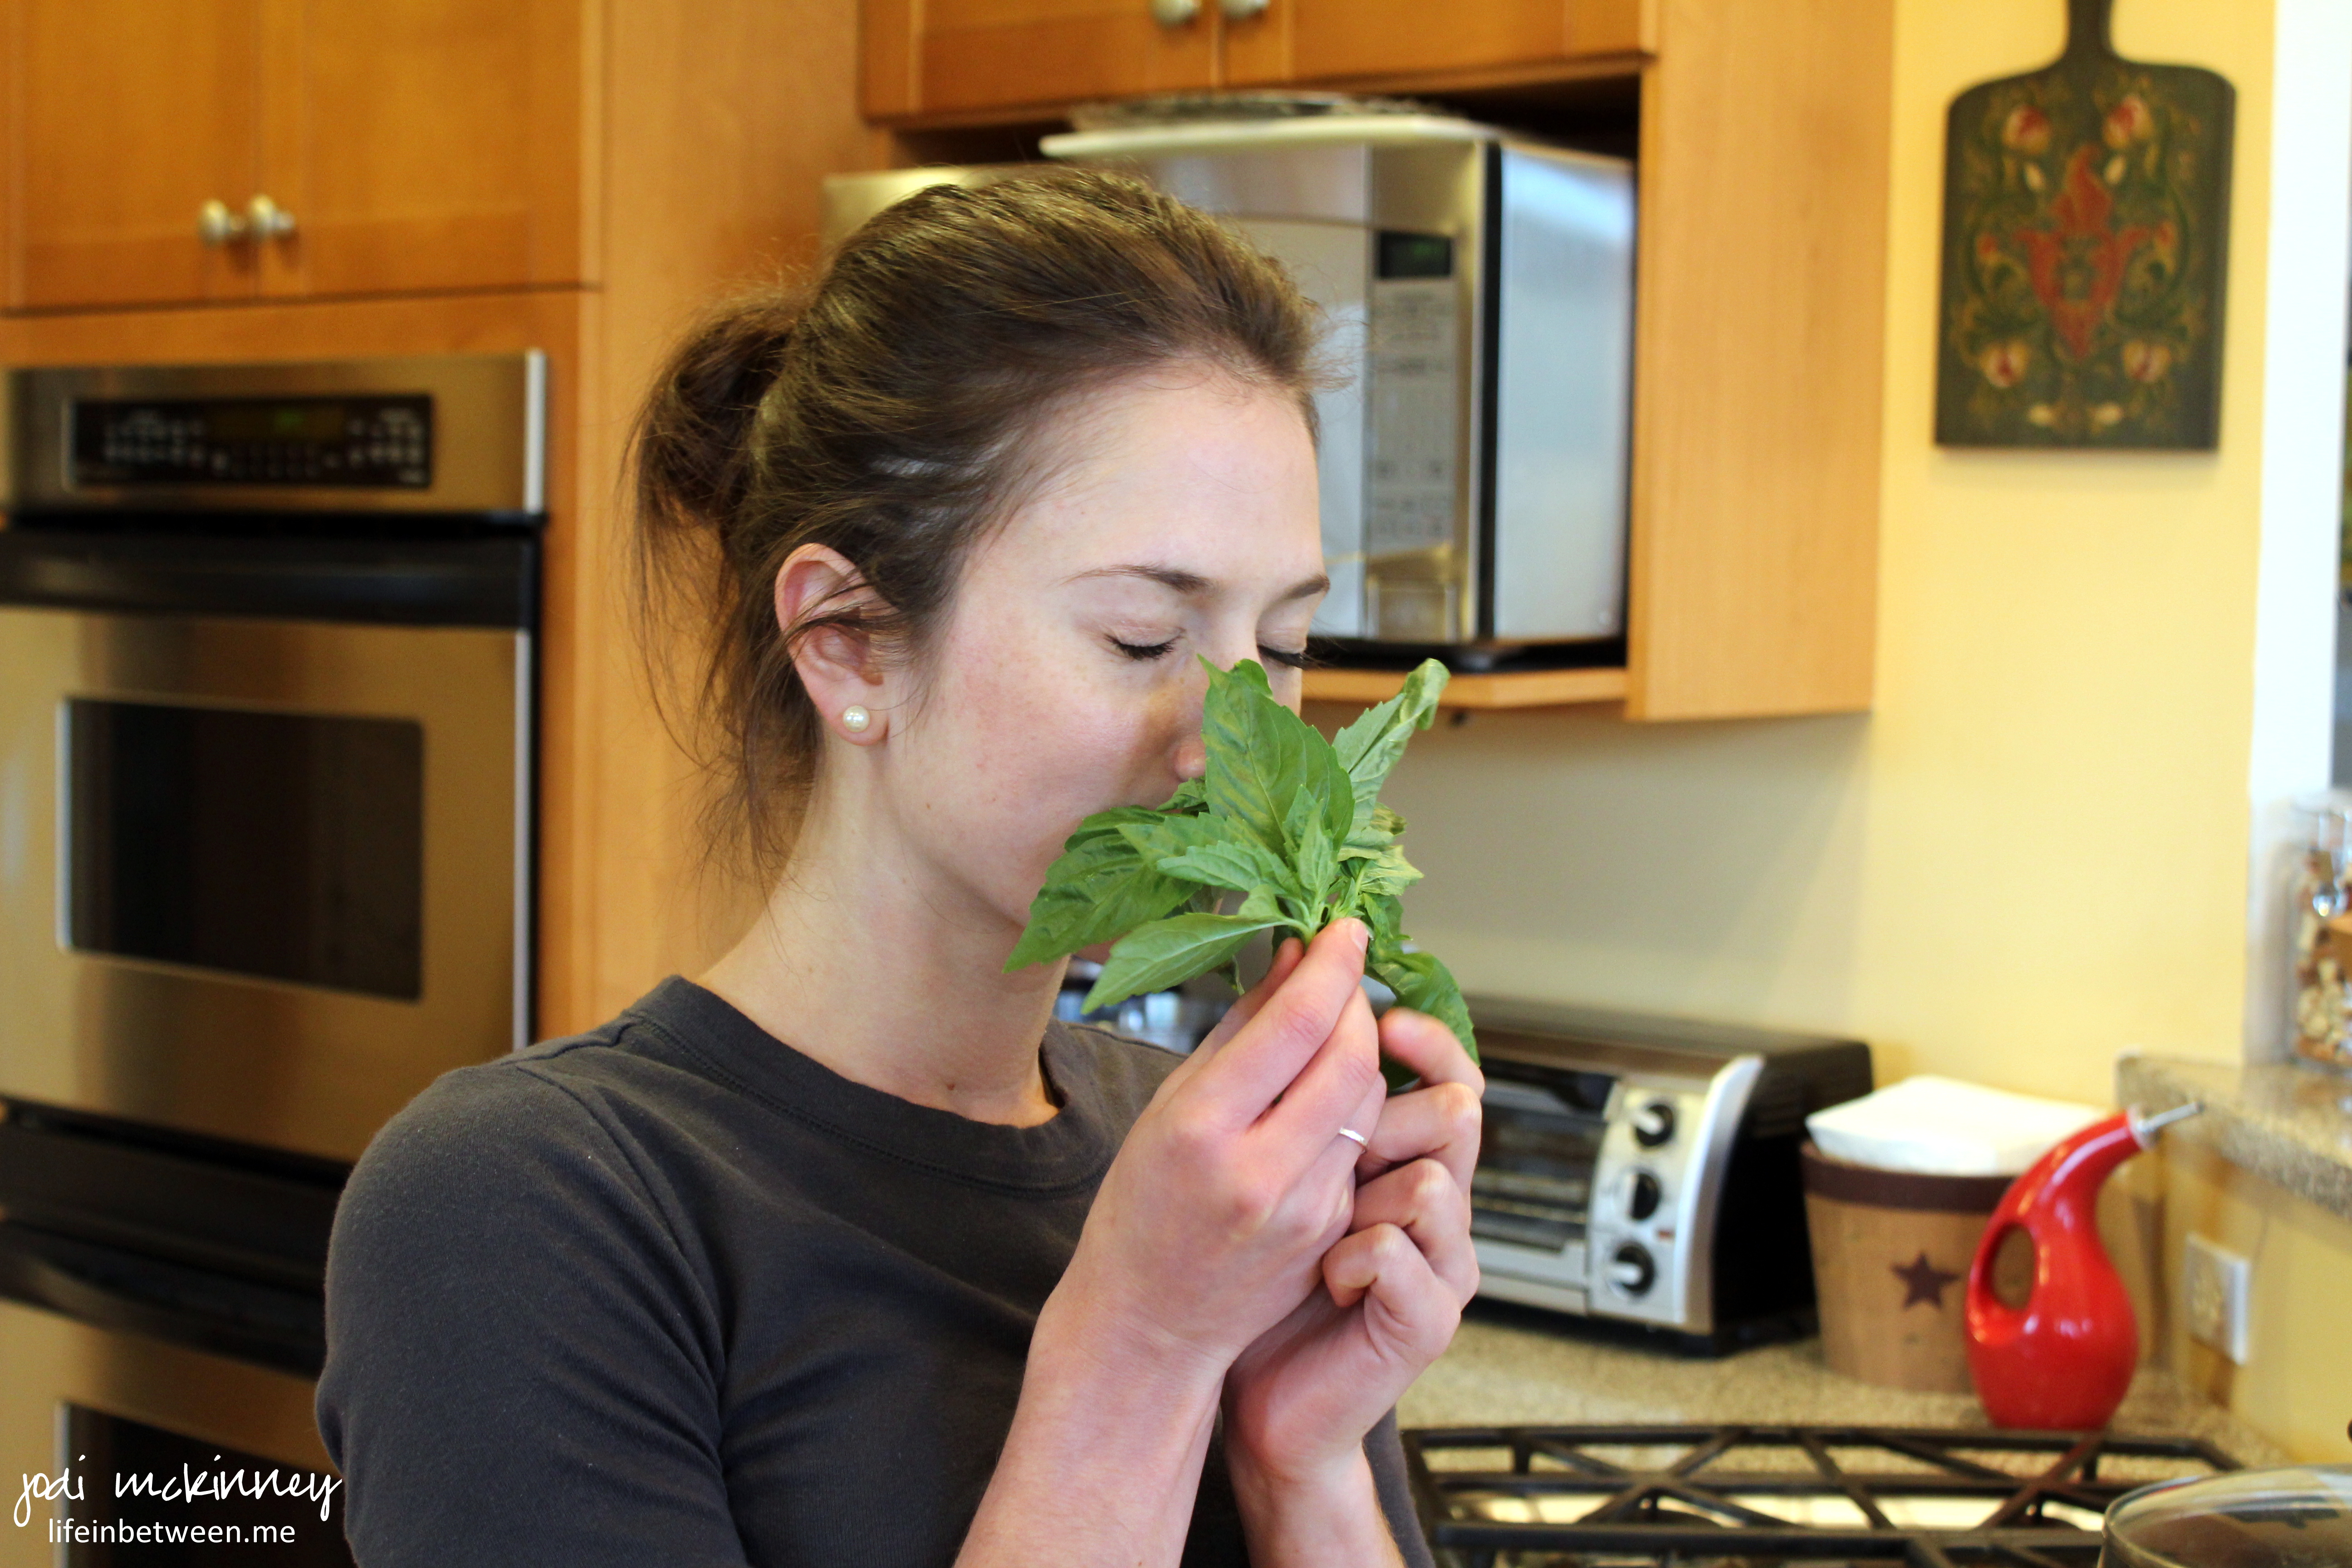
One of the joys of cooking is appreciating and embracing the fresh ingredients that make a recipe so wonderful – like the smell of fresh basil.

z2

And the only thing better than smelling fresh basil is the smell of sauteed onions and garlic in olive oil!

z5

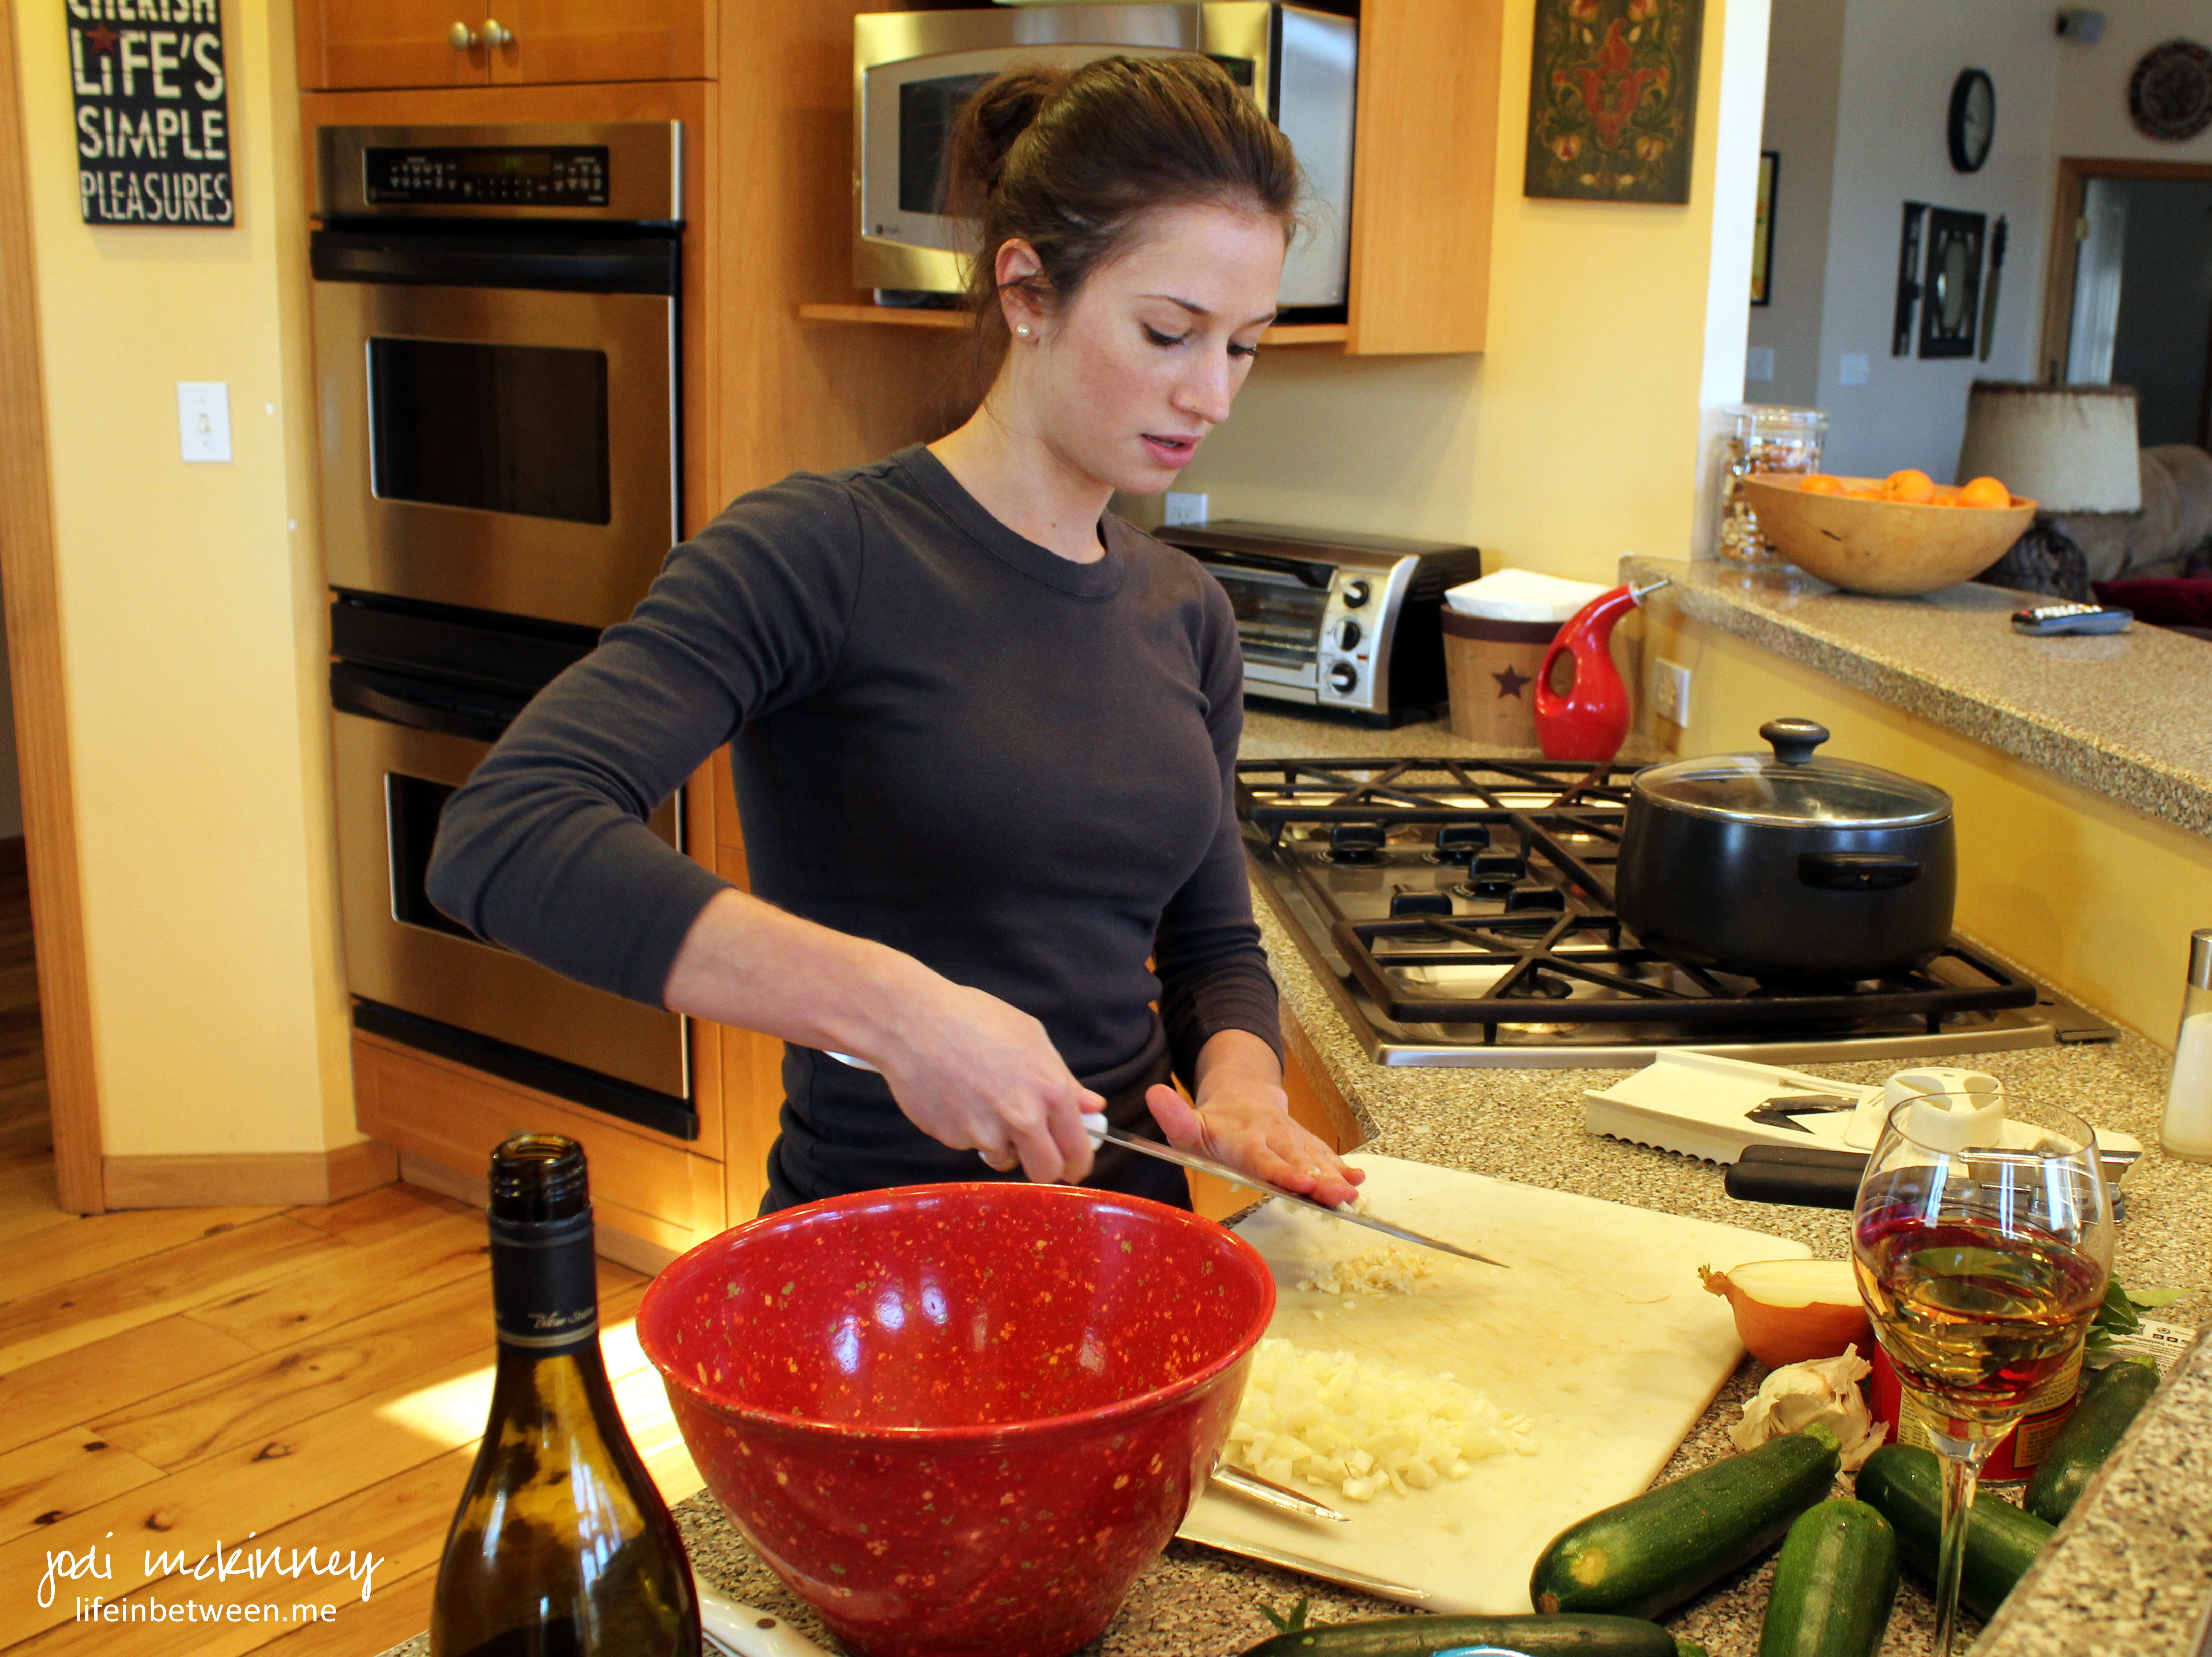
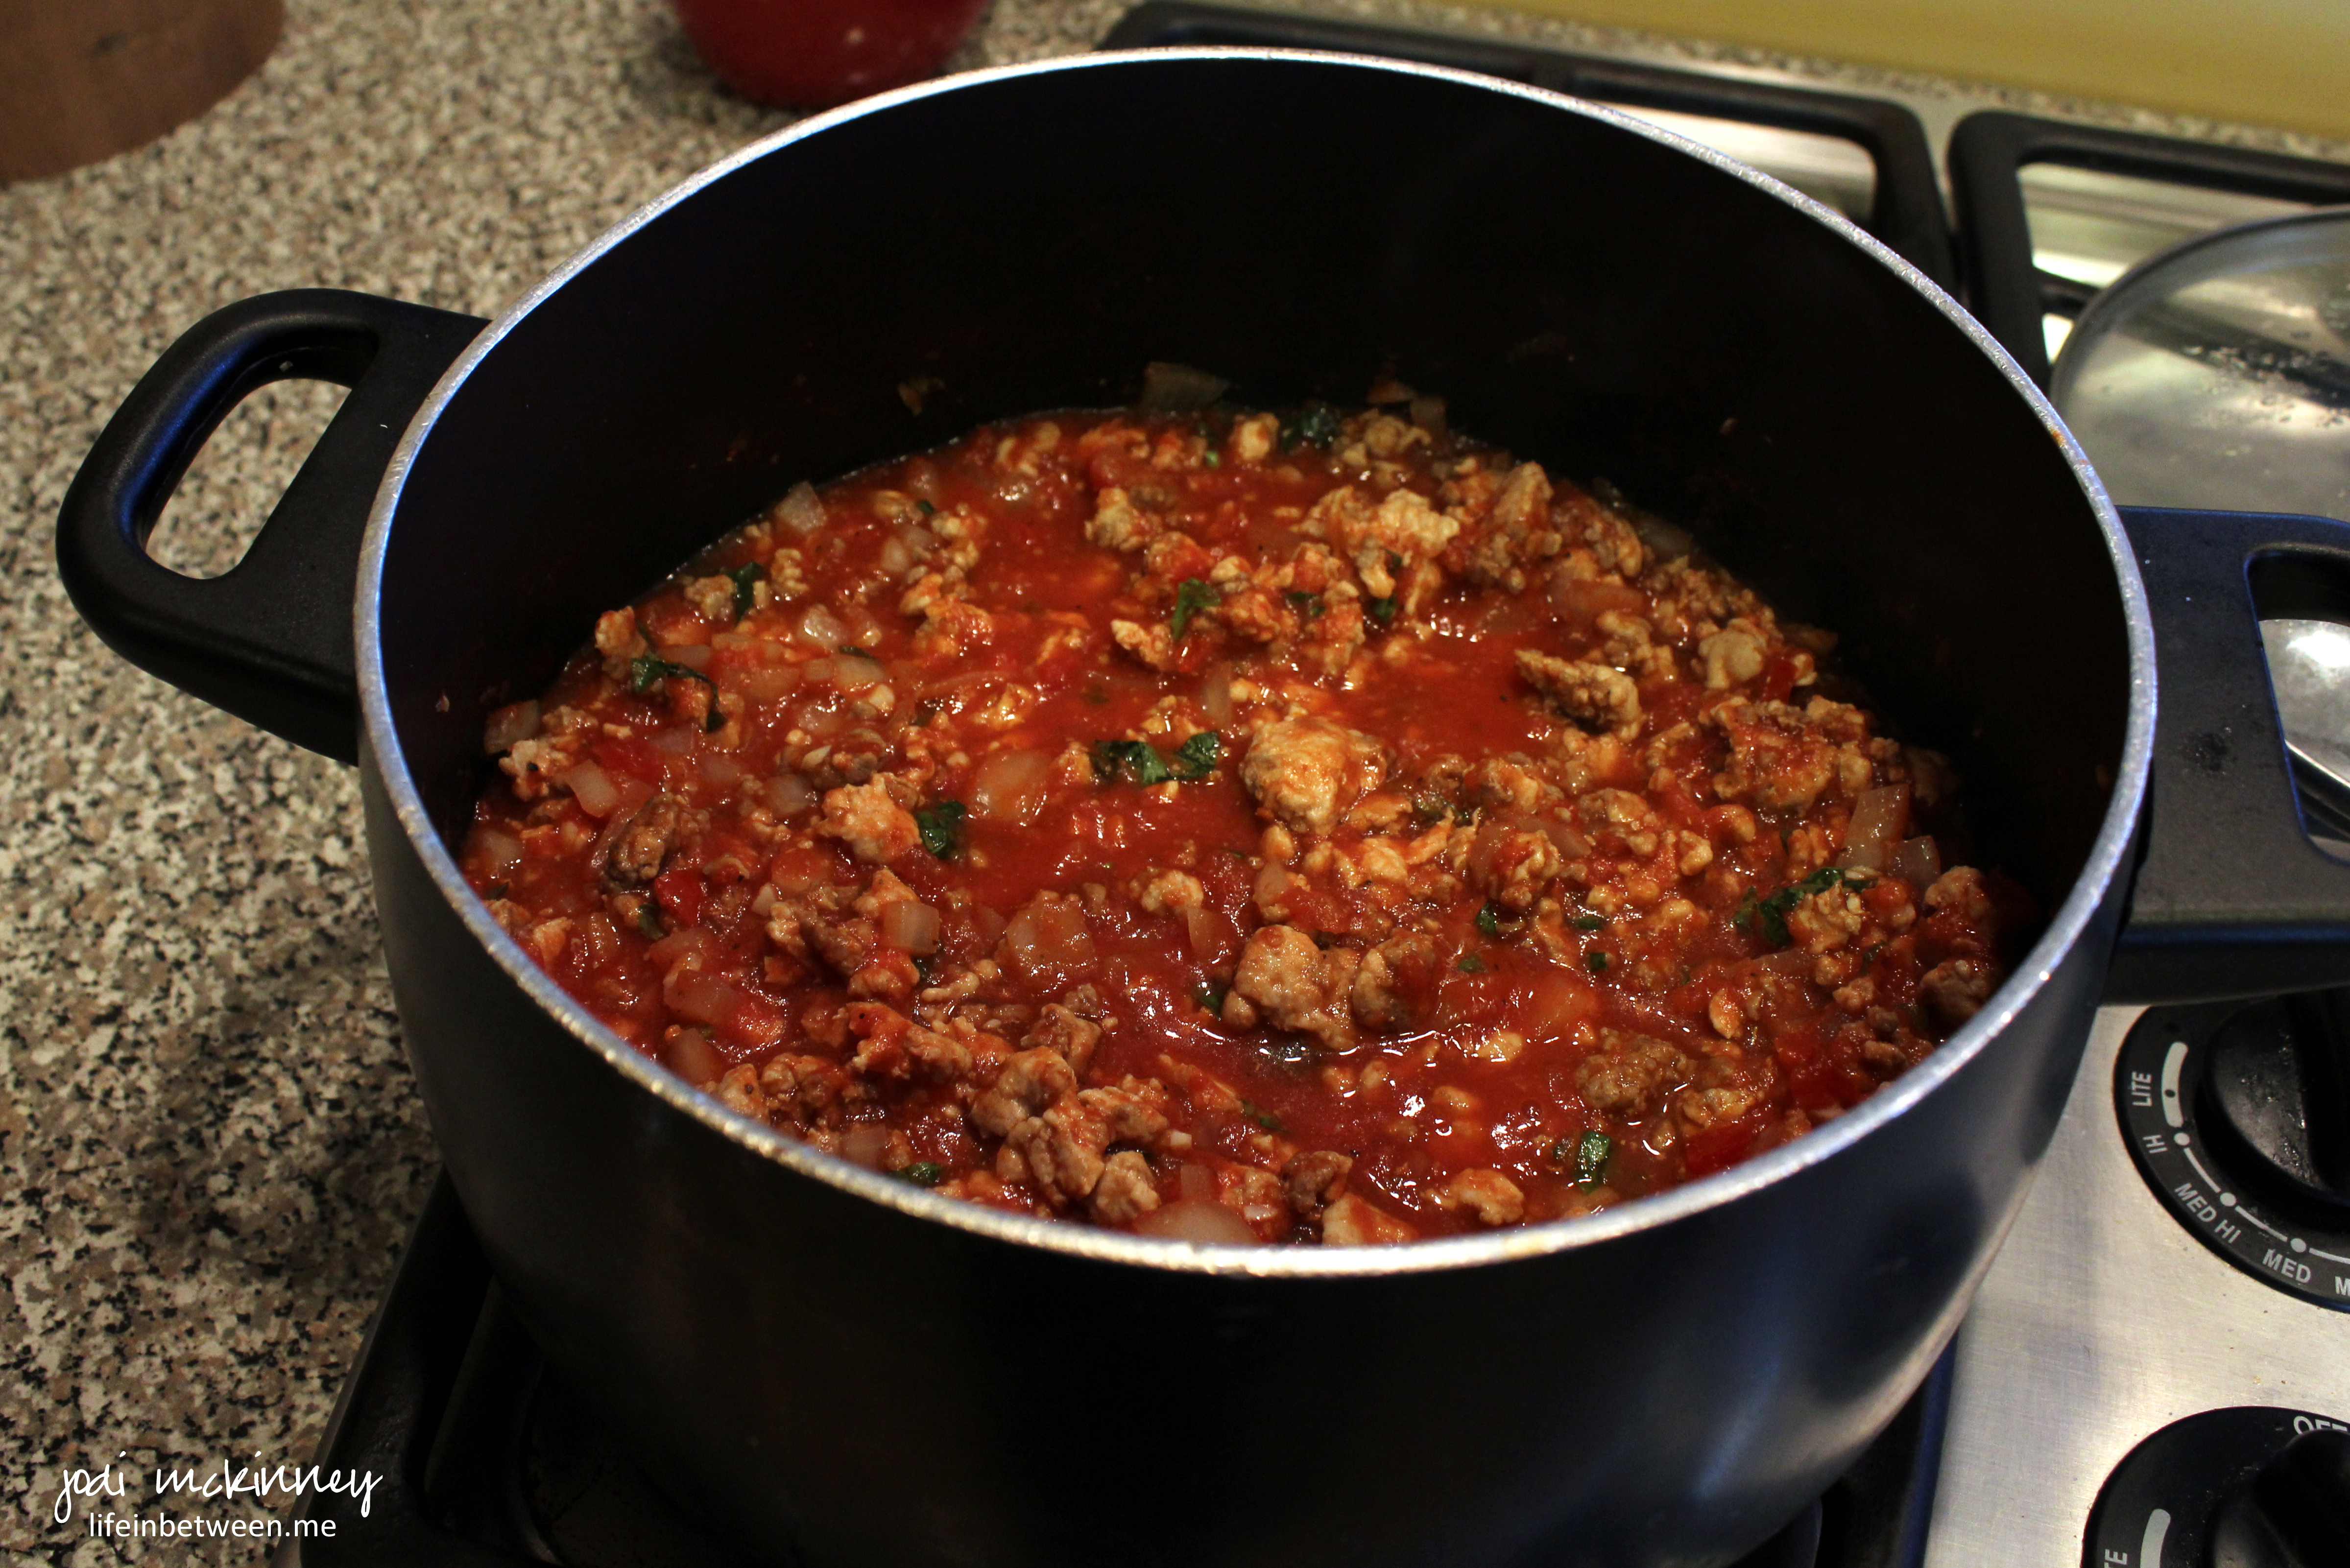
For the meat sauce, Liz used lean ground turkey instead of beef or sausage, and when mixed with crushed tomatoes, fresh basil, onions and garlic, you would never know you are “missing” anything – except you get the bonus of less fat and calories!

Z3

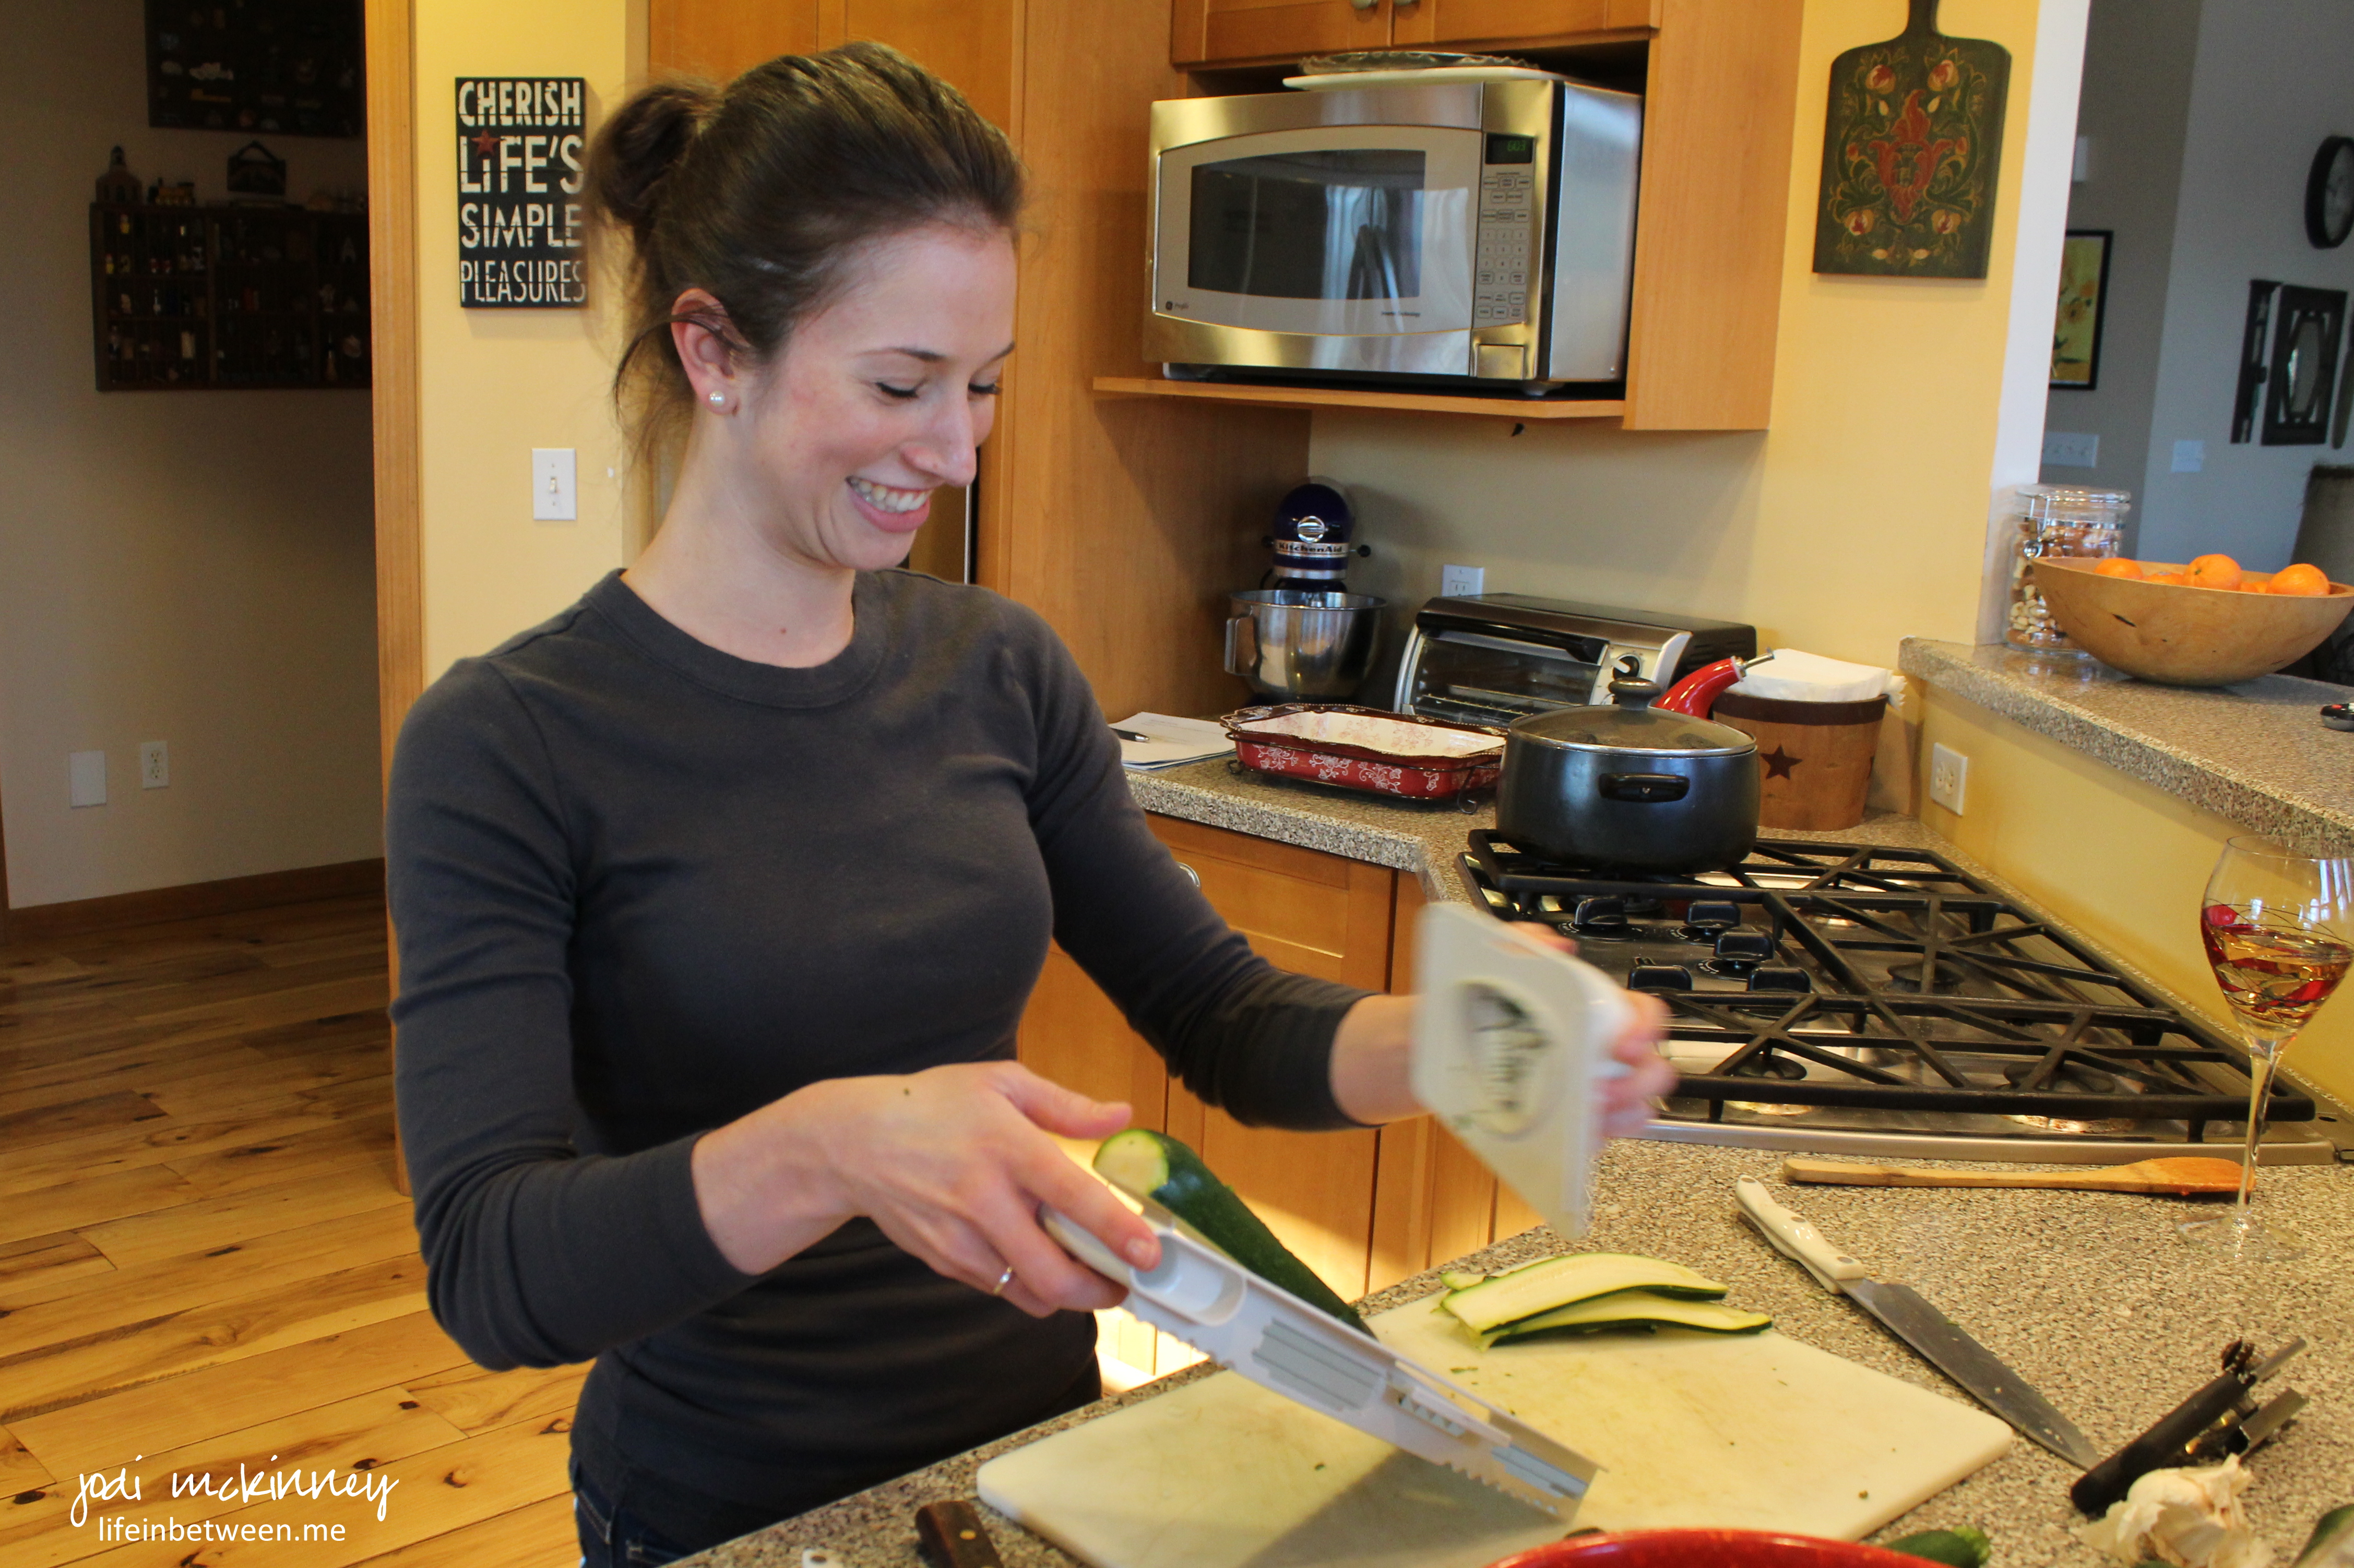
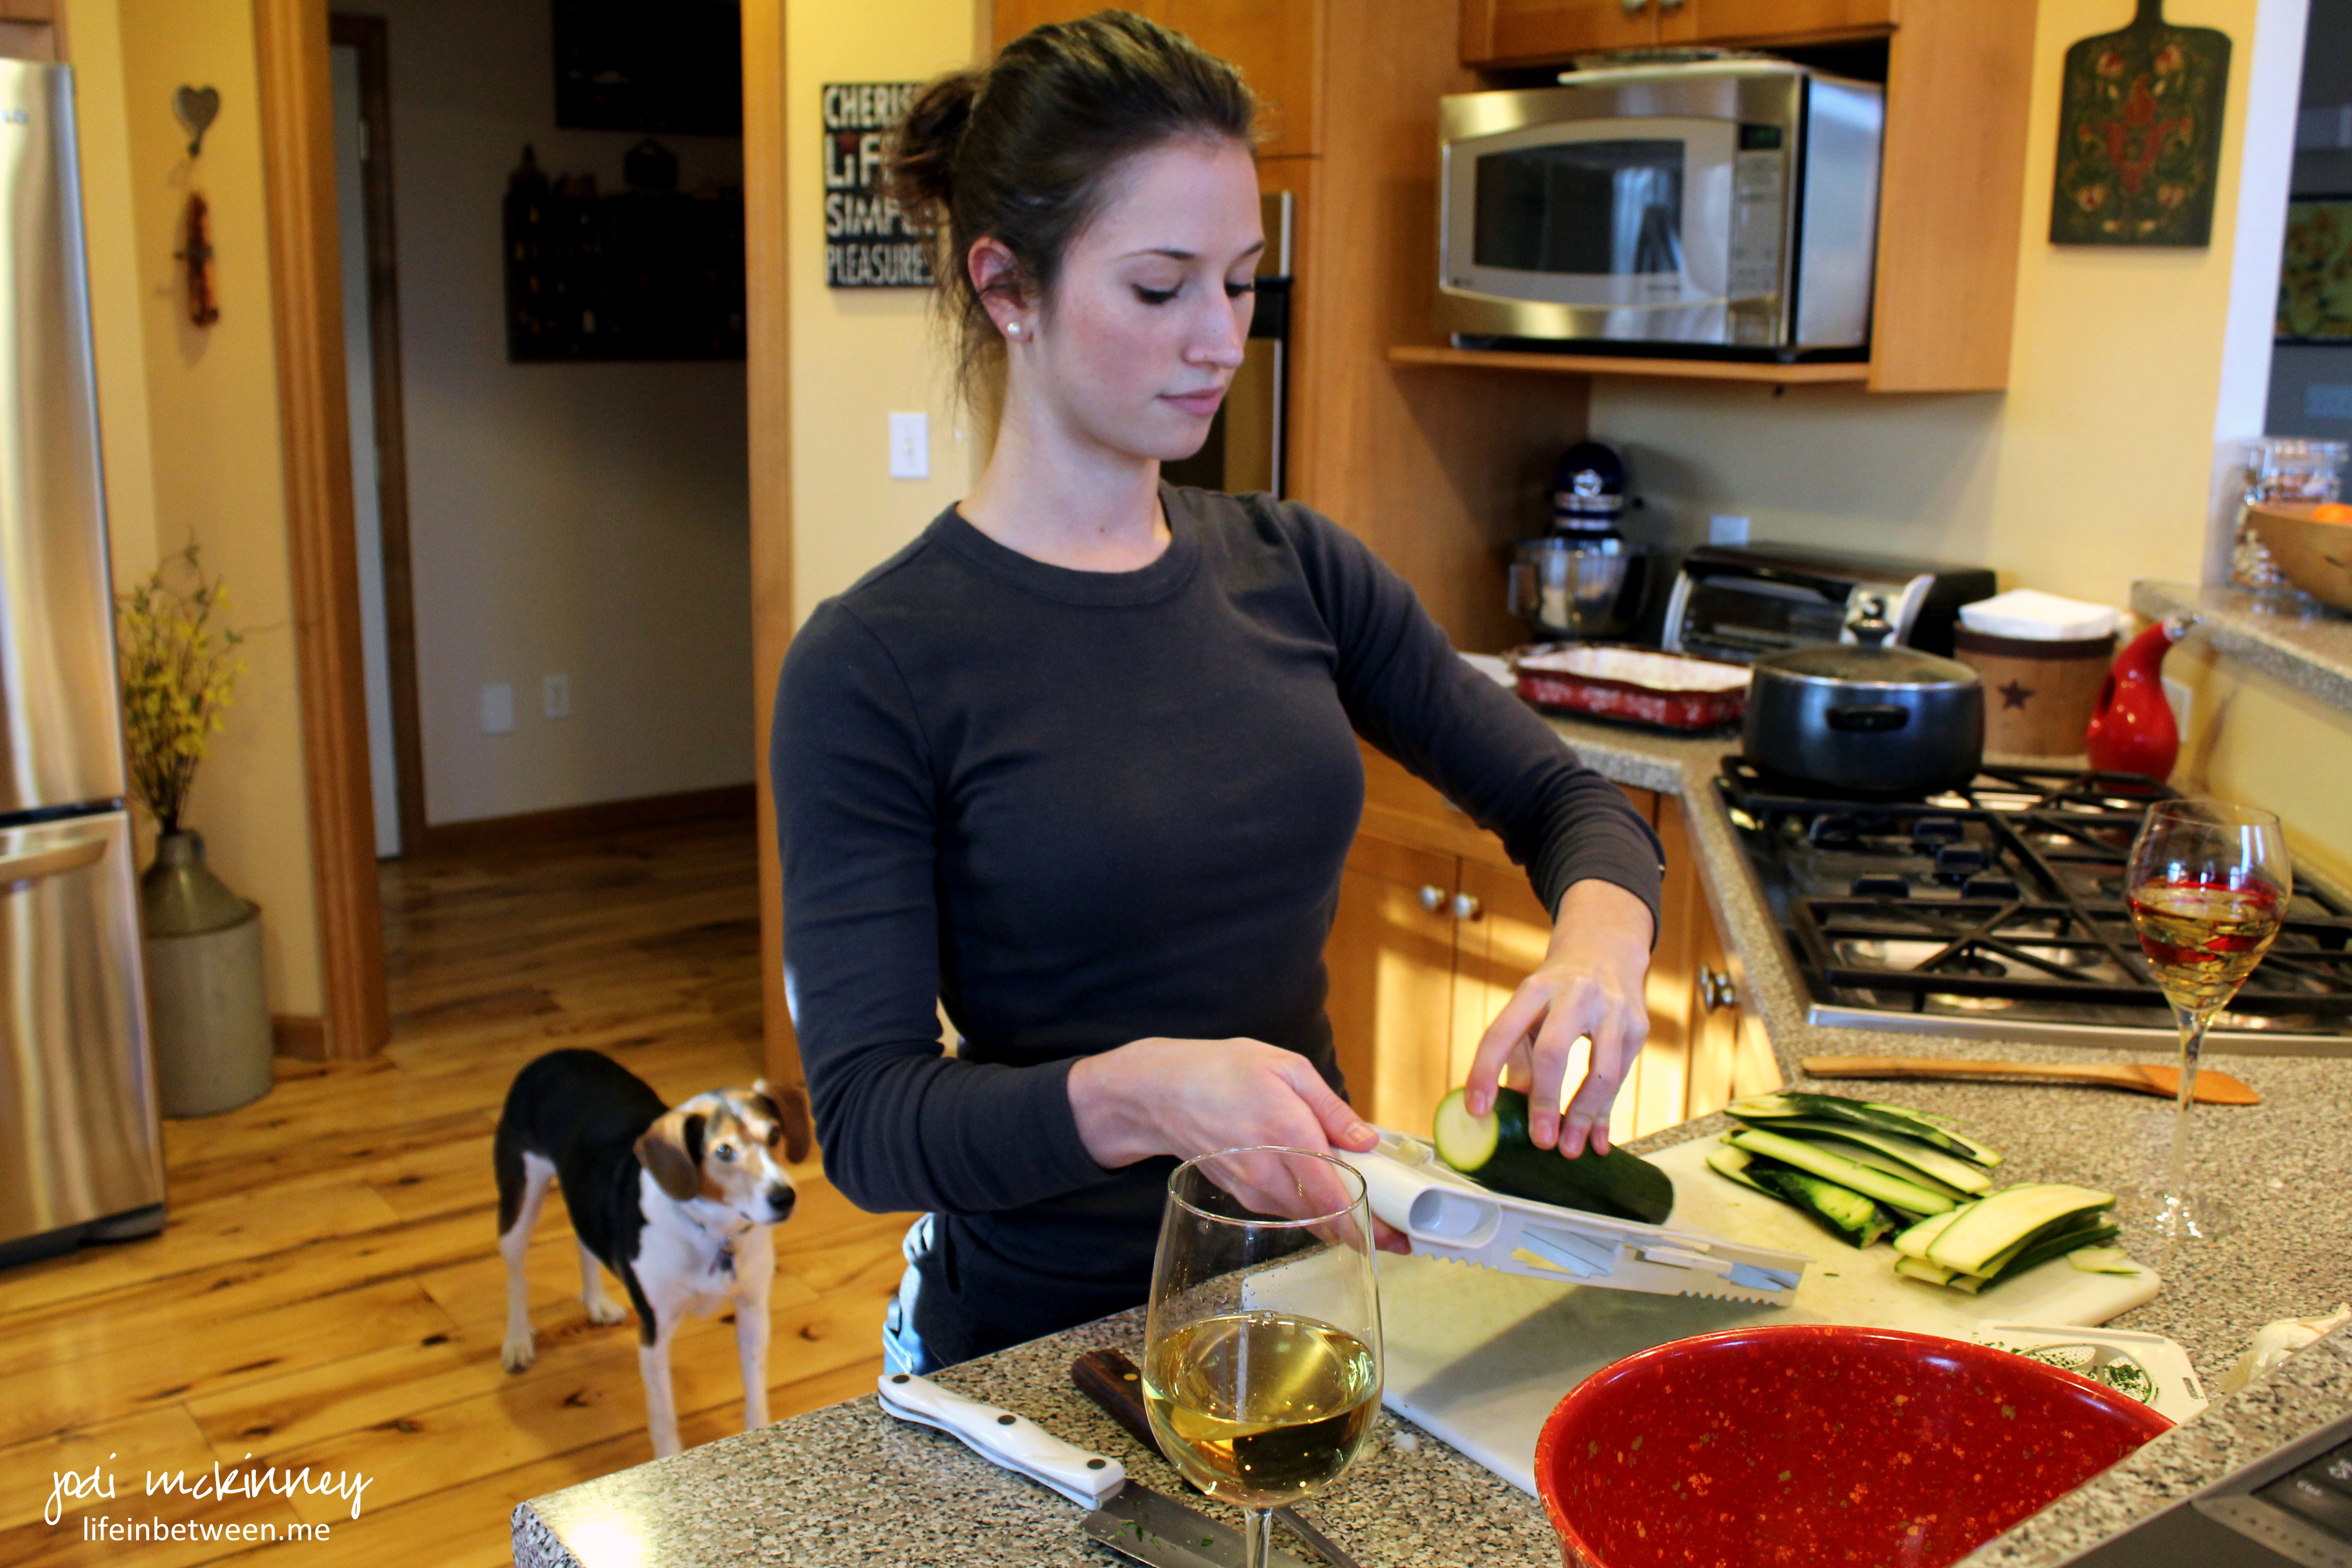
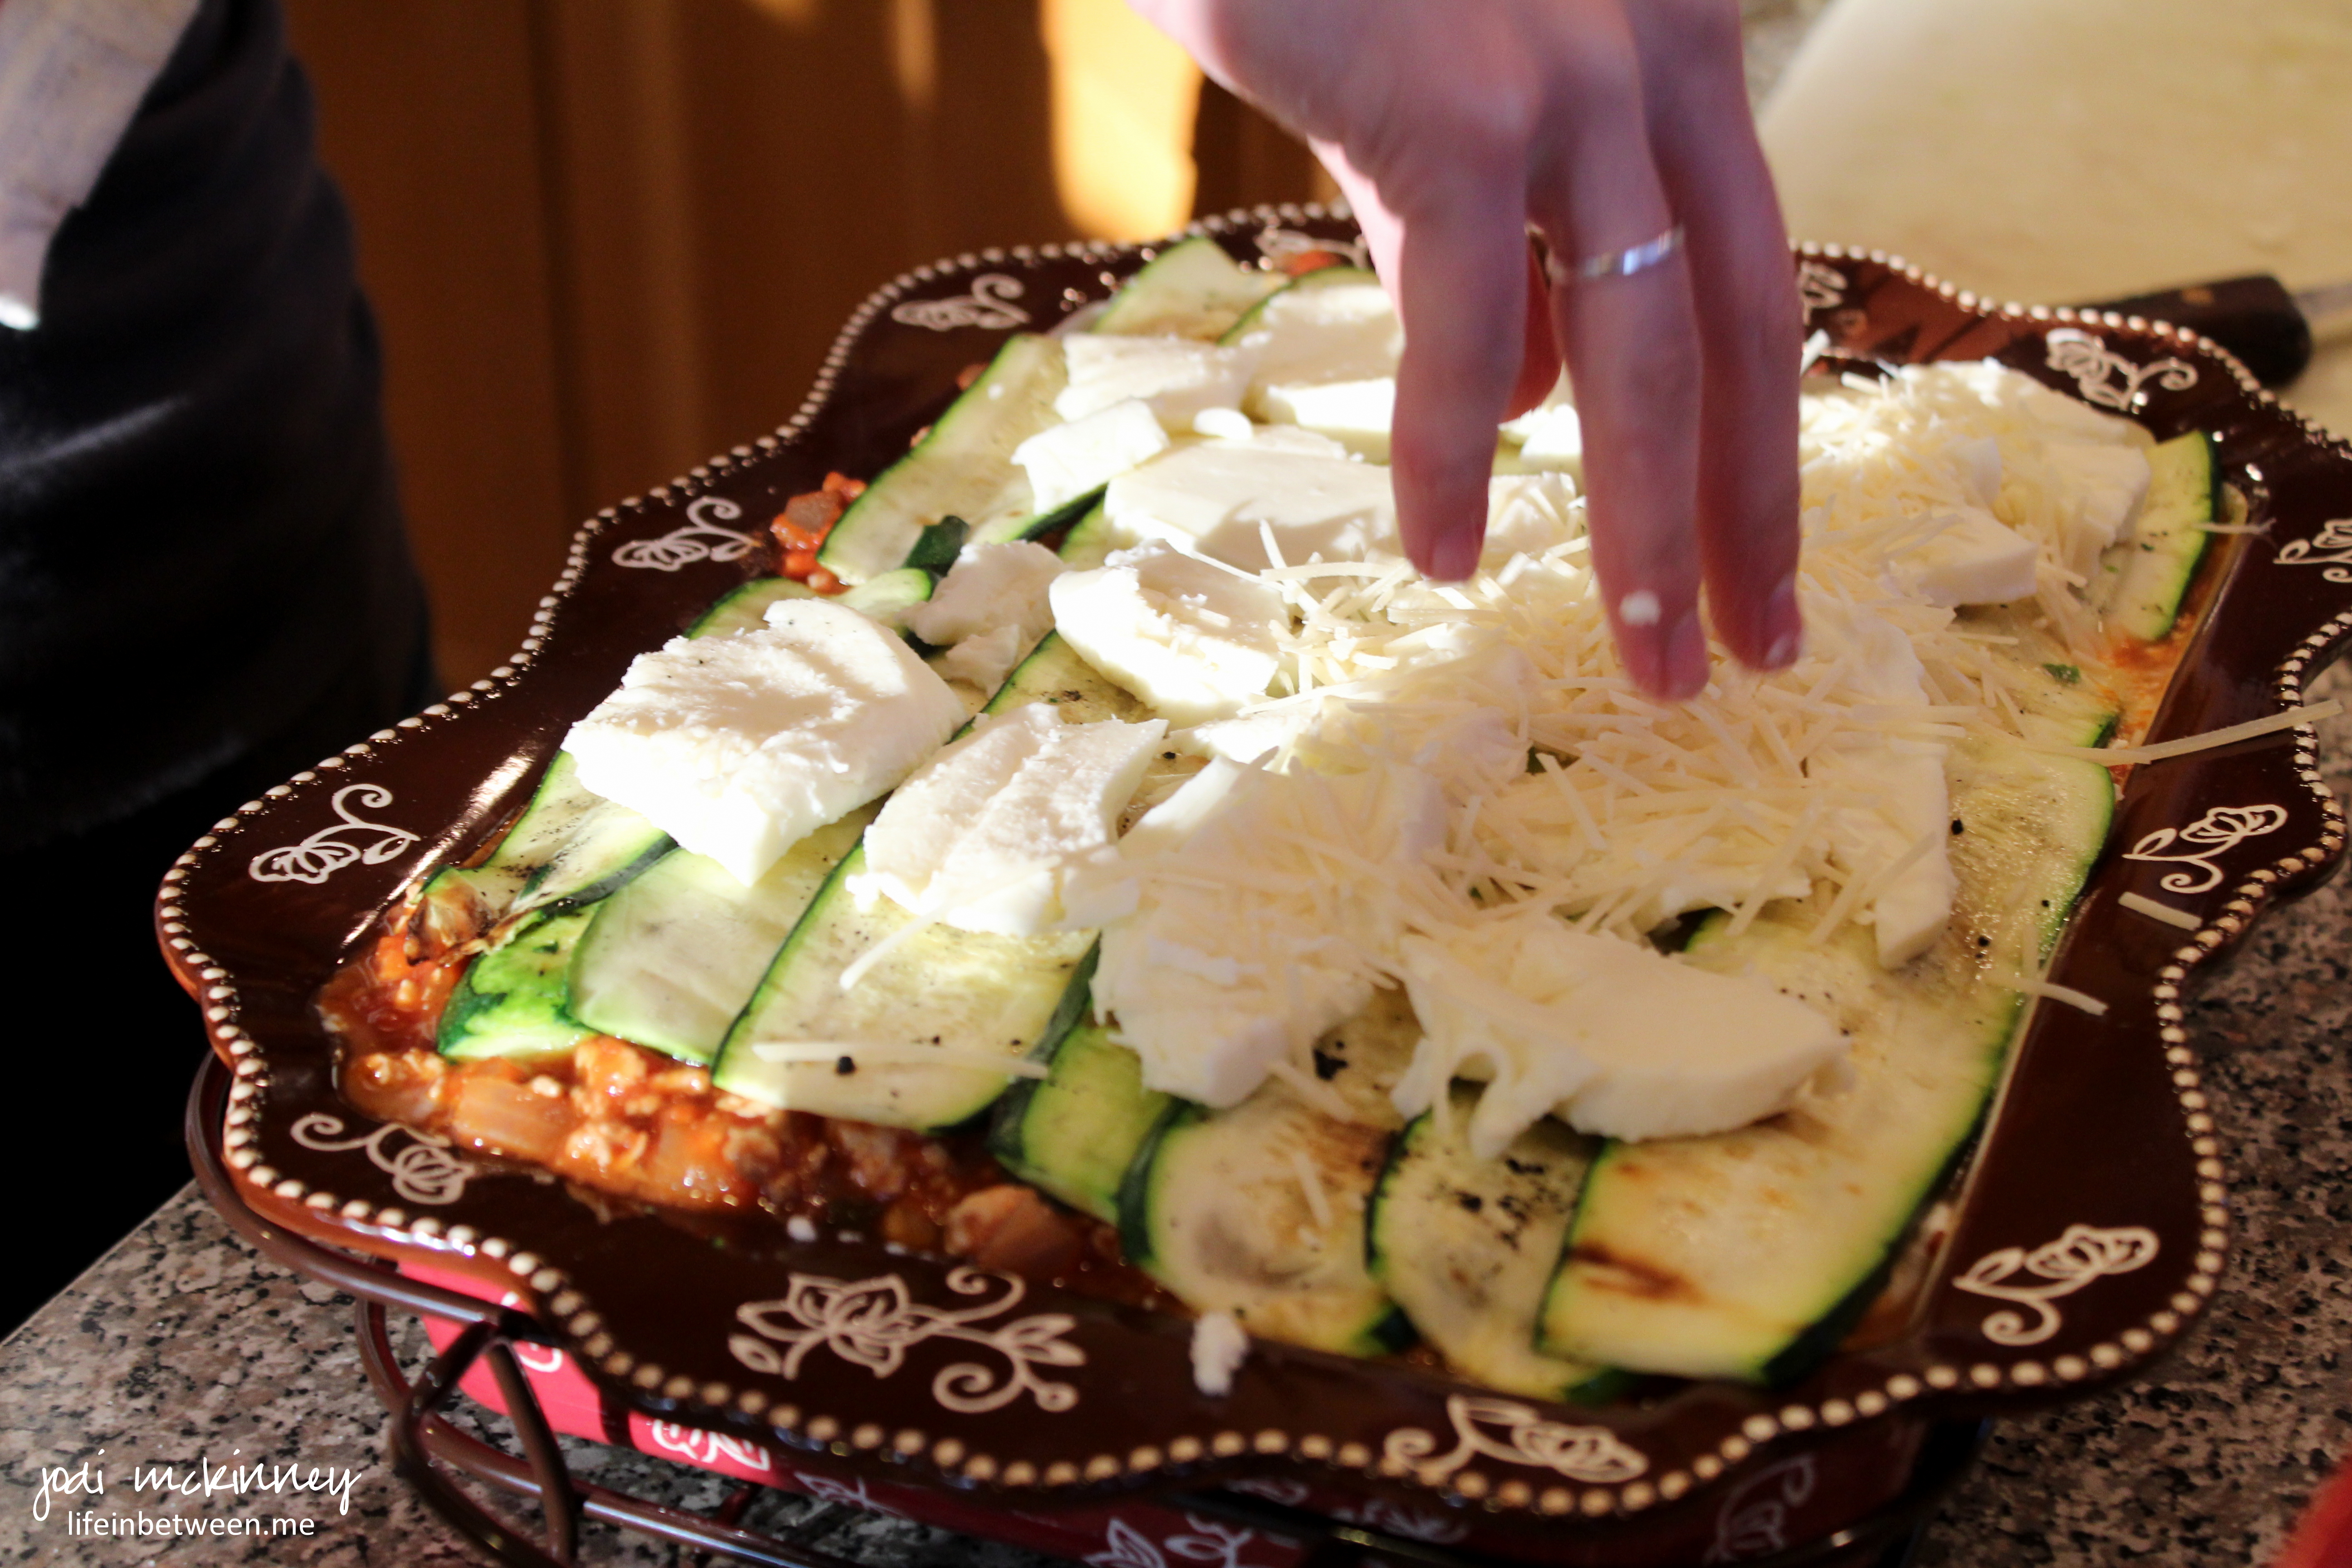
This adorable amateur in the kitchen totally mastered using a mandolin (which she formerly only knew as a musical instrument 🙂 ) to perfectly slice the zucchini to replace the pasta noodles.

Z4

And of course Mikey was on his steadfast “clean the floor” duty making sure no crumb is left behind (and yes – he even likes raw zucchini).

z6

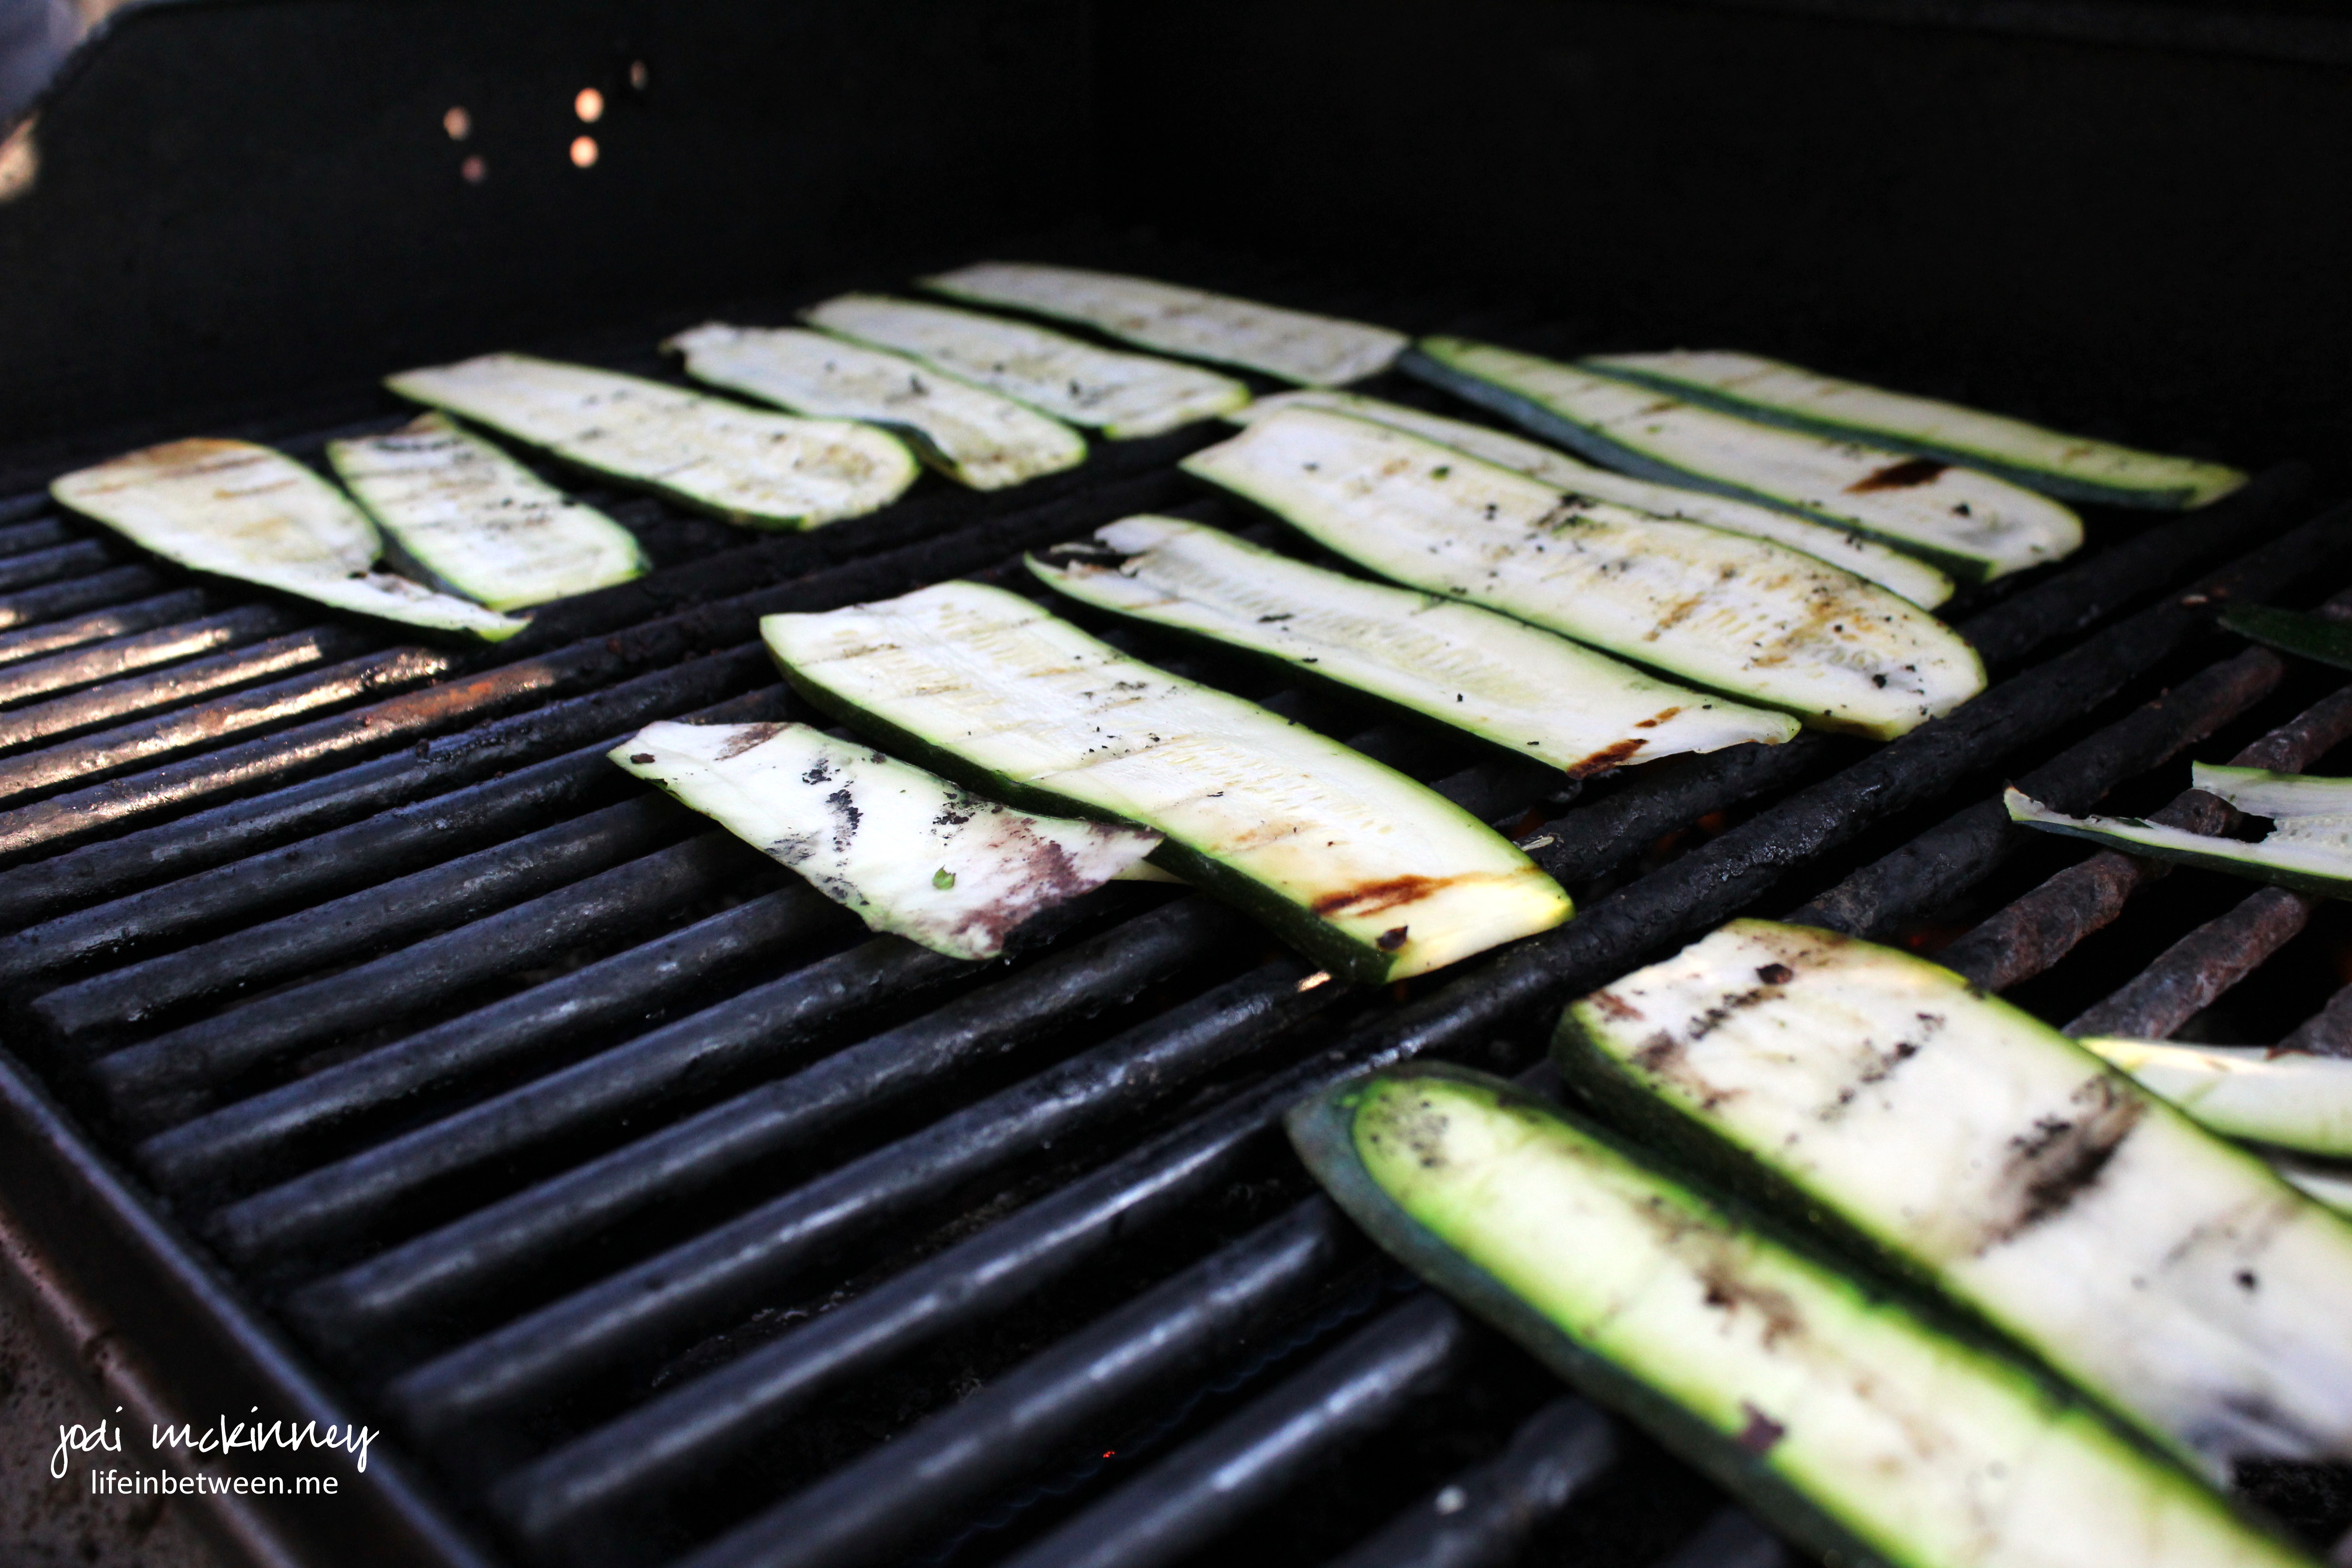
This recipe even includes mastering the grill, so Nick was in charge of instructions here, and the zucchini strips were char-grilled beautifully.

z7

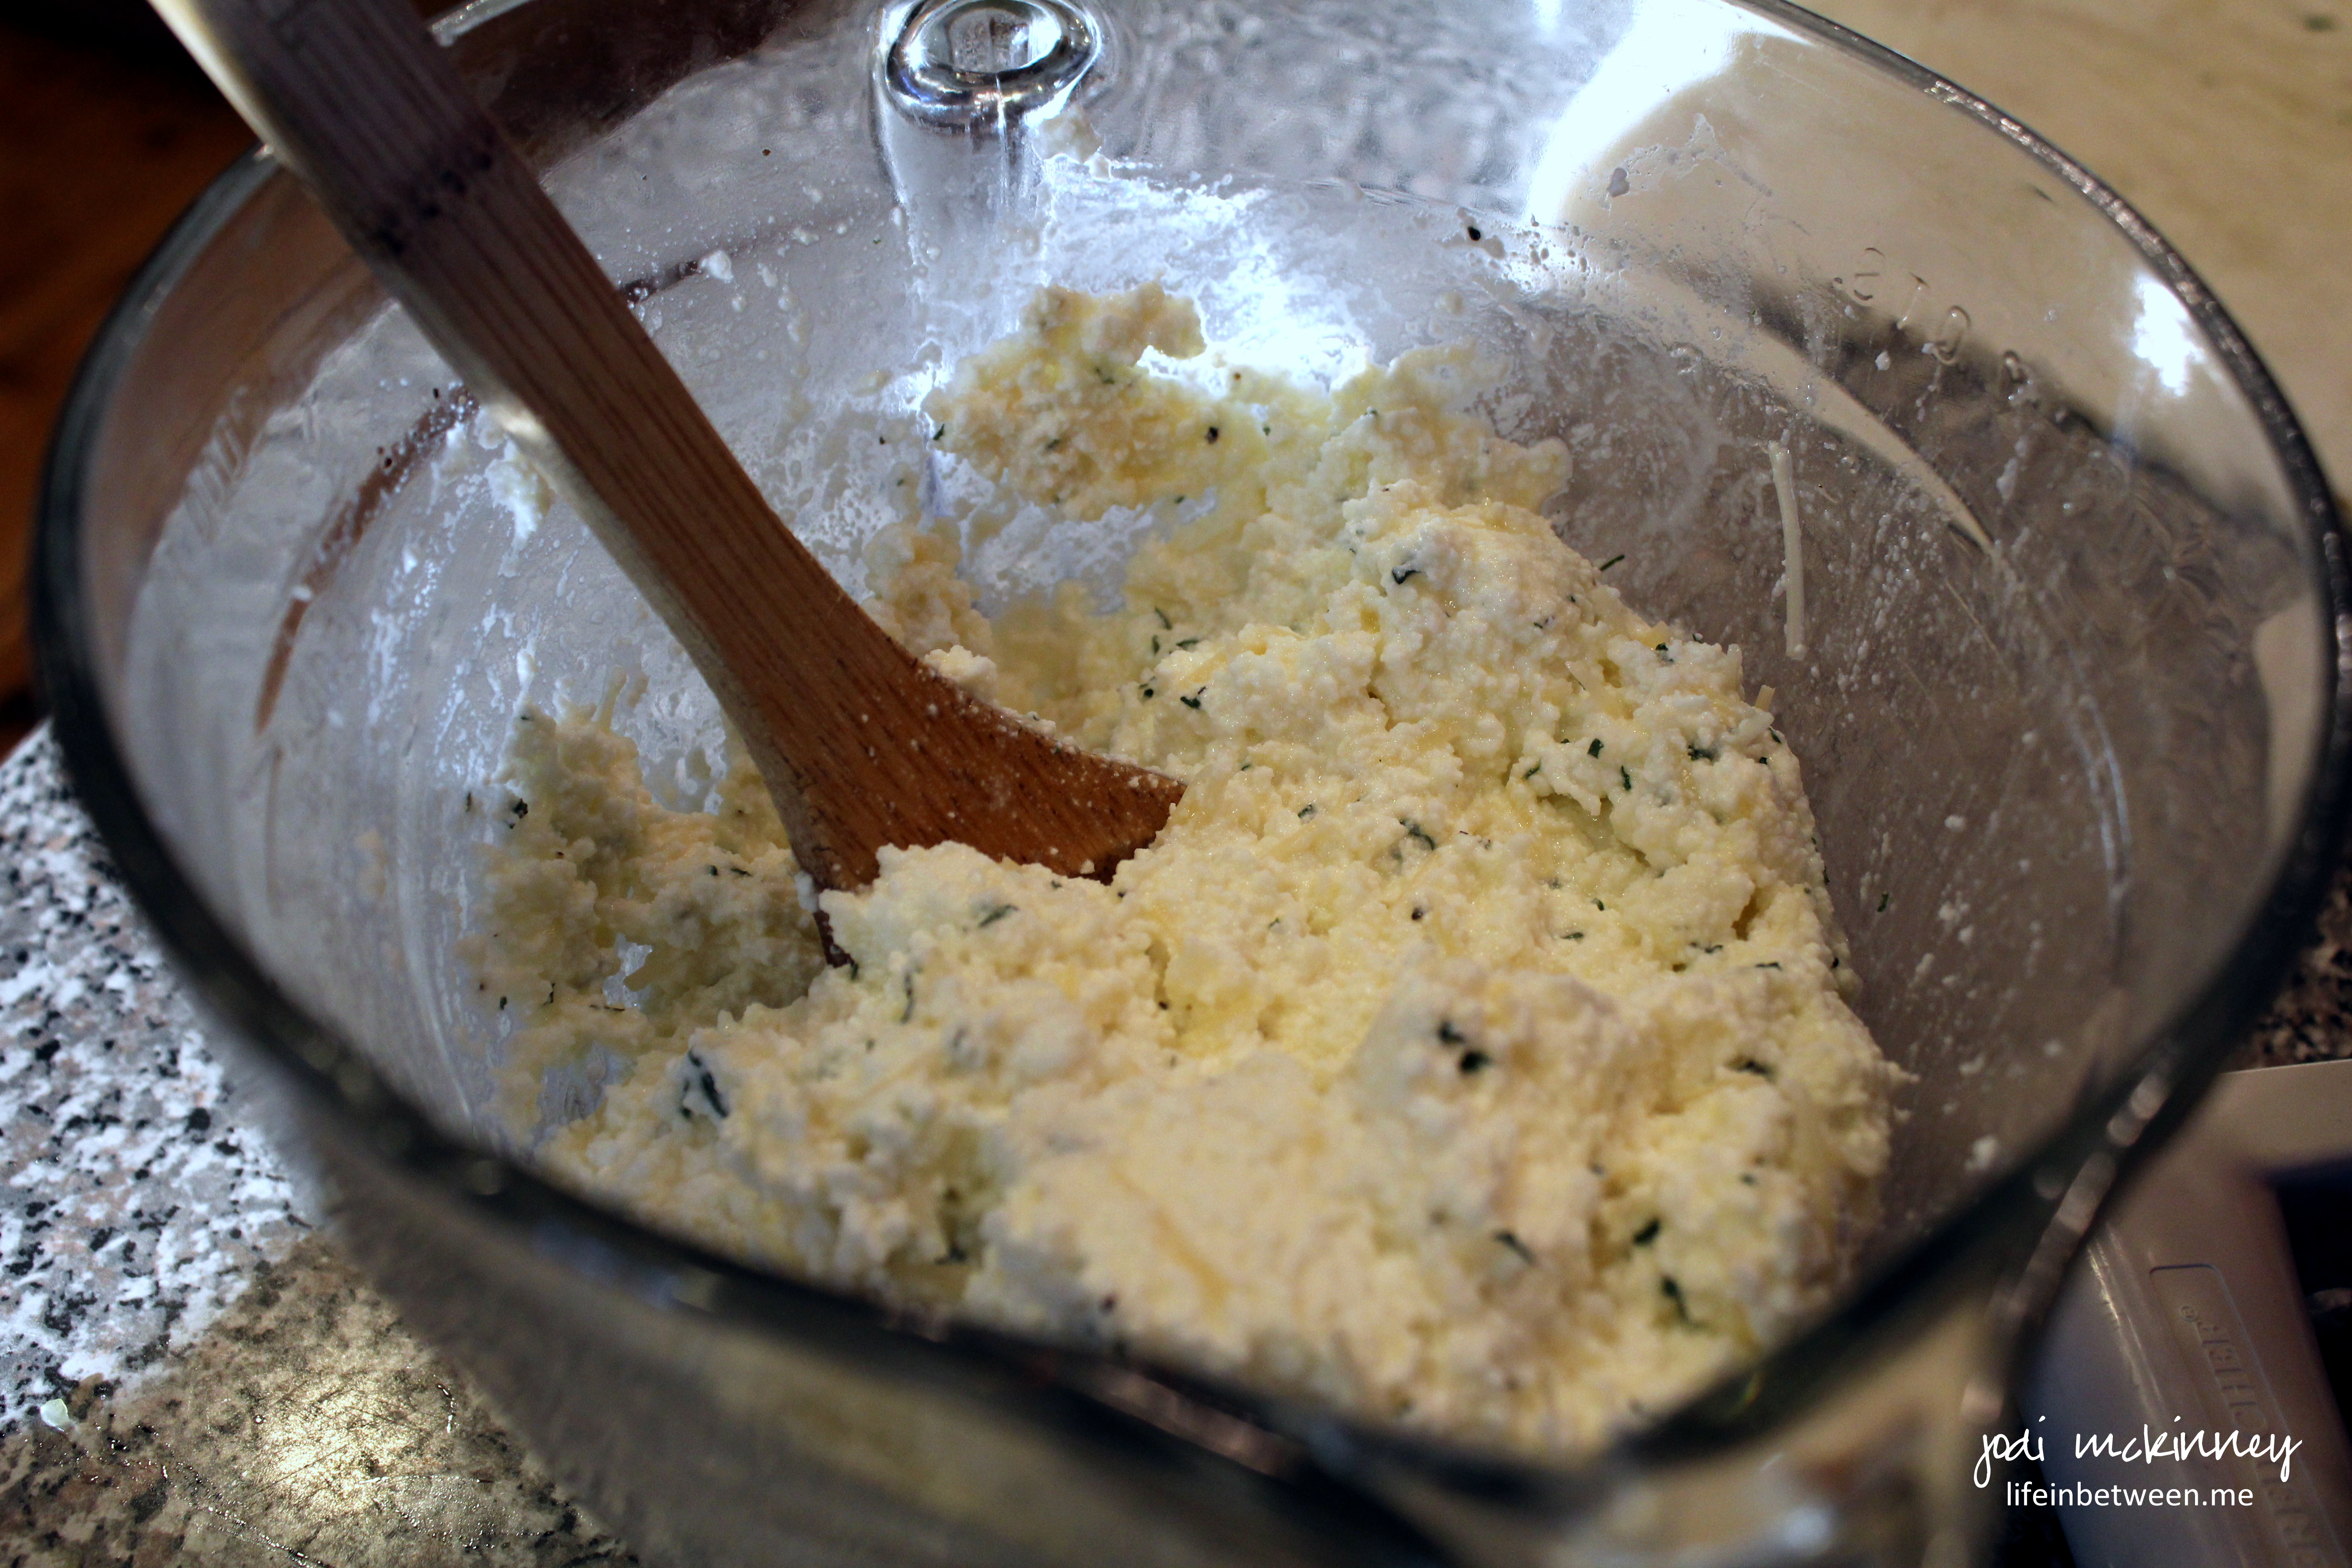
Yummy ricotta and Parmesan cheeses are mixed with some parsley, salt, pepper, and an egg for the traditional filling.

z8

Everything was layered, using the zucchini strips as “noodles” and topped with fresh slices of mozzarella for that extra yumminess.

z9

And who can’t resist an extra sprinkle of freshly grated Parmesan on top before diving in?!

Here is the recipe Liz used as adapted from Skinnytaste.com:

Zucchini Lasagna

Ingredients:  z

  • 1 lb ground turkey
  • 4 cloves garlic, minced
  • 1/2 onion, chopped
  • 1 tsp olive oil
  • salt and pepper to taste
  • 1 28 oz can crushed tomatoes
  • 4 Tbsp chopped fresh basil
  • 4 medium zucchini, sliced thin
  • 24 oz part-skim ricotta cheese
  • 1 Tbsp fresh or dried parsley
  • 1 1/2 lbs. part-skim fresh mozzarella cheese, sliced
  • 1/2 cup shredded Parmigiano Reggiano
  • 1 large egg

Directions:

In a medium sauce pan, brown ground turkey.   Season with salt.  Remove from pan to bowl, and add olive oil to the pan.   Saute garlic and onions about 2 minutes.  Return the meat to the pan, add tomatoes, basil, salt and pepper. 

Simmer for 30-40 minutes, covered.

While sauce is simmering, slice zucchini into 1/8″ thin slices.  Salt lightly, and set aside for 10 minutes. Zucchini has a lot of water when cooked, salting it takes out some of the moisture. After about 10 minutes, aggressively blot excess moisture with a paper towel.

On a gas grill or grill pan, grill zucchini on each side, until cooked, about 1-2 minutes per side. Place on paper towels to soak any excess moisture.

Preheat oven to 375° F.

Stir together ricotta and Parmesan cheese, parsley, salt, pepper and egg in a medium bowl.

With zucchini, sauce, and cheese mixture complete, you are ready to begin assembling the lasagna.

In a 9×12 inch casserole, spread half the sauce on the bottom and layer the zucchini to cover. Then place the ricotta cheese mixture topped with half  of the mozzarella cheese.

Repeat with remaining sauce, another layer of zucchini, mozzarella and a bit of extra Parmesan.

Cover with foil, and bake for 45 minutes.

Uncover, and bake an additional 15 minutes.

Let stand 10 minutes before serving to “set.”

ENJOY!

Thanks, Liz, for being such a good sport and for being such a bright spot in our lives.  We love you!  🙂

And you all are going to love this recipe!

Cheers & Hugs,

Jodi


Lemon Basil Shrimp Risotto

lemon basil shrimp risotto 1

When trying to decide what to make with a beautiful bag of shrimp I had, I came across this recipe from one of my kitchenista heroes, Ree Drummond aka The Pioneer Woman.

lemon basil shrimp risotto ingred

Risotto gets a bad rap for being difficult, but it really isn’t, and it doesn’t even take that long.

And oh how the fresh lemon juice and zest in this recipe combined with the fresh basil gives this recipe such a light, Springy, refreshing twist.

lemon basil shrimp risotto

Here is the recipe as I slightly adapted from Ree:

Lemon Basil Shrimp Risotto


Ingredients:lemon basil shrimp risotto
1 Tbsp Butter
1 Tbsp Olive Oil
1-1/2 pound Large Shrimp
1 Onion,  Diced
4 cloves Garlic, Minced
2 cups Arborio Rice
2 cups Dry White Wine
4-5 cups Chicken (or Vegetable) Broth
1 Lemon
1/2 tsp Salt
1 Tbsp Black Pepper
2 Tbsp Half & Half Cream
1/2 – 3/4 cup chopped fresh Basil Leaves
1/4 cup grated Parmesan Cheese

Directions:

Heat the butter and olive oil in a large skillet over medium-high heat. Add shrimp and cook for 3-5 minutes until opaque in the middle.

Remove shrimp to a cutting board, chop into bite-sized chunks, and set aside.

Add the onion and garlic to the skillet that still has the butter and olive oil in, and cook for 2 – 3 minutes over medium-high heat or until onion starts to turn translucent.

Add dry Arborio rice to the pan and stir for a couple minutes.

Pour in 1 cup of wine and stir gently, allowing the rice to absorb the liquid. Add second cup of wine and do same.  After the wine is absorbed, begin adding broth 1/2 cup to 1 cup at a time, allowing the rice to cook and absorb the liquid each time. Stir occasionally as you go, and add the salt and pepper during one of the broth additions. After 4 cups of broth have been absorbed, taste the rice. It should have a slight bite, but if it seems undercooked, add additional broth and cook it until it absorbs until the risotto is the perfect doneness.

Zest and juice the lemon and add both the zest and the juice to the risotto toward the end of cooking. Stir in the half and half cream, the chopped basil, and serve immediately with extra lemon zest and Parmesan cheese on top.

This recipe would also taste delicious with chicken breast substituted for the shrimp.  I think it could also be great adapted as a vegetarian dish using your favorite vegetables.  I could imagine it with some broccoli, cauliflower, asparagus, or maybe even some yummy roasted butternut squash.

This is a very versatile recipe that could become a staple in your dinner repertoire. Hope you’ll give it a try.

Cheers and Hugs,

Jodi

Happier than a Bird with a French Fry

Hey There

This card I am sharing today is a quite a diversion from my “usual” (if there even is such a thing), but oh how much fun it was to make!

I needed a birthday card for a special 14-year old boy, so pretty posies and sappy sentiments were not in order.

hey there inside

Remember last week when I shared my watercolor painted petals card and entered it into a new challenge, Can You Case it (CYCI#62)? 

Well…. lucky lucky me – I won!  Woohoo!  Happy dance!  🙂

So I was excited to see what the next challenge is, and this card is an entry for the CYCI#63 challenge.  It’s a sketch challenge, and here here is our sketch:

CYCI63-232x300

I tried to stay pretty true to the sketch.  What do you think?

Hey There

For this  card, I used the following materials:

  • StampinUp’s Just Sayin’ Stamp Set “hey there” stamp
  • StampinUp’s Just Sayin’ Framelit Die Set bubble die
  • StampinUp’s Gorgeous Grunge Stamp Set “ink blot” stamp
  • Jillibean’s You’re Tweet Stamp Set “little bird” stamp & “happier than a french fry” sentiment stamp
  • StampinUp’s Pumpkin Pie Orange Marker (for birdie’s beak)
  • StampinUp’s Adventure Bound Designer Series Paper “brick wall” paper
  • StampinUp’s Very Vanilla and Black Card Stock
  • Inks:  Stazon Black, SU White Craft Ink, Versa Mark, SU Tempting Turquoise
  • White Embossing Powder
  • Wink of Stella Clear Brush

Have a great day – in fact, I hope your day is Happier than a Bird with a French Fry!

By the way – have you ever seen a bird with a french fry??  I can say I have first hand!  A couple of years ago, a friend took me to this very specific “special” french fry place on the boardwalk in Ocean City, Maryland.  We got a batch of fries and were walking along talking, when out of nowhere and in no time at all (I hadn’t even tasted one fry yet), a bird swooped in to grab a fry, startling me to the point of throwing the fries in the air.  When they fell to the ground, about 50 hundred gabillion birds appeared, and the fries disappeared in about 1.5 seconds.  And to top it off……… the stinkin’ bird POOPED on my shoulder in the process.  So after that fiasco, I went to the ladies room to “wash” off my top, and back we headed to buy more fries.  When we arrived at the shop, it had closed for the day…..

I never did get to try those fries.  But the birds sure were happy!  🙂

Cheers & Hugs,
Jodi

PS  Happy Birthday Aaron!  With love from Aunt Jodi ❤

Is it You?

cardinal female

Is it you come to visit my sweet beloved Star?
Does your spirit fleetingly flutter from oh so afar?

Are you happy, and can you tell me if it is really true?
Is eternity the beautiful place they say we go to?

I miss your bright eyes, your warm heart, your infectious laughter.
I dream you’re with Grandpap dancing happily ever after.

Please guide me and show me the best way to be
your legacy, my hero, my matriarch, my cherished destiny.

Cheers & Hugs,
Jodi

Cardinals have long been believed to represent a loved one who has passed.  It is said that when you see one, it means your loved one is visiting you, and they usually show up when you most need them or miss them.  I have recently come to appreciate the delicate beauty of the female cardinal with her delicate coloring.  The bright red males get most of the attention, but I’m partial to these beauties.

This short poem is written in honor of my beloved Grandma Stella, my star; and this photo I took Saturday morning from our master bath window of Mrs.Cardinal briefly sitting in the dormant Rose of Sharon bush is being shared as part of the WordPress Weekly Photo Challenge:  Ephemeral.

Black Bean & Edamame Salad

Black Bean and Edamame Salad 1

I love legumes!

Unfortunately – the two guys I live with – do not…

So when I had some girls over last week, it was my chance to make this black bean and edamame salad as a nice accompaniment to our chicken fajitas.

Black Bean and Edamame Salad

This is one of those things I will sometimes make for myself as a high protein, high fiber, nutrient rich lunch to have on hand for a few days.  It holds up nicely, and the fresh cilantro really kicks it up!

You can really play with this recipe and use whatever you have or whatever you like.  Mix up the beans.  Marinade with YOUR favorite vinaigrette.  Add YOUR favorite veggies.  I daresay it is a smidge different every time I make it according to my mood or what I have on hand.

If you are a legume lover like me, I hope you will give it a try.  And… share your ideas and combos too!

Black Bean & Edamame Salad

2 cans black beans, drained and rinsed
1 cup edamame beans
2 cloves garlic, finely minced
1/4 cup sliced green onions
1/4 cup finely chopped celery
1 cup chopped red, orange, and/or yellow pepper
1/4 cup fresh cilantro, finely chopped
1 Tbsp Olive Oil
3 Tbsp Red Wine Vinegar
1/2 lime, juiced
Salt & Pepper to taste

Combine all ingredients in a large bowl, mix and refrigerate for a few hours to marinade.  Serve cold.

Enjoy!

Cheers & Hugs

Jodi

Rubber Ducky Diaper Cake

rubber ducky diaper cake

Looking for a fun baby shower gift?

How about taking a box of disposable diapers and making it into a “cake!”

Yesterday, I shared my Rubber Ducky Watercolor Card.  Here is another part of the gift that goes with it.  A gift bag full of baby hooded towels, and I am ready for the shower.

This is so simple to make.

I re-purposed an aluminum serving tray and hot glued a cardboard paper towel holder to the center.  I then took an 88-count box of Pampers Swaddler Diapers, rolling each diaper and holding it together with a rubber band.

Begin by placing the rolled diapers around the center paper towel tube.  Tie together with string, and then surround with another ring outside that.  Repeat four times for the bottom layer.  Then make the middle layer with two circles and the top layer with just one circle around the paper towel tube.  Cover the string/rubber bands with ribbon and make a decorative bow.  Decorate your cake with various rubber duckies and/or any other “theme” you choose to complete your gift cake.

Those of you that have been “lifeinbetweeners” for a while might remember the Birthday Money Cake I made for my son a few months ago.

Isn’t it fun to find creative ways to bake make cakes?!

What are you baking up today?

Cheers & Hugs,

Jodi

Chicks & Rubber Duckies

rubber duck 1

I’m going to a baby shower this weekend, so I had fun using the same technique I used for my Watercolor & Painted Petals Note Card to make this little bitty Rubber Ducky card.

rubber duck 2

I used the rubber ducky stamp from StampinUp’s Something for Baby stamp set and embellished with a white gel pen and pearl for the eye.

I can’t get enough of this fun technique and know I will be doing more of it.

And speaking of having fun and making cards, I had a few chicks over one night this week.  We ate chicken fajitas and Cadbury mini egg blondies, washed it down with some wine and G&Ts, stamped, and made…

chicks stamping

some CHICKS!  (Easter Chicks that is!)  So here we are… Chicks making Chicks!   Thanks to Head Chick Stacey for leading our “class.

chicks and chicks

Aren’t they cute?!

Easter Chick

Here is a video tutorial on how to make one similar done by Deb Valder.

We made ours a just a little different by adding a little holder for a Cadbury Egg.

Easter Chick side

Happy Friday from this crazy Chick!

Cheers & Hugs,

Jodi

Cadbury Mini Egg Blondie Bars

cadbury mini egg blondies

I’ve been randomly buying Easter candy to play with in baking (don’t you?!?) and couldn’t resist picking up a huge bag of Cadbury Mini Eggs just knowing they would be great in something (because they ARE great – right?!).

cadbury mini egg blondies 4

And according to one of my guests last night, these Cadbury Mini Egg Blondies are her new favorite.  (Thanks sweet Katie!)

cadbury mini egg blondies 5

When perusing for ideas, I came across this recipe by  Bakeaholic Mama.

cadbury mini egg blondies 2

And since the recipe only made an 8×8 pan, I obviously doubled it!  But then realized (after I began cutting them…) that doubling an 8×8 recipe in a 13×9 pan makes for some pretty thick blondies!  (Next time I would do in a bar pan if doubling.)

cadbury mini egg blondies 3

Since they were extra thick, I just cut them in smaller pieces.

Below is the single recipe.  Double it if you dare!  And if you don’t like blondies (boo to you!), these little mini eggs would taste great in a batch of brownies too!

Cadbury Mini Egg Blondies

Ingredients:

2 cups all-purpose flour
1/2 teaspoon baking soda
1/2 teaspoon salt
3/4 cup butter, melted
1 cup packed brown sugar
1/2 cup white sugar
1 tablespoon vanilla extract
1 egg
1 egg yolk
2 cups Cadbury Mini Eggs

Directions:

Combine flour, baking soda and salt in a medium bowl and set aside.

Cream melted butter with sugars using electric mixer.  Add vanilla and eggs, and beat until light and fluffy.

Slowly add in flour mixture until incorporated.

Fold in Mini Eggs.

Spread batter into a greased 8×8 or 9×9 baking dish.

Bake at 325 for about 40 minutes or until a tooth pick is inserted in the center and comes out clean. 

Let the bars cool for 30 minutes before slicing.

Recipe from Bakeaholicmama.com

ENJOY!

Cheers & Hugs,
Jodi

Easy Homemade Mongolian Beef

Mongolian Beef

Sometimes yummy, delicious food is not the best “subject” for photographing.  Like this absolutely amazing tasting Mongolian Beef.

Apparently it is a knock-off recipe to what is served at PF Chang’s (per Jo at JoCooks where I found this recipe), but I have never had it there.  If I go to PF Chang’s, it is Chicken Lettuce Wraps E V E R Y… single… time… period.

But I do try to make beef occasionally for Hubby who complains he fears he may grow feathers from eating chicken so many times a week.   I have tried Mongolian Beef from other places like our local Pan-Asian restaurant, Jimmy Wan’s; and I must say, this recipe could take on any that I have tried…

We LOVED this recipe.

I really wish I could have shot some better photos of this amazingness – – and I totally should have sprinkled it with some sesame seeds for the “photo shoot,” but I forgot!  UGH!  I guess I was too anxious to get eating.  And you will be too!

Here is the recipe you REALLY SHOULD TRY as adapted from JoCooks.com.  And it is SO easy too!

Easy Homemade Mongolian Beef

Ingredients:
2 lbs flank steak
½ cup cornstarch
½ cup vegetable oil

Sauce:
2 Tbsp vegetable oil
1 cup soy sauce
1 cup brown sugar
5 cloves garlic, minced
1 cup water

Garnish:
6 green onions, sliced

Directions:

Slice the steak into thin strips against the grain.

In a large Ziploc plastic bag, add the beef strips and cornstarch, and shake to completely coat the beef.

In a small sauce pan add the oil, soy sauce, brown sugar, garlic and water. Stir and cook over medium heat for 20 minutes or until sauce thickens and reduces.

Heat the vegetable oil in a skillet, add beef, and cook until browned. Pour sauce over the beef. Stir and cook for a few more minutes.

Serve over rice and garnish with green onions.


ENJOY!

Cheers & Hugs,
Jodi