Chewy Oatmeal Raisin Cookies

Oatmeal Raisin Cookies

Oatmeal cookies are one of my hubby’s faves, and I was surprised to notice I had not posted my recipe here yet.

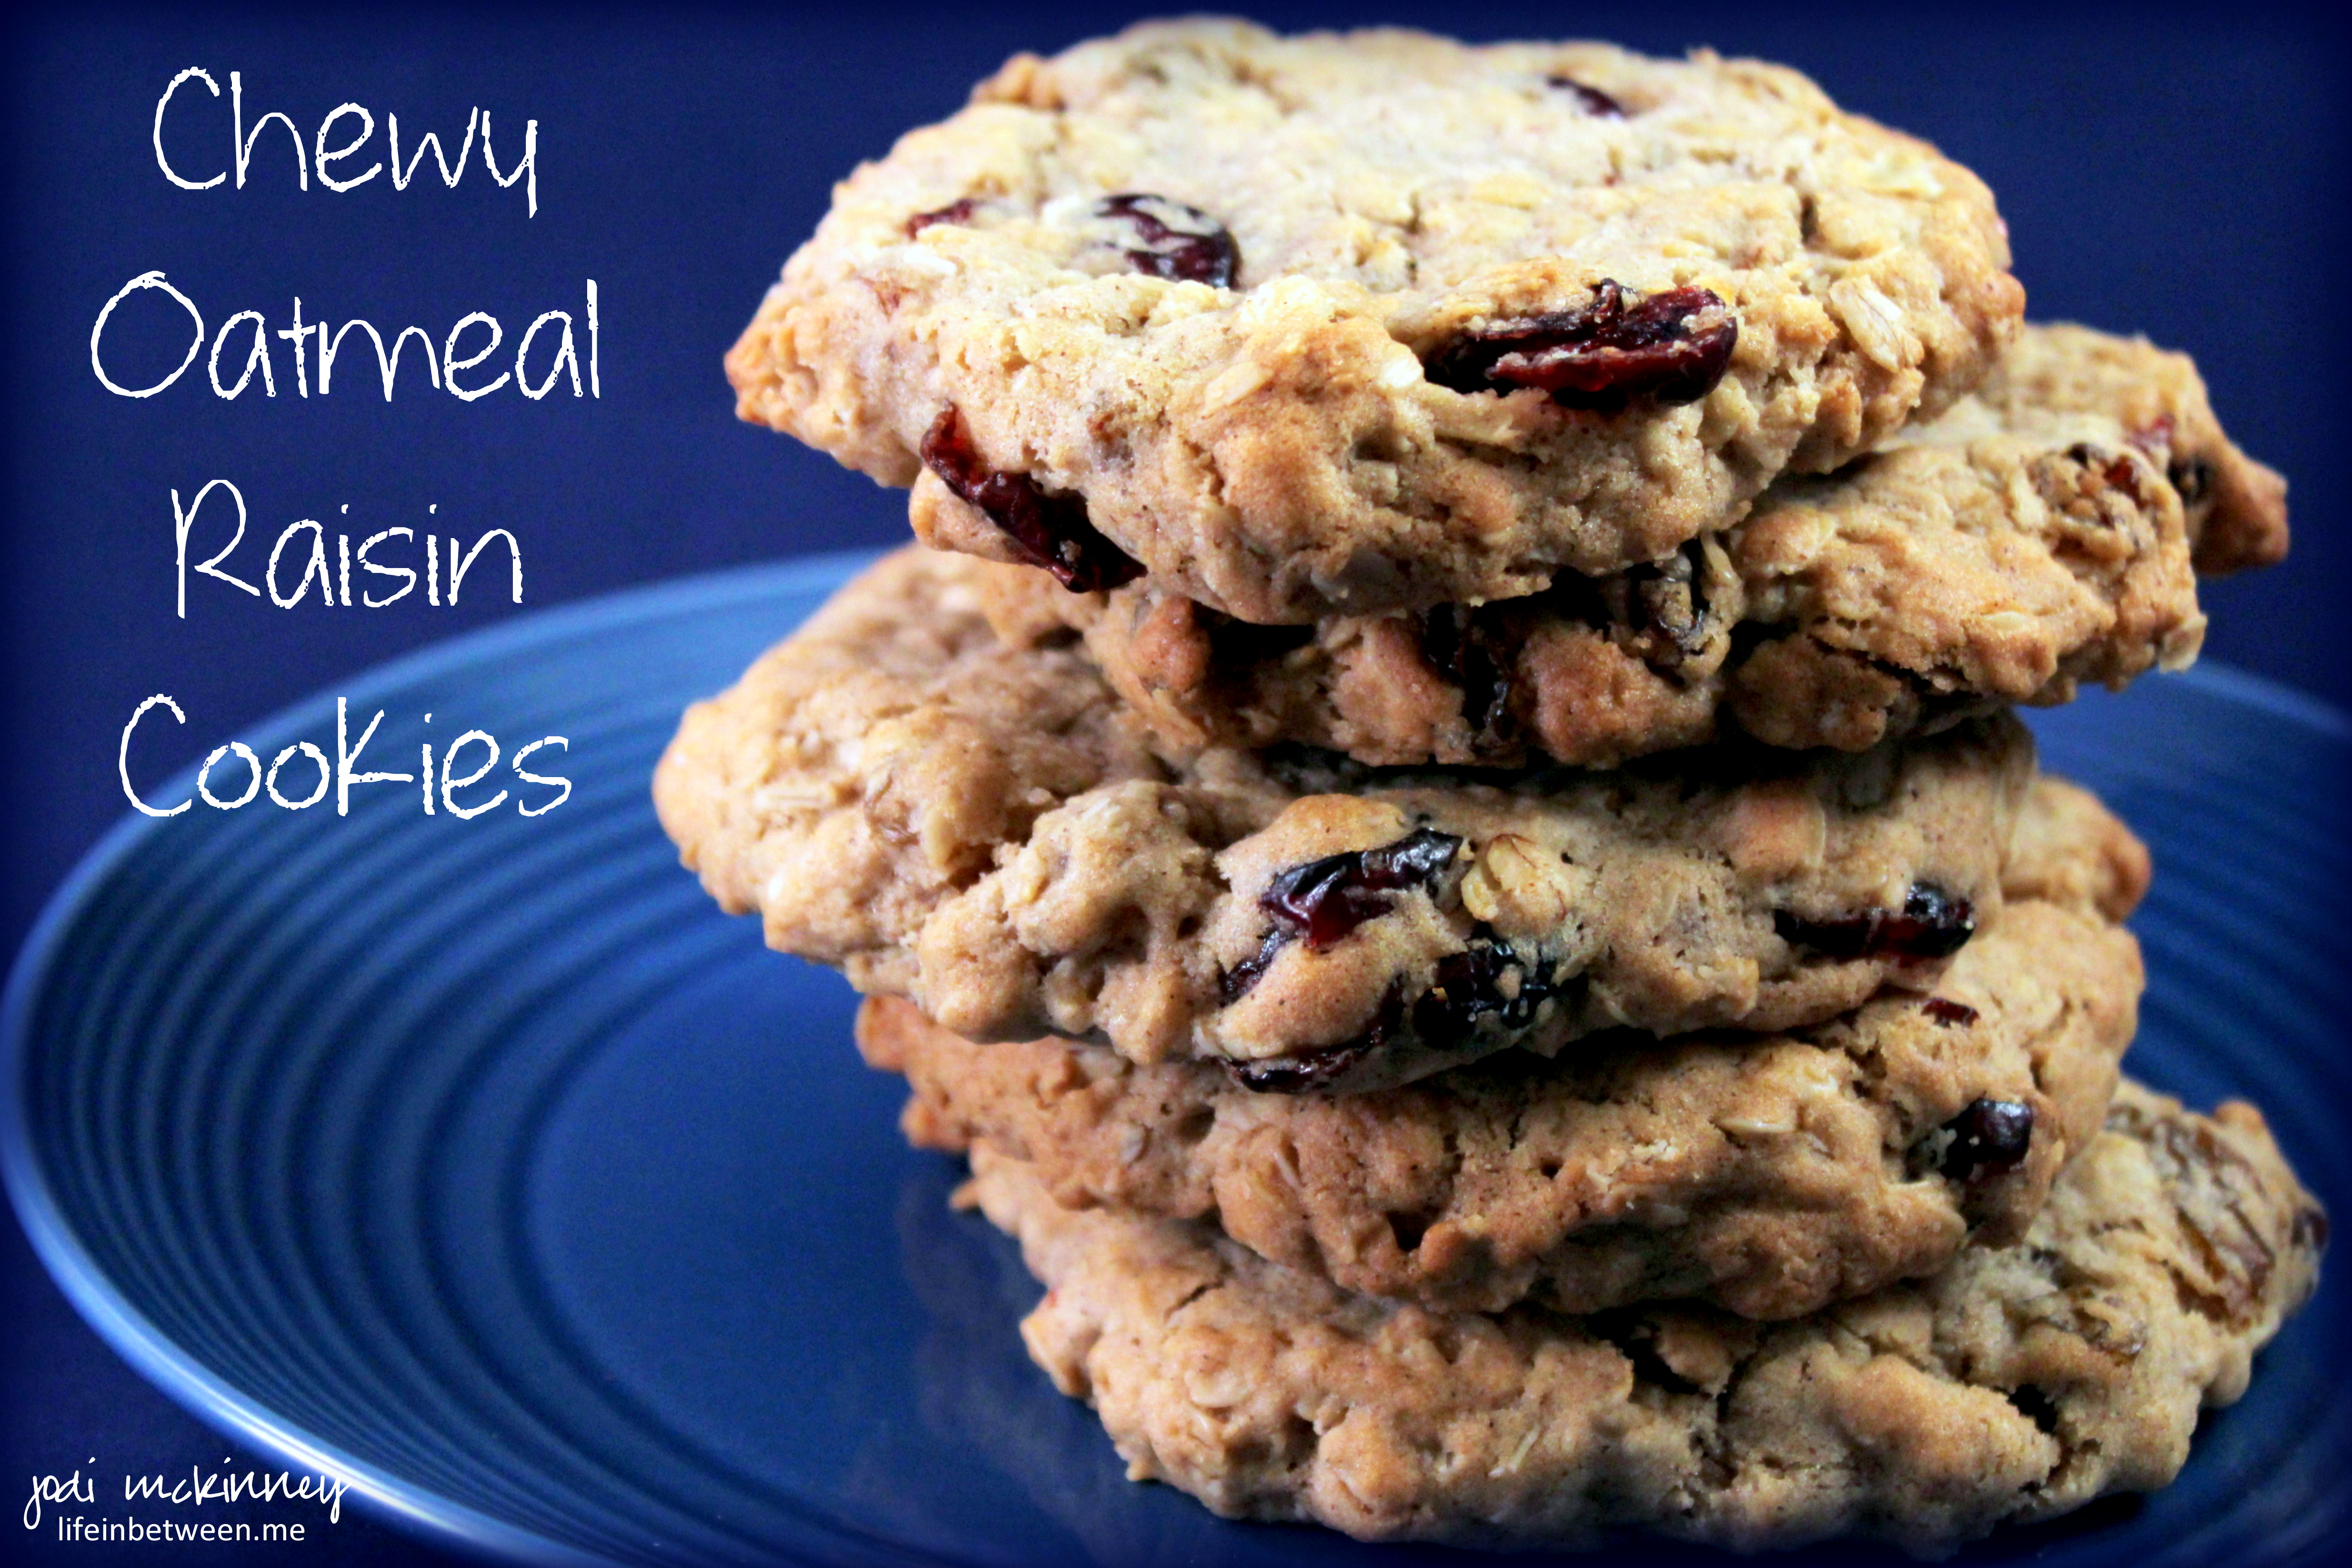
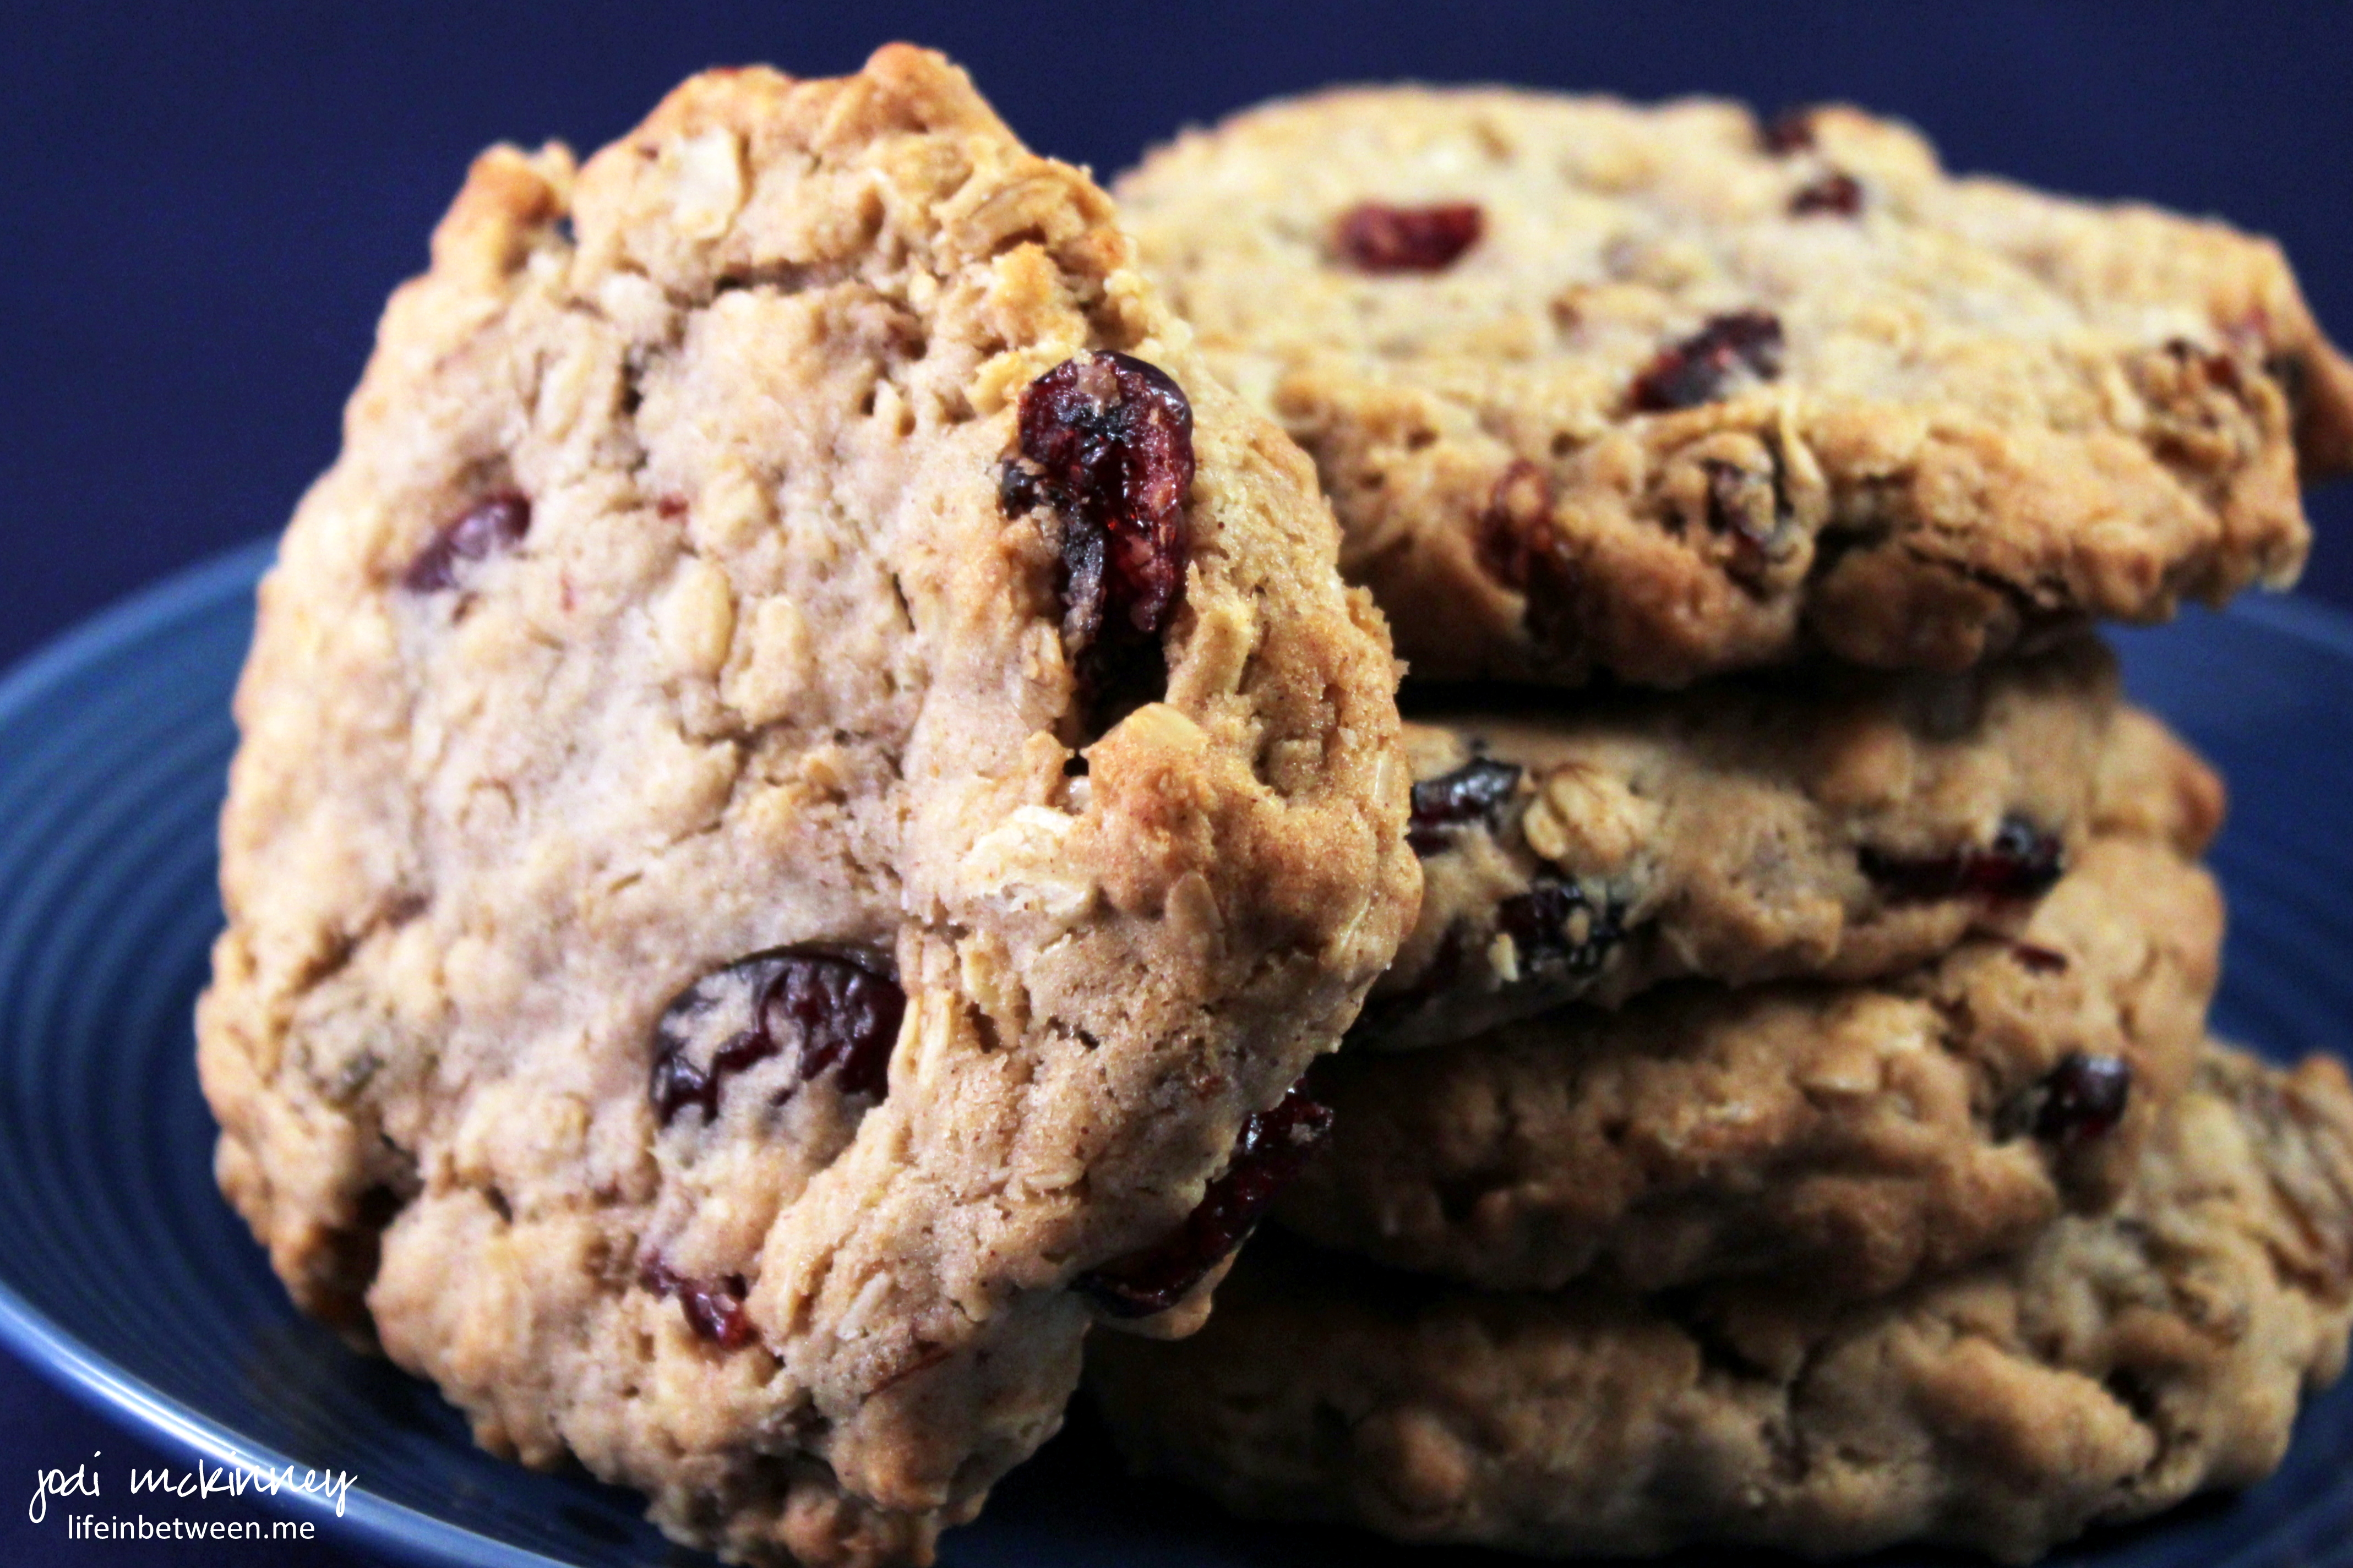
When I make oatmeal cookies, I like to make them ginormous – – – typically about 3 inches in diameter.

It just seems to be the right way to make them….  Do you think I subconsciously consider them healthier in the cookie category?  There are oats.  There is fruit.  Sometimes there are nuts….   (no worries about that little ole’ bit of butter and sugar!)  😉

I also tend to flatten them a bit before baking, which I do not do with my chocolate chips and others.  I think because they are so full of HEALTHY oats, they don’t tend to spread and flatten as much on their own.

oatmeal raisin cookies 3

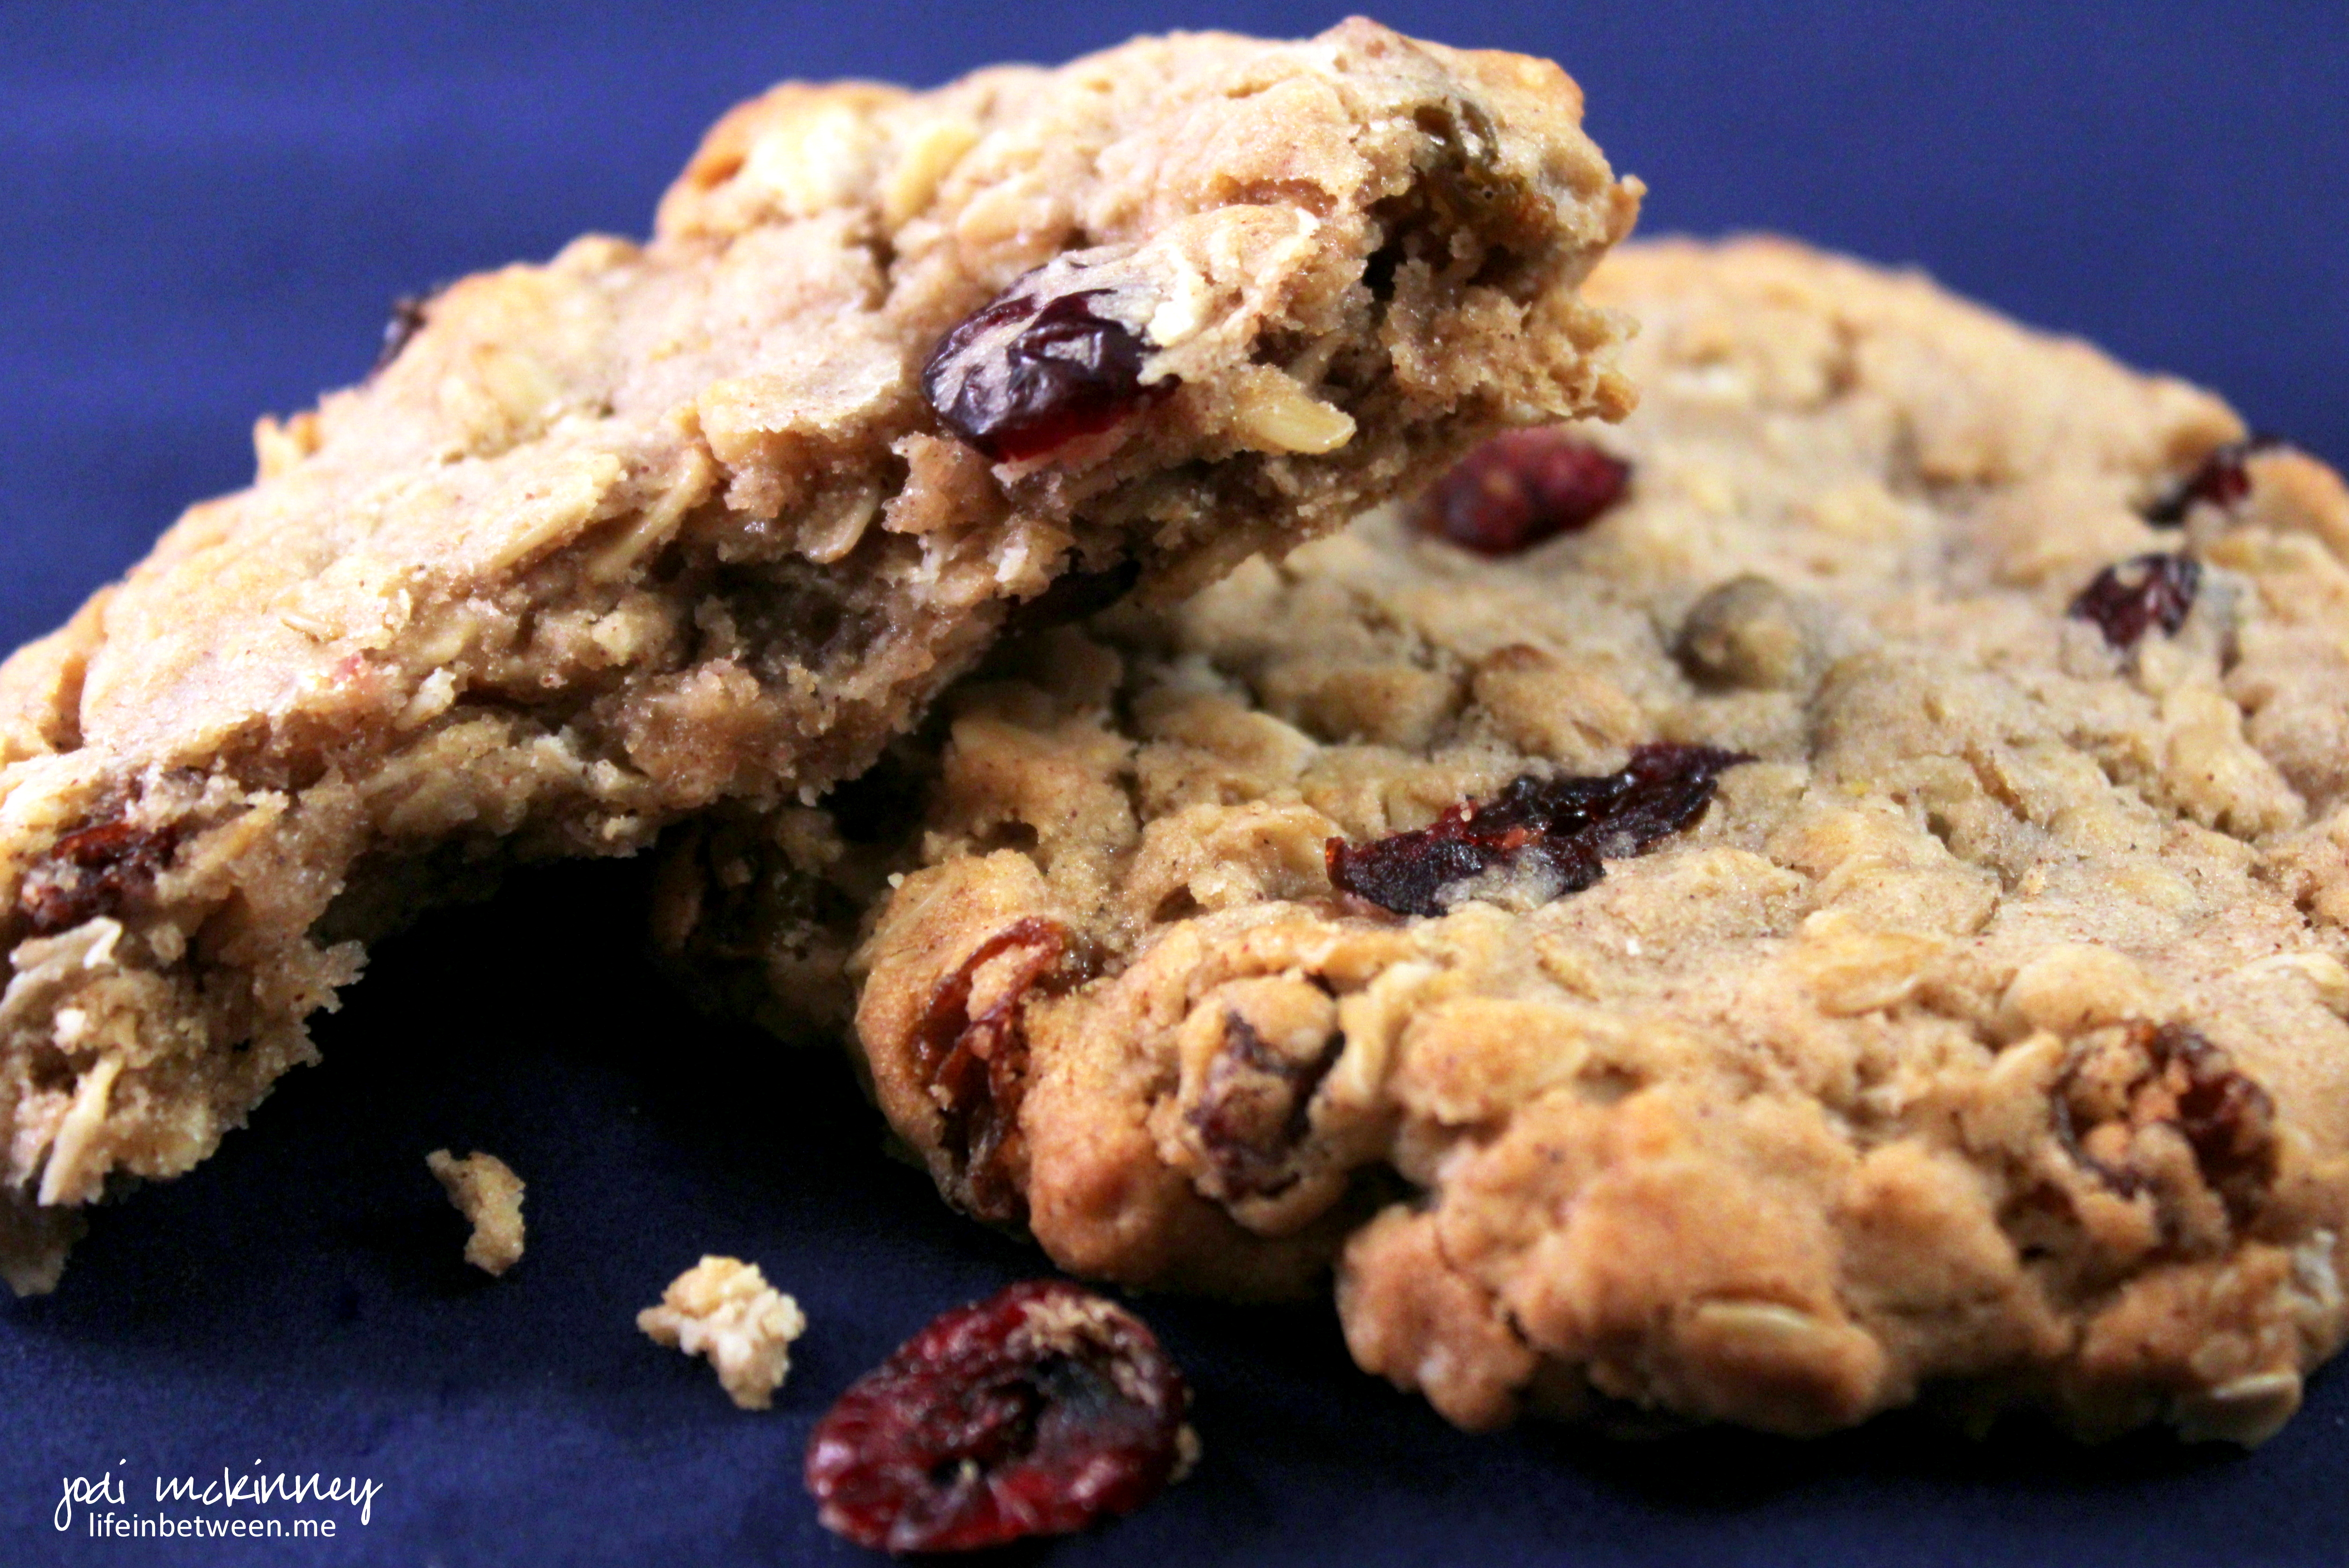
To me, the best oatmeal cookies are not puffy or fluffy, but crispy on the outside edges and chewy on the inside.

I change up the fruit or nuts for however the wind is blowing for me that day, so sometimes I add just golden raisins (which I always buy over the standard “brown” ones), other times I use raisins and dried cranberries (like this time).  Sometimes I add chopped walnuts… and sometimes not.  I’ve been known to add dried cherries or dried blueberries (and even candy orange slices once!).

oatmeal raisin cookies 2

So for you oatmeal cookies lovers, here’s my favorite tweaked from the Quaker Oats canister lid called “Vanishing Oatmeal Raisin Cookies:”

Chewy Oatmeal Raisin Cookies

  • Servings: 2 dozen ginormous or 4 dozen regular sized cookies
  • Print

Ingredients:oatmeal raisin cookies 3

14 Tbsp softened butter
3/4 cup packed brown sugar
1/2 cup white sugar
2 eggs
1 1/2 tsp vanilla
1 1/2 cups all purpose flour
1 tsp baking soda
1 tsp cinnamon
1/2 tsp salt
3 cups uncooked oats
1 cup golden raisins (or fruit/nuts of your choice)

With electric mixer, beat butter and sugars until creamy. Add eggs and vanilla and beat for two more minutes. Add dry ingredients and mix well. Add oats and raisins and mix well.

Refrigerate for at least 2 hours or up to 2 days.

When ready to bake, preheat oven to 350 degrees F.

Roll dough into large 2 inch balls (or smaller 1 inch if you prefer), place on baking stone, and flatten with the palm of your hand.

Bake 8 minutes for small, 10 minutes for large.

Jodi’s Best Cookie Baking Tips: Electric oven provides most even, consistent baking. I always bake on stones as opposed to aluminum or glass or metal.  I always refrigerate my cookie dough for several hours before baking. I always under bake as the cookies continue to cook slightly while cooling on the baking stone for 2-3 minutes before removing to cooling rack. Cookies freeze well if stored in airtight freezer bags after completely cooled.

Enjoy!

Cheers & Hugs,
Jodi

Zucchini Lasagna

z
The Challenge:  Take a classic recipe, and make a healthier version.

That was the assignment my son, Nick’s girlfriend, Liz, had for her final assignment in a cooking class she is taking as part of her Master’s Degree Program in Nutrition.

We were excited to help her out and have her cook dinner for us last evening.

And she rocked it!  This Zucchini Lasagna recipe is a KEEPER!  I do believe I like it even better than the classic version.

Liz was sweet enough to allow me to photograph her and share the adventure and recipe here with all of you.

z1

One of the joys of cooking is appreciating and embracing the fresh ingredients that make a recipe so wonderful – like the smell of fresh basil.

z2

And the only thing better than smelling fresh basil is the smell of sauteed onions and garlic in olive oil!

z5

For the meat sauce, Liz used lean ground turkey instead of beef or sausage, and when mixed with crushed tomatoes, fresh basil, onions and garlic, you would never know you are “missing” anything – except you get the bonus of less fat and calories!

Z3

This adorable amateur in the kitchen totally mastered using a mandolin (which she formerly only knew as a musical instrument 🙂 ) to perfectly slice the zucchini to replace the pasta noodles.

Z4

And of course Mikey was on his steadfast “clean the floor” duty making sure no crumb is left behind (and yes – he even likes raw zucchini).

z6

This recipe even includes mastering the grill, so Nick was in charge of instructions here, and the zucchini strips were char-grilled beautifully.

z7

Yummy ricotta and Parmesan cheeses are mixed with some parsley, salt, pepper, and an egg for the traditional filling.

z8

Everything was layered, using the zucchini strips as “noodles” and topped with fresh slices of mozzarella for that extra yumminess.

z9

And who can’t resist an extra sprinkle of freshly grated Parmesan on top before diving in?!

Here is the recipe Liz used as adapted from Skinnytaste.com:

Zucchini Lasagna

Ingredients:  z

  • 1 lb ground turkey
  • 4 cloves garlic, minced
  • 1/2 onion, chopped
  • 1 tsp olive oil
  • salt and pepper to taste
  • 1 28 oz can crushed tomatoes
  • 4 Tbsp chopped fresh basil
  • 4 medium zucchini, sliced thin
  • 24 oz part-skim ricotta cheese
  • 1 Tbsp fresh or dried parsley
  • 1 1/2 lbs. part-skim fresh mozzarella cheese, sliced
  • 1/2 cup shredded Parmigiano Reggiano
  • 1 large egg

Directions:

In a medium sauce pan, brown ground turkey.   Season with salt.  Remove from pan to bowl, and add olive oil to the pan.   Saute garlic and onions about 2 minutes.  Return the meat to the pan, add tomatoes, basil, salt and pepper. 

Simmer for 30-40 minutes, covered.

While sauce is simmering, slice zucchini into 1/8″ thin slices.  Salt lightly, and set aside for 10 minutes. Zucchini has a lot of water when cooked, salting it takes out some of the moisture. After about 10 minutes, aggressively blot excess moisture with a paper towel.

On a gas grill or grill pan, grill zucchini on each side, until cooked, about 1-2 minutes per side. Place on paper towels to soak any excess moisture.

Preheat oven to 375° F.

Stir together ricotta and Parmesan cheese, parsley, salt, pepper and egg in a medium bowl.

With zucchini, sauce, and cheese mixture complete, you are ready to begin assembling the lasagna.

In a 9×12 inch casserole, spread half the sauce on the bottom and layer the zucchini to cover. Then place the ricotta cheese mixture topped with half  of the mozzarella cheese.

Repeat with remaining sauce, another layer of zucchini, mozzarella and a bit of extra Parmesan.

Cover with foil, and bake for 45 minutes.

Uncover, and bake an additional 15 minutes.

Let stand 10 minutes before serving to “set.”

ENJOY!

Thanks, Liz, for being such a good sport and for being such a bright spot in our lives.  We love you!  🙂

And you all are going to love this recipe!

Cheers & Hugs,

Jodi


Lemon Basil Shrimp Risotto

lemon basil shrimp risotto 1

When trying to decide what to make with a beautiful bag of shrimp I had, I came across this recipe from one of my kitchenista heroes, Ree Drummond aka The Pioneer Woman.

lemon basil shrimp risotto ingred

Risotto gets a bad rap for being difficult, but it really isn’t, and it doesn’t even take that long.

And oh how the fresh lemon juice and zest in this recipe combined with the fresh basil gives this recipe such a light, Springy, refreshing twist.

lemon basil shrimp risotto

Here is the recipe as I slightly adapted from Ree:

Lemon Basil Shrimp Risotto


Ingredients:lemon basil shrimp risotto
1 Tbsp Butter
1 Tbsp Olive Oil
1-1/2 pound Large Shrimp
1 Onion,  Diced
4 cloves Garlic, Minced
2 cups Arborio Rice
2 cups Dry White Wine
4-5 cups Chicken (or Vegetable) Broth
1 Lemon
1/2 tsp Salt
1 Tbsp Black Pepper
2 Tbsp Half & Half Cream
1/2 – 3/4 cup chopped fresh Basil Leaves
1/4 cup grated Parmesan Cheese

Directions:

Heat the butter and olive oil in a large skillet over medium-high heat. Add shrimp and cook for 3-5 minutes until opaque in the middle.

Remove shrimp to a cutting board, chop into bite-sized chunks, and set aside.

Add the onion and garlic to the skillet that still has the butter and olive oil in, and cook for 2 – 3 minutes over medium-high heat or until onion starts to turn translucent.

Add dry Arborio rice to the pan and stir for a couple minutes.

Pour in 1 cup of wine and stir gently, allowing the rice to absorb the liquid. Add second cup of wine and do same.  After the wine is absorbed, begin adding broth 1/2 cup to 1 cup at a time, allowing the rice to cook and absorb the liquid each time. Stir occasionally as you go, and add the salt and pepper during one of the broth additions. After 4 cups of broth have been absorbed, taste the rice. It should have a slight bite, but if it seems undercooked, add additional broth and cook it until it absorbs until the risotto is the perfect doneness.

Zest and juice the lemon and add both the zest and the juice to the risotto toward the end of cooking. Stir in the half and half cream, the chopped basil, and serve immediately with extra lemon zest and Parmesan cheese on top.

This recipe would also taste delicious with chicken breast substituted for the shrimp.  I think it could also be great adapted as a vegetarian dish using your favorite vegetables.  I could imagine it with some broccoli, cauliflower, asparagus, or maybe even some yummy roasted butternut squash.

This is a very versatile recipe that could become a staple in your dinner repertoire. Hope you’ll give it a try.

Cheers and Hugs,

Jodi

Black Bean & Edamame Salad

Black Bean and Edamame Salad 1

I love legumes!

Unfortunately – the two guys I live with – do not…

So when I had some girls over last week, it was my chance to make this black bean and edamame salad as a nice accompaniment to our chicken fajitas.

Black Bean and Edamame Salad

This is one of those things I will sometimes make for myself as a high protein, high fiber, nutrient rich lunch to have on hand for a few days.  It holds up nicely, and the fresh cilantro really kicks it up!

You can really play with this recipe and use whatever you have or whatever you like.  Mix up the beans.  Marinade with YOUR favorite vinaigrette.  Add YOUR favorite veggies.  I daresay it is a smidge different every time I make it according to my mood or what I have on hand.

If you are a legume lover like me, I hope you will give it a try.  And… share your ideas and combos too!

Black Bean & Edamame Salad

2 cans black beans, drained and rinsed
1 cup edamame beans
2 cloves garlic, finely minced
1/4 cup sliced green onions
1/4 cup finely chopped celery
1 cup chopped red, orange, and/or yellow pepper
1/4 cup fresh cilantro, finely chopped
1 Tbsp Olive Oil
3 Tbsp Red Wine Vinegar
1/2 lime, juiced
Salt & Pepper to taste

Combine all ingredients in a large bowl, mix and refrigerate for a few hours to marinade.  Serve cold.

Enjoy!

Cheers & Hugs

Jodi

Easy Homemade Mongolian Beef

Mongolian Beef

Sometimes yummy, delicious food is not the best “subject” for photographing.  Like this absolutely amazing tasting Mongolian Beef.

Apparently it is a knock-off recipe to what is served at PF Chang’s (per Jo at JoCooks where I found this recipe), but I have never had it there.  If I go to PF Chang’s, it is Chicken Lettuce Wraps E V E R Y… single… time… period.

But I do try to make beef occasionally for Hubby who complains he fears he may grow feathers from eating chicken so many times a week.   I have tried Mongolian Beef from other places like our local Pan-Asian restaurant, Jimmy Wan’s; and I must say, this recipe could take on any that I have tried…

We LOVED this recipe.

I really wish I could have shot some better photos of this amazingness – – and I totally should have sprinkled it with some sesame seeds for the “photo shoot,” but I forgot!  UGH!  I guess I was too anxious to get eating.  And you will be too!

Here is the recipe you REALLY SHOULD TRY as adapted from JoCooks.com.  And it is SO easy too!

Easy Homemade Mongolian Beef

Ingredients:
2 lbs flank steak
½ cup cornstarch
½ cup vegetable oil

Sauce:
2 Tbsp vegetable oil
1 cup soy sauce
1 cup brown sugar
5 cloves garlic, minced
1 cup water

Garnish:
6 green onions, sliced

Directions:

Slice the steak into thin strips against the grain.

In a large Ziploc plastic bag, add the beef strips and cornstarch, and shake to completely coat the beef.

In a small sauce pan add the oil, soy sauce, brown sugar, garlic and water. Stir and cook over medium heat for 20 minutes or until sauce thickens and reduces.

Heat the vegetable oil in a skillet, add beef, and cook until browned. Pour sauce over the beef. Stir and cook for a few more minutes.

Serve over rice and garnish with green onions.


ENJOY!

Cheers & Hugs,
Jodi

Soft Pretzels stuffed with Bacon, Spinach & Artichoke Dip

stuffed soft pretzels

Imagine if steamy, fresh baked, salty soft pretzels had a love child with ooey gooey, creamy, cheesy bacon spinach artichoke dip…….

stuffed soft pretzels 3 filling

Can you E V E N imagine the gloriousness?

And then maybe kick up that pretzel bread dough with just enough beer to make it magical…

Look no further!  Here is the most amazing appetizer/snack/meal in a pretzel ever created!  Are you ready for the deliciousness?

stuffed soft pretzels 4

Though this is not a difficult recipe, it is definitely a bit time consuming.   But….  It is so worth it!

stuffed soft pretzels 5

If you are looking for a WOW factor treat to make and share, look no further.   Get your apron on and get ready to rock your socks!

stuffed soft pretzels 6

My son, Nick, originally found this recipe on an amazing food blog, Half Baked Harvest, and asked if I was up for “attempting these.”  Are you kidding?!?!  I live for this stuff!

Thank you Tieghan for sharing!  I tweaked it up just a bit – you know…. maybe just a bit more bacon (have you ever heard of using only two slices of bacon?!?) and always more garlic!  🙂 , but this is pretty true to Tieghan’s amazing recipe.

stuffed soft pretzels 2

Oh…. and besides going amazing well with a great draft beer, these go amazingly well with (yep – you guessed it…. a great red wine!)  🙂

Soft Pretzels Stuffed with Bacon, Spinach & Artichoke Dip

  • Servings: 8 Giant Stuffed Pretzels
  • Print

Pretzel Dough Ingredients:

  • 1/2 cup warm waterstuffed soft pretzels
  • 2 Tbsp light brown sugar
  • 1 pkg (2 1/4 tsp) active dry yeast
  • 1 cup beer
  • 1 stick butter, melted
  • 1 1/2 tsp salt
  • 2 1/2 cups all-purpose flour
  • 2 cups whole wheat flour
  • 2/3 cup baking soda (for boiling pretzels)
  • 1 egg, beaten
  • Coarse sea salt

Spinach and Artichoke Dip Filling Ingredients:

  • 6 slices thick-cut bacon, chopped
  • 1 Tbsp butter
  • 3 cloves minced garlic
  • 1 Tbsp flour
  • 1/2 cup milk
  • 1 oz. cream cheese
  • 1/2 cup shredded mozzarella cheese
  • 1/2 cup grated Parmesan cheese
  • 1/2 cup Greek yogurt
  • 1 tsp coarsely ground black pepper
  • 1 box frozen chopped spinach, thawed and squeezed dry
  • 1 8 oz. can marinated artichoke hearts, chopped

Instructions:

Pretzel dough:  Combine water, brown sugar and yeast in the bowl of a stand mixer and mix with the dough hook until combined. Let sit for 5 minutes.

Add melted butter, beer, salt, and flour to the mixture.  Mix on low speed until combined. Increase to medium speed and continue kneading until the dough is smooth and begins to pull away from the sides of the bowl, about 3 – 4 mins.  Remove dough from bowl and knead into a ball with your hands.

Coat a large bowl with oil, add dough and turn to coat with the oil. Cover with a clean towel and place in a warm spot until the dough doubles in size.

In the meantime, make the filling:  Fry bacon until crispy.  Remove with a slotted spoon and drain on paper towels.  In the same skillet, melt  butter, add garlic, and cook for a couple of minutes. Whisk in flour until it makes a paste. Cook over medium-low heat for 1-2 mins, then pour in milk. Stir and cook 1 more minute.

Add cream cheese, mozzarella, Parmesan and black pepper. Stir until cheeses are melted. Stir in yogurt until smooth. Add chopped artichokes, spinach, and bacon, and stir to combine.

Preheat the oven to 425 degrees F. Bring a large pot of water to a boil.

When pretzel dough has doubled, punch down and divide into 8 equal balls.  Roll each out into a 11×3 inch rectangle.  Spread about 2 Tbsp dip filling along the length of each piece. Roll the dough up into a log, enclosing the filling inside. Pinch the seams together and then very gently roll the dough with your hands to form an even cylinder and fully enclose the filling.  Form into a pretzel shape, and press to seal.

Slowly add the baking soda to the boiling water. Boil the pretzels in the water solution, 2 at a time for 1 minute, splashing the tops with the warmed water using a spoon. Remove with a large flat slotted spatula.

Place pretzels on baking sheet about 2 inches apart.  Brush tops with beaten egg and season liberally with sea salt.

Bake for 15 to 18 minutes or until pretzels are golden brown.

Remove pretzels from oven and let cool five minutes.

If made ahead, you can reheat the pretzels at 350 degrees F. for 15 minutes or until warm.  (But they are BEST fresh out of the oven!)

Cheers & Hugs,
Jodi

Roasted Cabbage Slices with Garlic

roasted cabbage

O. M. G. I am becoming obsessed with roasting vegetables!  And this one is another winner!

Cabbage has NEVER tasted better!  Nor has it ever been easier!

roasted cabbage before

I’ve seen a variety of versions of this recipe floating around, but when I saw this simple version with roasted garlic that you smear on top of the cabbage slices after roasting, I had to try.  And it so delivered!

How can something so stinking simple end up tasting so luscious?  It is truly magical… and so wonderful to eat food in its purist state with just a little olive oil, salt, pepper and garlic that tastes like this.

roasted cabbage before 1

You can use green or purple cabbage.  Slice it, drizzle it generously with pure olive oil, and sprinkle it generously with coarse sea salt and fresh cracked black pepper.  Add a few cloves of peeled garlic drizzled with olive oil to roast along side.  Throw it in a 425 degree F oven for about 30 minutes, and get ready to rumble!

roasted cabbage after

This is a great accompaniment to most any meal.  SO DELISH!  I’ll bet this would make a cabbage loving fan out of ANYone!

Try it TODAY!

Roasted Cabbage with Garlic

Ingredients:
1 head cabbageroasted cabbage after
6 large cloves garlic
Olive Oil
Salt and Pepper

Directions:
Preheat oven to 425 degrees F.
Carefully slice cabbage into 6 thick slices, and lay on a shallow baking stone or baking dish.
Drizzle both sides of each slice with olive oil.
Generously sprinkle coarsely ground sea salt and freshly ground cracked pepper on top of each slice.
Peel garlic cloves and add to dish. Drizzle with olive oil.
Roast for approximately 30 minutes.
When done, smash garlic cloves and spread one on top of each cabbage slice.

ENJOY!

jodimckinney @lifeinbetween.me

Can’t wait to hear if you try it and like it!

Cheers & Hugs,
Jodi

Chocolate Pretzel Shamrock Pops

Chocolate Pretzel Shamrock Pops

It will soon be St. Patrick’s Day, and I couldn’t let it pass without making a fun treat.  These Chocolate Pretzel Shamrock Pops are about as easy and cute as it comes.  I simply placed three mini pretzels and a cookie pop stick on a piece of parchment paper, spooned about a teaspoon of melted chocolate in the center, and placed a green Mint Dark Chocolate M&M in the center.  Let it cool/dry for about 5-10 minutes, and voila – a fun St. Patrick’s day treat.

Chocolate Pretzel Shamrock Pops. 2jpg

I originally saw a photo of what I thought was the same thing here created by Amy @ MomAdvice. (Amy has an awesome blog, Pinterest boards, and Instagram BTW!)  But then I realized, after actually going back to find the post to give credit, that Amy actually used Rolo candies in the center of hers!  How yummy does that sound?!  SCORE!  And it would have been even EASIER!

I should have read it first, but these became my version, and they are yummy and festive!

Chocolate Pretzel Shamrock Pop

When I ran out of sticks, and knowing my daughter-in-law was coming over and how much she loves white chocolate, I made a small batch of pretzels without a stick, but with a dot of white chocolate and an M&M.

white chocolate pretzel M&M st patricks day

Here’s my recipe (if you can even call this a recipe!) for this simple, festive treat:

Chocolate Pretzel Shamrock Pops

Ingredients:
1 Bag Mini Pretzel TwistsChocolate Pretzel Shamrock Pops
1 Bag Mint Dark Chocolate M&M’s (you could also just use green plan M&Ms or any other favorite flavor)
6-8 oz. Melting Chocolate (whatever is your favorite)
20 Cookie Pop Sticks
Parchment Paper

Directions:
Lay down 3 pretzels in the shape of a shamrock and cookie pop stick on parchment paper.
Repeat with as many as you have.
Melt chocolate in small bowl in microwave for 1 minute at 50% power, stir. Continue at 30 second intervals until completely melted.
Using a teaspoon, place a spoonful of chocolate in the center of the pretzel “shamrock.”
Push together gently if it pushes apart when you spoon the chocolate on top.
Place an M&M in the center.
Let cool/dry for 5-10 minutes.
ENJOY!  (And P.S. – you will have plenty of leftover M&M’s and pretzels to munch on too!)

jodi mckinney @lifeinbetween.me

Wishing you the luck of the Irish this week!

Cheers & Hugs,
Jodi

Roasted Caramelized Garlic Carrots

roasted carrots after

Are you often looking for new ways to prepare and serve veggies?  I’ve got another delicious, nutritious orange food for you today.  This time in the form of beautiful, fresh roasted, caramelized, garlicky carrots.  Nom Nom!  I find so many vegetables are best when roasted.  Flavor and nutrients are retained and the flavor is hard to beet.  (pun intended)

roasted carrots before

Lots of fresh garlic, thyme, parsley, olive oil, and balsamic vinegar sprinkled onto fresh young carrots creates a wonderful veggie to complement almost any meal.

roasted carrots plated

We had ours with an herb marinated pork tenderloin and tiny roasted golden Yukon potatoes.

Here is the recipe as I made it.  I was inspired by another great recipe Chungah posted on Damn Delicious.  Measurements are guesstimates.  Make it how you enjoy.  That is the true JOY of cooking.

Roasted Caramelized Garlic Carrots

Ingredients:
15 fresh new carrots with stems trimmed, no need to peel
4 cloves garlic, coarsely minced
1 Tbsp dried thyme or 2 Tbsp fresh thyme
1 Tbsp dried parsley or 2 Tbsp fresh parsley
1 tsp. coarse sea salt
1 Tbsp. coarse ground black pepper
Approximately 1/4 cup olive oil
Approximately 1/4 cup balsamic vinegar

Directions:
Preheat oven to 375 degrees F.
Wash carrots and lay in a single layer on a baking stone or baking dish.
Drizzle with olive oil.
Liberally sprinkle with garlic, thyme, parsley, salt and pepper to your taste and liking.
Drizzle all with balsamic vinegar.
Toss to coat.
Roast for 30-40 minutes – turning once or twice during cooking.

I daresay even kids will enjoy these carrots that turn out so sweet and delicious.  I found them almost addicting!

Enjoy!

Cheers & Hugs
Jodi

Best Ever Grilled Chicken Fajitas

chicken fajita

So I don’t know about you, but I make something with chicken at least once… often twice… and sometimes three times a week (if I can get away with it!).  I love how versatile chicken is, and I challenge myself to find a new recipe to try with chicken every week.

Chicken Fajitas are a family favorite, and I have made them a variety of ways throughout the years.  Yesterday, however, I created this FREAKIN’ FABULOUS version that is my absolute favorite to date!

lime cilantro marinade for chicken fajitas

I started with a fresh lime and cilantro marinade…

lime cilantro marinade for chicken fajitas 1

adding some spicy chili powder, cumin, and garlic salt.

chicken fajita 1

I put half the marinade on the chicken and half on the sliced veggies.

chicken fajita 2

After allowing everything to marinate most of the day, we grilled the chicken and veggies.

Wow!  The smell…  the taste…  So Dang DELISH!

chicken fajita

Add some fresh homemade guacamole, shredded cheddar cheese, fresh greens, and WOWSERS!  Best meal in a wrap!  Add a tossed green salad, and you have an amazing weeknight dinner.

Here’s my recipe.  You HAVE TO try this!  I swear it is the best chicken fajita I’ve EVER had.

Jodi's Best Ever Lime Cilantro Marinated Grilled Chicken Fajitas

  • Servings: Approx. 8 Fajitas
  • Print

Ingredients:

Marinade:
1 large ripe lime, juiced (approx 4 tsp juice)
1 cup chopped fresh cilantro
1 cup olive oil
2 tsp. chili powder
3 tsp. cumin
1 tsp. garlic salt (I use the kind with parsley in, but not necessary)

3 large chicken breasts, sliced into three thin slices each, to make 9 pieces.
1 large vidala onion, sliced
2 cups sliced sweet red, yellow, orange peppers
8 Large Flour Tortilla Wraps (wrapped in foil and placed on grill for a few minutes to warm)

Toppings:
Jodi’s Fresh Homemade Guacamole
1 cup shredded cheddar cheese
Mixed Fresh Greens (spinach, arugula, romaine)
Sour Cream (optional)

Directions:
Prepare marinade by whisking together all ingredients.
Pour half on chicken in a glass baking dish. Cover with saran wrap and refrigerate.
Pour other half on sliced onions and peppers in another glass baking dish.  Cover with saran wrap and refrigerate.
Marinade 4-8 hours.

When ready to prepare, grill chicken and veggies (we used a wire grill basket for the veggies).
When done, slice chicken into strips.
Assemble fajitas by spreading about a tablespoon of guacamole onto the warmed tortilla, top with chicken strips, grilled onion and pepper strips, cheddar cheese, and fresh greens.  Wrap and ENJOY!
Serve with a fresh salad, mexican rice, or refried beans.

You are going to love these!

Cheers & Hugs,
Jodi