Old-Fashioned Snickerdoodles

snickerdoodle 1

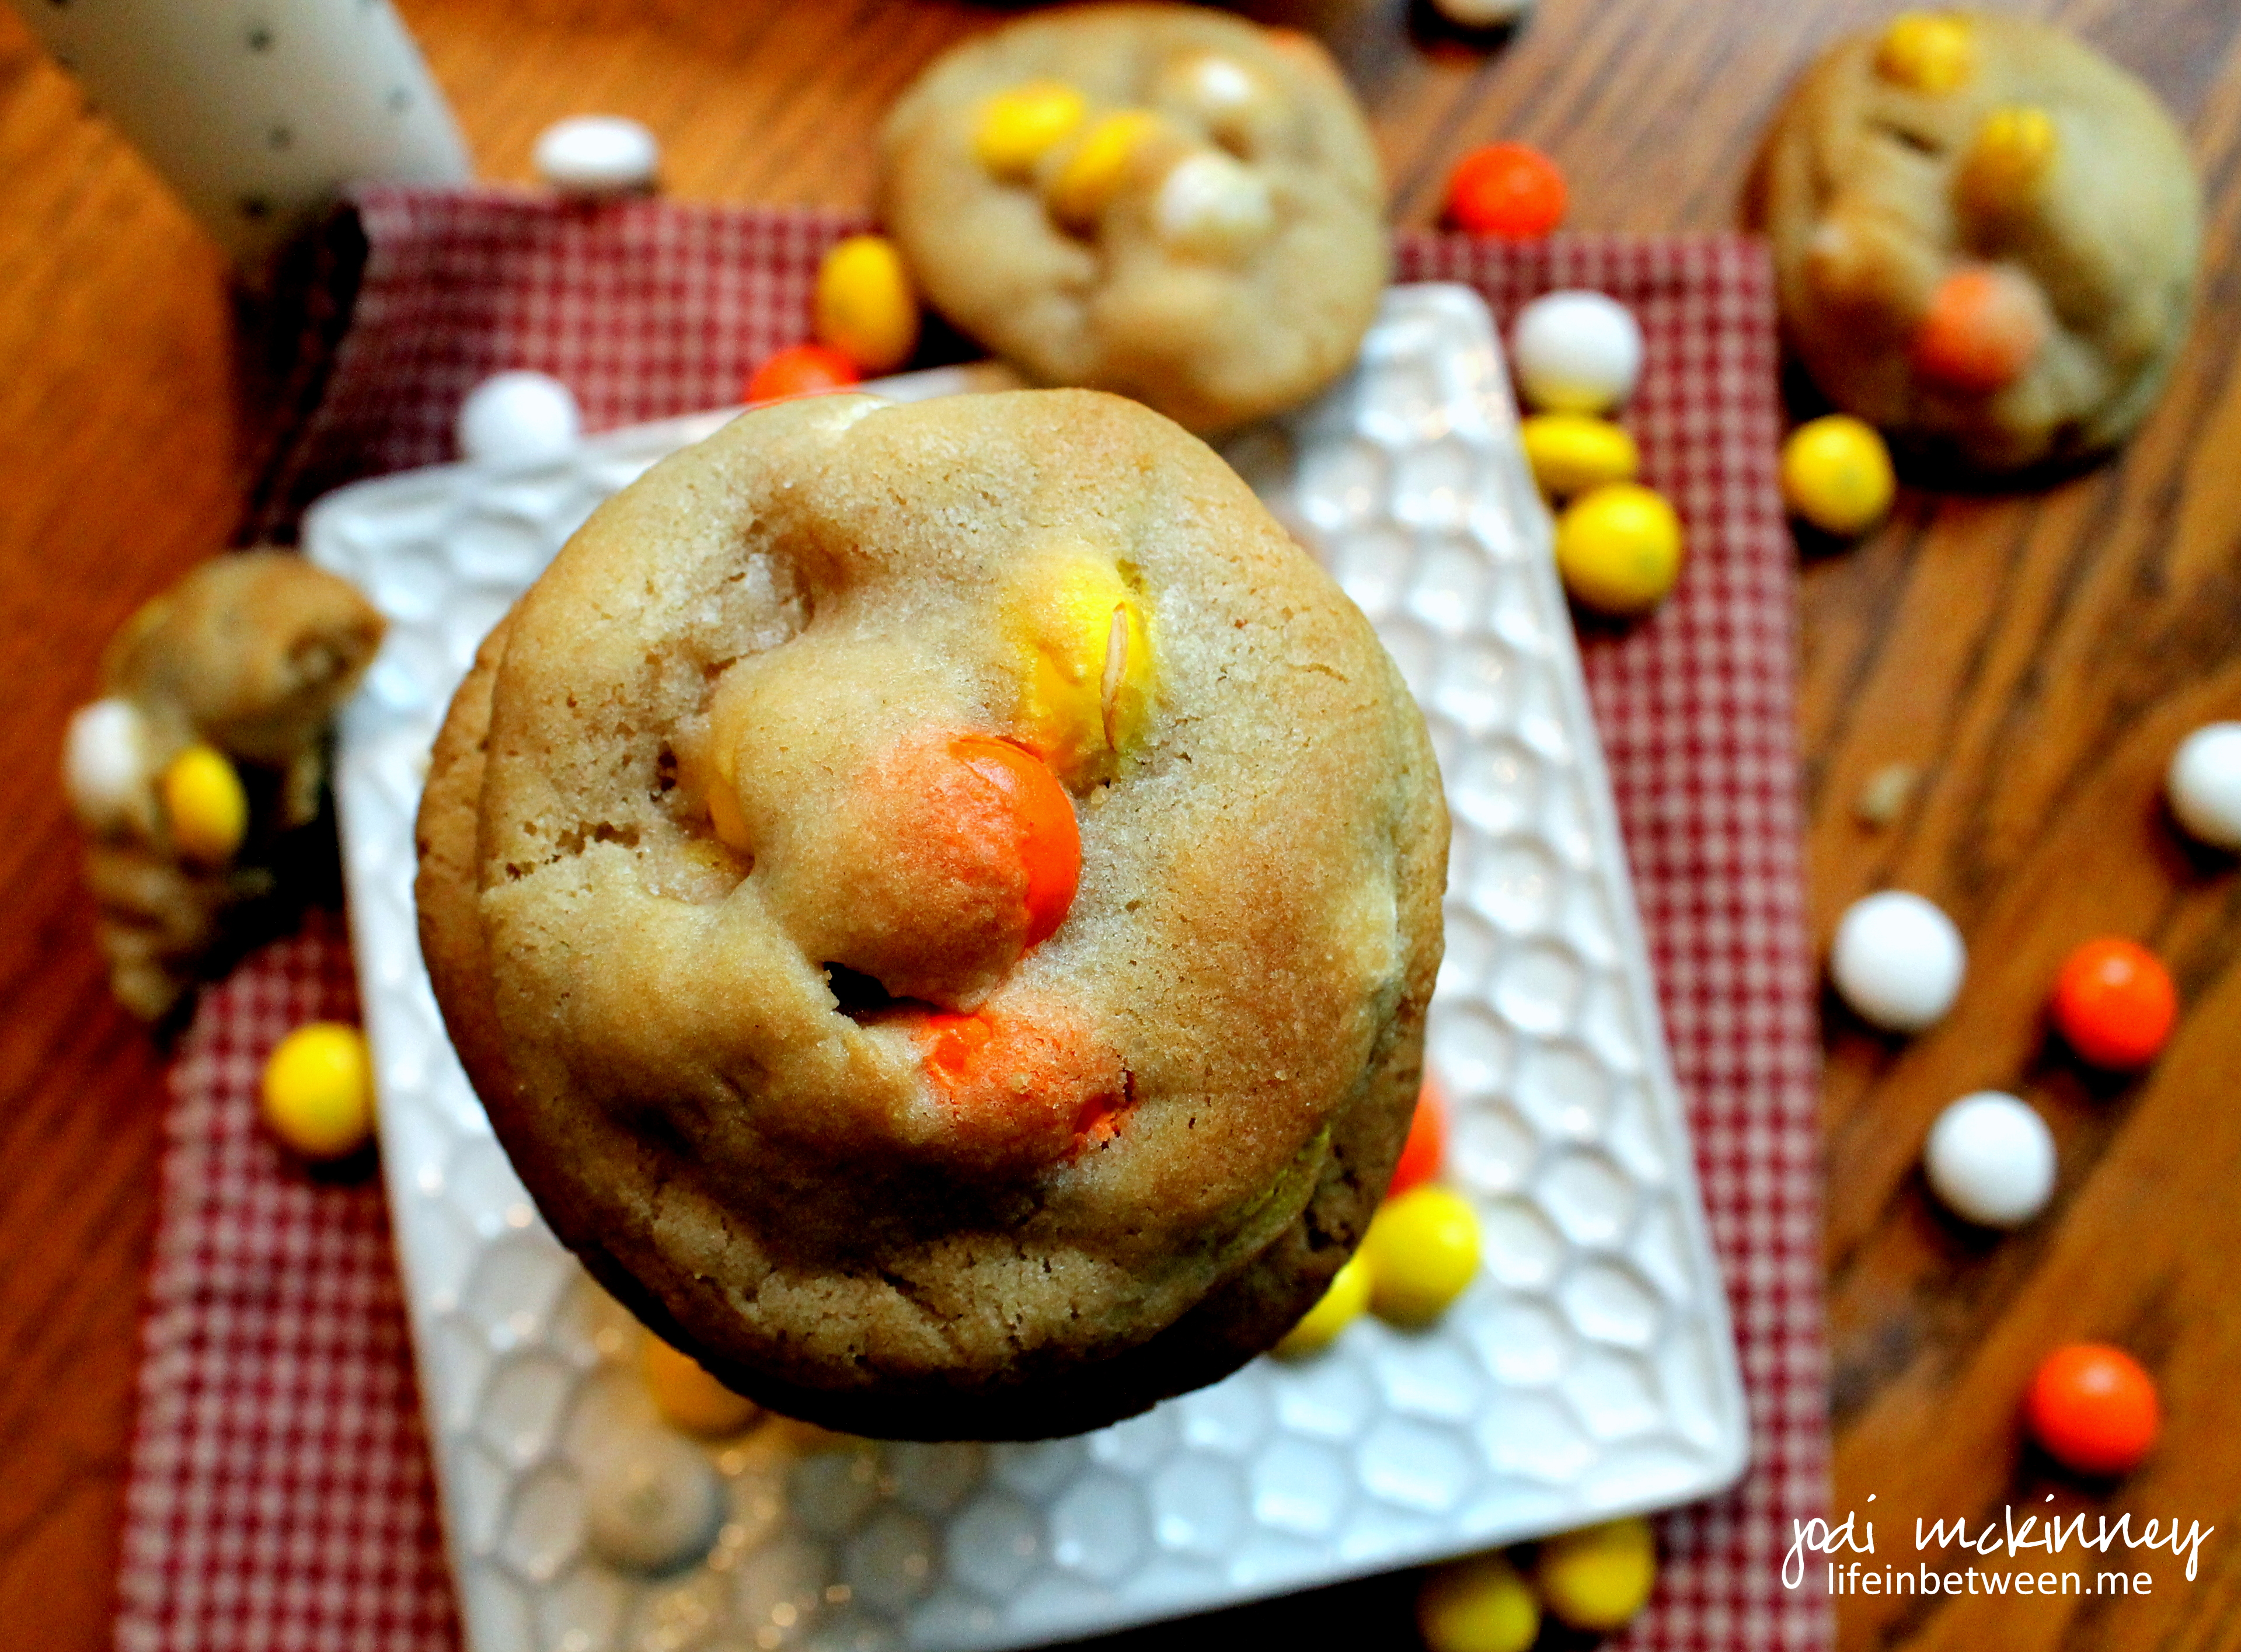
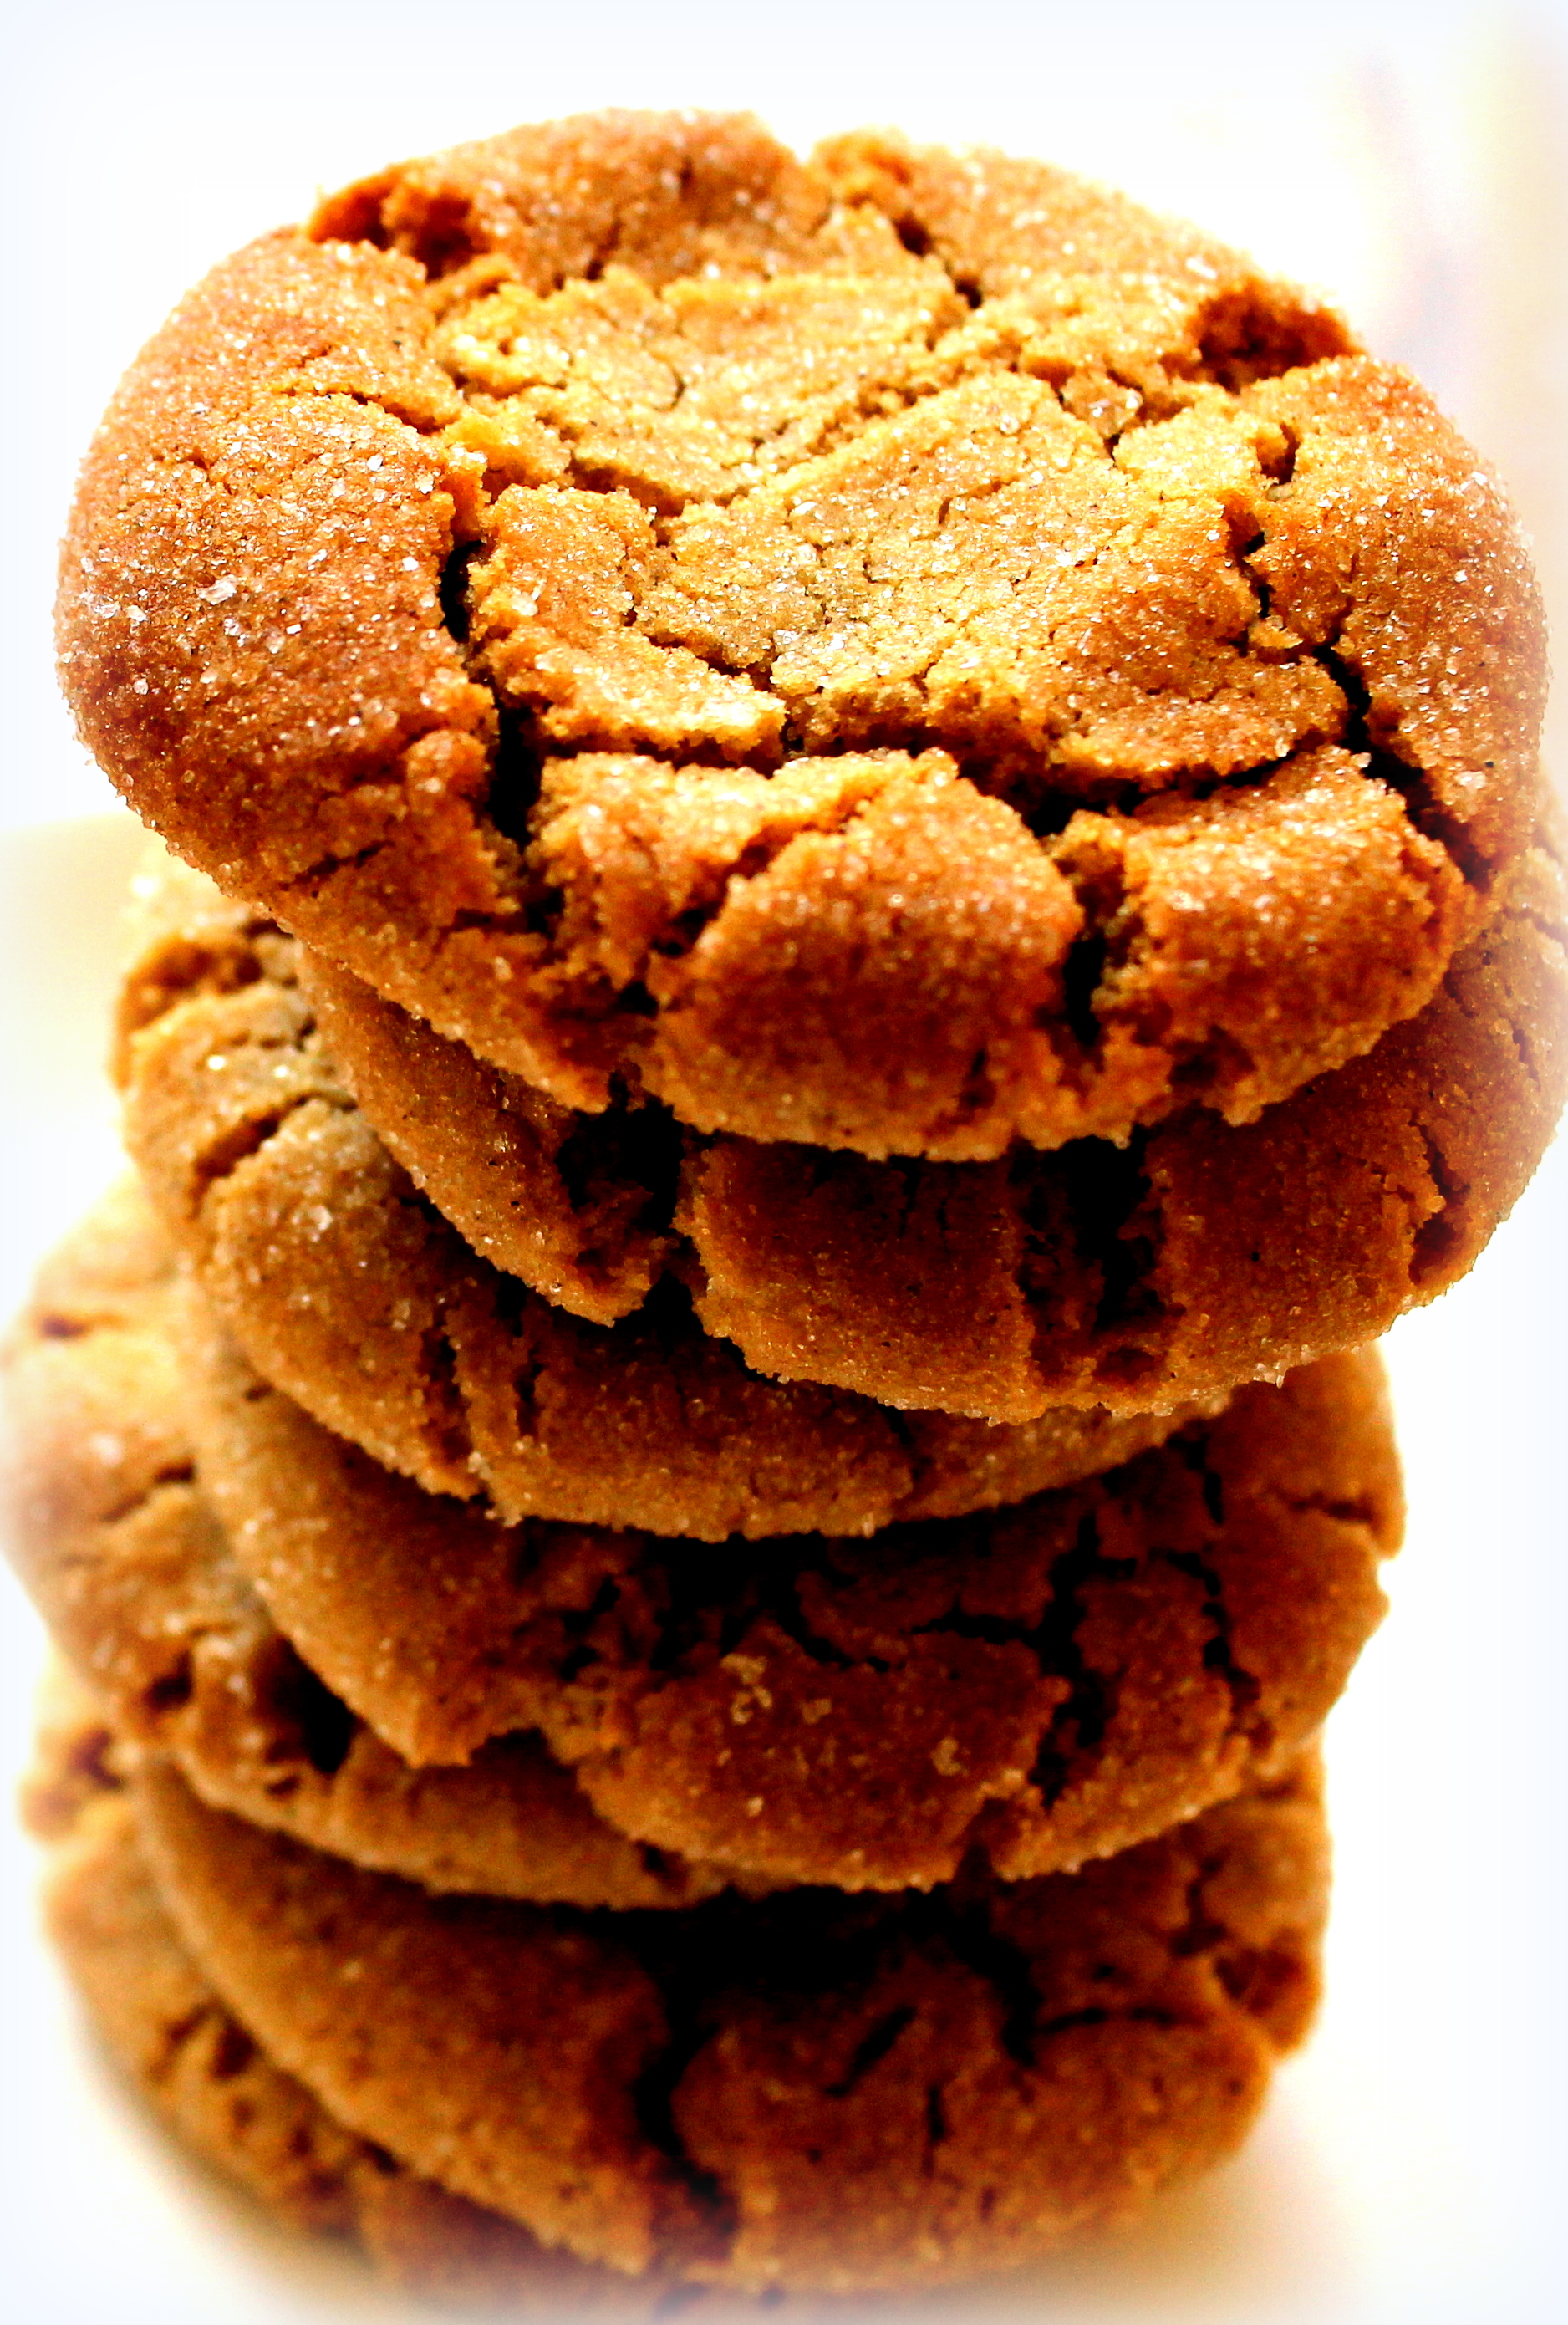
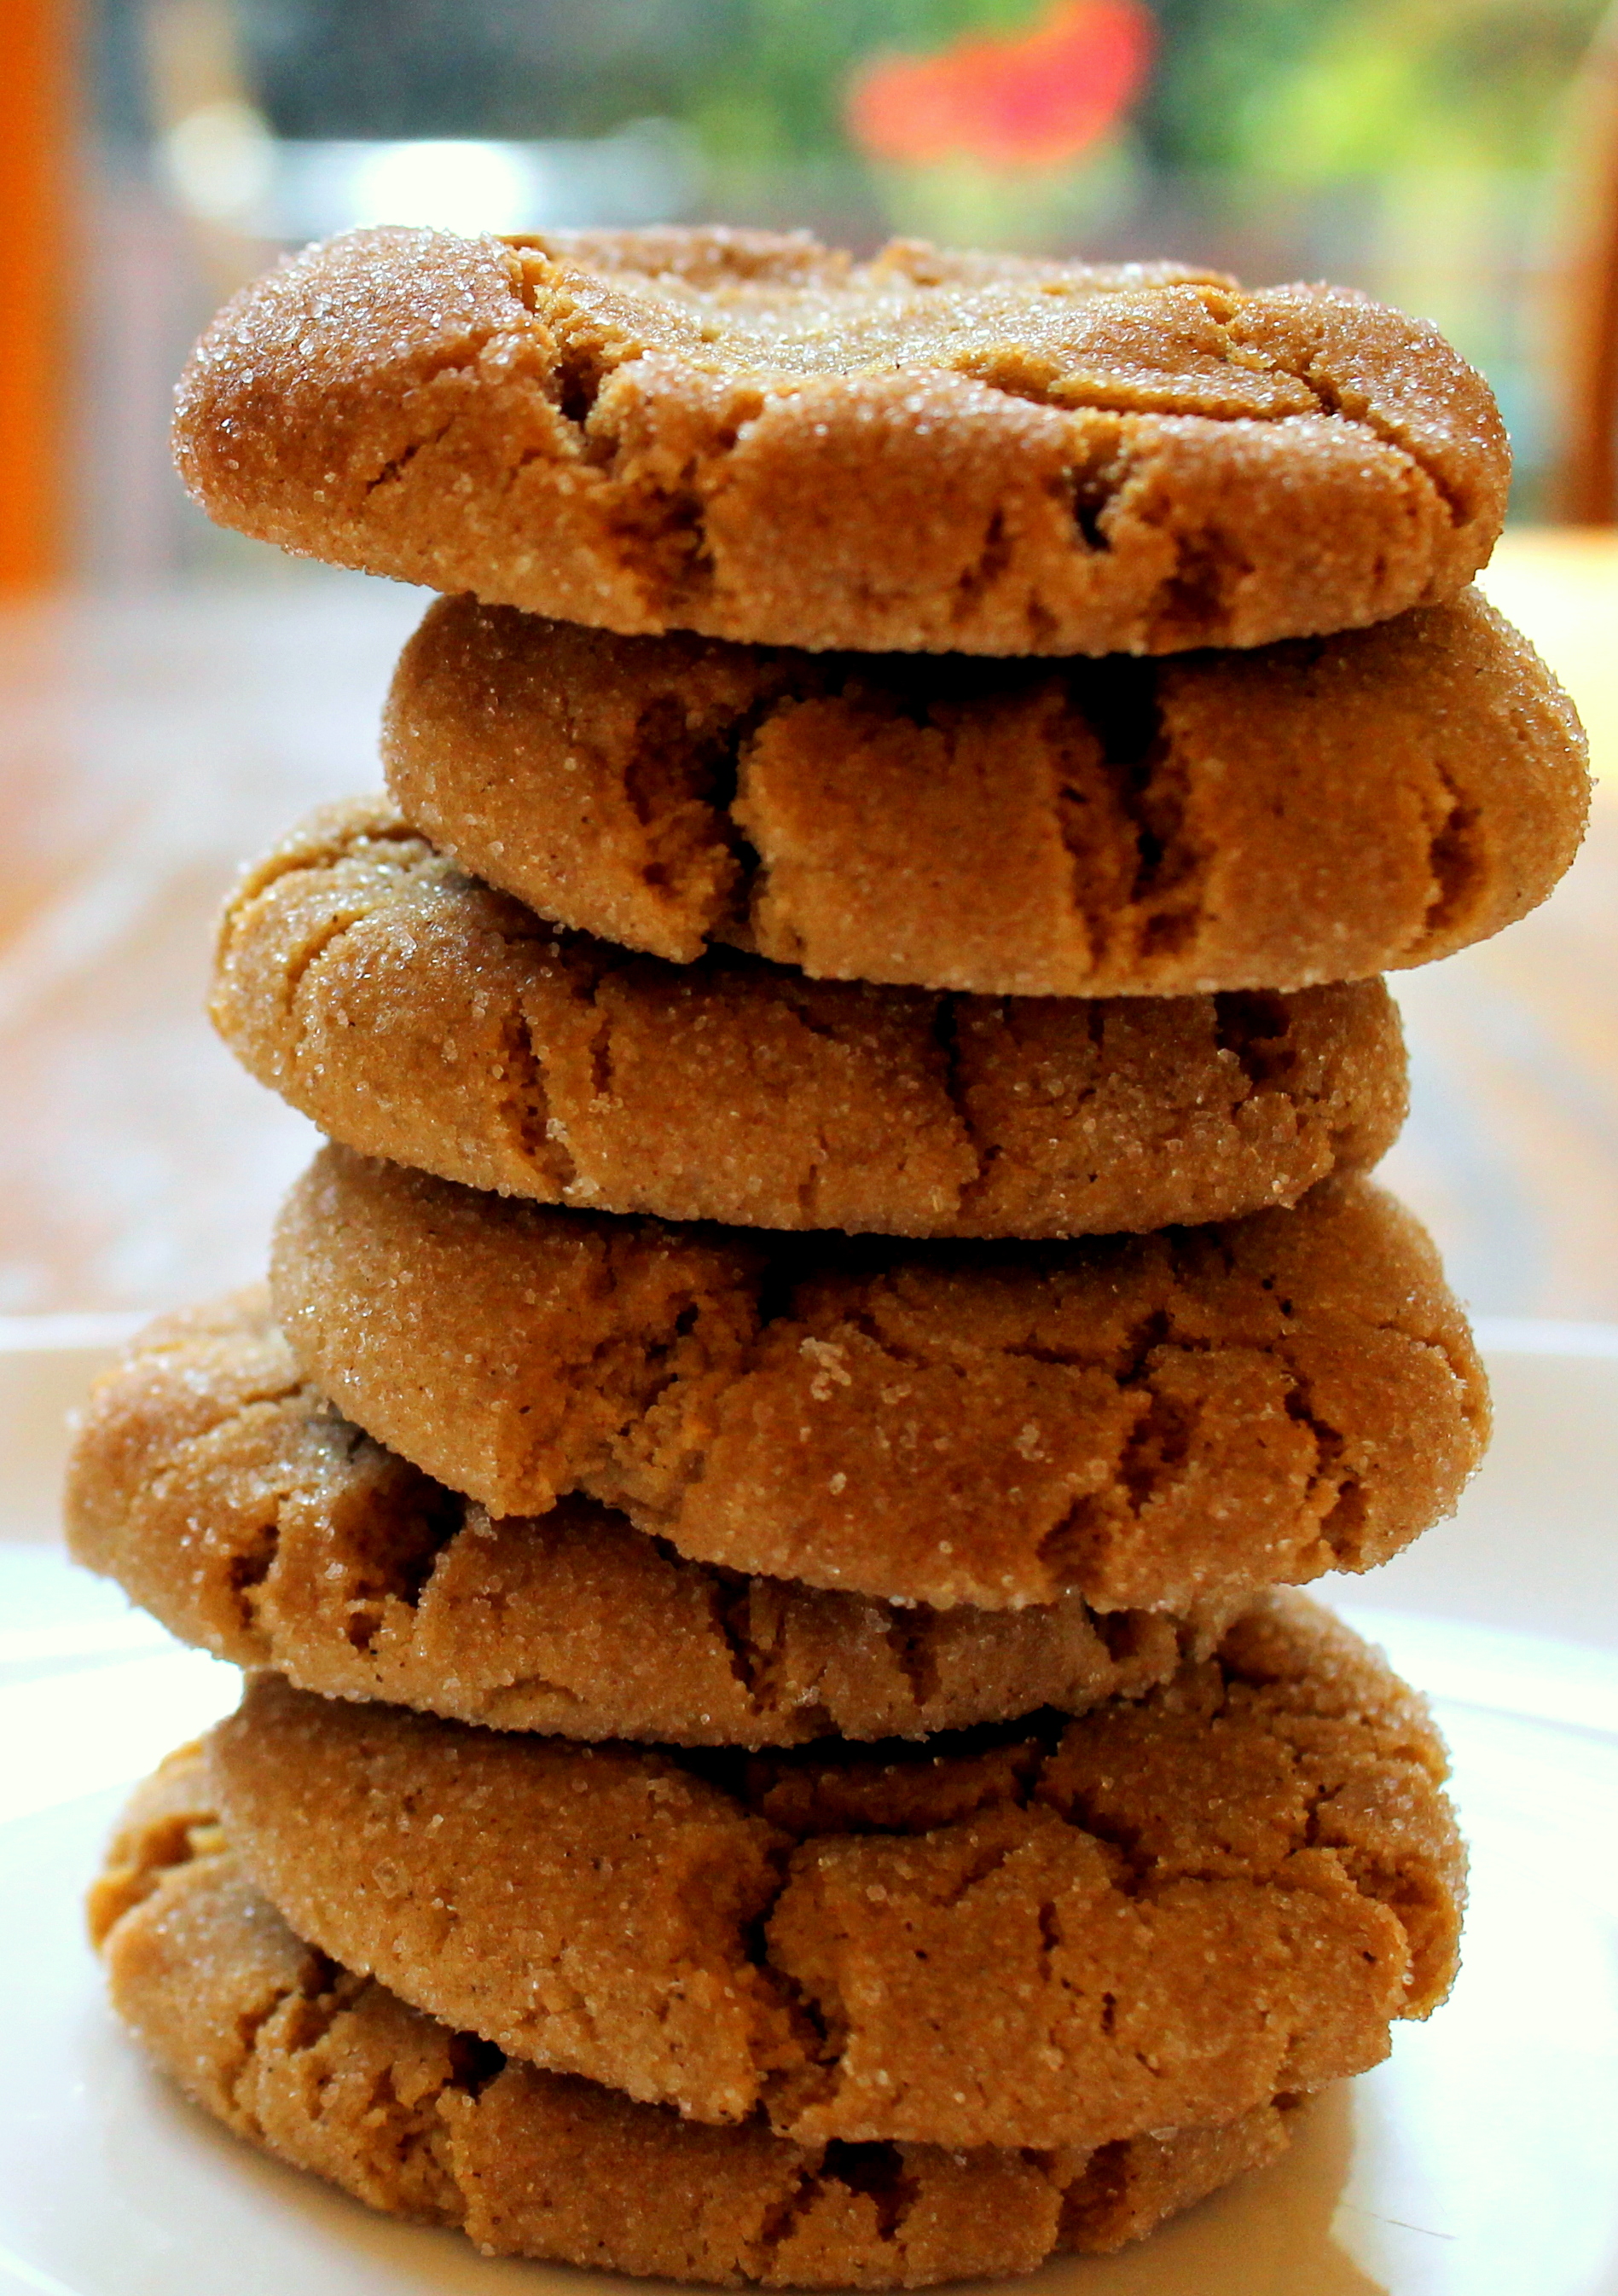
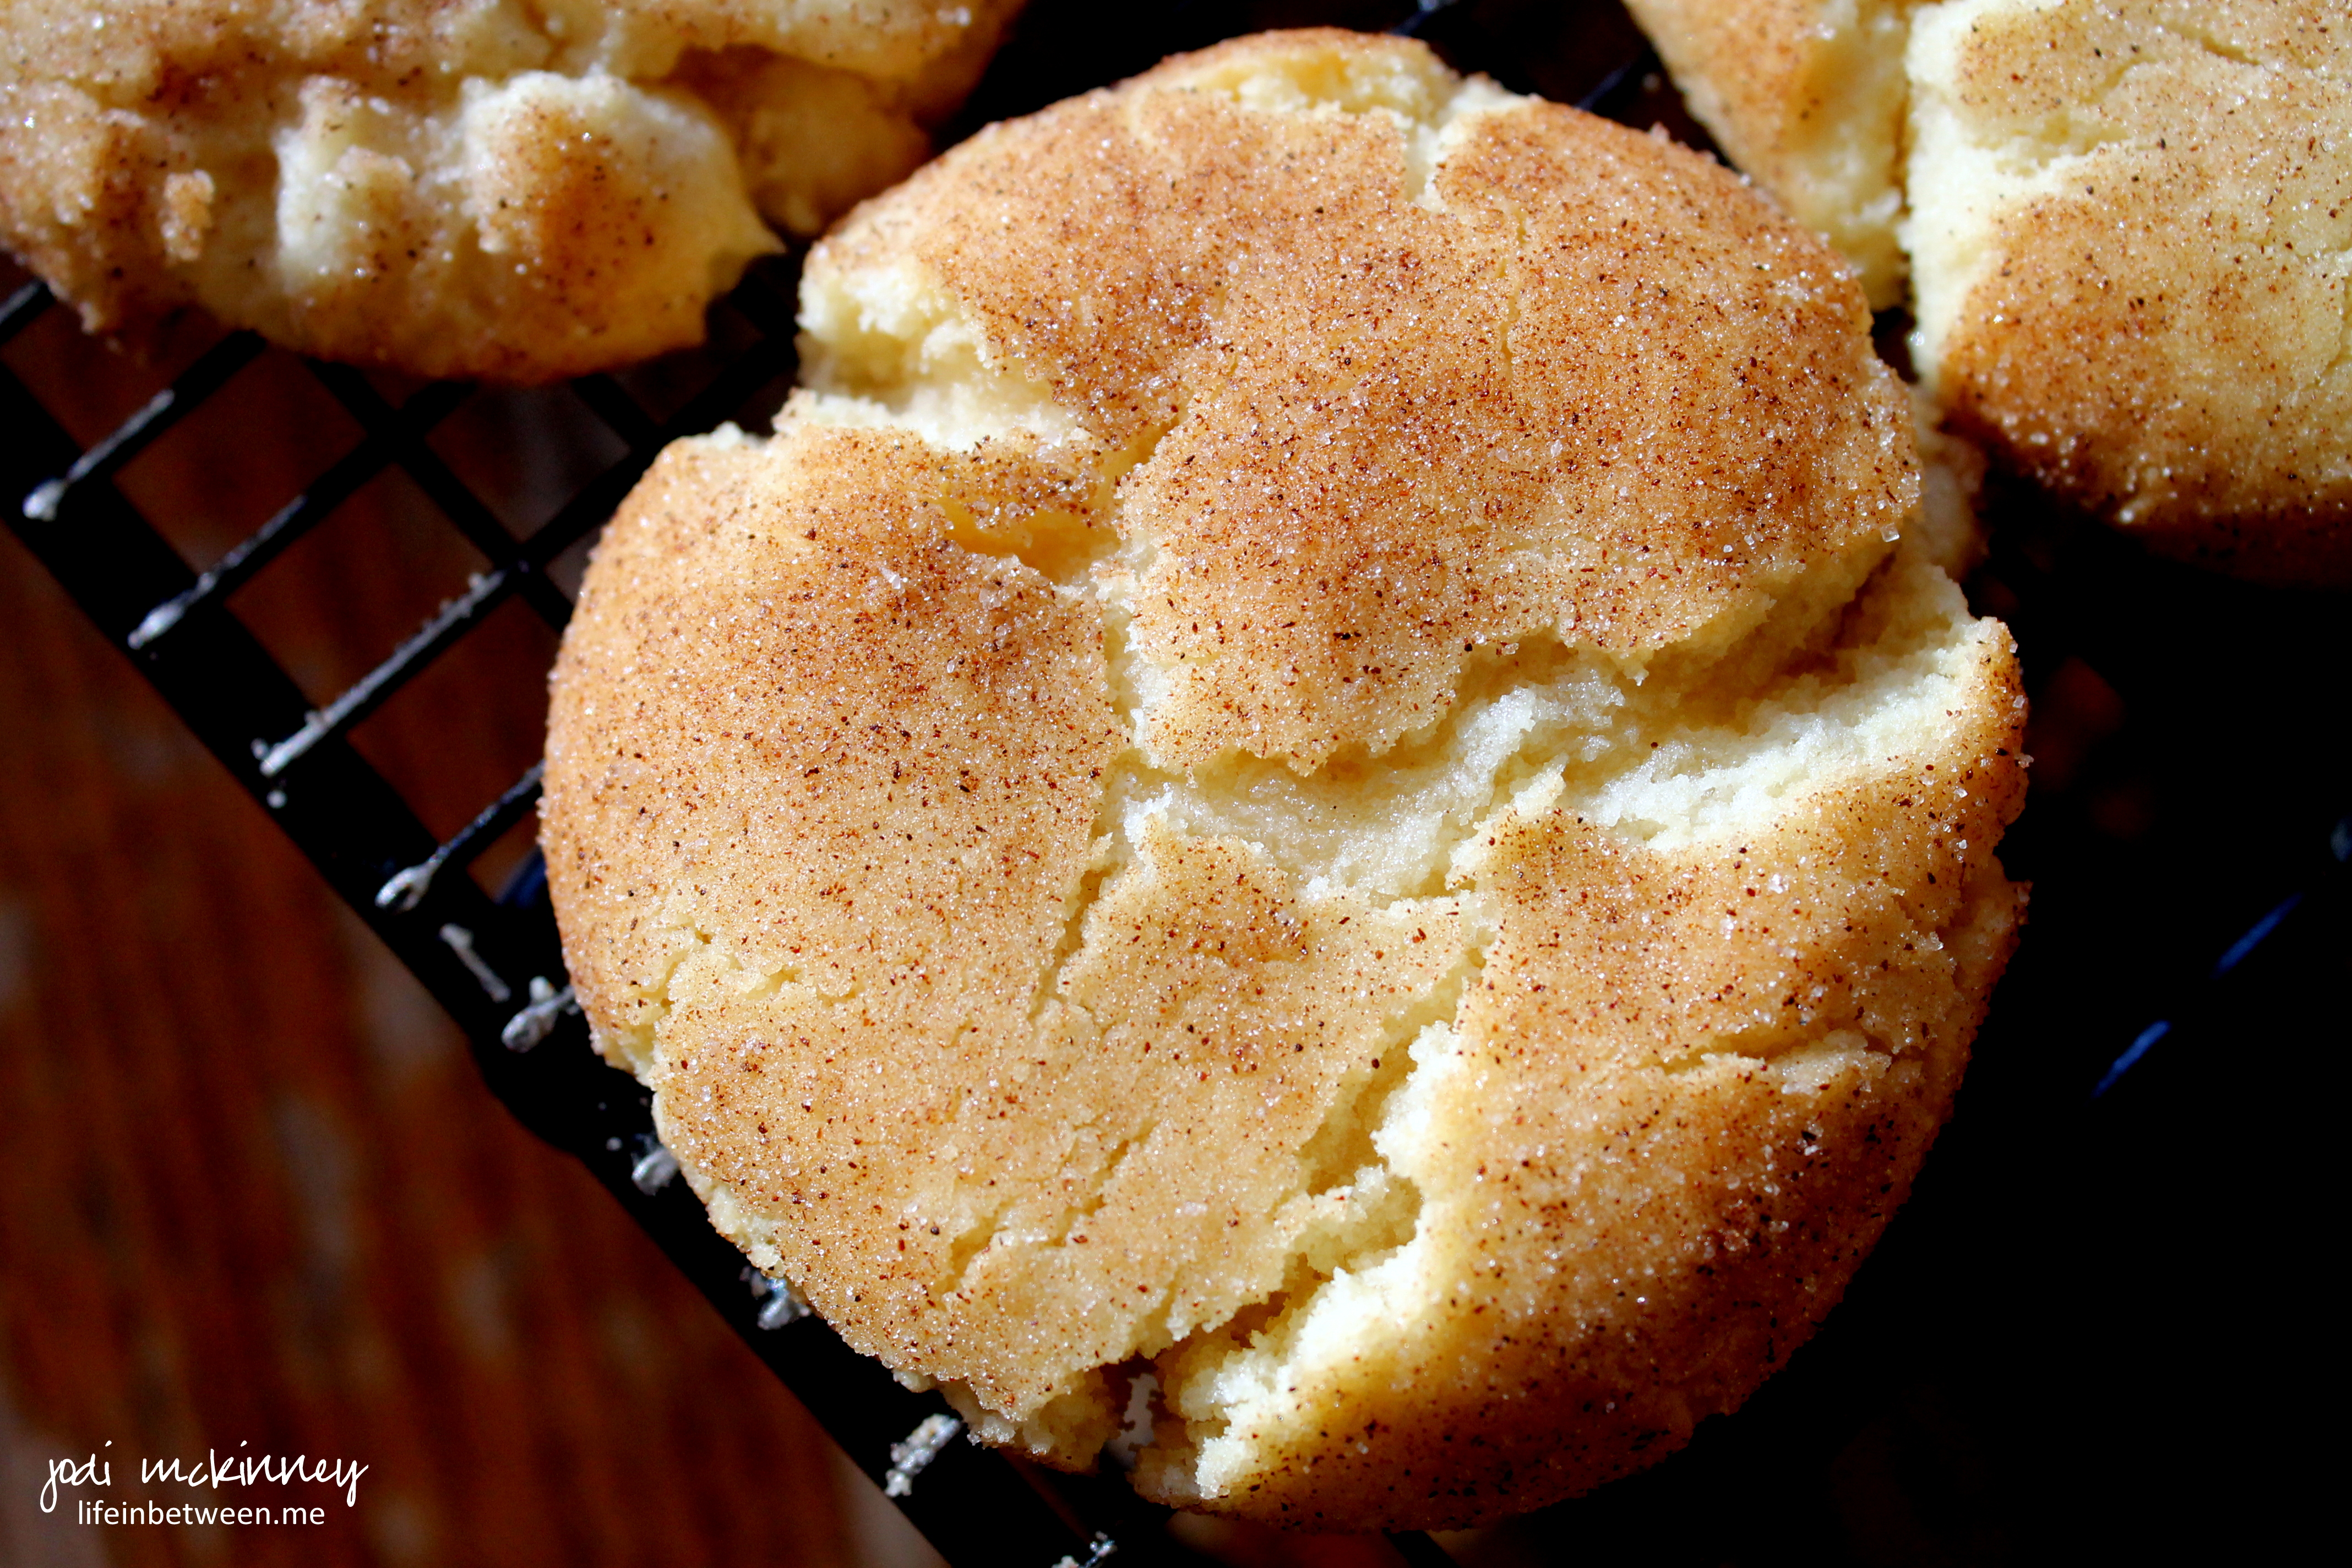
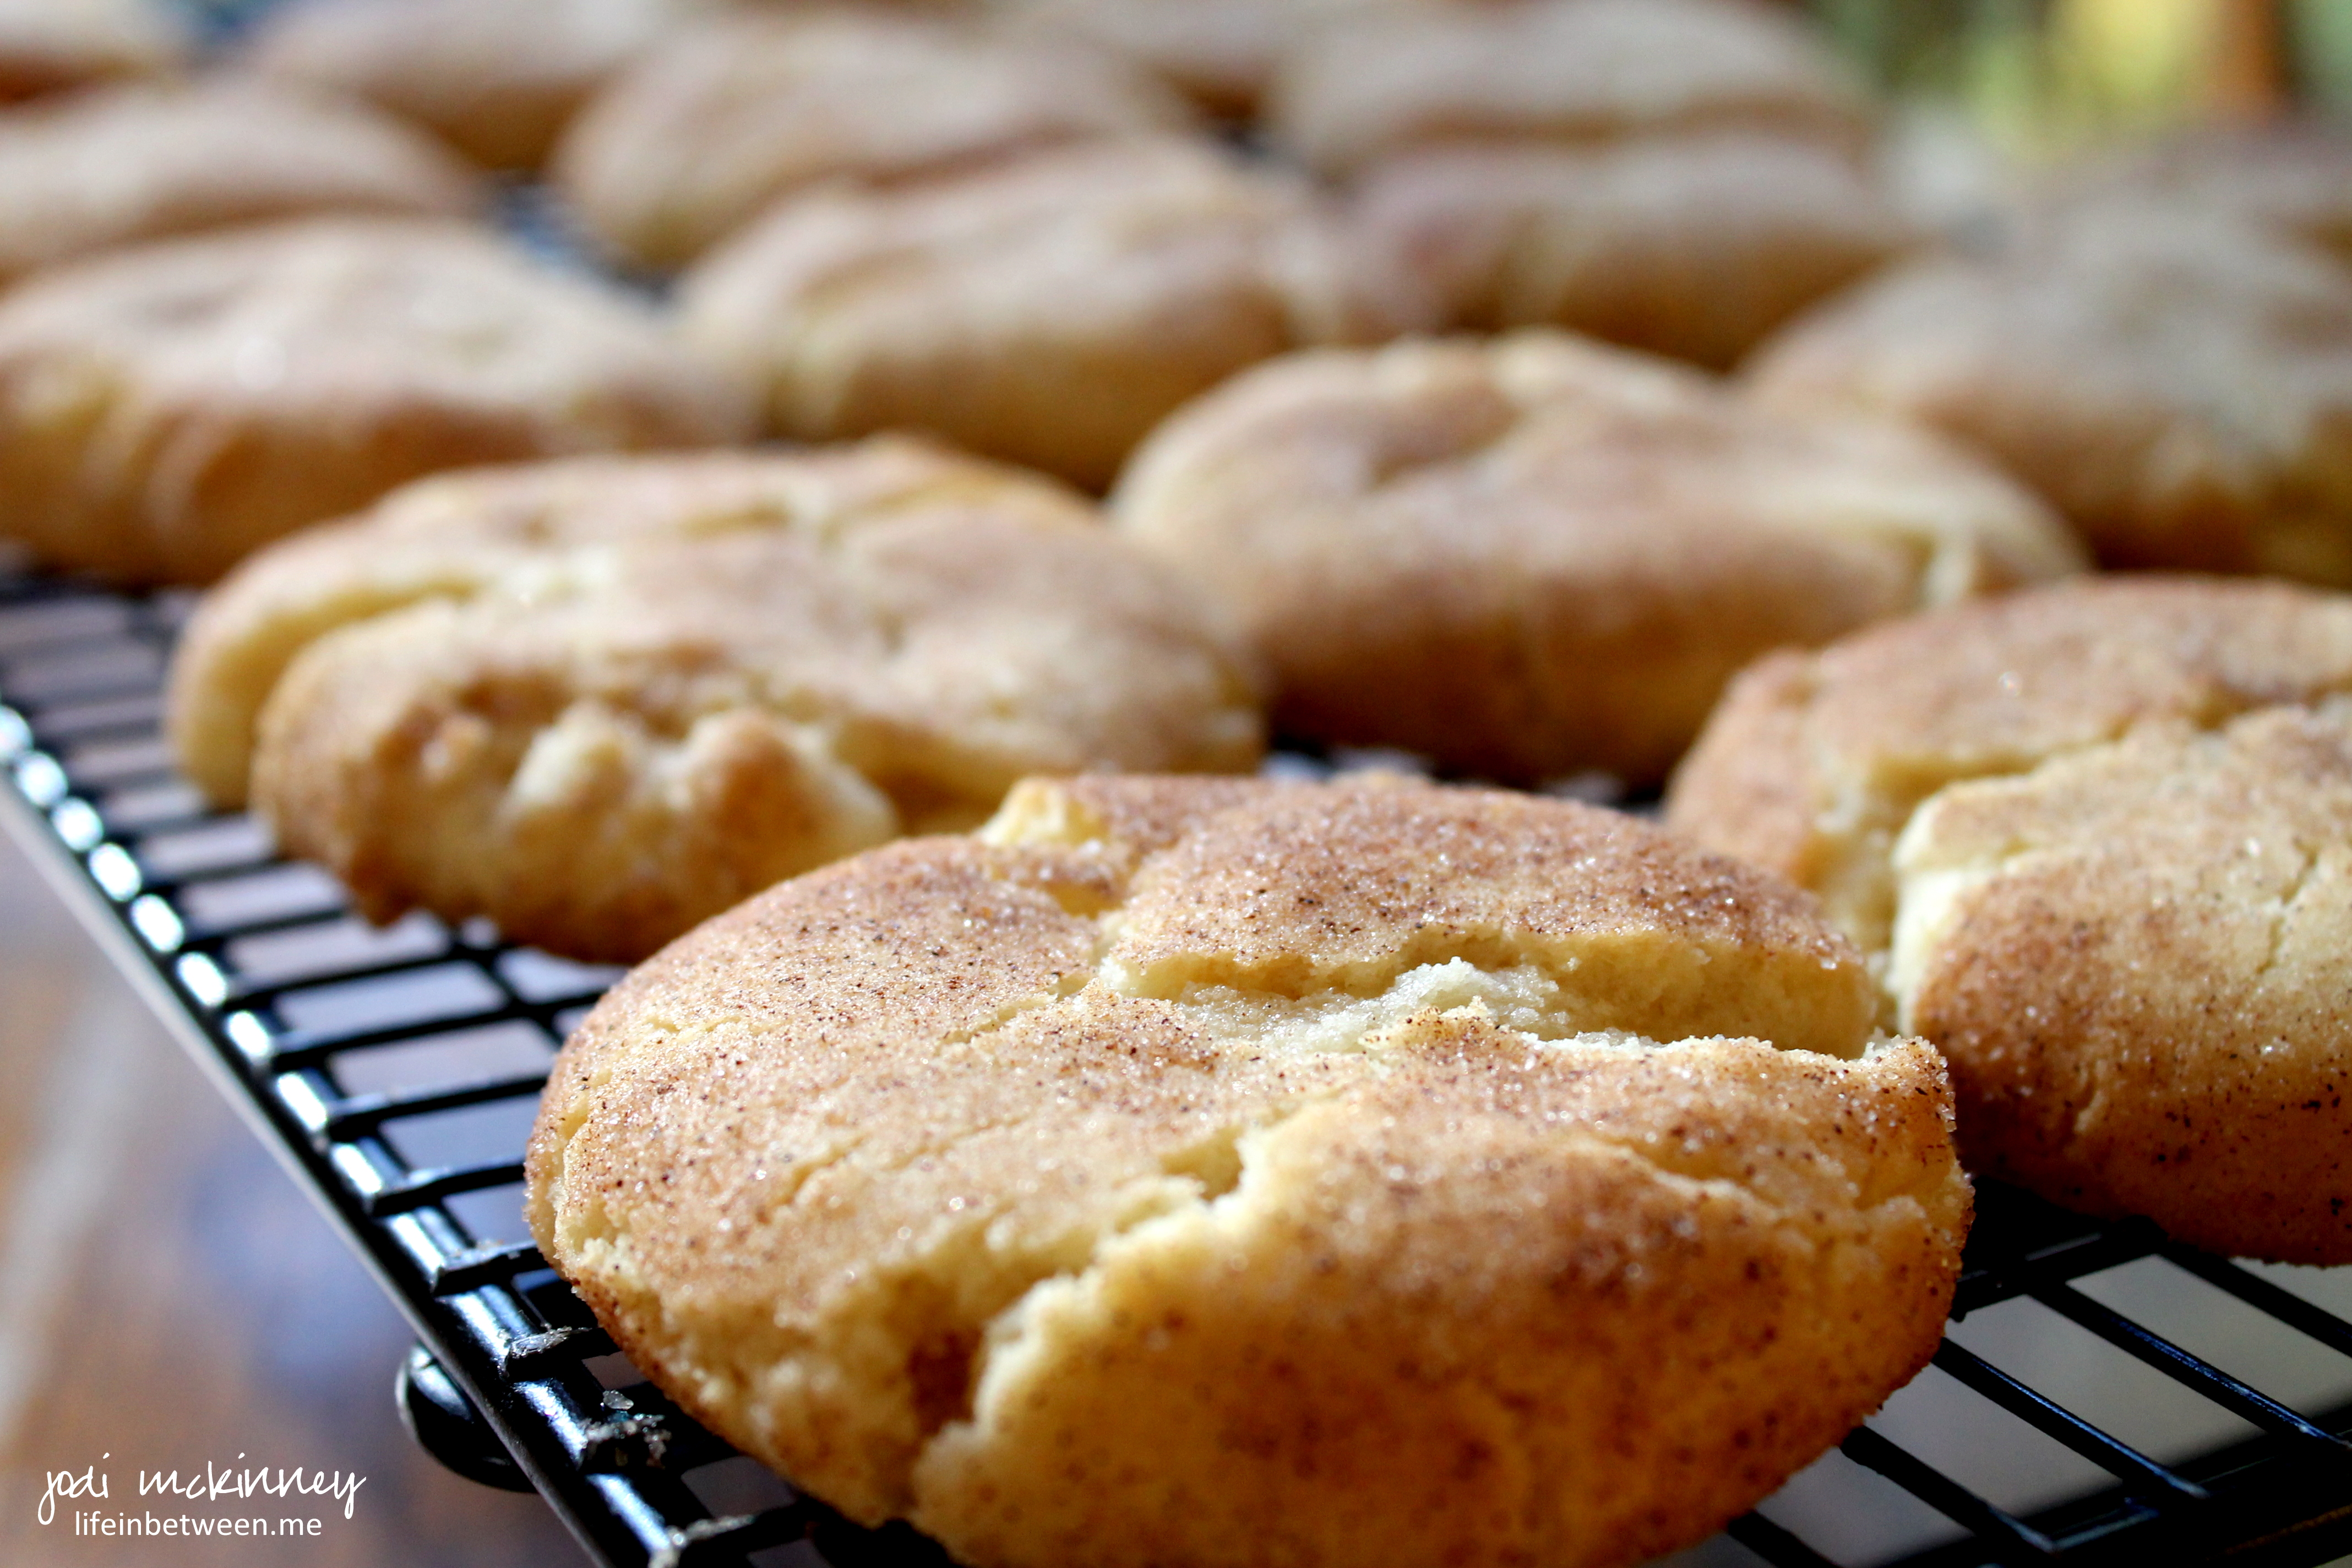
I made some Snickerdoodles this past weekend to take along to Krautfest.  They are such a simple, old-fashioned cookie, but one that folks seem to really love.

Every time I bake these, I think of my friend, Janet and her sweet mom.  Before them, I had never heard of Snickerdoodles.  I recall visiting one day, and their house smelled so cinnamony wonderful with these fresh-baked treats cooling on the kitchen table.  I can remember tasting my first one and loving it.  They are a bit crispy and crunchy on the outside and tender and chewy on the inside. Nobody in my family had ever baked these – not even Grandma, but they have become one of our family’s favorites.  I have passed this recipe on to my daughter-in-law, Colleen, who has begun making them too.

snickerdoodle 2

The nice thing about Snickerdoodles is you can make them in a pinch as you typically have everything you need on hand.  They can also be made pretty quickly, as this is one dough that really doesn’t need refrigerated before baking like I usually prefer to do.  I think because shortening makes for a firmer dough – but if there is someone out there that knows more about this than me, I hope you will offer your feedback.

snickerdoodle 3

Snickerdoodles

1 ½ cups sugar
½ cup butter, soft
½ cup butter Crisco shortening
2 eggs
3 cups flour
2 tsp cream of tartar
1 tsp baking soda
¼ tsp salt
¼ cup sugar
2 tsp cinnamon

  1. Heat oven to 400ºF.
  2. Mix 1 1/2 cups sugar, the butter, shortening and eggs in large bowl. Stir in flour, cream of tartar, baking soda and salt.
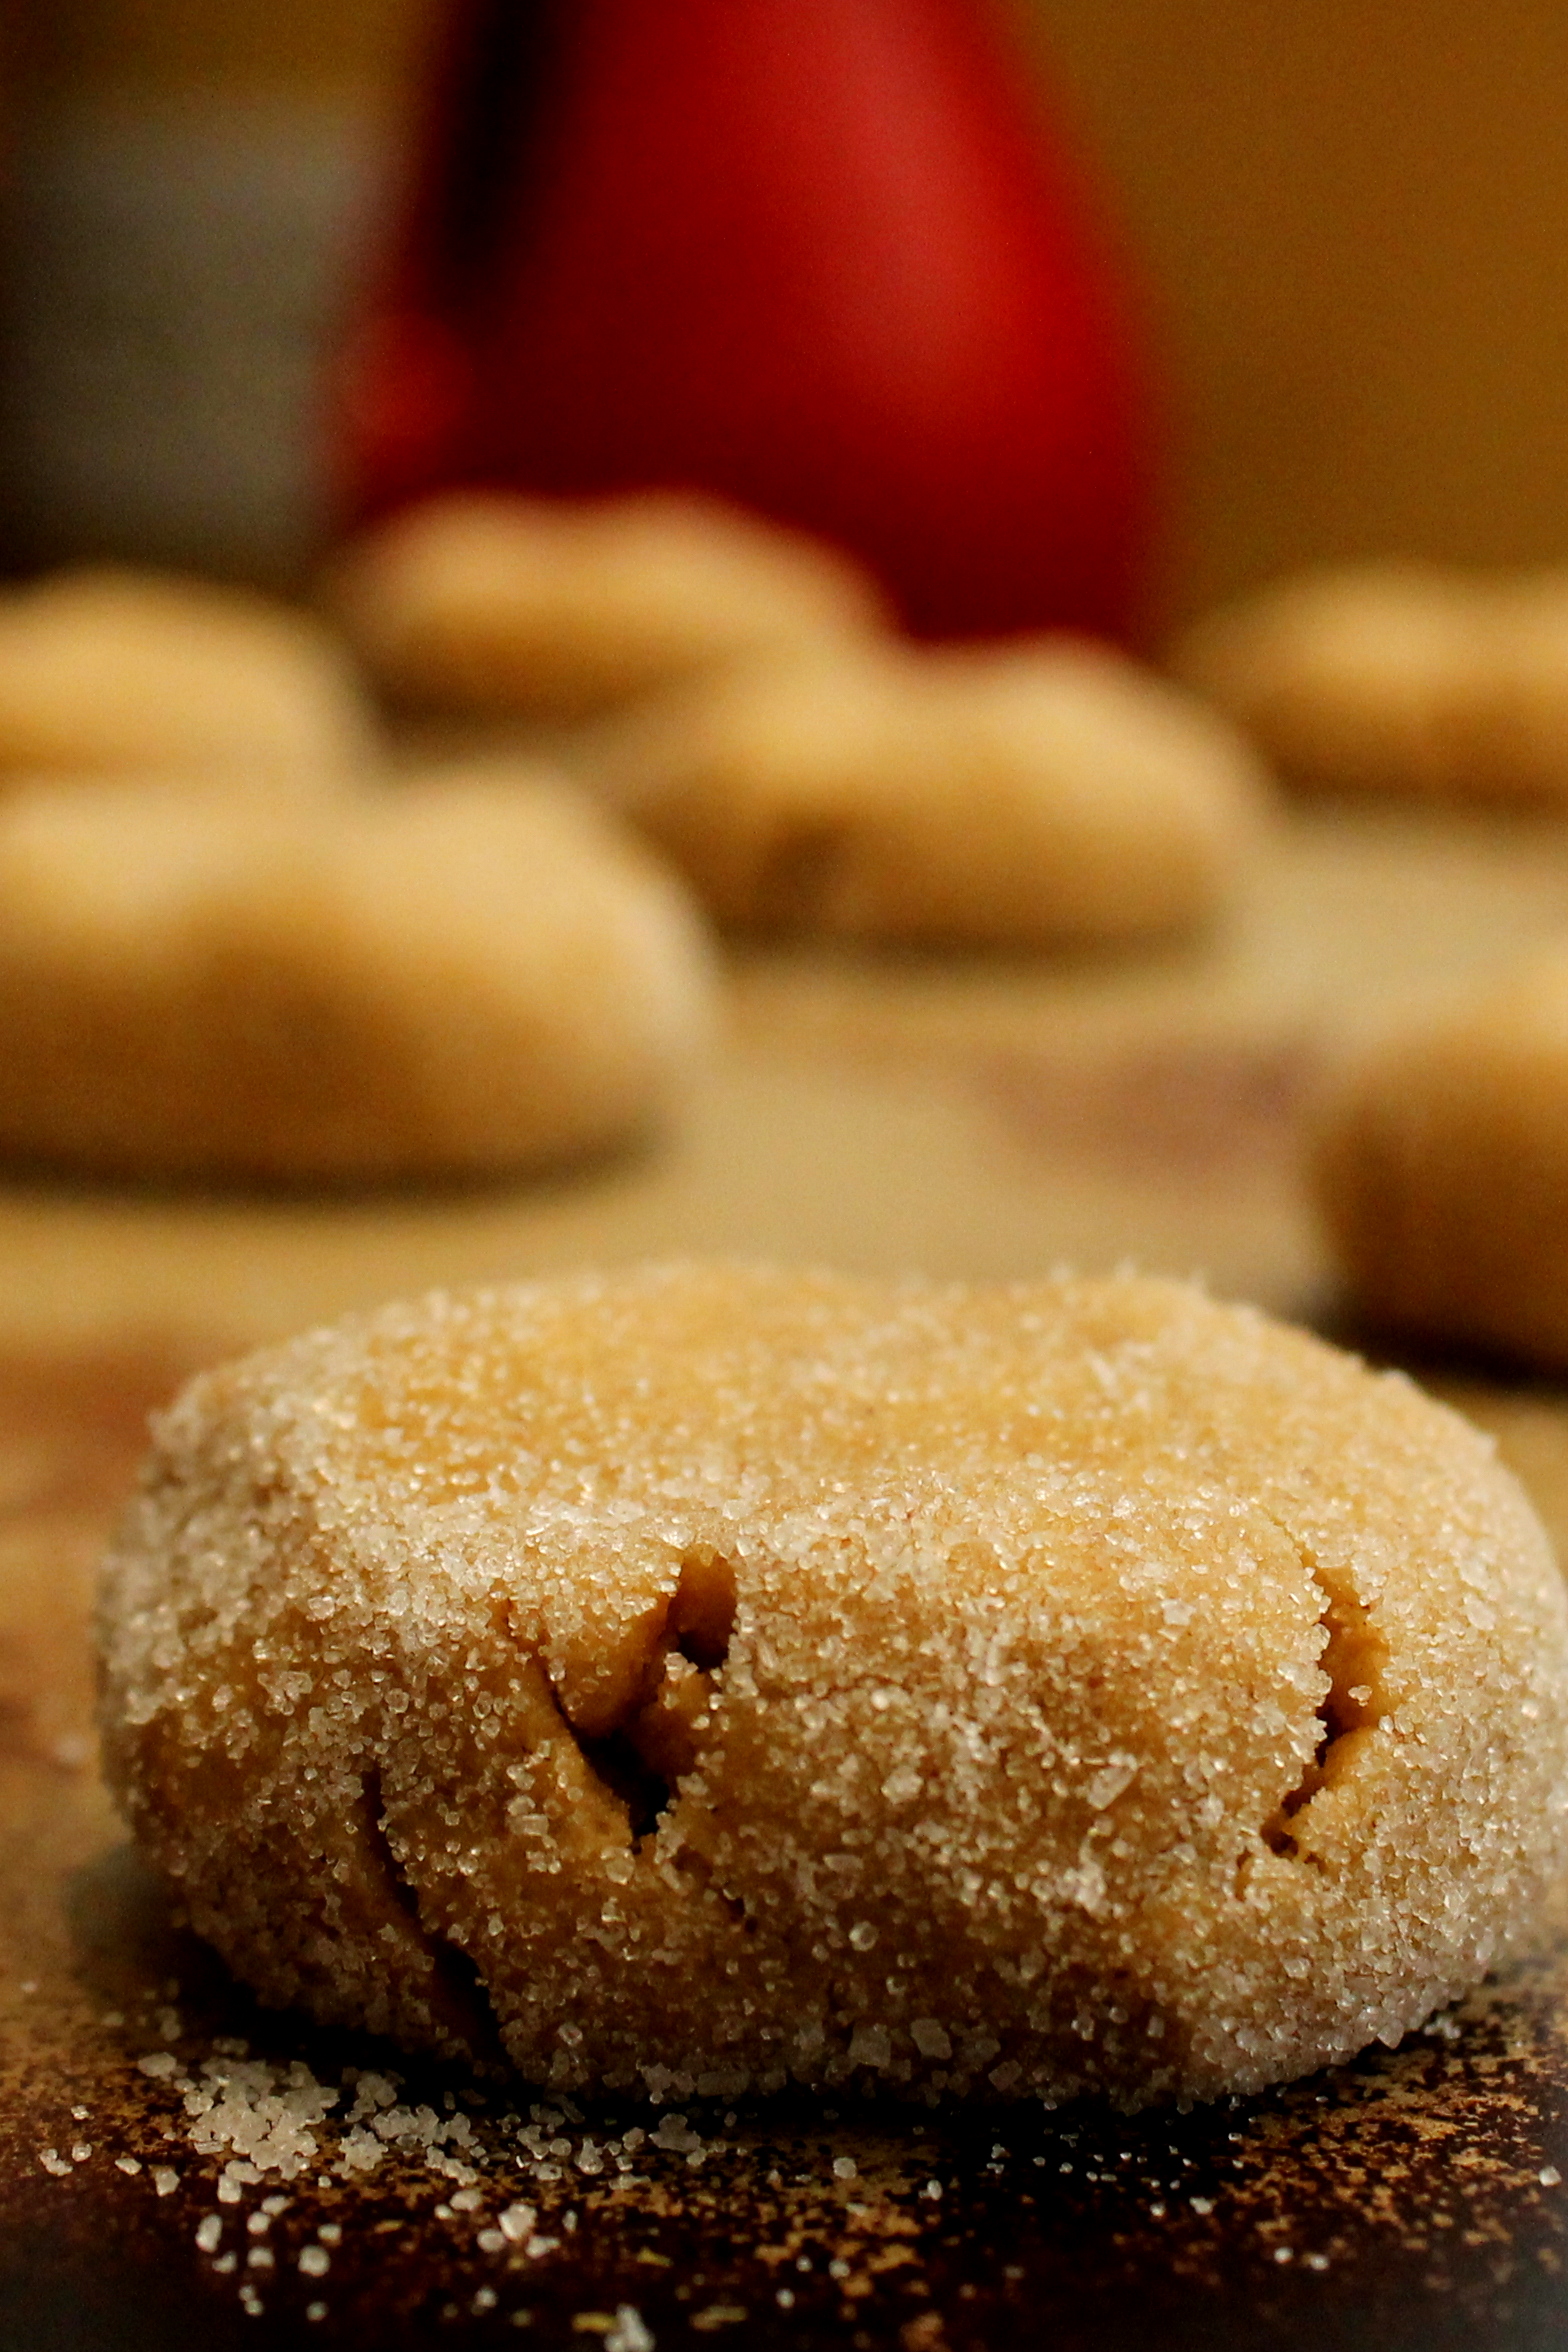
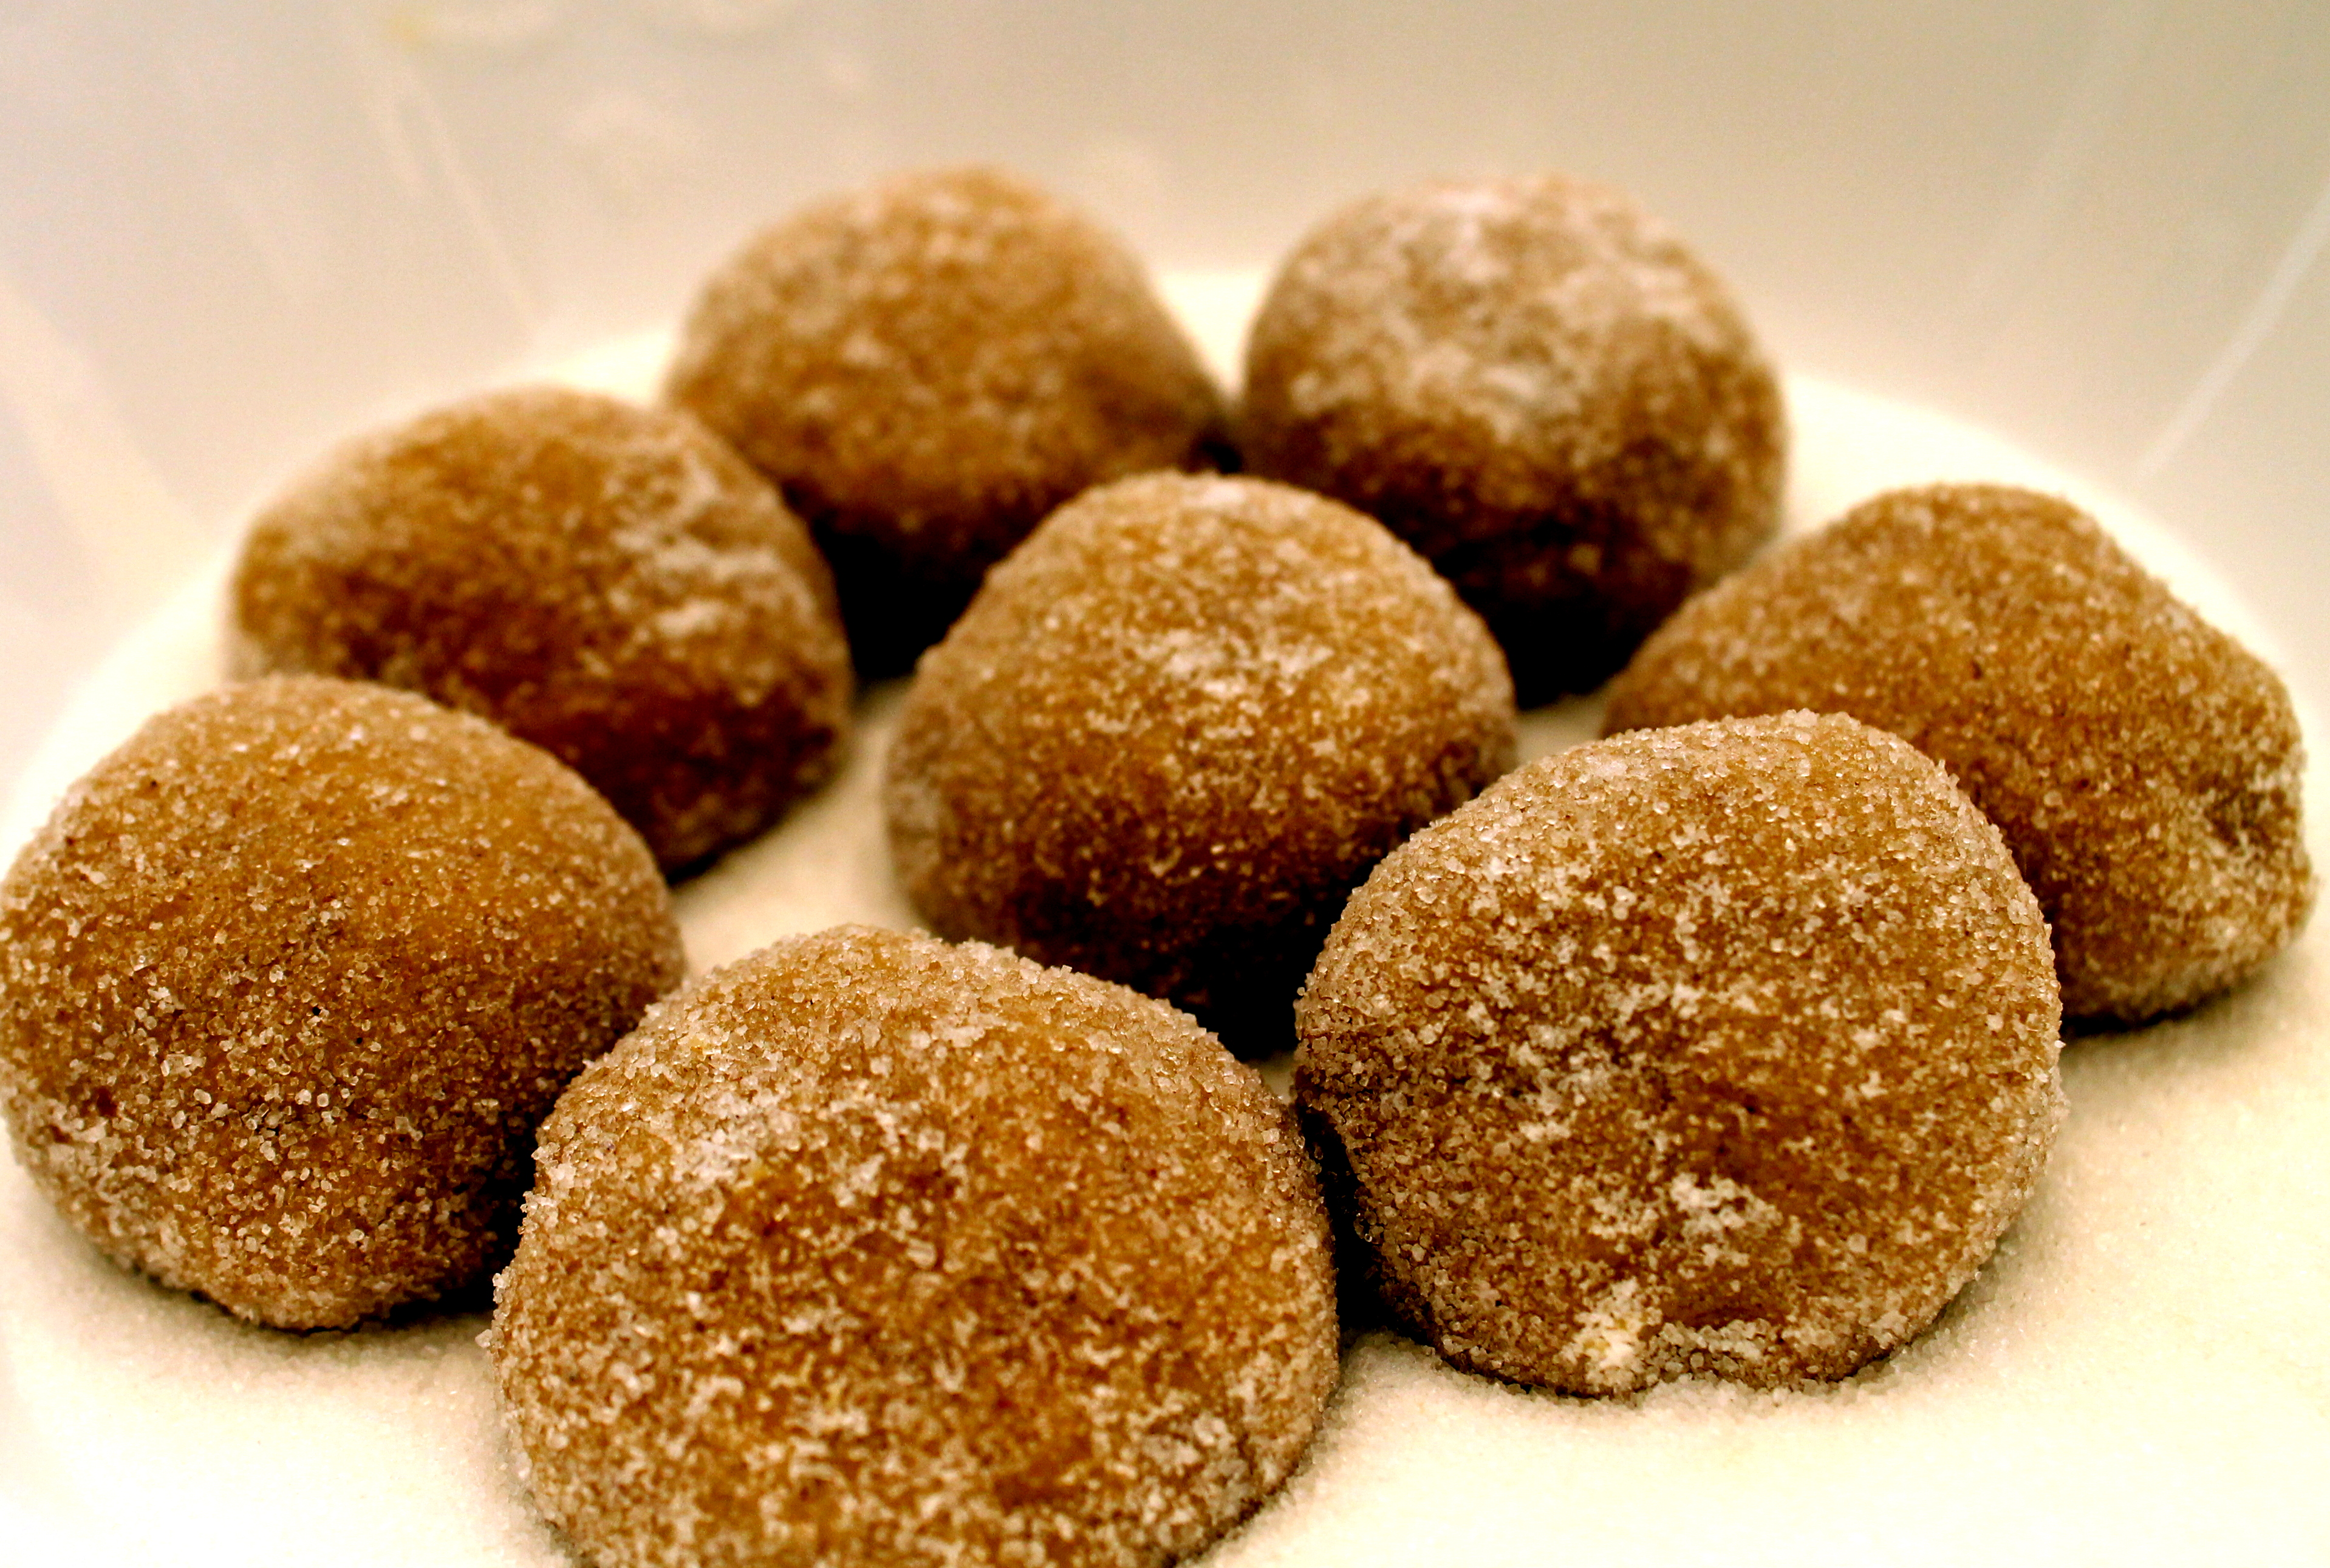
  3. Shape dough into 1 1/4-inch balls. Mix 1/4 cup sugar and the cinnamon. Roll balls in cinnamon-sugar mixture. Place 2 inches apart on ungreased cookie sheet.  Press down slightly.
  4. Bake approx. 8 minutes or until set.  I usually give a gentle push on them with two fingers to flatten a bit more right before pulling them out of the oven to get them to “crackle” a bit.
  5. Cool on the baking sheet for 1-2 minutes, then remove to cool on wire rack.

Makes 4 dozen cookies

My cookie secrets include: Always add a little extra flour (included in this recipe), underbake, bake on well-seasoned baking stones, use electric oven.

ENJOY!

Cheers & Hugs,

Jodi

Homemade Dill Bread

Dill Bread

One Christmas holiday season about 15 years ago, some dear friends, Jan and Mike, showed up at our front door on a snowy, blustery day with a warm loaf of this amazing Dill Bread.

I thought I had died and gone to heaven.

After sharing with my family devouring this luscious loaf, I quickly begged for the recipe.  Jan sweetly obliged, and I have been making this bread at least once a year ever since.

This bread is so right up my alley of flavor fiestas!   Sauteed buttery onion flakes and dill seed baked into this dense, no-knead bread and topped with a sprinkling of coarse sea salt.  A cup of cottage cheese in the dough makes it moist and dense.

Yesterday was a bit windy and rainy and seemed a perfect day to let an easy loaf of bread raise and bake for dinner to accompany a beef pot roast and caramelized butternut squash.  A perfect Fall feast.

Here’s the recipe for “Jan’s Dill Bread”

1 pkg dry yeast
1/4 cup warm water
2 Tbsp sugar
1/4 c olive oil
2 Tbsp minced onion flakes
2 Tbsp butter
1 c cottage cheese
1/4 tsp baking soda
1 egg
2 Tbsp dill seed
1 tsp salt
2 1/2 c flour

Soften onion in butter over low heat and let cool.

Dissolve yeast in warm water. Add all ingredients except flour, and mix well. Then stir in flour to make stiff dough.

Let rise until doubled (an hour or so). Punch down and place in greased 2 qt casserole or baking stone. Let rise 40 min. Bake for approx. 30 minutes at 350 degrees F until well browned.

Brush top with butter and sprinkle with coarse sea salt.

ENJOY! (and thanks Jan!)

Cheers & Hugs
Jodi

Food Photography – for National Homemade Cookie Day

Candy Corn Cookies cover

Did you know yesterday, October 1, was NATIONAL HOMEMADE COOKIE DAY?!??!

In my house, it is Homemade Cookie Day AT LEAST once a week, so I almost missed this monumental celebration.

Thankfully, I had made cookies anyway on National Homemade Cookie Day that I took to the office to share with some special visitors.  THEY were the ones that pointed out that today was this wonderful holiday, and I was excited that I could oblige!

In honor of that, and because my son, Nick, told me I need to vary up my cookie photography pictures since they were all starting to look the same, I thought I would share some varying photographs of the cookies I made yesterday.

Now please bear in mind that I have never taken a photography course, not even a single lesson.  Never even read the full manual that came with my favorite Christmas present of all time (this year) that Marty got me last year – a DSLR Camera (Cannon EOS Rebel T3) – but I just LOVE to have fun with it.

I really do want to take some classes.  I know when I do, I will probably look back at the ones I have taken thus far with great embarrassment, but hey – it’s just me having fun at life in between!

Now I know there are some professional photographers out there that follow my blog, so please give me some feedback, critique, provide constructive criticism/feedback.  But please be kind.  I have this ridiculous habit of taking everything personally!  UGH!

So here are some fun photos of these Peanut Butter M&M and Candy Corn M&M cookies I made yesterday morning.  I just used my standard chocolate chip cookie dough recipe, but substituted the M&Ms for the chocolate chips.  They turned out pretty yummy.

Candy Corn Cookies 8

Candy Corn Cookies 3


Candy Corn Cookies 1


Candy Corn Cookies 2


Candy Corn Cookies 12


Candy Corn Cookies 11


Candy Corn Cookies 10


Candy Corn Cookies 4


Candy Corn Cookies 14


Candy Corn Cookies 15

Ok – so I think I’m ready…  Any that you particularly like?  Particularly dislike?  Love?  Hate?  Tips??  Am I going to regret this..???  🙂

Cheers & Cheers & Hugs  – – – I think I might need that second “Cheers” 🙂 ,

Jodi

Gingersnaps & Finding Memories

Have you ever found yourself baking something just because of what it reminds you of?  The memories it evokes?  The traditions created around that certain recipe?

Gingersnaps are one of those recipes for me.

Baking them takes me back to Thanksgiving mornings many years ago when the boys were young, and we lived on Borderline Drive.

The only thing separating us from our closest neighbors and the boys’ best friends was five glorious acres of woods with a stream running through it and a clearing right smack in the middle that our two boys and the three neighbor boys (and one girl) declared, designed, and spent countless hours at – – “the Field.”

In the summer, there was a dugout made from chain link fence and whatever scraps of wood or pipe the boys could rustle up to hold it up that year.  They built up a pitcher’s mount, painted base lines with spray paint, and secured tattered rubber bases to create their field of dreams.

Come Fall, however, the baseball field was converted to a football field.

And every Thanksgiving morning, after turkeys were stuffed and left to roast, our neighborhood families would gather for our annual “Turkey Bowl” football game.

One neighbor brought the cooler of beer for the adults and built the bonfire for the “fans” and “cheerleaders” to hover and converse at.

My job was hot chocolate and warm gingersnaps fresh out of the oven.

I made them for years every Thanksgiving for the Turkey Bowl.  They usually got eaten by ravenous linebackers and receivers wearing mud covered gloves.  The men found them to go famously with beer too!  There were Thanksgivings with snow on the ground and others where no coat was necessary, but we always had warm gingersnaps.

I seemed to have misplaced the original handwritten recipe from Barb.  I’ve never got around to properly organizing my recipes, and I’m sure I could just call her, but I found this recipe online, and it seems to come pretty close.  I made them the other day to share with some guests at the office.  I think they need a little more ginger, but that is a preference you can decide.

Today’s #Writing101 Assignment is to write about finding something.  I know this is a stretch 🙂 – and a better story would be if I would have found that dang original handwritten recipe from Barb!

But this was my sneaky way of getting to share a recipe, share a memory, and share some photos I took of the cookies I made.  I call that a SCORE!  And hey – I wrote – and I found something.

gingersnaps 8

gingersnaps 2

gingersnaps 3

gingersnaps 5

gingersnaps 9

gingersnaps 6Gingersnap Gems (from Midwest Living)

Classic Apple Dumplings

apple dumpling cover

One of my hubby’s favorite treats this time of year is Apple Dumplings, so after a crisp Autumn morning walk on Saturday followed by a cup of coffee and phone call to catch-up with my BFF, I decided I was going to make some of these classic Fall favorites.  Nothing fancy, just pure nostalgic goodness.

apple dumpling apple

It’s apple time of year in Western Pennsylvania, so the varieties to choose from are plenty.  You can use pretty much any kind of apple you love best.  The only one I NEVER buy and NEVER bake with is Red Delicious.  Never could understand why they are so popular…

apple dumpling apple peeler corer slicer

The apple/peeler/slicer I have from back in my Pampered Chef days sure comes in handy for this job, but you can do by hand if you don’t have one.

apple dumpling apple peels

A fun little tip to make your house smell wonderful for days is to take all of those peelings and cores and throw them in a saucepan with a couple cinnamon sticks (and cloves if you like), cover with water and simmer.  The steam will permeate through your house and leave it smelling cinnamony applicious.

apple dumpling potpourri

You can even cover it and leave it on the stove for a couple days, removing the lid and simmering for a few hours a day just to bring that wonderful Fall aroma back.

I have a funny story from back in the good ole’ Pampered Chef Days.  I had a young lady who was new to the business that I had been training, and I shared this tip with her.  Holly still lived at home with her parents.  One Saturday morning, after practicing some recipes to demonstrate with her apple/peeler/corer/slicer, Holly decided to make some of this Fall potpourri.  She had it simmering on the stove while she went upstairs to take a shower.  When she came down, her Mom had a perplexed, comical look on her face.

“Holly Honey,” she said. “I don’t recommend you make this recipe at your cooking demonstrations.  It just really doesn’t taste that good.”

apple dumpling dough

For my dumplings, I just use my standard pie crust.  Remember the trick to flaky pie crust is to not overwork it.  (You can check out my secrets to successful pie crust here.)

apple dumpling prep

No special dimensions on cutting the dough – just make sure it is large enough to cover the apple completely.

And if it doesn’t, you can always use scraps of dough to patch and “glue” with water.  No perfection needed in my kitchen!

apple dumpling pre oven

Bake them for 30 minutes without the sauce.

apple dumpling sauce

And then for 30 additional minutes with the sauce.

apple dumpling post oven

If you don’t (want to) eat them all at once, Apple Dumplings freeze well.  It is nice to freeze them individually with a little sauce for a sweet treat when you want it most.

apple dumpling single top

Marty was a pretty happy camper when he saw what I was baking.

And I kinda thought he deserved it after publicly professing he thinks I’m cuuuuuuute!  🙂

The old bugger is losing his eyesight a bit…  Isn’t it nice how that happens as you age and grow old together?!

Cheers & Hugs,

Jodi

Classic Apple Dumplings

Pie Crust Pastry:
2 c. flour
2/3 c. shortening
Dash of Salt
3/4 c. water
Apples:
5-6 med-large firm apples (Fuji, Gala, Granny Smith)
1 can Mountain Dew or Lemon Juice
1/2 c. granulated sugar
1 tsp.  cinnamon
1 c. brown sugar
1 Tbsp. butter
Sauce:
2 c. water
3/4 c. granulated sugar
2 Tbsp. butter
1 1/2 tsp. vanilla
1/8 tsp. grated nutmeg
Preheat oven to 375 degrees.
Roll out pie dough, and cut into 5-6 uniform squares.
Peel and core apples, but leave them whole.
Pour the Mountain Dew or lemon juice over peeled, cored apples in bowl to keep from browning while assembling.
In another bowl, combine the granulated sugar and cinnamon.Place apple in center of square pastry.   Sprinkle all over with cinnamon sugar mixture.Fill each apple cavity with approx. 2 Tbsp. brown sugar and 1 tsp. butter.Pull the pastry squares up over the apples and twist on top.  Seal well, using water if necessary as “glue.”Place in an greased 9x13x2 inch baking pan or stone.Bake for 30 min.While apple dumplings are baking for first half of time, combine sauce ingredients in saucepan over high heat. Bring to boil and continue boiling for 1 minute.After the dumplings have baked for 30 minutes, pour the sauce over top and bake 30 minutes longer, basting occasionally.Serve hot with cream or vanilla or cinnamon ice cream or cold – however you like best!

Sally’s Pumpkin Chocolate Chip Bread (and why I bake)

pumpkin bread sallys top down sliced 2

It’s pumpkin time!  Yippee-Skippee!

Here is another pumpkin recipe I found and tried this past week for a yummy, moist bread by one of my favorite baking bloggers:  Sally’s Baking Addiction.  Be sure to check it out!  Sally also recently published a cookbook, and this recipe is in it.  (and she is only 29 years old!)

pumpkin bread sallys cover

I’ve been following Sally’s blog long before lifeinbetween.me was even a twinkle in my eye (though I could be Sally’s mom).

She is such an inspiration – sharing a “sprinkle of fun and adventure” in every post.

pumpkin bread sallys slice 2Sally is getting married soon to a lucky guy named Kevin who “makes her happier than cupcakes.”

Thanks for a great blog, Sally, and best wishes on your upcoming wedding!

So we didn’t eat the entire loaf of bread ourselves at home, I sent half of it to work with Liz this past week to share with some of her work friends who follow my blog.

Look at these adorable smiles Liz got for sharing with them.

TSM Girls with pumpkin bread

That is why I bake!

So thank you for the smiles ladies!

You made my day. 🙂

TSM Girls with pumpkin bread 2

Here is Sally’s recipe, or go directly to her website here.

Sally’s Pumpkin Chocolate Chip Bread

Ingredients:

  • 1  3/4 cups  flour
  • 1 tsp baking soda
  • 2 tsp ground cinnamon
  • 1/4 tsp ground nutmeg
  • 3/4 tsp salt
  • 2 large eggs
  • 3/4 cup granulated sugar
  • 1/2 cup brown sugar
  • 1 1/2 cups canned pumpkin puree (you could certainly use fresh if you want to work that hard!)
  • 1/2 cup  melted coconut oil  (you could substitute vegetable or canola oil if you desire)
  • 1/4 cup freshly squeezed orange juice
  • 2/3 cup semi-sweet chocolate chips (feel free to change it up with cinnamon chips, butterscotch chips, milk chocolate chips, white chocolate chips, nuts, raisins, or a combination)

Adjust the oven rack to the lower third position and preheat the oven to 350F degrees.  Spray or grease and flour a 9×5 inch loaf pan (baking stone) with non-stick spray. Set aside.

Whisk the flour, baking soda, cinnamon, nutmeg, and salt together until combined in one bowl. In another, whisk the eggs and sugars together until combined. Whisk in pumpkin, oil, and orange juice. Combine wet and dry ingredients and gently mix together.  Do not overmix – lumps are allowed. Gently fold in chocolate chips (or your desired add-in).

Pour batter into the prepared loaf pan. Bake for approximately 1 hour.  Loosely cover bread with foil halfway through baking to prevent top from getting too brown. Bread is done when a toothpick inserted in center comes out clean with only a few small moist crumbs.

Allow the bread to cool completely in the pan on a wire rack before removing and slicing.  Makes 1 delicious loaf!

Cheers & Hugs,

Jodi

Pumpkin Nutella Swirled Cookies

pumpkin nutella cookies coverNothing says Fall like pumpkin.

At the first signs, I am perusing recipes and pins on Pinterest to find new and exciting pumpkin recipes.

I had a jar of Nutella that Nick wanted to try a while back that has just been sitting there begging to be used in some sweet form, so I decided on this recipe I found from Jenn @eatcakefordinner.

pumpkin nutella stack

The guys loved them, and I had fun using my new micro-planer (from our Trip to the Strip) to add freshly ground nutmeg to these tasty little puffs of pumpkiny goodness.  (what a difference fresh seasonings, herbs, and spices makes.  Oh – if you could only scratch ‘n sniff this photo – which I DO NOT recommend!)

We might also be able to trick ourselves into thinking these are a little bit healthy……… pumpkin is a vegetable with loads of vitamins – and this recipes uses Greek yogurt too.  Give them a try.  They are a perfect Fall treat.

pumpkin nutella nutmeg

Pumpkin Nutella-Swirled Cookies
From: Jenn@eatcakefordinner

3 c. flour
1 tsp. baking soda
1/2 tsp. salt
1/2 tsp. ground nutmeg
1 tsp. cinnamon
1/2 c.  butter, room temperature
1 1/4 c. light brown sugar
1 c. non-fat plain Greek yogurt (or sour cream)
1 c. canned pumpkin puree
1 egg
1 tsp. vanilla
1/2 c. Nutella

Preheat oven to 350 degrees.  In bowl, combine flour, baking soda, salt, nutmeg and cinnamon; set aside.  In a separate bowl, cream together the butter and brown sugar.  Add the yogurt, pumpkin, egg and vanilla and mix until combined.  Gradually mix the dry ingredients into the wet ingredients and mix until just combined.  Drop spoonfuls of dough, about 1 1/2 – 2 Tablespoons each, onto a greased baking sheet.  Flatten cookies a bit.  They do not spread much while baking and they puff up quite a bit, so make sure to flatten them. 

Top each cookie with 1/2 teaspoon or so of Nutella, spreading out and swirling slightly.   Bake cookies for 12-15* minutes or until a toothpick inserted in the center comes out clean.  Makes 36-43* cookies.     

*Jenn’s recipe said bake for 15 min, but I only needed 12 min in my convection oven.  Also, Jenn said her recipe made 43 cookies, and I got 36.

Enjoy!

Cheers & Hugs,

Jodi

You Know You’re Getting Old When…………………… and Peach Cookie Cobbler

peach cobbler cover

You know you are getting old when…………

———————————————————————————————————————————–

So I dialed the number I know by heart.   It’s our Friday evening ritual.

The pleasant voice on the other end of the line asks, “Is this Mrs. M?”

“Why Yes,” I say, with a bit of a startle and a big grin – wondering whether to be flattered or concerned….

“Delivery to Blankety Blank Blank Road?”

“Yes!”    I’m either more excited or more concerned….

And I go about ordering our usual Friday night pizza/salad delivery from our favorite Mars Pizza.

Yep – that’s our Friday night ritual.

And yep – that means we are getting old.

When Friday night is your earliest go to bed night, earliest get in your jammies and sit in front of the television and eat dinner night – you are getting O L D!

But I LOVE IT!

And what is even better?

When the delivery boy tells you they are extremely embarrassed about the condition of your grilled chicken salad and a credit is going on your tab for next time.  SCORE!

And I thought the salad was just fine.

So anyway – since dinner is so much effort on Friday night, the least I can do is make a sweet treat for the Hubster.  (Is Marty lucky or what?!?)  🙂

———————————————————————————————————————————

My guys love peaches, but not when they get very ripe.  I had a few “more ripe than they like” peaches that I thought I could do something with, and then I had this tube of refrigerator sugar cookie dough from who knows when in the fridge, so put that together…..

and I come up with Peach Cookie Cobbler!

peach cobbler cover

So, since this was just a wing it recipe (I should have measured thinking I would blog the recipe!) – we’ll give a shot at remembering the ingredients.

But I do want to tell you, friends – Don’t be afraid to wing it!  Just like cooking, baking does not have to be an exact science.  Experiment.  Improvise.  Use what you have and what tastes good or “right” to you!

So I gathered the peaches.

peachy

After peeling and slicing them (and munching on one!) – I squeezed some fresh lemon juice over them, added some sugar and cinnamon and a bit of flour to thicken.  (My guesstimate is about 1/2 cup sugar, 1 Tbsp cinnamon, and 1/4 cup flour to the 6 peaches)

peach cobbler 1

I put this mixture in an 8 inch round baking stone.

peach cobbler 2

Then I just pulled pieces of the cookie dough off and crumbled all over the top of the peaches.

peach cobbler  5

I sprinkled a little more cinnamon sugar on top and baked at 350 for 30 minutes.

peach cobbler 4

And Voila!  A quick and easy peach cookie cobbler.

This would work wonderfully with apples too!

Enjoy!

peach cobbler cover

Cheers & Hugs,

Jodi

Peanut Butter & White Chocolate Chip Cookies

pbwc stack

I made some pretty yummy cookies for a picnic we went to yesterday.

These peanut butter and white chocolate chip cookies pretty much MELLLLLT in your mouth!

I was looking for something new and different and came across a similar recipe on one of my favorite baking blogs, Cookies and CupsShelly made me chuckle with her description of her “big-boned” version!

I didn’t want mine to be quite as “big-boned,” so I used another favorite blogger’s recipe (Sally’s Baking Addiction) for soft peanut-butter cookies.

Combining Shelly’s idea with a tweak or two to Sally’s recipe, I came up with a winning version (at least according to my guys – – –  and there were none left at the picnic either!).

pbwc stand

Here’s the recipe:

Peanut Butter & White Chocolate Chip Cookies

  • 2 cups (4 sticks) salted butter, softened to room temperature
  • 2 cups light brown sugar
  • 1 cup granulated sugar
  • 4 large egg
  • 3 cups creamy peanut butter
  • 4 teaspoon vanilla extract
  • 2 tsp baking soda
  • 5 1/4 cups all purpose flour
  • 2 bags white chocolate chips

Cream butter and sugars together in mixer until light and fluffy.  Mix in peanut butter, egg, and vanilla. Slowly mix in the dry ingredients. Do not overmix. Chill dough for at least 1 hour.

Preheat oven to 350 degrees.  Remove chilled dough from fridge and roll into balls.  Then flatten slightly as these cookies will not spread very much.

pbwc balls

Bake for 9 minutes until the tops begin to start cracking slightly.  Do not over bake.   Cookies may not look done, but they will firm up as they cool.

pbwc rack

I got about 7 dozen from this recipe.

(And I was sure to set a few aside for a certain sweet someone whose favorite candy bar is White Reese’s Peanut Butter Cups that I think is going to LOVE these!)  🙂

Mikey is always such a big helper in the kitchen too!  He always cleans the floor for me.  All I need do is brush crumbs from the counter to the floor, and they magically disappear.

choosey dogs choose Jif

Choosy Dogs Choose Jif!

And since we polished off this jar of Jif, Mikey took care of cleaning it out for me before we put it in the recycle bin.

Enjoy!

Cheers & Hugs,

Jodi

Jack of Many Trades, Master of None

I wonder what those of you that happen upon my blog must think…..

Do you say – what the heck is this blog about?

One day this Jodi chick is baking and sharing recipes…

smore cookies

S’more Cookies Please!

Haluski

Homemade Haluski – Peasant Food Fit for a King

Another day stamping and gluing and cutting and sewing and card-marking…

child birthday card punch art birds on wire The paper players

Birthdays are for the Birds!


Friends Make the World a Better Place Mojo Monday

Ain’t it good to know you’ve got a Friend!

I also love to take photos and consider myself an amateur student of photography…

Hummingbird Photo

Hummin’ the Hummingbird Tune!

polar bear pittsburgh zoo & ppg aquarium

Sunday at the Pittsburgh Zoo

and writing and telling stories gives me such joy.

Remembering Grandma - Stella Star

Remembering Grandma – Stella Star

I thrive on encouraging people – it’s in my DNA (or at least my DISC profile – LOL!)….

Remembering moments

Remembering Moments

Always be the last to let go of a hug

Hugs

and if I just could find the time to make 1/1,000,000th of the DIY ideas I’ve pinned on my Pinterest boards for decorating or gift-giving…

Wedding Survival Kit

Wedding Survival Kit

I adore spending time with my family and friends…

Fishing

The Day We Almost Caught a Fish

Girlfriend Camp GFC2014 Mars, PA spaceship

Girlfriend Camp

I tinker with gardening…

gardening, tomatoes

The Great Tomato Caper

and I truly seek to discover and learn new things always – it keeps me (ahem) young and alive…

Alpacas  Four Points Alpacas

A Visit to Four Points Alpacas

I enjoy doing so many things (and am so fortunate to work a full-time job I love too!) that I just wish there were more hours in the day…

or at least wish that I was one of those people that only needed 3-4 hours of sleep a day (tried it for a while – didn’t work out – dangit!)

I sure am a jack of many hobbies and master of none.

But it is fun to be that way – eh?!?

And I love sharing the journey with you – my  supportive friends that have encouraged and continue to encourage me to write my blog – and those that have become new friends along this journey.

Global Mudder Tough Mudder

Tough Mudder

It is so exciting to see new friends subscribe, and comment, and “like” daily.

So on this Labor Day Holiday – I just thought I would share some of these faves from the 100+ posts I’ve shared so far from this labor of love blog I call LifeInBetween.me.

It was really hard to pick favorites, as I have LOVED writing and sharing every single one of them.

What is your favorite thing I write about?

I’d love to hear from you.

Happy Labor Day!  Make every thing you labor over a labor of love!

Cheers & Hugs,

Jodi