Peaches & Cream Pretzel Pie

Peaches & Cream Pretzel Pie.

Oh My Goodness Friends!  This Pie!!!

I think it might be my favorite thing I’ve made in a long time!

As many of you know, I love to bake.  It brings me such joy to see the people I share with enjoying the “fruits” of my labor of love.  But, I can usually pass on dessert.  I am more of a salty, savory girl than a sweet one.

But this pie!!!!!!!  I cut a piece to photograph and was only going to take a bite to taste it.  Thirty seconds later, it was somehow all gone as I literally moaned and squealed with delight eating it!

The cream filling is lusciously light and fluffy and so perfect…..  especially on top of the salty, crunchy, buttery pretzel crust with a hint of cinnamon………. and then the glorious topping of sweet juicy honeyed peaches….   It’s just so divine!

I couldn’t wait to share it!  Hubby loved it, and I shared it with a sweet friend and her family for the recent holiday.

I originally saw this recipe at Half Baked Harvest and tweaked it up ever so slightly.

I cannot wait for you all to try this!  Please do while peaches are so perfect right now and let me know what you think.

Thank you Tieghan for such a great recipe!

Peaches & Cream Pretzel Pie

Ingredients:

Pretzel Crust:

  • 2 cups finely ground salted pretzel crumbs
  • 1 stick (8 Tbsp.) + 3 Tbsp salted butter, melted
  • 3 Tbsp. honey
  • 1 tsp. cinnamon

Filling/Topping:

  • 1 1/2 cups heavy whipping cream
  • 2 tsp. vanilla
  • 8 oz. cream cheese, softened to room temperature
  • 4 Tbsp. powdered sugar
  • 3 Tbsp. raspberry preserves
  • 1/2 cup honey
  • 4 ripe, but firm peaches, sliced

Directions:

Preheat oven to 350 degrees F.

Make pretzel crumbs using food processor.  Add crumbs to medium bowl and combine with melted butter, honey, and cinnamon.  Reserve 2-3 Tbsp. of crumb mixture (for topping) and place in small baking dish.  Press remaining into 8-9 inch pie plate.  Put both in oven for 8 minutes and bake until toasted.  Cool completely before filling.

Beat heavy cream and vanilla on medium high with electric mixer until soft peaks form (about 2-3 minutes).  Add the cream cheese and powdered sugar and beat until incorporated (about another minute).  Place in refrigerator to chill until ready to use.

Bring 1/2 cup honey to a low boil in a medium saucepan, and simmer for one minute.  Remove from heat and stir in sliced peaches (I did not remove skin).  Let sit for at least 10 minutes to cool.

Spread red raspberry preserves into bottom and up sides of cooled pretzel crust.  Fill crust with cream.  Refrigerate for at least 3-4 hours or overnight.

When ready to serve, top with honeyed peaches and sprinkle with additional pretzel crumb mixture.  You could also top with fresh red raspberries for an extra treat!

This pie can also be frozen for up to two weeks.

ENJOY!

Cheers & Hugs,
Jodi


Homemade Cherry Pie

Homemade Cherry Pie.

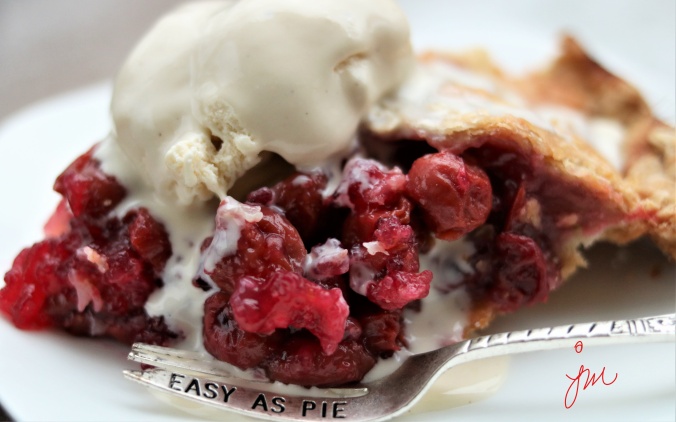
On a recent visit to an awesome new grocery store that opened up near us called Fresh Thyme, I discovered they carried big 2.5 lb bags of red sour pie cherries.  I was so excited!  This is something hard to find where we live.  You can find dark sweet cherries everywhere, and they are delicious for eating, but to make a good old-fashioned homemade cherry pie, you have to have the sour cherries.

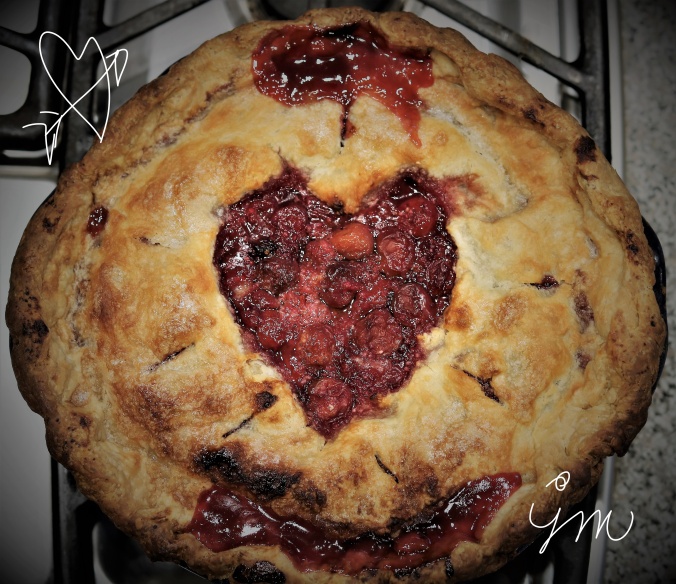
I snagged a couple bags and was excited to get to make a cherry pie for hubby for Valentine’s Day last week.

If you are lucky enough to find sour cherries, here is the simple, old-fashioned recipe I use to make a classic cherry pie.

Bake a little love!

Cherry Pie

Ingredients:

Directions:

Preheat oven to 400 degrees F.

In a large bowl, combine cherries, sugar, tapioca, and almond extract.  Mix well, and let sit while preparing pie crust.

Prepare crust and place bottom layer in pie plate.  Fill with cherry mixture.  Top filling with dabs of butter followed by top crust, being sure to cut slits or a shape to allow bubbling and steam to escape.  Spread a small amount of milk or water on top crust, and sprinkle with an additional tablespoon of sugar if desired.

Place pie in oven.  Cover loosely with foil to prevent over browning.  Bake approximately one hour.  Remove foil and continue baking until filling bubbles out of top and crust is beautifully browned.

Allow to cool completely to set.  Serve with scoop of vanilla ice cream.

Enjoy!

Cheers & Hugs,
Jodi


Pecan Pie Thumbprint Cookies

Pecan Pie Thumbprint Cookies.

It’s December, and that means time to start Christmas cookie baking!

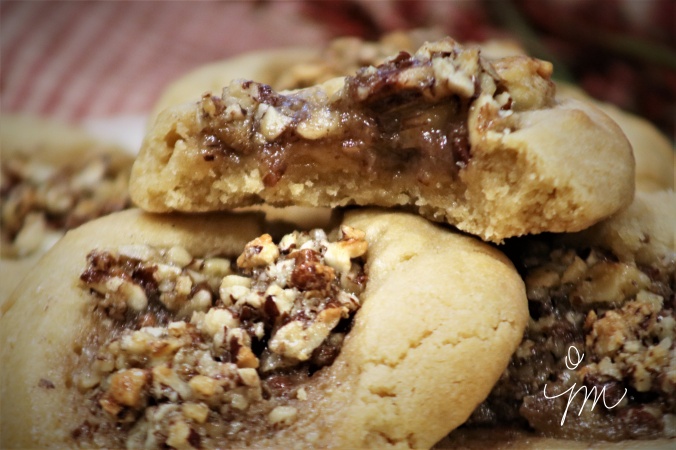
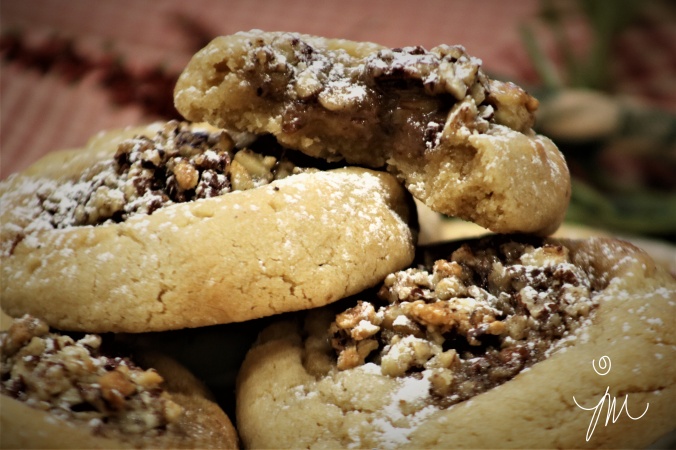
These cookies are a wonderful version of pecan pie in a cookie!

They are similar to Pecan Tassies, but a lot easier.

The cookie is buttery and shortbread-like, while the filling is nutty and sticky and sweet and AMAZING!

I had a little bit of extra filling left that I just couldn’t throw away, so I spread it on a sheet of crescent roll dough, rolled it up, and sliced it into 8 easier-than-pie pecan “sticky buns!”

So
worth
it!

Hope you will give these yummy cookies a try for something new on your Christmas cookie baking list.  I do believe these will become a regular in our home!

Here is the recipe I found at  Crazy for Crust, which I only slightly altered.  Thanks for a great recipe, Dorothy!

Pecan Pie Thumbprint Cookies

Ingredients:

Cookie Batter:

  • 2 cups brown sugar
  • 1 1/2 cups butter, softened
  • 2 eggs
  • 2 tsp. vanilla
  • 4 cups flour
  • 2 tsp. baking powder
  • 1/2 tsp. salt

Pecan Pie Filling:

  • 2 cups pecans, chopped
  • 1/2 tsp. coarse or flaked salt
  • 1 cup brown sugar
  • 4-5 Tbsp. Half and Half or Heavy Cream
  • 2 tsp. vanilla

Optional:  Powdered sugar for sprinkling on top of cooled cookies.

Preheat oven to 350 degrees F.

Beat brown sugar, butter, egg, and vanilla in electric mixer until creamy.   Add in baking powder, salt, and flour, and mix on low speed until well combined.

Shape dough, two tablespoons at a time, into balls, and place the balls two inches apart on a baking stone or cookie sheet.  Indent a hole in center with your thumb.

Prepare filling by stirring pecans, salt, brown sugar, and vanilla with cream until it forms a thick mixture.  Spoon approximately one teaspoonful into thumb indentation of each cookie.

Bake for 10-12 minutes.  Cool for 5 minutes on stone or cookie sheet before removing to rack to cool completely.

Sprinkle with powdered sugar if desired.

Cookies freeze well for up to a month.

Enjoy!

Cheers & Hugs,
Jodi

Fresh Red Raspberry Pie

Fresh Red Raspberry Pie.

Before we fully embrace all things pumpkin and apple and cinnamon and spice for Fall, I decided to slide in one  last “Summery” pie for the season a week or so ago when my youngest son and his wife came over for dinner (knowing this is one of his faves).

Fresh red raspberries are such a treat all by themselves, but baked to overflowing  with a bit of tapioca inside a tender flaky pastry crust is pretty close to heaven.

Fresh red raspberries used to be a rare find in our part of the world, but they are quite prolific in the grocery stores year-round now.  Buying enough for a pie can be a bit pricey, but worth it for a treat every once in a while.

Grandma always said the only way to know when a berry pie is done is when it bubbles over into the oven, so that is how I gauge the time too!

Here is my simple, old-fashioned recipe.

Fresh Red Raspberry Pie

Ingredients:

Pie Crust:

  • 2 cups all purpose flour
  • Heaping 2/3 cup Crisco shortening
  • 2 dashes of salt (12 shakes)
  • Approx. 1 cup cold water

Filling:

  • 5 cups fresh red raspberries
  • 1 cup white sugar
  • 3 Tbsp tapioca
  • 1 Tbsp lemon juice
  • 1 dash salt

Directions:

Preheat oven to 425 degrees F.

Prepare filling by blending raspberries, sugar, tapioca, lemon juice, and salt in a bowl.  Let sit while you prepare crust.

Prepare crust by blending flour, Crisco, and salt in a large bowl with a pastry blender until crumbly.  Add cold water and gently mix just until able to form a ball.  Divide dough in half, and put one half on floured surface to roll out.

IMPORTANT:  Do not overwork the dough.  It is not bread dough that needs kneaded.  The more you “work” pie crust, the tougher it will become.  The less you play with it, the more tender and flaky it will be.

Roll out first half using heavy floured marble rolling pin into a circle large enough to fill 9″ pie pan.  Lift it from the surface to your pie pan by folding it into quarters, then unfold it in the pan letting it hang over edges.

Roll out other half of dough into rectangle and cut into 8 strips to weave into a lattice topping.

Pour filling into bottom crust.  Top with 4 strips going same direction.  Weave by lifting two alternating and place one the opposite direction, the lifting the other two, and repeating.  Pinch top to bottom doughs together all around edges.

A nice finishing tough is to brush crust with some water and sprinkle with coarse sugar.

Cover edges of the pie with strips of aluminum foil or a pie crust shield (the most GENIUS invention ever in my baking opinion!)

Bake in 425 degree oven for 15 minutes.  Reduce heat to 375 degrees F, and bake until crust is golden and filling is bubbly, about 30 minutes more.

Serve warm or cold topped with a scoop of vanilla ice cream!

Enjoy!

Cheers & Hugs,
Jodi


Old-Fashioned Tomato Pie

Old-Fashioned Tomato Pie.

Looking for something to do with the abundance of fresh, juicy, sweet, beautiful tomatoes in your garden or available this time of year?

How about an old-fashioned tomato pie?!

It’s like a deep dish pizza  in an old-fashioned crust….

Layers of tomatoes, onions, garlic, basil and parsley… topped with cheesy yumminess.

Make one, and enjoy it hot, warm, room temperature, or even cold.  It is a wonderful treat to celebrate the end of summer’s bounty and the delight of vine-ripened tomatoes.

Old-Fashioned Tomato Pie

Ingredients

  • Single Pie Crust
    • 1 cup flour
    • 1/3 cup Crisco shortening
    • Dash of salt (6 shakes)
    • 1/3 cup cold water
  • Filling
    • 2-3 lbs tomatoes, thinly sliced (I used a variety of red and yellow heirloom tomatoes)
    • 1 sweet onion, coarsely chopped
    • 3 cloves garlic, chopped
    • 2 Tbsp olive oil
    • 1/2 cup chopped fresh basil and parsley
    • salt and pepper to taste
    • 1/2 cup freshly shredded Parmigiano Reggiano cheese
    • 1/2 cup freshly shredded Gruyere cheese
    • 1/8-1/4 cup cup mayonnaise

Directions

Preheat oven to 425 degrees F.

Prepare pie crust by blending flour, shortening and salt with a pastry blender to create coarse crumbs.  Add cold water, and mix until just combined.   Do not overwork (this is the secret to flaky pie crust).  Roll out dough on floured surface and line a 9″ pie plate with dough – folding overhanging dough under itself along rim to create rustic edge.

Line piecrust with aluminum foil and fill with dried beans (or pie weights) to keep crust in place.  Bake for 20 mins.  Cool completely.

To prepare filling, place thinly sliced tomatoes on paper towels, and sprinkle with salt.  Let stand 10 mins.  Pat dry with another layer of paper towels.

While tomatoes are resting, saute onion and garlic, sprinkled with salt and pepper, in olive oil for 3-4 minutes until tender.

Layer tomatoes, then onion/garlic mixture, and a sprinkle of freshly chopped herbs into pie crust.  Continue layering until all tomatoes, onions, and herbs are used.

Combine shredded cheese and mayonnaise.  Spread over top of tomato pie.

Bake at 350 degrees F for 30 minutes or until lightly browned, shielding edges with foil or pie shield (the GREATEST invention ever for pie bakers!) to prevent excessive browning.

Serve hot, warm, or at room temperature, whichever you prefer. 

Enjoy!

Cheers & Hugs,
Jodi

Recipe adapted slightly from Myrecipes.com.

Zucchini & Broccoli Galette

Zucchini and Broccoli Galette.

So you know yesterday was #SneakSomeZucchiniIntoYourNeighborsPorchDay – right?

Of course you did!

So after picking three zucchinis from our garden, I snuck one to our neighbor on the right…

and one to our neighbor on the left.

Then I decided to use the third zucchini to make a revised version of Jenna from the Painted Apron’s recipe for Zucchini Galette.

Fresh zucchini, broccoli, caramelized onions, roasted garlic, and freshly grated Parmesan cheese all wrapped up in a golden, flaky crust……..

is surely a glorious way to celebrate this zucchini lover’s day!

How did you celebrate?

Zucchini & Broccoli Galette

Ingredients:

  • 1 medium zucchini, sliced
  • 1 sweet onion, sliced
  • 2 Tbsp butter, divided
  • 1 Tbsp olive oil
  • 2 cups fresh broccoli florets
  • 1 tube Pillsbury Crescent rolls
  • 1 head of garlic, roasted*
  • 4 oz freshly grated Parmesan cheese
  • 1 egg, beaten
  • Salt and Pepper

Lay zucchini slices out on a paper towel and sprinkle with salt.  Let sit for 15-30 minutes.  Pat dry, then turn over and repeat on new dry towels.  This will help remove some of the excess water that naturally occurs during cooking of zucchini.

Caramelize sliced onion by cooking over medium-high heat in 1 Tbsp butter and 1 Tbsp olive oil for 10-15 minutes, stirring occasionally, until soft and brown.  Add broccoli and  the other 1 Tbsp butter, and cook for 5 more minutes.  Lay out crescent roll triangles in a circle on a baking stone or baking sheet, pressing together and flattening with rolling pin. Squeeze out roasted garlic and spread over dough, leaving a 1 inch border.  Sprinkle with 1/3 of the cheese.  Top with 1/2 of onion and broccoli mixture and half of zucchini.  Repeat layers.  Top with cheese.  Fold dough up and over filling around the edge. Brush dough with an egg wash and bake at 375 degrees F for approximately 30 minutes or until golden and melted.  Cut into 6 wedges to serve.

*Roasted Garlic:  Cut top off top of garlic head exposing the cloves.  Place on a piece of foil and drizzle with olive oil.  Wrap up and bake at 400 degrees F for approximately 1 hour.  This can be done ahead of time and refrigerated.

Enjoy!

Cheers & Hugs,
Jodi

Fresh Red Raspberry & Blueberry Pie

Fresh Red Raspberry & Blueberry Pie.

Are you looking for an amazing fruit pie that is tart and sweet and bursting full of fresh fruits of the season?

I haven’t baked a pie in a while, so I thought it was high time I treated hubby to something he would love being that it is Father’s Day weekend and all.

He would choose pie over cake or cookies approximately 99.5 times out of 100 – conservatively speaking.

I had some fresh red raspberries and some fresh blueberries in the fridge, but not enough of either to make a whole pie, so I decided to try combining the two into one pie.

I researched some recipes and then decided to combine things I liked about different ones into my own creation – including using tapioca instead of cornstarch as the thickening agent for this pie.  Grandma always used tapioca in her berry pies, so there is no other way in my book!

This pie turned out perfectly thickened and so full of fresh berry flavors.  It was a complete hit with Hubby – especially when topped with a melting scoop of vanilla bean ice cream.

If you are looking for a new twist on berry pie, I hope you’ll give this recipe a try!

Fresh Red Raspberry & Blueberry Pie

Ingredients:

  • Double recipe for Pie Crust
  • 2 cups fresh red raspberries
  • 2 cups fresh blueberries
  • 1 cup + 1 Tbsp. white sugar
  • 1/4 cup tapioca
  • 1 Tbsp. flour
  • 2 tsp. freshly grated lemon peel
  • 1 tsp. vanilla extract of paste
  • 1/2 tsp. cinnamon
  • 1 Tbsp butter
  • 1 Tbsp. milk or water

Directions:

Preheat oven to 400 degrees F.

Line a 9 inch pie plate with bottom pastry.

In a bowl, combine berries, 1 cup sugar, tapioca, flour, lemon peel, vanilla, and cinnamon.  Gently stir, and pour into pastry lined pie plate.

Top with remaining pie crust cut and wove into lattice.

Brush with milk or water, and sprinkle with remaining 1 Tbsp. sugar.

Bake at 400 degrees F for 45-50 minutes or until crust is golden brown and filling is bubbly.

Enjoy!

Cheers & Hugs,
Jodi

Best Ever Pecan Pie

pecan-pie-2

If you have it with coffee, it counts as breakfast.
Right??
Confession – I ate a slice of pecan pie for breakfast the day after Thanksgiving.

There.
It’s out!

And O M G – was it delicious!

pecan-pie-1

I made this pecan pie for Thanksgiving, and I have to admit,  I was too full of turkey and stuffing and much too busy holding my new granddaughter to even give a second thought to dessert that day.

pecan-pie-3

But the next morning (while decorating for Christmas 😉  ), I decided to have my piece.

This recipe is simply divine.  If you’ve never tried making a pecan pie, you really should try this.  You won’t be sorry!  MMM MMM Good!

Best Ever Pecan Pie

Ingredients:pecan-pie-2

Pie Crust:

  • 1 cup flour
  • Heaping 1/3 cup Crisco shortening
  • Dash of Salt
  • 1/3-1/2 cup cold water

Filling:

  • 1 cup brown sugar, packed
  • 1 1/2 cups light corn syrup
  • 4 eggs
  • 1/4 cup butter
  • 2 tsp. vanilla
  • 2 cups whole pecans

Directions:

Preheat oven to 350 degrees F.

Prepare pie crust by blending flour, shortening and salt with pastry blender until fine crumbs form.  Add cold water and mix just until dough comes together and can be formed into a ball.  Do not overwork dough – this makes it tough.  Place ball on floured surface and roll out to fit into 9″ pie plate.  Fold dough in half and then in quarters.  Life and unfold in pie plate.  Pinch edges to flute.

Prepare filling by boiling brown sugar and corn syrup in a saucepan for 2-3 mins.  Set aside to cool slightly.

In a large bowl, beat eggs lightly.  Slowly pour the syrup mixture into the eggs, stirring constantly.  Stir in butter, vanilla and pecans, and pour into crust.

Bake for approximately 50-60 minutes or until set.  Cool completely.

Cheers & Hugs,
Jodi


Easy Cinnamon Roll Apple Pie

cinnamon-roll-apple-pie-1

When my sister-in-law posted one of those amazing Tasty Videos on Facebook for a Cinnamon Roll Apple Pie, I just knew I HAD to try it!

cinnamon-roll-apple-pie-3

We love apple pie.  We love cinnamon rolls.  Who doesn’t??!!  Putting them together to make an EASY apple pie = Winner!

cinnamon-roll-apple-pie-2

If you struggle with making homemade crust or are looking for a new twist on traditional apple pie, this is an easy and super yummy semi-homemade version to try.

I made it for a birthday brunch yesterday when the family came over to celebrate hubby’s upcoming birthday.  After gorging ourselves on smoked sausages (that hubby smoked himself in his Pit Barrel Cooker we got him this past Father’s Day), Spinach, Feta, Bacon & Roasted Red Pepper Egg Casserole, Warm Biscuits and Sausage Gravy (homemade by our oldest son), and a fresh berry fruit salad, we waited a little while before eating this.  But when we did….. thumbs up all around!

I tweaked the recipe up a bit to assure the apples would be fully cooked without overbaking and drying out the cinnamon rolls.  It turned out wonderfully amazing!  And the smell……..  can you even imagine the wonderful smell?!?!

Hope you will give this delicious treat a try.  (Thanks for sharing Terri!)

Cinnamon Roll Apple Pie

Ingredients:cinnamon-roll-apple-pie-3

  • 6 cups peeled, cored, and thinly sliced tart apples
  • 1/2 cup sugar
  • 1 tsp cinnamon
  • 1 Tbsp butter
  • 3 Tbsp flour
  • 2 cans Pillsbury Cinnamon Rolls

Directions:

Preheat oven to 350°F/180°C.

Melt 1 Tbsp butter in large skillet, add apple slices, sugar, and cinnamon.  Cook on medium heat for approximately five minutes until tender.  Add flour and stir.  Cook one more minute until thickened.

Roll out each cinnamon roll in one tube until flat and thin using a small amount of flour to avoid sticking to rolling pin and counter.  Layer on the bottom and up sides of pie pan to form bottom crust.  Add the cooked apples.

Roll out each cinnamon roll in second tube until flat and thin, and layer on top of apples to form top crust.

Cover with foil and bake for 30 minutes.  Remove foil and bake for another 5 minutes.

Allow pie to cool and drizzle with icing from one tube of cinnamon rolls.

Enjoy!

Cheers & Hugs,
Jodi

Summer Vegetable Tart

Summer Vegetable Tart Baked

My sweet friend Janet found a recipe for this amazing summer vegetable tart, and I told her she had to come over so we could make it together and enjoy.

And that we did one evening this week.

Besides being so great to see her and spend time in the kitchen slicing and chopping and chatting….

O. M. G. –  this turned out so delish!

Summer Vegetable Tart Before Baked

With summer coming to an end and the abundance of zucchini and red-ripe tomatoes and eggplant and squash, this recipe is a must-do for a hot August evening dinner or Sunday lunch or brunch – or anytime really!

Summer Vegetable Tart Before Baked with Cheese

Anything smothered with Parmegiano Regianno is a winner in my book, but this savory summer vegetable tart is seriously a new favorite.  Dare I admit I had 4 pieces?!

I think you are going to want to try this, so here is the recipe.

Summer Vegetable Tart

Ingredients:Summer Vegetable Tart Baked

  • 1 medium zucchini squash, thinly sliced
  • 1 medium yellow squash, thinly sliced
  • 1 medium eggplant, thinly sliced
  • 2 large tomatoes, thinly sliced
  • 1 sheet frozen puff pastry, thawed (or pie crust or crescent rolls)
  • 1/4 cup tomato or pizza sauce
  • 1 cup freshly grated Parmegiano Reggiano Parmesan cheese
  • Olive Oil
  • Salt

Directions:

Preheat oven to 400 degrees F.  Roll out puff pastry or pie crust or crescent rolls on a baking stone or cookie sheet to rectangle or circle to form “pizza” tart crust.

Thinly slice vegetables with mandolin or sharp knife.  Lay out on parchment paper or paper towel.  Sprinkle with salt, and let set for 15 minutes.  Pat dry with paper towel to absorb excess moisture.

Spread tomato sauce on pastry.  Layer with vegetables.  Drizzle with olive oil.  Top with Parmesan cheese.

Bake for 30-40 minutes until crust is golden brown, vegetables are tender, and cheese is melted and browned.  Let set for 5-10 minutes, cut, serve, and enjoy!

Happy Eating!

Cheers & Hugs,
Jodi