
Wishing you calm
Wishing you bright
Be with the people you love
Doing the things that are right
As best as you can
Each day and each night
Cheers & Calm, Bright Hugs,
Jodi
Wishing you calm
Wishing you bright
Be with the people you love
Doing the things that are right
As best as you can
Each day and each night
Cheers & Calm, Bright Hugs,
Jodi
Trying to keep things in perspective
and remembering to enjoy the journey.
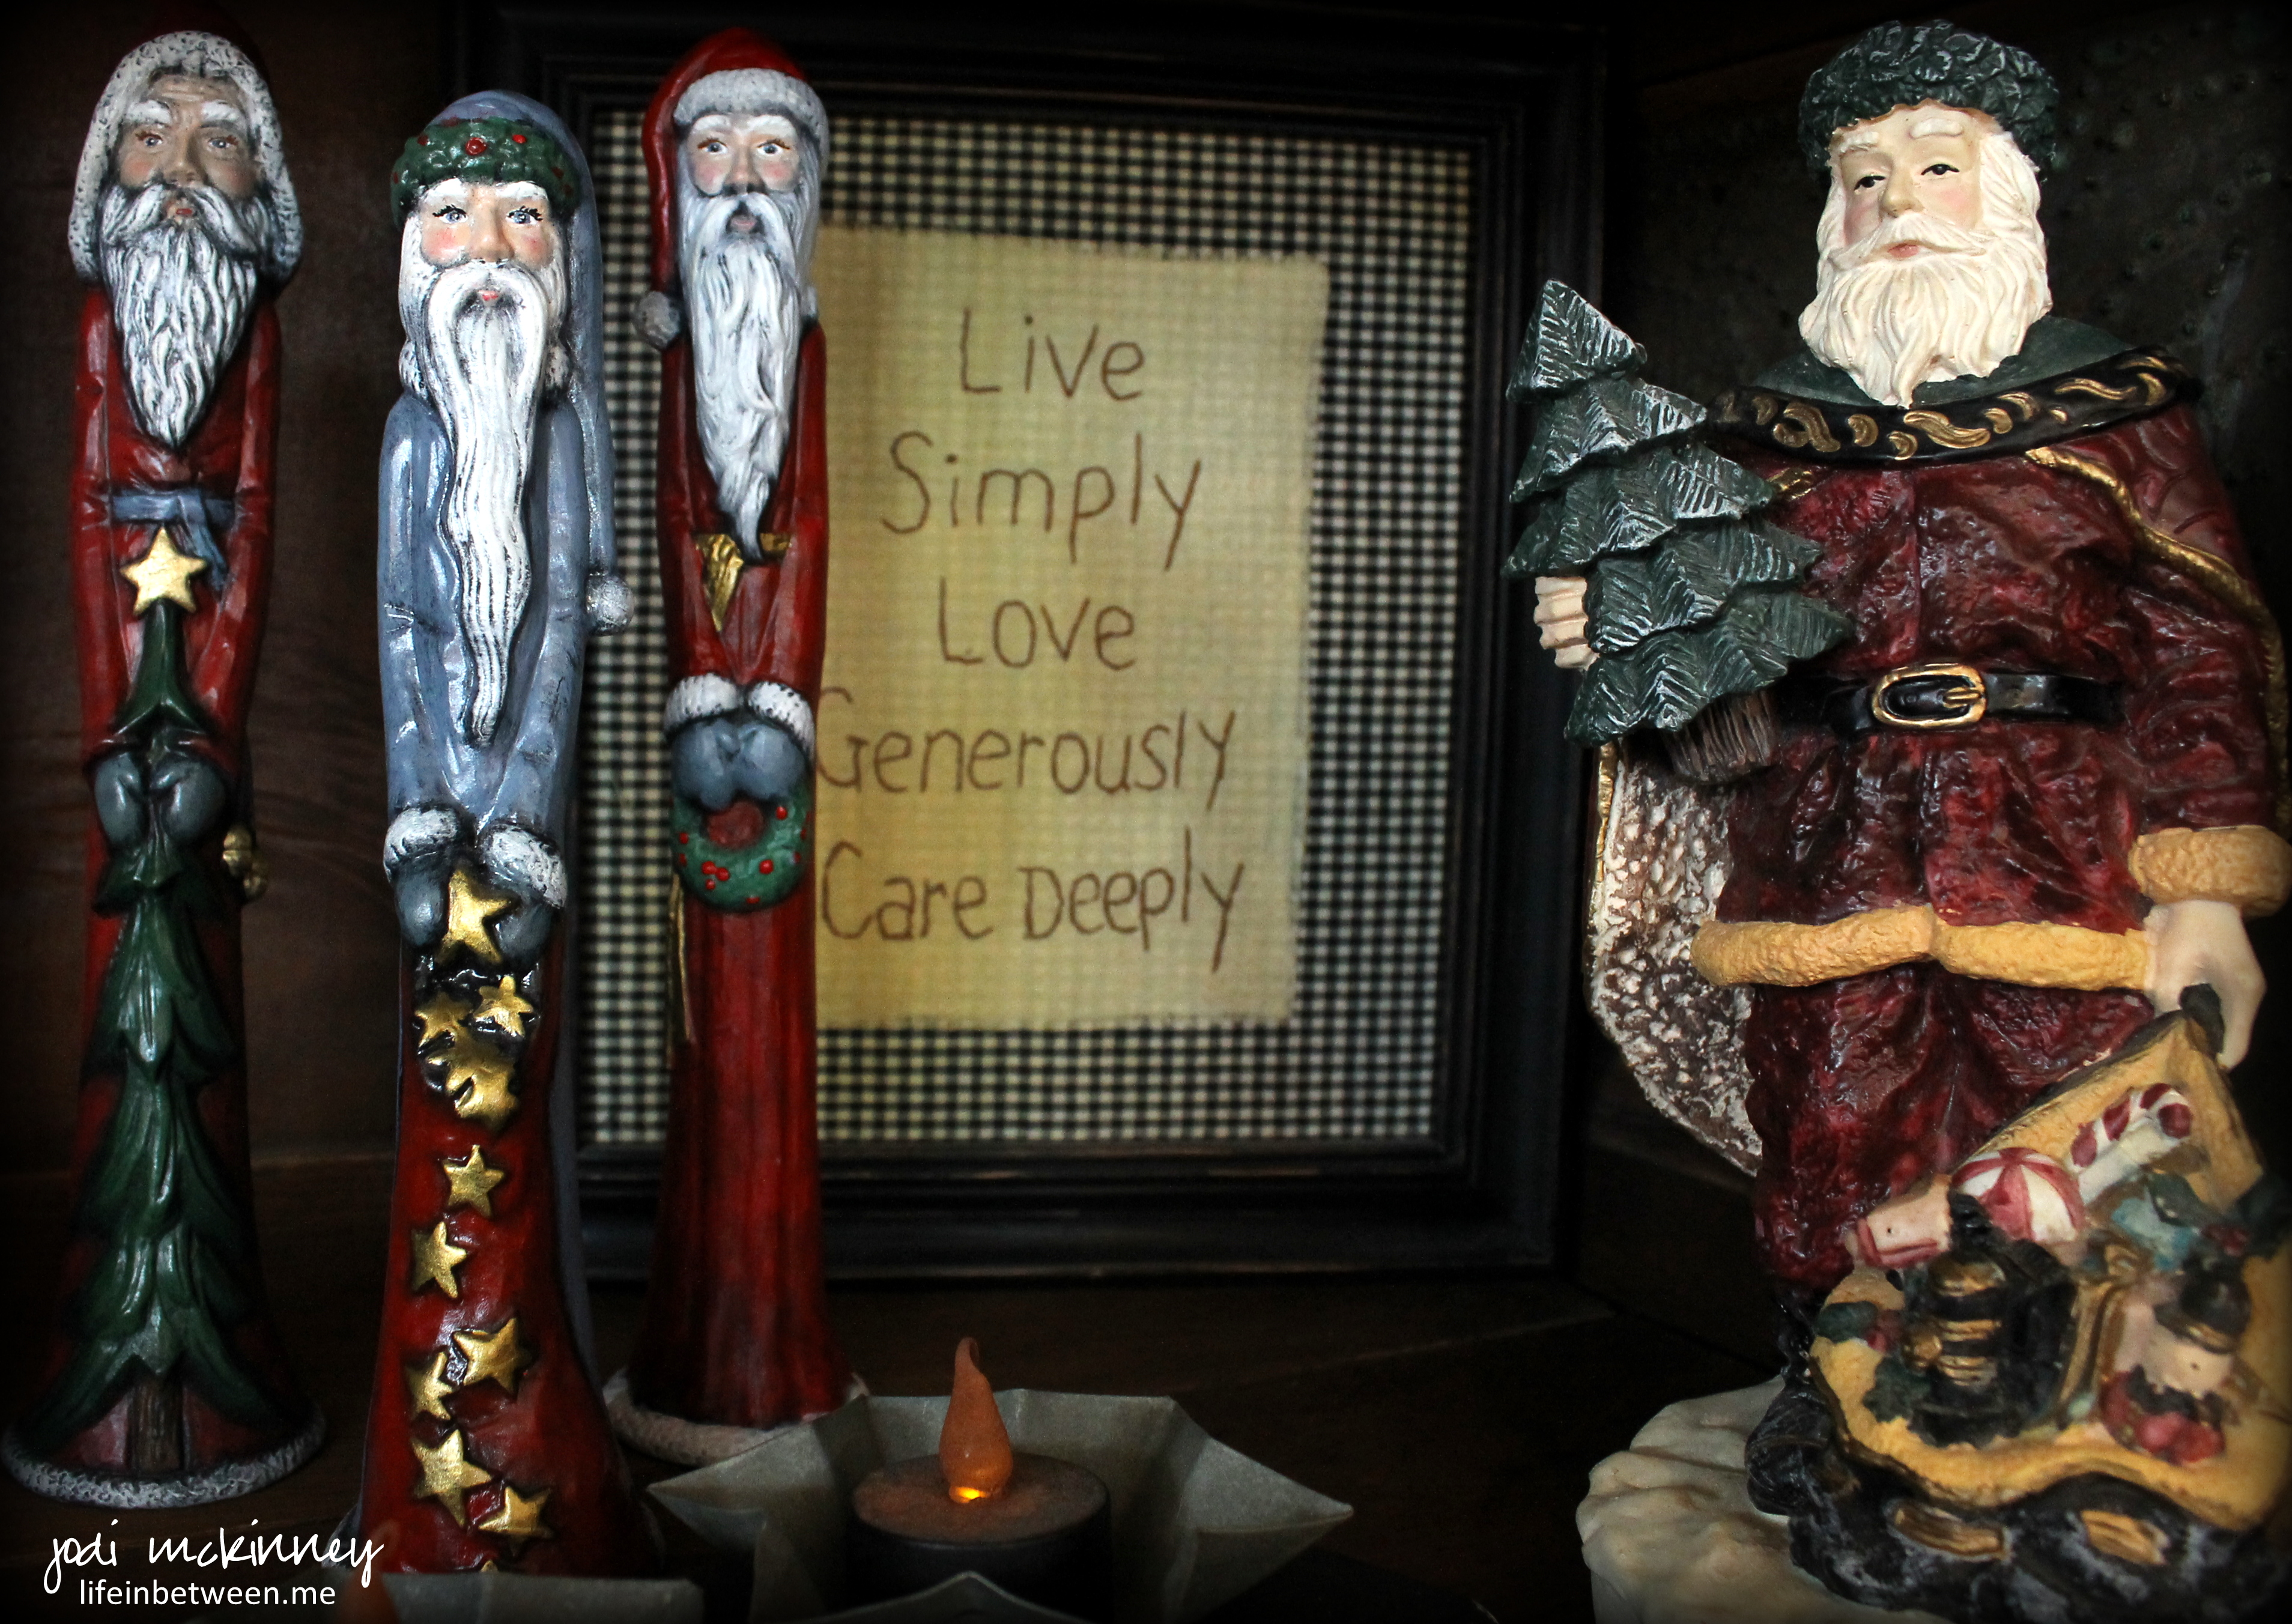
Life Simply, Love Generously, Care Deeply.
That is what matters.
Cheers & Hugs,
Jodi
(P.S. Remember when doing ceramics was “all the rage?” I still love these three little pencil Santas on the left I painted about 20 years ago. They are hanging out in an antique jelly cupboard in our great room with a bunch of others for the season. I have a bit of a “Santa” thang.)

(This card was made using StampinUp’s Endless Wishes Stamp Set inked in white on Night of Navy card stock and simply embellished with pearls.)
Cheers & Merry Hugs,
Jodi
Look what flew in….
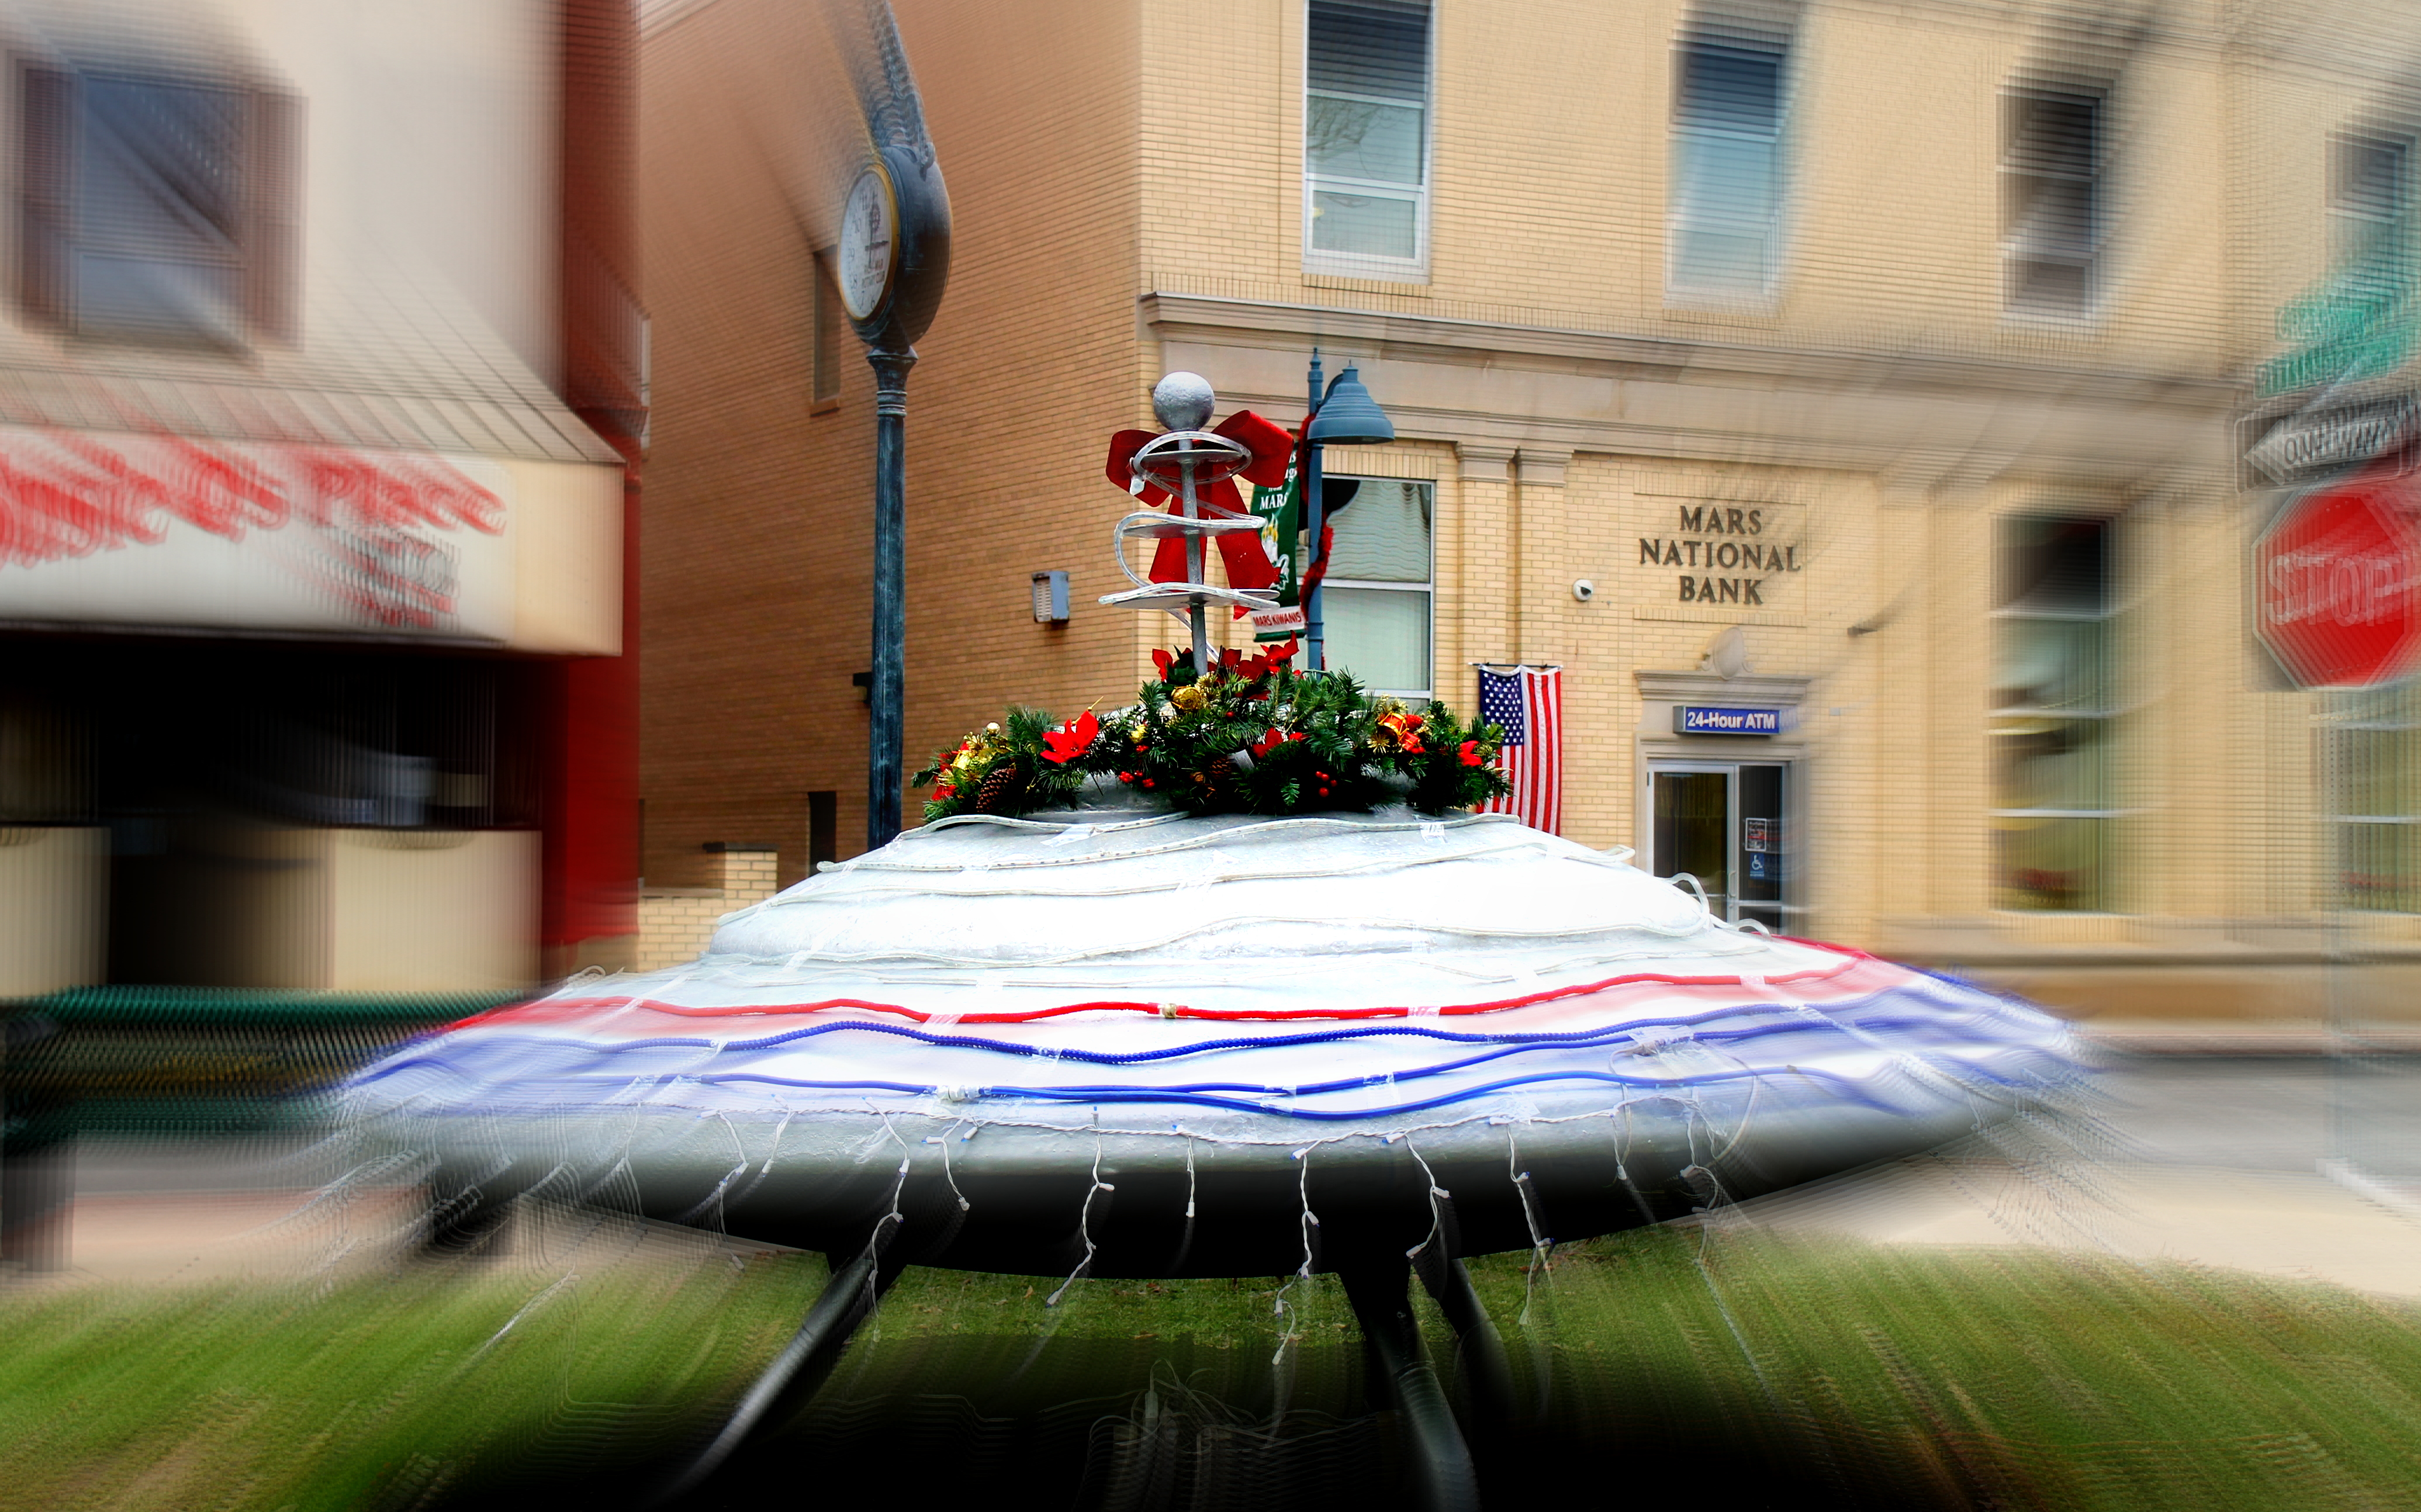
Yep – this is what we do in Mars…

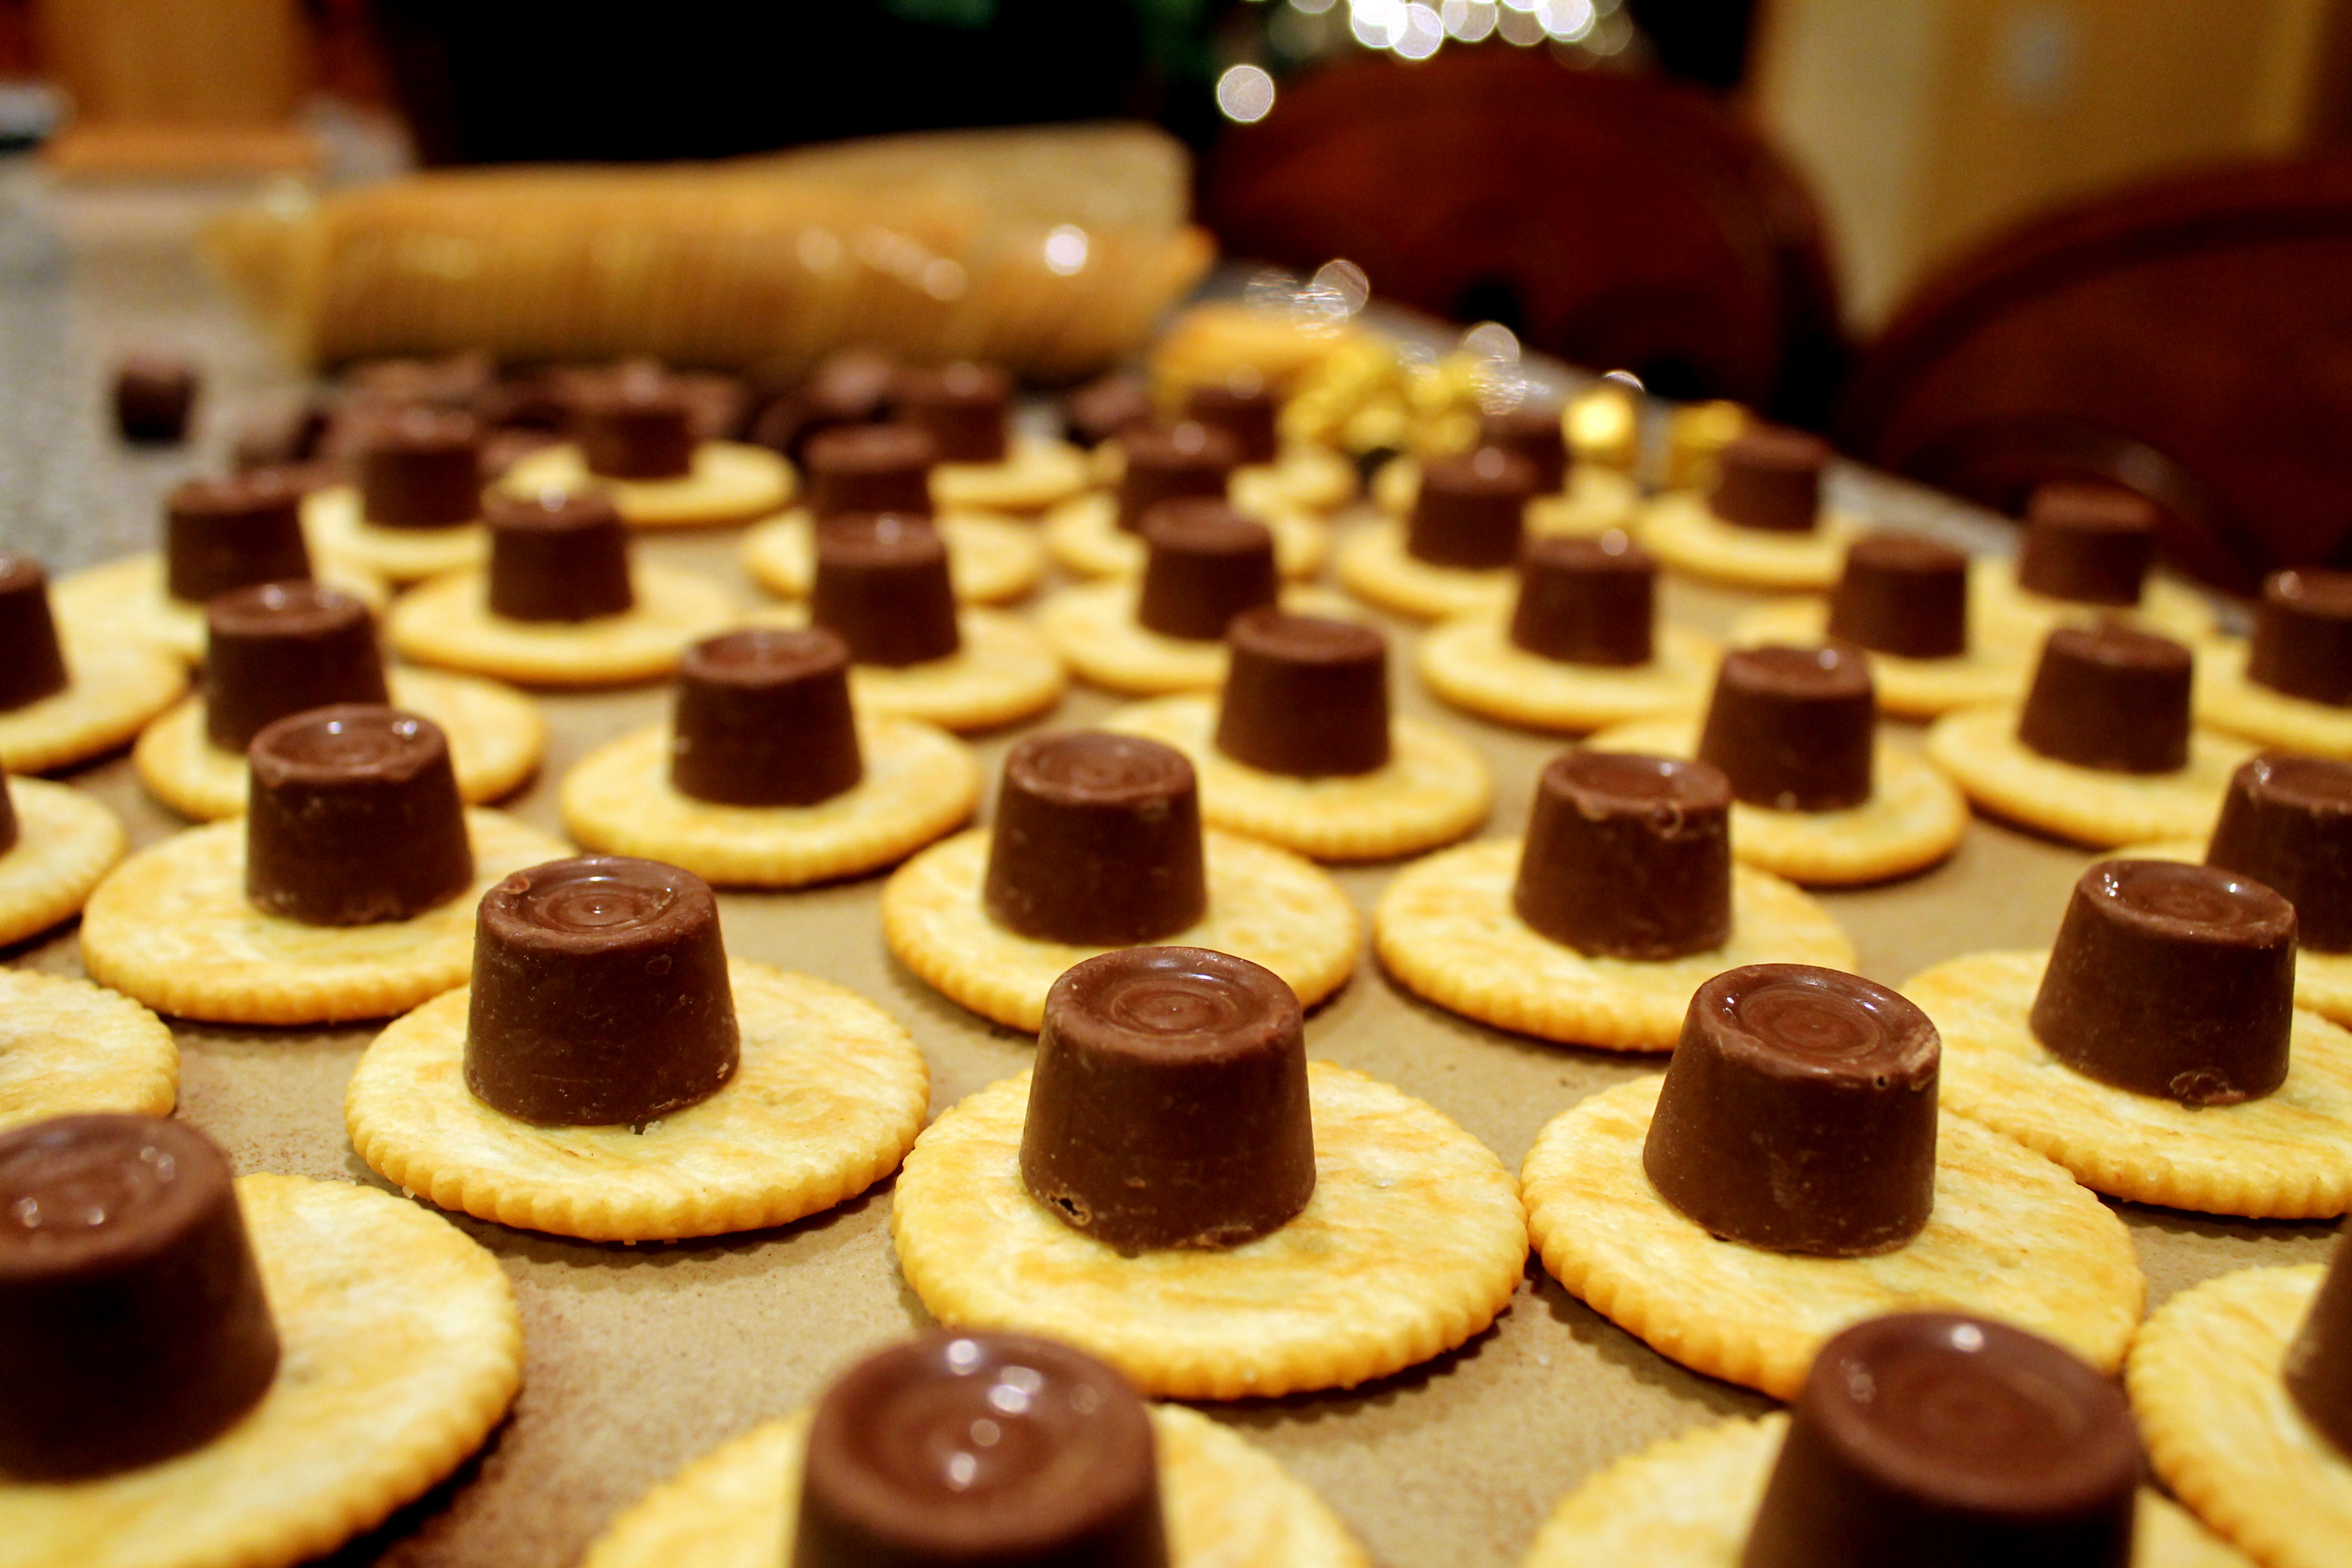
Chocolate + Crisp, Salty, Buttery Ritz Crackers + Rolo Candies = PURE BLISS in my book…
Do you agree?

Oh THANK YOU, Ruthanne at easybaked.net for sharing this super easy, wonderfully delicious recipe!

It is literally THREE (3) ingredients + any embellishments you want to add – or not.
Ritz Crackers
Rolo Candies
Chocolate
Now seriously – anyone can do that – right?
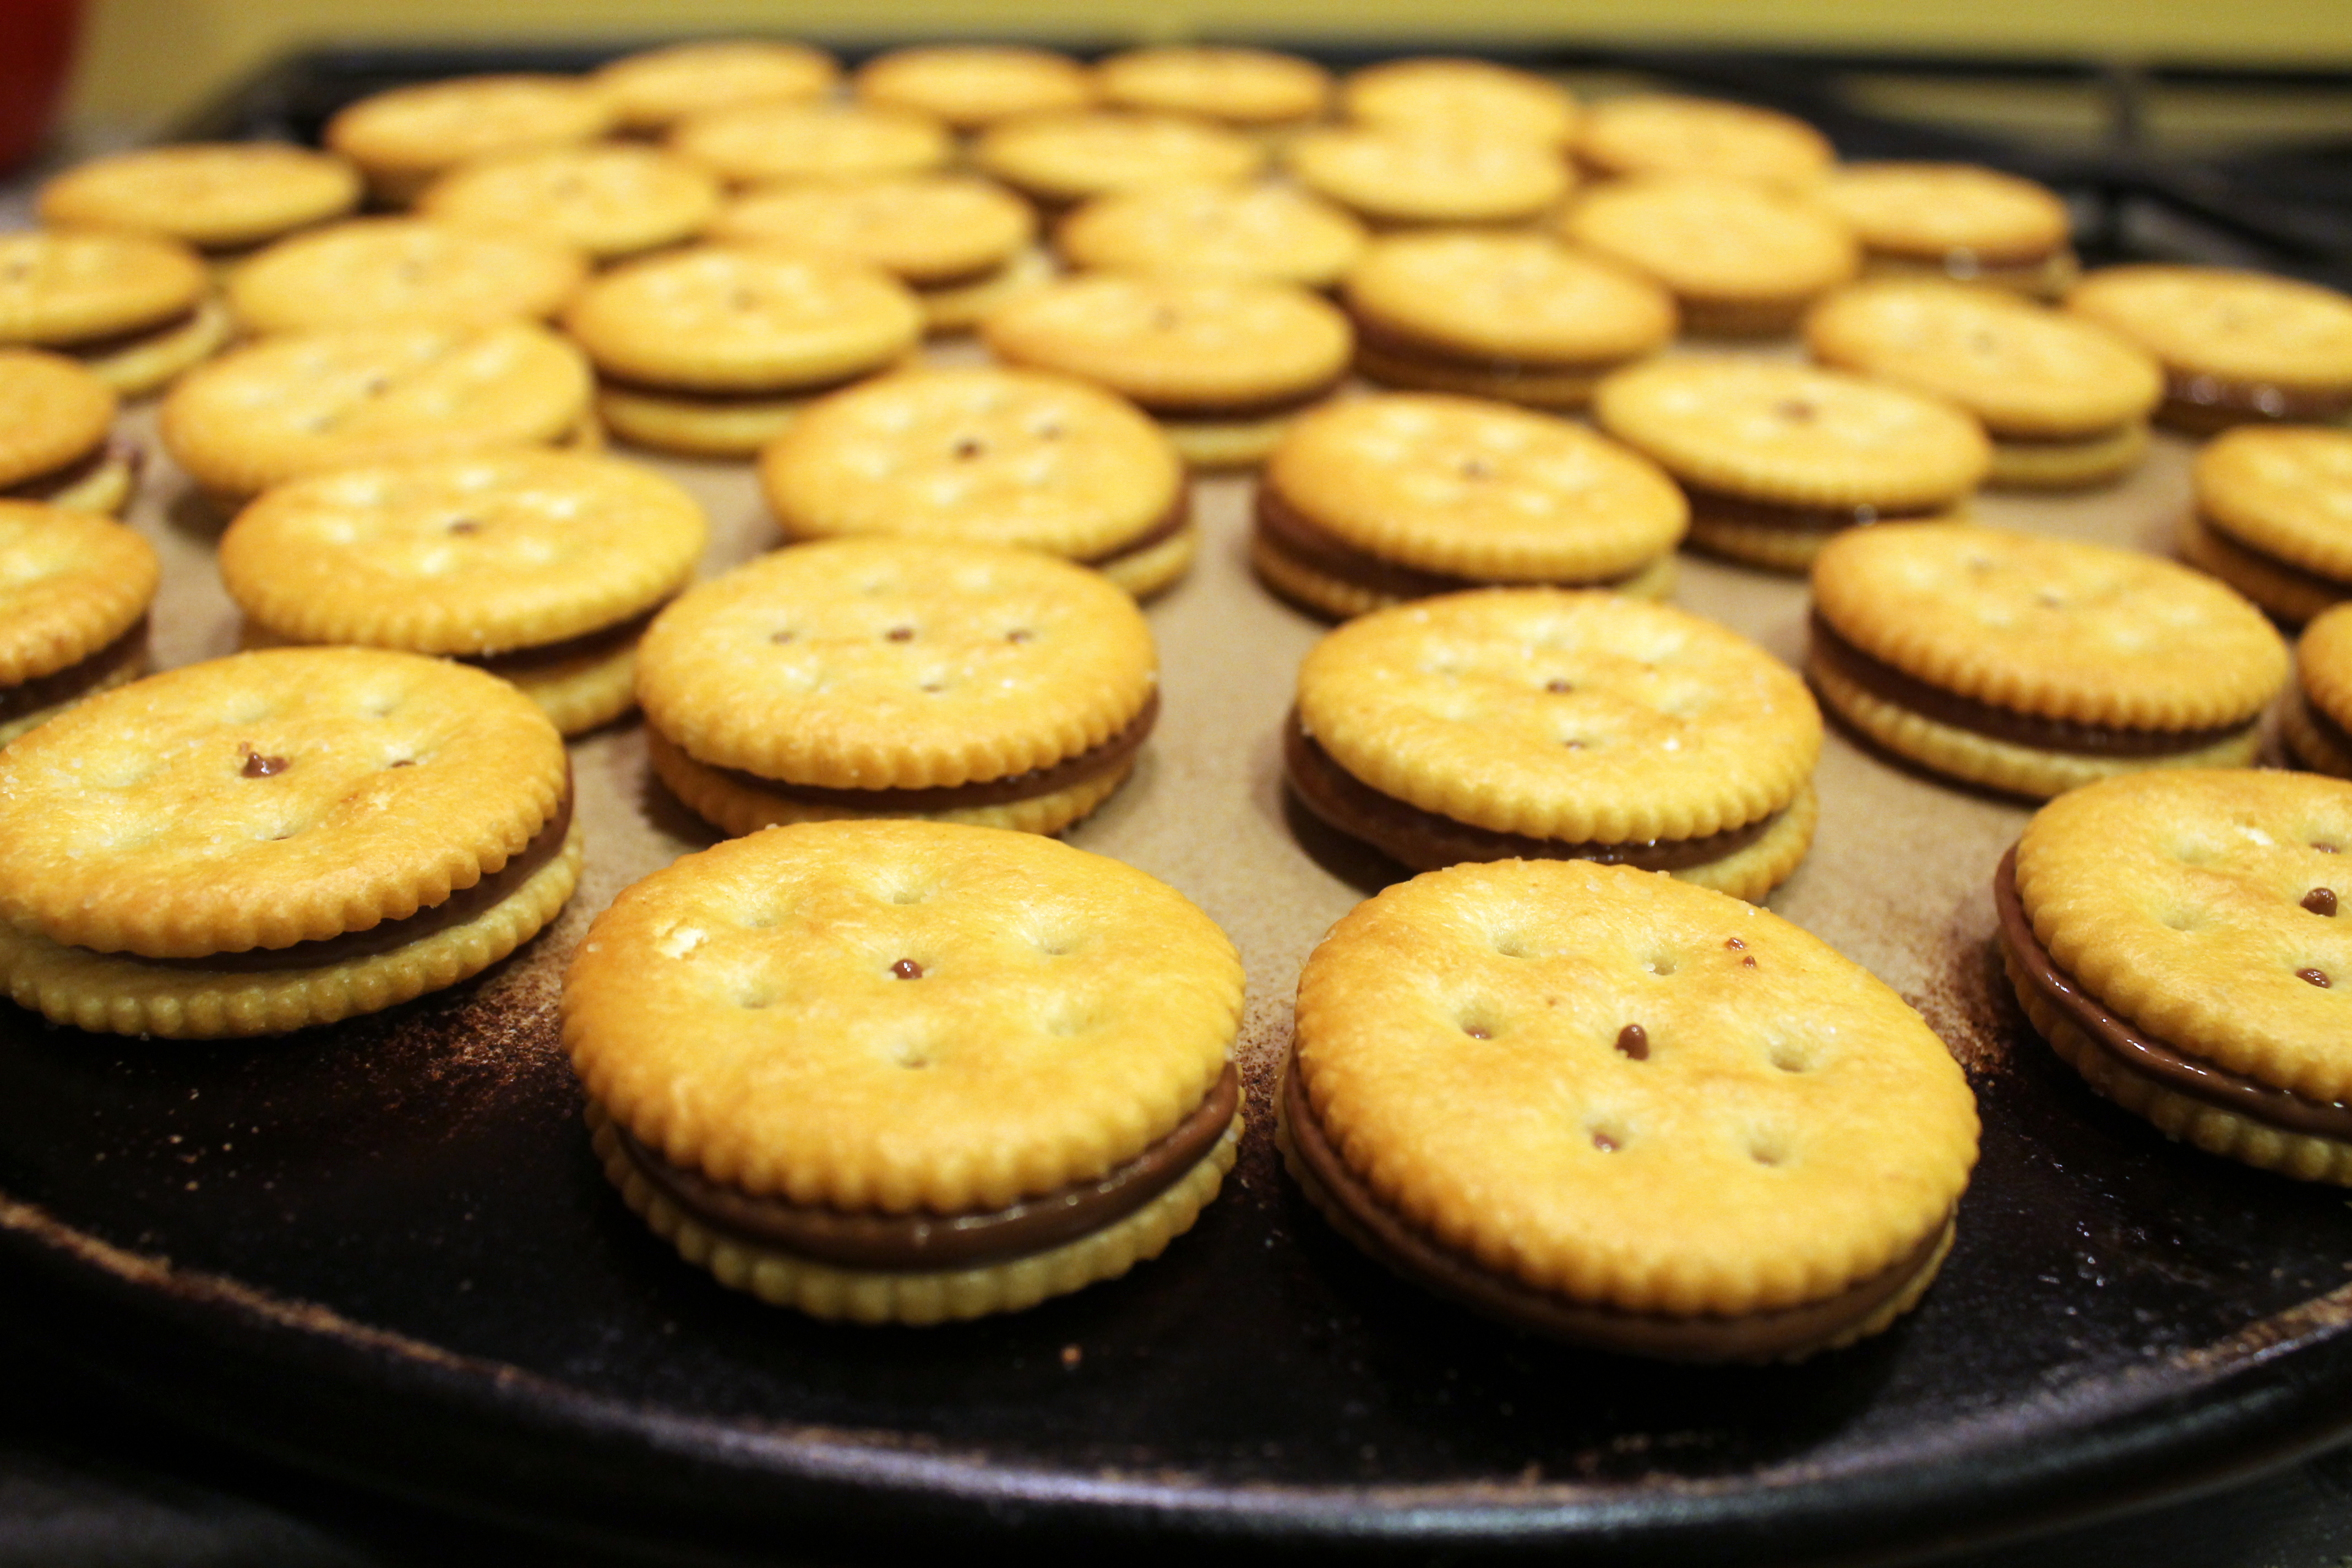
And according to Ruthanne’s Dad, they are the BEST cookies he’s ever eaten…

Here is Ruthanne’s recipe from her awesome website: easybaked.net:
INGREDIENTS: (makes about 50 cookies)
DIRECTIONS:
ENJOY!

Cheers & Chocolately Hugs,
Jodi

– Dr. Wayne Dyer
Weekly Photo Challenge: Twinkle
Cheers & Bright Twinkly Hugs,
Jodi
One of my favorite things to bake (and eat) for the holidays is my Grandma’s Old-Fashioned Apricot Nut Bread.
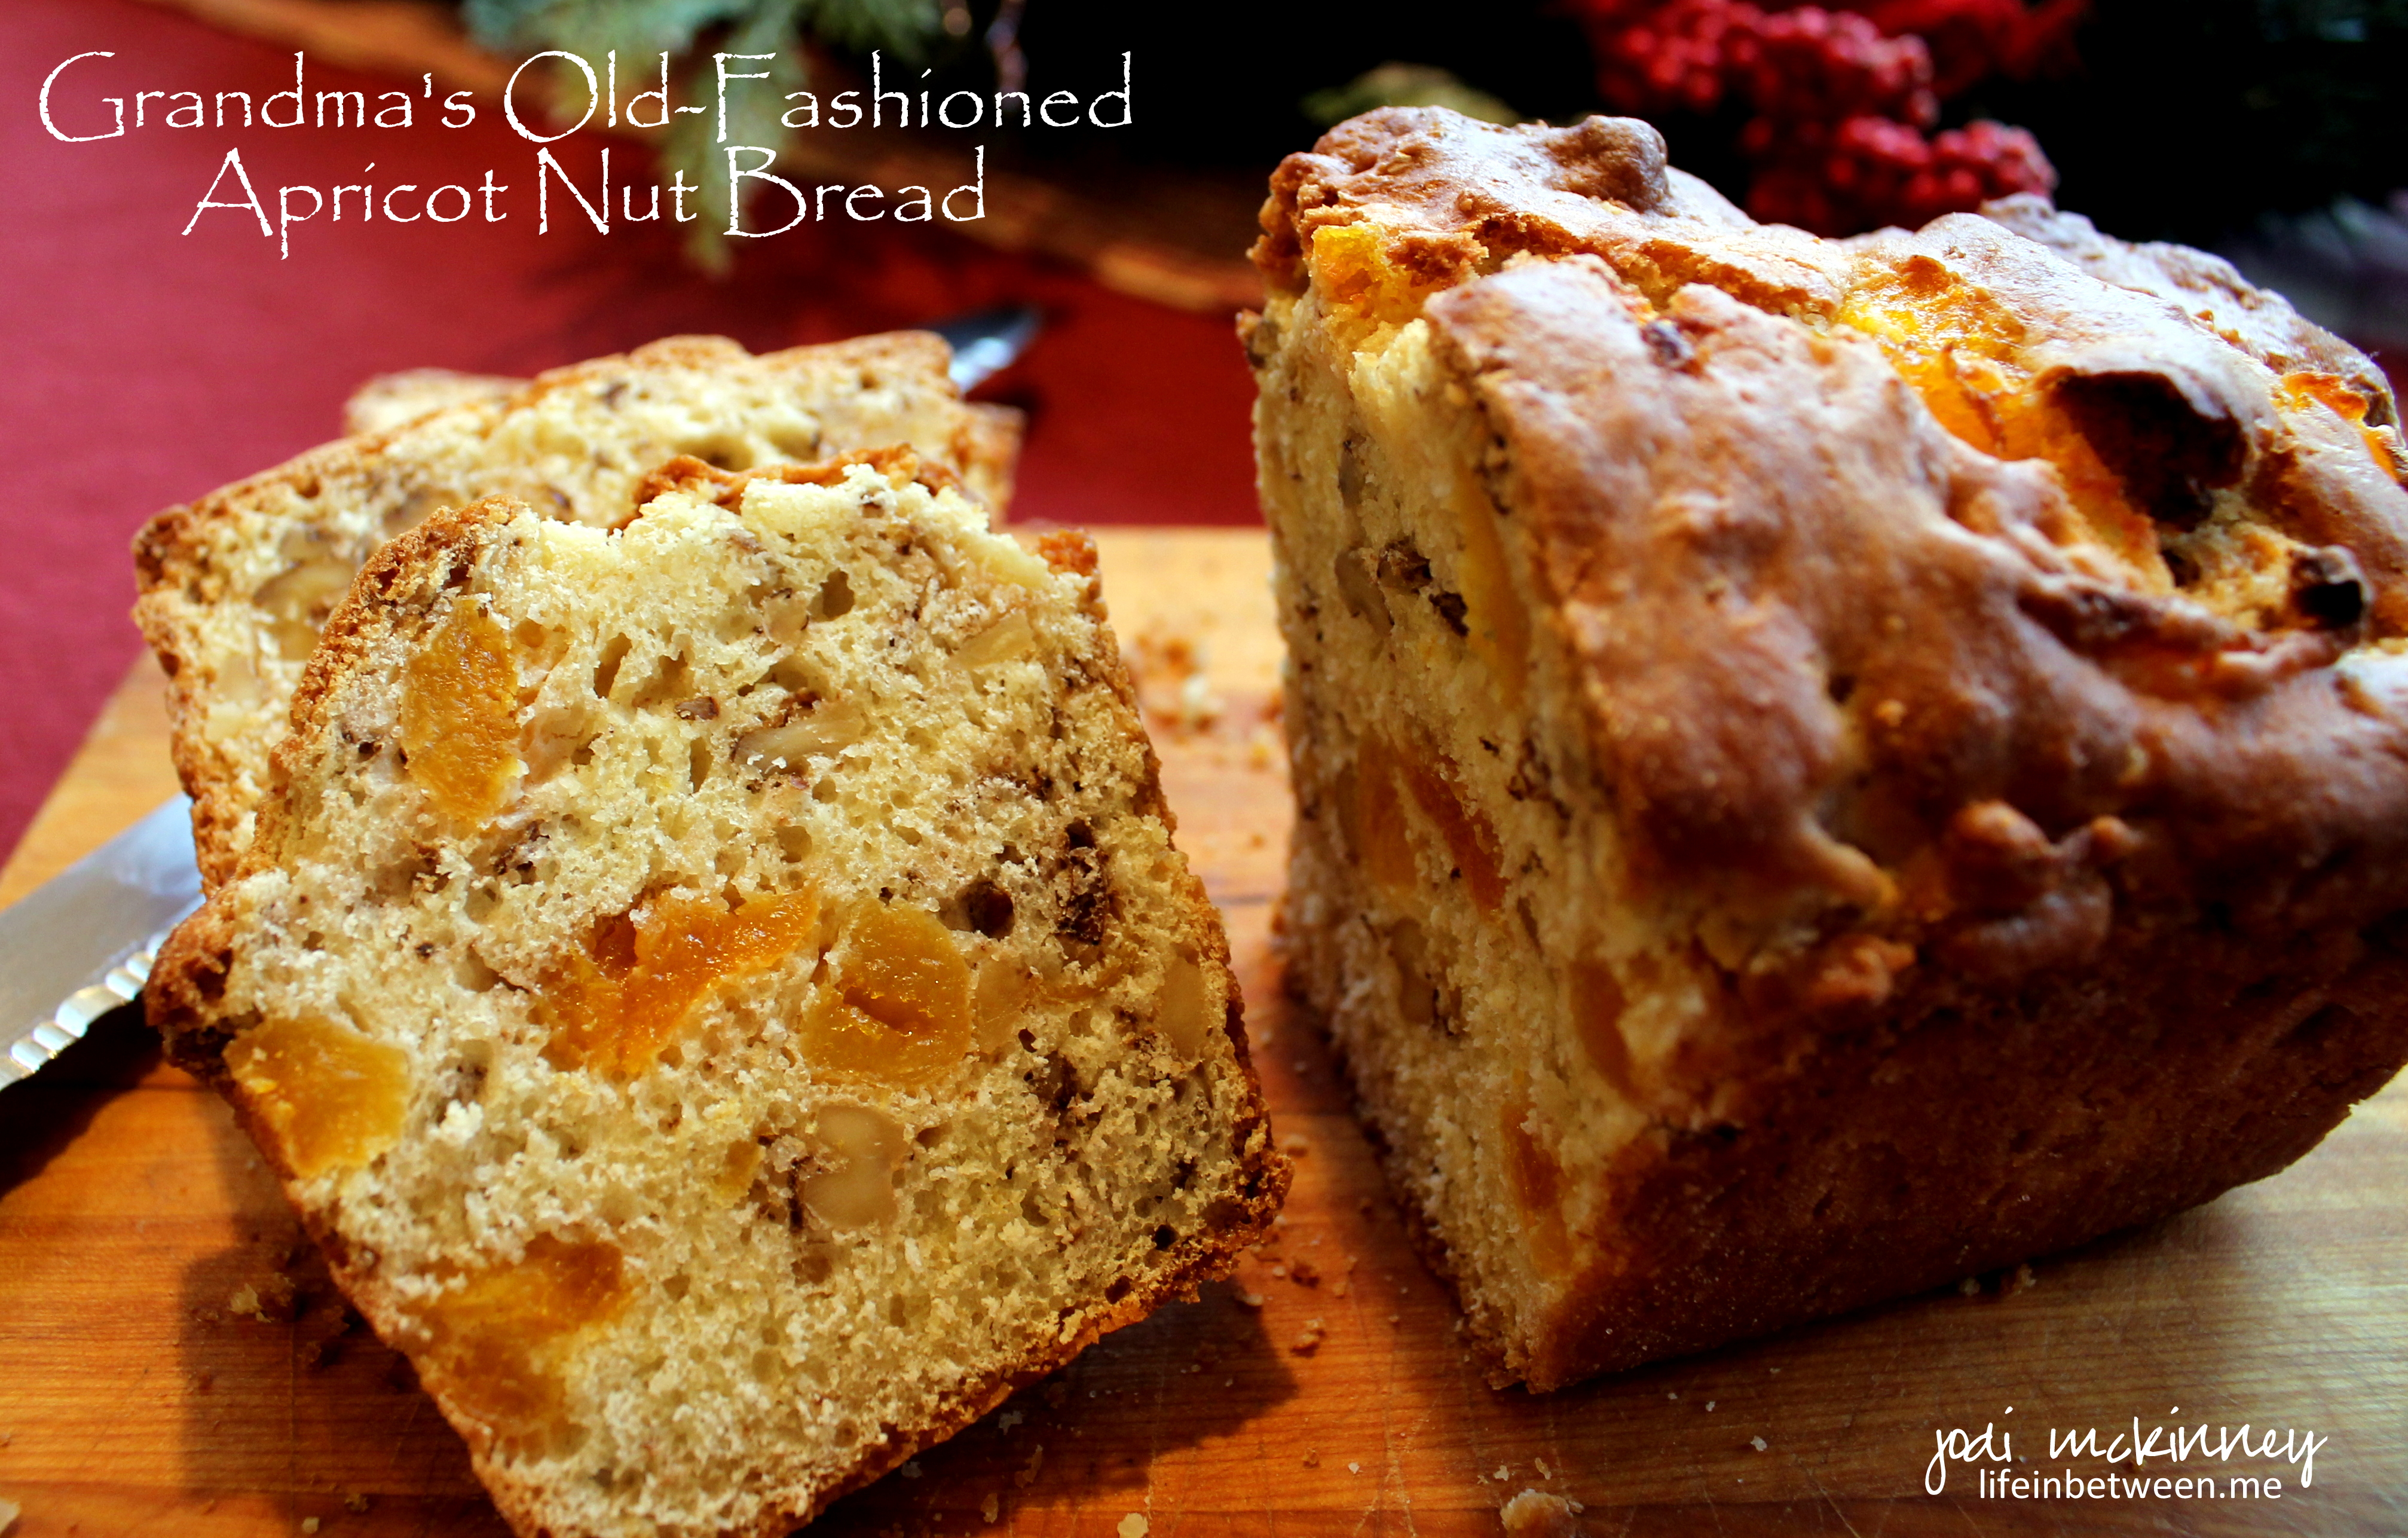
For me, it is like spending a little time with Grandma – even though she’s been gone for 20 years now. The smells that fill the house… using her recipe card – complete with stains from baking episodes past… using her old tin measuring cup, snipping apricots, chopping nuts… To me, the holidays aren’t truly here until I make Grandma’s Apricot Nut Bread and spend a little time with her through this ritual.
When I was young, I spent Christmas vacations (and every other moment I could) with Grandma. We spent a lot of our time together in the kitchen. While we were cooking or baking, Grandma would tell me stories about her childhood. It was sadly a pretty short one, because she had to become Mama to her baby brothers at only 9 years old when her mom died at a devastatingly early age. We would talk about her early married life with outhouses, coal furnaces, and washboards. And some of my favorite stories, especially when I was young, were the ones she would tell about me when I was a baby and how she danced in the hospital hallway with the doctor after I was born and how she fed me her homemade chicken soup on my first day home.
We laughed while we worked, and I never felt so loved.
One of the things Grandma made every year was Apricot Nut Bread. Growing up, it really wasn’t my favorite. I much preferred the lady locks or nut horns or nut roll – even the chocolate chip cookies. This bread is not overly sweet. It is not overly moist. But as an adult, it has become my absolute favorite. A slice with a swirl of creamy salted butter or a schmear of rich cream cheese and a cup of coffee might just be my favorite way to start the day.
This weekend, I made my annual batch of Grandma’s Old-Fashioned Apricot Nut Bread.
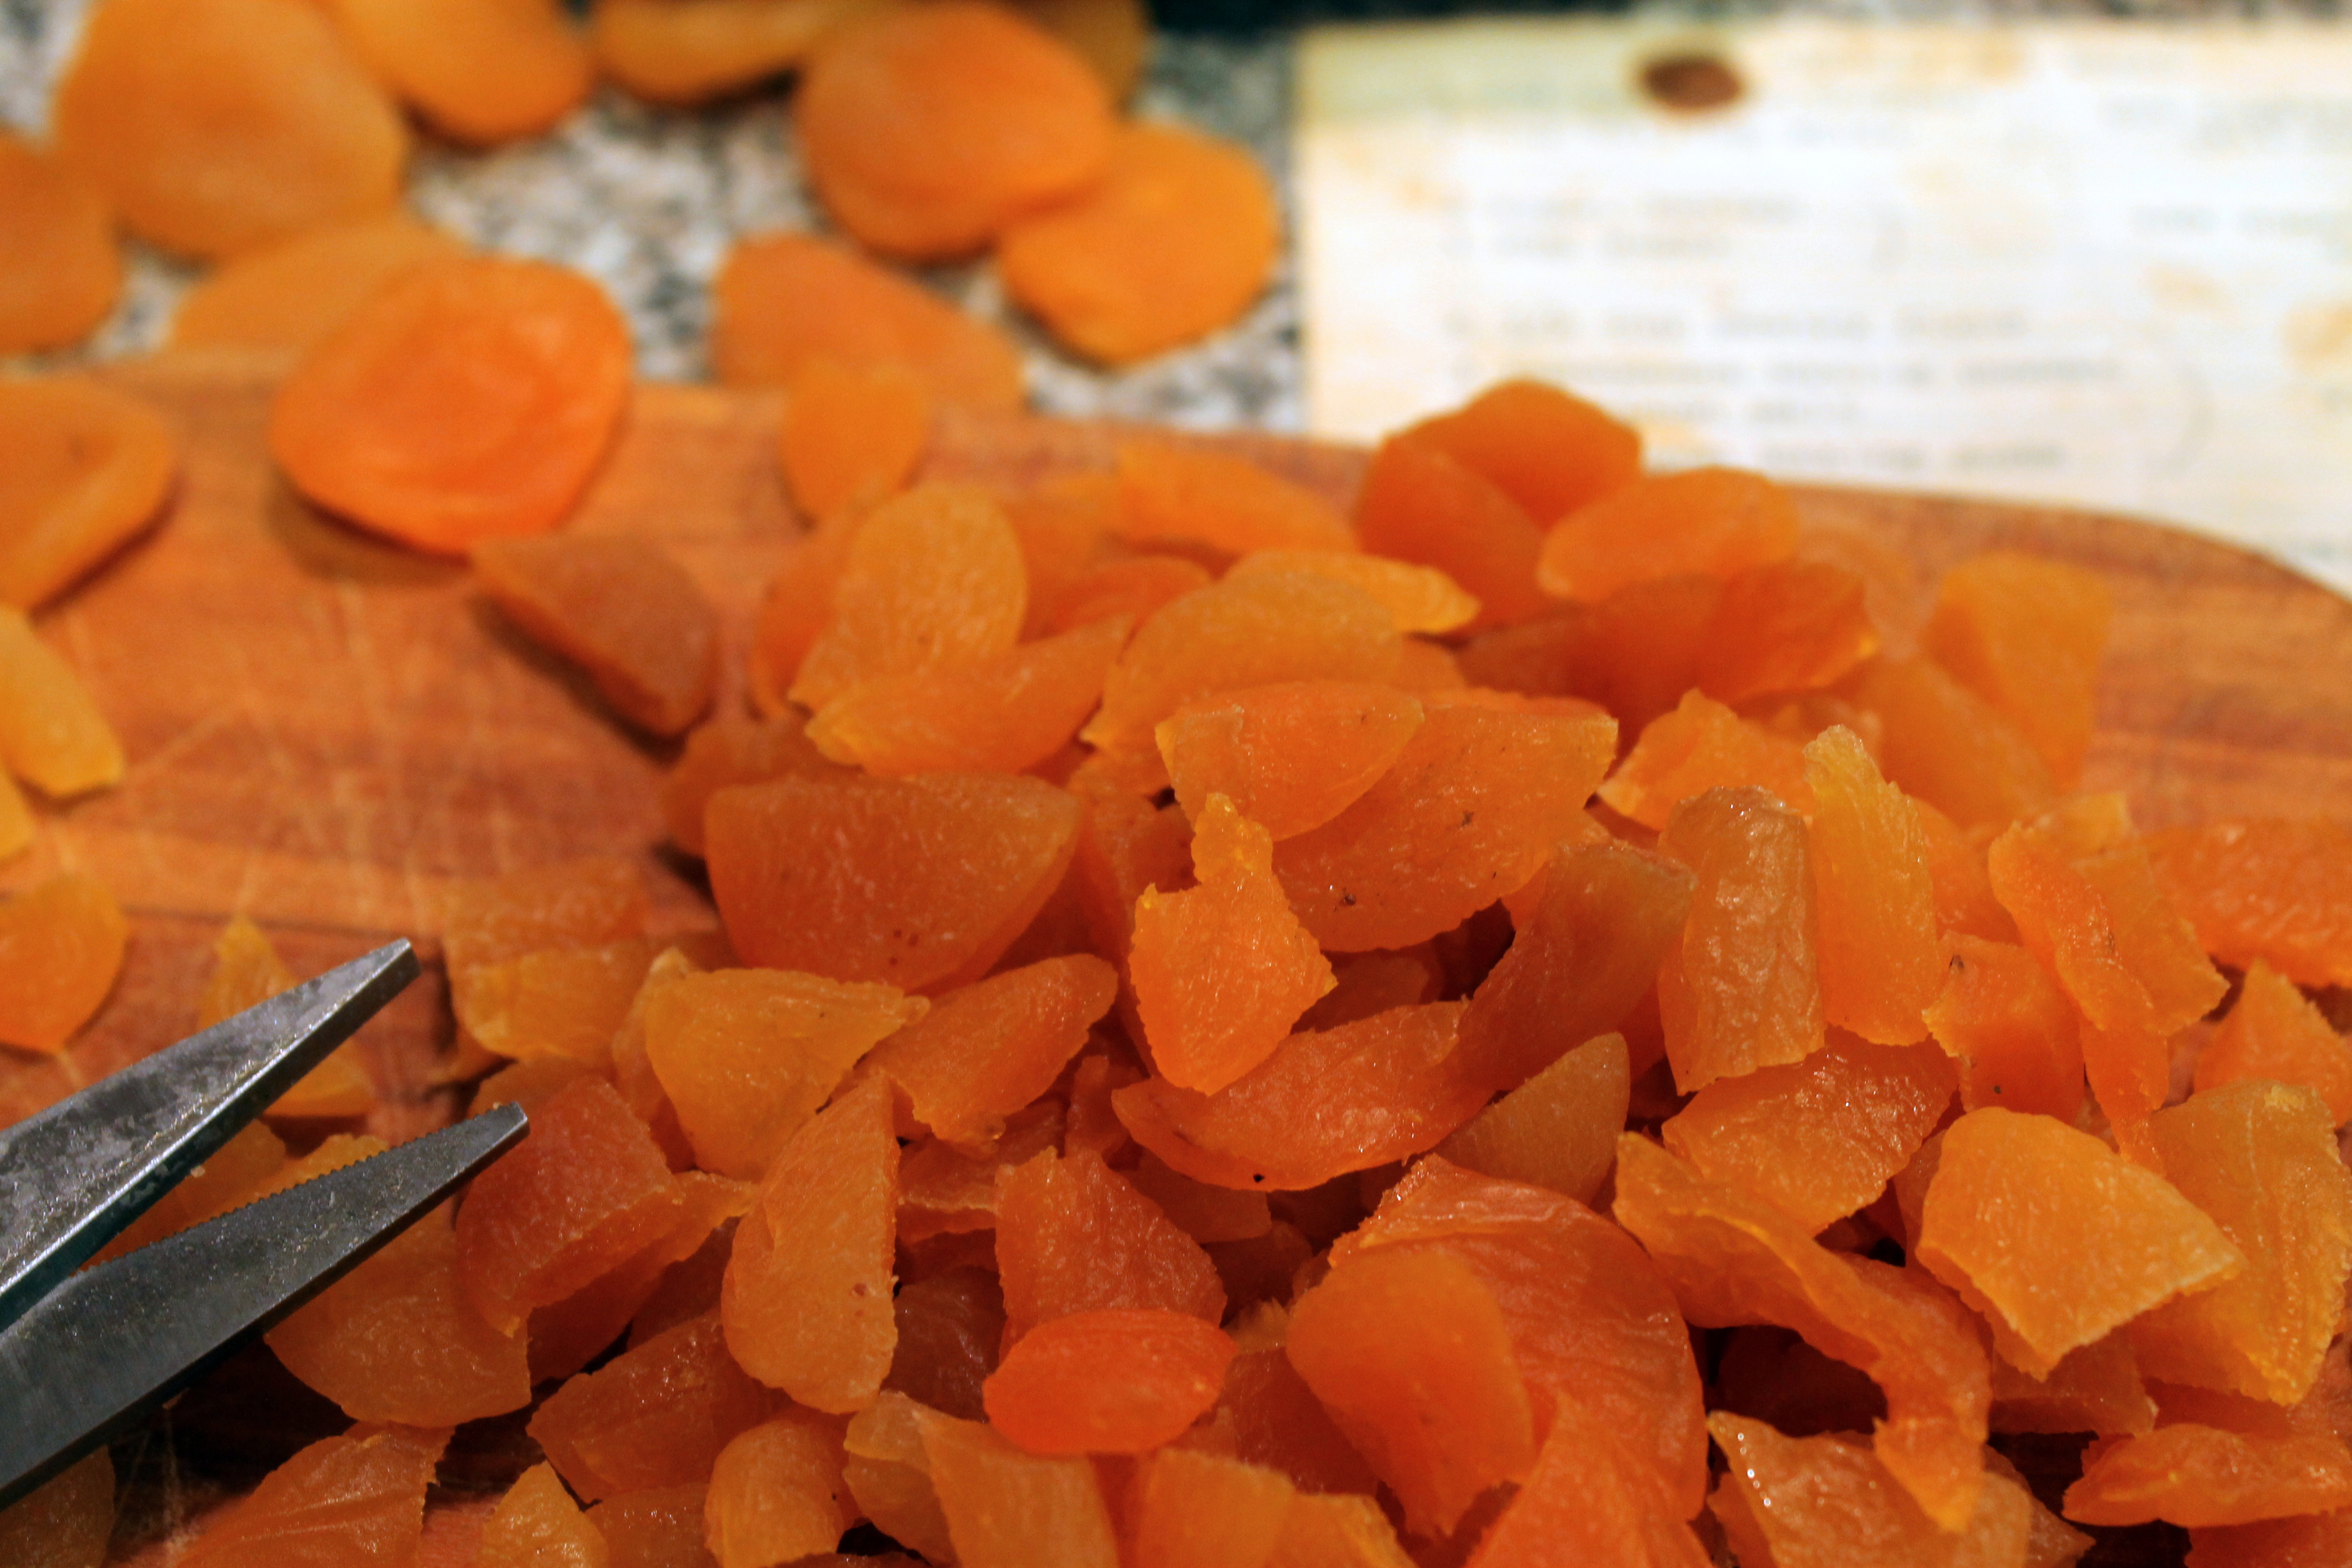
I started with some dried apricots, which I snipped with scissors into large chunks. (I cut most of the apricots into fourths.) Sharp kitchen shears work much better than a knife given the stickiness of the apricots while cutting. And – it’s how Grandma did it…
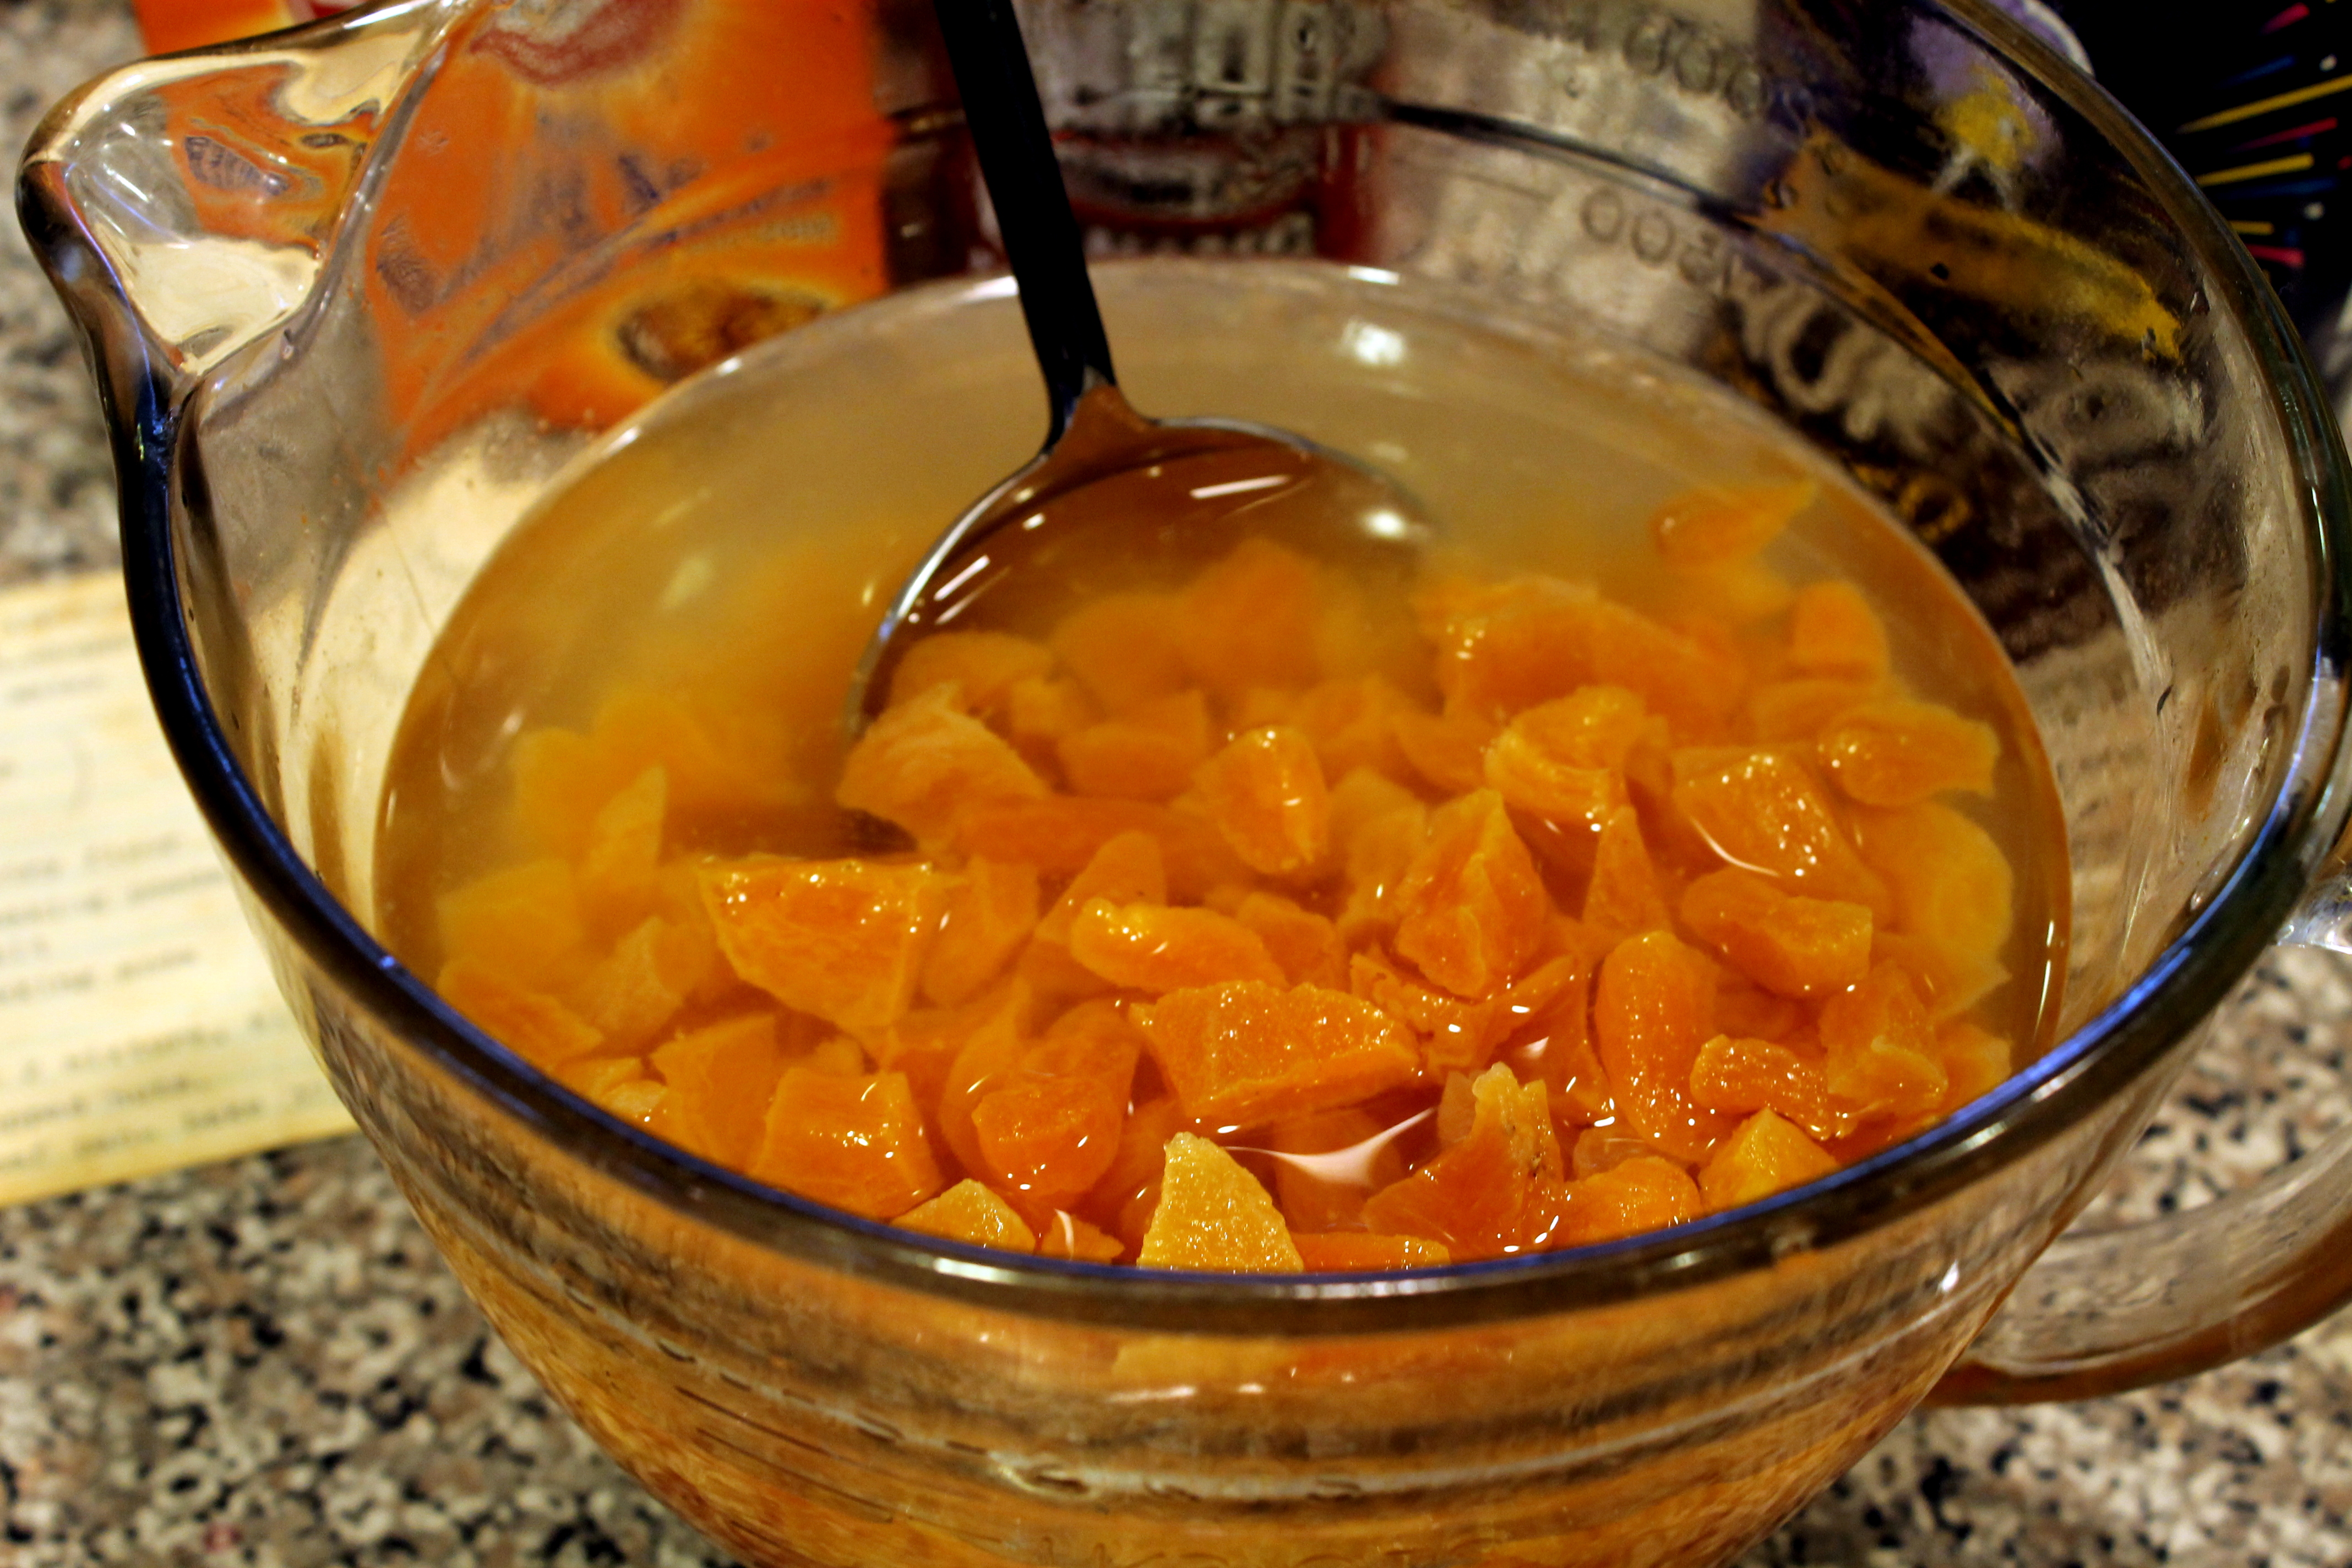
 After the apricots are coarsely snipped, they are placed in a bowl of hot water to further plump and soften. Equal parts of apricots and water are used.
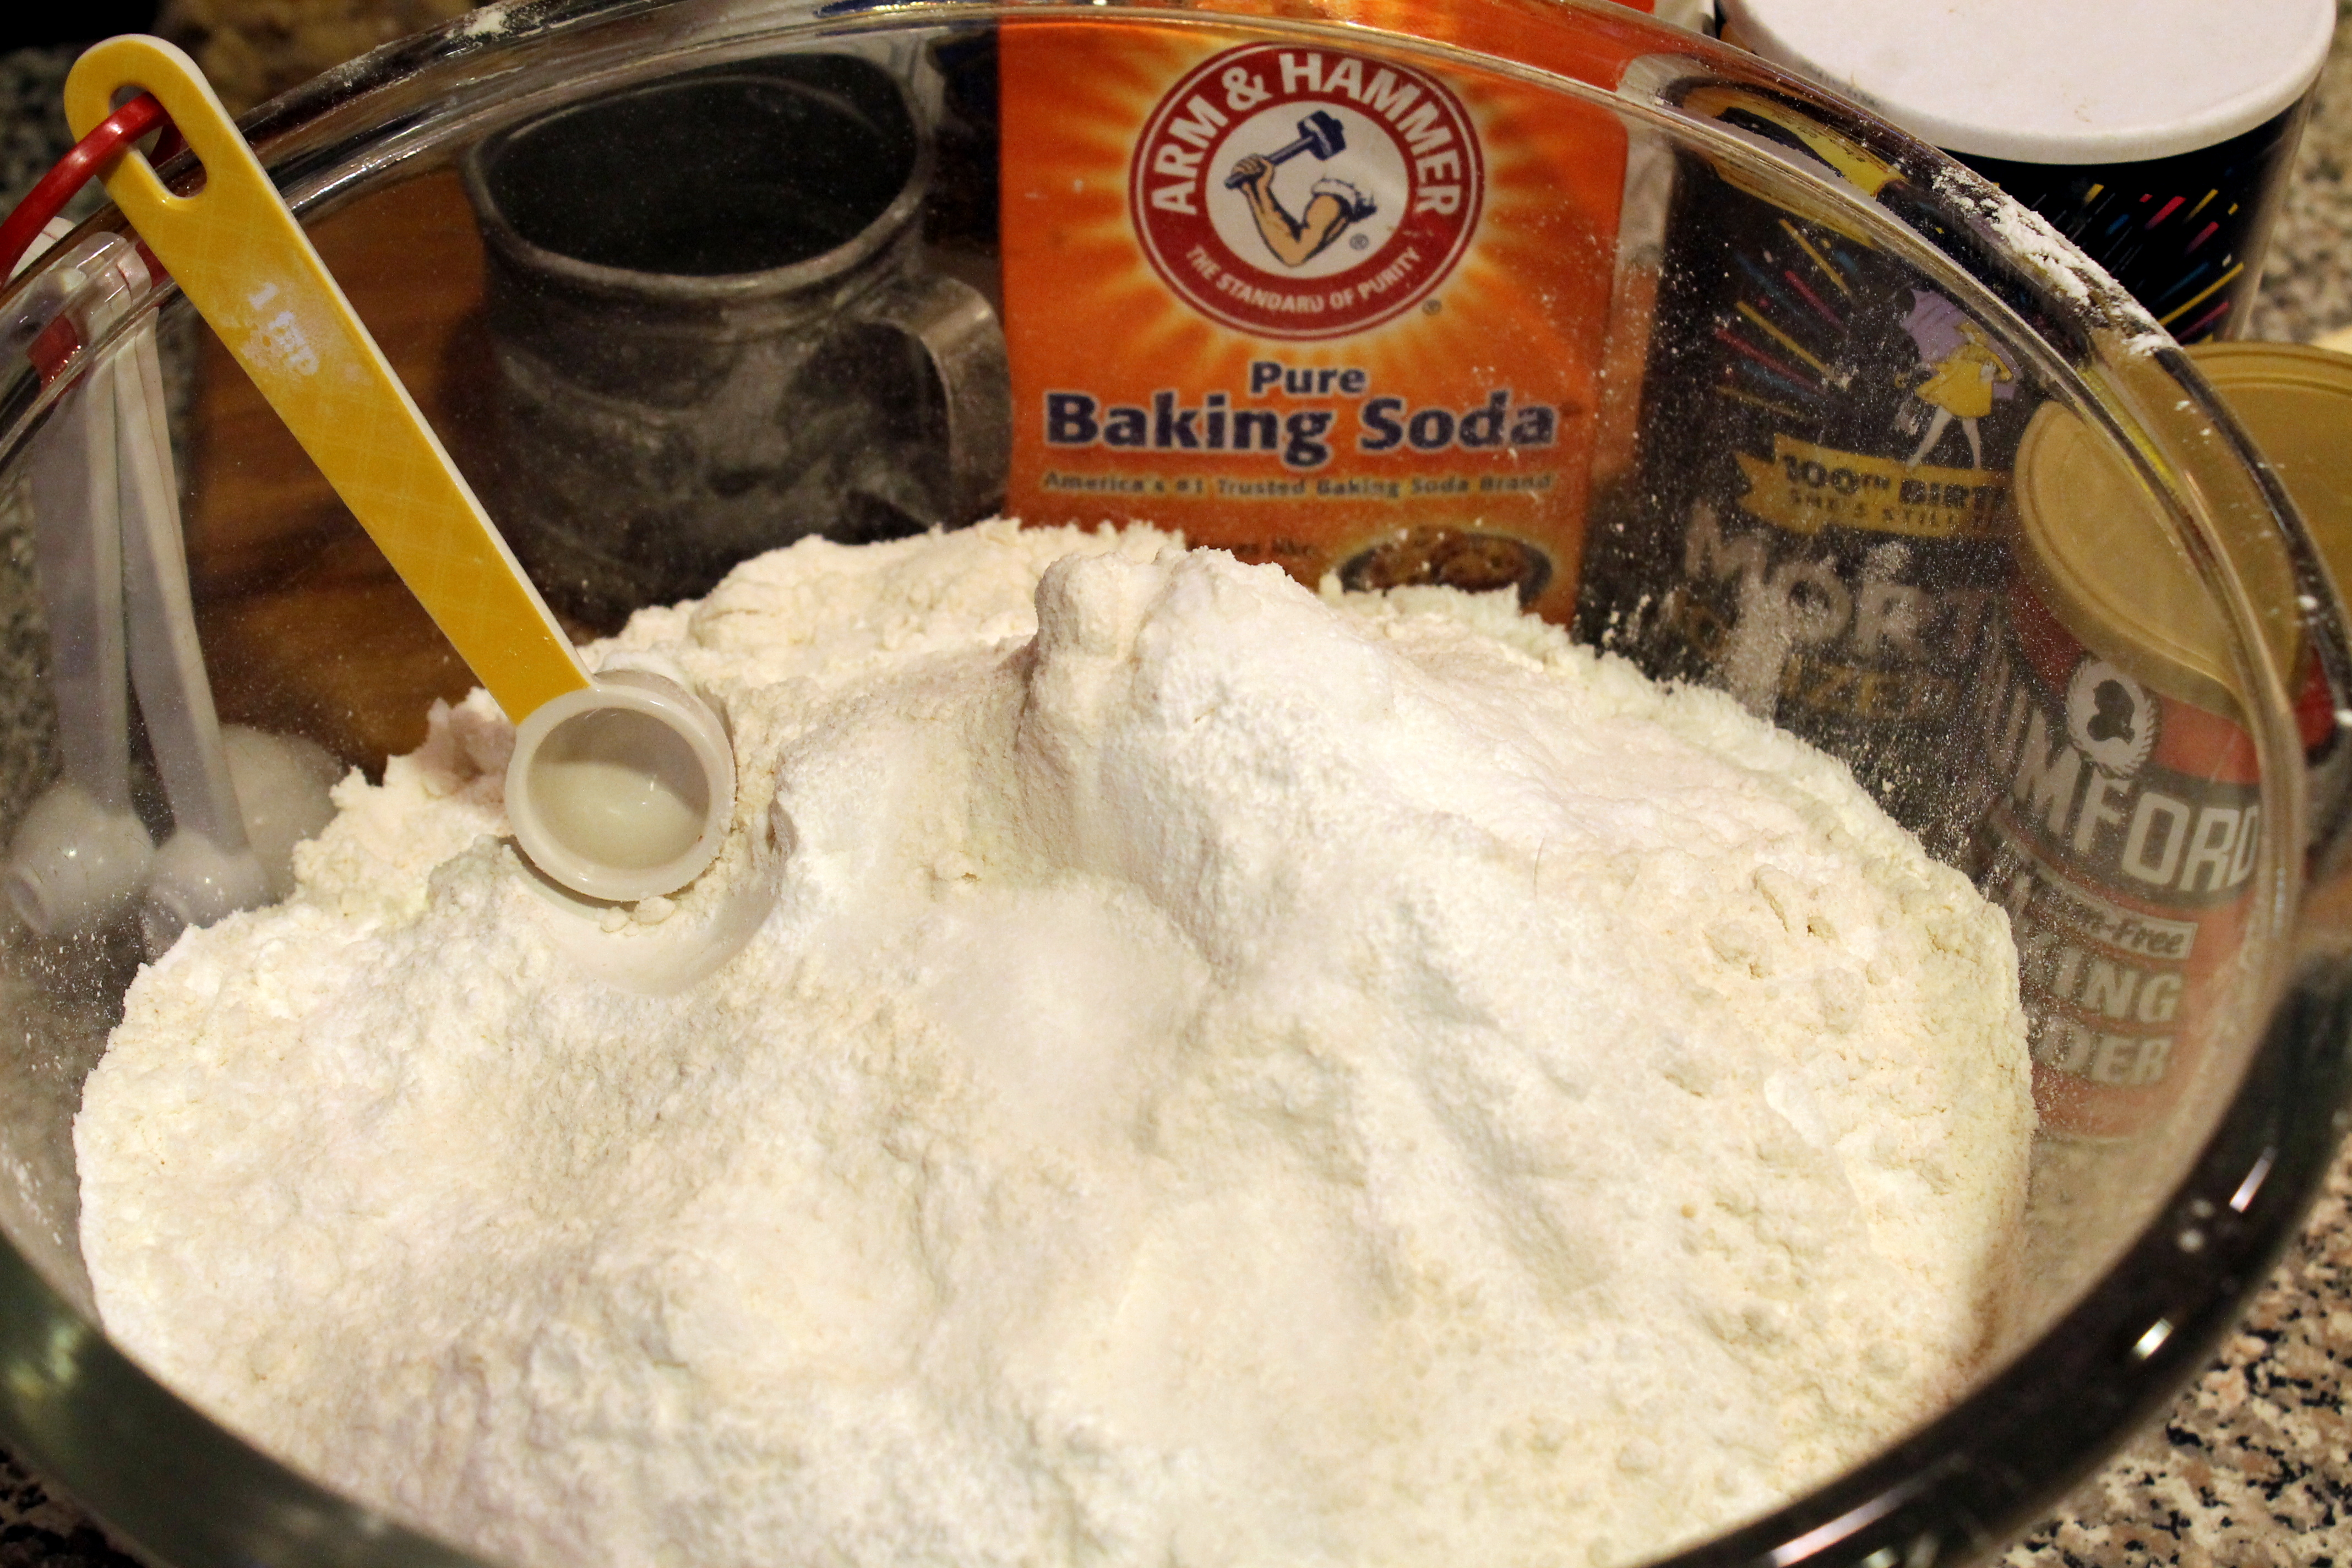
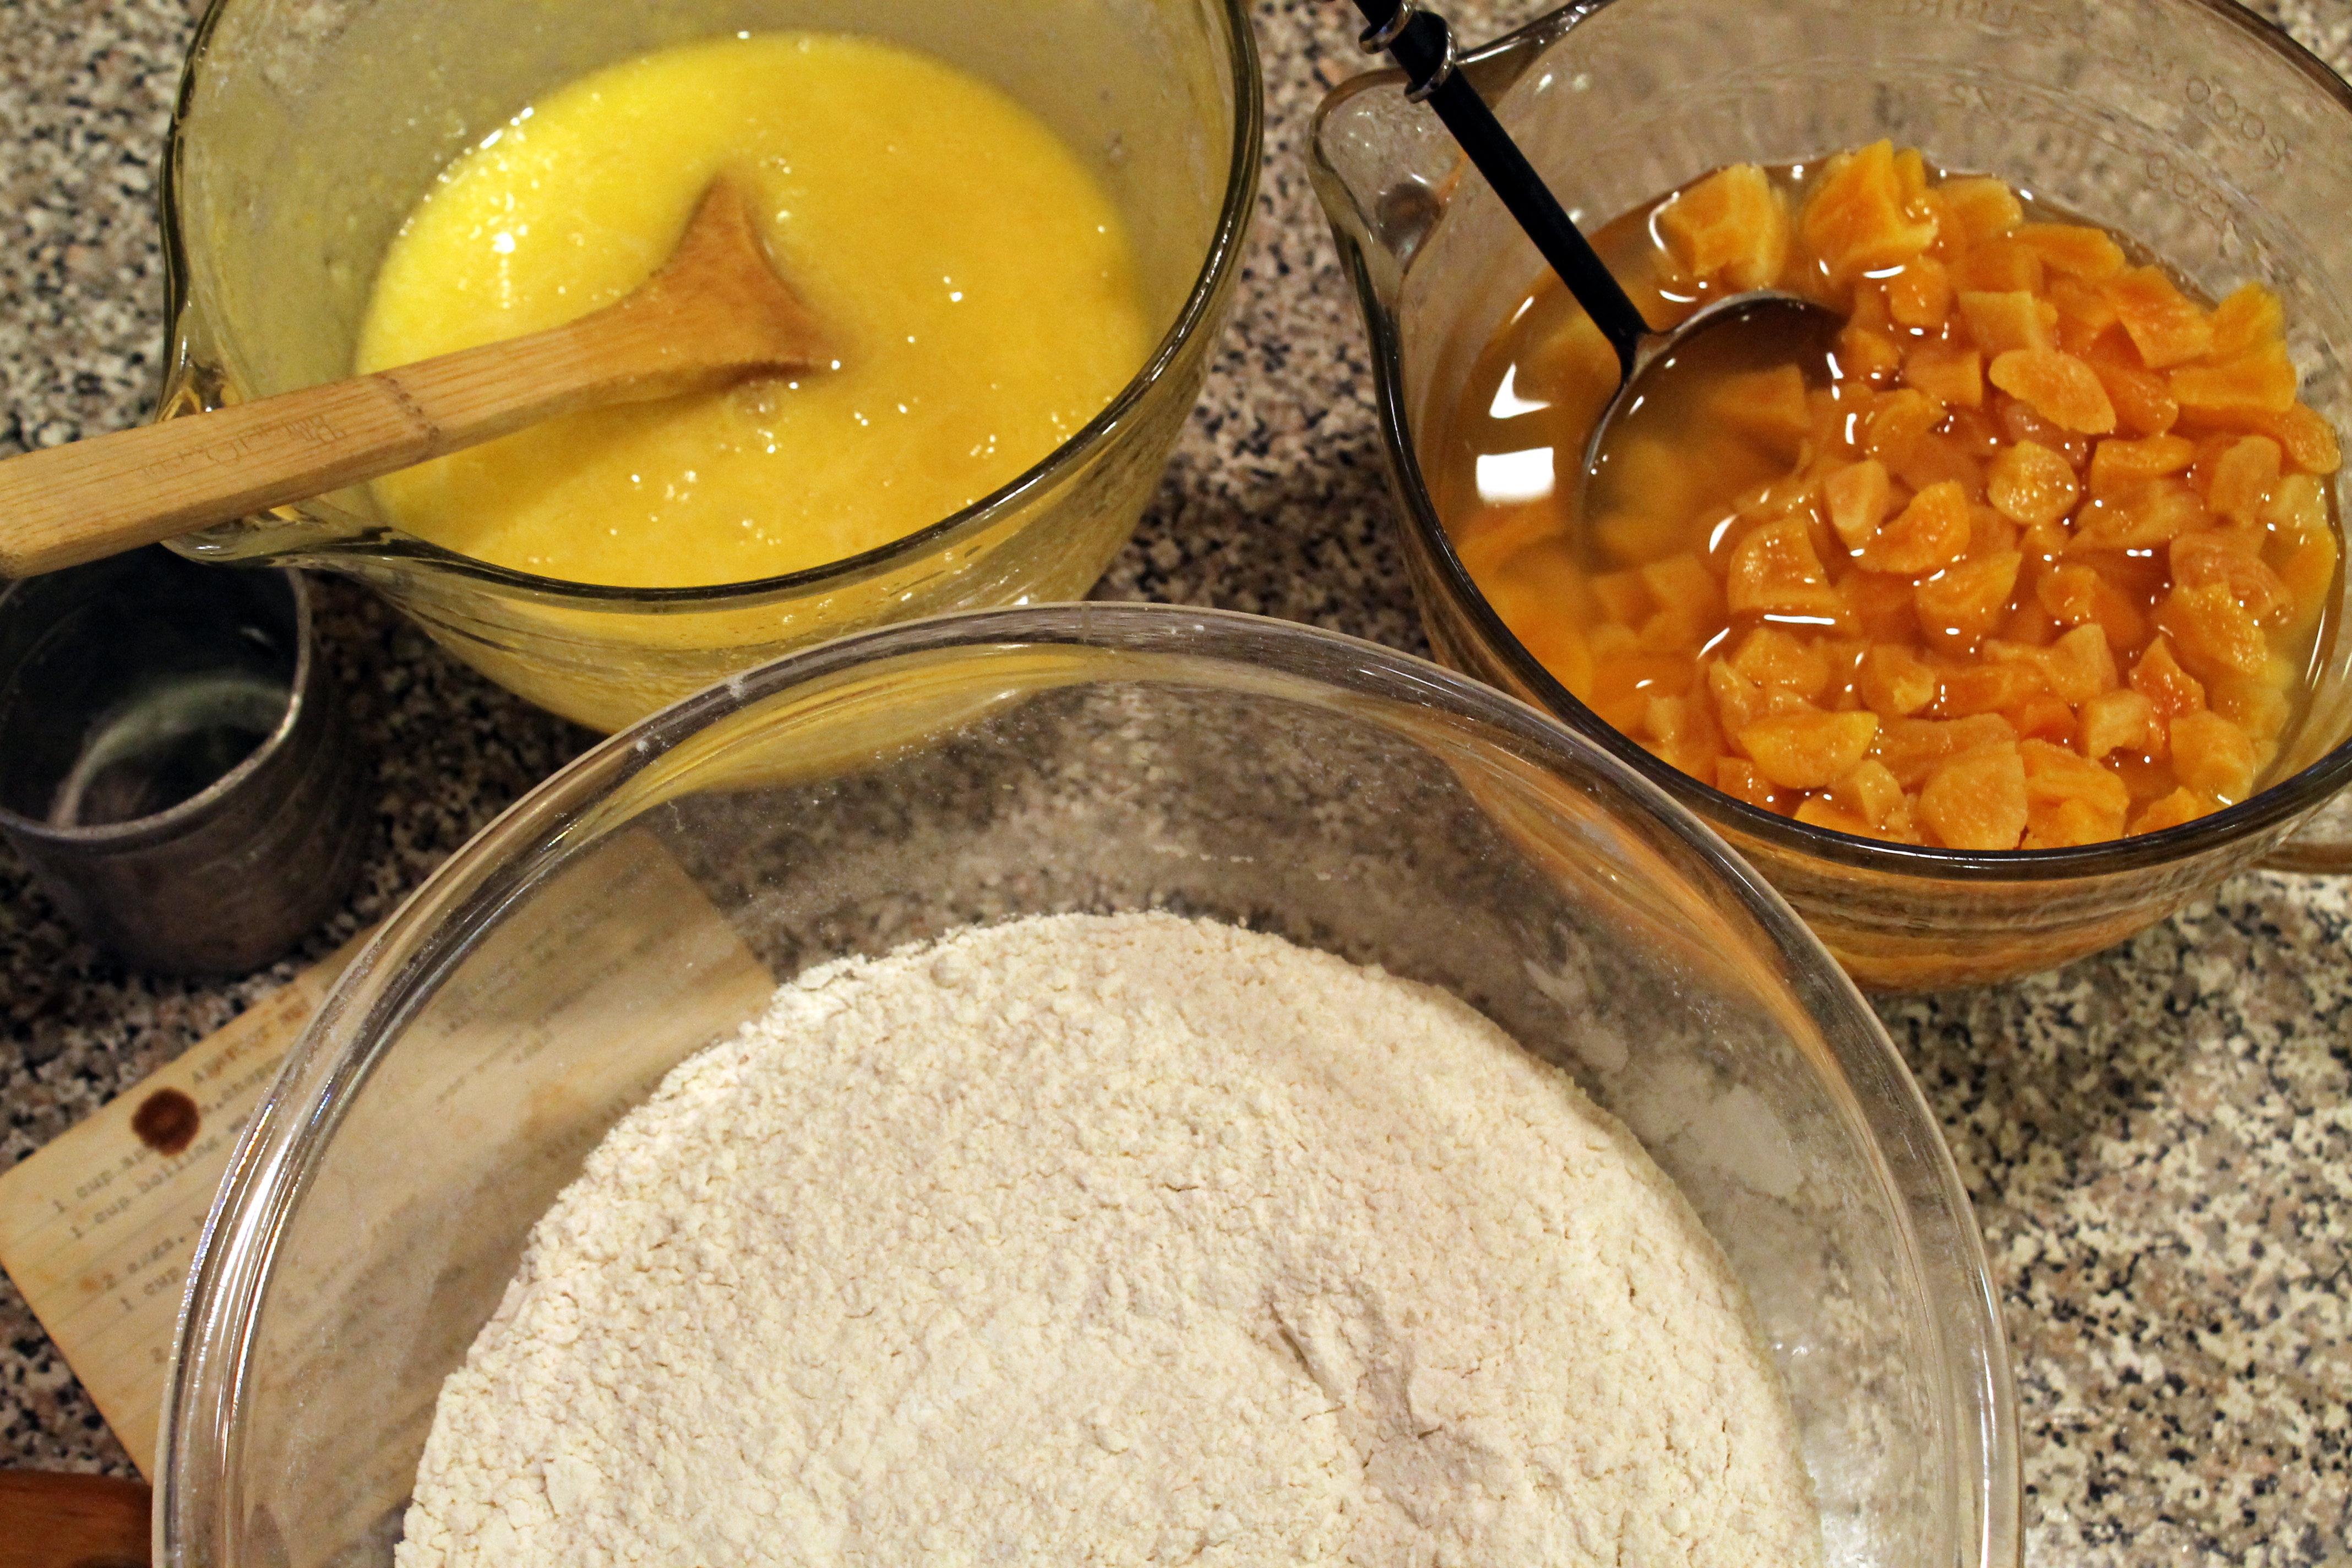
 The dry ingredients are mixed together next in a separate bowl: flour, baking soda, baking powder, and salt.
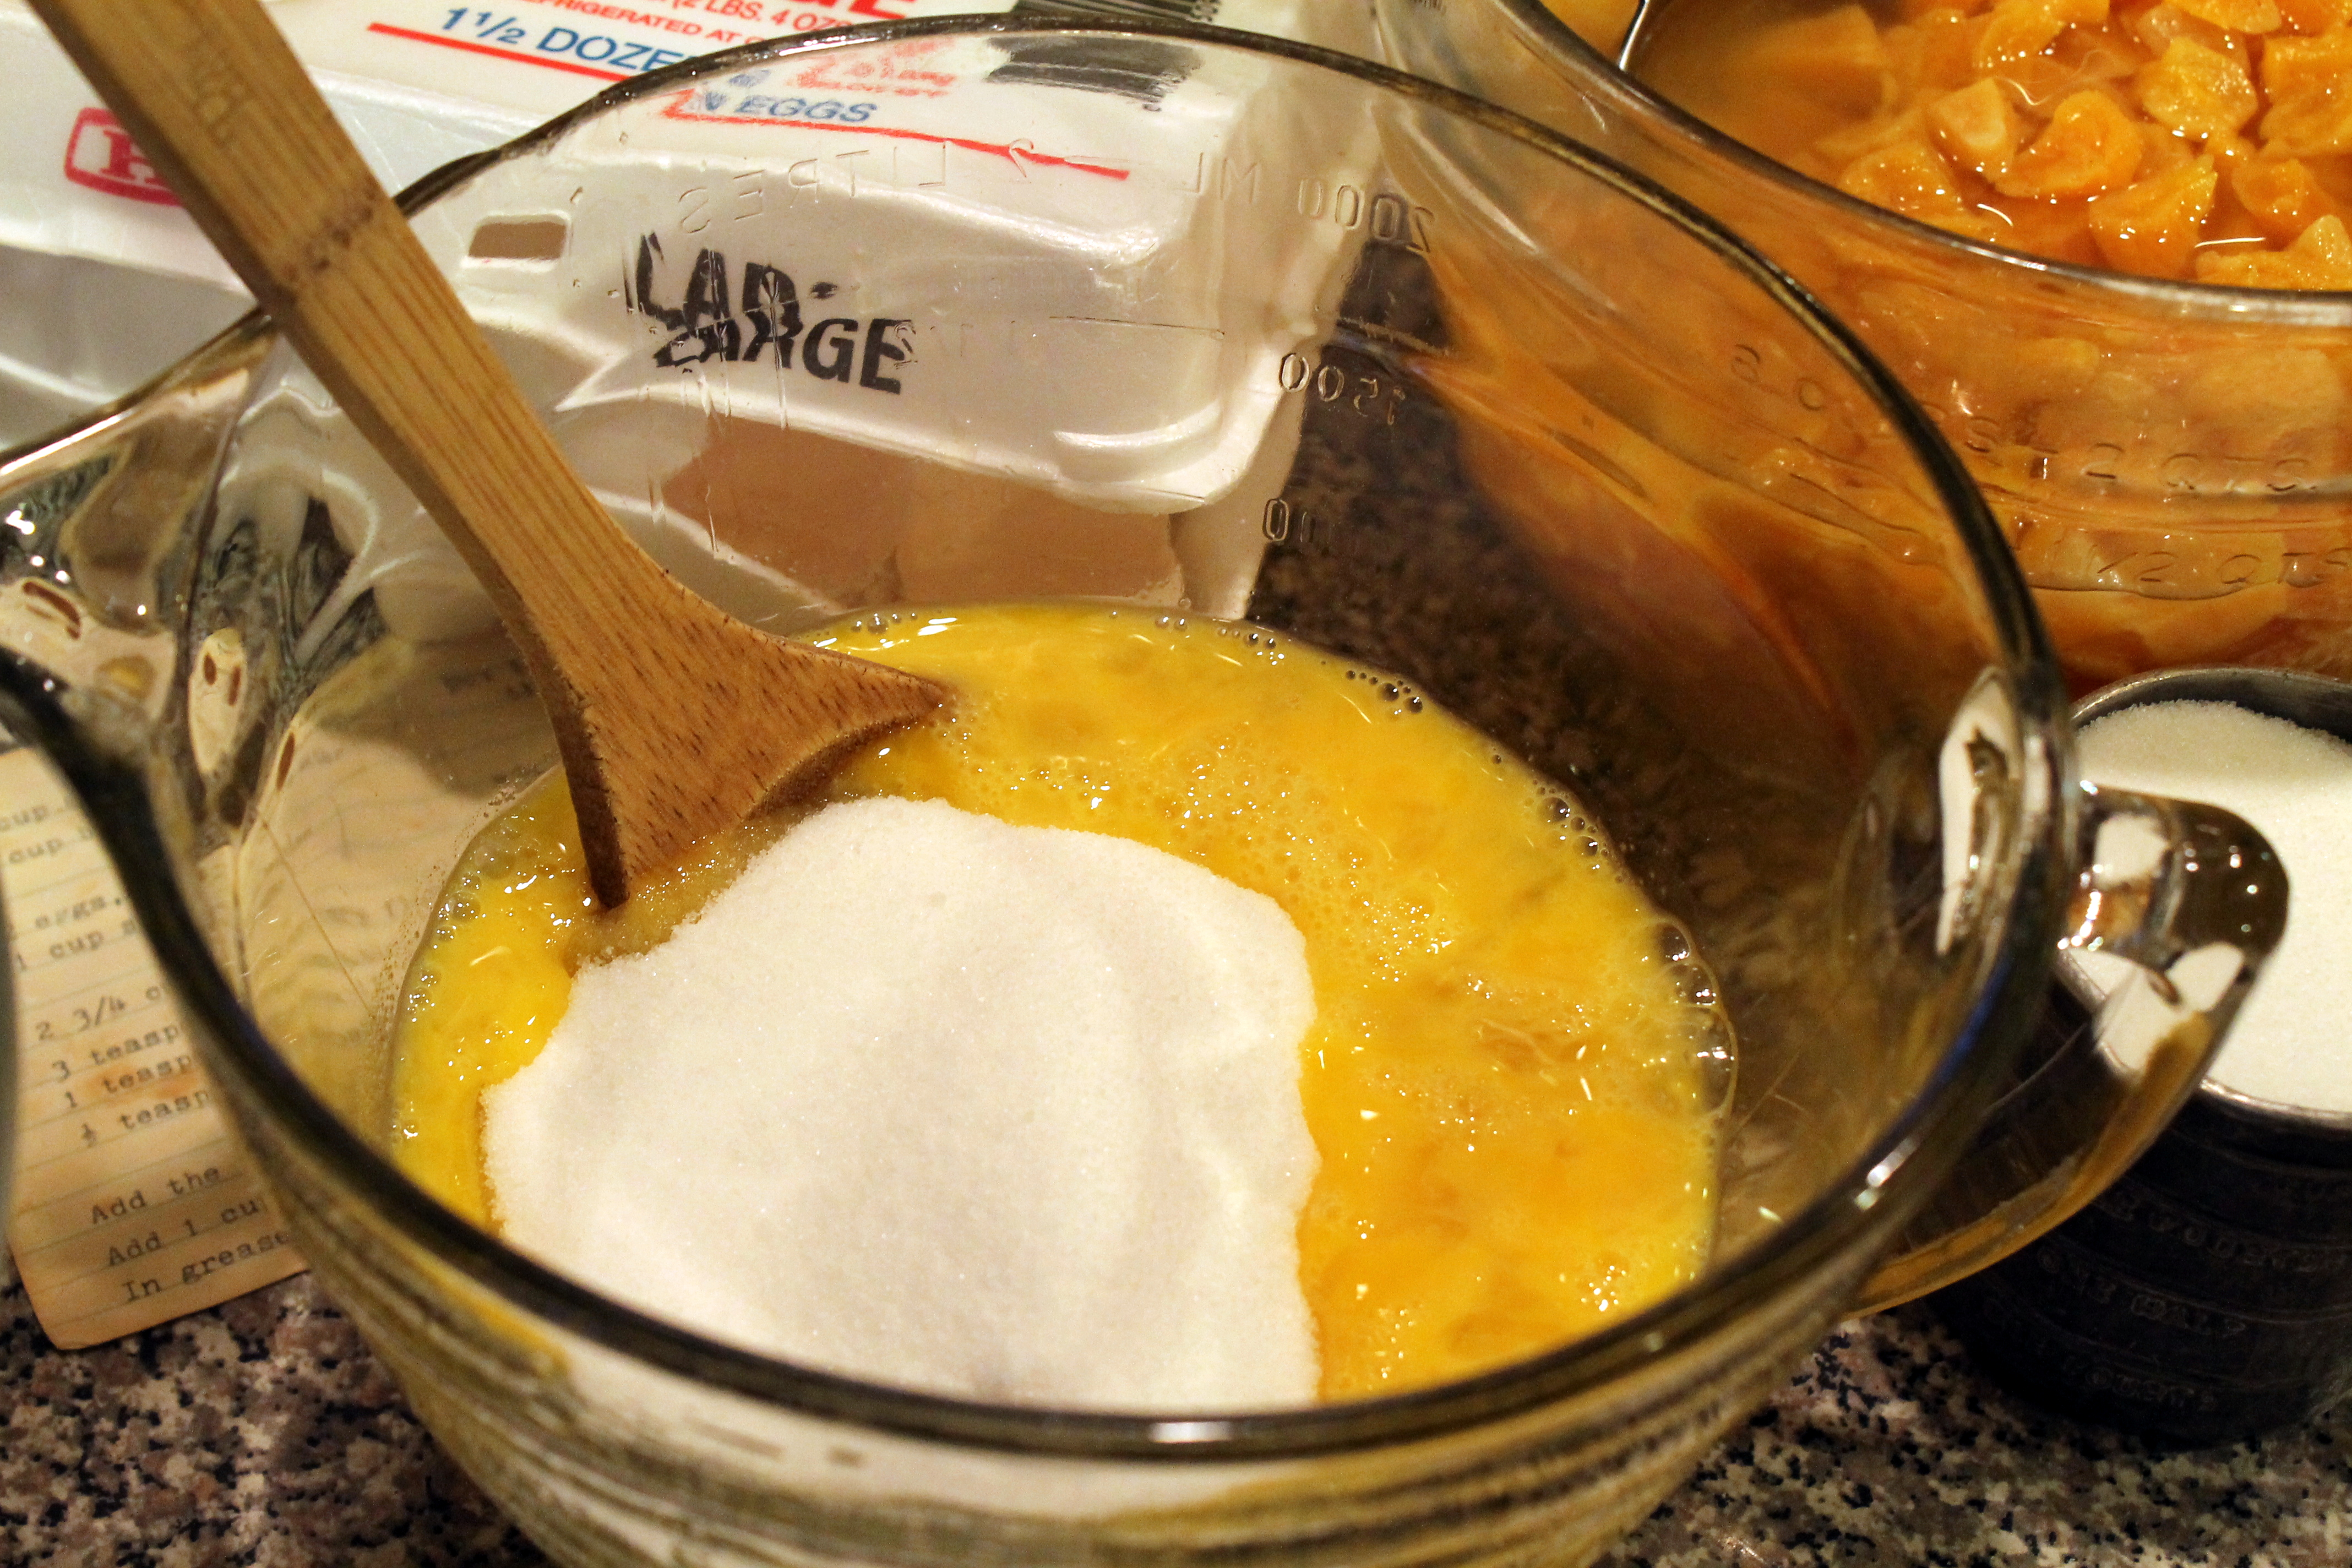
 In a third bowl, eggs are beaten, and sugar is added.
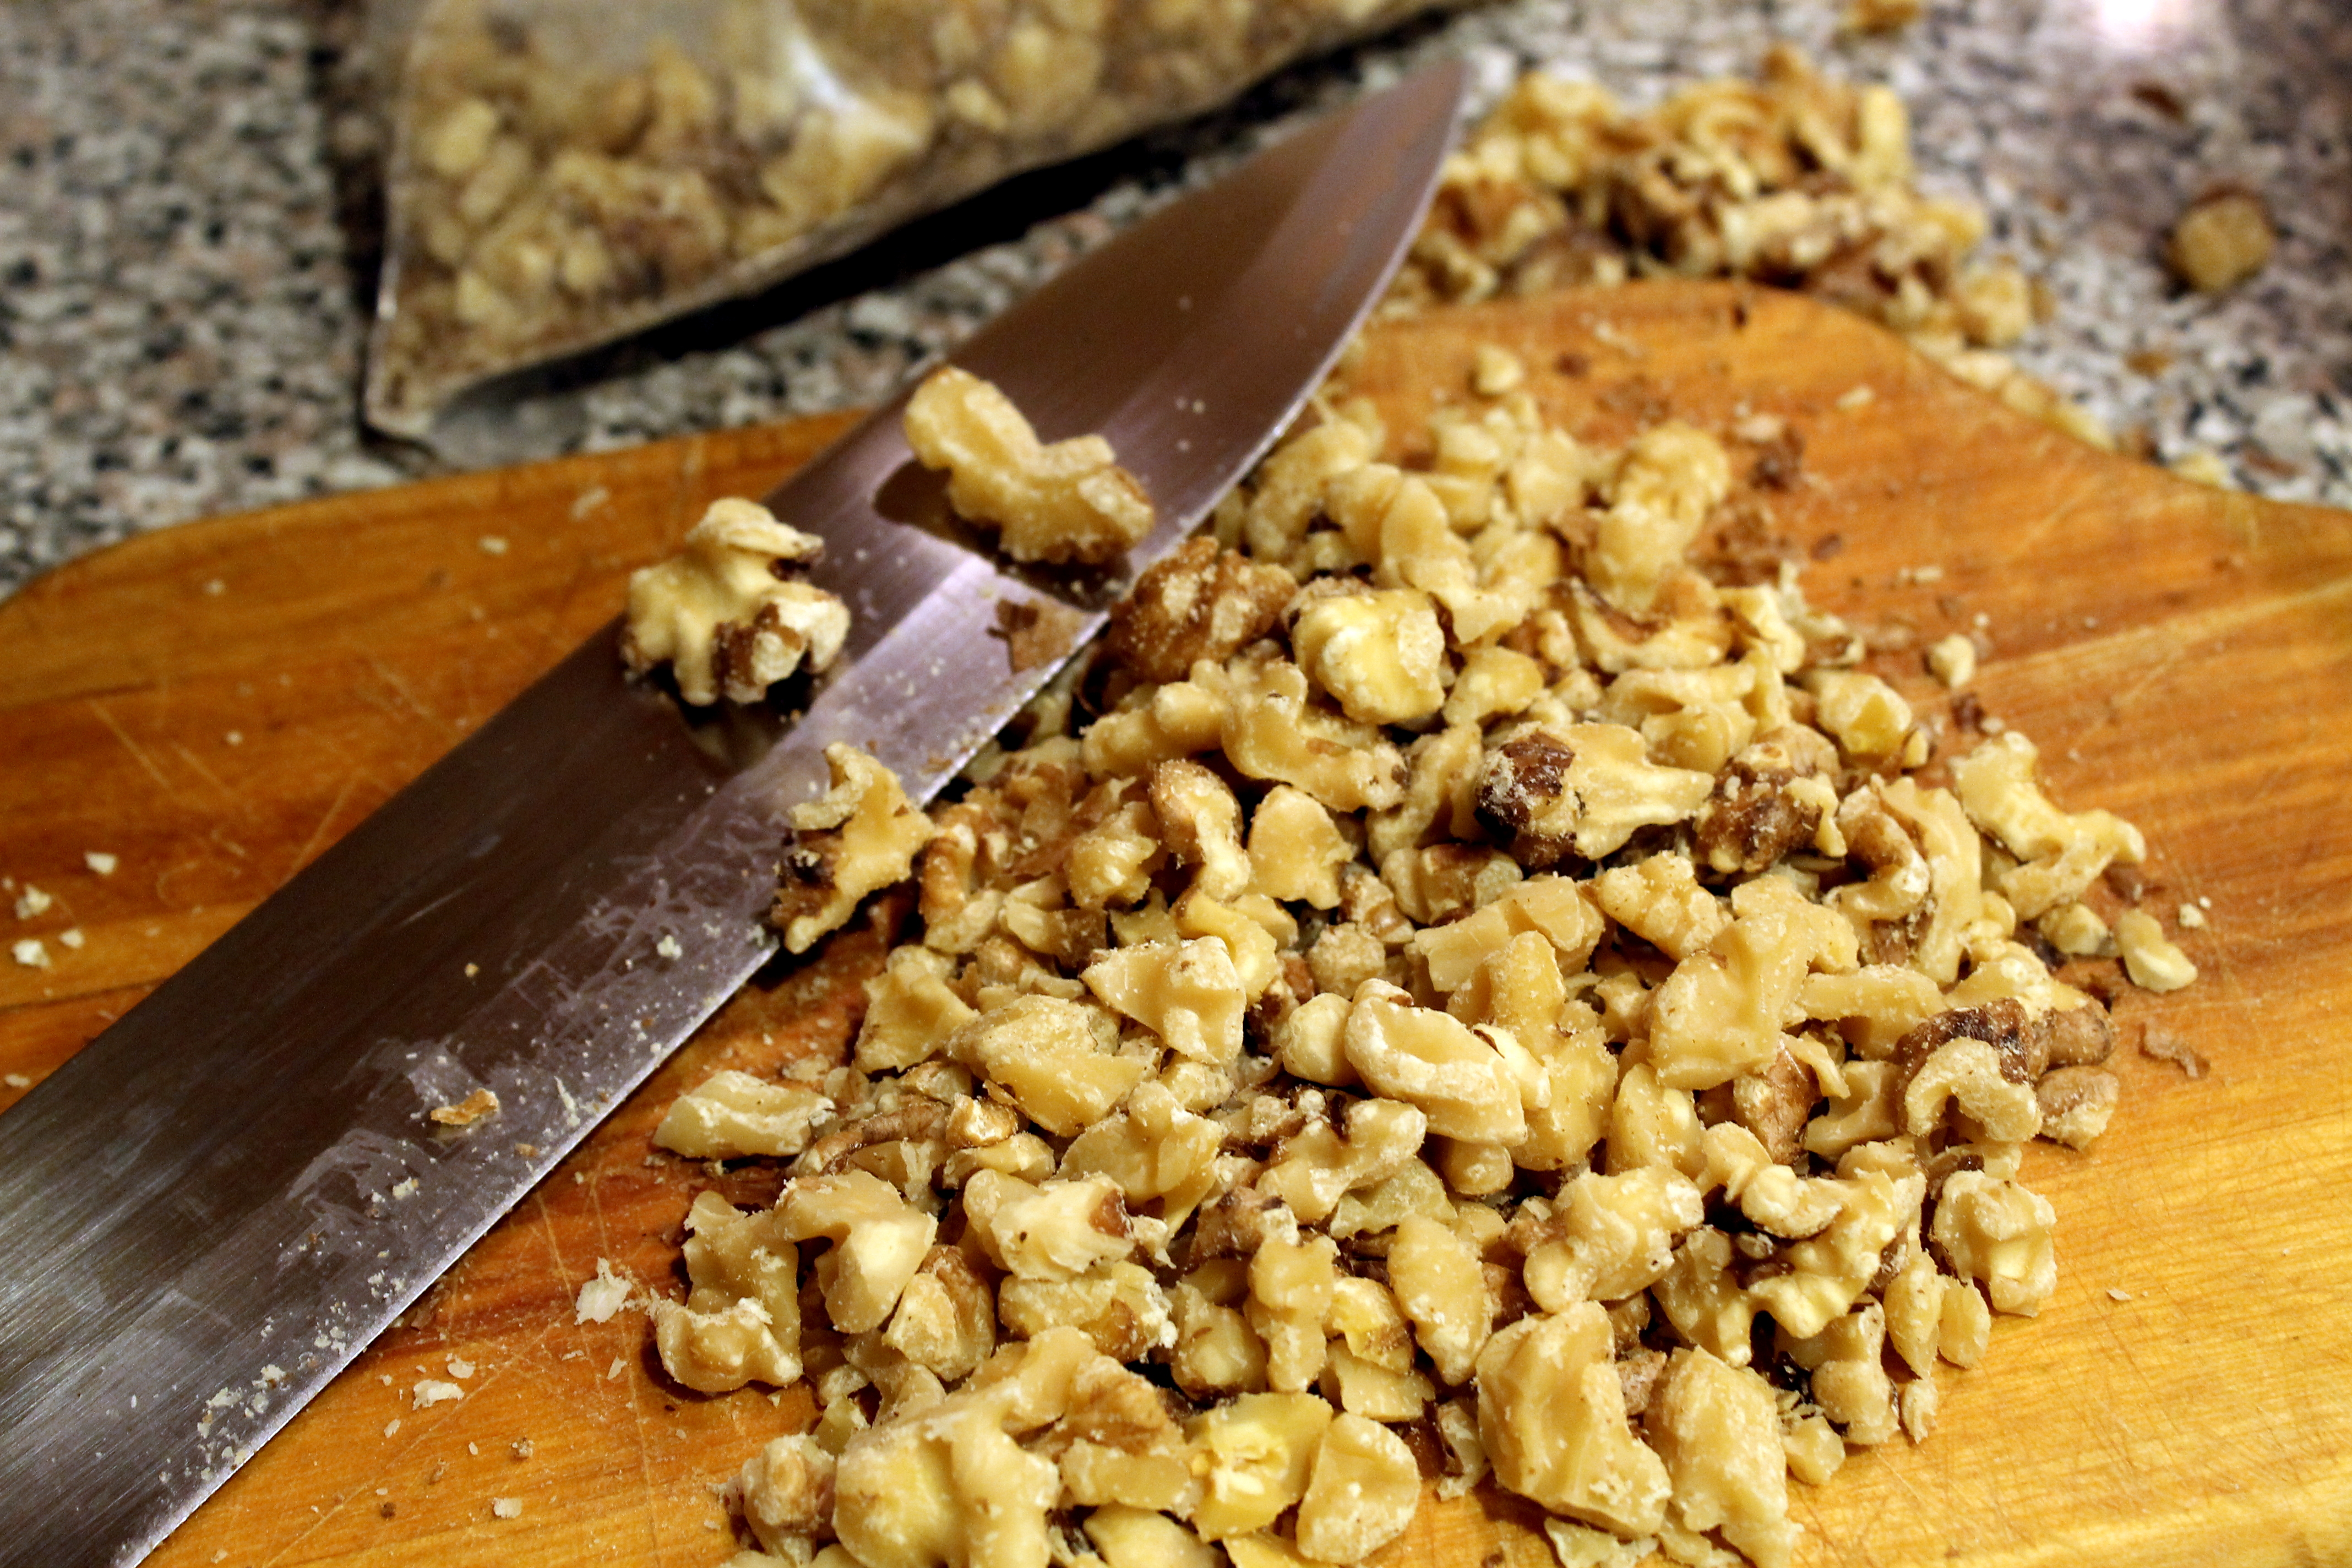
 Next is time to coarsely chop some walnuts – 1 cup per batch (unless you are my son, Nick – then no nuts are added!)
 To combine everything, alternately add the apricots with water and egg/sugar mixture to the dry ingredient bowl.
 At this point, you could place the batter in your greased and floured bread pans if you are not adding nuts.
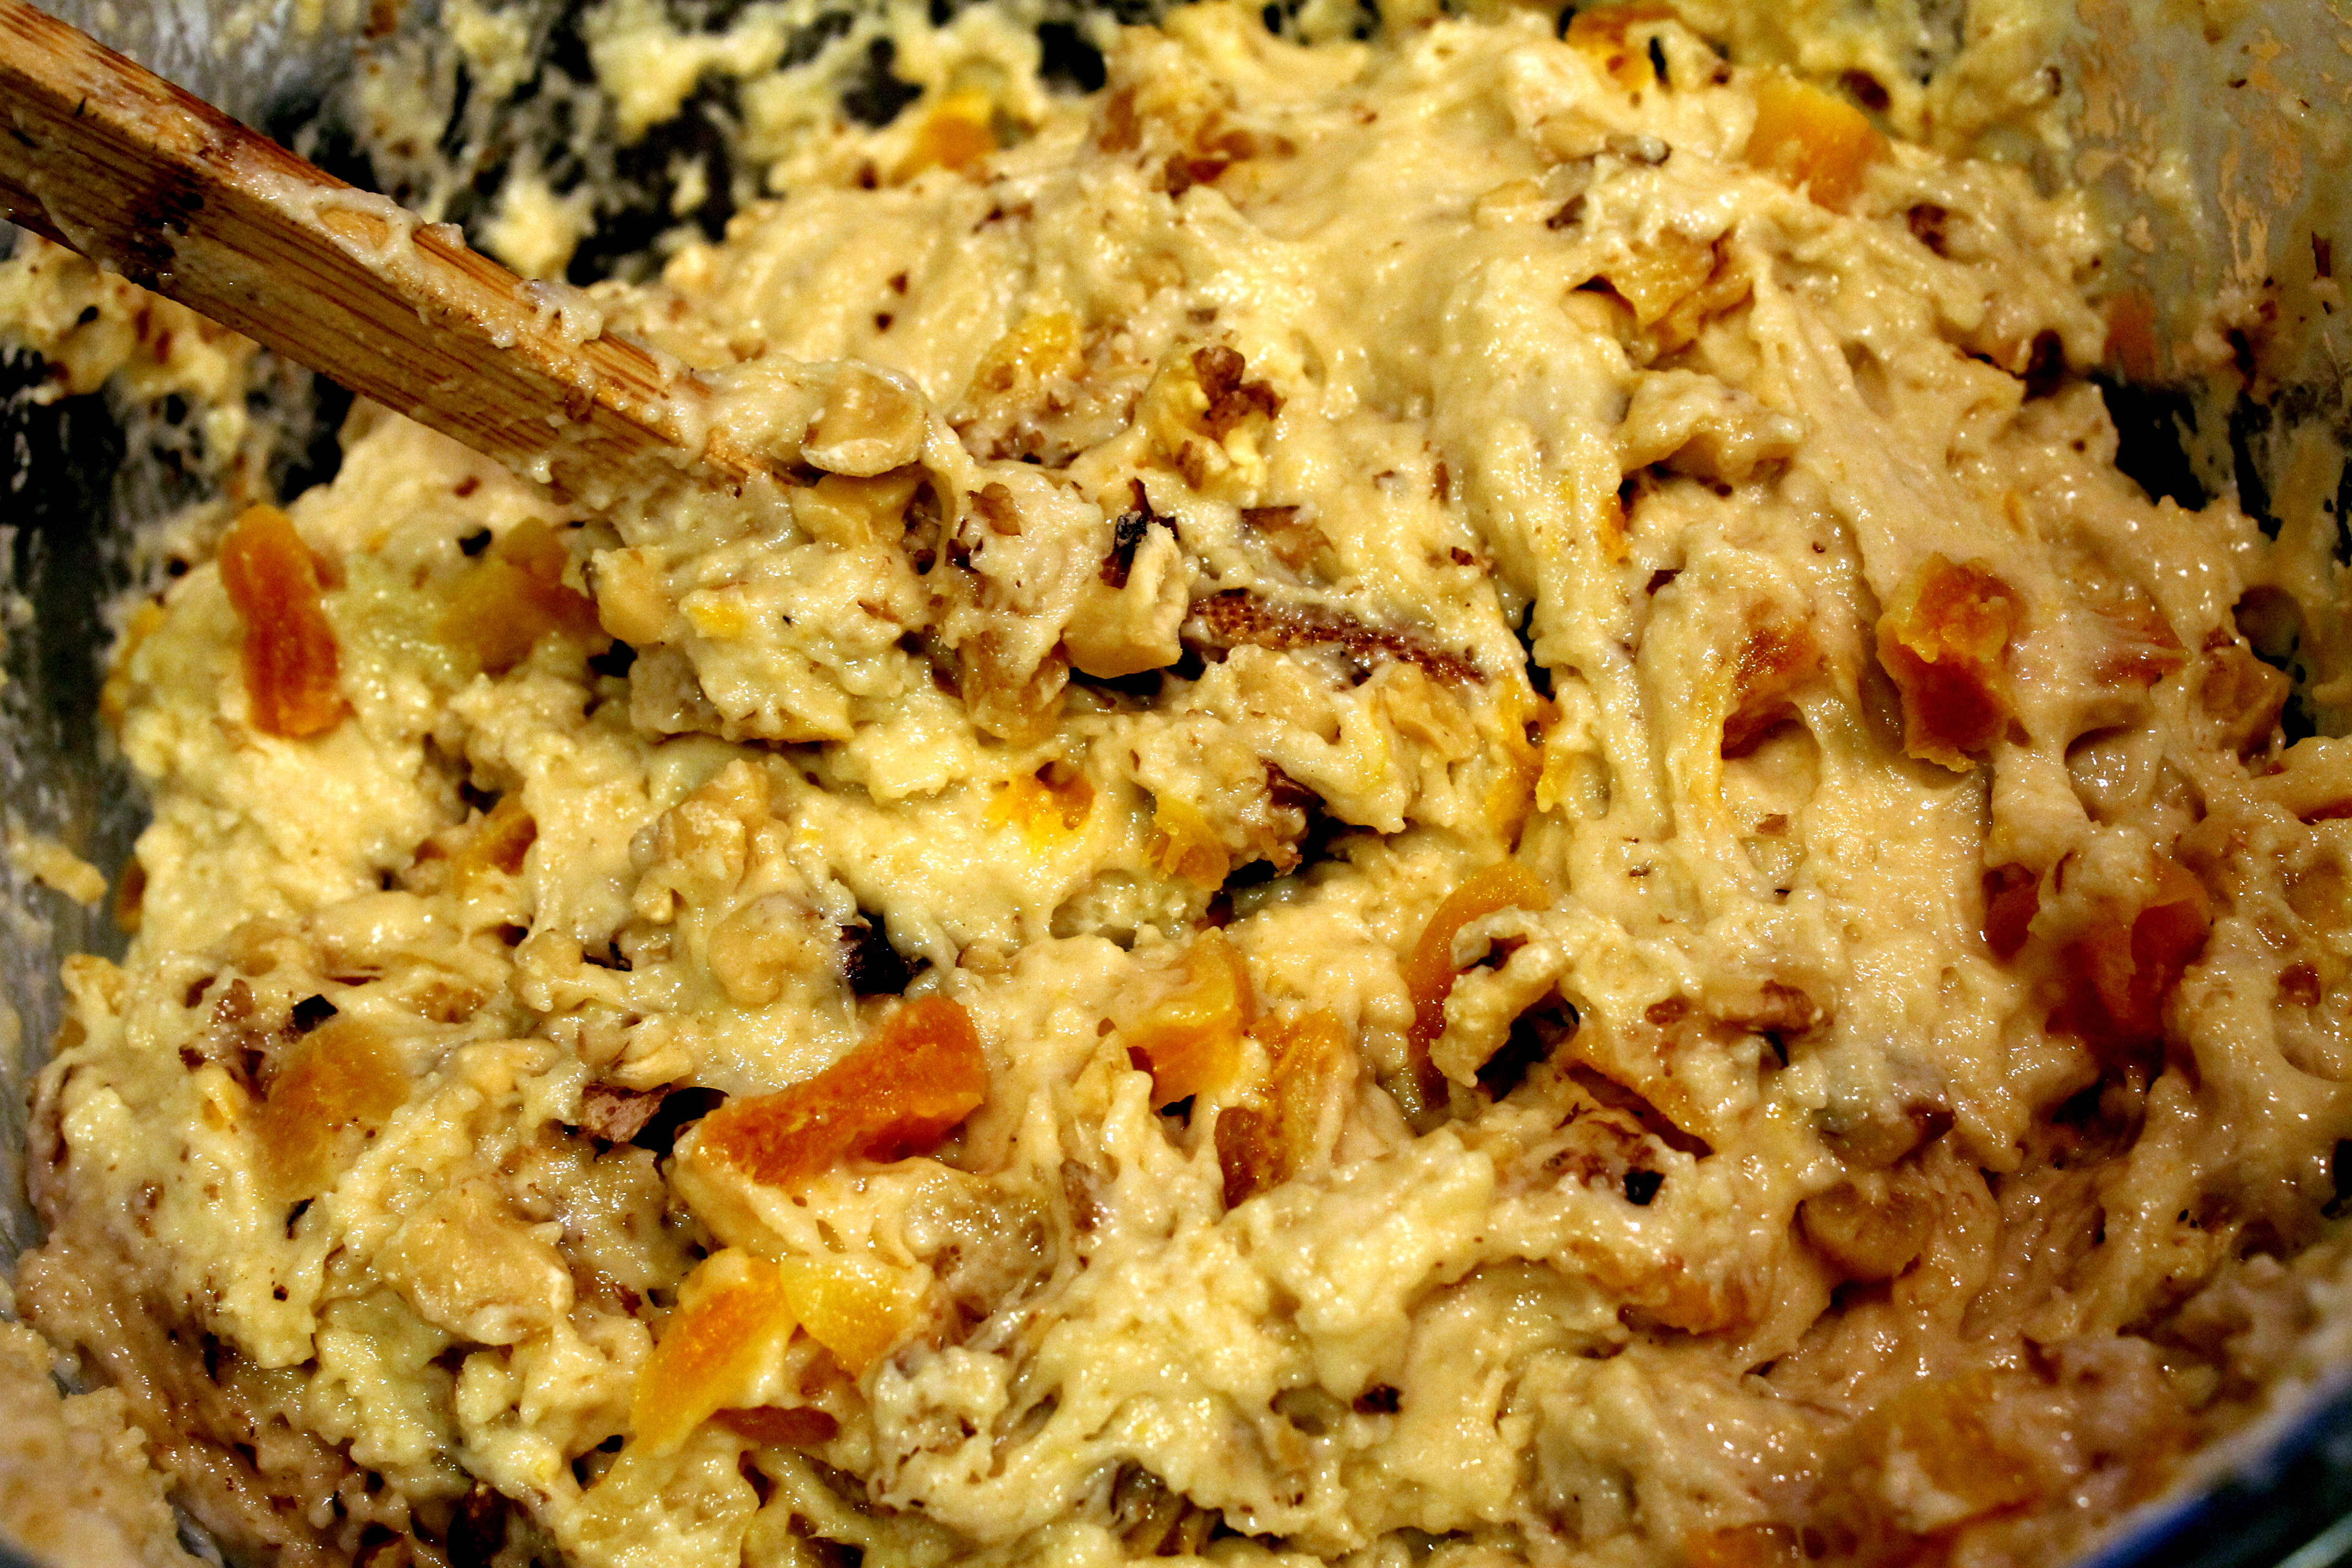
 Or gently fold in the nuts.
 It is important to thoroughly grease and flour your bread pans. I use a paper towel to generously smear Crisco into every corner and crevice of the pan and then dust thoroughly with four. If done well, the bread will roll right out when you tip the pans once out of the oven.
 You can use a number of small bread pans or one large bread pan for a single recipe. I tripled the recipe this weekend and made eight smaller loaves.
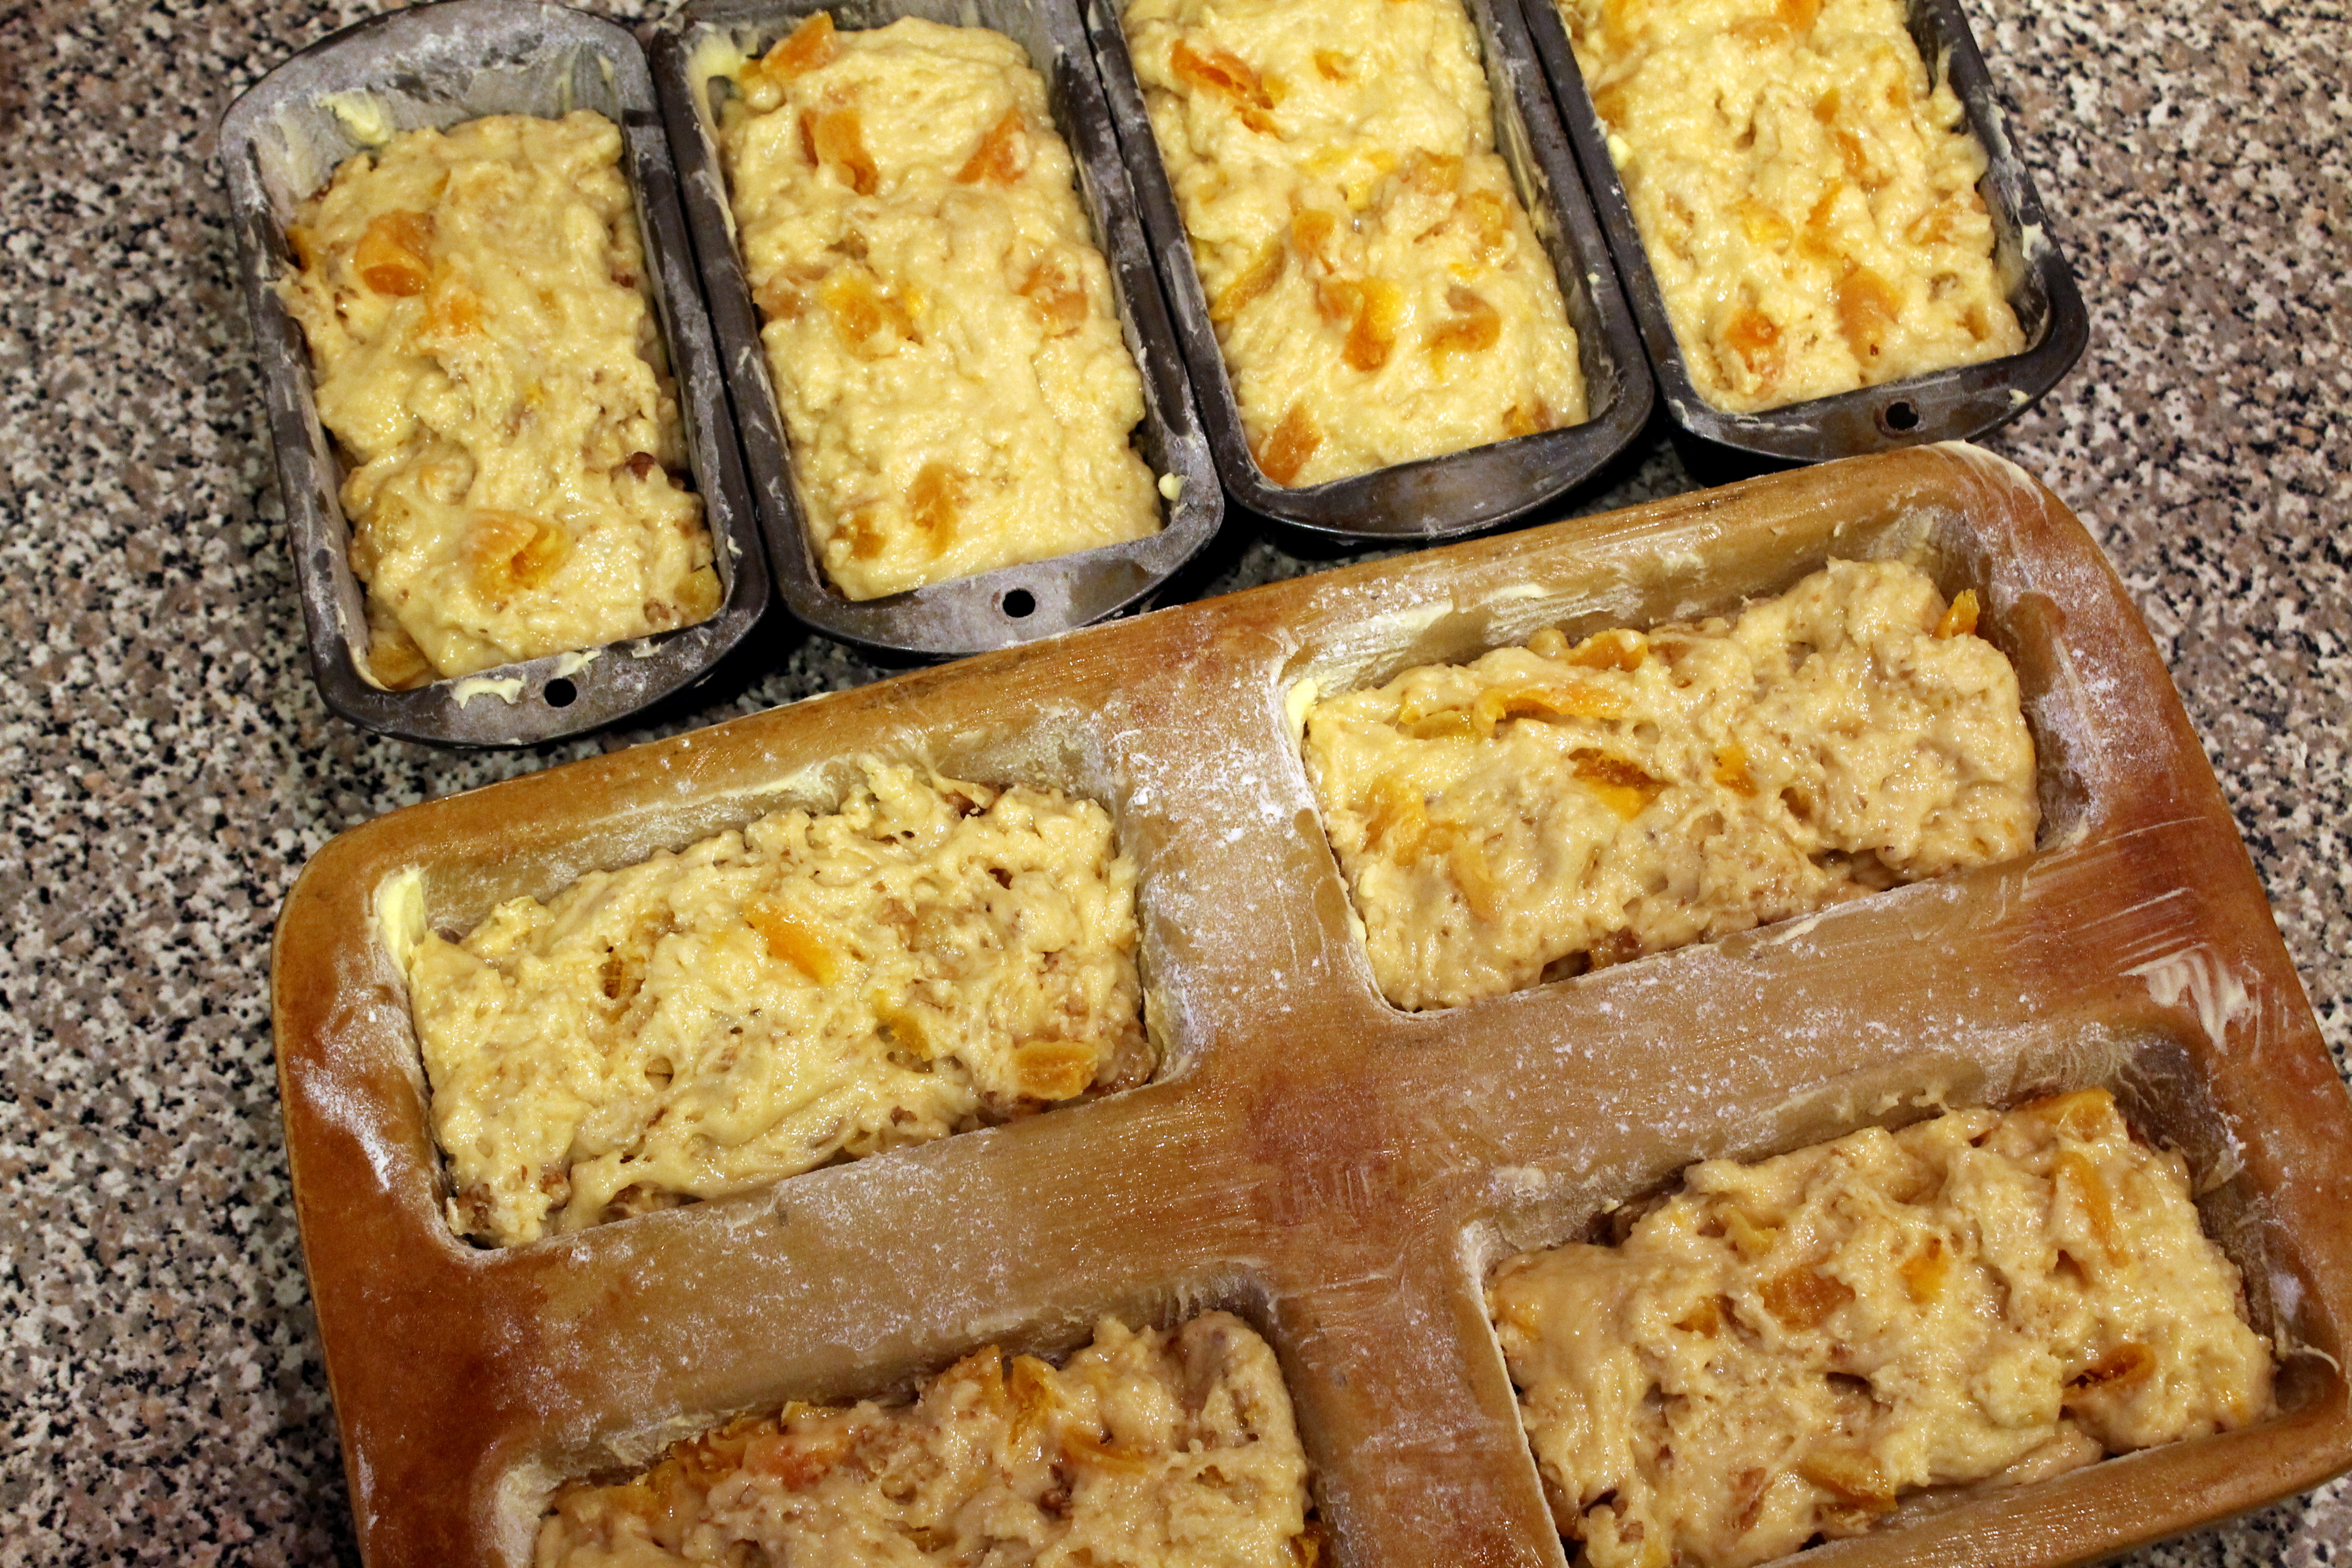 I fill them about 3/4 full to get a nicely risen loaf.
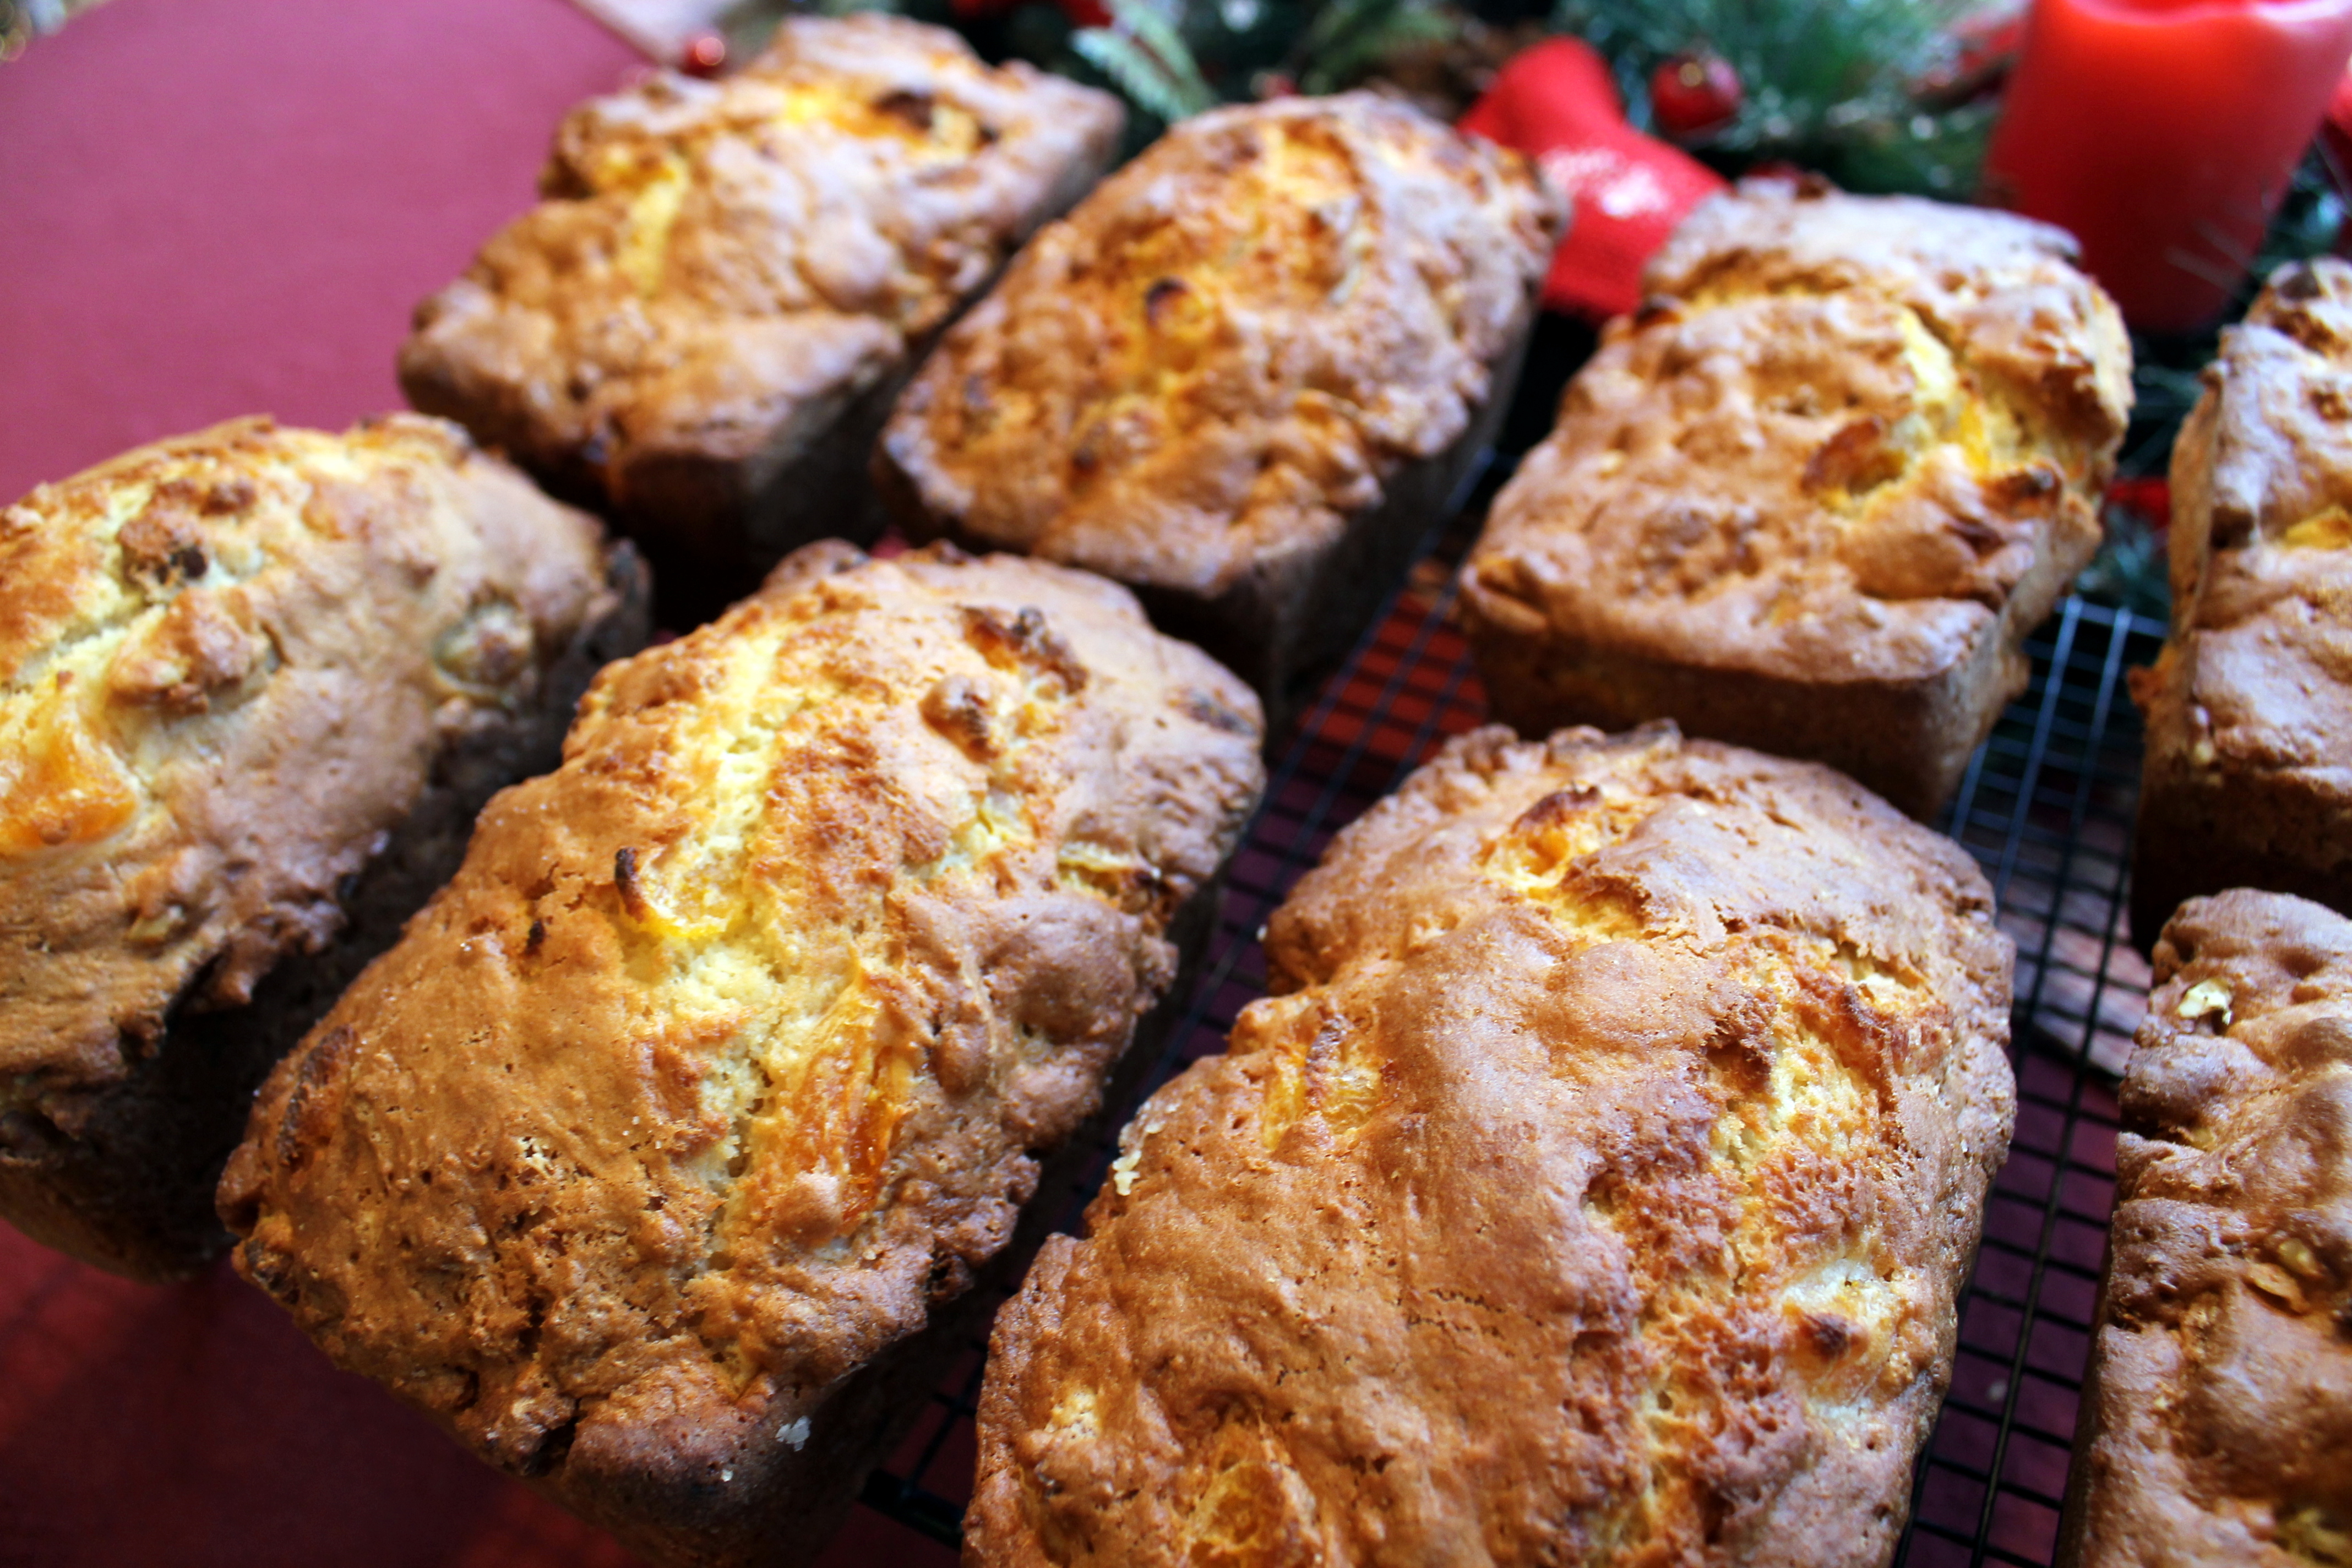 Baking time varies depending on the size of the loaf, so watch carefully and check with a toothpick. If you insert a toothpick in the center and it comes out clean, the bread is done.
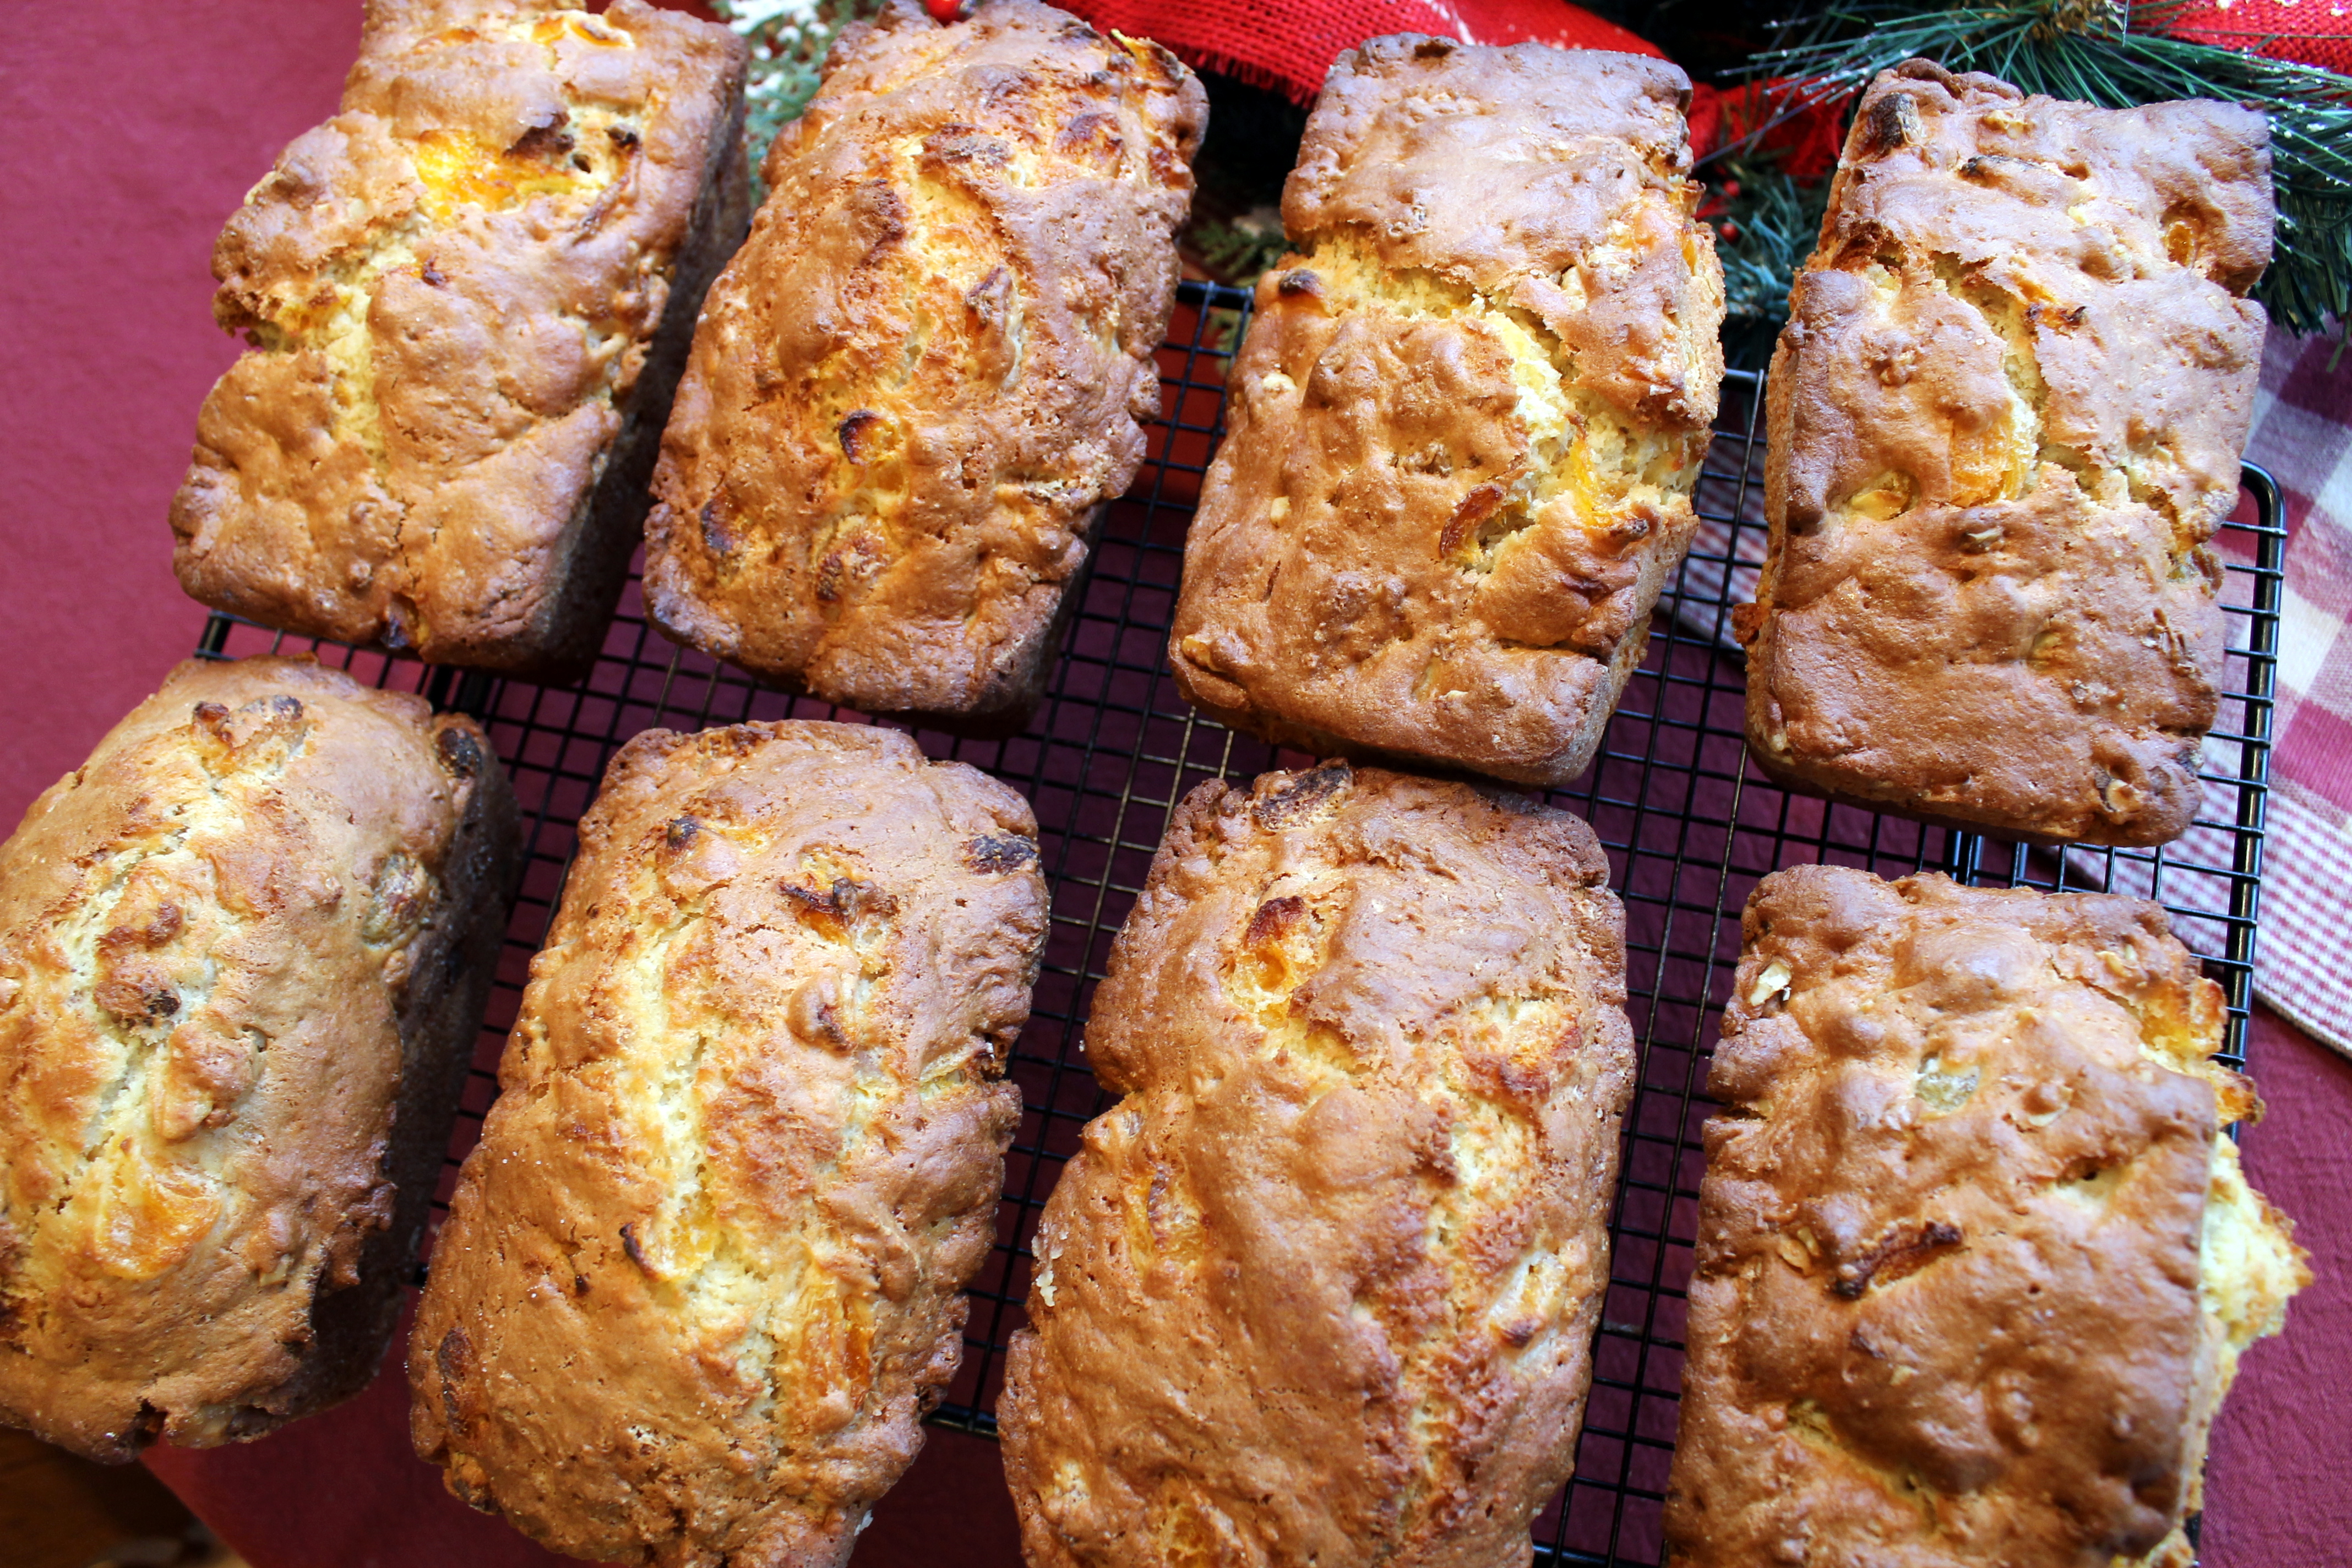 I immediately pop them out out of the pans and cool completely on a wire rack. These loaves freeze beautifully if wrapped in saran wrap and foil or in freezer Ziploc bags.
 Slice and serve warm or cold and with or without butter or cream cheese. In my opinion, this is best served as breakfast or brunch fare with a steaming cup of coffee (with Italian Sweet Cream of course!). Sometimes we even toast a slice of it, and then the edges are crisp and the center is warm and gooey and the butter just melts into it.
Here is Grandma’s well-loved and stained recipe card:
 I remember typing these on index cards for Grandma as a young girl. I wish I had more of her handwritten copies, but they are long gone…

Some beloved people and possessions in our lives may no longer be around, but memories can never be erased or replaced.
May cherished memories of your loved ones and holidays past fill you with warmth and happiness.
Here is the recipe for you to try:
Grandma’s Old-Fashioned Apricot Nut Bread
Mix together 1 cup chopped apricots and 1 cup boiling water. Let stand until the rest of the ingredients are ready.
In another bowl, beat two eggs and gradually add 1 cup of sugar.
In a third large bowl, stir together:
2-3/4 c. flour
3 tsp. baking powder
1 tsp salt
1/2 tsp baking sodaAdd the first two mixtures to the dry ingredients – alternating as you incorporate. Fold in chopped nuts.
Bake one large loaf at 375 degrees F for approximately 50 minutes, then 350 degrees F for 25 additional minutes.
For smaller loaves, bake at 350 degrees for 40-50 minutes.
I hope you enjoy.
Cheers & Nostalgic Hugs,
Jodi
Happy Sunday Friends!
I’ve finally accomplished getting a card made this week for the last Paper Players Challenge (PP225) of the year, and it is a Black Tie theme. (Holiday Projects that are Fancy)

I had seen similar cards like this done on Pinterest various ways and thought the clean and simple look with pearls, a classy sheer cream ribbon and a simple glittery string spoke elegance. The sentiment I chose is from StampinUp’s Ornamental Pine Stamp Set.

Now if I could just get some of my Christmas cards in the mail, I’ll be in good shape! It’s on today’s list, but we’ll see what happens…
Enjoy your day.
Cheers & Hugs Dahlink,
Jodi

I got a new nickname Thursday night… “Killer”
It all started out quite innocently. (Isn’t that what they all say?!)
I’m pretty sure Mary, the instructor at the Chocolate-Making Class I attended at our local community college Thursday evening, dubbed me this because of my “killer” chocolate tasting making skills. Or – maybe it was because she recognized my “killer” charm, wit and personality. Or it could have possibly been for my “killer” fashion sense (I mean who doesn’t envy an aging 50+ in jeans, pink Keds, and an Old Navy funnel neck fleece?!).
But alas, I’m not sure any of the above apply. I actually was a bit of a hot mess Thursday night…
Colleen, my daughter-in-law, and I were texting about something earlier this week, when she asked, “Hey, don’t we have some kind of chocolate-making class coming up soon here in December?”
I had completely forgotten!
Several months ago when the local community college published their “Fall/Winter Continuing Education” pamphlet, I had registered us for this as something fun to do together. It was this Thursday evening.
Thursday started out like many others these days with rising early and every intention of jumping in the shower before jumping into my work (from home) day. But, as is more often the case than not lately, that didn’t happen. Dang if I didn’t open my laptop first to start working, and next thing you know, Marty is home, and I am still in my pajama pants and hoody, bed head, yesterday’s mascara, and with a half cup of cold coffee on my desk – – – at 5 o’clock!
Colleen was coming at 5:30 for our 6:00 class. YIKES!
Jump in the shower, slap on some makeup, gargle with a bit of Listerine, and come out smiling. Ready with two minutes to spare. Score!
As we were driving to class, and I was secretly praying that I was heading to the correct campus location, my friend and neighbor, Tracy, called. I answered (on speaker – hands free!) trying to be witty with, “Do you have a visitor?”
(You see, Tracy is Mikey’s and my walking buddy – and when I leave and he is left to his own accord with doggie door freedom – my little 37 lb furry son likes to take the beaten path through the woods to Tracy’s house and whine at her door until she lets him in for some “poor little ole’ me” ear scratches and belly rubs.)
But Tracy said, “No… Did you forget we have a chocolate-making class tonight?”
I looked at Colleen. OH YEAH! Tracy is the one that told me about this class, and we were meeting her and her sister there. Sometimes I seriously think I am developing early onset Alzheimer’s! (But then one of my boys will charmingly question: “Early? onset?” GRRR! Some day they will be 50+, and I hope their kids remind them often how ancient they are too!)
We showed up for class, with another amazing two minutes to spare, after choosing the farthest parking lot from the Arts & Hospitality Building we could find just so we could run walk briskly through the freezing cold and dark charming campus paths and arrive ready to rumble create magnificent sugary confections.
Mary was wonderful – and so was her daughter and chocolate-melting assistant, Ashley. Mary has been making homemade chocolate for over 30 years and works professionally in the food industry. At first, reserved and professional, her true wit and humor unraveled as the evening progressed. We learned some great tips for melting and molding and filling chocolates, while making new friends and laughing along the way.

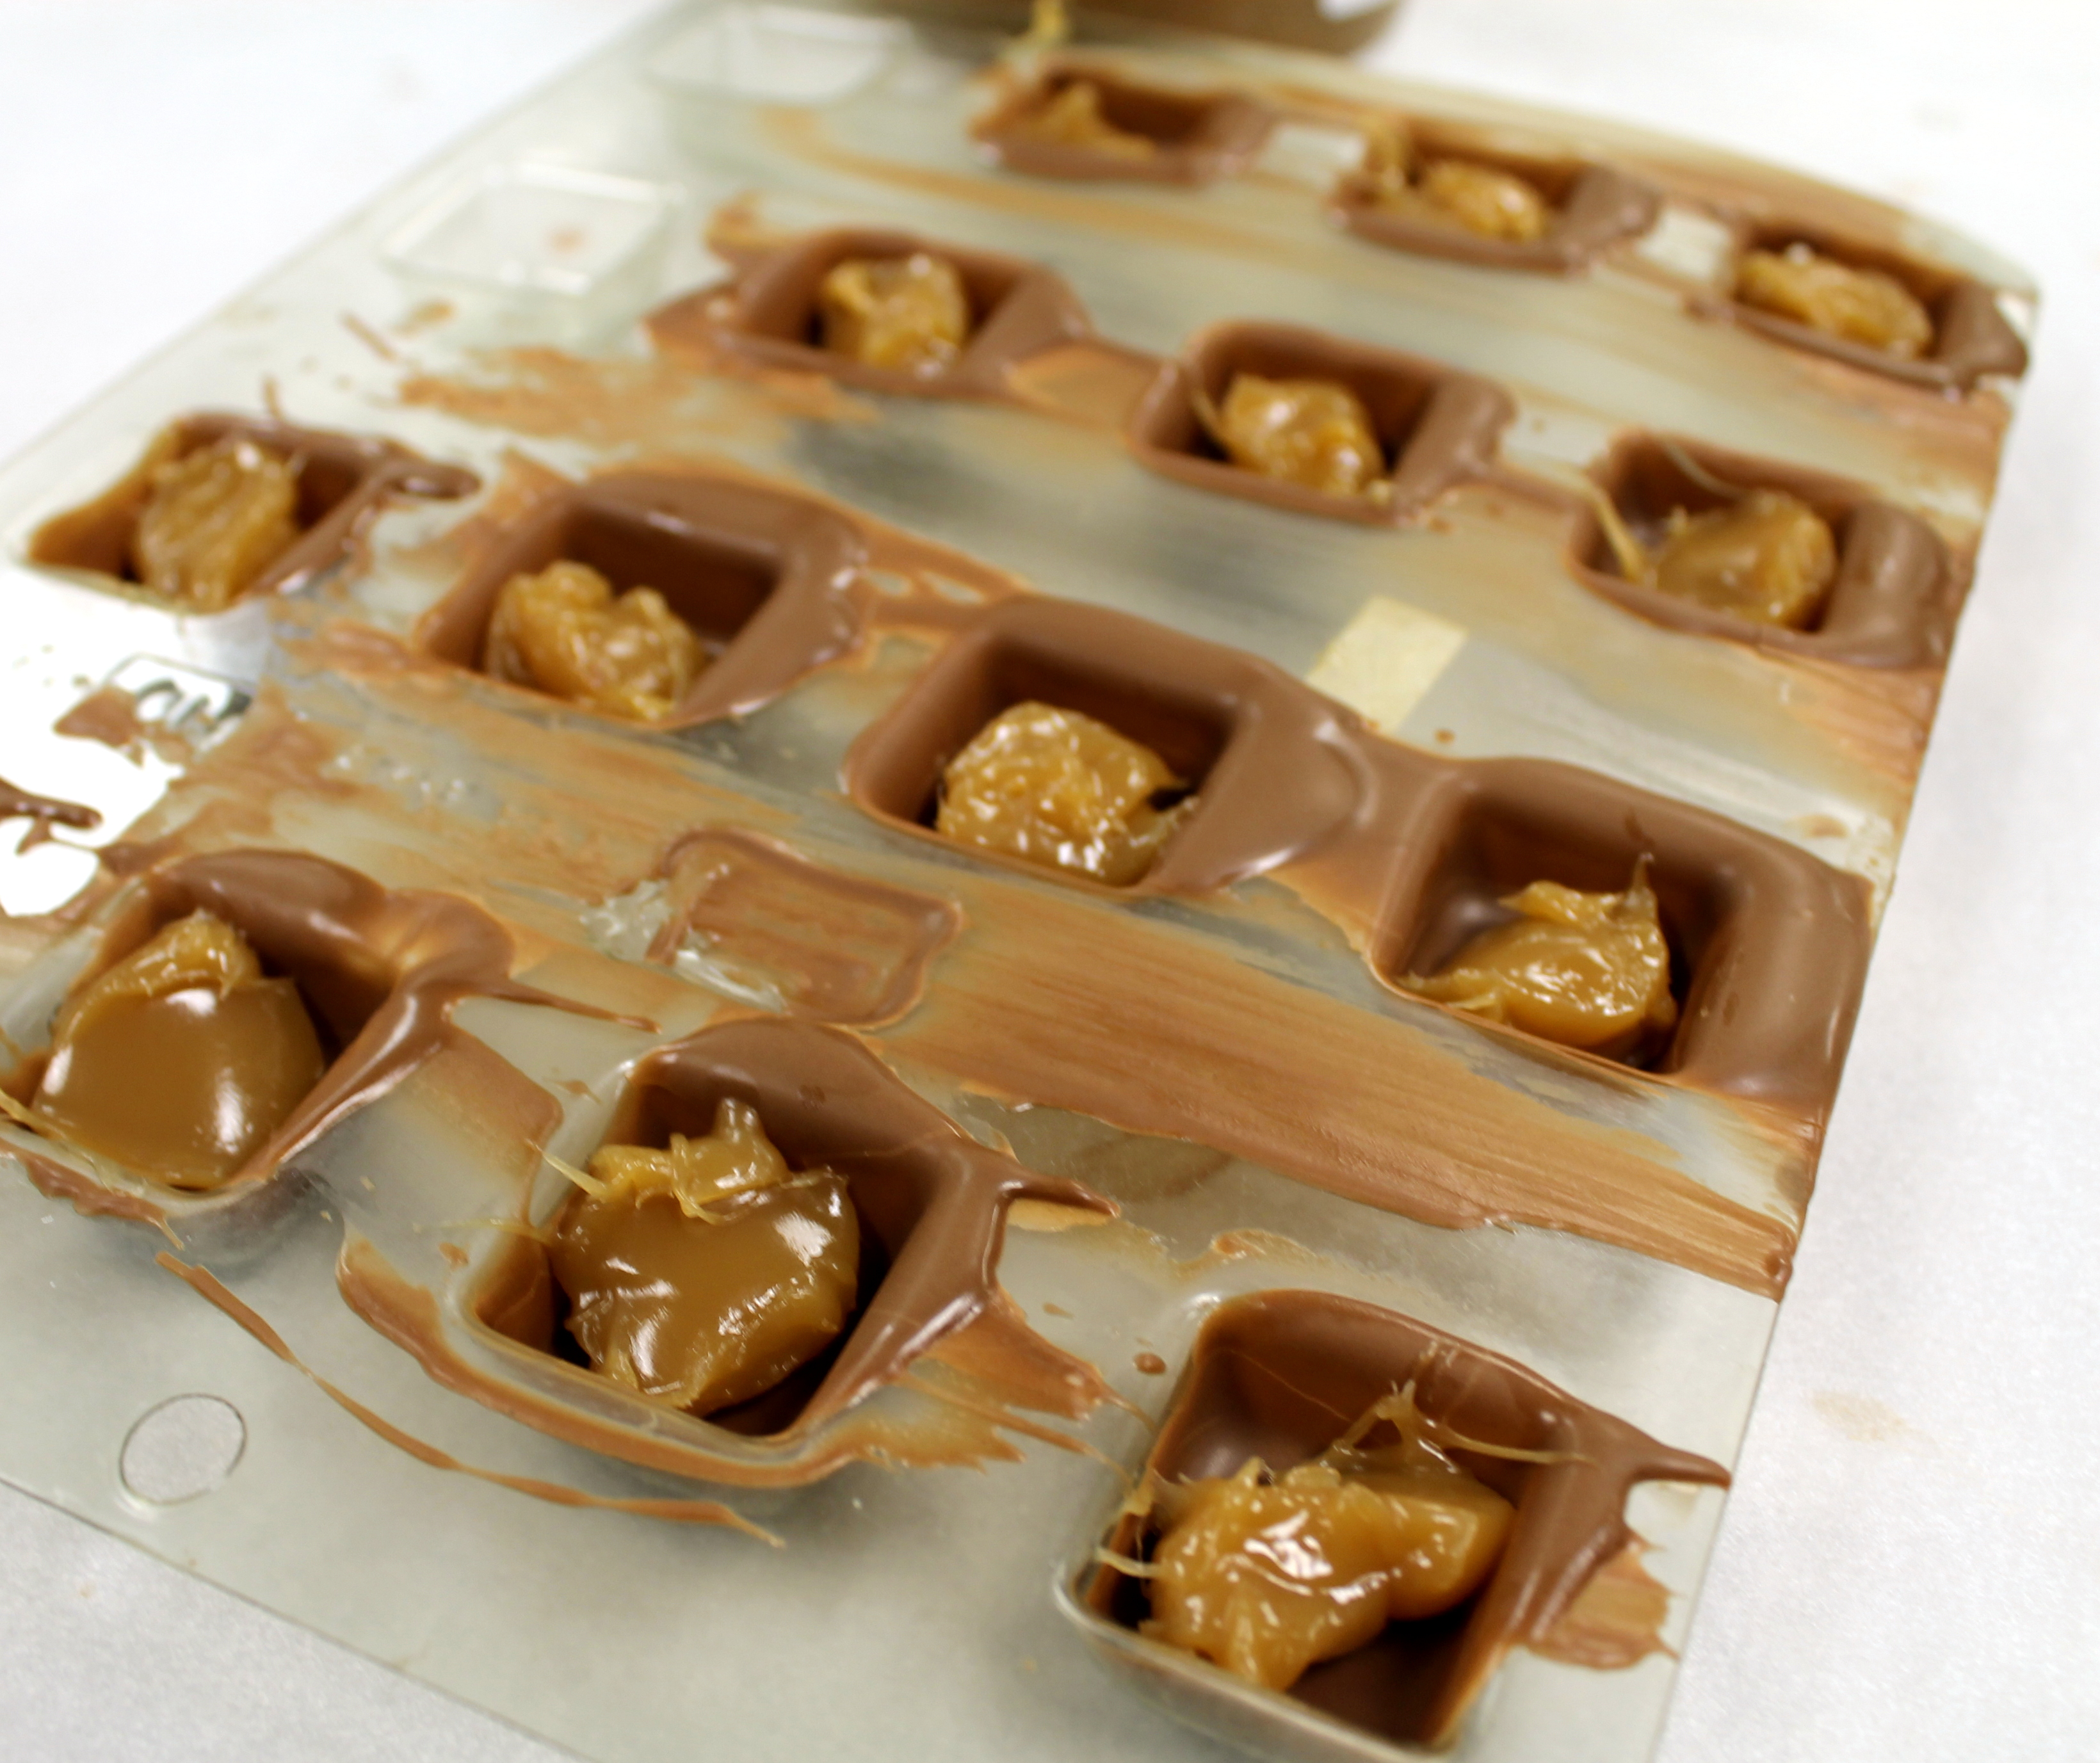
TIP: Mary taught us to completely fill the plastic mold with melted chocolate (i.e. for chocolate covered cherries) to thoroughly coat all sides of each individual mold. You then turn it over onto parchment paper and let the inside drip out. Place in refrigerator or cool spot to let set, then repeat a second layer. Fill it full again and turn over and dump. Let harden again, then place a cherry inside and fill to top with chocolate. (Roll in fondant if you like.)
TIP: Use a squeezie bottle to fill molds. In the past, I had always spooned into the mold and made a bit of a mess. Squeezing it in is a breeze and much neater…….
Unless you are “Killer!”
I think I must have been showing off and trying to finish filling my molds first. I was humming along smiling and laughing and squeezing and filling, when SPLAT! – the lid popped off the squeezie bottle and all the chocolate was splattered atop the mold!
I was so embarrassed I forgot to take a picture (imagine that!?)
If Mary wanted to kill me was frustrated, she sure didn’t show it. She simply instructed me to grab a spatula to scoop it off onto the parchment and kindly refilled my squeezie bottle. (THANK YOU MARY!)
I continued on, and my chocolate covered caramels turned out quite yummy – you never would have known if I didn’t tell you here what a total mess I made!
 This photo is AFTER the cleanup!
The next time Mary made her rounds checking on all of our progress, she politely and slyly asked,
“How are you making out, Killer?”
She said it so sincerely and innocently and quietly, I couldn’t help but burst out laughing!
And being one to “not let it go,” I continued on all night with my new nickname. I also dubbed my sidekick chocolate-making aficionado, Colleen as “Killer Junior.”
TIP: Use “melting” chocolate – not chocolate chips (i.e. Nestle). Mary mentioned they put something in chocolate chips to help them keep their “chip” shape that prevents them from melting completely and smoothly. I have found this to be true, and there is a big difference in the end product when using “melting” chocolate!
TIP: We used Merckens brand chocolate, and it was pretty good. I would give it a medium/average rating. It’s not the cheapest, but far from the most expensive also. It did melt beautifully, but the taste was not as creamy and milky as I personally like if I am going to indulge in chocolate treats such as this. I look forward to trying out some other higher quality chocolates, but this was not too shabby. (Marty and Nick were pleasantly surprised at what I brought home!)
 Mary showed us how to make peanut and coconut clusters.
TIP: Use FREEZE-DRIED coconut as opposed to the typical sweetened, flaked coconut you might typically use for baking. It turns out much better! Less moisture content to “confuse” (for lack of a more technical term) the chocolate and result in a delightful treat.
While Colleen was busy making her favorite white chocolate covered peanut butter cups, I was flitting around being disruptive to everyone taking pictures and offering my own tips….
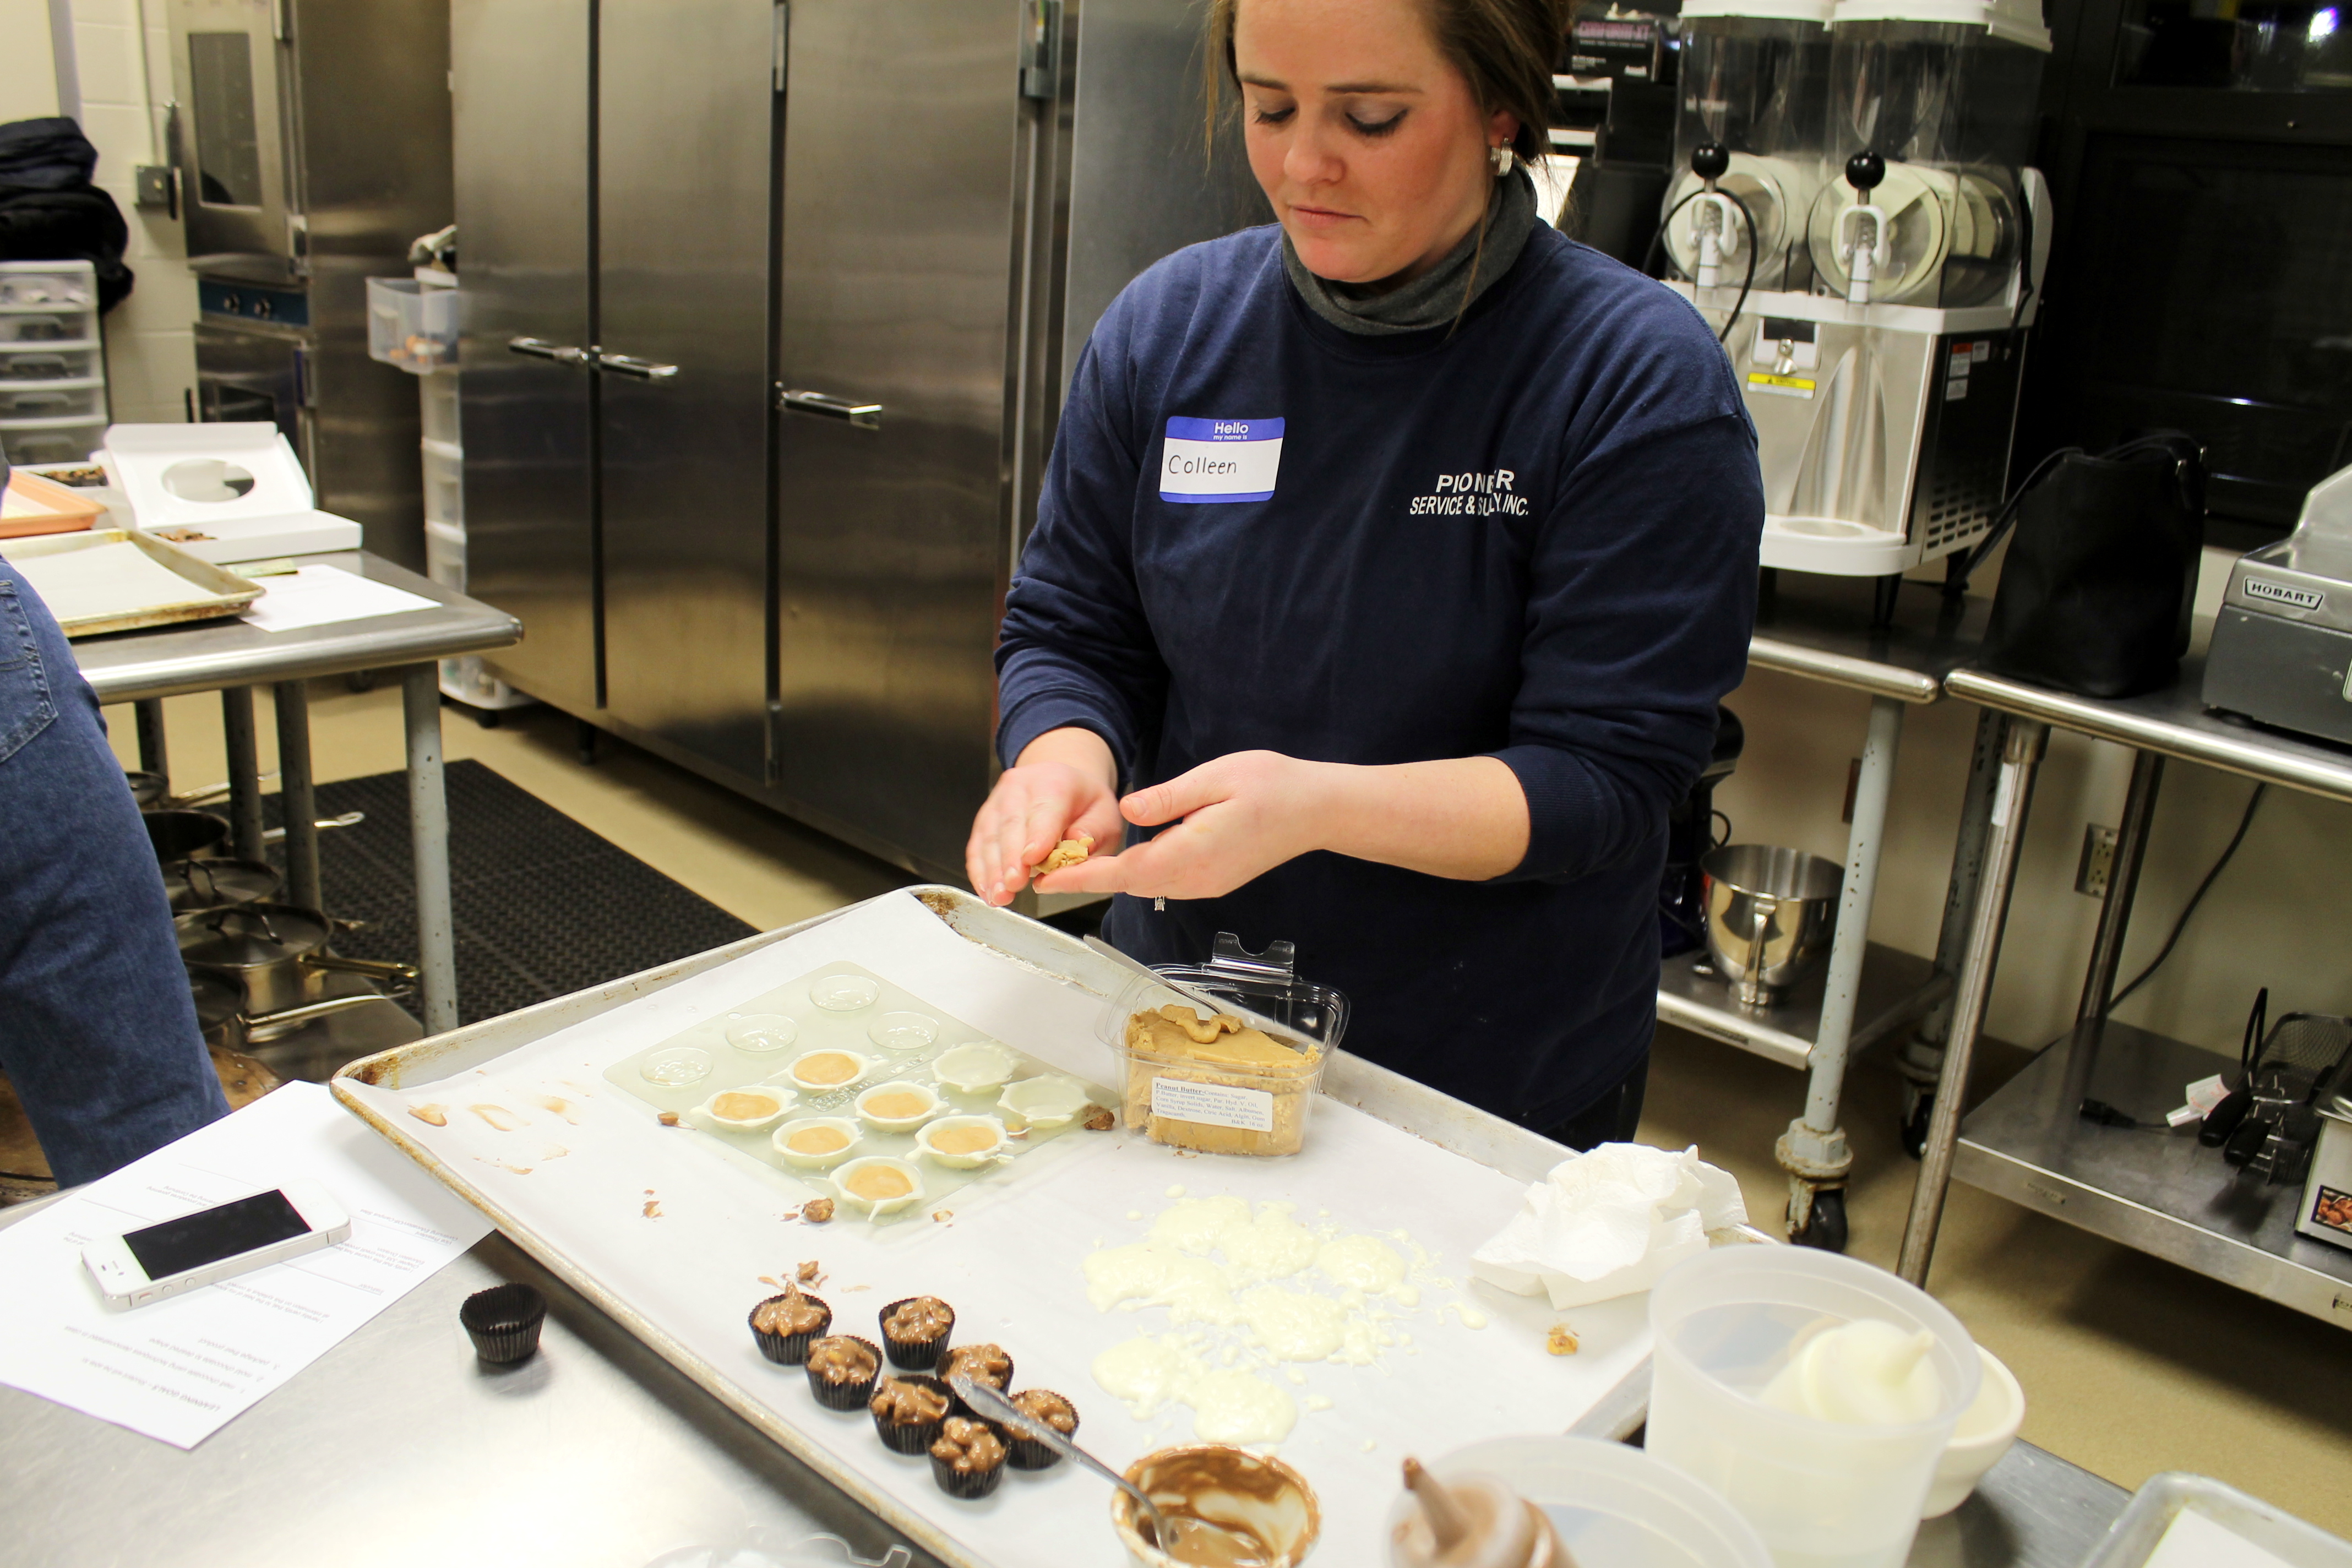
While Colleen was making our dark chocolate covered fudge fondants, I took a few more photos, offered a few more tips, and did accomplish a bit of chocolate making too! (note those beautiful caramels on the right in my spot below… though Colleen did do the white drizzle part… I know I know – I have the best D-I-L ever!)
TIP: Once all of your chocolate and filling is in the mold, tap it lightly a few times on the table or lightly shake back and forth horizontally a few times to even and smooth out the chocolate before it sets. It makes the WORLD of DIFFERENCE in the finished product!
 I did manage to make chocolates, and look at what we ended up with!
TIP: A great way to melt chocolate and keep it melted is to do it in a crockpot. Who would’ve thought?
 Not too shabby – eh?
We had a BLAST! We learned some great TIPS… We made chocolate (which Marty and Nick are thoroughly enjoying)…
But most of all – we made memories!
TIP: Clean-up is much easier if you let the chocolate cool and harden. Place the squeezie bottles that are all but empty, but coated with chocolate, in the refrigerator for several minutes. When the chocolate hardens, all you need do is squeeze the bottle several times and the hardened chocolate cracks and releases from the sides into a pile of broken up pieces in the bottom of your bottle. This can be saved and remelted. Much more cost-effective than washing and throwing out all of that delicious chocolate – and A LOT less messy too!
And after all that fun, Colleen and I were both thinking candy making and cookie baking the next day. I found the 40+ molds I had boxed up in the attic from about 20 years ago when Marty’s Mom and sister and I used to do all this together and texted Colleen to see if she wanted to come borrow to use for her baking and cooking this weekend. It brought back a flood of happy memories….
and I hope Colleen will remember our day and many more to come as we enjoy spending time and making memories!
Killer, Jr. & Killer
Of course she is the cute one on the left!
Cheers and Sweet Hugs,
Jodi
What are you up to this weekend? Do you have a crazy, long, exhausting “To Do” list for getting ready for the holidays?
I recently saw a great revised list on Instagram… and it really made me think. So I got to working on re-setting some of my own priorities.
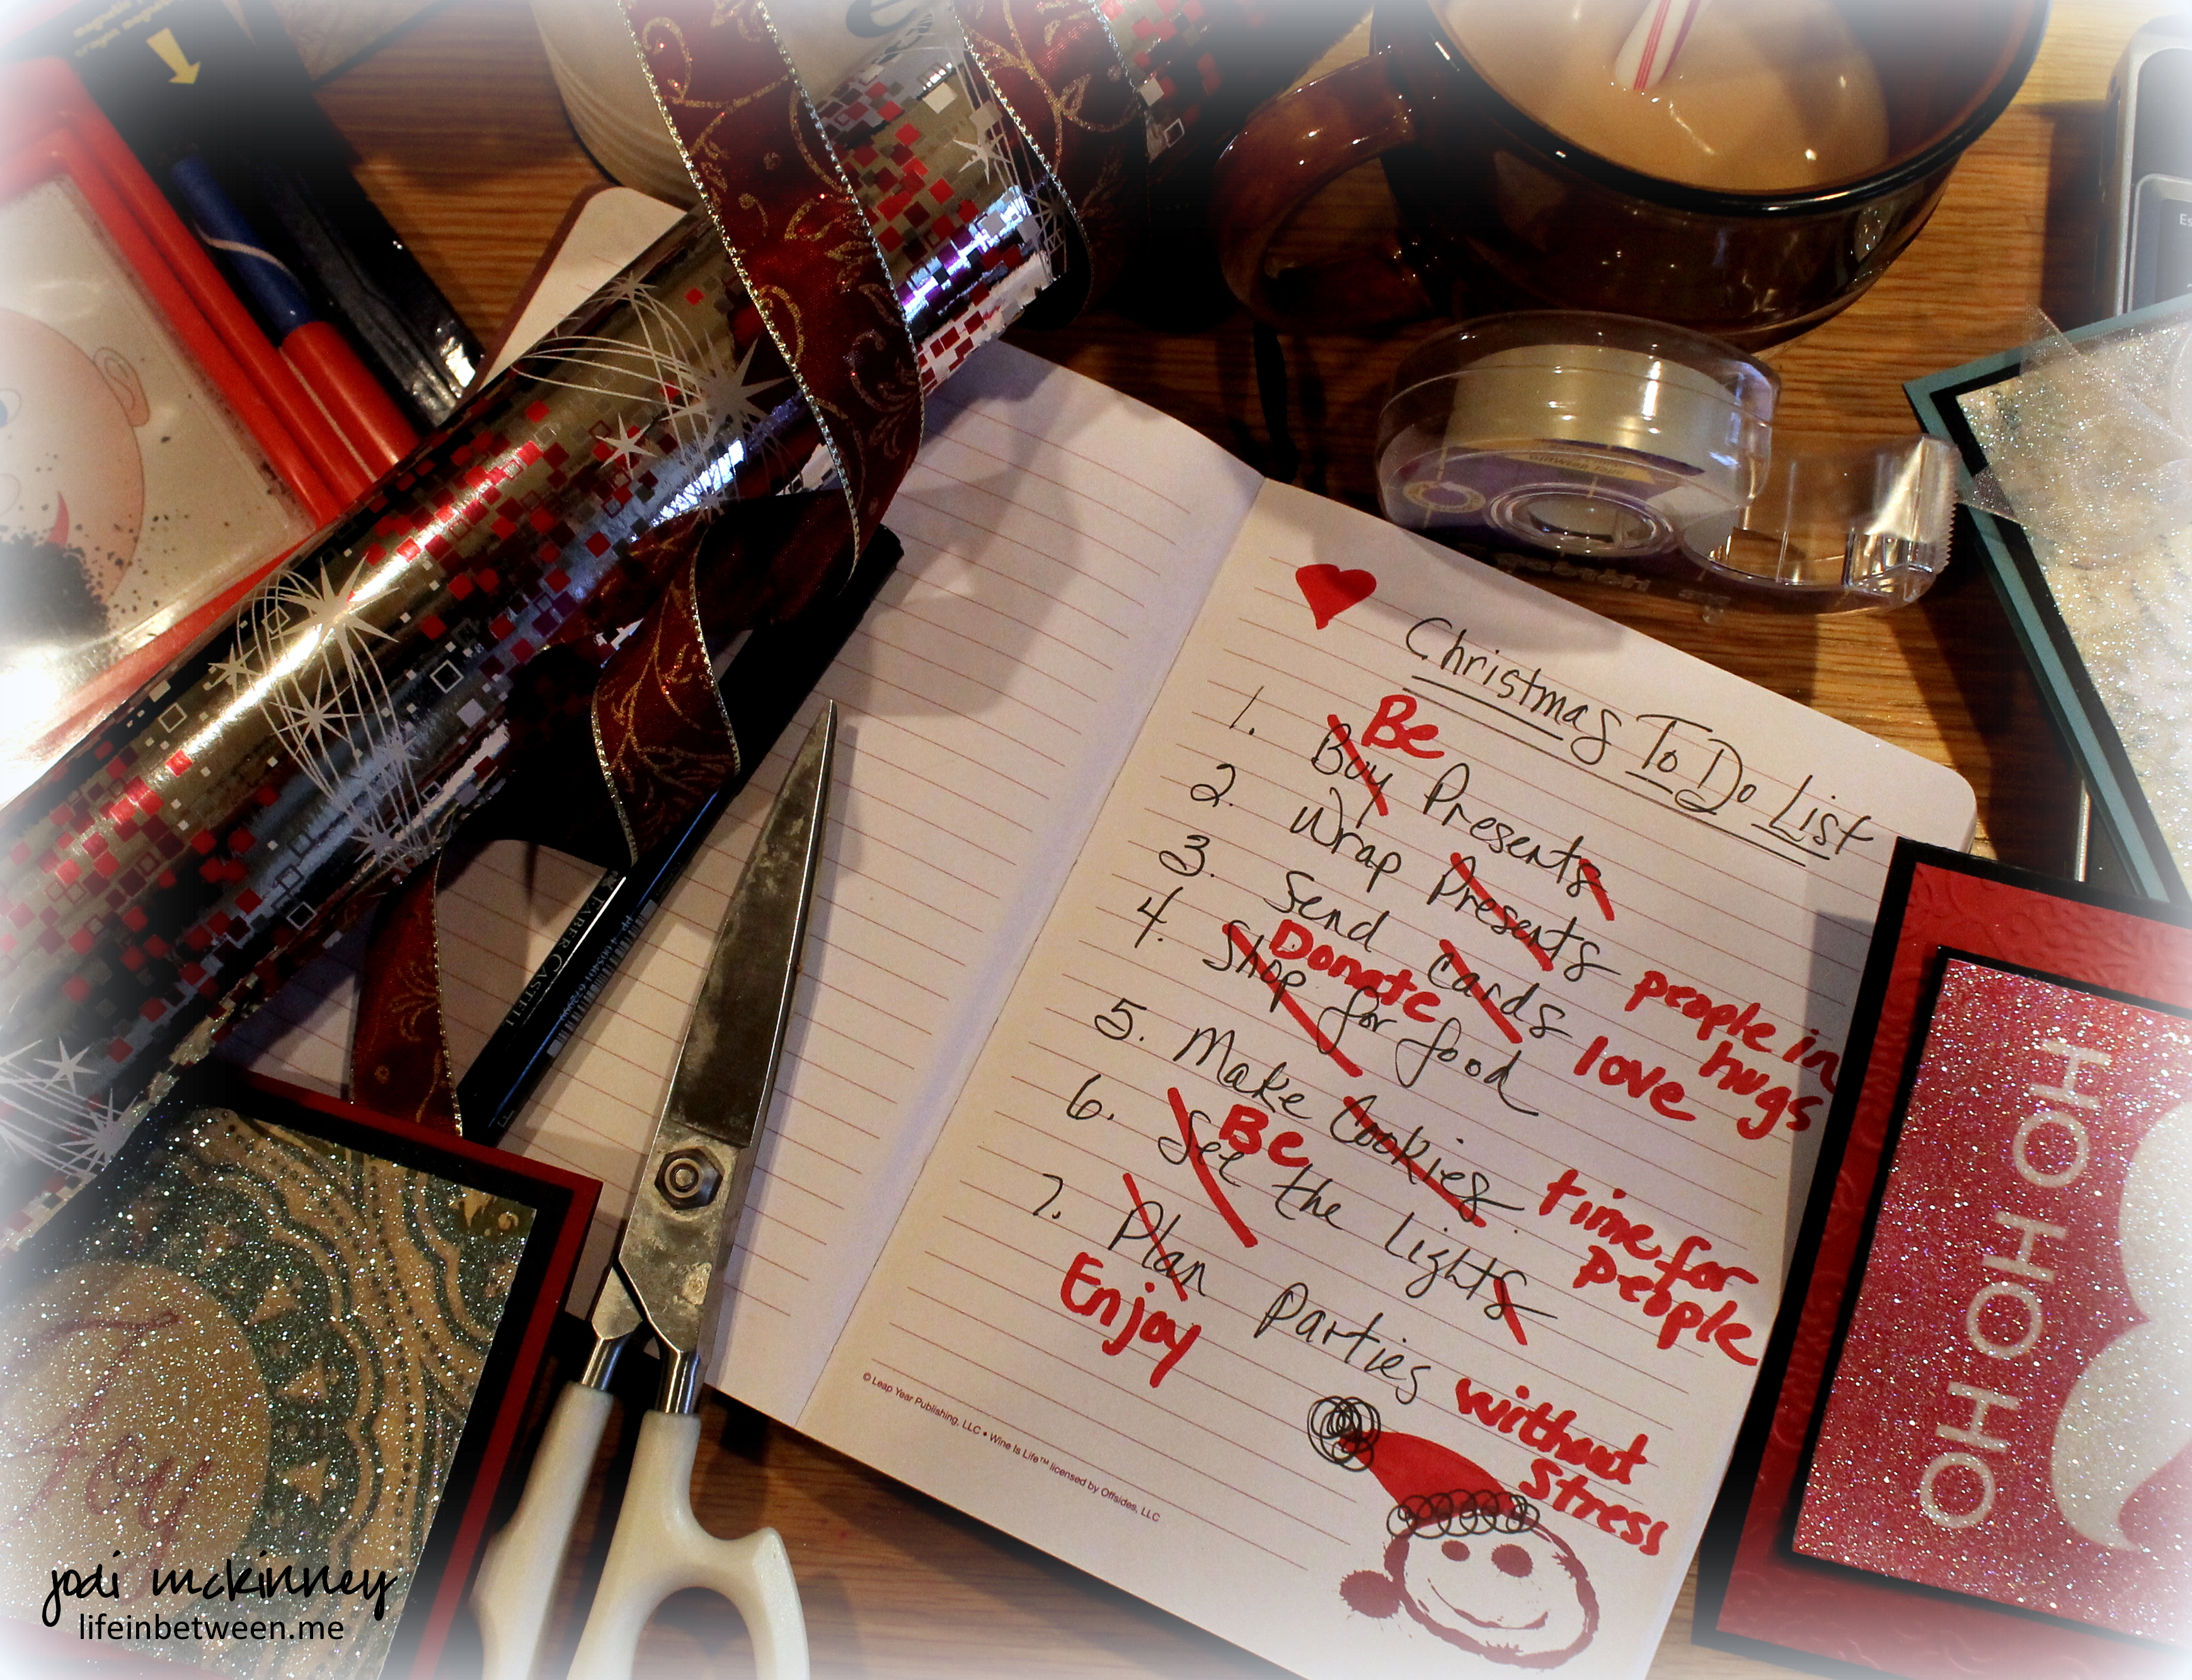
#1: Do you have a lot of presents left to buy? I do! But I’m not going to worry about it. If it gets down to the wire, I’ll just give gift cards or money. I think my kids like that best anyway.
And when I receive a text from my cousin’s six-year old daughter like I did earlier this week that says:
I have a concert on Saturday December 13. Can you be there? I don’t know what time
Well – you can bet I’ll be there. Those kind of invites are too precious to pass up!
#2: Do you still have wrapping to do? Remember there are always gift bags. Instead, make sure you wrap everyone you love with lots of warm hugs. And my little twist is to always try to be the last to let go…. You never know when you might get the chance again or how much that person needs it at that moment.
#3: I still haven’t sent my cards out. And you know I’m a card making fool! Much more fun creating them than addressing and stuffing and licking envelopes, so whatever ones I do get out, I do – and it will be sent with all the love and time I put into it. But if I don’t get them out, or even mail them after the holidays – that’s ok – right?! No crime! I want to make sure I’m sending love, not just a card for a card’s sake.
#4: I’ve got lots of food shopping to do – and no worries – the stores are open 24 hours, so I will eventually get there. What I do want to make sure we do is donate food to those in need.
#5: I love to make cookies – and it is a rare occasion that we don’t have a homemade cookie in the house to munch on or offer a guest – but guess what? No Christmas cookies baked yet. I’ll get to some I’m sure. What is more important is making time for people – like the little cutie we’re going to go listen to sing on Saturday or the chocolate-making class I went to last night with my daughter-in-law. Sure – I could be baking, but I first want to make time for those I love.
#6: I adore seeing all the Christmas lights, and Marty and I sure had fun at Kennywood’s Festival of Lights, but what is more important is that I make time to BE that light.
#7: And Parties….. I kinda live for hosting parties. We are hosting four in a row from Christmas Eve until Saturday 12/27, and then again on New Year’s Eve. YIPPEE! Am I stressing over it?! NOPE! Will I fuss? Probably not so much. Or maybe a little – if I have time. But if I don’t — – not gonna worry! As long as the people show up, we have something to eat and drink, and there is lots of love and laughing – then the party is a success! Right?

So check your list. Does it need a little tweaking? A couple of revisions? Make sure you are cherishing each moment along the way.
Cheers and Hugs,
Jodi
