Cake Pops! Tips for Beginners


chocolate-dipped-german-chocolate-cake-pops

Cake Pops!  Tips for Beginners.

I adore cake pops!

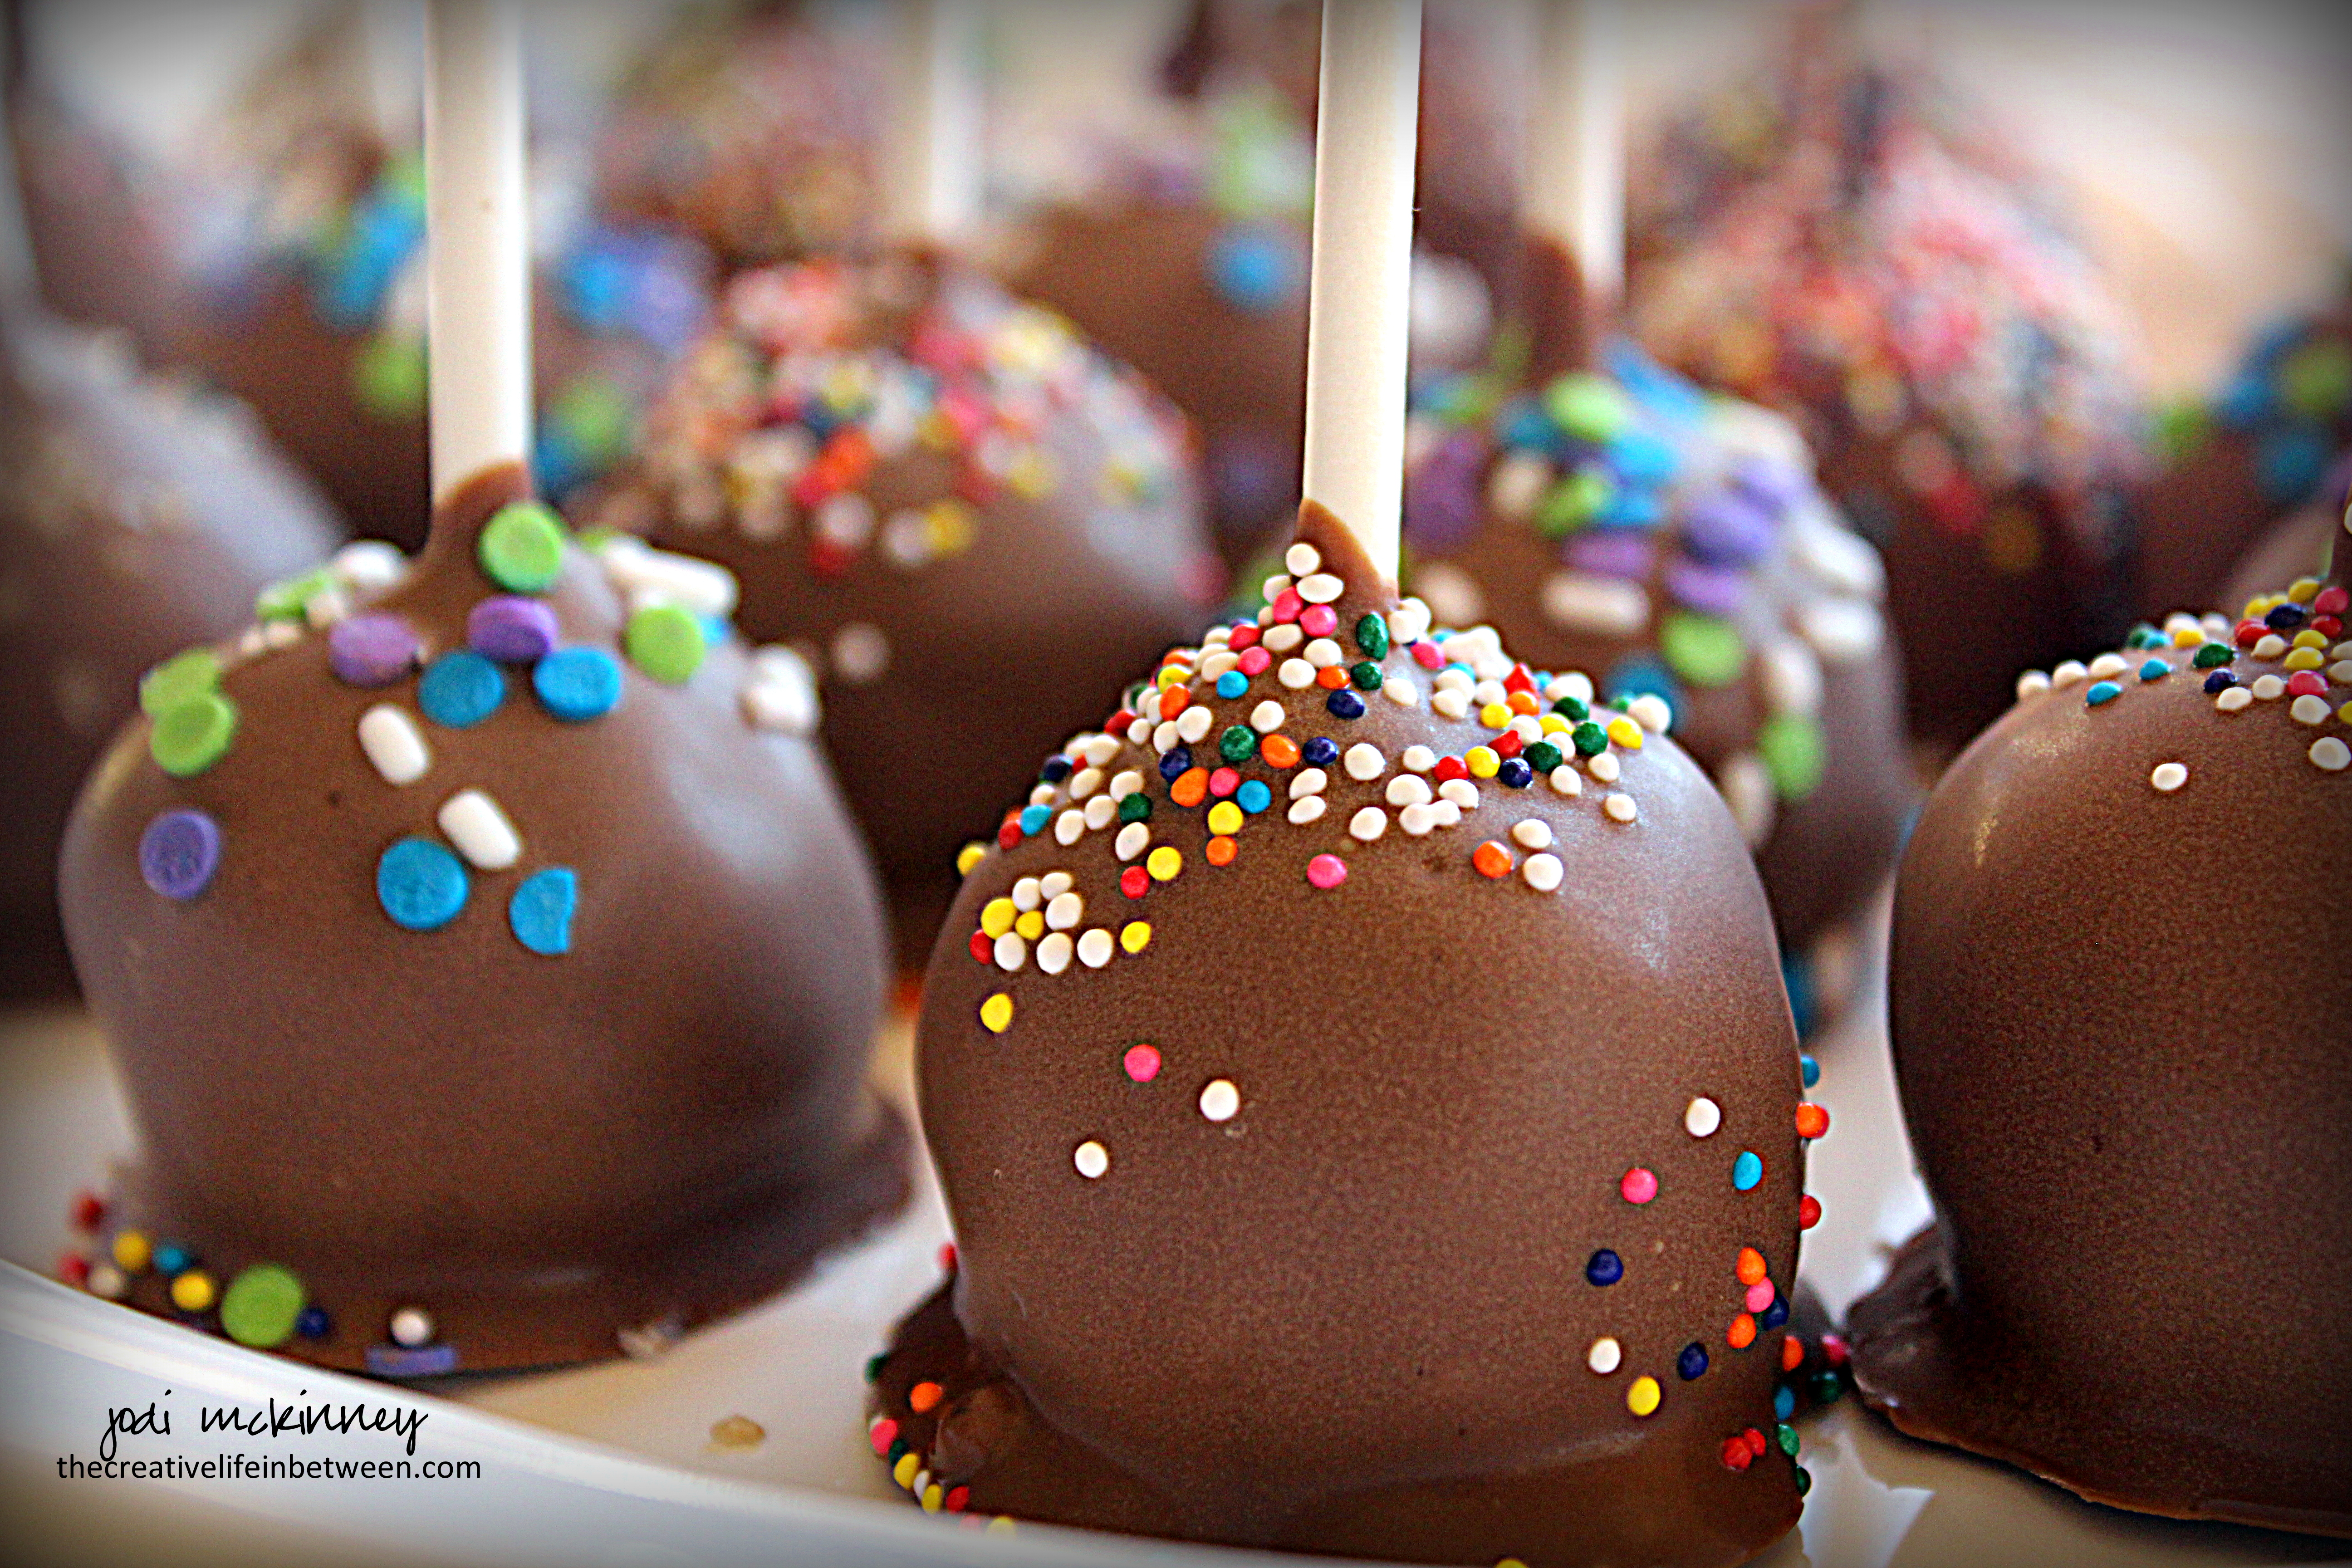
Because… really…  what could be better than a bite-sized morsel of cake dunked in chocolate?  And then maybe adorned with sprinkles?!

They are delicious and pretty and cute; but until this past weekend, I had never tried to make them.

I wanted to practice for an upcoming event or two, so I read and researched and asked around and gave them a whirl this past weekend.

white-and-gold-elegant-cookie-pops

They are really not that difficult, but there are a few tricks to success.  I thought I would provide a few tips that helped make mine turn out delicious and beautiful!  At least that is the consensus I got from the party I took them to as “practice” pops.

cake-pops-german-chocolate-before-dipping

To make cake pops, bake a cake mix – whatever you favorite flavor is.  Then follow these tips for success.

  • Freeze cake – even if overnight.  It allows you to plan ahead and also adds to the moisture of the cake.  Simply place baked  cake – crumbled, broken pieces, or all in one piece – in a large Ziploc bag in the freezer.
  • 1 boxed cake mix  makes approximately 3 dozen cake balls.
  • When ready to assemble, defrost the cake and crumble to fine crumbs with your hands in the bag.
  • Add only enough frosting (ready made works perfect) to add a bit of “glue” for forming and holding balls together.  I used 1 heaping tablespoon – that is it!  This allows your cake balls to truly taste like cake.
  • Scoop crumb mixture with a small scoop to form uniformly-sized 1 inch balls.  Then roll with your hands to round ball.
  • Melt chocolate candy melts in microwave in a deep cup that is not too wide to allow for ease of dipping.  It only takes 1 1/2 – 2 minutes.
  • Dip tips of sticks into candy melts and insert into cake balls.
  • Refrigerate or freeze for at least a half hour or several hours.
  • Remelt chocolate at 30 second intervals until desired consistency.
  • Dip cake balls on sticks into chocolate candy melts.  Allow excess to drain.
  • Place on parchment paper if using with stick up, and sprinkle with jimmies or edible glitter.
  • Stick into styrofoam if using cake ball up and decorate as desired.
  • Make ahead up to 3-5 days if needed – no more than 7 days.  (there are horror stories of moldy cake balls made too far ahead of time)
  • I found this site – Heavenly Cake Pops – to be extremely informative.

Have fun and enjoy!

Cheers & Hugs,
Jodi

Peanut Butter Banana Bread with Chocolate Chips

peanut-butter-banana-bread-with-chocolate-chips

Peanut Butter Banana Bread with Chocolate Chips.

I had a few bananas hanging out that were getting very ripe, so I decided to make a loaf of banana bread yesterday morning.

Instead of making my usual, I wanted to try something different.  Knowing how yummy peanut butter toast is with sliced bananas (right??!!), I thought peanut butter would be a wonderful addition to banana bread.  And while I was at it, why not throw in a few chocolate chips?!

peanut-butter-banana-bread-with-chocolate-chips-2

Thinking I was a genius for coming up with this idea, I searched online just in case.  Well of course others had tried this combo!  (Where have I been?!) I found a few different versions, so I took what I liked from them and adapted to come up with this one below.  It was delish!  The peanut butter is subtle, but adds a wonderful new twist.  This bread is SUPER moist and really wonderful warm out of the oven.

Hope you’ll give this twist on banana bread a try!

Peanut Butter Banana Bread with Chocolate Chips

Ingredientspeanut-butter-banana-bread-with-chocolate-chips

  • 4 medium ripe bananas, mashed
  • 1/2 cup creamy peanut butter
  • 1/2 cup sugar
  • 1/2 cup brown sugar
  • 1/3 cup buttermilk (I make by mixing milk and a dash of vinegar)
  • 1/4 cup vegetable oil
  • 2 eggs
  • 2 tsp vanilla extract
  • 1 tsp baking soda
  • 1/4 tsp salt
  • 2 1/4 cups all-purpose flour
  • 1 cup semi-sweet chocolate chips or chunks

Directions:

Preheat oven to 350 degrees F.  Grease or spray a large bread loaf pan (of course I use a stoneware bread pan), then line with parchment paper allowing it to hang over the edges for easier removal.

In a large bowl, combine first 8 ingredients.  Mix well.  Add baking soda, salt, and flour.  Mix until combined.  Gently fold in chocolate chips reserving a handful to sprinkle on top. of batter.

Pour batter into prepared pan.  Bake approximately one hour or until toothpick inserted in center comes out clean.   If the bread starts getting too brown, place a tent of foil over top at around 45 minutes.

Cool in pan for 10 minutes, then lift out by grabbing parchment paper.  Cool on wire rack.  

Enjoy!

Cheers & Hugs,
Jodi

Five-Minute Homemade Rustic Artisan Bread

bread-5-minute-rustic-artisan-bread

Five-Minute Homemade Rustic Artisan Bread.

Aren’t these loaves beautiful?!  I recently found this recipe that makes homemade bread so easy!

bread-5-minute-rustic-artisan-bread-2

You can mix this dough together in five minutes.  Then it just needs to rest for two hours while you go about doing something… anything else.  After that, throw it in the fridge – for up to 14 days!  Whenever you want a fresh loaf of bread, grab a hunk of dough, and bake it.  Super simple, super delicious!

bread-5-minute-rustic-artisan-bread-3

So… disclaimer… you obviously can’t make it from start to finish in five minutes, but that really is all the longer the dough takes to mix together, and there is no kneading, so it really is a simple way to make warm, fresh, delicious homemade bread quickly and easily with just a few simple staple ingredients!

Five-Minute Homemade Rustic Artisan Bread

  • Servings: 4 1 lb loaves
  • Print

Ingredients:bread-5-minute-rustic-artisan-bread

  • 3 cups lukewarm water (approx. 100 degrees F)
  • 1 Tbsp active dry yeast
  • 1 1/2 Tbsp coarse salt (I love using Maldon Sea Salt Flakes)
  • 6 1/2 cups flour

Directions:

Pour water in large bowl.  Sprinkle with yeast and salt, and mix until dissolved.  Add flour all at once, and mix until completely incorporated.  That’s it!  Five minutes.  No kneading.

Place a clean kitchen towel over the bowl and let it sit for two hours.

After two hours, cover bowl with saran wrap (but not too tight as it needs a little vent for gases to escape), and throw it in the fridge.

Your dough is ready to use at anytime in the next 14 days.

When you are ready to bake a loaf, preheat oven to 450 degrees F.  Grab a hunk of dough with floured hands.  Do not punch it down, and do not knead or overwork it.  Gently shape as desired into a ball, loaf, rolls – whatever you like.  Place on a baking stone. (I bake absolutely EVERYthing on baking stones – cookies, bread, roasted vegetables, meatloaf, french fries – they are all I use in the oven – and the results are awesome!) You can let it rest for 30-40 minutes or bake right away – depending on the density you desire.  Dust top of dough with flour (and salt if desired).  Slash a few cuts in the dough with a serrated knife.

Place an empty metal broiler pan on bottom rack of oven and fill with warm water right before placing dough in oven.

Bake for 20-30 minutes until the crust is a rich brown color and firm to the touch.  Remove from oven and cool on wire rack.

Enjoy!

Cheers & Hugs,
Jodi

*original recipe found at Leite’s Culinara

Creamy Cauliflower Soup

creamy-cauliflower-soup-4

Creamy Cauliflower Soup.

Does anything warm you up more wonderfully on cold winter days than a steamy, creamy bowl of soup?

I made this yummy creamy, cheesy cauliflower soup one day this past week, and we absolutely loved it.

creamy-cauliflower-soup-1

When hubby, who typically prefers to eat lunch out during the work week, asked for a serving to take for lunch the next day, I knew I had a real winner on hand!

creamy-cauliflower-soup-2

It is chock full of delicious vegetables simmered in broth and then creamed by adding an easy cheesy roux and blending a bit.  You could completely cream it if you like, but I like to cream about half and leave plenty of hearty chunks of the cauliflower, celery, carrots and sweet red peppers.

creamy-cauliflower-soup-3

Fresh thyme really adds a fabulous fragrance and taste, and hot sauce is a great way to kick it up just a bit!

Imagine serving this with some crusty french or chewy ciabatta bread to dunk in it or alongside a sandwich or salad.

Hope you’ll give it a try, and hope you enjoy it as much as we did!

Creamy Cauliflower Soup

Ingredients:creamy-cauliflower-soup-4

  • I head cauliflower, broken into florets (5-6 cups)
  • 1 cup finely chopped carrot
  • 1/2 cup chopped celery
  • 1/2 cup chopped sweet onion
  • 1/2 cup chopped sweet red pepper
  • 1 tsp freshly chopped thyme
  • 3 cups chicken broth (I made from water and 3 tsp. chicken base)
  • 3 Tbsp butter
  • 3 Tbsp flour
  • Dash of salt and pepper to taste
  • 2 cups half and half or milk
  • 1 cup freshly grated sharp cheddar cheese (do not use pre-grated)
  • 2 tsp Cholula Hot Sauce (or you can use Sriracha or your favorite or none)

Directions:

  • Combine all vegetables, thyme, and chicken broth in a large pot.  Cover and bring to a boil.  Reduce heat, and simmer for 15 minutes.
  • In a medium saucepan, melt butter, then add flour, salt and pepper to create a roux.  Whisk half and half in slowly.  Bring to a boil over medium-high heat.  Cook and continue whisking for 2 minutes until thickened and smooth.  Turn heat off and stir in shredded cheese until melted.  Add hot sauce (if desired).
  • Pour creamy cheese mixture into vegetables and broth.  Stir until completely combined.
  • Puree to desired consistency using Immersion Blender leaving chunks of vegetables, but creating a creamy texture.
  • Ladle into bowls to serve.  

Cheers & Hugs,
Jodi


Strawberry Chocolate Ganache Tart with Oreo Cookie Crust

chocolate-strawberry-tart-valentines-day-couples-camp-dessert

Strawberry Chocolate Ganache Tart with Cookie Crust (No Bake).

You may recall seeing this dessert I made for our Valentine’s Couple Camp Party.  I promised then that I would share the recipe.

I have to tell you… this dessert is not only beautiful and elegant looking, it is so simple, uses only five basic ingredients, and is possibly the most luscious chocolate dessert I have EVER tasted.  And I’m really not exaggerating.  I absolutely loved this tart!

I typically make dessert, but just taste enough to know it is okay to serve.  This one, however… I not only had the evening of our party, I ate the last leftover slice!

I am certain I will make this tart again.. and again.  It is a great dessert for ANY occasion, any season, anybody.  I would take this to a summer picnic.  I would make this for a birthday “cake.”  I would make this for a Christmas dinner dessert.  I would make this for ANY reason.

chocolate-strawberry-tart-valentines-day-couples-camp-dessert-2

I originally came across this recipe posted by Mary at HomeisWheretheBoatis, and I only tweaked it slightly.  Thanks for sharing Mary!

I so hope you will give this a try, and I cannot wait to hear how you like it!

Strawberry Chocolate Ganache Tart with Oreo Cookie Crust (No Bake)

Ingredients:chocolate-strawberry-tart-valentines-day-couples-camp-dessert

  • 1 pkg. Oreo Cookies (approx. 32 cookies)
  • 1/2 cup (1 stick) butter, melted
  • 12 oz. of Your Favorite Chocolate (I used Baker’s German Sweet)
  • 1 1/2 cups Heavy Cream
  • Strawberries

Directions:

  • Place Oreo cookies in a gallon size Ziploc bag.  Then place entire bag in another bag to double (so you can crush them without making a mess!)  Crush Oreo cookies using a heavy rolling pin, your hands, or whatever way you prefer to smash them fine enough to make a crust from.  (The original recipe calls for pulsing them in a food processor, so feel free to do that if you have one.)  
  • Pour melted butter into the bag.  Zip to close again and  completely incorporate the cookie crumbs and butter using your hands.  Pour crumb and butter mixture into an 11″ tart pan.  Pat onto bottom and up sides of tart pan.  Refrigerate to firm up for one hour before preparing and adding filling.
  • To make filling, break up chocolate and place in a heat-proof bowl.  Bring heavy cream to a boil in a small sauce pan.  As soon as it boils, pour over chocolate.  Let sit for a couple minutes to soften the chocolate, then slowly whisk until until smooth and fully incorporated.  Pour into chilled, firm crust.  Refrigerate for 4-6 hours or overnight.
  • Garnish with strawberries (red raspberries would amazing too if you prefer!).  Drizzle melted chocolate over all if desired.  I also sprinkled just a tiny bit of sea salt flakes, which gave it an amazing, but subtle taste burst.  And then – any cookie crust crumbs that fall off when you remove the tart bottom from the sides of the pan can be thrown on top too. 

Enjoy!  I know you will!

Cheers & Hugs,
Jodi

Chocolate Dipped Sugar Wafer Cookies

chocolate-dipped-sugar-wafer-cookies-2

Chocolate Dipped Sugar Wafer Cookies.

Remember those light, crispy, sweet wafer cookies you loved as a child that came in fun colors and flavors?  Vanilla, Strawberry, Chocolate, even Peanut Butter…  Oh how I loved them!

Grandma would occasionally get them as a special treat, and we would enjoy them as a late night treat on a hot summer night while sitting outside on the swing catching a cool breeze that could not be felt sitting in the overheated non-air conditioned house.

chocolate-dipped-sugar-wafer-cookies

I hadn’t thought about these sugary treats for years, but I recently stopped in a local candy shoppe where they featured a pair of these sweet little cookies dipped in chocolate, sprinkled with colorful sprinkles, and wrapped in cellophane.   I couldn’t resist trying – even at the crazy price they were asking… several dollars for two little treats.

chocolate-dipped-sugar-wafer-cookies-3

Well – OMG – there were delish!  And I realized they would be so easy to make!  So I found them at my local grocery store, where a whole package of sugar wafer cookies cost a whopping 99 cents!

I dipped them in chocolate, sprinkled them with fun Valentine sprinkles, and I’ll be sharing them with some friends I love dearly this weekend!

Cheers & Hugs,
Jodi

Crockpot Honey Balsamic Pork Roast

crockpot-honey-balsamic-pork-roast-with-onions

Crockpot Honey Balsamic Pork Roast.

Oh my dear programmable crockpot – how do I love thee?
Let me count the ways….

All kidding aside, I do love cooking in the crockpot, and I love this new one I got that is programmable and then keeps dinner warm once its done cooking.  They have come such a long way since the first one I got oh so many years ago as a newlywed.  I use it at least once a week – especially in the colder weather months.

This past Sunday was a bit of a cold, lazy day, so this Honey Balsamic Pork Roast was just the ticket for dinner.  That hubby of mine is going to make a pork lover out of me yet!

crockpot-honey-balsamic-pork-roast-plated

A tender white meat pork loin with a full flavored simple sauce that turns into a rich, easy gravy warmed up and filled our tummies – especially with a dollop of mashed potatoes and healthy serving of steamed broccoli.

Just look at that yumminess!  I am beginning to think pork is the “other white meat” Hubby keeps trying to convince chicken-lover me into believing.

crockpot-honey-balsamic-pork-roast-close-up

Here is the simple, yet hearty and flavorful recipe I slightly adapted from SixSisterStuff.   Hope you’ll give it a try.

Crockpot Honey Balsamic Pork Roast

Ingredients:crockpot-honey-balsamic-pork-roast-with-onions

  • 2-3 lb. pork loin roast
  • salt and pepper
  • 1/4 cup honey
  • 1 cup beef broth (I made using 1 cup water and 1 beef bouillon cube)
  • 1/2 cup balsamic vinegar (I realized I was out, so used Balsamic Vinaigrette Dressing – I am the queen of improvising!)
  • 2 Tbsp Worcestershire sauce
  • 1 tsp garlic powder
  • 3 cloves garlic, minced (optional)
  • 1 large sweet onion, sliced (optional)
  • 2 Tbsp butter
  • 1/4 cup flour

Directions:

Place pork roast in crockpot and sprinkle generously with salt and pepper.  Drizzle honey over top of roast.  Add rest of ingredients except for the last two (butter and flour).  Cook on low for 8-10 hours or high for 4-6 hours.

When ready to serve, remove roast to cutting board to rest.  In a small saucepan, melt butter, then whisk in flour to create a roux.  When thickened, pour juice from crockpot into roux, and stir to incorporate and thicken into gravy.  Slice roast and serve with gravy.

Enjoy!

Cheers & Hugs,
Jodi

Cinnamon Pecan Crumb Cake

cinnamon-pecan-crumb-cake-piece

BEWARE:  This Cinnamon Pecan Crumb Cake is only for the most serious crumb cake lovers!  Are you one like me?  Do you love more buttery, sugary, nutty crumbs than cake?  If so, this is the cake for you!  And I dare say it should not be consumed without a large steaming cup of coffee to wash down the “crumby” goodness.  Be still my coffee crumb cake lovin’ heart!

Let’s take a closer look at all that “crumby” deliciousness…

cinnamon-pecan-crumb-cake-piece-2

Don’t say I didn’t warn you.  This is a seriously “crumby” cake!

cinnamon-pecan-crumb-cake-piece-3

With buttery, nutty, cinnamony wonderfulness, this cake is a serious indulgence justified as breakfast when served with coffee…. but Hubby discovered it works very well as an evening snack when topped with a scoop of Vanilla Caramel Gelato!

If you don’t like your cake quite so “crumby,” you could double the cake batter or half the crumb topping.  Also – be careful not to overbake and dry the cake out – –  unless you are eating it with vanilla caramel gelato or dunking it in coffee.  In that case – who cares!

Diet shmiet – this cake is worth the calories!  Enjoy!

Cinnamon Pecan Crumb Cake

Ingredients:cinnamon-pecan-crumb-cake-piece-2
  • Topping
    • 2 1/2 cups flour
    • 1 cup packed light brown sugar
    • 2 1/2 tsp ground cinnamon
    • 1/2 tsp freshly ground nutmeg
    • 2 sticks (1 cup) butter, melted
    • 1 cup finely chopped pecans (or walnuts)
  • Cake
    • 1 1/2 cups flour
    • 1/2 cup sugar
    • 2 1/2 tsp baking powder
    • 1/2 tsp salt
    • 2/3 cup milk
    • 1 large egg
    • 2 Tbsp canola or vegetable oil
    • 3 tsp vanilla extract

Directions:

Preheat oven to 325° F.  Prepare  8 or 9 inch square baking pan by spraying with vegetable spray and lining with parchment paper so it overhangs sides of pan. Spray the parchment paper with vegetable spray and set aside.

Make topping by combining flour, sugar, cinnamon, and nutmeg in a large bowl.  Make a well in the center of the mixture and add the melted butter. Stir to combine, then add the pecans using your hands to thoroughly mix. Topping should have a loose, crumbly consistency.  Set aside.

Prepare cake by whisking milk, oil, egg, and vanilla in medium bowl.  Add sugar, baking powder, salt, and flour.  Stir until just combined.

Pour the cake batter into prepared pan. Add all of the crumb topping evenly over the batter.

Bake approximately 30 mins.  The cake will rise, and the topping will bake into the cake batter.

Remove from oven and cool for 10 mins. in pan. Run a butter knife along the edges of the pan to loosen cake and lift it out to a cutting board. Cut into 9 squares. Sprinkle with powdered sugar to garnish if desired. 

Cheers & Hugs,
Jodi

*recipe adapted from Garlic&Zest

The Ultimate Reese’s Peanut Butter Cup Cookie & That Something about Baking

reeses-peanut-butter-cup-cookies-stack

The Ultimate Reese’s Peanut Butter Cup Cookie

The Ultimate Reese’s Peanut Butter Cup Cookie

A few months ago, I recall my youngest son, watching me mix together a batch of cookie dough, asking, “Do you actually enjoy doing that?  Seems like a lot of work!”

I thought about it.

It is a bit tedious.

It makes a mess in the kitchen.

I could be binge-watching Gilmore Girls on Netflix or painting or exercising or reading or so many other things.

But…

There’s something about baking…

reeses-peanut-butter-cookies-close-up

There’s something about using Grandma’s old tin measuring cup and reminiscing about childhood summers.

There’s something about the way the house smells like home when you bake.

There’s something about the smiles you know will emerge when hubby sees stacks of cookies cooling on racks when he comes home or comes in from out of the cold.

There’s something about making goody packages to send home with your kids (even though they are grown and on their own and perfectly capable of making themselves).

There’s something about taking a special treat into the office for a long day of meetings and seeing your co-workers’ faces light up.

There’s something about taking a plate of cookies to the Thursday night gang at John’s Bar and watching your buddy eat one cookie before his dinner and two after.

There’s something about trading a cookie or piece of cake with Cliff the mailman when he delivers a package and handful of mail right to the kitchen door (with a treat always in hand for your furry kid).

There’s something about your kids’ friends saying “You make the BEST cookies Mom M!”

reeses-peanut-butter-cookies-with-coffee-and-book

So you see – baking is more than the chore of mixing butter and sugar and flour.  It’s about creating happiness.

When I read a recent blog post by one of my very favorite blog writers, Pam at Catching My Drift, I knew I HAD to try her cookie recipe.  Pam is not a food blogger, but a storyteller – a GREAT storyteller I might add.  And the story she wove about her persistent and passionate quest to recreate her ultimate cookie painted a picture of the most heavenly bite on earth.  Pam tells the story of  how she loves sitting in the Starbucks snack bar of her local Barnes & Noble noshing on the most amazing Reese’s peanut butter cookie while sipping dark Italian roast and paging through glossy magazines.  You must read about her 35-year quest to recreate this cookie and the surprising place she found the recipe.

reeses-peanut-butter-cookies-1

Well, dear Pam, we were certainly not disappointed in this Ultimate Reese’s Peanut Butter Cookie!  It is indeed the ultimate.  It is a new favorite of hubby’s.  And it will now be a staple in my cookie recipe collection!  They are super crispy on the outside edges and tender and  soft on the inside.  The perfect combination of texture and flavor.

Here is the recipe as shared by Pam (which of course I doubled – because I knew I had to share)!

Reese's Peanut Butter Cup Cookies

Ingredients:

  • 1 cup margarine (I used butter)
  • 1 cup peanut butter (I used Jiff Creamy)
  • 1 cup white sugar
  • 1 cup brown sugar
  • 2 eggs
  • 1 tsp vanilla
  • 2 1/2 cups flour
  • 1 tsp. baking powder
  • 1 tsp. baking soda
  • 1 tsp. salt
  • Candy or chocolate of your choice to mix in (I used 4-6 Reese’s peanut butter cups, chopped, and 1/2 cup chopped Hershey’s Kisses.)
  • Sugar for dipping

Directions:

Preheat oven to 350 degrees F.

Beat first six ingredients until fluffy.  Add next four ingredients.  Blend well.  Fold in chopped candy.  Shape into 1 1/2 – 2 inch balls.  Roll in sugar.  Place 2 inches apart on ungreased cookie sheet.  Flatten with sugared bottom of glass.  Bake 12-15 minutes or until browned on the edges and beginning to crinkle.  Remove from oven, and cool completely on wire cooling rack.  

Enjoy immensely!

Cheers & Hugs,
Jodi

Oodles of Zoodles

zoodles-2

Oodles of Zoodles.

Has anyone else joined the zoodle craze?

zoodles-1

Low carb, low calorie, gluten free, grain free, wheat free, healthy, nutritious, unprocessed, vegetarian, cheap and and easy ZOODLES!

zoodles-3

Zoodles are zucchini noodles.  Or better put, vegetable noodles made from spiral cut zucchini.  They can be used in so many ways!

I recently purchased a SpiralLife Vegetable Slicer, and couldn’t wait to give it a try.  Super inexpensive at $14.99 on Amazon, it was easy to use, easy to clean, and easy on the wallet.

I made my zoodles to accompany a light dinner of Lemon Butter Chicken this week, and we loved them.

I simply sauteed them ever so briefly in olive oil with salt and pepper and a couple cloves of minced garlic.  After about two minutes, I added a handful of halved grape tomatoes and a generous grating of fresh Parmigiano reggiano cheese.  After sauteeing another two minutes, my zoodles were ready to serve and eat.  Yum!

How are you making your zoodles?

Cheers & Hugs,
Jodi