Homemade Apple Fritters

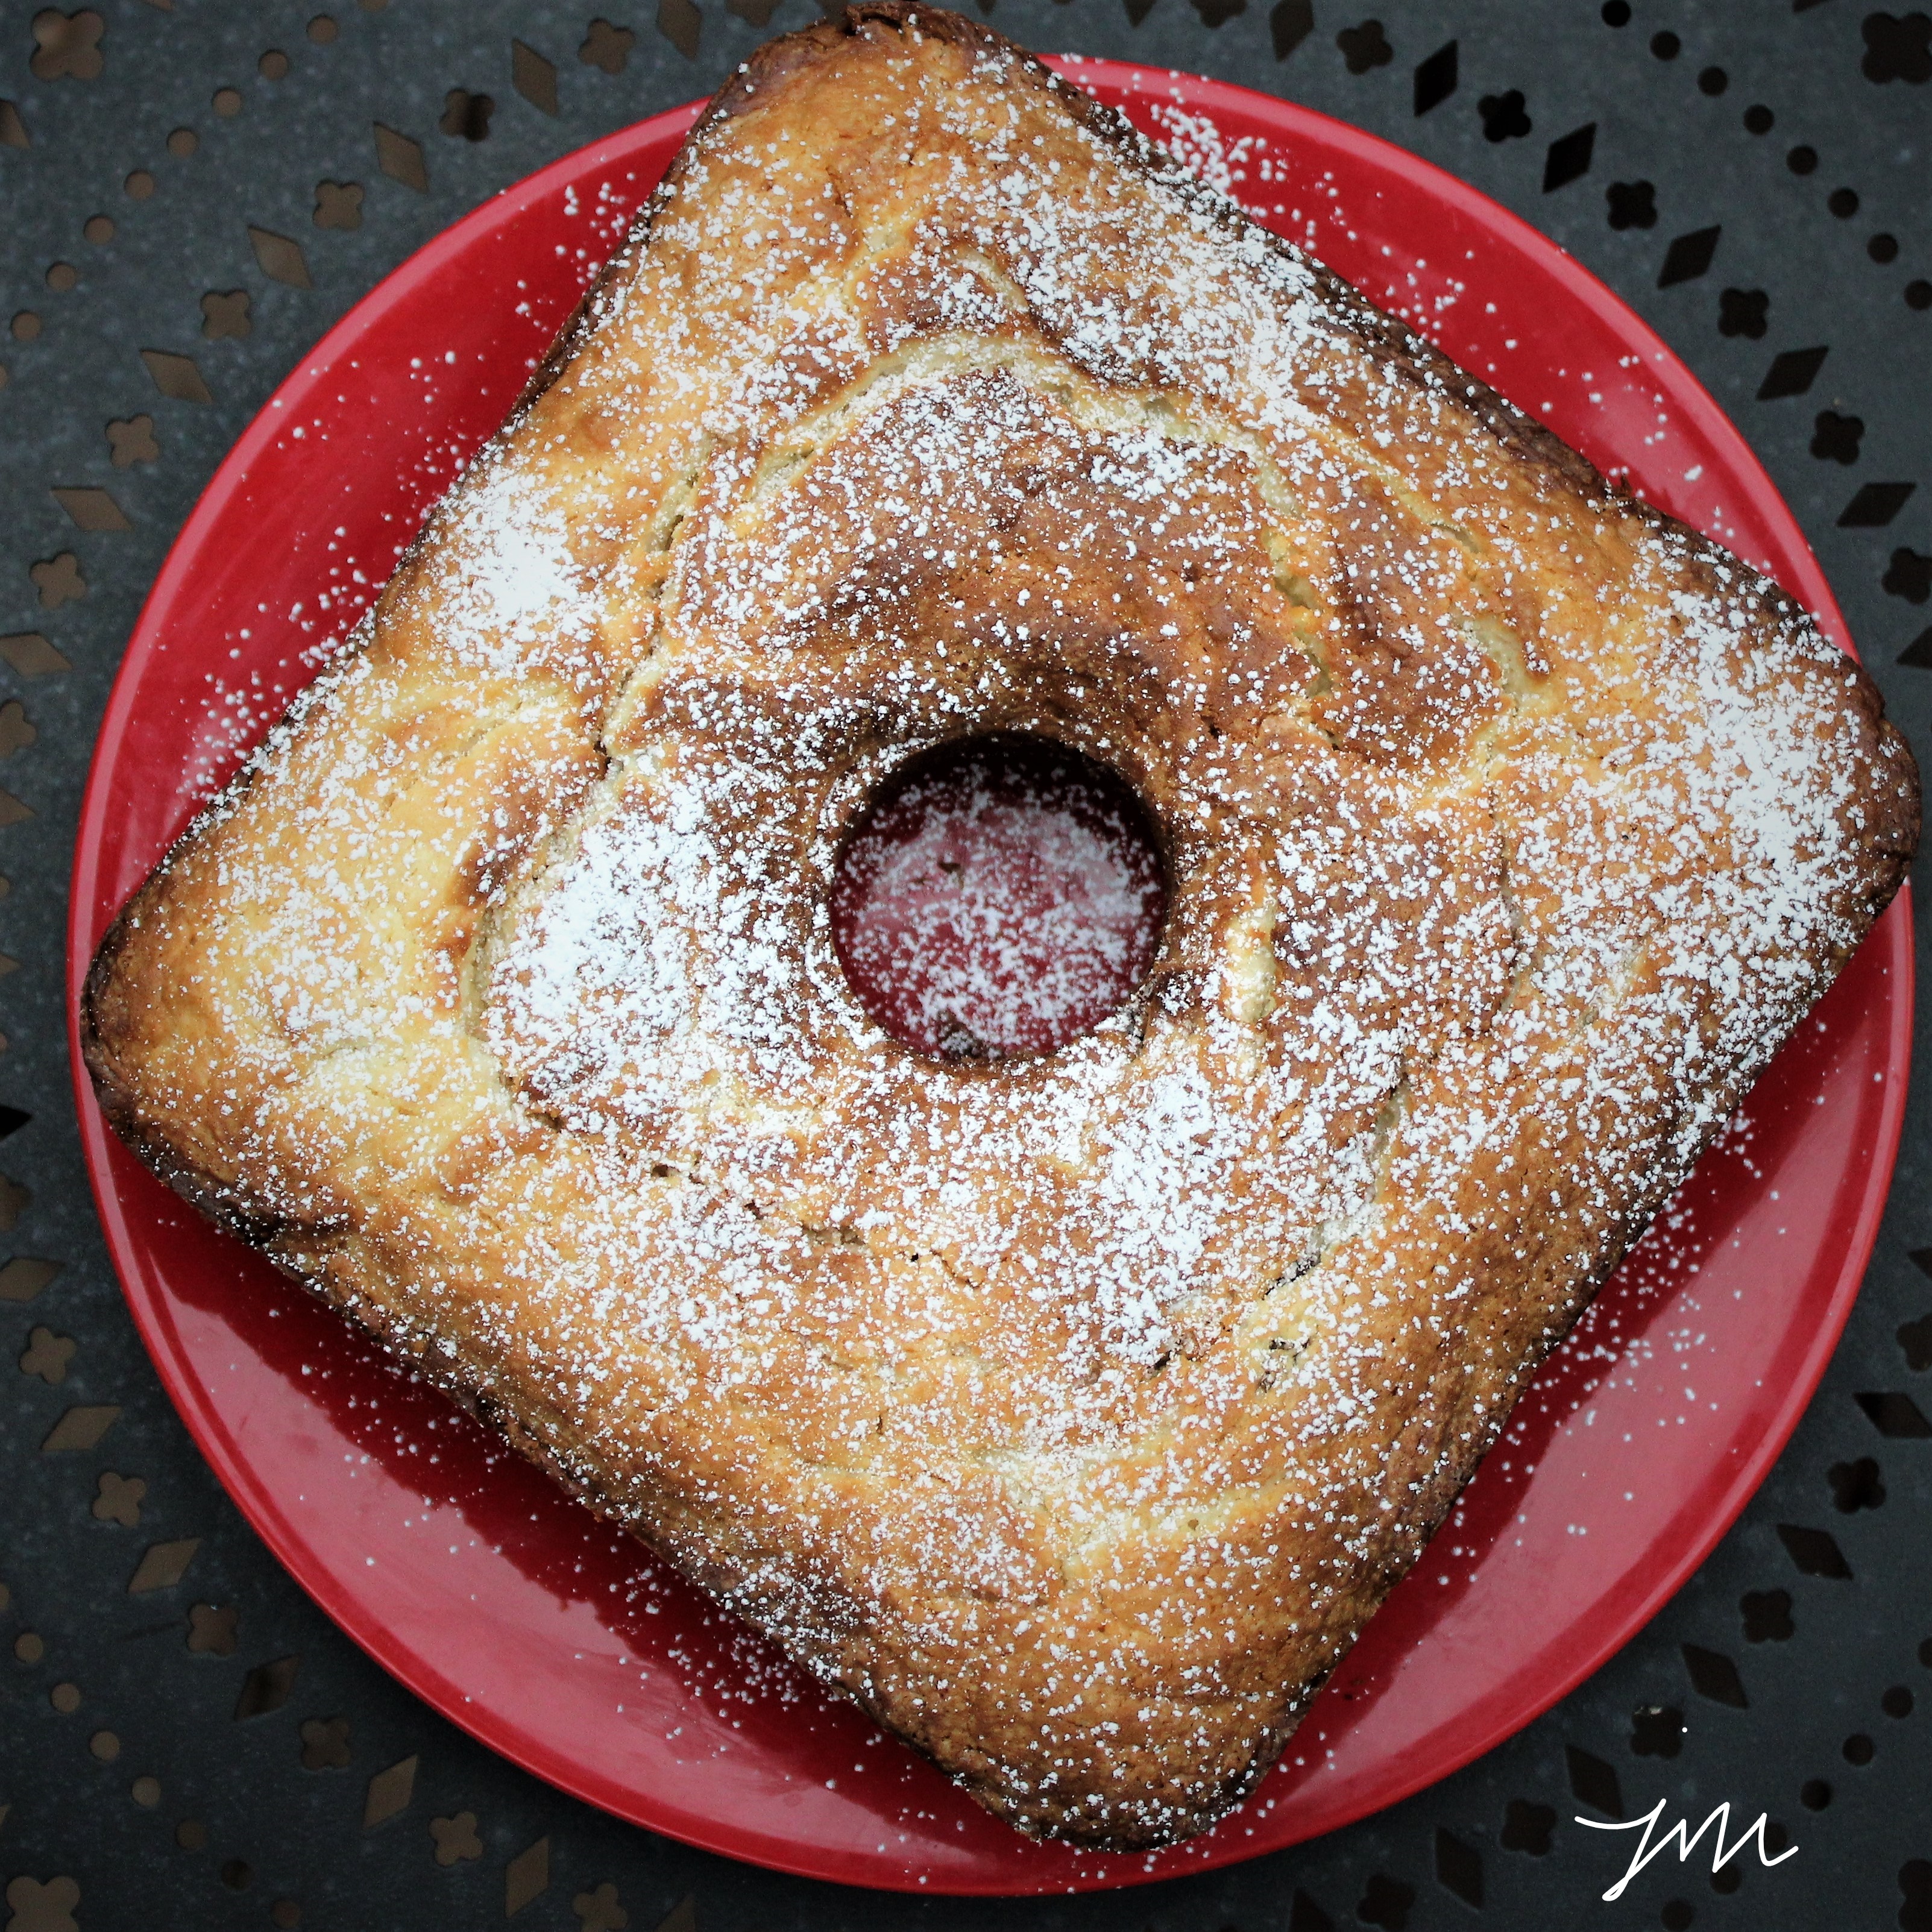
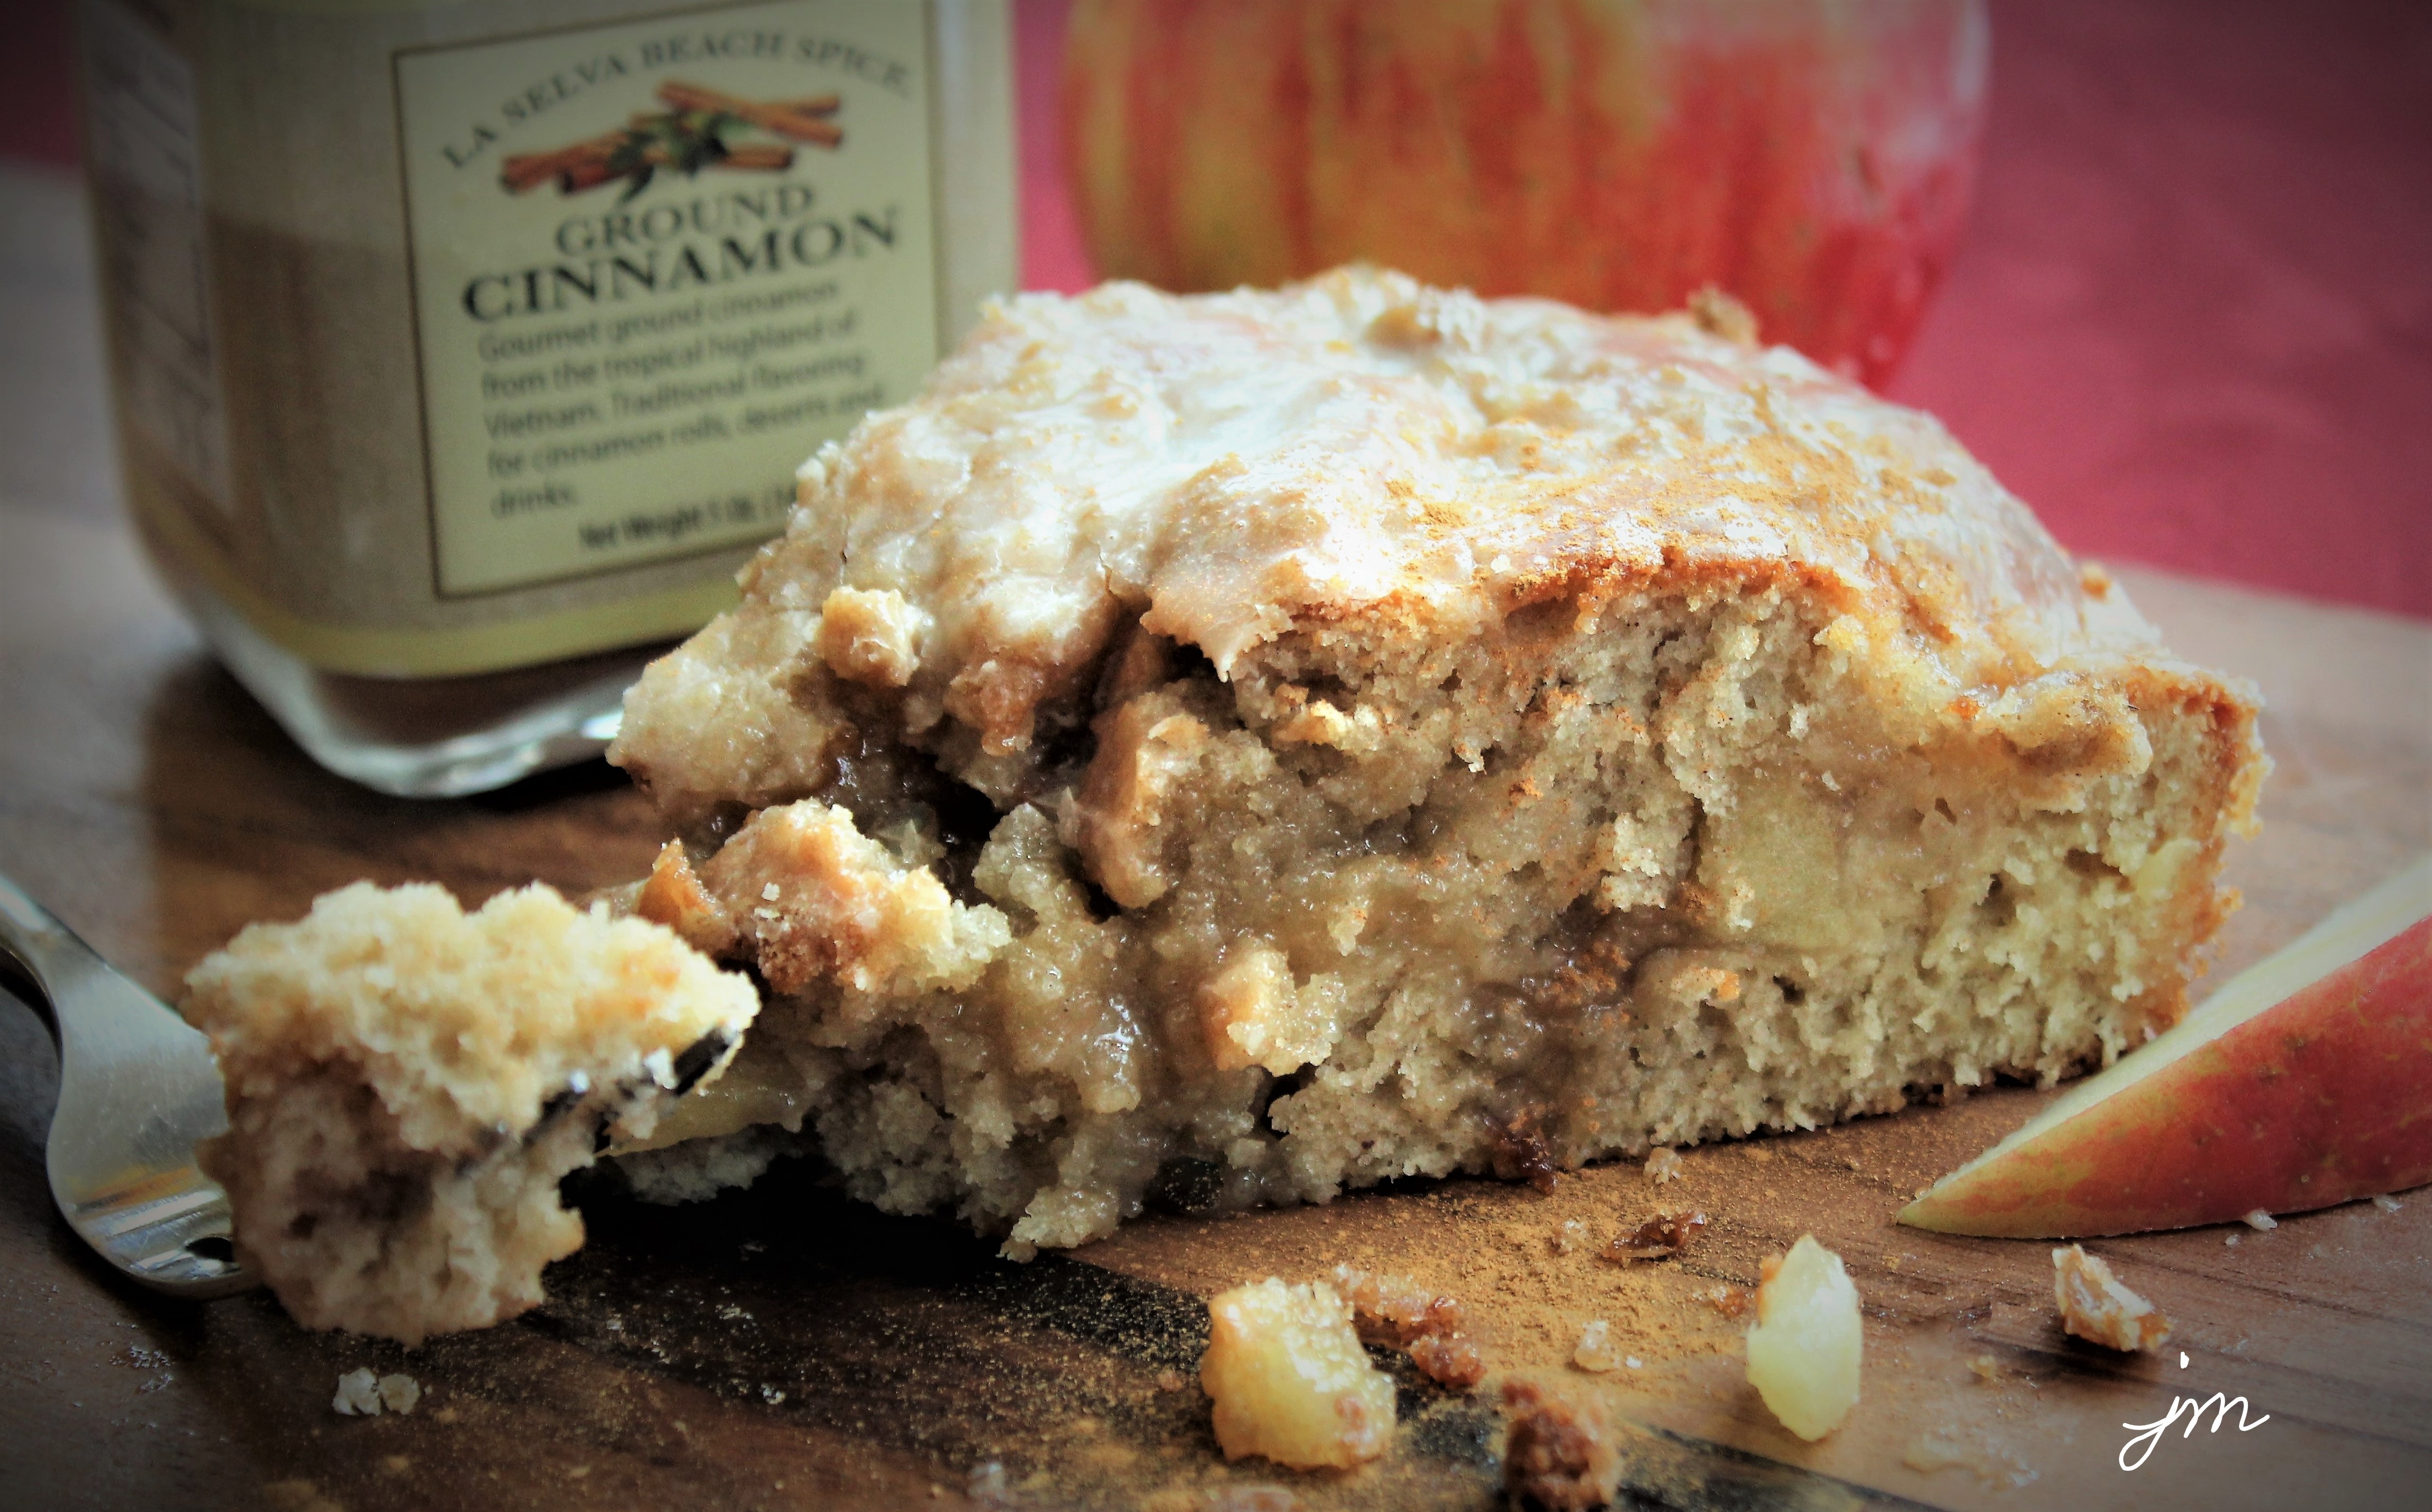
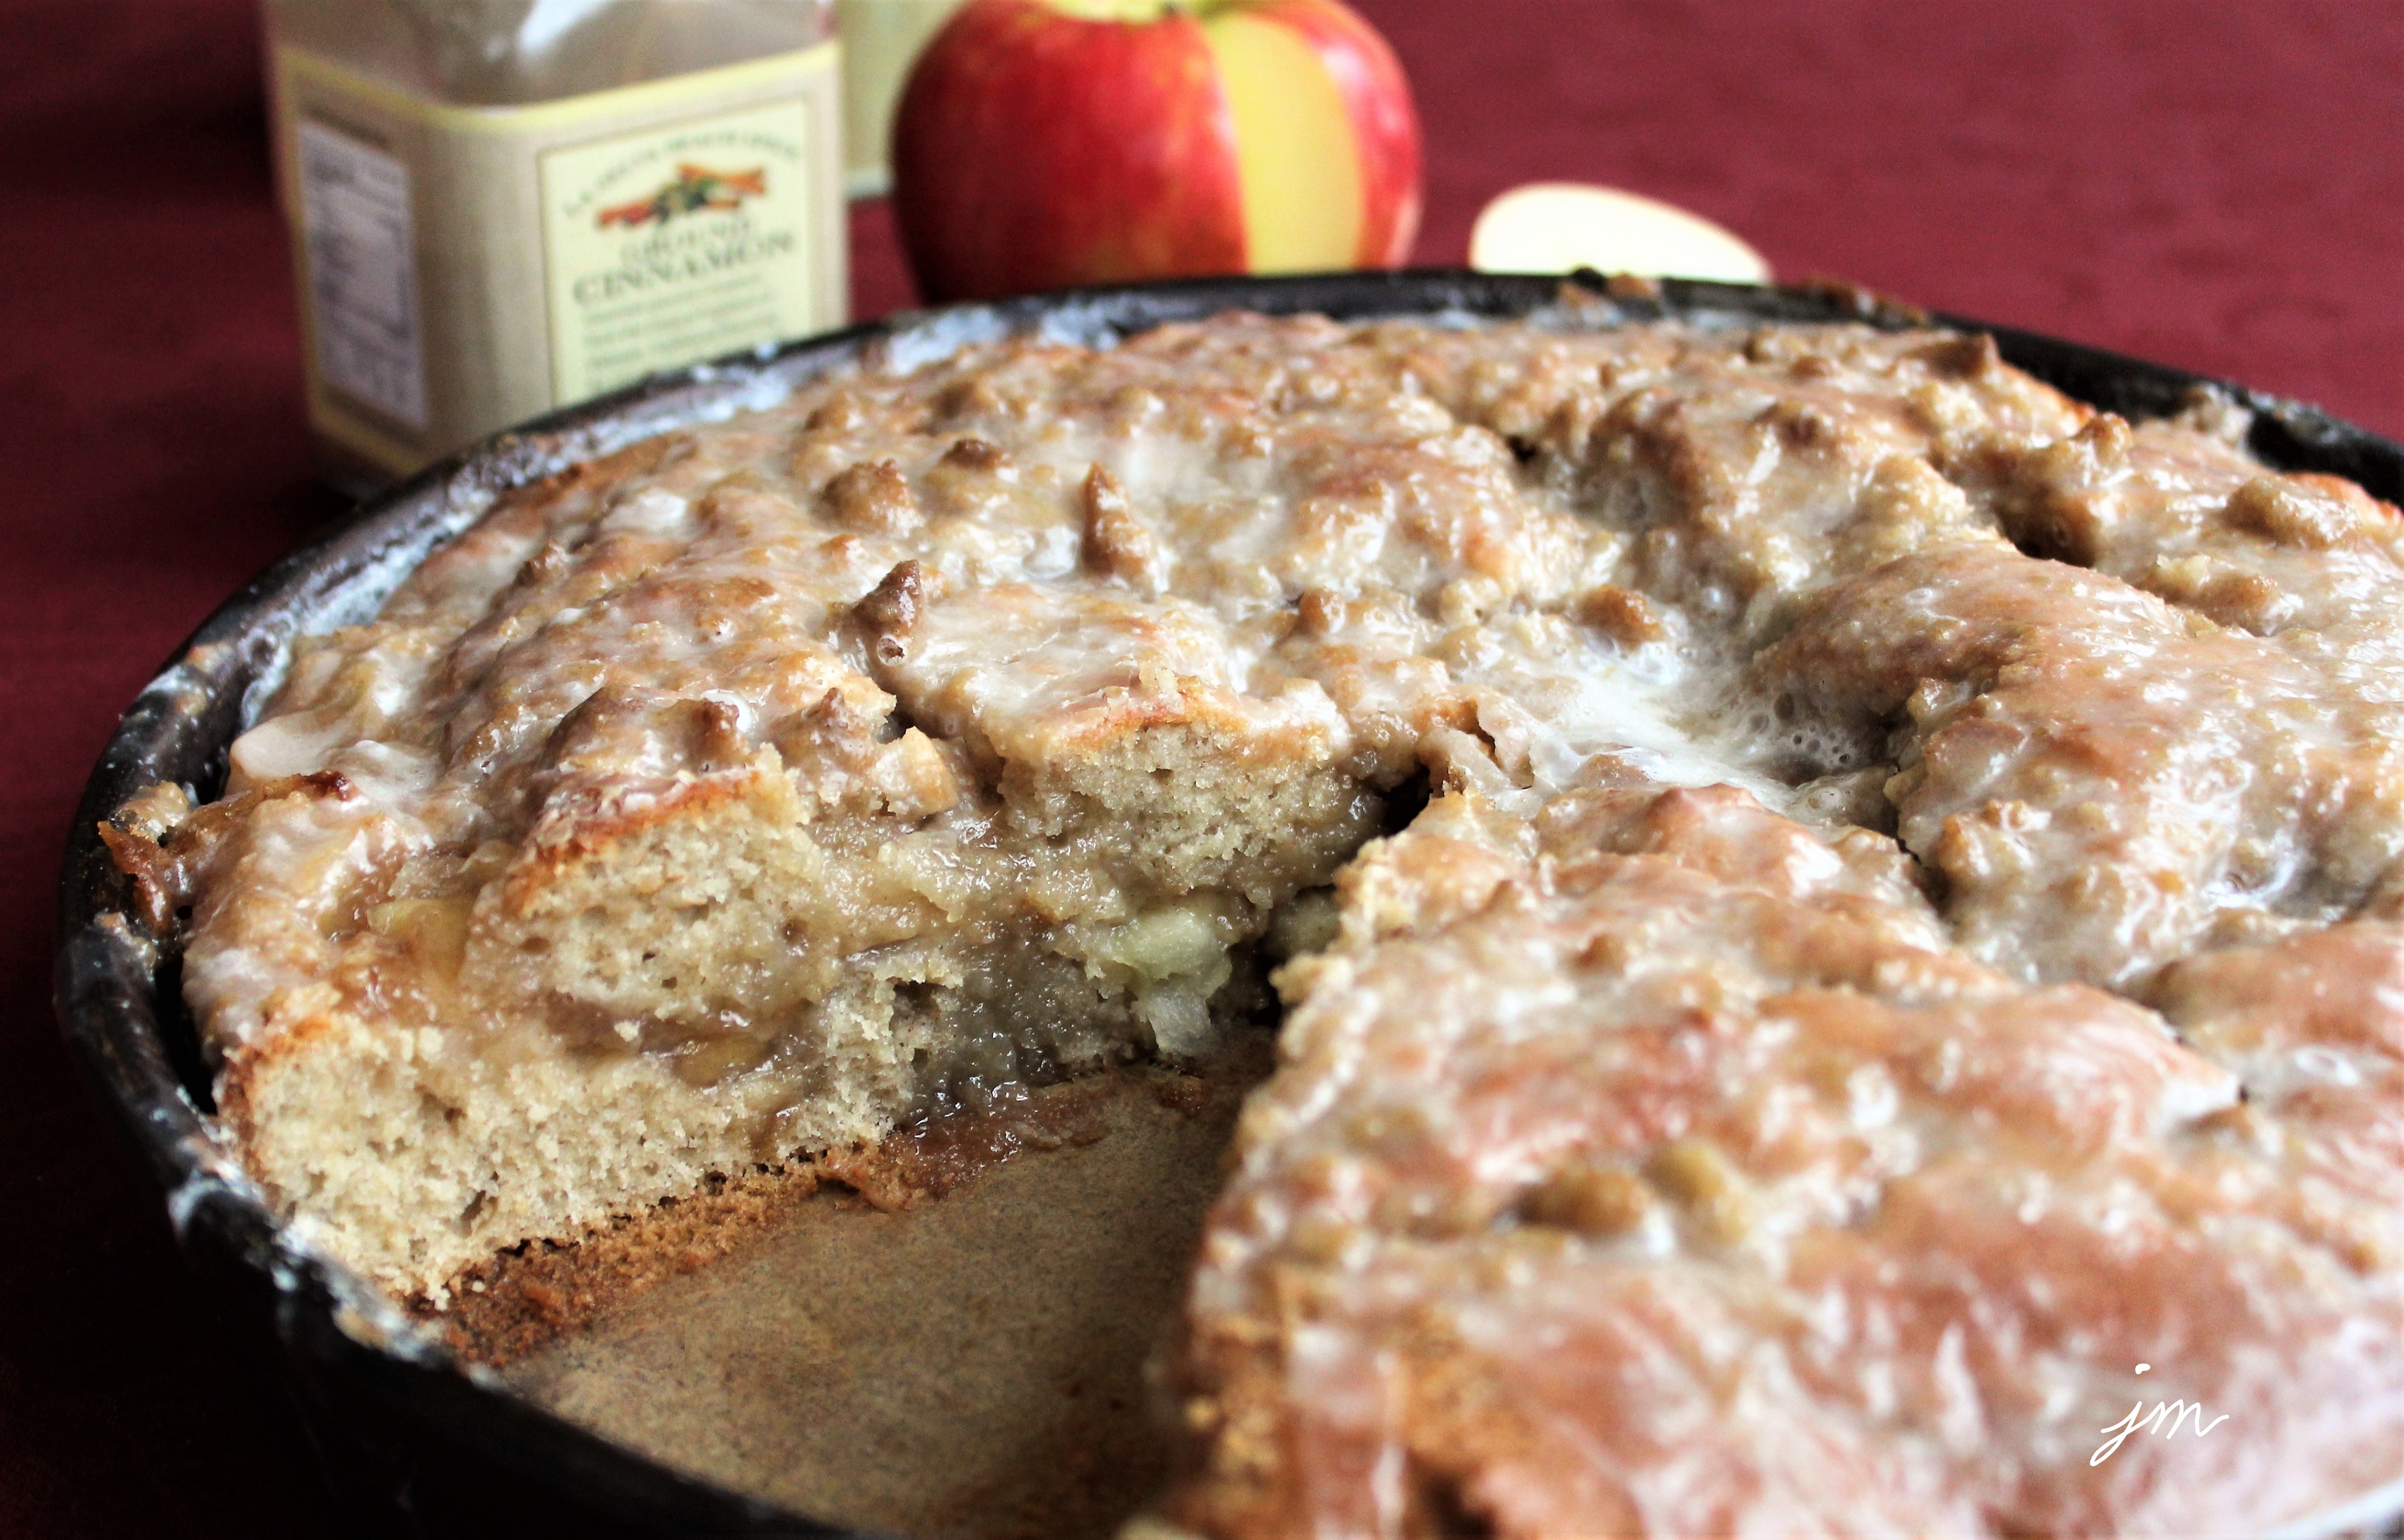
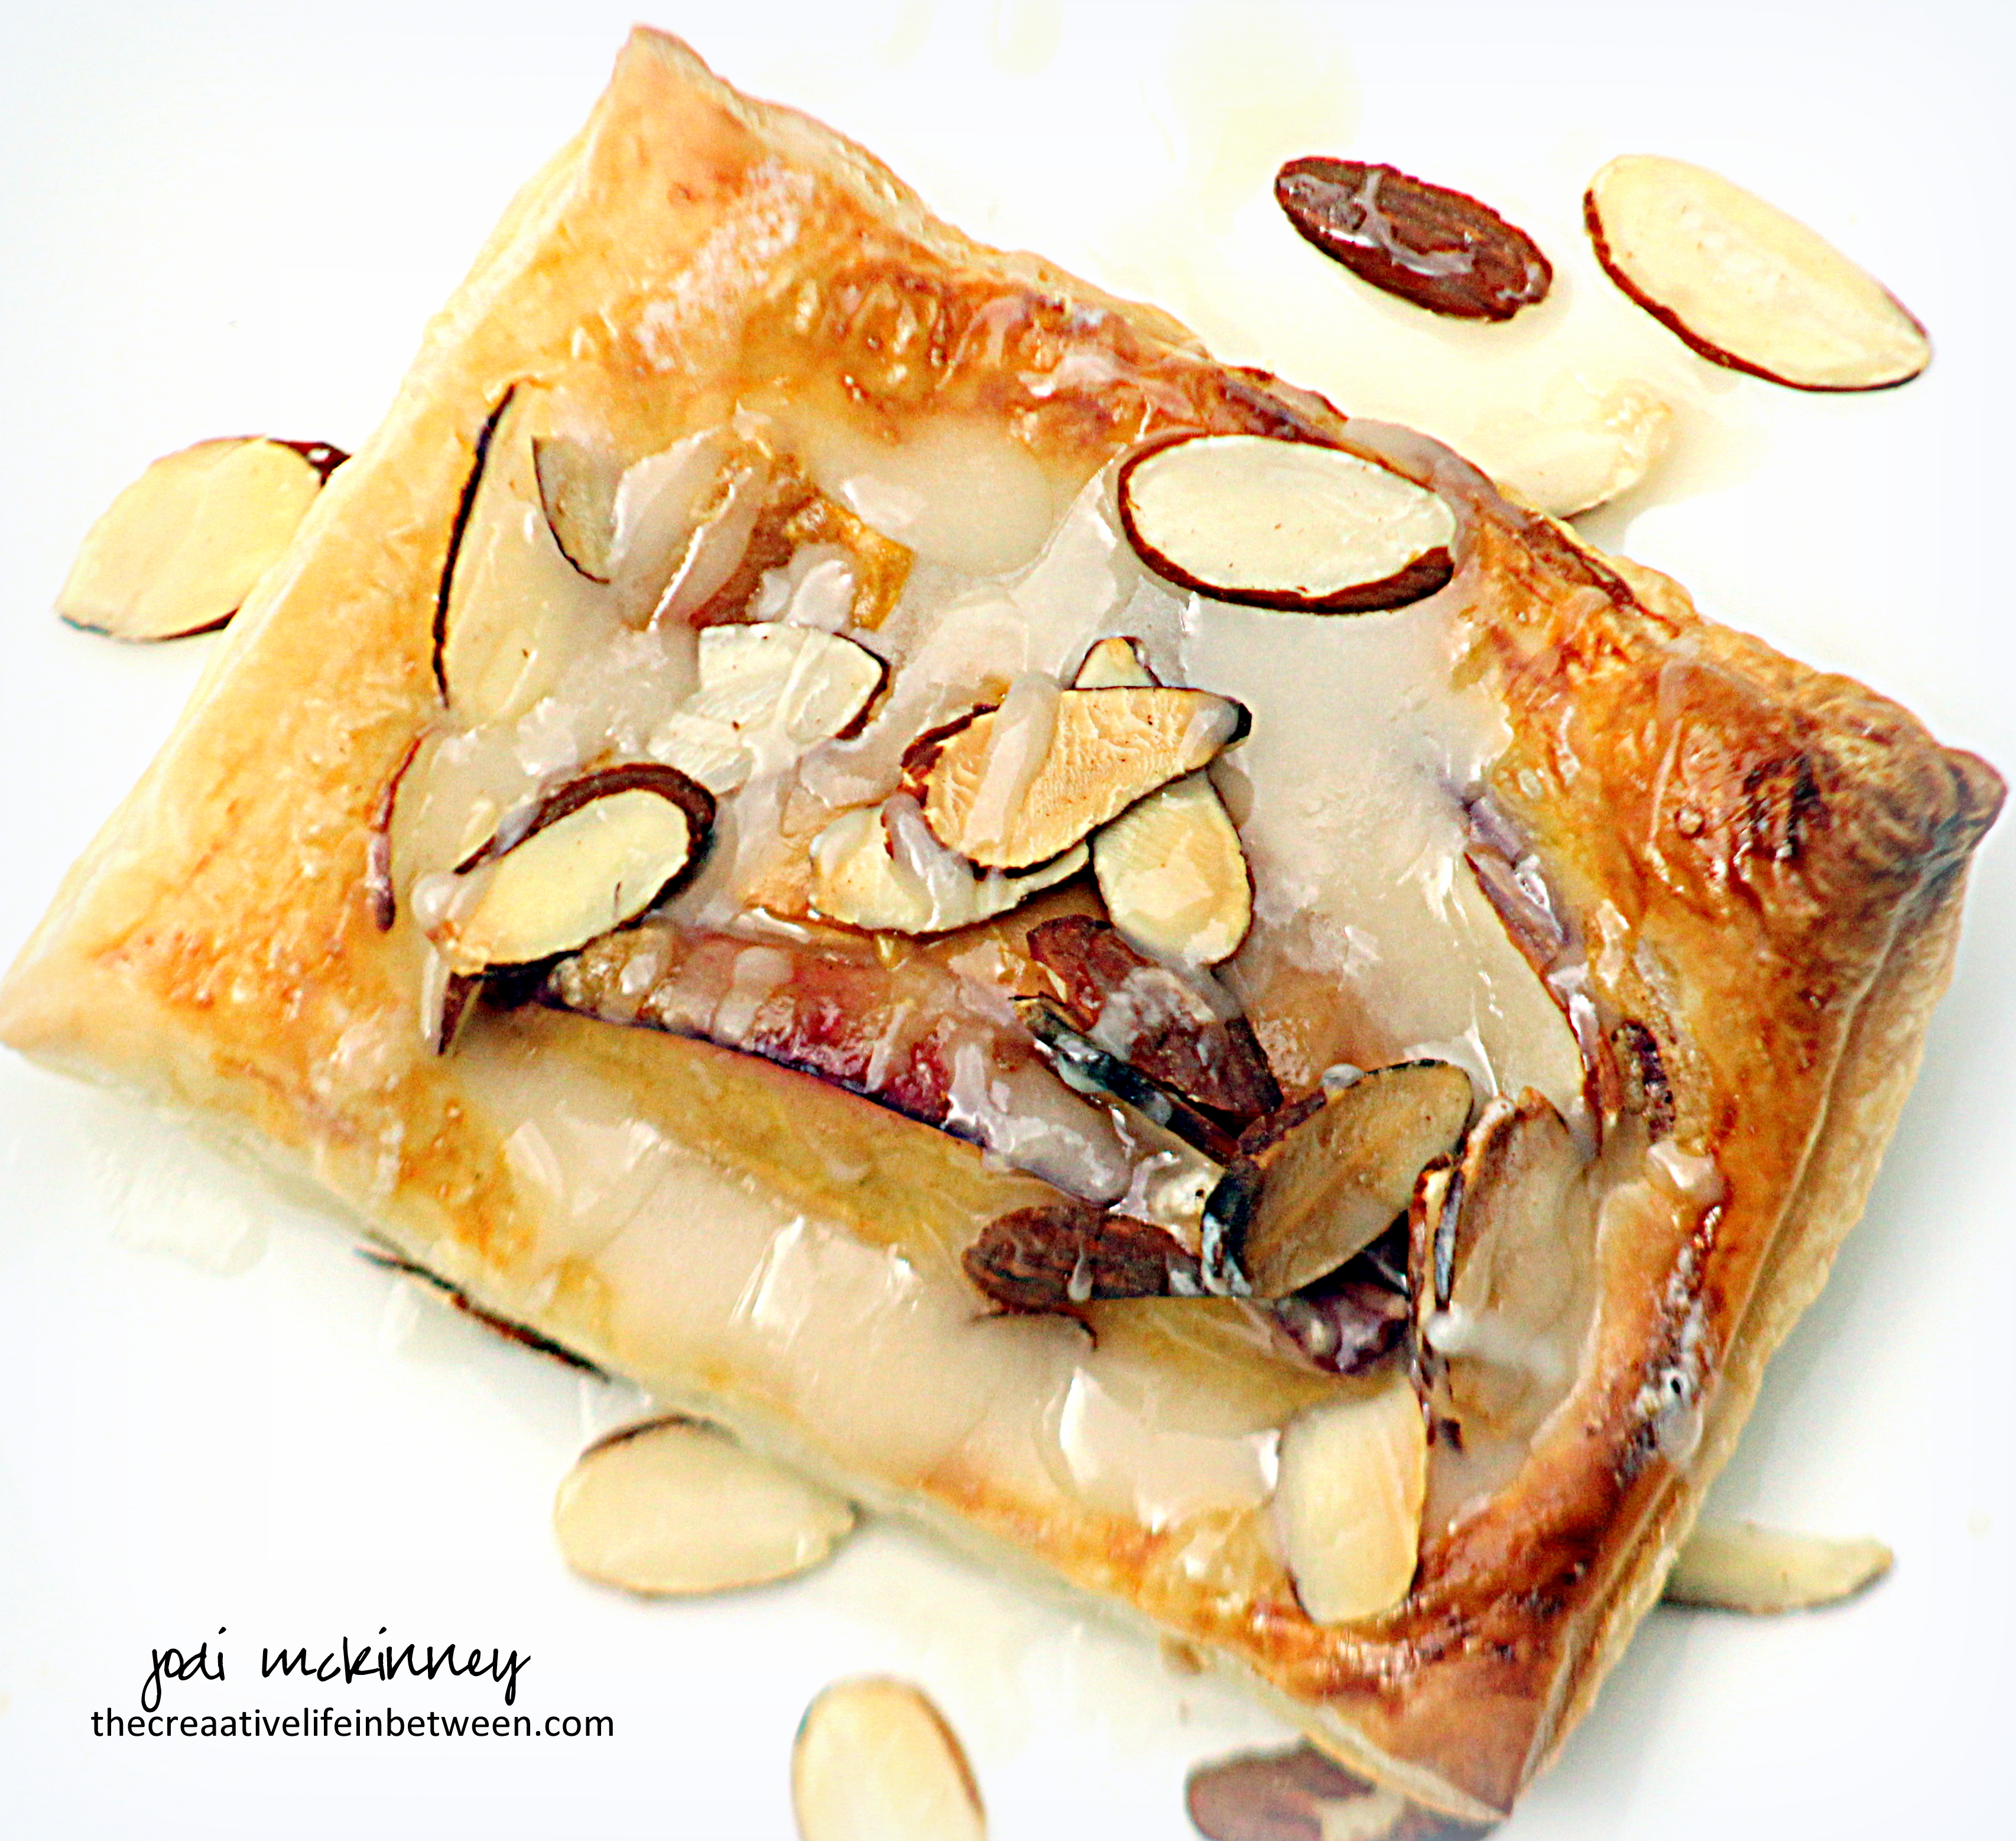
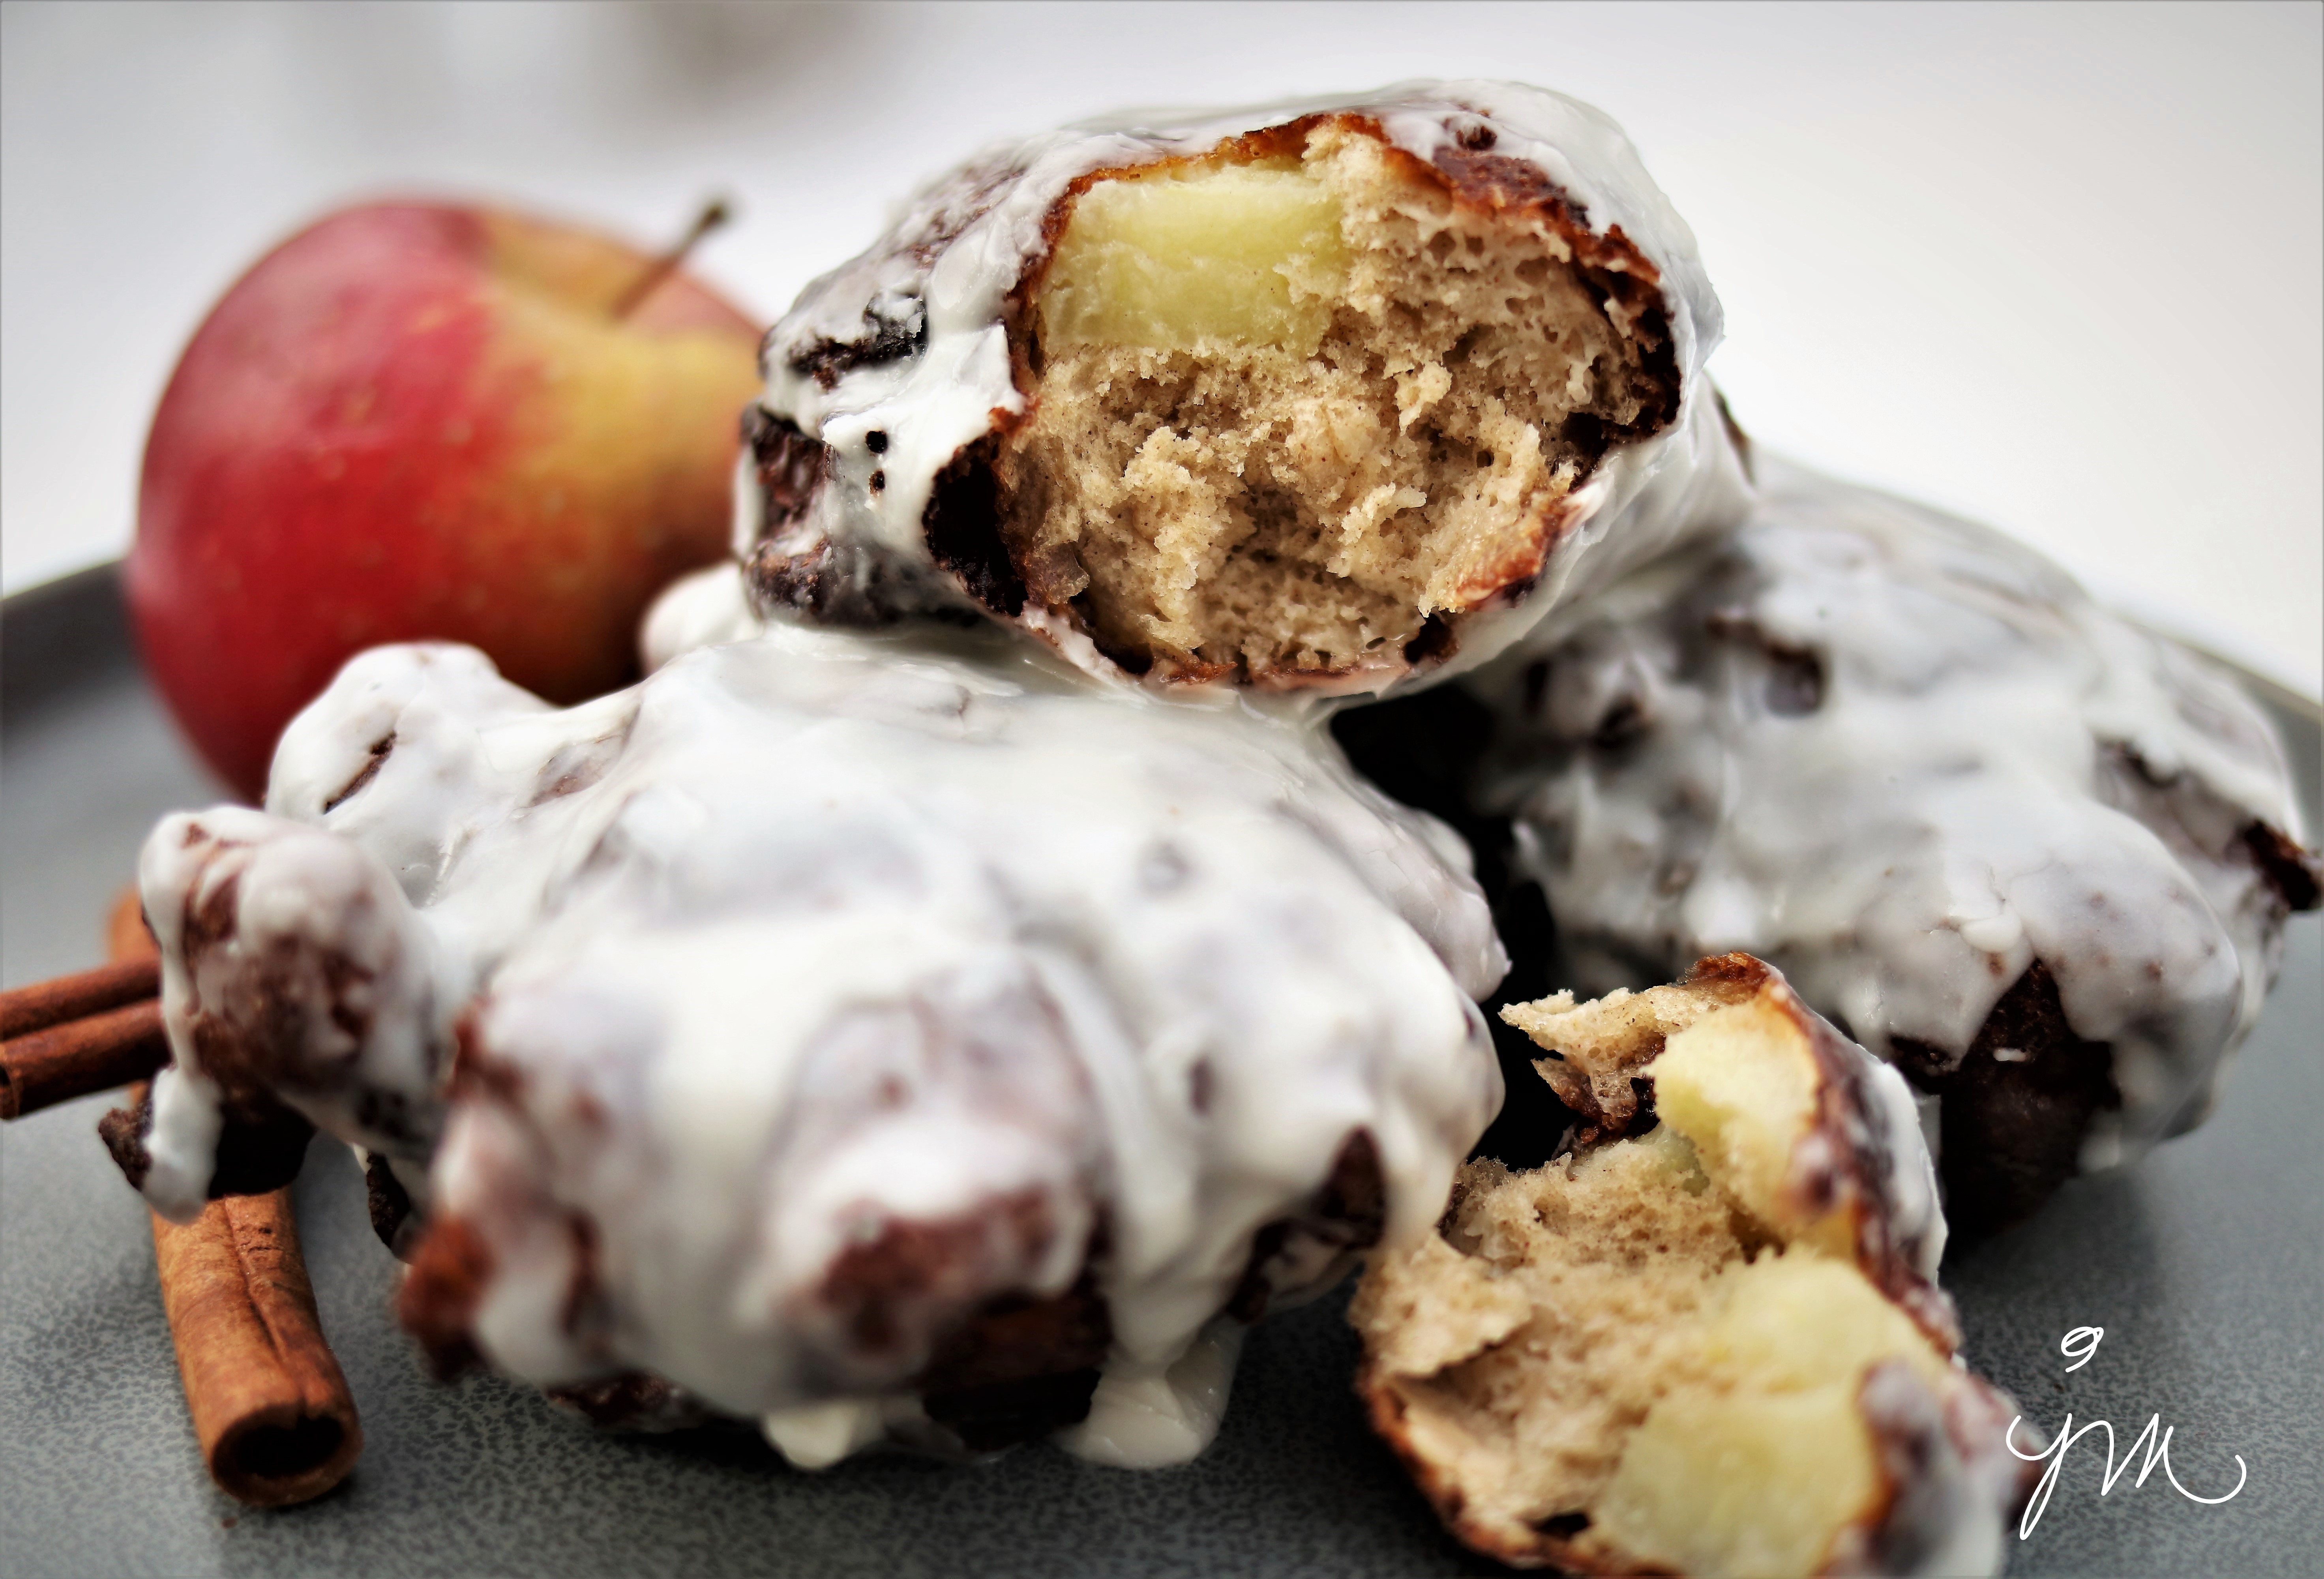
Homemade Apple Fritters.

Last Sunday, Hubby had to get up very early – really the middle of the night – to work during a winter weather event in our area.

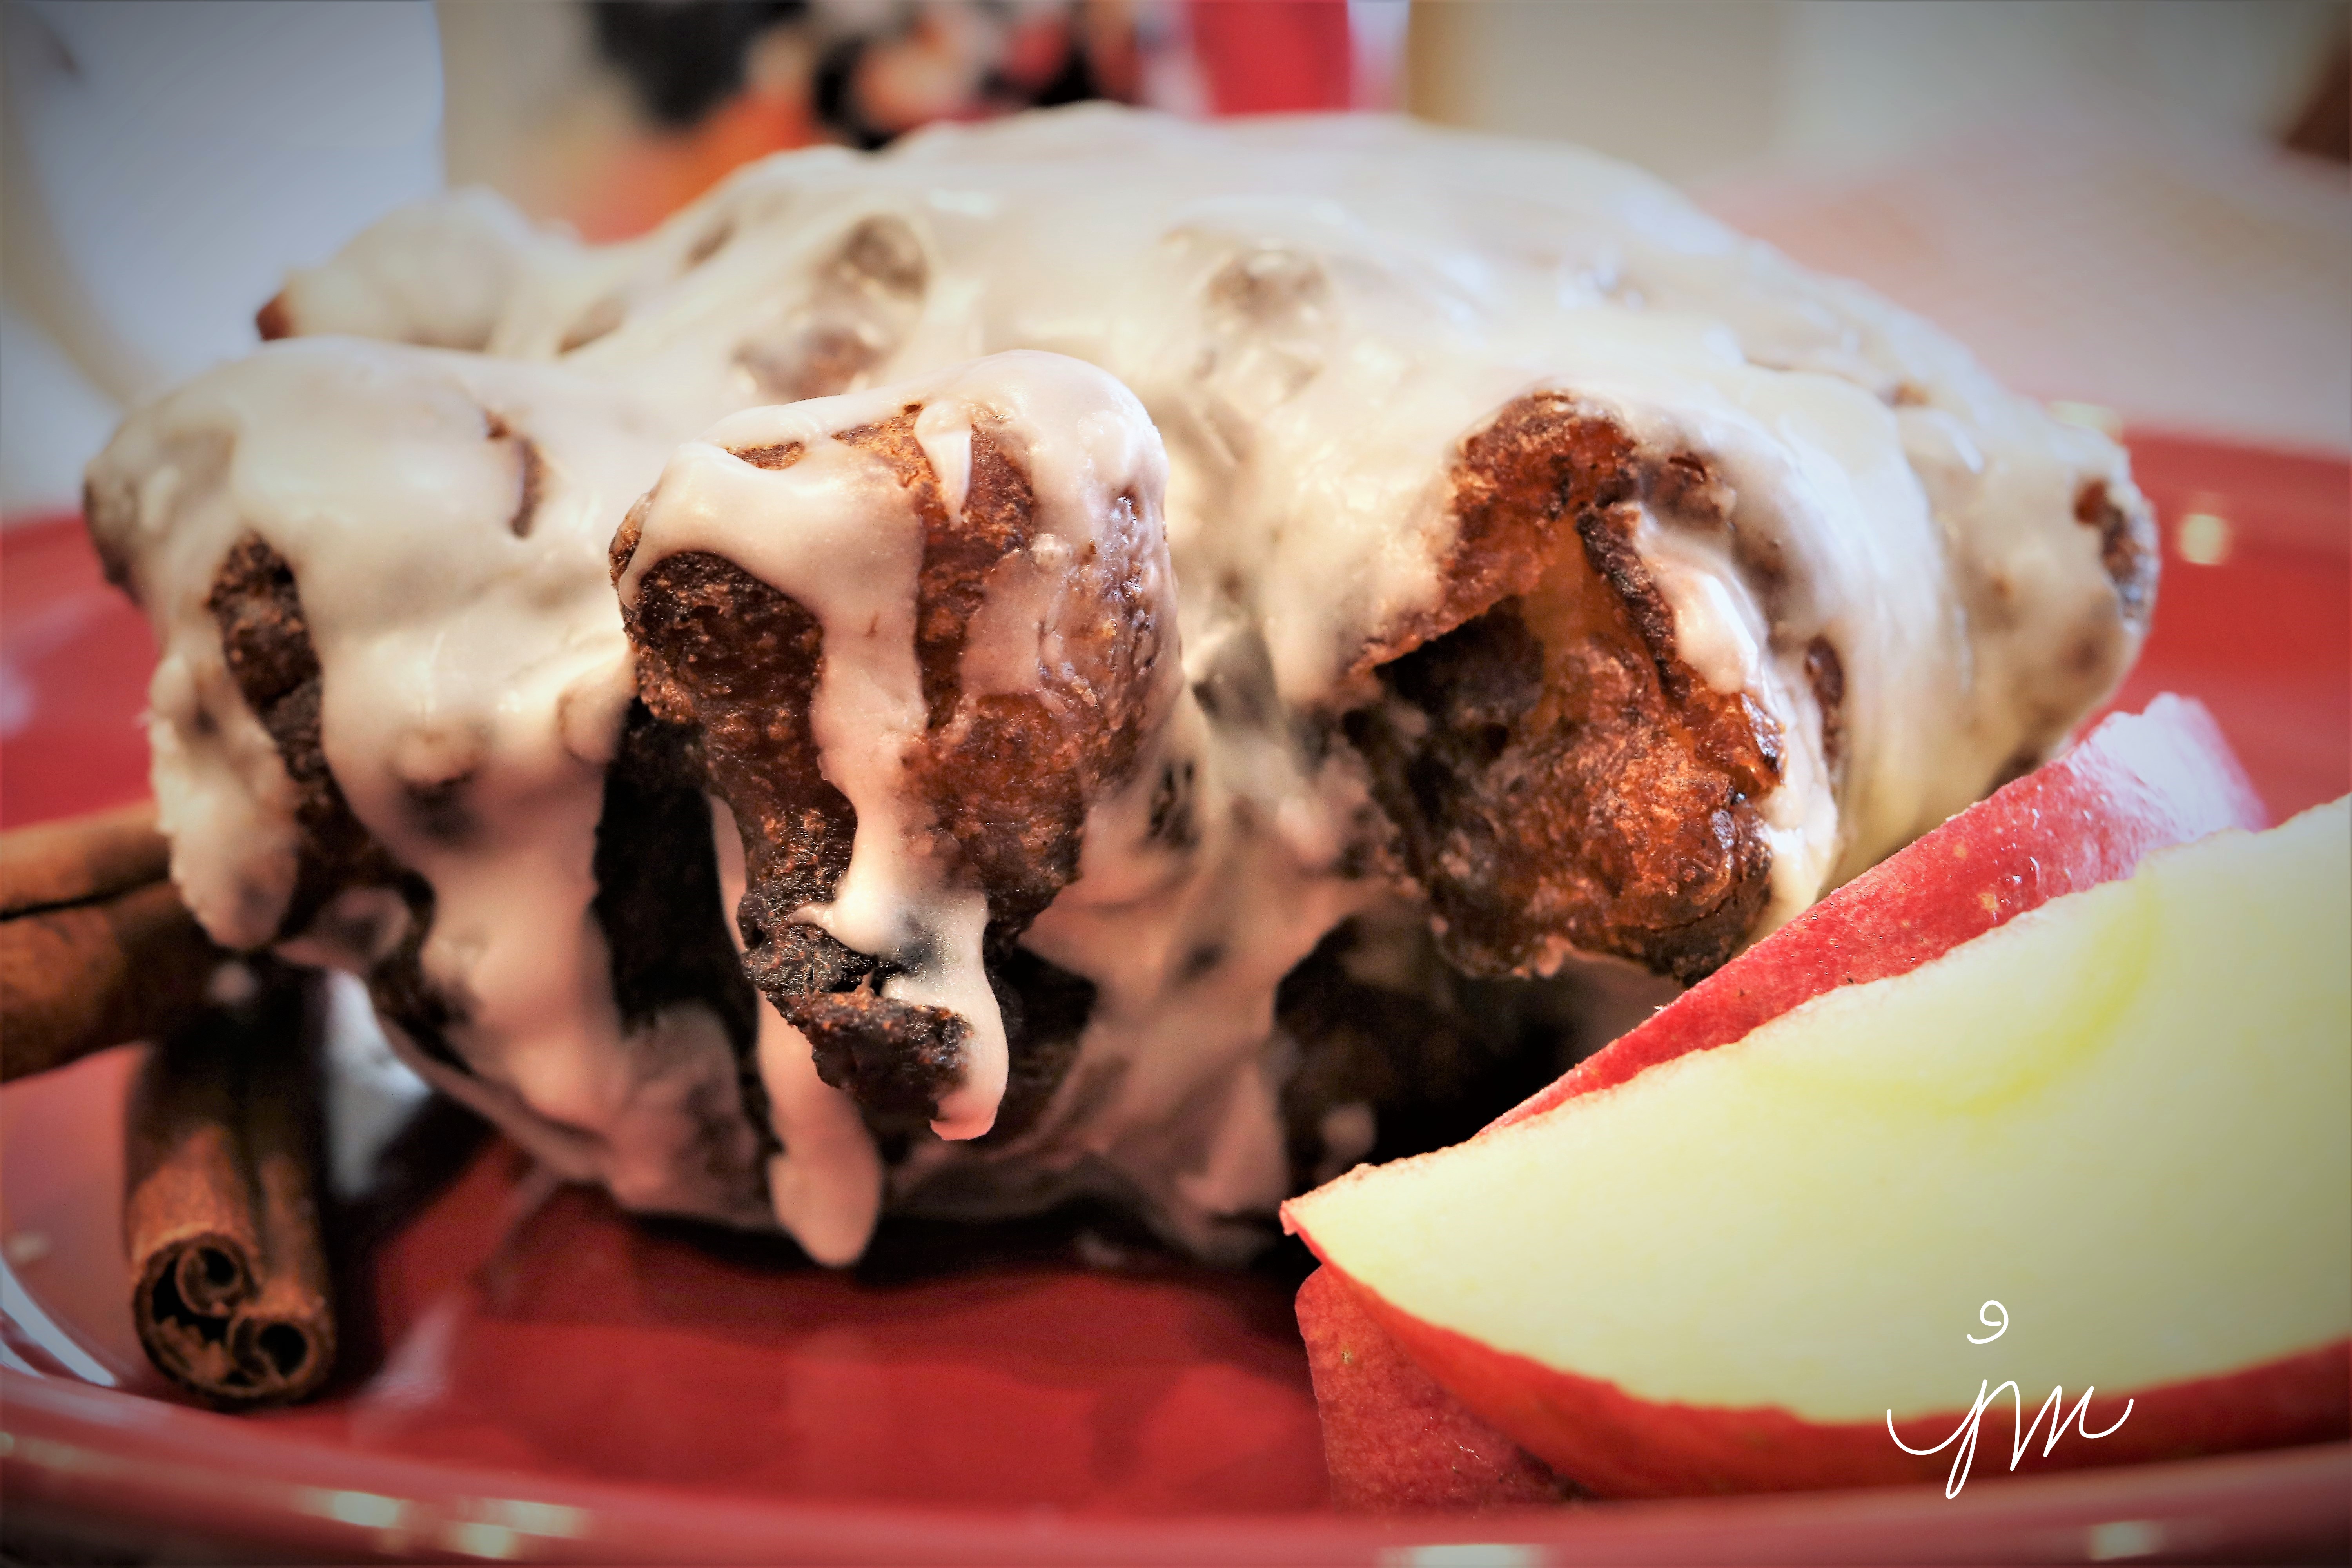
Missing Sunday breakfast, I wanted to make him a special treat for when he returned home.

With some wonderful Misfits Market apples in the crisper, I thought I’d try my hand at homemade apple fritters.

Who can resist a fresh apple fritter??!!

A couple tips from a first-time apple fritter maker:

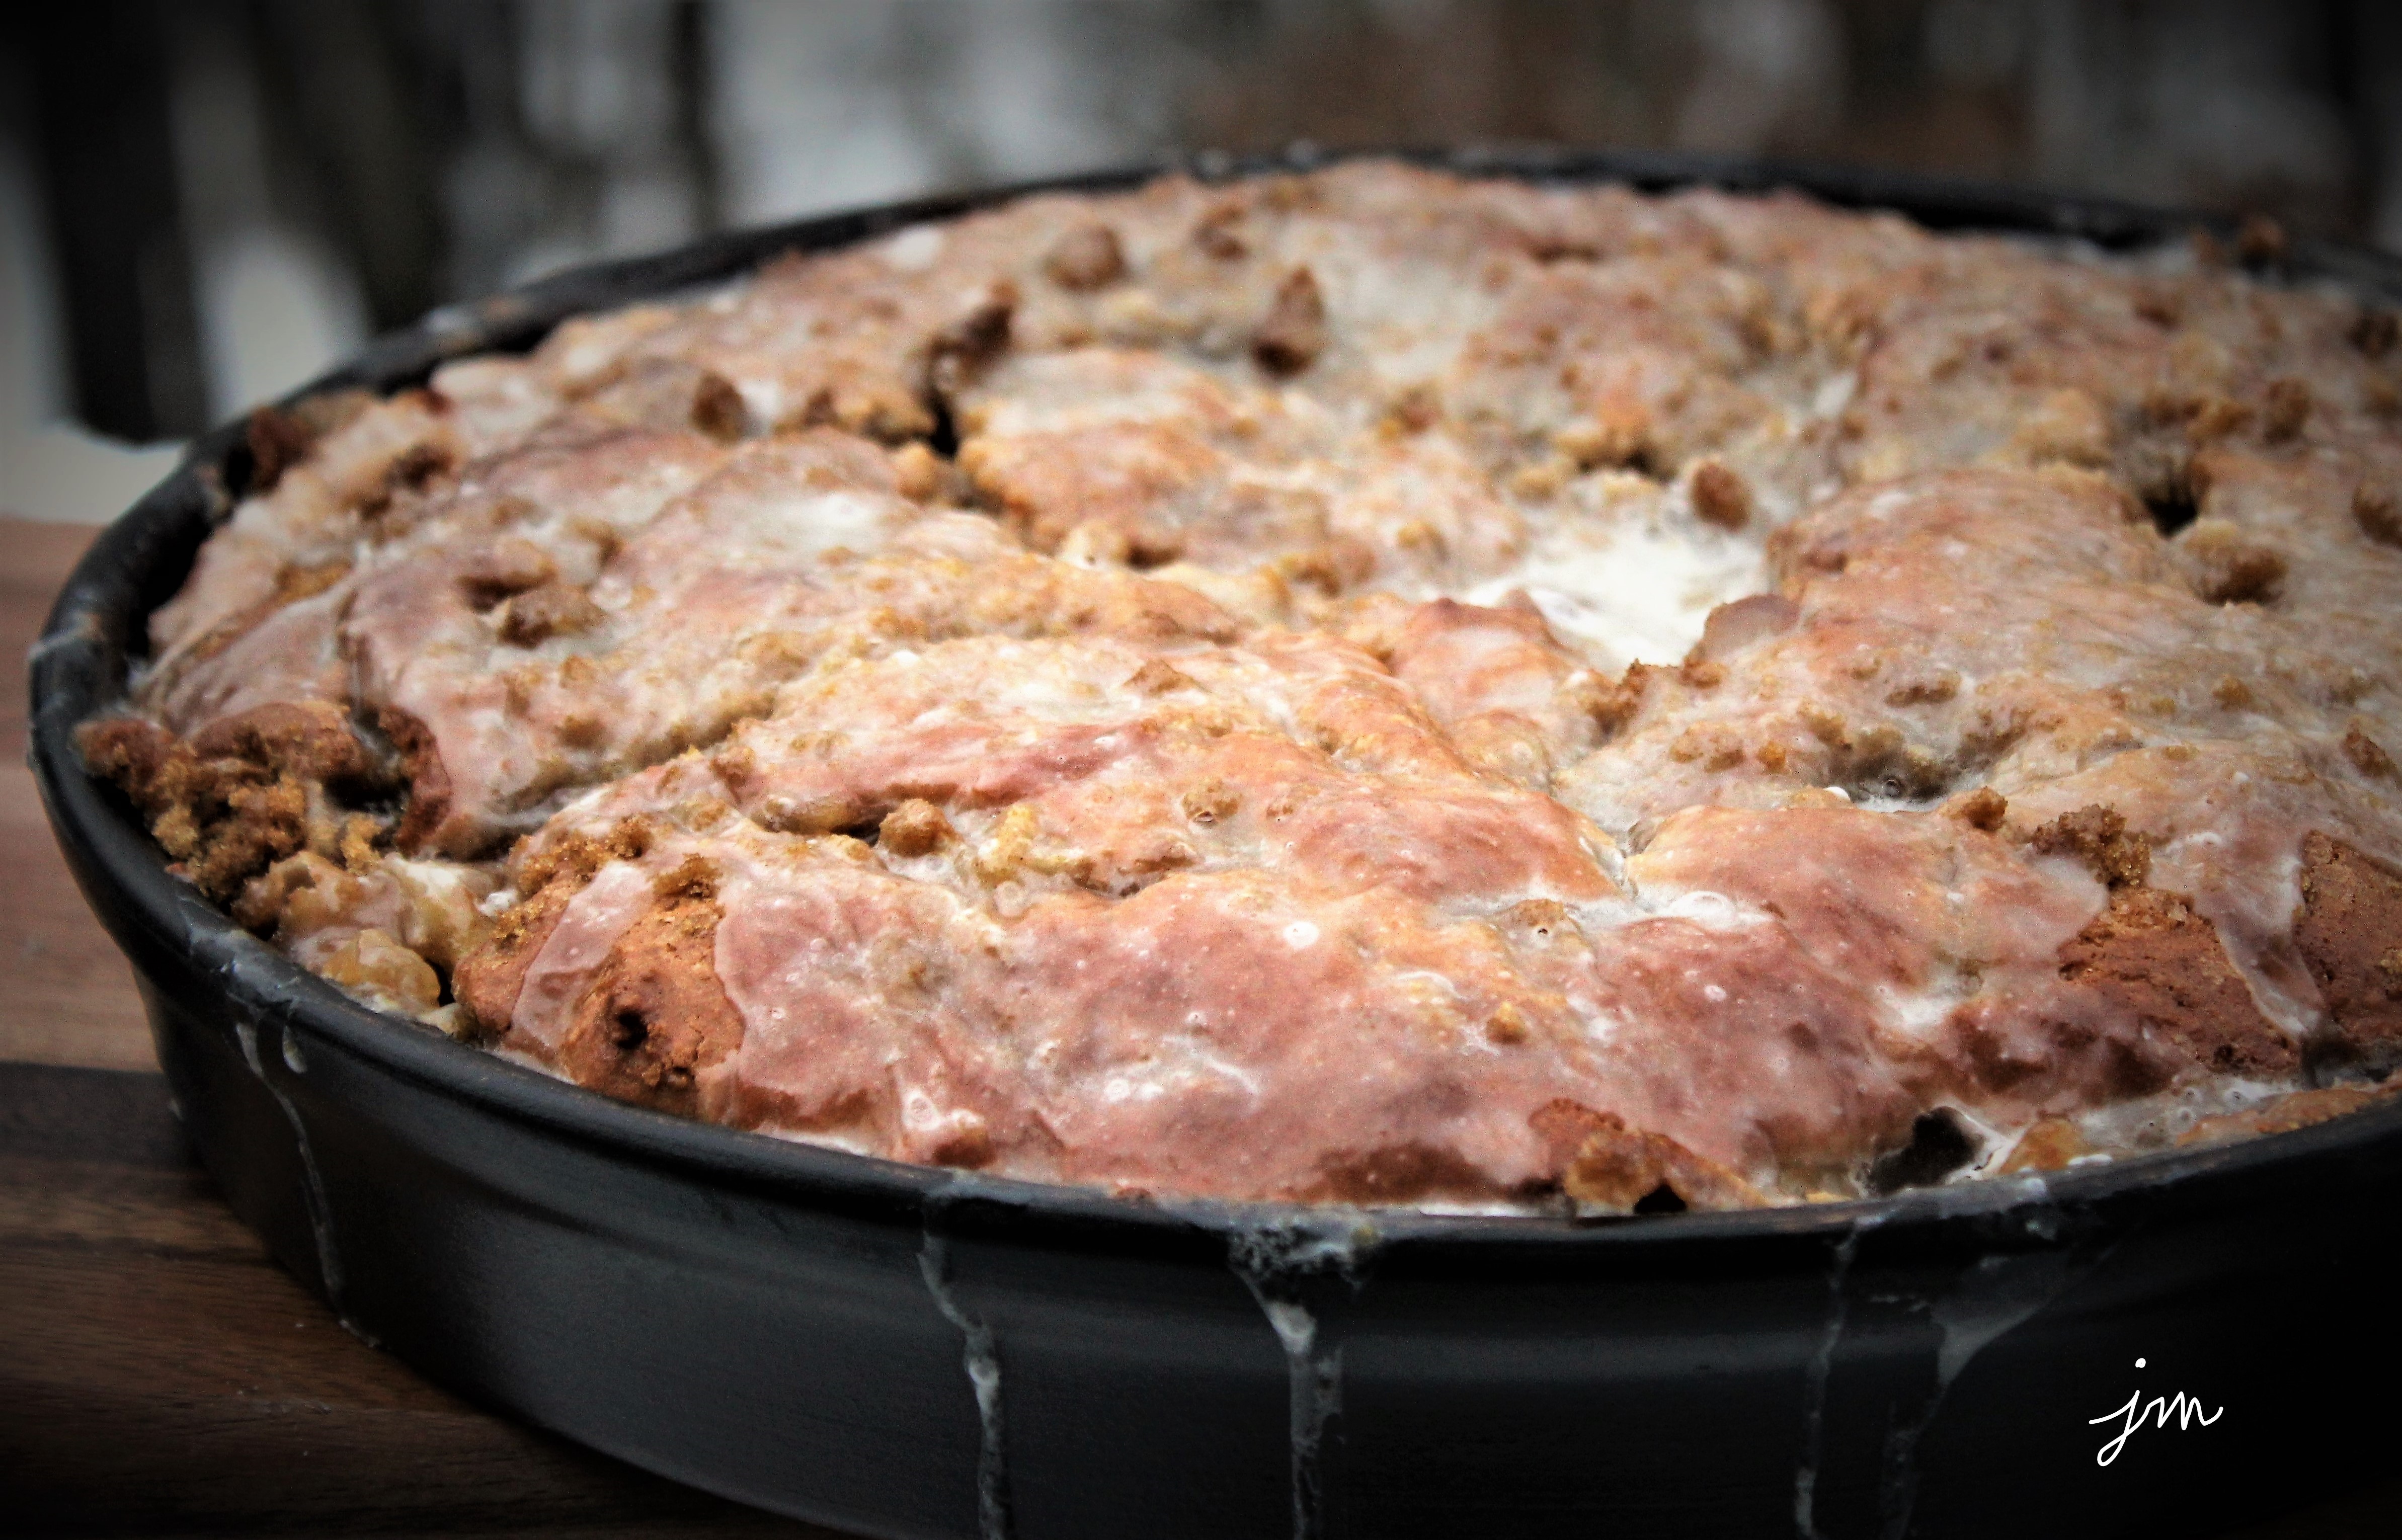
  • Don’t heat the oil too hot.  Be patient and use a medium heat.  Better to fry them a little longer and get a golden brown than to overcook the outside and undercook the inside with high heat.  (Which, by the way, is what I did with the first batch of three, resulting in us only having three total!)
  • Spread them a little flatter than I did so you get more icing in each bite as the dough itself only contains a small amount of sugar. (This was hubby’s suggestion!)
  • Use a sweeter, less firm apple for best results.  I would not recommend Granny Smith.  The recipe calls for 3 medium apples, but you could really add another apple, which I will do next time.

Let me know if you try and/or if you have made and have any of your own tips.  We sure enjoyed these on a cold, snowy, comfort food, stay-in kind of day.

Here is the recipe I very slightly adapted from I am Baker‘s blog.

Homemade Apple Fritters

Ingredients:

  • 3 medium apples, peeled, cored, and diced
  • Juice of half a lemon
  • 2 Tbsp. sugar
  • 2 eggs
  • 1 cup all-purpose flour
  • 2 tsp. baking soda
  • 1 tsp. cinnamon
  • 1/2 tsp. salt
  • 1/4 cup milk
  • Canola or Vegetable Oil  for frying
  • Glaze
    • 1 1/2 cups powdered sugar
    • 1/2 tsp. vanilla
    • 4 tsp. water (or enough for best consistency)

Directions:

In a small bowl, drizzle lemon juice over diced apples.  Stir to coat.  Set aside.

In electric mixer, beat sugar and eggs on medium-high speed until combined.  Reduce speed to low, and add flour, baking powder, cinnamon, and salt.  Mix until combined.  Add milk, and mix until incorporated.  Fold in apples with spatula.

Fill a frying pan halfway full with oil.  Heat over medium heat to 375 degrees F.

Drop three 1/4-1/3 cup portions of batter into the oil.  Let fry for a few minutes until golden brown.  Flip and fry until other side is golden brown.  Test for doneness by inserting a small knife in center.  If uncooked batter remains, fry longer.

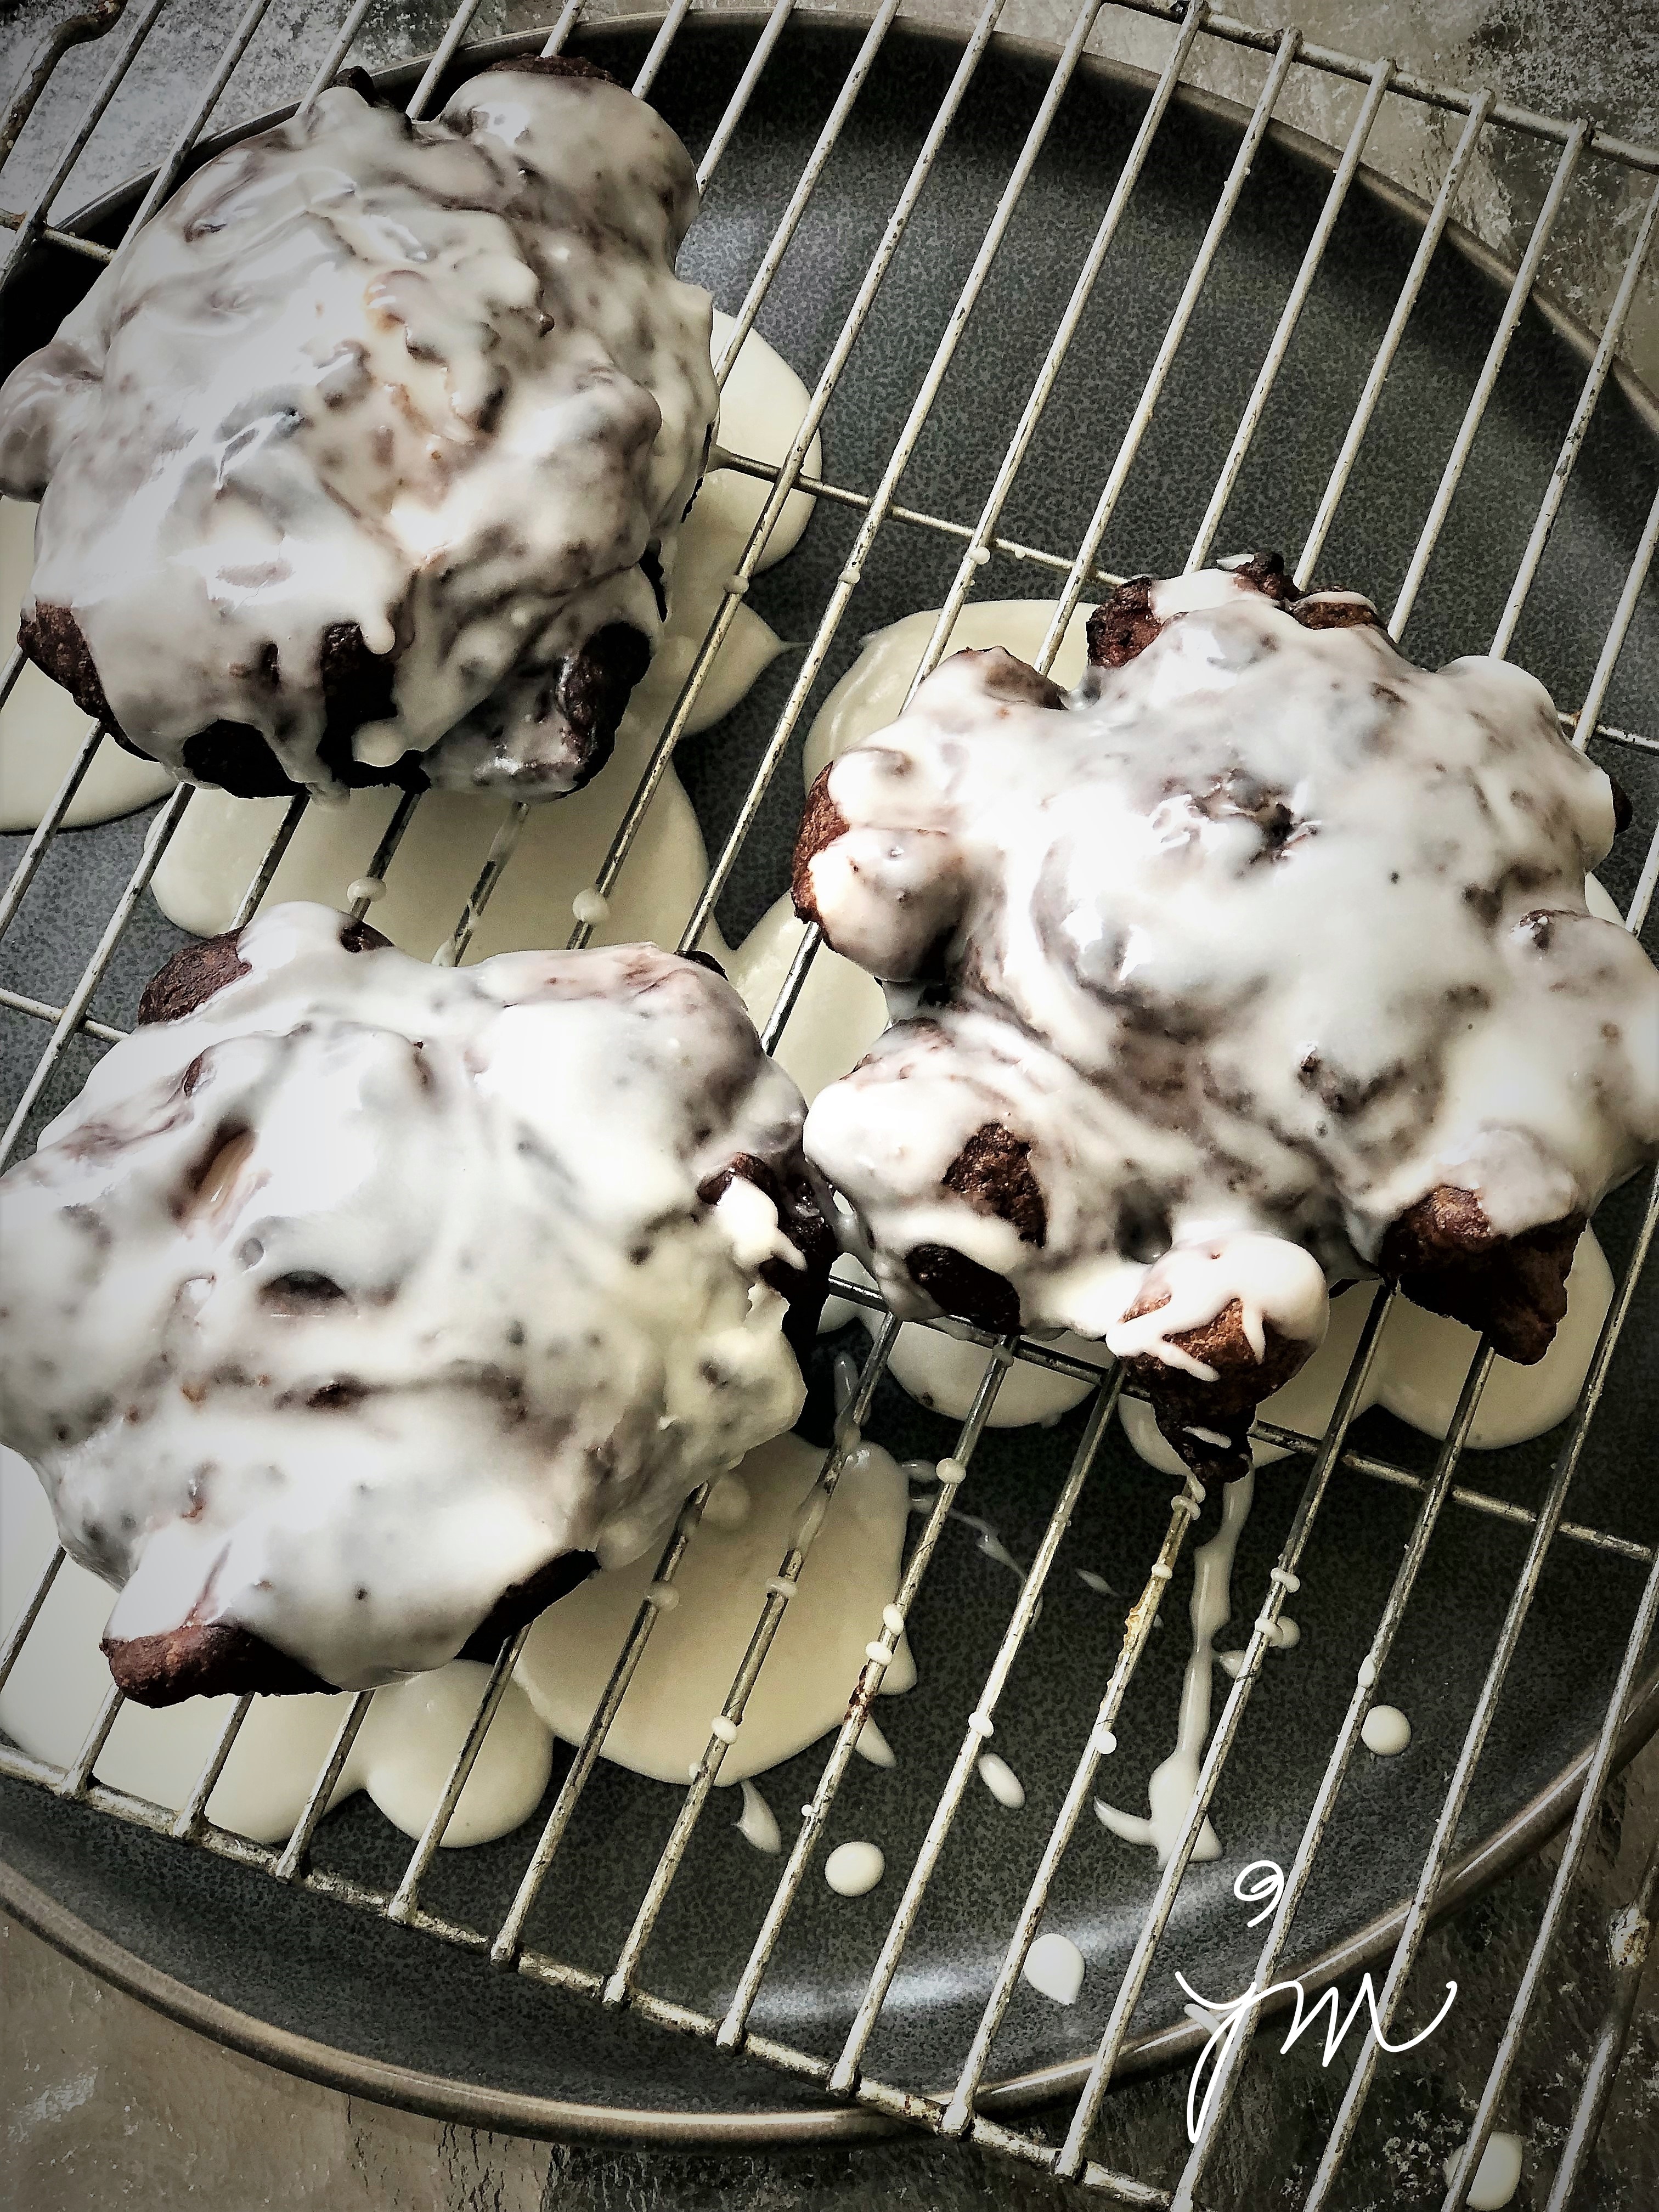
Remove fritters from oil with slotted spoon to wire rack layered with paper towels or napkins to drain.  Allow to cool.

Repeat with remaining three portions of batter.

Prepare glaze by combining powdered sugar, vanilla, and water.  Drizzle over cooled fritters on cooling rack.  When glaze has set, turn to coat other side with glaze that dripped through, if desired.

Enjoy!

Cheers & Hugs,
Jodi

Red Raspberry Dark Chocolate Puff Pastry Tarts

Red Raspberry Dark Chocolate Puff Pastry Tarts.

Phew!  That name is a mouthful….

But it really does say it all!

And I’m betting you would love a mouthful of these simple, but elegant and amazingly delicious treats!

I made these this past weekend for a Sunday family football dinner.

Would you believe me if I told you there are only three ingredients?!?!

Well – four if you count the powdered sugar you sprinkle on top.

Puff Pastry is such a dream to work with!

Keep these ingredients on hand and this recipe up your sleeve when you need a quick, but fabulous dessert or treat.

I’m betting you won’t be sorry. 😉

Red Raspberry Dark Chocolate Puff Pastry Tarts

Ingredients:

Directions:

Preheat oven to 375 degrees F.

Roll out one sheet of puff pastry, and cut into 9 squares approximately 3 1/2 x 3 1/2 inches.  Place a teaspoon of raspberry jam in center of each square.  Top with a piece of dark chocolate.  Pull all four corners to center and pinch to seal.

Bake for 15-18 minutes on baking stone or cookie sheet until puffed and lightly browned.    Remove to cooling rack.  Sprinkle with powdered sugar.

Serve warm or cold.  

Enjoy!

Cheers & Hugs,
Jodi

Dark Sweet Cherry Crumb Cake

Dark Sweet Cherry Crumb Cake.

I am a complete sucker for crumb cake.  It is most likely my Achilles heel.  I will say I don’t want a piece but will sliver slices away and pick off crumb topping until the whole cake somehow seems to disappear.

When I had a huge bag of sweet dark cherries lingering in the refrigerator one Sunday a week or so ago and the desire to bake something, I knew I found “IT” when I came across this recipe I slightly tweaked from Laura at Tutti Dolce who described the cake like this:

The best kind of cherry crumb cake is a plush buttermilk cake, scented with almond and vanilla, and topped with a scattering of sweet dark cherries. Piled high with buttery crumbs and baked until beautifully golden, this is the cherry cake your summer needs.

Laura had me at “plush!”

Here is this divine crumb cake recipe.  This IS the cake of your summer needs!

Dark Sweet Cherry Crumb Cake

Ingredients:

Cake:

  • 10 Tbsp butter, room temperature
  • 1 1/4 cups sugar
  • 2 eggs
  • 1 cup buttermilk (or 1 cup milk plus 1 Tbsp vinegar let set for 5 min)
  • 1 tsp pure almond extract
  • 1tsp pure vanilla extract
  • 1 tsp baking powder
  • 1/2 tsp salt
  • 2 1/2 cups flour
  • 1 1/2 lbs dark sweet cherries, pitted

Crumb Topping:

  • 2/3 cup flour
  • 1/2 cup sugar
  • 1 tsp cinnamon
  • 1/4 tsp salt
  • 1/4 cup butter, melted
  • 1/2 tsp pure almond extract

Directions:

Preheat oven to 350 degrees F.  Grease and flour 10 in. springform pan.

Prepare crumb topping by combining flour, sugar, cinnamon, and salt in a small bowl.  Add melted butter and extract and toss with a spoon or your fingers until crumbly.

Prepare cake batter by beating butter and sugar with electric mixer until light and fluffy.  Beat in eggs one at a time.  Add baking soda and salt.  Combine buttermilk and extracts.  Then alternately add buttermilk and flour in three additions just until incorporated.

Pour batter into prepared springform pan.  Top with an even layer of pitted cherries, pressing lightly into batter.  Sprinkle with crumb topping.

Bake 70 minutes or until a toothpick inserted in center comes out clean.  Cool 15 mins. in pan.  Remove springform side, and cool completely.  

Enjoy!

Cheers & Hugs,
Jodi

Gluten-Free (Flourless) Banana Oatmeal Bread

Gluten-Free (Flourless) Banana Oatmeal Bread.

When you have a bunch of bananas that ripen before you eat them – and you know nobody will eat them – they are perfect for baking.

I have a really yummy banana bread recipe, but it is not the “healthiest.”  I decided I wanted to make something with less (or no) sugar, and maybe no flour either.

I was excited when I found this super-easy and oh so yummy recipe at The Baker Mama.

It’s been very hot here, so I baked this early on a Sunday morning.  I made one loaf for my youngest son and his wife (my son loves banana bread and my daughter-in-law likes to eat healthy and gluten-free if possible) and one loaf for hubby and me.

My son mentioned that if I added some protein powder to the recipe, it would be the perfect breakfast.  I will have to try that next time.

But how simple is this recipe with five healthy, wholesome ingredients?!

Hope you will give it a try.

Gluten Free Banana Oatmeal Bread

Ingredients:

3 ripe bananas
2 cups old-fashioned rolled oats
2  eggs
¼ cup pure maple syrup
1 tsp baking soda

Directions:

Preheat oven to 350°F. Lightly grease 9×5-inch loaf pan with non-stick cooking spray.

Combine all ingredients in a food processor or blender and blend until smooth and well combined. Pour into prepared loaf pan.
Garnish the top of the batter with thinly sliced bananas or pecans or walnuts, if desired).

Bake for 25-30 minutes or until a toothpick inserted in the center comes out clean.  Do not overbake or bread will be dry tasting.

Let loaf cool completely in pan. Store in a Ziploc bag in the refrigerator,

Enjoy!

Cheers & Hugs,
Jodi

Sour Cream Pecan Coffee Cake

Sour Cream Pecan Coffee Cake.

I’ve been meaning to share this recipe for quite some time.  It is my most favorite coffee cake recipe to date.

I can pass on a brownie or a chocolate chip cookie, but put a piece of coffee cake in front of me………. and forget it!  I can’t resist.

This recipe was shared with me from a super sweet guy I used to work with.   His aunt makes it for him every year for his birthday – at his request – and he was always kind enough to bring it to the office to share.

The recipe card Steve copied to share with me is dated March, 1969.  Almost as old as me!

It’s a classic, and it’s definitely a keeper!

The crunchy ribbon of cinnamony pecans that runs through the middle of this buttery, tender cake seals the deal!

Here is the recipe Steve shared with me that I slightly adjusted:

Sour Cream Pecan Coffee Cake

Ingredients:

  • 1 cup salted butter, softened (2 sticks)
  • 2 cups + 4 Tbsp sugar
  • 2 eggs
  • 1 cup sour cream
  • 1 tsp vanilla
  • 2 cups flour
  • 1 tsp baking powder
  • 1/4 tsp salt
  • 1 cup chopped pecans
  • 1 tsp cinnamon

Directions:

Preheat oven to 375 degrees F.  Grease and flour 9″ tube pan.

Cream butter and 2 cups sugar until light and fluffy.  Beat in eggs one at a time.  Fold in vanilla and sour cream.  Fold in baking powder, salt, and flour.

Combine remaining 4 Tbsp sugar, with chopped pecans and cinnamon.

Place half of batter in tube pan.  Sprinkle with nut mixture.  Top with remaining batter.

Bake 50-60 minutes.

Enjoy!

Cheers & Hugs,
Jodi


Fresh Blueberry Scones

Fresh Blueberry Scones.

I had a friend come over Saturday morning.

HOORAY!  Excuse to bake something yummy.

I surely couldn’t know someone is coming and not have something freshly baked to share if I could help it.  Right?

Surprise visitors might not be as lucky – but are equally welcomed!   (They may just have to look beyond my make-up-less face, a potentially less than clean house, and deal with frozen cookies.)

It was so good to catch up with this friend I haven’t seen in a while – munching on these tender, buttery, lightly sweet biscuits bursting with tart blueberries and sipping on Cinnamon Dolce coffee with Italian Sweet Cream.

Sometimes it takes a guest to make us sit back and relax and truly appreciate our home.  My friend asked me how I ever get anything done with the beautiful view and comfy surroundings?

It made me think….

I need to quit apologizing for the carpet that needs replaced or the walls that need a fresh coat of paint or the old “stuff” I have.

The greatest compliment I receive is when someone tells me they feel completely comfortable and relaxed and welcome in my home.

Isn’t that what makes a house a home?   I have two signs in my home (one I bought and one made for me by my BFF who didn’t know I had bought the same sign!) that say “The thing I love best about my home is who I share it with.”

That could not be truer for me.  A house is made of wood and nails, but a home is made with love and family and friends.

And maybe fresh Blueberry Scones!

Here’s my recipe.

Fresh Blueberry Scones

Ingredients:

2 1/2  Cups Flour
1/2 cup Sugar
2 1/2 Tbsp Baking Powder
Pinch of Salt
1 tsp Cinnamon
1 1/2 Sticks Cold Butter
1 tsp Vanilla
1 Cup Buttermilk (easy substitute is 1Tbsp white vinegar added to 1 cup milk)
1 cup Blueberries
Coarse Raw Sugar for Sprinkling

Directions:

Preheat oven to 400 degrees F.

In a large bowl, mix together flour, sugar, baking powder, salt, and cinnamon.  Cut butter into small cubes and cut into dry ingredients with a pastry blender until coarse crumbs are formed.  Pour in vanilla and buttermilk, and mix with pastry blender just until incorporated.  Dump dough onto counter, gently incorporate blueberries into dough, and gently shape into a 15″ x 3″ rectangle.  Cut dough in half, then each half in half, then each quarter in half, so that you have 8 rectangles.  Cut each rectangle on the diagonal to form 16 triangular shaped scones.

Place on backing stone or cookie sheet, brush with some milk or water, and sprinkle with coarse raw sugar.  Bake at 400 degrees F for 10-15 minutes.  Cool for a few minutes on stone or cookie sheet, then remove to cooling rack to cool completely.

Enjoy!

Cheers & Hugs,
Jodi

Easy Sausage & Vegetable Quiche


Easy Sausage and Vegetable Quiche.

For those days when you want a hearty, substantial supper, but don’t feel like putting a lot of time and effort into it, this simple recipe is just the ticket.

It’s full of protein and veggies and could really be eaten for breakfast, lunch or dinner!

The secret to it being easy is in the fact that you don’t have to prepare a crust.  You simply use a little bit of baking mix (like Biquick) to create an almost crust-like texture.

And the options are limitless for what you can put in for your protein and veggies.  Exchange the sausage for bacon or chicken or turkey or ground beef.   You could even leave the meat out and just add more veggies.  Throw in any favorite vegetables you have in your fridge – mushrooms, asparagus, cauliflower, spinach, kale, tomatoes…..  And use any kind of cheese you love.  Exchange the cheddar for Swiss or muenster or provolone or mozzarella or even blue cheese or feta.

You get the idea…  right?  Toss in whatever you like, and you can have a wide variety of quick and easy meals.

I was recently reminded of this recipe when I came across a version of it at The Speckled Pumpkin.  It reminded me of years ago making all of those “impossible” pies….  Impossible Cheeseburger Pie, Impossible Taco Pie, Impossible Lasagna Pie, Impossible Tuna Pie….  Anybody else remember the Impossible Pie craze?  I may be back in the mood for these!

Serve it with a salad or side of roasted potatoes or even some chunky applesauce.

Here is how I made mine for our Sunday Supper last night.

Easy Sausage and Vegetable Quiche

Ingredients:

  • 1 lb pork sausage, cooked and crumbled
  • 1/2 medium sweet onion, chopped
  • 1 red pepper, chopped
  • 1 1/2 cups chopped fresh broccoli
  • 1 cup shredded cheddar cheese
  • 4 eggs
  • 2 cups milk
  • 1 cup Bisquick baking mix (or your favorite)

Directions:

Preheat oven to 400 degrees F.

Put sausage in bottom of stoneware deep dish baker or your favorite 2-quart round casserole dish or deep dish pie pan.  Top with chopped onions, pepper, broccoli, and cheese.

In a medium bowl, beat the eggs, milk and baking mix with a wire whisk until well blended.  Pour over sausage, veggies and cheese.

Bake for approximately 40 minutes until knife inserted in center comes out clean. 

Enjoy!

Cheers & Hugs,
Jodi


Best Ever Apple Fritter Cake

Best Ever Apple Fritter Cake.

So… this happened the other day…. this absolutely amazing “cake” that is like a pan full of apple fritters.

O M G!

It might not be the healthiest or quickest or easiest to make….

but it is sooo worth it!

With all the snow and colds and flu and healing going on around here…. we needed some serious comfort food.  We needed the house to feel warm and smell wonderful.
We needed some sweetness.  We needed some yummy for our tummy.

Everyone I’ve shared this with pretty much moaned with delight.

And I am right now trying to ignore it calling me from the fridge!  (Eat me…. you know you want me…)


If you are in the mood to treat yourself….

Or need to treat yourself…

Look no further!

Here is the recipe that I slightly tweaked from Cookies and Cups.

Best Ever Apple Fritter Cake

Ingredients:Fillings:

  • 2 cups peeled and diced apples (I used 2 large Gala – use your favorite!)
  • 1/3 cup granulated sugar
  • 1 tsp. cinnamon
  • 2 Tbsp. cornstarch
  • 2 tsp. water
  • 1/2 cup brown sugar + 1 tsp cinnamon

Cake:

  • 1/3 cup butter, room temperature
  • 3/4 cup granulated sugar
  • 3/4 cup chunky applesauce
  • 2 tsp. vanilla
  • 2 eggs
  • 2 1/4 cup flour
  • 1 tsp. baking powder
  • 1 tsp. baking soda
  • 1/2 tsp salt
  • 1 tsp cinnamon
  • 1 cup Greek yogurt (or you can use sour cream)

Glaze:

  • 2 cups powdered sugar
  • 1/3 cup milk
  • 1 tsp. vanilla

Directions:

Fillings:

Combine apples, granulated sugar, cinnamon, cornstarch, and water in a medium saucepan.  Heat on medium-high heat for approximately 5 minutes until apples soften and a syrup forms.  Set aside.

Mix the brown sugar and cinnamon in a small bowl, and set aside as well.

Cake:

Preheat oven to 350 degrees F.

Blend butter and sugar for 3 minutes with electric mixer until fluffy.  Add applesauce, vanilla, and eggs, and mix until combined.  Gently mix in baking powder, baking soda, salt, and cinnamon.  Finally, add flour and Greek yogurt in alternating parts (flour, yogurt, flour, yogurt).  Mix until just combined.

Spread half of the cake in an Deep Dish Baking Stone (or your favorite 10-12 inch round or square or 11×13 rectangle baking dish).  Top with all of apple filling to cover batter.  Sprinkle with 2/3 of the brown sugar/cinnamon mixture.  Add remaining cake batter and top with remaining 1/3 brown sugar/cinnamon.

Bake approximately 30 minutes until center of cake is set, but do not overbake.

Glaze:

While cake is baking, prepare glaze by mixing powdered sugar, milk and vanilla in a medium bowl until smooth.

As soon as cake is removed from oven, poke holes using a butter knife or wooden spoon handle all over the cake – 20-30 pokes.  Pour glaze over the top, spreading to cover completely and allowing to soak in the holes and edges.

Allow glaze to set approximately 20 minutes, and cake is ready to serve warm.  Also very good refrigerated cold – just depends on your preference.  (In our case, hubby likes it warm, and I adore it cold!)

Enjoy!

Cheers & Hugs,
Jodi

Quick and Easy Peach Puff Pastry Tartlets

Quick and Easy Peach Puff Pastry Tartlets.

This Sunday, we had the family over for dinner.  Hubby made the most amazing BBQ spare ribs, which we served with grilled sweet corn on the cob, cowboy baked beans and a caprese salad.  A fresh peach dessert seemed the perfect ending for this BBQ, but I didn’t feel like fussing much.

Knowing I had a package of puff pastry in the freezer, I quickly googled “peaches and puff pastry” and found this wonderful recipe at Natasha’s Kitchen.

These only took about 10 minutes to throw together and 15 minutes to bake for a beautiful and super delicious dessert.

Well – at least that is what I hear…. You’ll have to take my family’s word for how delish they were as I didn’t get to try one.  They’re gone (which is always a good sign).

When your sons ask for a second (or a third), you happily feed them and drink a glass of wine instead <wink>!  I can make these anytime I want again, but feeding my guys and daughter-in-laws and granddaughter and a bestie – – – seeing smiles, hearing yums, and getting hugs – – – well – that’s all this momma needs.

I’m pretty sure I’ll be making these again!  I’m betting sliced apples and walnuts would be a wonderful Autumn version as well as loads of other fruit and nut combinations.

Here’s Natasha’s recipe as I made it.

Quick and Easy Peach Puff Pastry Tartlets

Ingredients:

  • 1 sheet of frozen puff pastry, thawed 20-30 mins.
  • 1 egg
  • 2 large fresh peaches
  • 2 Tbsp sugar
  • 1 Tbsp flour
  • 1/2 tsp cinnamon
  • 1/2 tsp vanilla
  • 1/3 cup sliced almonds
  • 1/2 cup powdered sugar
  • 1 tsp vanilla extract
  • 1 Tbsp milk

Directions:

Preheat oven to 400˚F.

Cut thawed puff pastry into 9 equal sized squares and place on parchment lined baking sheet or baking stone.

Beat egg in a small bowl and set aside.

Slice peaches and place in a medium mixing bowl. Sprinkle with sugar,  flour, cinnamon, and vanilla.  Gently fold together.

Place 3 -4 peach slices in the center of each pastry square. Avoid getting peach juice on pastry edges. Brush edges generously with beaten egg. Sprinkle sliced almonds over pastry and peaches.

Bake at 400˚F for 15-18 minutes or until puffed and golden on the edges.  Remove from oven and let cool on baking sheet for 10 minutes.

While cooling, make the glaze by stirring together powdered sugar, vanilla and milk in a small bowl or measuring cup. Add more milk if needed to reach desired consistency.   Drizzle over cooled tartlets.

Enjoy!

Cheers & Hugs,
Jodi

#Natashaskitchen

Avocado Toast

Avocado Toast with Spicy Pico de Gallo

Avocado Toast with Spicy Pico de Gallo

Avocado Toast.

My latest obsession.

Skip the butter.
Skip the jam.

A perfectly ripe,
creamy avocado half
spread on toast.

Topped with a spoonful
of fresh pico de gallo
with a slight kick
and a dash of salt.

O M Geee!

When only using a half of an avocado, I’ve found a way to keep the other half fresh until the next day.  Leave the pit in and cover tightly with plastic wrap to keep out any bit of air that could touch it and turn it brown, then refrigerate.  I don’t refrigerate avocado before they are cut, but if you only eat half, I think it best to refrigerate the cut one.

Leaving the pit in is key too.  A friend whose son works in a restaurant that makes fresh guacamole shared this life-changing tip with me recently.  When making fresh guacamole, throw one of the pits in.  It keeps the guac from turning brown.  It really works!

How do you like your avocado toast?

Cheers & Hugs,
Jodi