Herb and Garlic Roasted Spaghetti Squash

Herb and Garlic Roasted Spaghetti Squash.

Simple.
Healthy.
Amazingly Delicious!

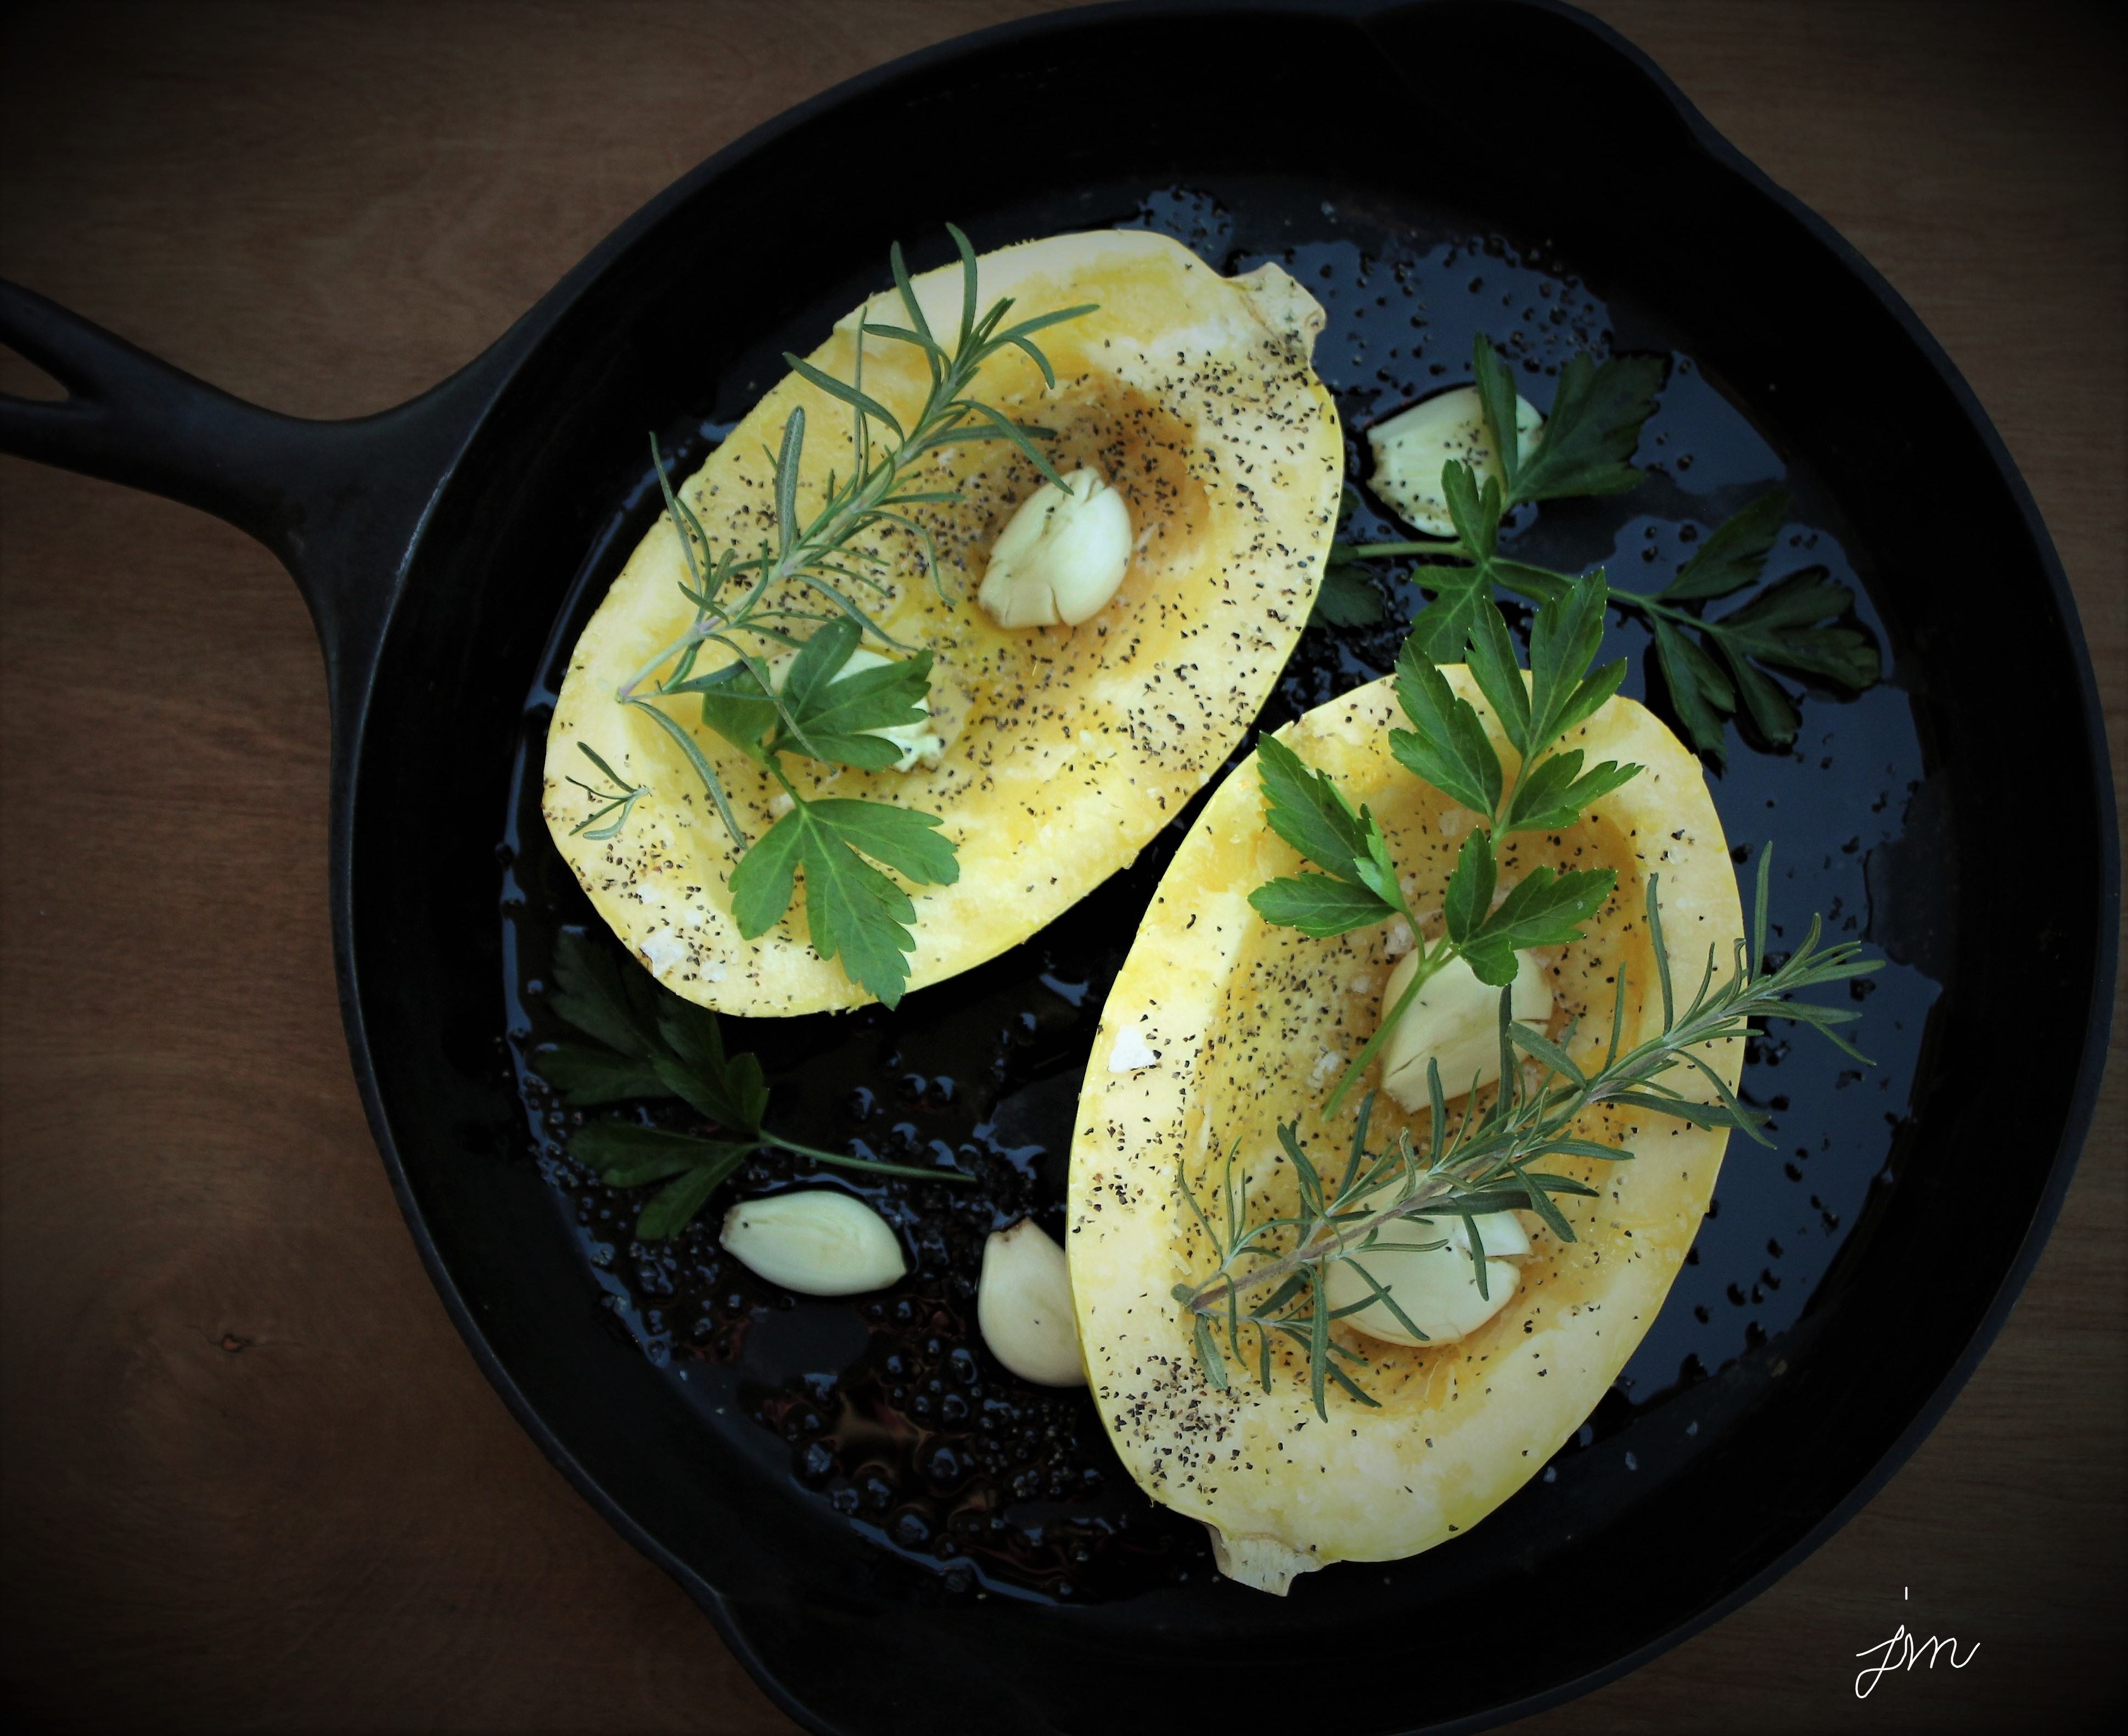
I thought I was going to make something a bit more extravagant when I decided to roast some spaghetti squash by simply drizzling with olive oil, sprinkling with coarse ground pepper and salt, and topping with some garlic cloves and fresh herbs.

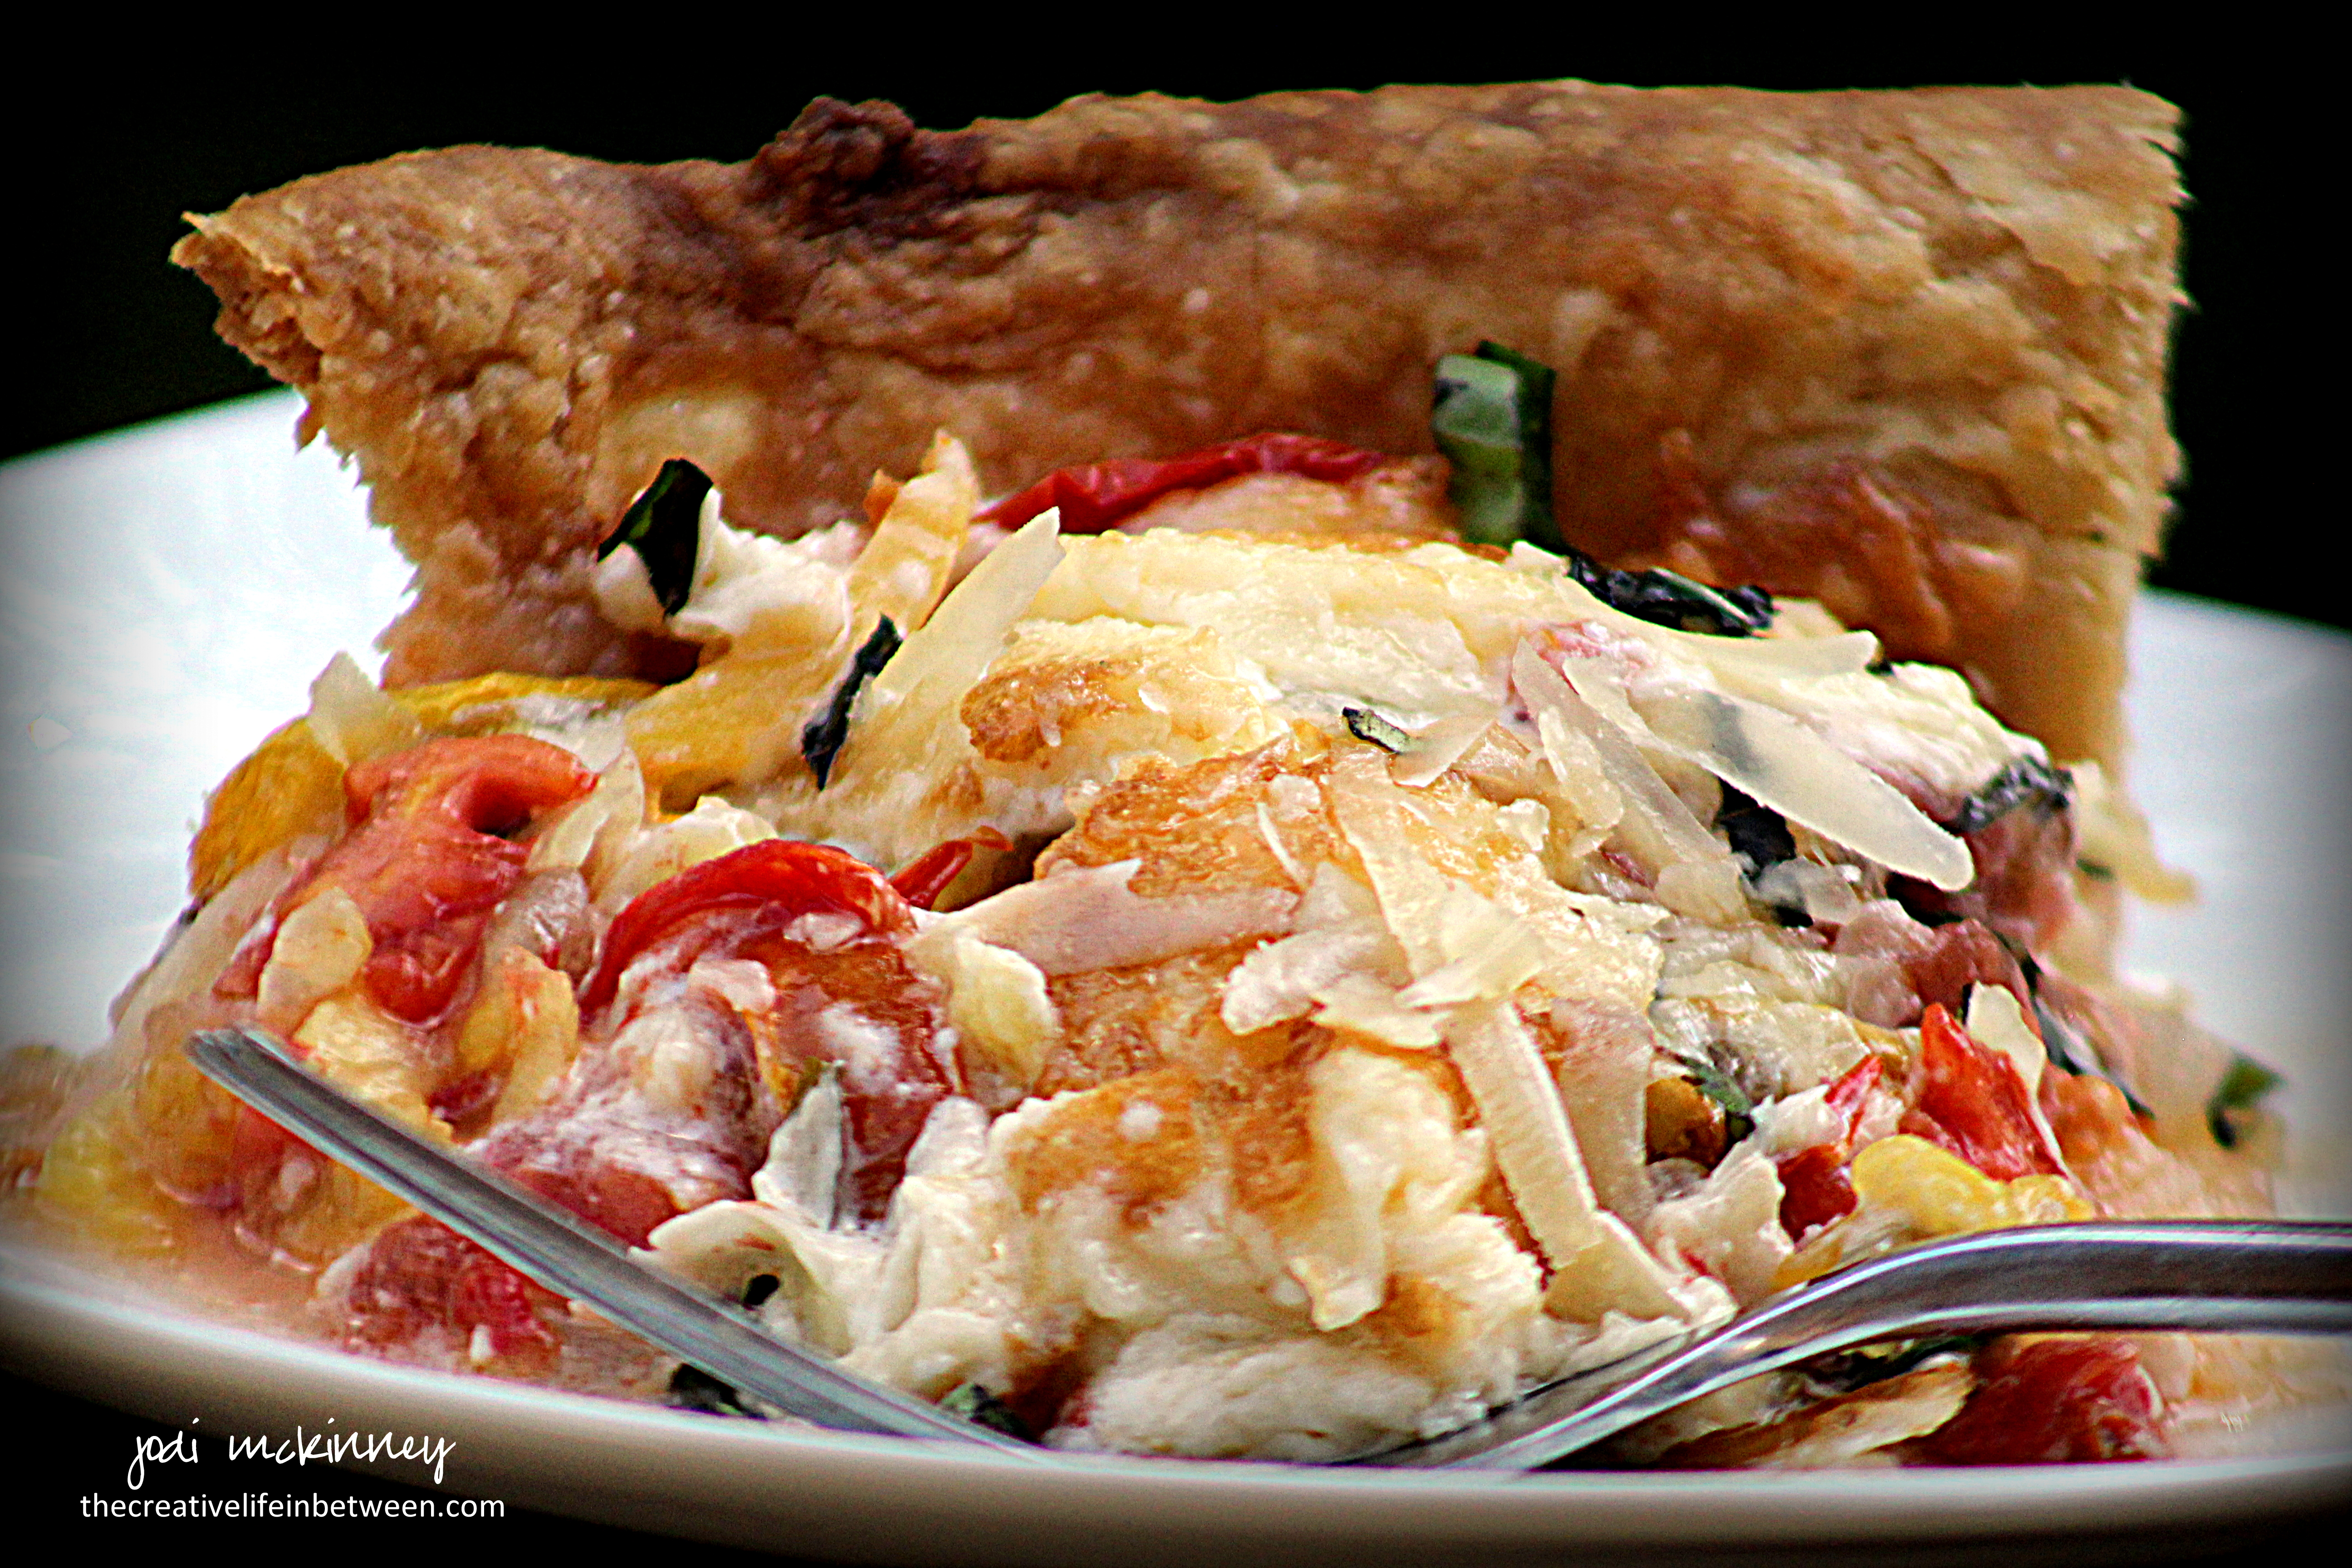
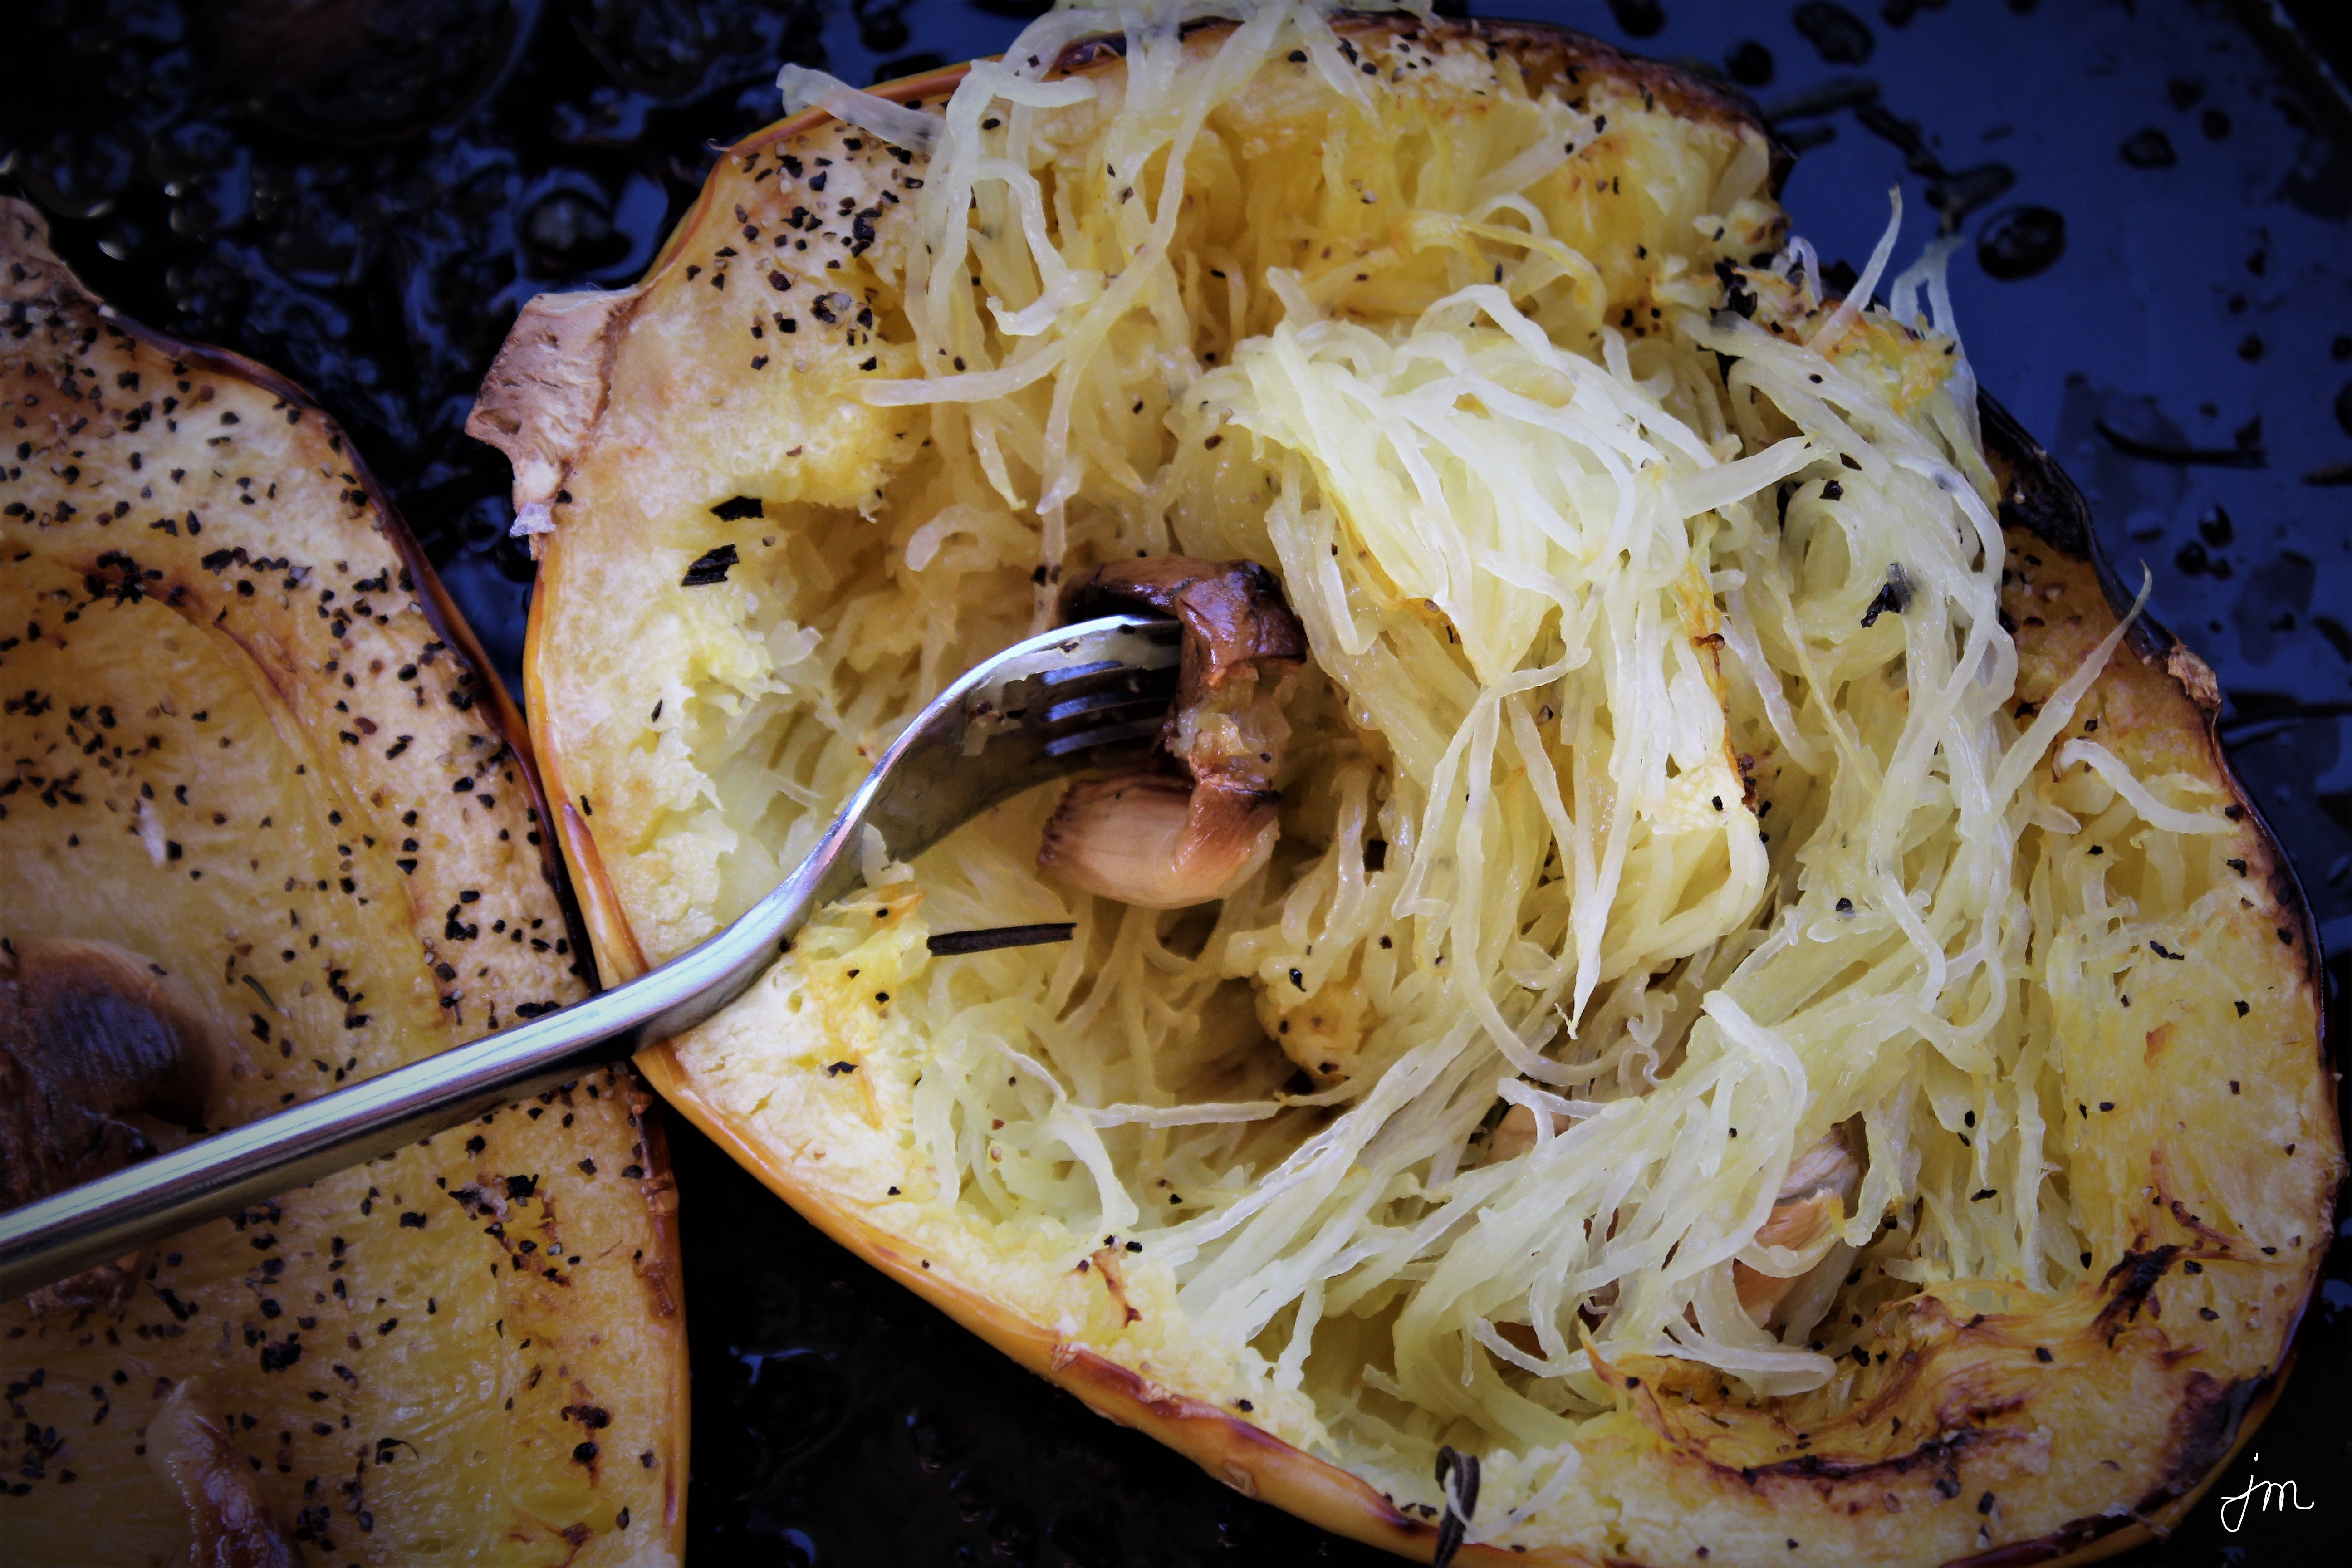
But when it came out of the oven looking like this….

And I took a teensy taste when scraping the flesh with a fork….

I ended up eating an entire half for my lunch!

I adore spaghetti squash, and have made it a number of ways that I’ve shared here:

Four Cheese Garlic Spaghetti Squash

Parmesan Garlic Roasted Spaghetti Squash

Italian Spaghetti Squash

But this super simple, quick and easy way is my new fave…..   at least for today!

Here is how I made it:

Herb & Garlic Roasted Spaghetti Squash

Ingredients:

  • 1 Spaghetti Squash
  • Extra Virgin Olive Oil
  • 4-6 cloves garlic
  • Salt & Pepper
  • Fresh Herbs

Directions:

Preheat oven to 400 degrees F.

Cut spaghetti squash in half, and scoop out seeds.  Place in cast iron skillet.  Drizzle liberally with extra virgin olive oil, toss garlic cloves and fresh herbs on top (I used fresh parsley and rosemary), and sprinkle liberally with fresh ground pepper and salt.

Roast for 45-55 minutes.

Remove from oven, and scrape flesh with fork to create spaghetti.  Serve immediately.

Enjoy!

Cheers & Hugs,
Jodi


Cranberry Jalapeno Holiday Dip

Cranberry Jalapeno Holiday Dip.

When I was asked to bring an appetizer to my new Daughter-in-Law, Liz’s family Thanksgiving, I knew I had to make this after being told by my BFF, Jill that everyone was “jonesing it” when she made it for a party.

First I had to laugh at our 50+ year old selves using urban slang, then I had to make it and see if it was so!

Well – Yep!  It was a hit! One sister asked if the recipe was on the blog, because she wanted it (here it is Laura!), and another said she normally doesn’t like salsas, but she really liked it.

It is sweet, and it is spicy. It is crunchy, and it is creamy. All of this in a bite!

Thumbs up from all, except for hubby, who said it was… meh… He preferred the other appetizer I made – Pumpkin Pecan Baked Brie – which was pretty amazing too!

But will you make this and let me know and prove him wrong? <wink>

So secret revealed here.  I did not take pictures of the batch I made for Thanksgiving, so I made it again this past week just to get pictures <whistles and rolls eyes… not owning up to the fact that I ate a quarter of it for lunch one day…..>

And guess what else I did with it this week?  I made a leftover cold turkey sandwich and slathered some of this on the Smart Bun first.  YUM!  Who knew it would make a great turkey sandwich spread too??!!

This will be a hit at any holiday gathering, and it is so easy and pretty!  Here is the recipe as I slightly tweaked from a recipe I found through Pinterest:

Cranberry Jalapeno Holiday Dip

Ingredients:1 12oz. bag fresh cranberries

  • 1/3 cup sliced green onions
  • 1/4 cup sliced jalapeno pepper slices in a jar (or 1-2 fresh if you like it HOT!)
  • 2 Tbsp. chopped cilantro
  • Juice of 1 fresh lemon
  • 1/4 tsp salt
  • 1 cup sugar
  • 16 oz. cream cheese, softened

Directions:

Chop cranberries (I used the Pampered Chef Food Chopper, and it worked wonderfully, but you can also chop by hand.  Do not put in a food processor as they will become too mushy), and place in a medium bowl.  Add chopped green onions, jalapenos, cilantro, lemon juice, salt, and sugar, and stir gently, but well.

Cover, and let refrigerate overnight.

When ready to serve, strain or squeeze liquid from cranberry relish.

Spread cream cheese in bottom of a pie plate or serving dish.  Top with cranberry relish mixture.

Serve with crackers, tortilla chips, pita chips, celery sticks, or your favorite “dipper.”

Enjoy, and let me know if you and your friends are jonesing it too!

Cheers & Hugs,
Jodi

Cheesy Bacon Ranch “Crack” Dip

Cheesy Bacon Ranch “Crack” Dip.

It’s party food time of year!

Time for dips and spreads, puffs and cups, hors d’oeuvres and crudites, balls and logs… Time for bits and bites in every color and shape and flavor.

When you are looking for an easy, crazy addictive, crowd-pleasing recipe, give this warm, cheesy, bacony, ranchy dip a go.

It’s sure to be a hit!

Cheesy Bacon Ranch Crack Dip

Ingredients:

  • 8 oz cream cheese, softened (I used 1/3 Less Fat)
  • 16 oz. sour cream (I used Light)
  • 2 cups cheddar cheese, shredded
  • 1 lb. bacon, cooked crisp and crumbled
  • 1/2 cup thinly sliced green onions (reserve a few for garnish)
  • 2 Tbsp. (or one 1oz. envelope) Ranch Dressing mix

Directions:

Preheat oven to 400 degrees F.

Combine all ingredients in bowl, reserving a bit of cheddar cheese and a few green onion slices for garnish.

Transfer dip to a pretty oven-proof serving bowl, fand back 20-25 minutes, uncovered until browned and bubbly.

Remove from oven, and immediately garnish with reserved shredded cheddar cheese and green onions.

Serve warm with tortilla chips, pretzel sticks, carrot or celery sticks, crackers, or your favorite dipper.

Enjoy!

Cheers & Hugs,
Jodi


S’More Cookie Bars

S’More Cookie Bars.

What S’more fun than S’mores?!

And what s’more perfect with hot cocoa or coffee than s’mores.

And what s’more delicious than campfire s’mores?

S’more cookie bars any time of year!

I love these adorable little cookie treats I learned from my daughter-in-law, Colleen, who first served them at a holiday cookie exchange she hosted a couple years ago.

They are simple.   They are fun. They are beautiful.  And best of all, they are SCRUMPTIOUS!

The teeny tiny miniature dehydrated marshmallows totally make them!  I purchased them locally at Make a Cake, a local, charming little cake and candy decorating shop, but they are also available online if you can’t find them near you.

Here is how to make them.

S'more Cookie Bars

Ingredients:

Directions:

After breaking all graham crackers and chocolate bars into rectangles, place one chocolate rectangle between two graham cracker rectangles forming a sandwich.

Melt Merckens milk chocolate one pound at a time in microwave.  Heat for 1 minute on high.  Stir well.  Heat 20-30 more seconds.  Stir well until smooth.

Dip each graham cracker and chocolate bar sandwich into chocolate – coating 1/2 – 2/3 of cookie.   Let excess drip, and place on sheet of wax paper to cool and harden.  Dip 4-6, place on wax paper, and sprinkle with marshmallows.  Working in groups allows the marshmallows to stick to the melted chocolate before it cools to harden.  Continue until all are coated and sprinkled with marshmallows.  Allow to cool and harden.

They are ready within 20-30 minutes to enjoy or store in an airtight container.

Enjoy!

Cheers & Hugs,
Jodi

P.S.  If you are local, I made these to share at the Berry Vine Gifts Christmas in the Woods Open House, which starts today, Friday, November 17th (10-6).  It also runs through the weekend, Saturday, November 18th (10-6) and Sunday, November 19th (12-4).  Come munch on one with a cup of cocoa while you browse the beautiful holiday handmade crafts, antique furniture, and gifts in this one-of-a-kind shoppe (including my art and Colleen’s rustic pallet signs!) 

Butterscotch Haystacks

Butterscotch Haystacks

Butterscotch Haystacks.

It’s a cookie?
It’s a candy?
Not quite sure what you call it….
but it is a scrumptious little treat!

Does anyone remember these little gems from their childhood?

A simple mixture of crunchy chow mein noodles, butterscotch chips, peanut butter, and dry roasted peanuts make a treat that looks like a tiny little haystack and is just the right mixture of sweet and salty, crunchy and creamy.

I made these for a “Wizard of Oz” party, thinking they were just the thing to do with the leftover “straw” that fell out of Scarecrow.

There are a variety of ways people have made them through the generations…

With our without the peanuts… with or without the peanut butter.
Some add a bit of vegetable oil.
Some add a a mixture of chocolate and butterscotch chips.

How about you?

Here is how I made them.

And if you haven’t tried them, they are definitely worth a try!  Super easy and super yummy!

Butterscotch Haystacks

  • Servings: approx. 3 dozen
  • Print

Ingredients:

Directions:

Melt butterscotch chips in a large microwavable bowl in microwave on high for 1 minute.  Stir.  Microwave an additional 30 seconds.  Stir again.  Add peanut butter.  Microwave 30 more seconds, and stir well.  At this point, mine is completely melted.  Add 30 second increments if necessary according to your microwave’s power until all is melted and smooth.  (If necessary, you can add a teaspoon of vegetable oil to create a smoother texture, but do not overcook or it will create a thick, gunky texture that will not work.)

Add bag of chow mein noodles and peanuts and stir gently until all noodles and peanuts are coated and ingredients are well combined.

Working relatively quickly before mixture cools, drop by tablespoonfuls onto wax paper or parchment paper.  Allow to set for several hours.  Store in an airtight container at room temperature or serve.

Enjoy!

Cheers & Hugs,
Jodi


Turkey Kielbasa, Brussels Sprouts, and Potato Skillet

Turkey Kielbasa, Brussels Sprouts, and Potato Skillet.

We all find ourselves on those days when we just need to throw something together quick for dinner – right?

We want it to be easy, but healthy and delicious if possible.

The other day I threw this together and really enjoyed it.  We had it with a cucumber salad on the side for a healthy delicious meal in 30 minutes.

I’m sure there are many options for different proteins and veggies and spices, but here is how I made this one.  Do you ever throw together quick “skillet” meals like this?  What do you like to use?

Turkey Kielbasa, Brussels Sprouts, and Potato Skillet

Ingredients:

  • 1 lb Turkey Kielbasa, cut into 1/2 inch pieces
  • 1 lb fresh Brussels Sprouts, cut in half
  • 1 lb petite yellow fingerling potatoes, cut in half (or your favorite)
  • 1 sweet red bell pepper, cut into 1 inch pieces
  • 1/2 sweet onion, chopped
  • 4 cloves garlic, minced
  • 3 Tbsp olive oil
  • Salt and pepper to taste
  • 1 Tbsp fresh minced rosemary

Directions:

Heat 2 Tbsp olive oil in a large skillet.  Add Brussels sprouts, potatoes, red bell pepper,  onion, and salt and pepper to taste. Cook for approximately 20 minutes or so beginning with high heat to brown and then reducing to medium and covering with a lid until Brussels are becoming tender and potatoes are almost cooked through (you can test with a fork).  Stir occasionally.

Add additional Tbsp of olive oil, garlic, turkey kielbasa and fresh rosemary.  Cook approximately 10  more minutes on medium heat, stirring occasionally until all is cooked and flavors are blended well.

Serve immediately.

Stores well to reheat for leftovers.  

Enjoy!

(I ate leftovers for breakfast the next day and LOVED!)

Cheers & Hugs,
Jodi


Peanut Butter Chocolate Triple Layer Cake

Peanut Butter Chocolate Triple Layer Cake.

Our family is pretty much huge fans of Reese’s peanut butter cups and all things peanut butter and chocolate.

So when it came time to celebrate one of my son’s birthdays recently, I was excited to try this Peanut Butter Chocolate Triple Layer Cake recipe I found at Life, Love, and Sugar.

Disappoint it did not!!! Oh the chocolately peanut buttery amazingness!

Want to see it a little closer?!

This cake is not for the faint of heart….  yes -it is only for the most serious of chocolate and peanut butter addicts!

Want to see what a slice of it looks like?

Yep – that is three heavenly layers of moist chocolate cake separated only by a fluffy peanut butter frosting and chopped up Reese’s peanut butter cups!

Can you even stand it??!!

As much as we all love our peanut butter cups, we decided this cake would be just as delicious or possibly even better with half the frosting, so that is how I will likely make it next.

You decide – half the frosting or all…. but I’m betting you are going to be somebody’s super hero if you make and serve this cake!

Here is how I made it.

Peanut Butter Chocolate Triple Layer Cake

  • Servings: 1 large cake
  • Print

Ingredients:

Chocolate Cake:

  • 1 3/4 cup flour
  • 2 cups sugar
  • 3/4 cup unsweetened cocoa
  • 2 1/2 tsp baking soda
  • 1/2 tsp baking powder
  • 1 tsp salt
  • 1 cup half and half
  • 1/2 cup canola (or vegetable) oil
  • 2 tsp pure vanilla extract
  • 2 eggs
  • 1 cup hot water

Peanut Butter Frosting:

  • 2 cups butter, softened
  • 1 1/4 cups creamy peanut butter
  • 9 cups powdered sugar
  • 6-8 Tbsp half and half

Chocolate Ganache:

  • 1 cup semi sweet chocolate chips
  • 1/2 cup heavy whipping cream

Garnish:

Directions:

Preheat oven to 350 degrees F.

Prepare three 9″ cake pans by spraying them with Pam Non-Stick Cooking Spray then placing a parchment circle on the bottom.

Combine flour, sugar, cocoa, baking soda and powder, and salt in a bowl.

Combine milk, oil, vanilla, and eggs in an electric mixing bowl.

Add dry ingredients to wet ingredients in mixing bowl, and mix until well combined.

Slowly add the hot water to the batter, and mix on low speed until well incorporated.

Pour the batter evenly between the three prepared pans, and bake for 20 – 25 minutes until toothpick inserted comes out clean.

Remove pans from oven, and allow cake to cool in pans for 3-4 minutes, then remove to a cooling rack.   When completely cool, wrap in plastic wrap and freeze for several hours, overnight or for several days or weeks.

When ready to assemble cake, prepare frosting by combining the butter and peanut butter with electric mixer until smooth and creamy.  Slowly add half the powdered sugar until incorporated.  Add half of the half and half and combine.  Add remaining powdered sugar, then remaining half and half, and combine until smooth and fluffy frosting is formed.

Place first layer of cake on a serving plate.  Top with frosting and 3 chopped Reese’s peanut butter cups.

Add the next cake layer and repeat frosting and peanut butter cups.

Add the final cake layer and frost top and sides of cake, reserving 1 cup of frosting for piping decorations if desired.

Make chocolate ganache by heating 1/2 cup heavy whipping cream in microwave for 1 minute.  Add one cup of chocolate chips.  Let set for a couple minutes, then stir until smooth ganache is created.  Pour on top of cake allowing some to drip down sides.

Decorate top of cake with chopped and halved Reese’s peanut butter cups and piped florets of frosting.

Enjoy!

Cheers & Hugs,
Jodi

Pumpkin Snickerdoodles

Pumpkin Snickerdoodles.

It’s the most pumpkiny time of the year…….. (are you singing with me to the tune of “It’s the Most Wonderful Time of the Year?”)

Seems we just can’t get enough of it.

I know I’m having fun trying new things with pumpkin…. Like my recent Pumpkin Chili recipe!  YUM!

How about a new twist on old-fashioned snickerdoodles by pumpkin’in them up?

Oooo Laaa Laaaa!

They just taste like Autumn!

Hope you’ll give them a try.

Pumpkin Snickerdoodles*

Ingredients:

  • 1 cup butter, softened
  • 1 cup sugar
  • 3/4 cup brown sugar, packed
  • 1 large egg yolk
  • 2 tsp vanilla extract
  • 3/4 cup canned pumpkin (not pumpkin pie mix)
  • 3 1/2 tsp cornstarch
  • 1 tsp cream of tartar
  • 1 tsp baking soda
  • 1/2 tsp baking powder
  • 1/2 tsp salt
  • 2 tsp ground cinnamon
  • 1/2 tsp ground ginger
  • 1/2 tsp ground nutmeg
  • 3 1/4 cups flour
  • For rolling:  1/4 cup sugar + 2 tsp ground cinnamon, combined

Directions:

Cream together butter and sugars with electric mixer.  Add egg yolk, vanilla and pumpkin, and combine.

Add next 8 ingredients, followed by the flour, and mix until combined.

Refrigerate dough for at least 1 hour.

When ready to bake, preheat oven to 350 degrees F.

Roll and shape dough into golf ball sized balls.  Roll balls in sugar-cinnamon mixture.  Place on baking stone or sheet and bake approximately 12 minutes until tops begin to crack.  Remove from oven and allow to cool on baking stone/sheet for an additional 10 minutes.  Transfer to wire rack to cool completely.

Enjoy!

Cheers & Hugs,
Jodi

*Recipe tweaked very slightly from Cooking Classy


Honey Garlic Chicken Stir Fry

Honey Garlic Chicken Stir Fry.

Do you love going to those fun hibachi restaurants where they cook delicious stir fry meals right before your eyes?

This honey garlic chicken stir fry recipe reminds me of the fresh deliciousness of those experiences.

This might very likely be my all-time favorite chicken recipe!

It is simple and easy, made from ingredients typically kept on hand, and so adaptable to your tastes.

Make it with mushrooms and snow peas and onions if they are your favorite vegetables or what you have on hand.

Make it with beef or pork or shrimp – whatever you like best.

Whatever you like, please do try this awesome recipe.

I wonder if it will become one of your favorites like it is for me?

Here is how I made it this past week.

Honey Garlic Chicken Stir Fry

Ingredients:

  • 2-3 Tbsp. olive oil
  • 2 lbs. boneless skinless chicken breasts, cut into 1 inch pieces
  • salt and pepper to taste
  • 2 cups fresh broccoli florets
  • 1 cup sliced carrots
  • 1 cup sweet red peppers, chopped
  • 1 cup zucchini, sliced
  • 5 cloves garlic, chopped
  • 1/2 cup chicken broth
  • 1/2 cup low sodium soy sauce
  • 6 Tbsp. honey
  • 3 tsp. cornstarch

Directions:

Heat 1-2 Tbsp oil in a large skillet over medium-high heat.  While oil is heating up, steam carrots in microwave for 3-4 minutes.

Season chicken cubes with salt and pepper to taste.  Allow to rest.

Add broccoli, carrots, red peppers, and zucchini to skillet.  Stir fry until vegetables are tender (approx. 3-4 mins.).

Remove veggies from skillet, and allow to rest.

Add remaining oil to skillet and stir fry seasoned chicken.  Cook 3-4 minutes on each side.

Add the chopped garlic, and cook for approx. 30 seconds.

Add the veggies back to the pan, and cook for a couple more minutes until the veggies are warmed through.

In a bowl, whisk together the chicken broth, honey, and soy sauce.  Pour over chicken and veggies.  Cook for one minute.

Whisk cornstarch with equal amount of cold water.  Add to skillet.  Bring to a boil, and cook for another minutes or so until sauce begins to thicken.

Serve over rice.

Enjoy!

Cheers & Hugs,
Jodi

*Recipe slightly adapted from DinnerAtTheZoo.

Old-Fashioned Tomato Pie

Old-Fashioned Tomato Pie.

Looking for something to do with the abundance of fresh, juicy, sweet, beautiful tomatoes in your garden or available this time of year?

How about an old-fashioned tomato pie?!

It’s like a deep dish pizza  in an old-fashioned crust….

Layers of tomatoes, onions, garlic, basil and parsley… topped with cheesy yumminess.

Make one, and enjoy it hot, warm, room temperature, or even cold.  It is a wonderful treat to celebrate the end of summer’s bounty and the delight of vine-ripened tomatoes.

Old-Fashioned Tomato Pie

Ingredients

  • Single Pie Crust
    • 1 cup flour
    • 1/3 cup Crisco shortening
    • Dash of salt (6 shakes)
    • 1/3 cup cold water
  • Filling
    • 2-3 lbs tomatoes, thinly sliced (I used a variety of red and yellow heirloom tomatoes)
    • 1 sweet onion, coarsely chopped
    • 3 cloves garlic, chopped
    • 2 Tbsp olive oil
    • 1/2 cup chopped fresh basil and parsley
    • salt and pepper to taste
    • 1/2 cup freshly shredded Parmigiano Reggiano cheese
    • 1/2 cup freshly shredded Gruyere cheese
    • 1/8-1/4 cup cup mayonnaise

Directions

Preheat oven to 425 degrees F.

Prepare pie crust by blending flour, shortening and salt with a pastry blender to create coarse crumbs.  Add cold water, and mix until just combined.   Do not overwork (this is the secret to flaky pie crust).  Roll out dough on floured surface and line a 9″ pie plate with dough – folding overhanging dough under itself along rim to create rustic edge.

Line piecrust with aluminum foil and fill with dried beans (or pie weights) to keep crust in place.  Bake for 20 mins.  Cool completely.

To prepare filling, place thinly sliced tomatoes on paper towels, and sprinkle with salt.  Let stand 10 mins.  Pat dry with another layer of paper towels.

While tomatoes are resting, saute onion and garlic, sprinkled with salt and pepper, in olive oil for 3-4 minutes until tender.

Layer tomatoes, then onion/garlic mixture, and a sprinkle of freshly chopped herbs into pie crust.  Continue layering until all tomatoes, onions, and herbs are used.

Combine shredded cheese and mayonnaise.  Spread over top of tomato pie.

Bake at 350 degrees F for 30 minutes or until lightly browned, shielding edges with foil or pie shield (the GREATEST invention ever for pie bakers!) to prevent excessive browning.

Serve hot, warm, or at room temperature, whichever you prefer. 

Enjoy!

Cheers & Hugs,
Jodi

Recipe adapted slightly from Myrecipes.com.