S’More Cookies Please!

smore cookies

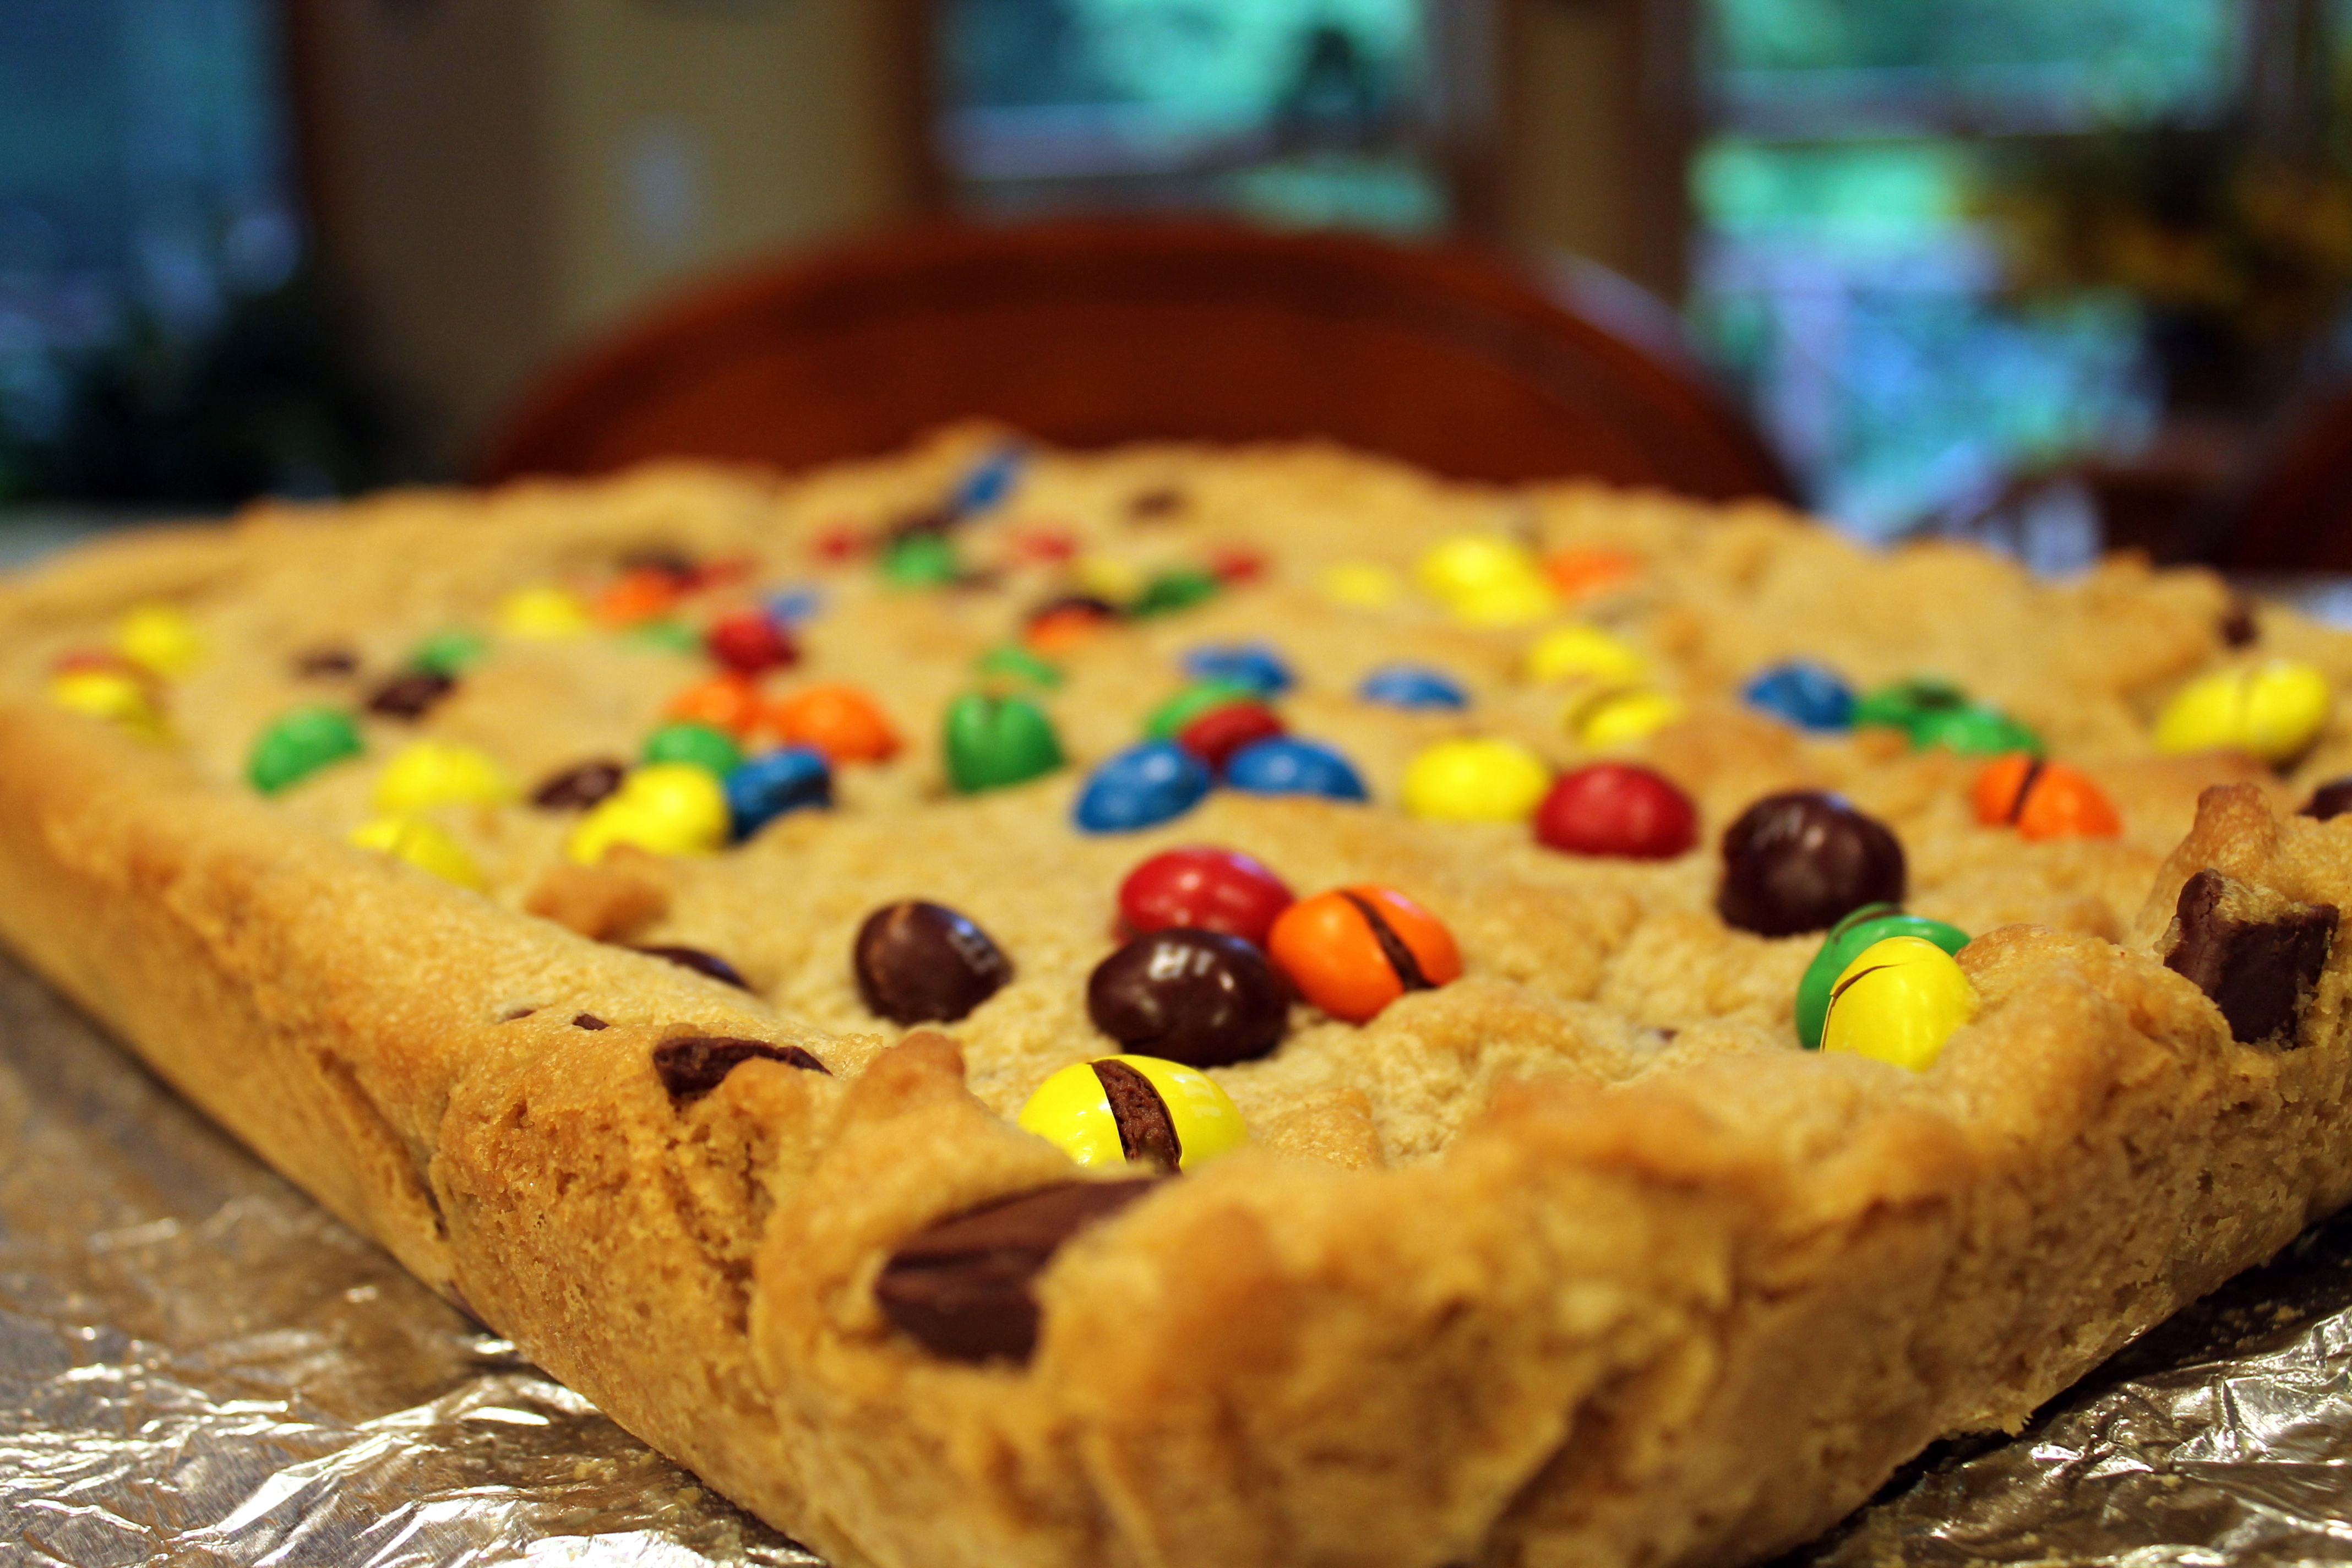
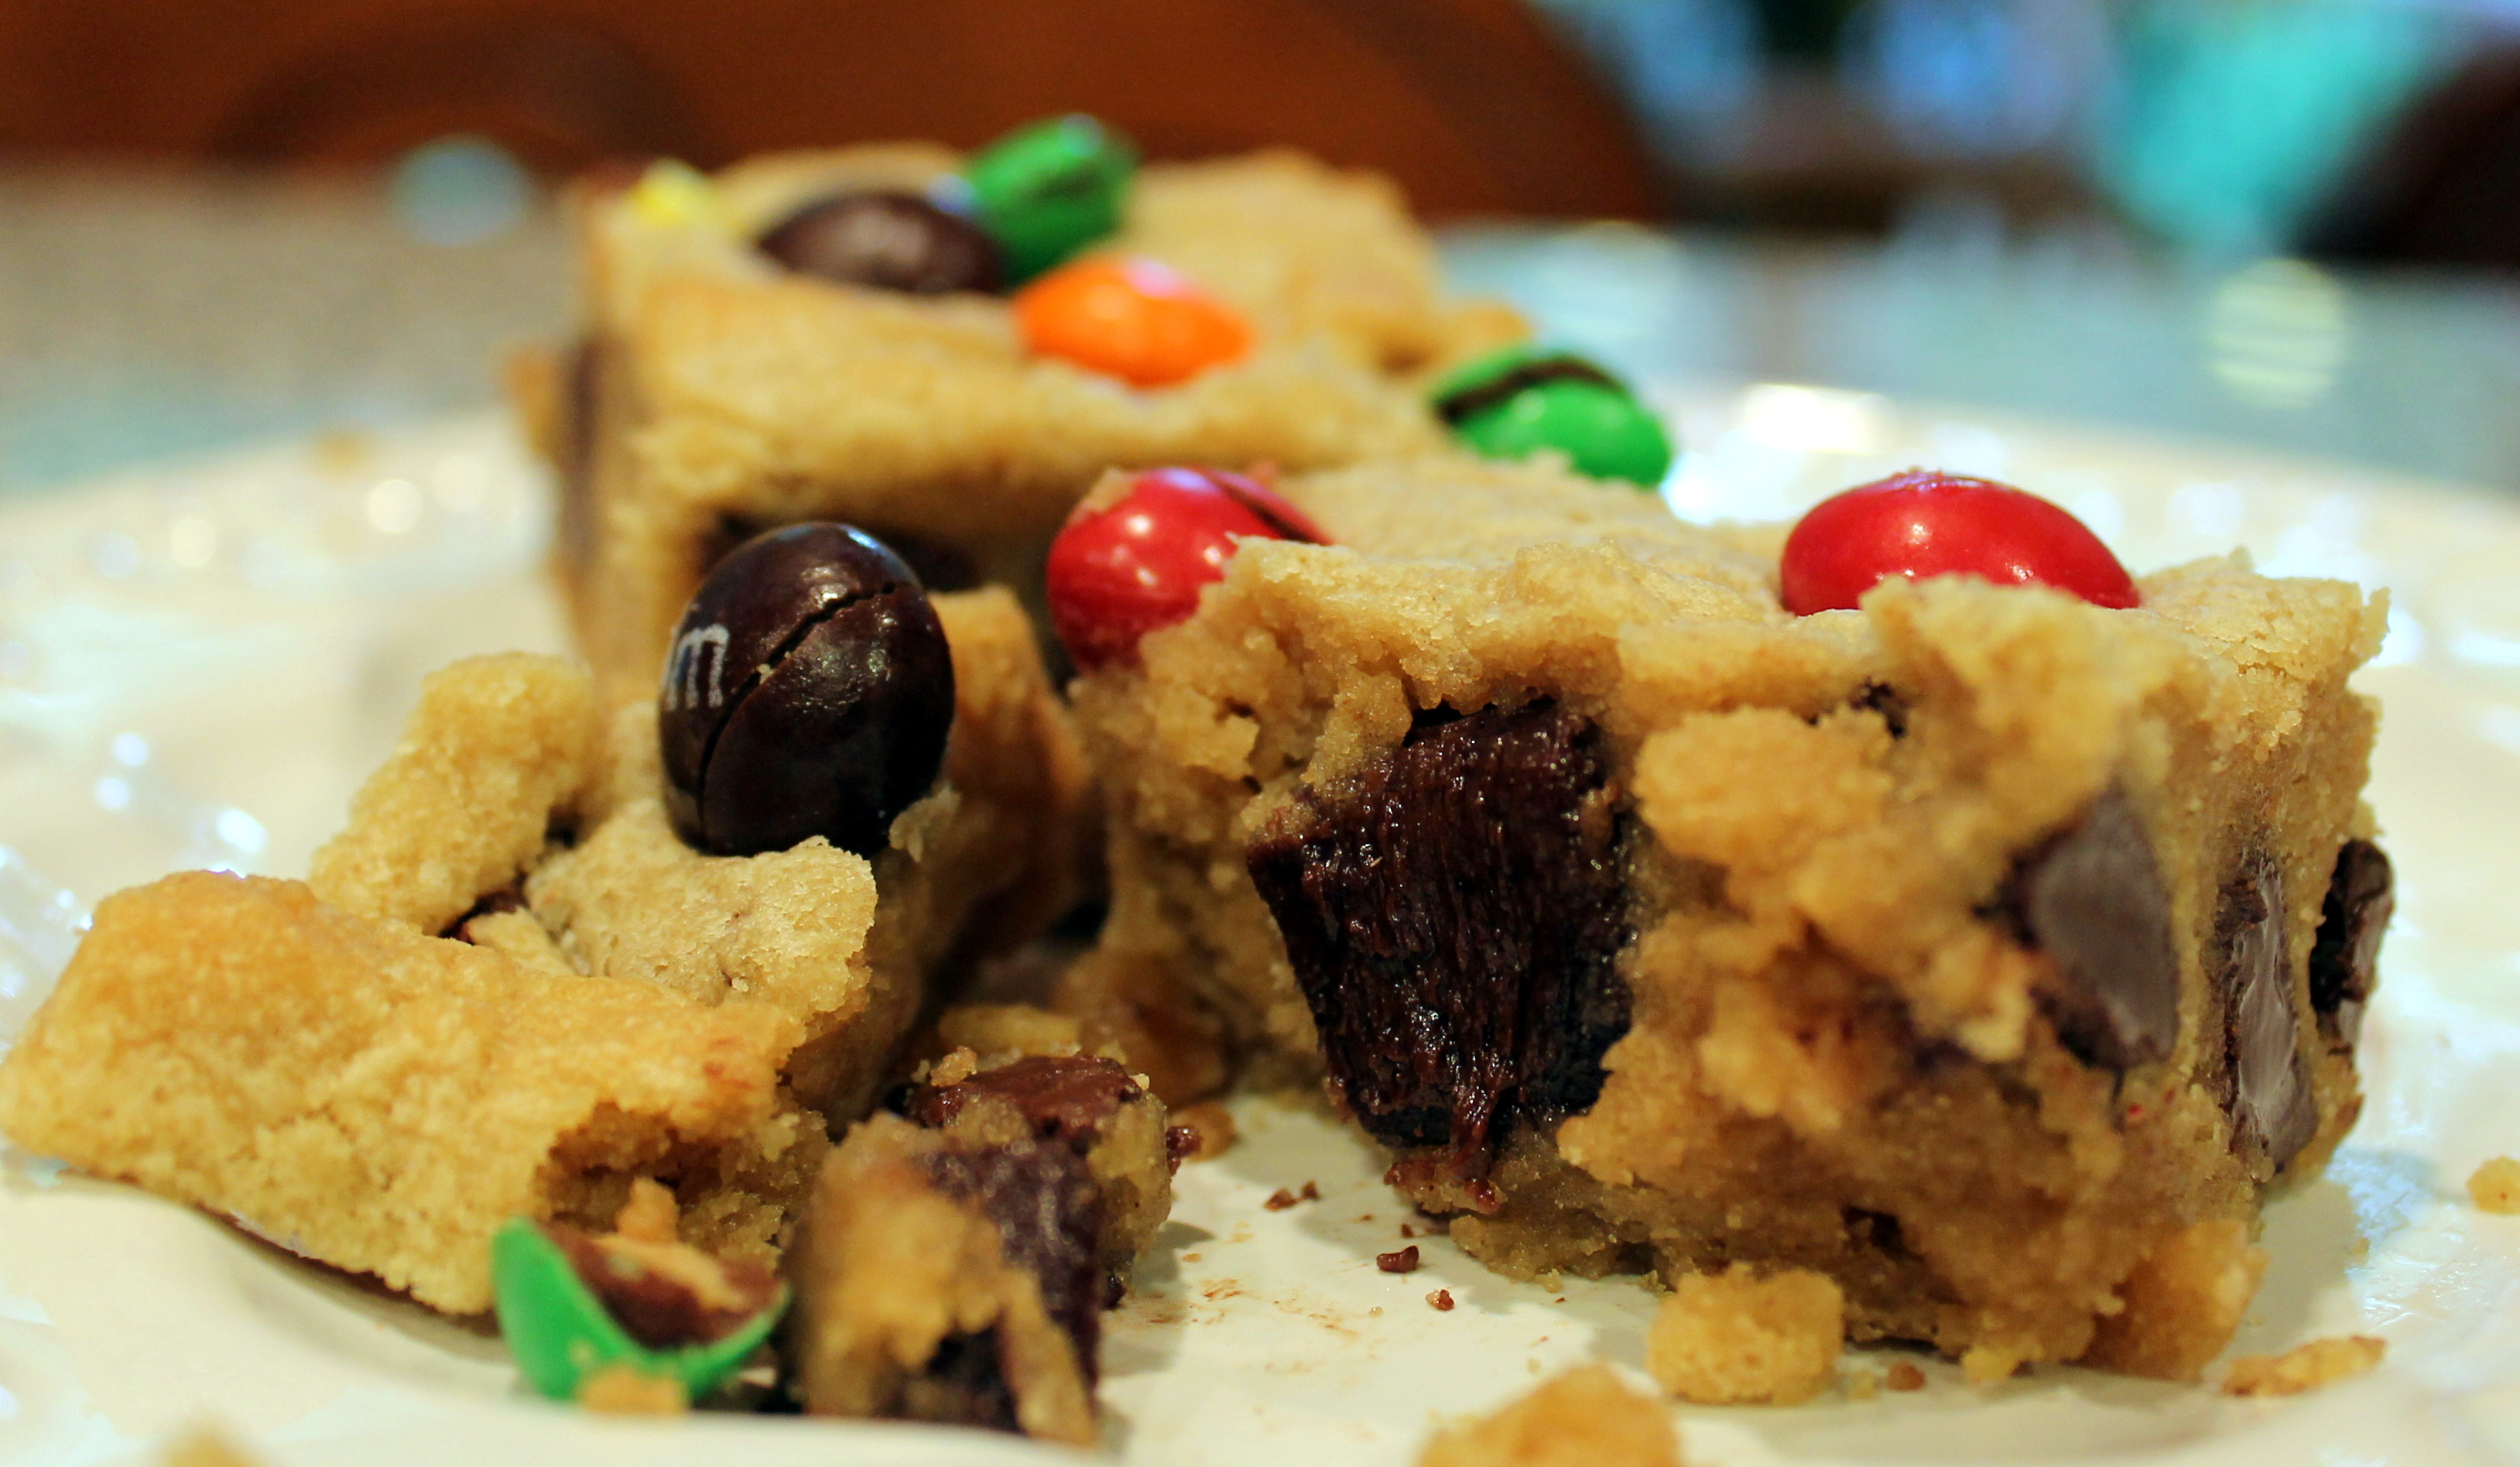
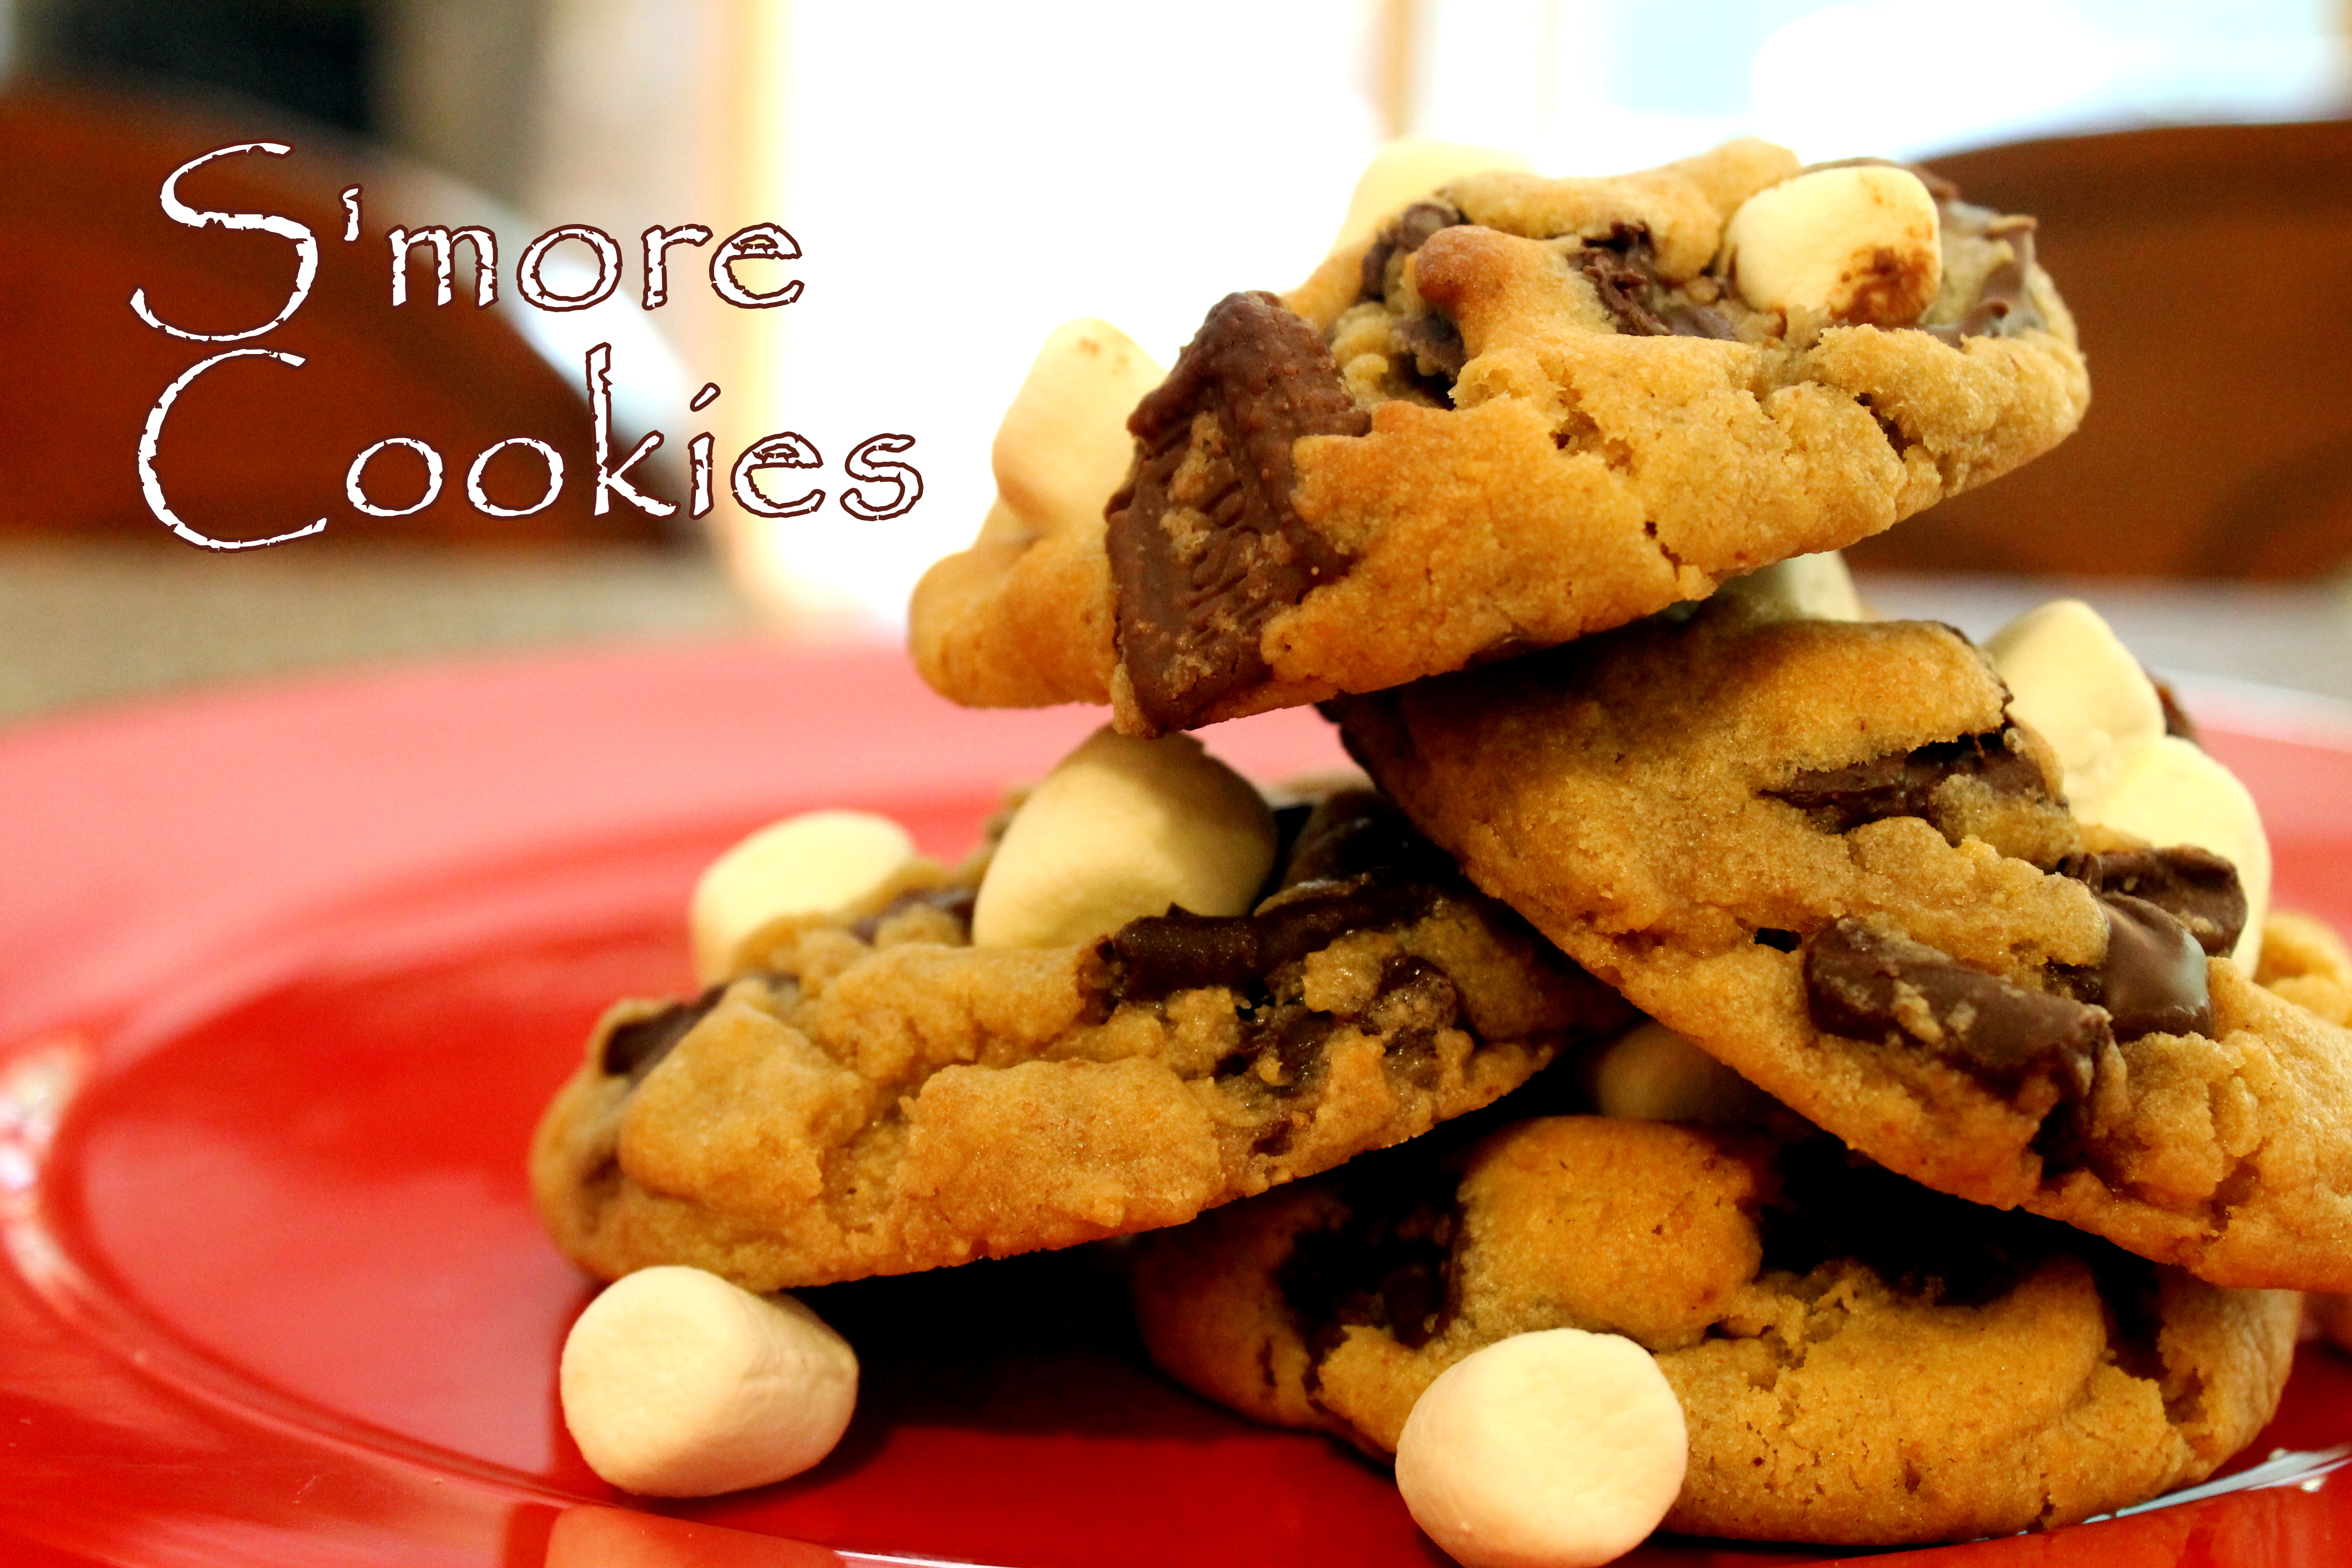
I could barely wait to share this recipe for S’More Cookies that I made on Sunday!

OOOOO  LAAAA  LAAAA!!!

smore broke

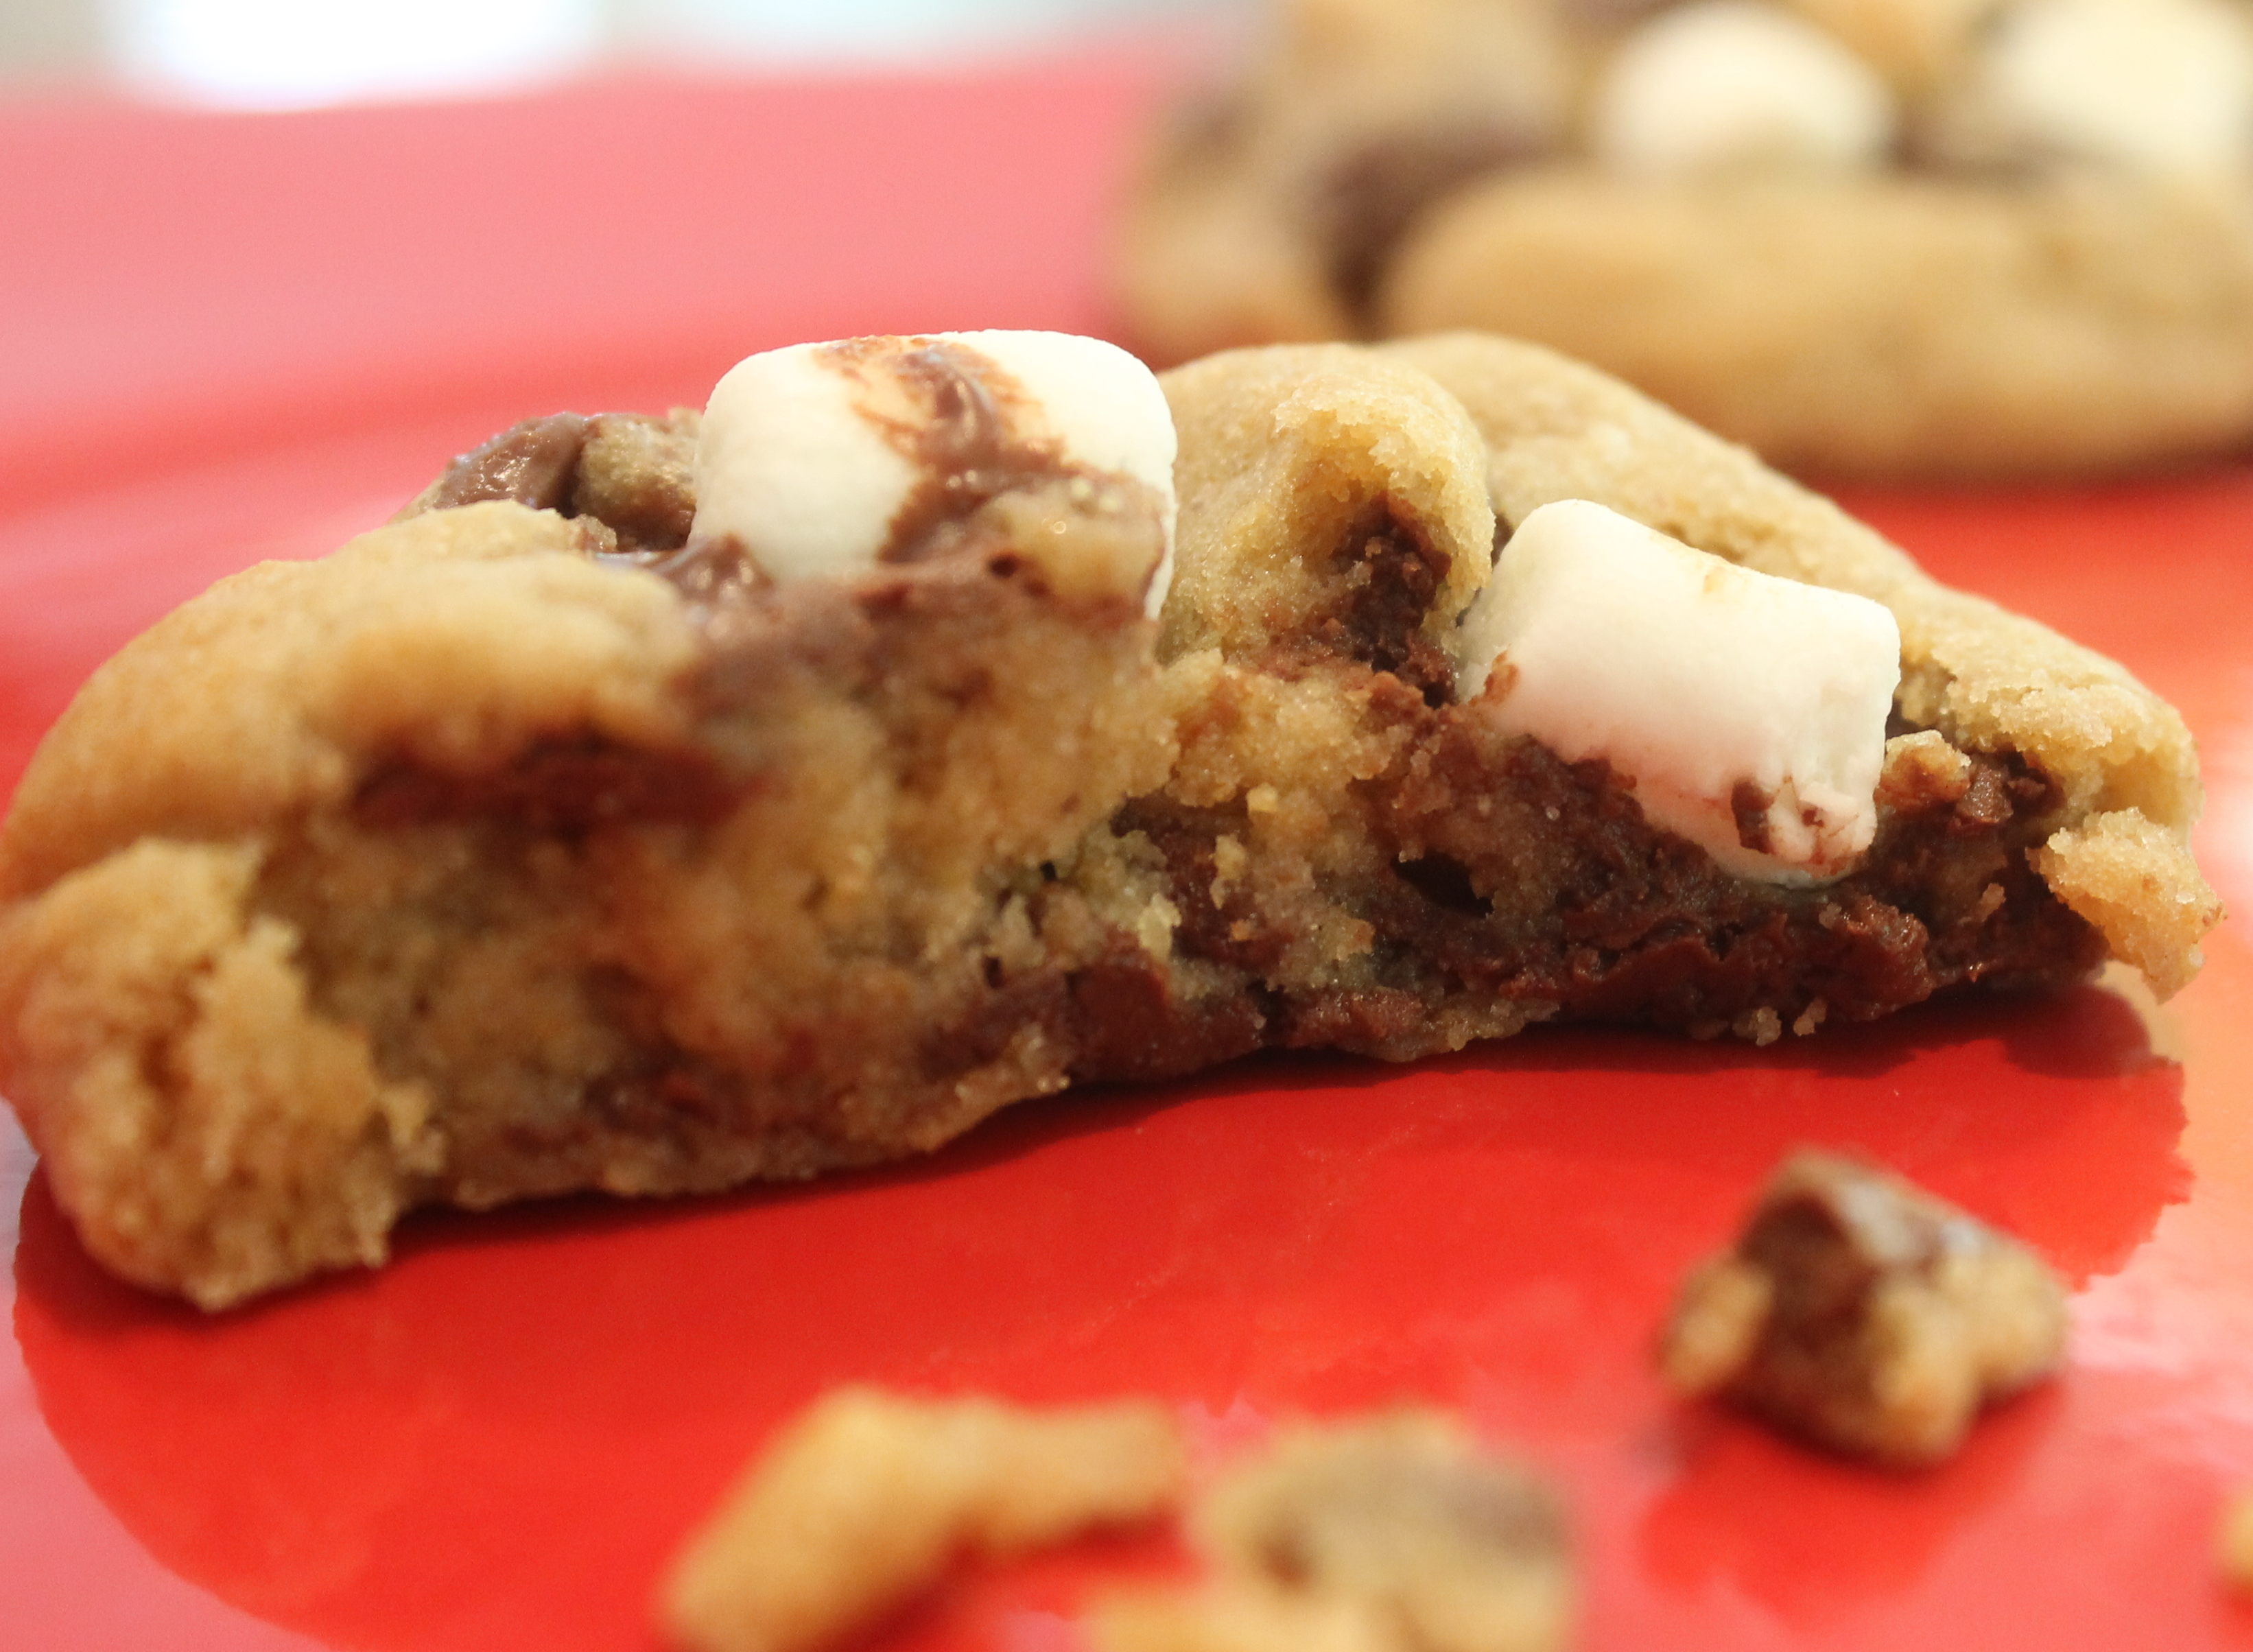
It’s like a campfire memory in a cookie!

I was inspired to make these as I began thinking about cookies to bake for Jackie’s Wedding (which is only a month away!!!  Sooooo excited!!!).

untitled

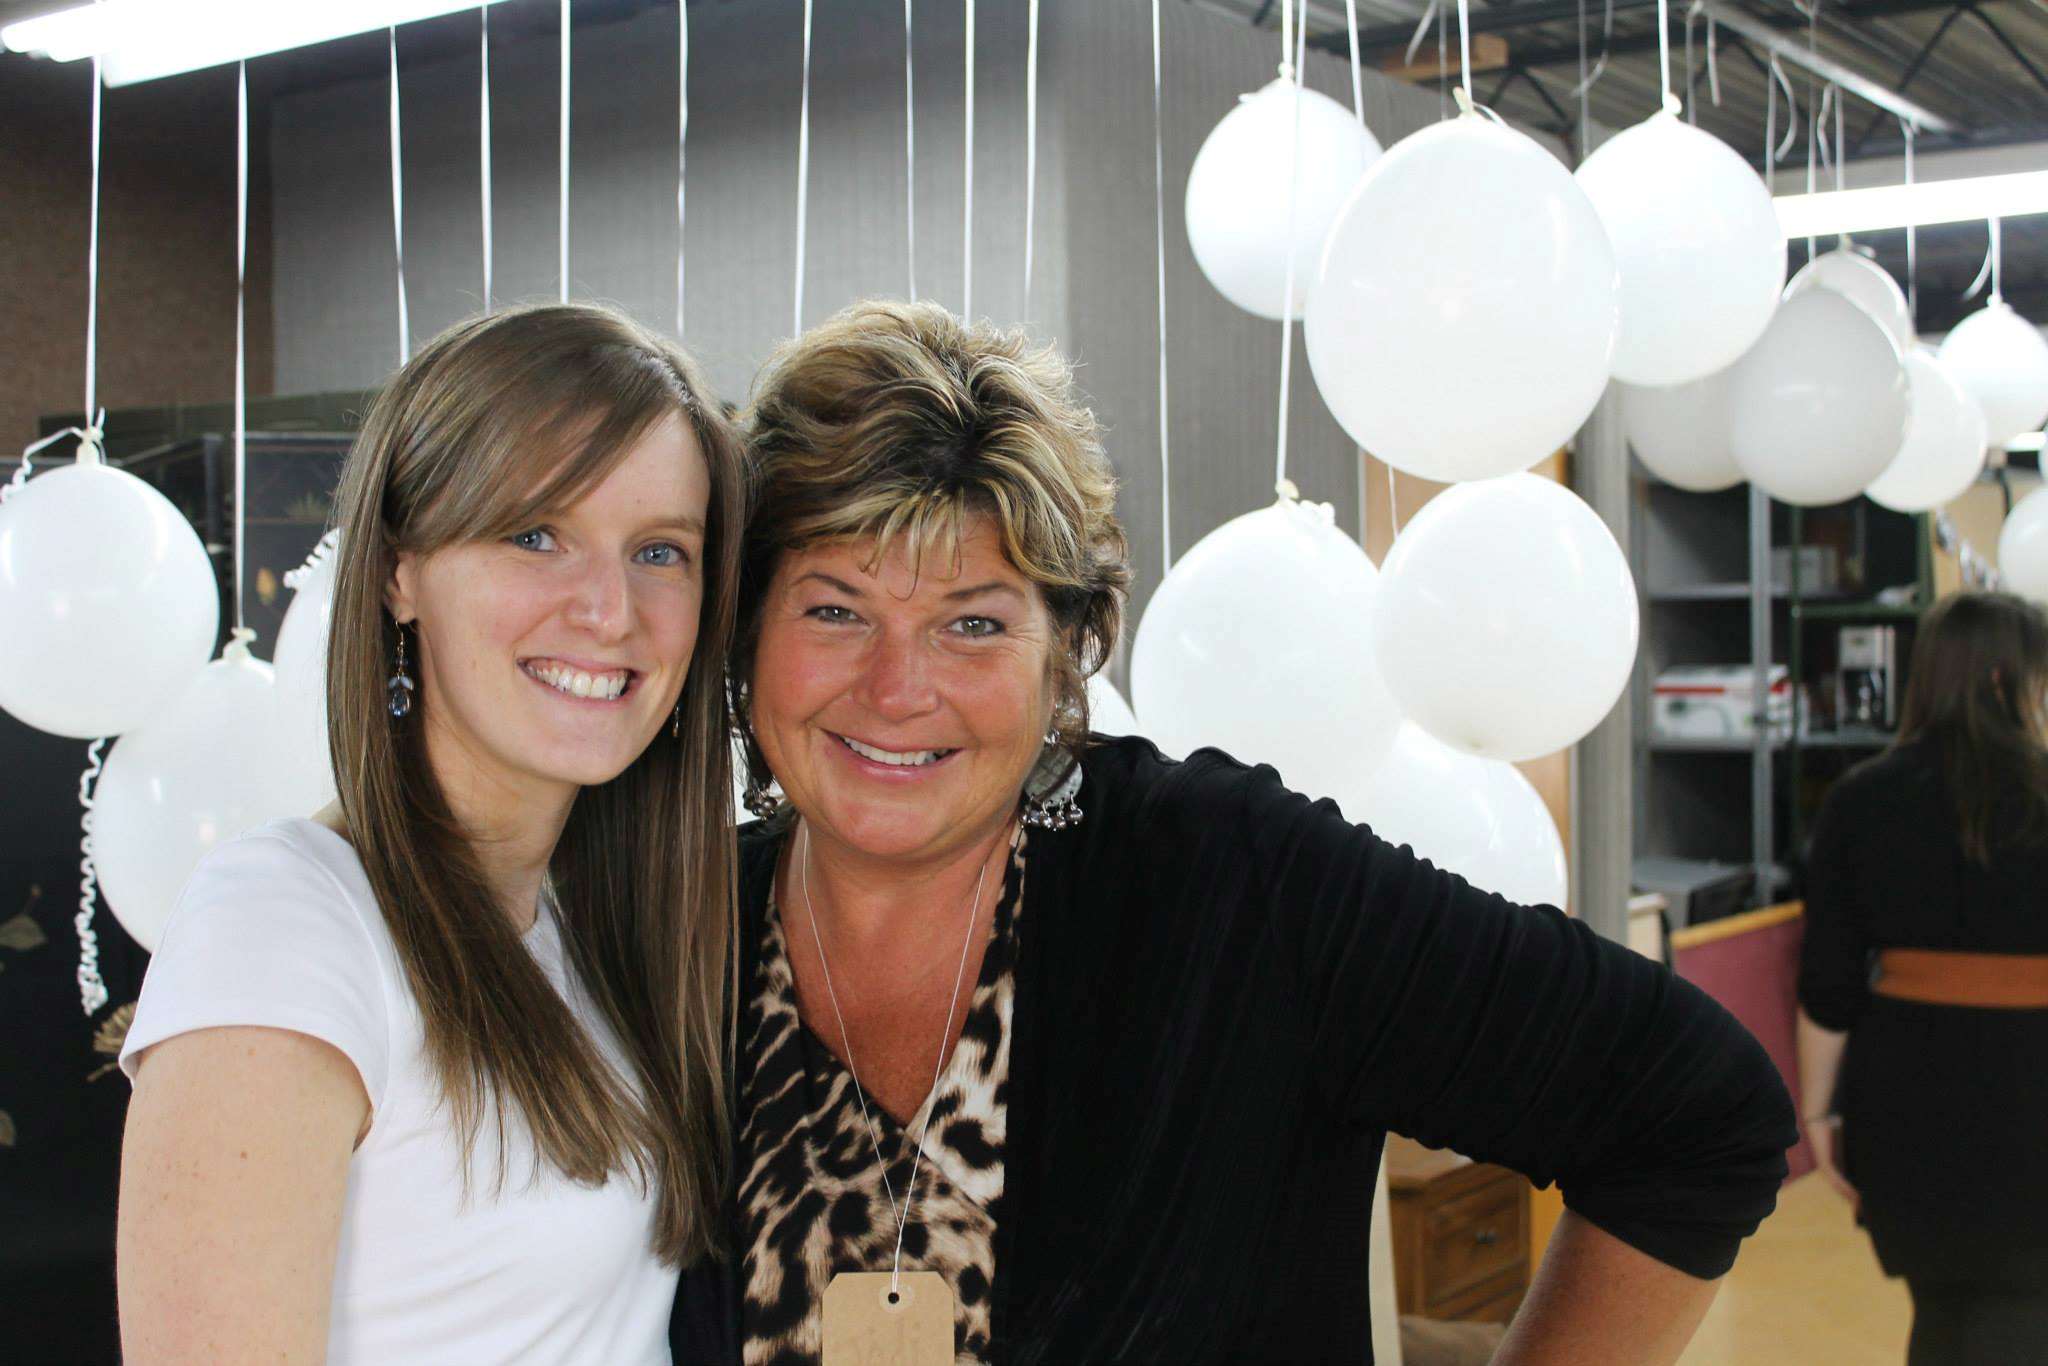
the beautiful bride to be, Jackie, at her bridal shower, with yours truly

For those of you that don’t live in or around Pittsburgh  – aka “Da ”Burgh,” – we have what I’ve come to learn is an unusual tradition at weddings.  (Much like french fries on salads, calling rubber bands “gum bands”, calling groups of people “Yinz,” being the ultimate “Stillers” and “Buccos” sports fans,  calling bologna “Jumbo” and – oh – I could go on and on about our wonderful Pittsburghese – isms! 🙂 )

We have Cookie Tables at weddings.

VERY large cookie tables.

Like where Cookies are APPETIZERS and DESSERT…  AND go with the meal…

cookies

The Cookie Table at Jake and Colleen’s Wedding on July 13, 2013 @ Gable Farms, Lake Latonka, PA

And just to be sure you understand correctly – this does not mean we don’t have wedding cake….  Oh my no – we have BOTH – cookies AND cake!

So when thinking of how to best celebrate our sweet Jackie and what kind of cookies to bake, I thought of S’Mores – which are Jackie’s favorite treat –  and I found this amazing recipe by Jen at CarlsbadCravings.com.

smore 1

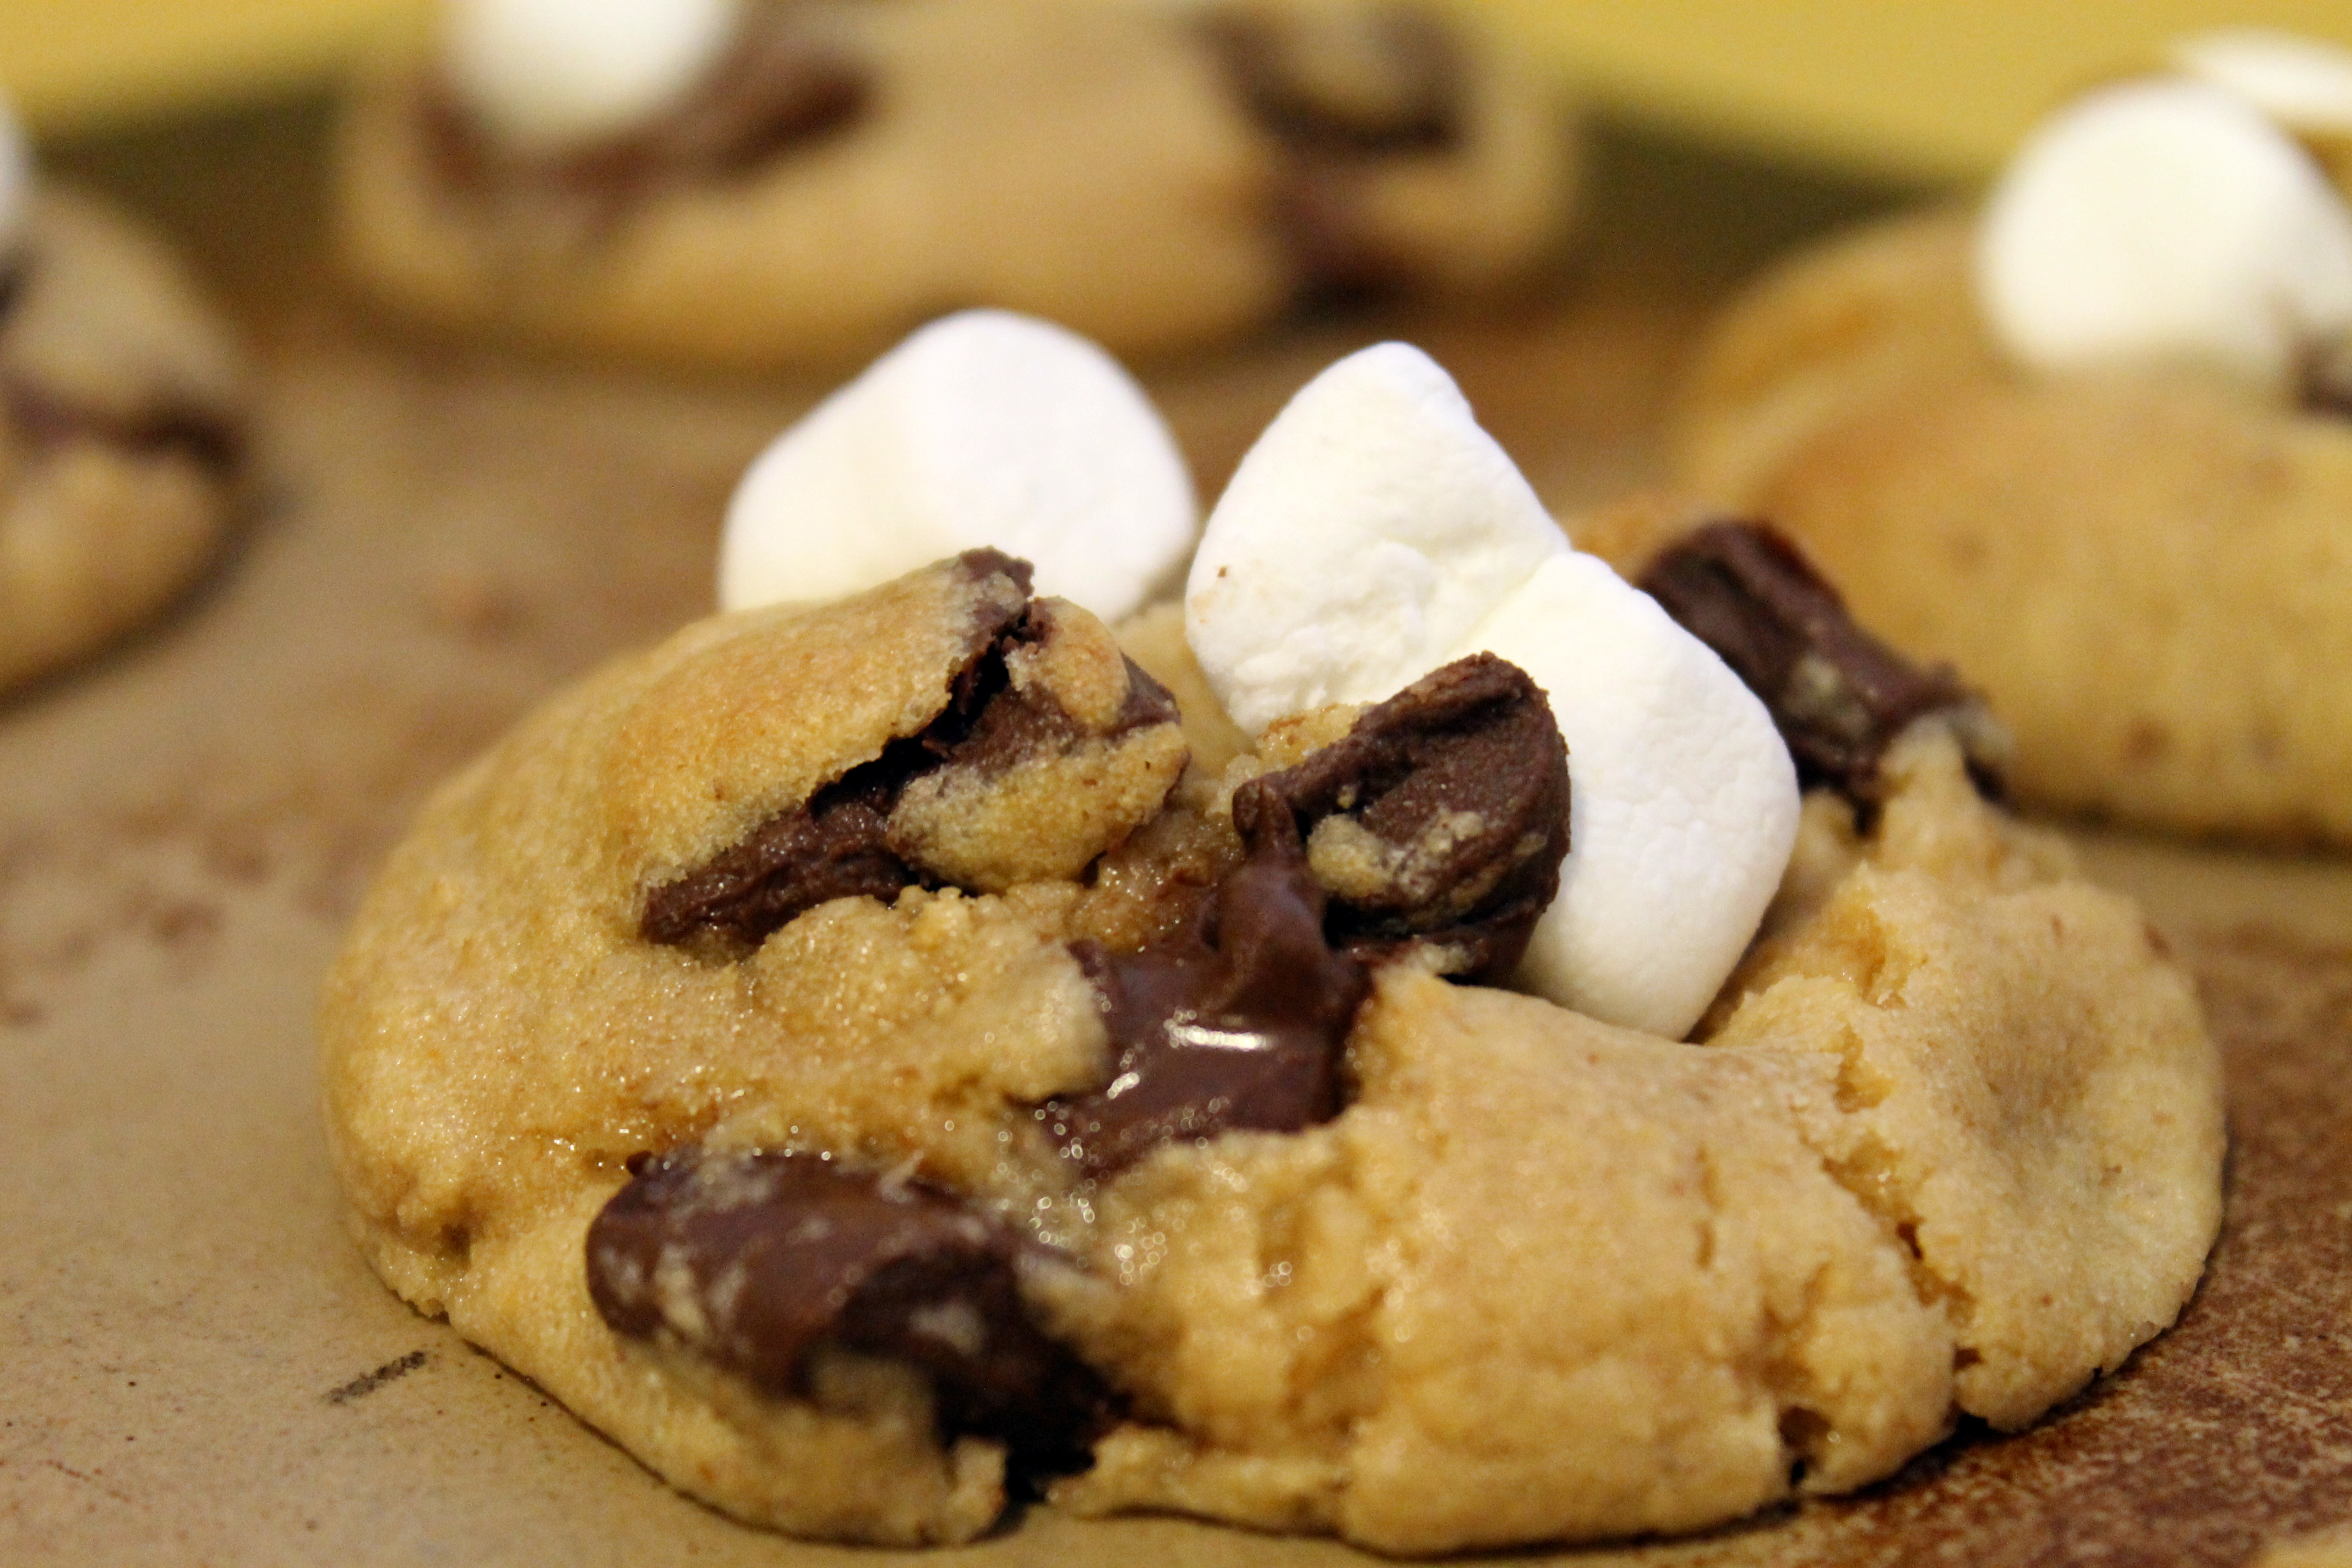
I couldn’t think of anything to make it any better, so here is Jen’s recipe exactly as she posted.  I hope you don’t mind me sharing Jen! (Photos are of the ones I baked.)

The only things I changed were that I baked for only 7 minutes on baking stones in my convection oven.  I always under bake slightly and let set on stones to finish.  I also added about an extra 1/4 cup flour, which I often do to cookie recipes to give them more fullness and chewiness.

smore 3

Soft and Chewy S’more Cookies
Author: Jen@CarlsbadCravings.com
Serves: 3 dozen 2″ cookies  (of course I doubled the recipe 🙂 )
Ingredients
  • ¾ cup butter, softened
  • ½ cup white sugar
  • ½ packed brown sugar
  • 1 egg
  • 1 teaspoon vanilla extract
  • 1 ¼ cups all-purpose flour
  • 1 cup graham cracker crumbs
  • ¼ teaspoon salt
  • ½ teaspoon baking soda
  • 1 ½ cups semi-sweet chocolate chips
  • 2 Hershey bars, broken
  • 1 cup mini marshmallows
Instructions:
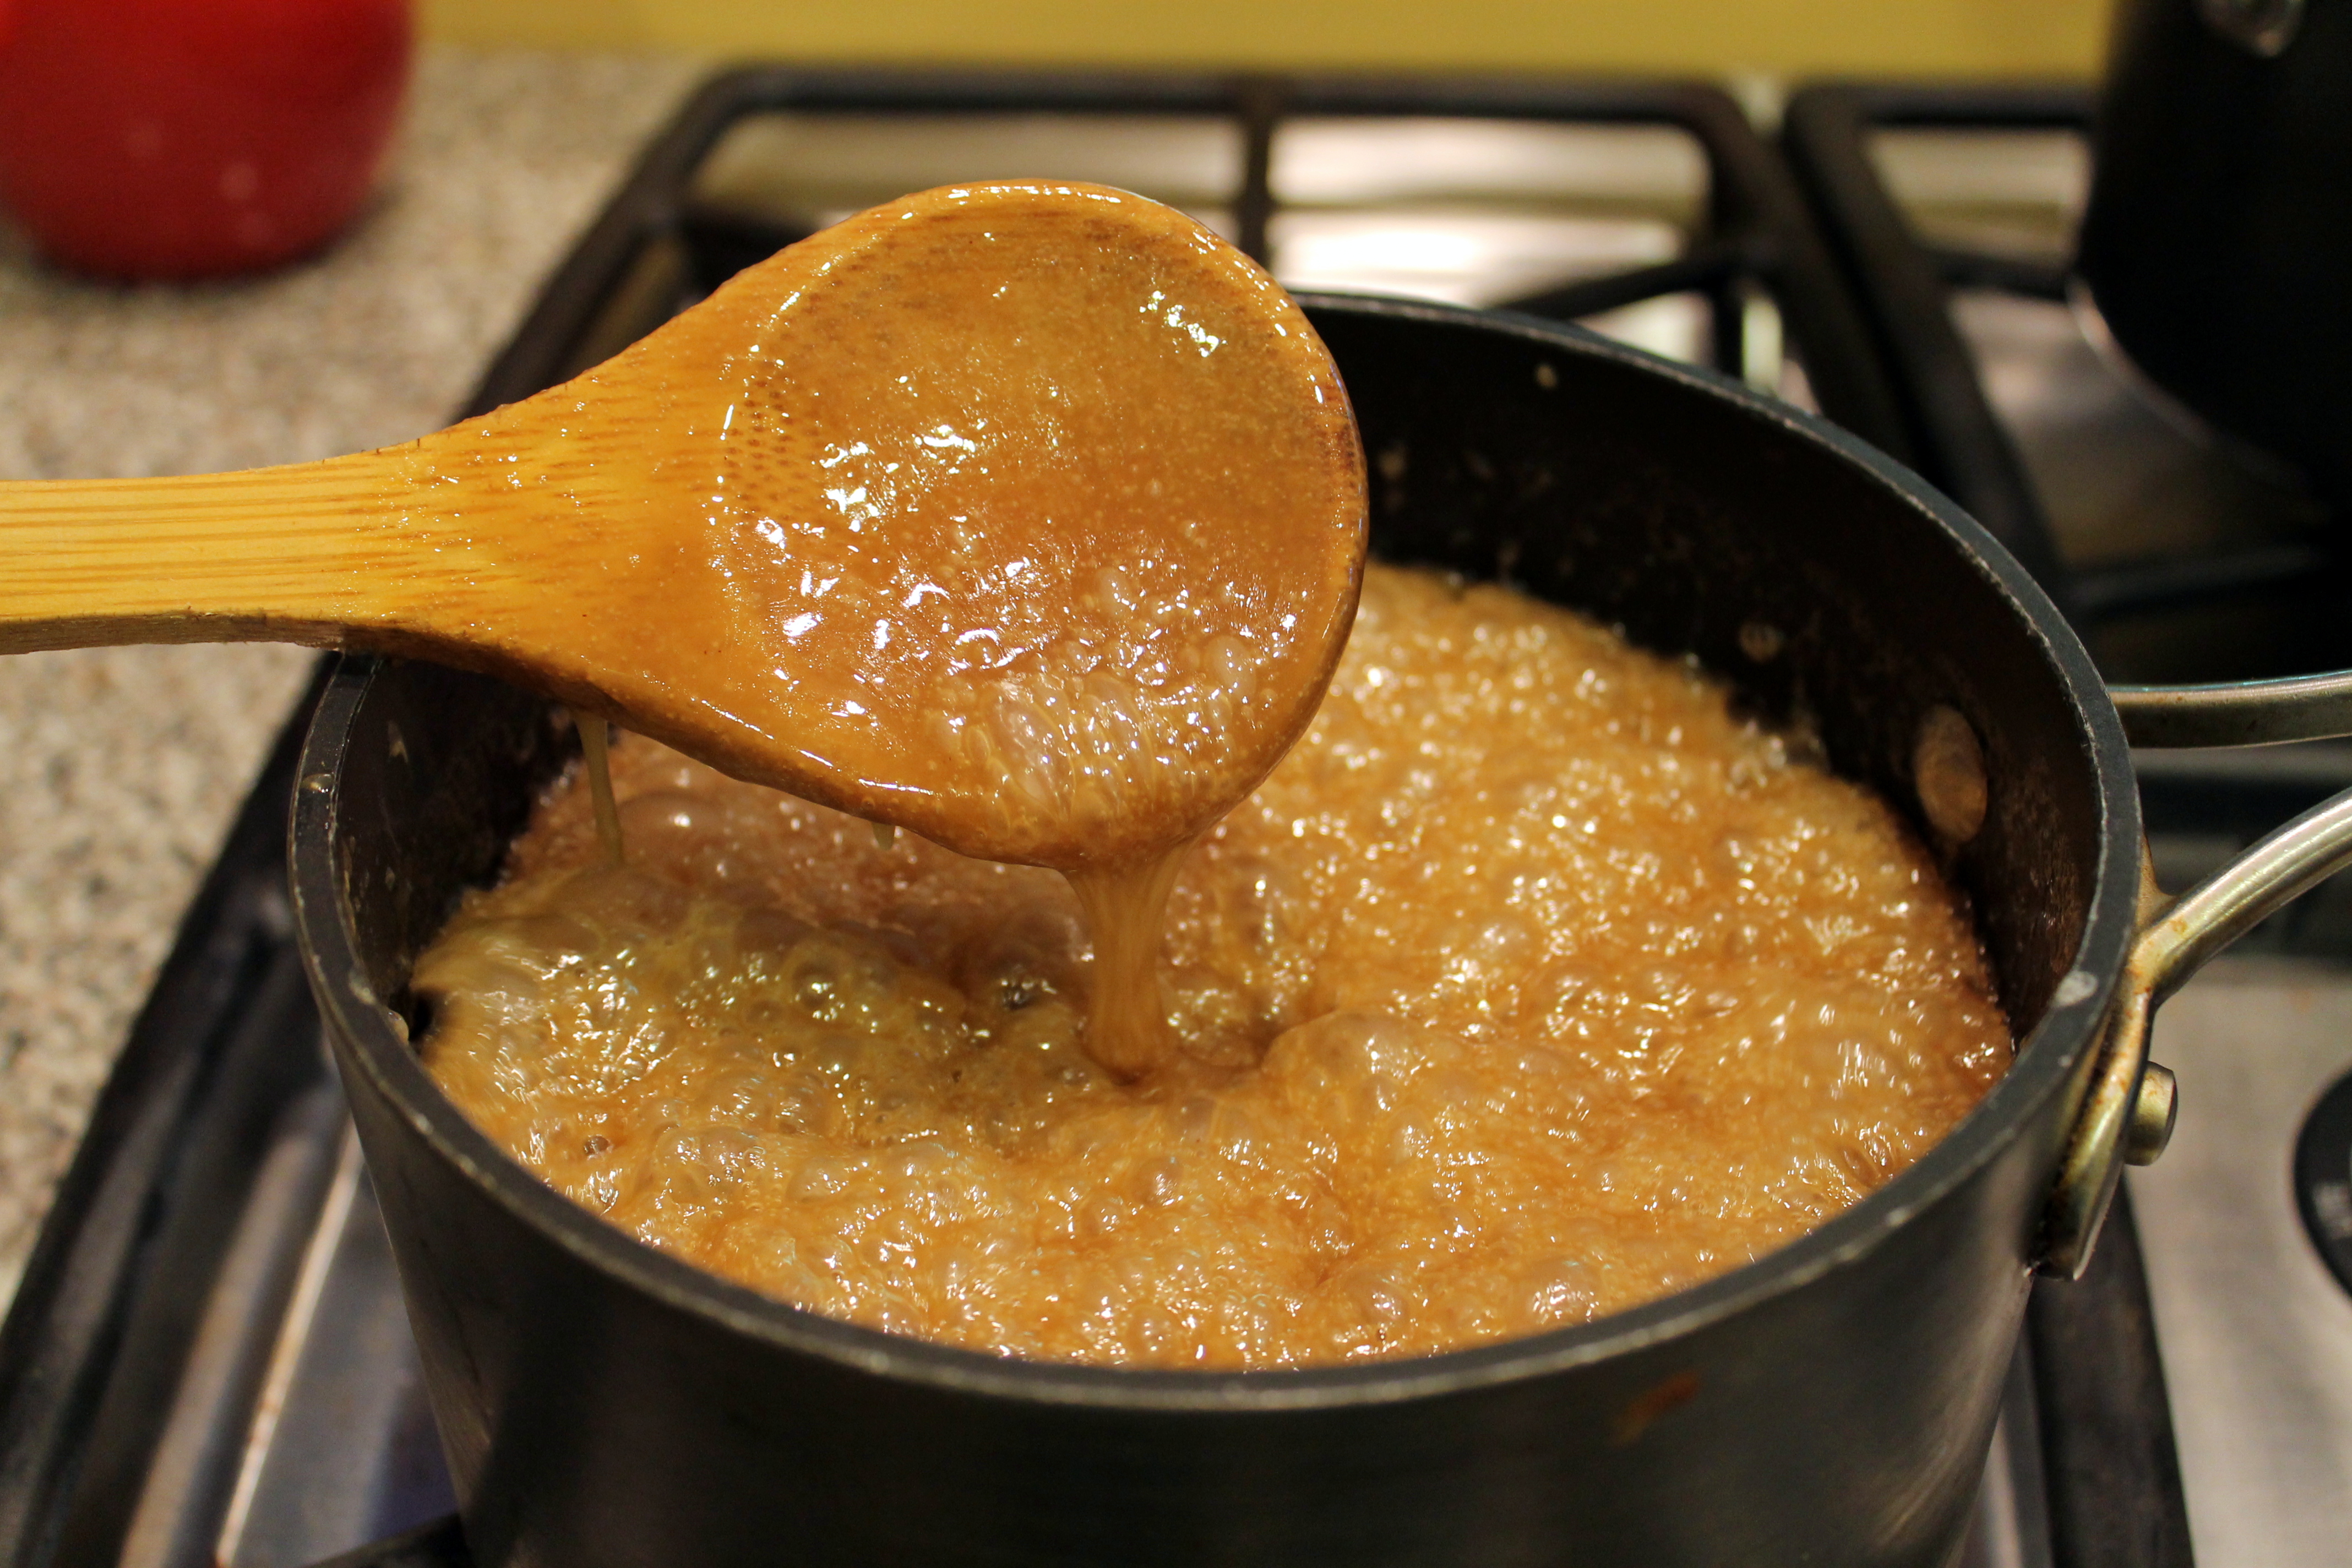
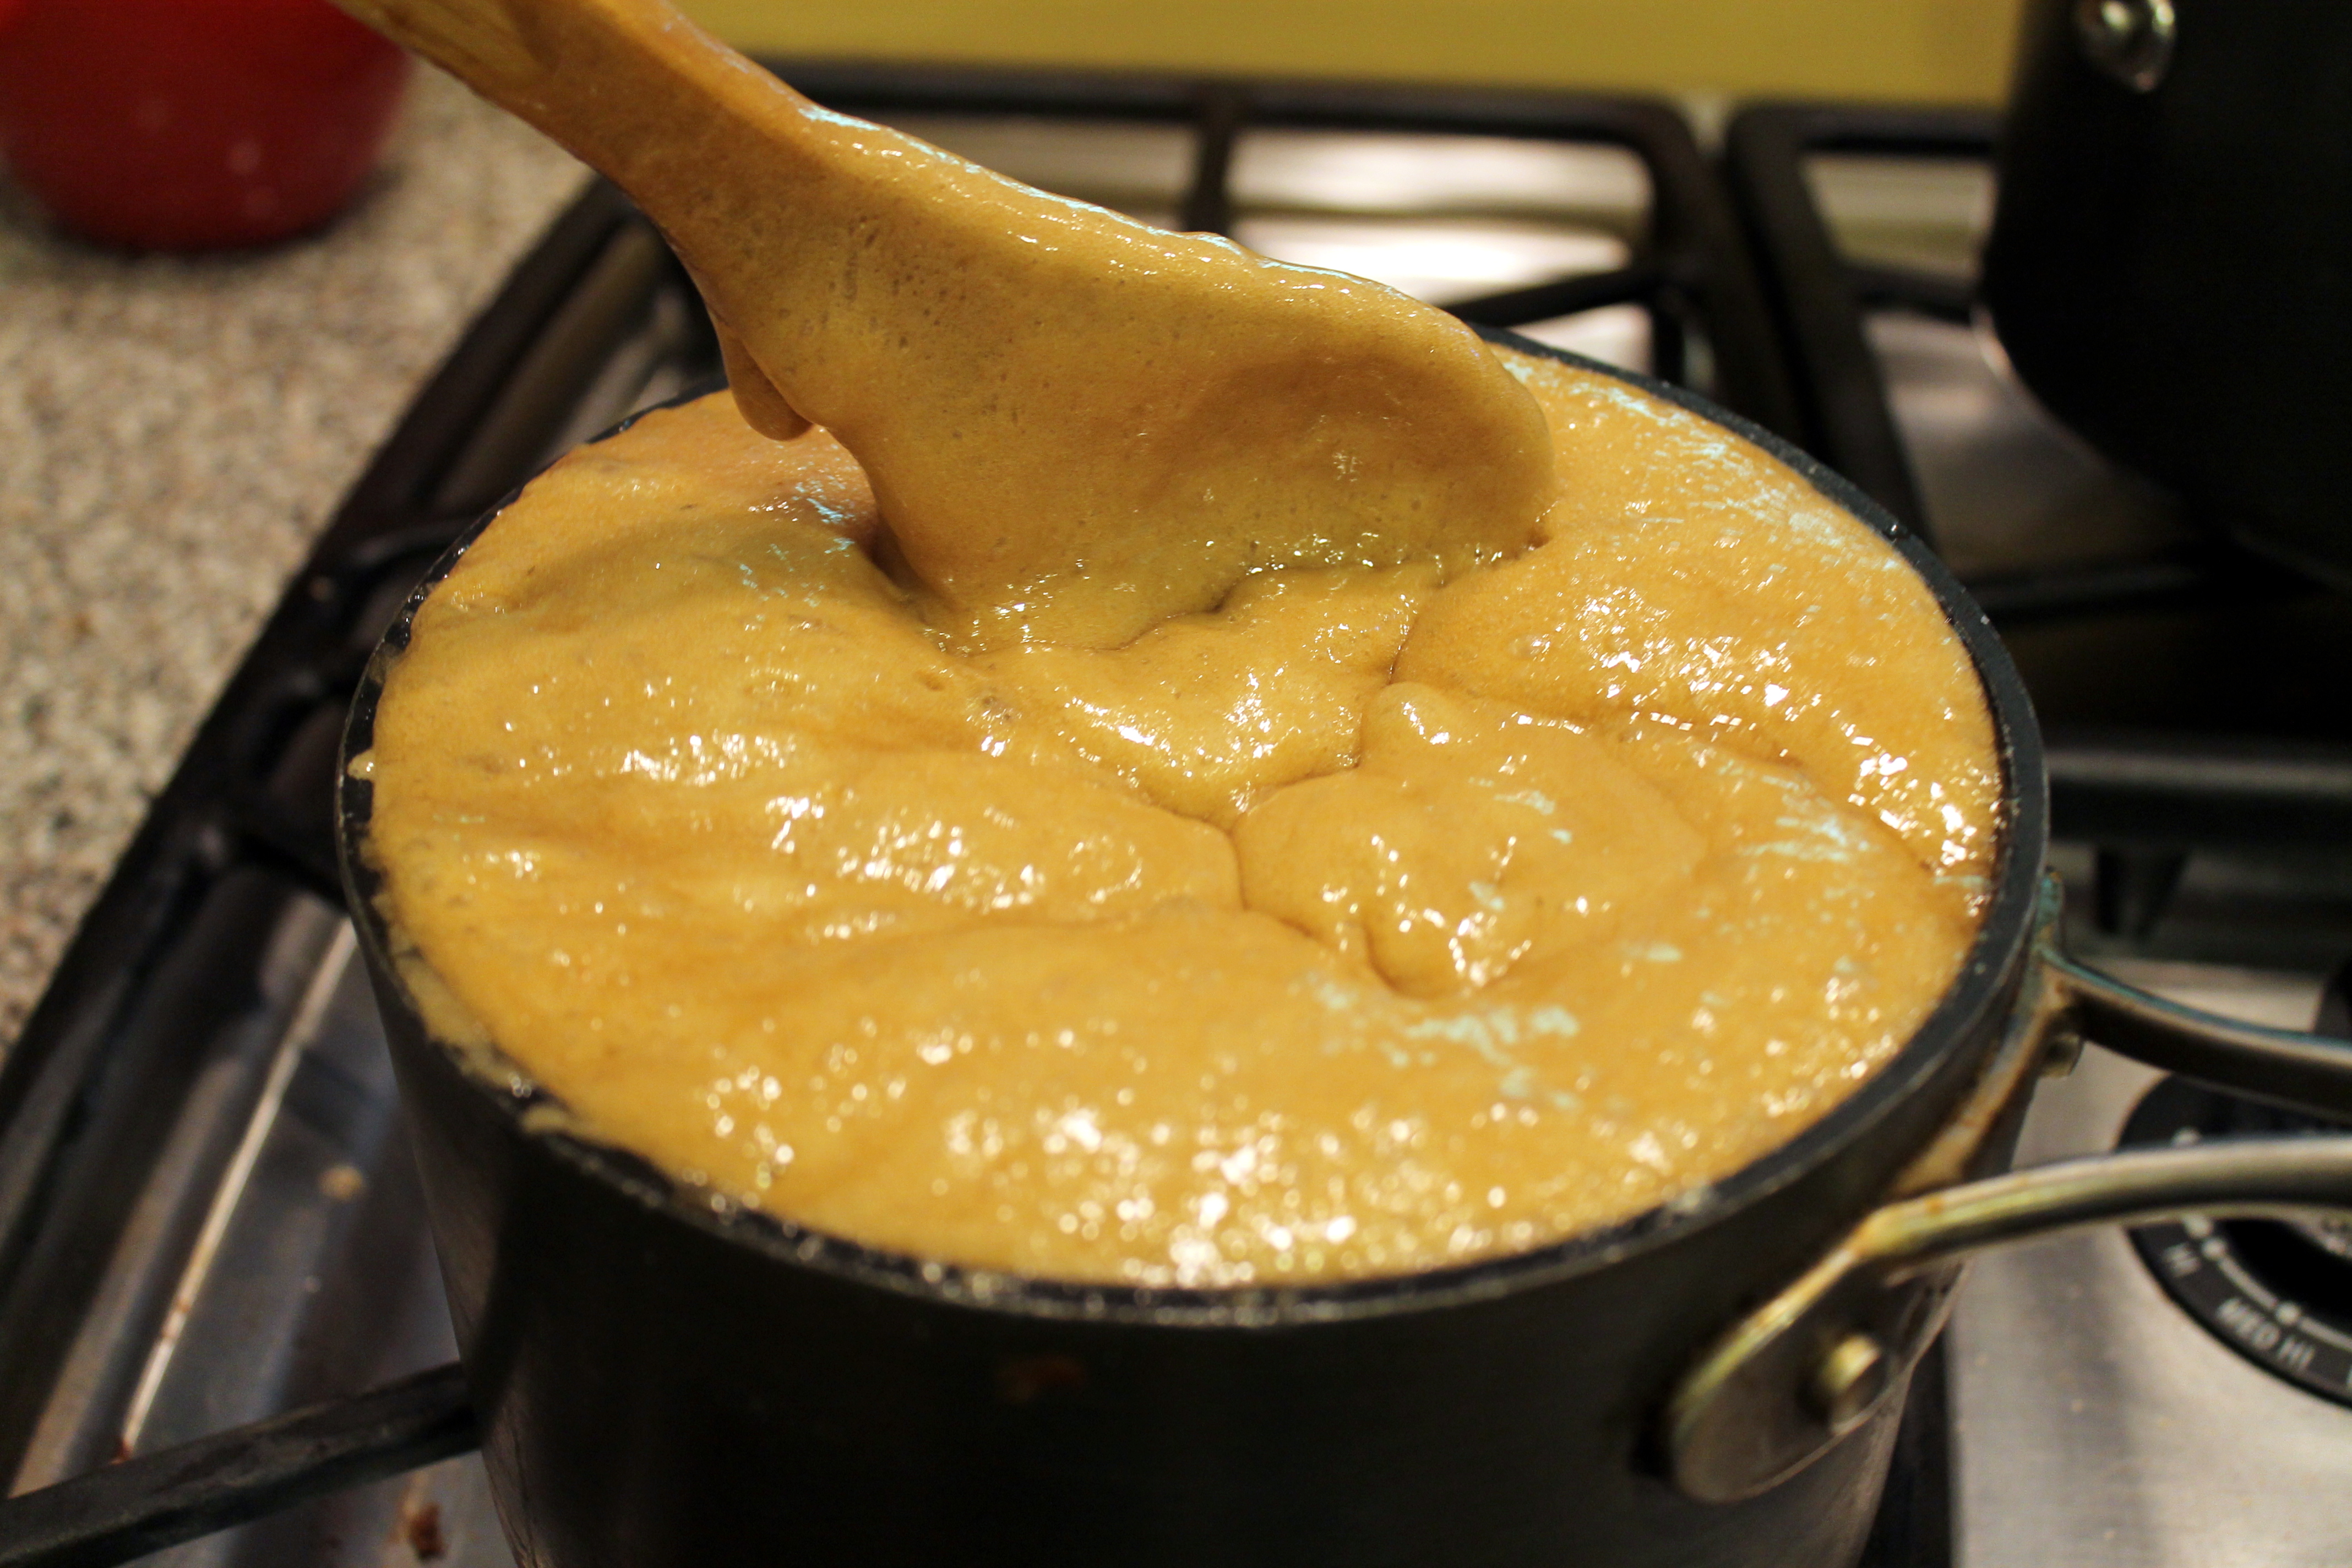
  1. Cream together butter and sugars; mix in egg and vanilla.
  2. Add flour, graham cracker crumbs, baking soda and salt. Mix until smooth.
  3. Stir in chocolate chips and chocolate chunks until well combined.
  4. Drop by heaping tablespoons onto cookie sheet about 3 inches apart.
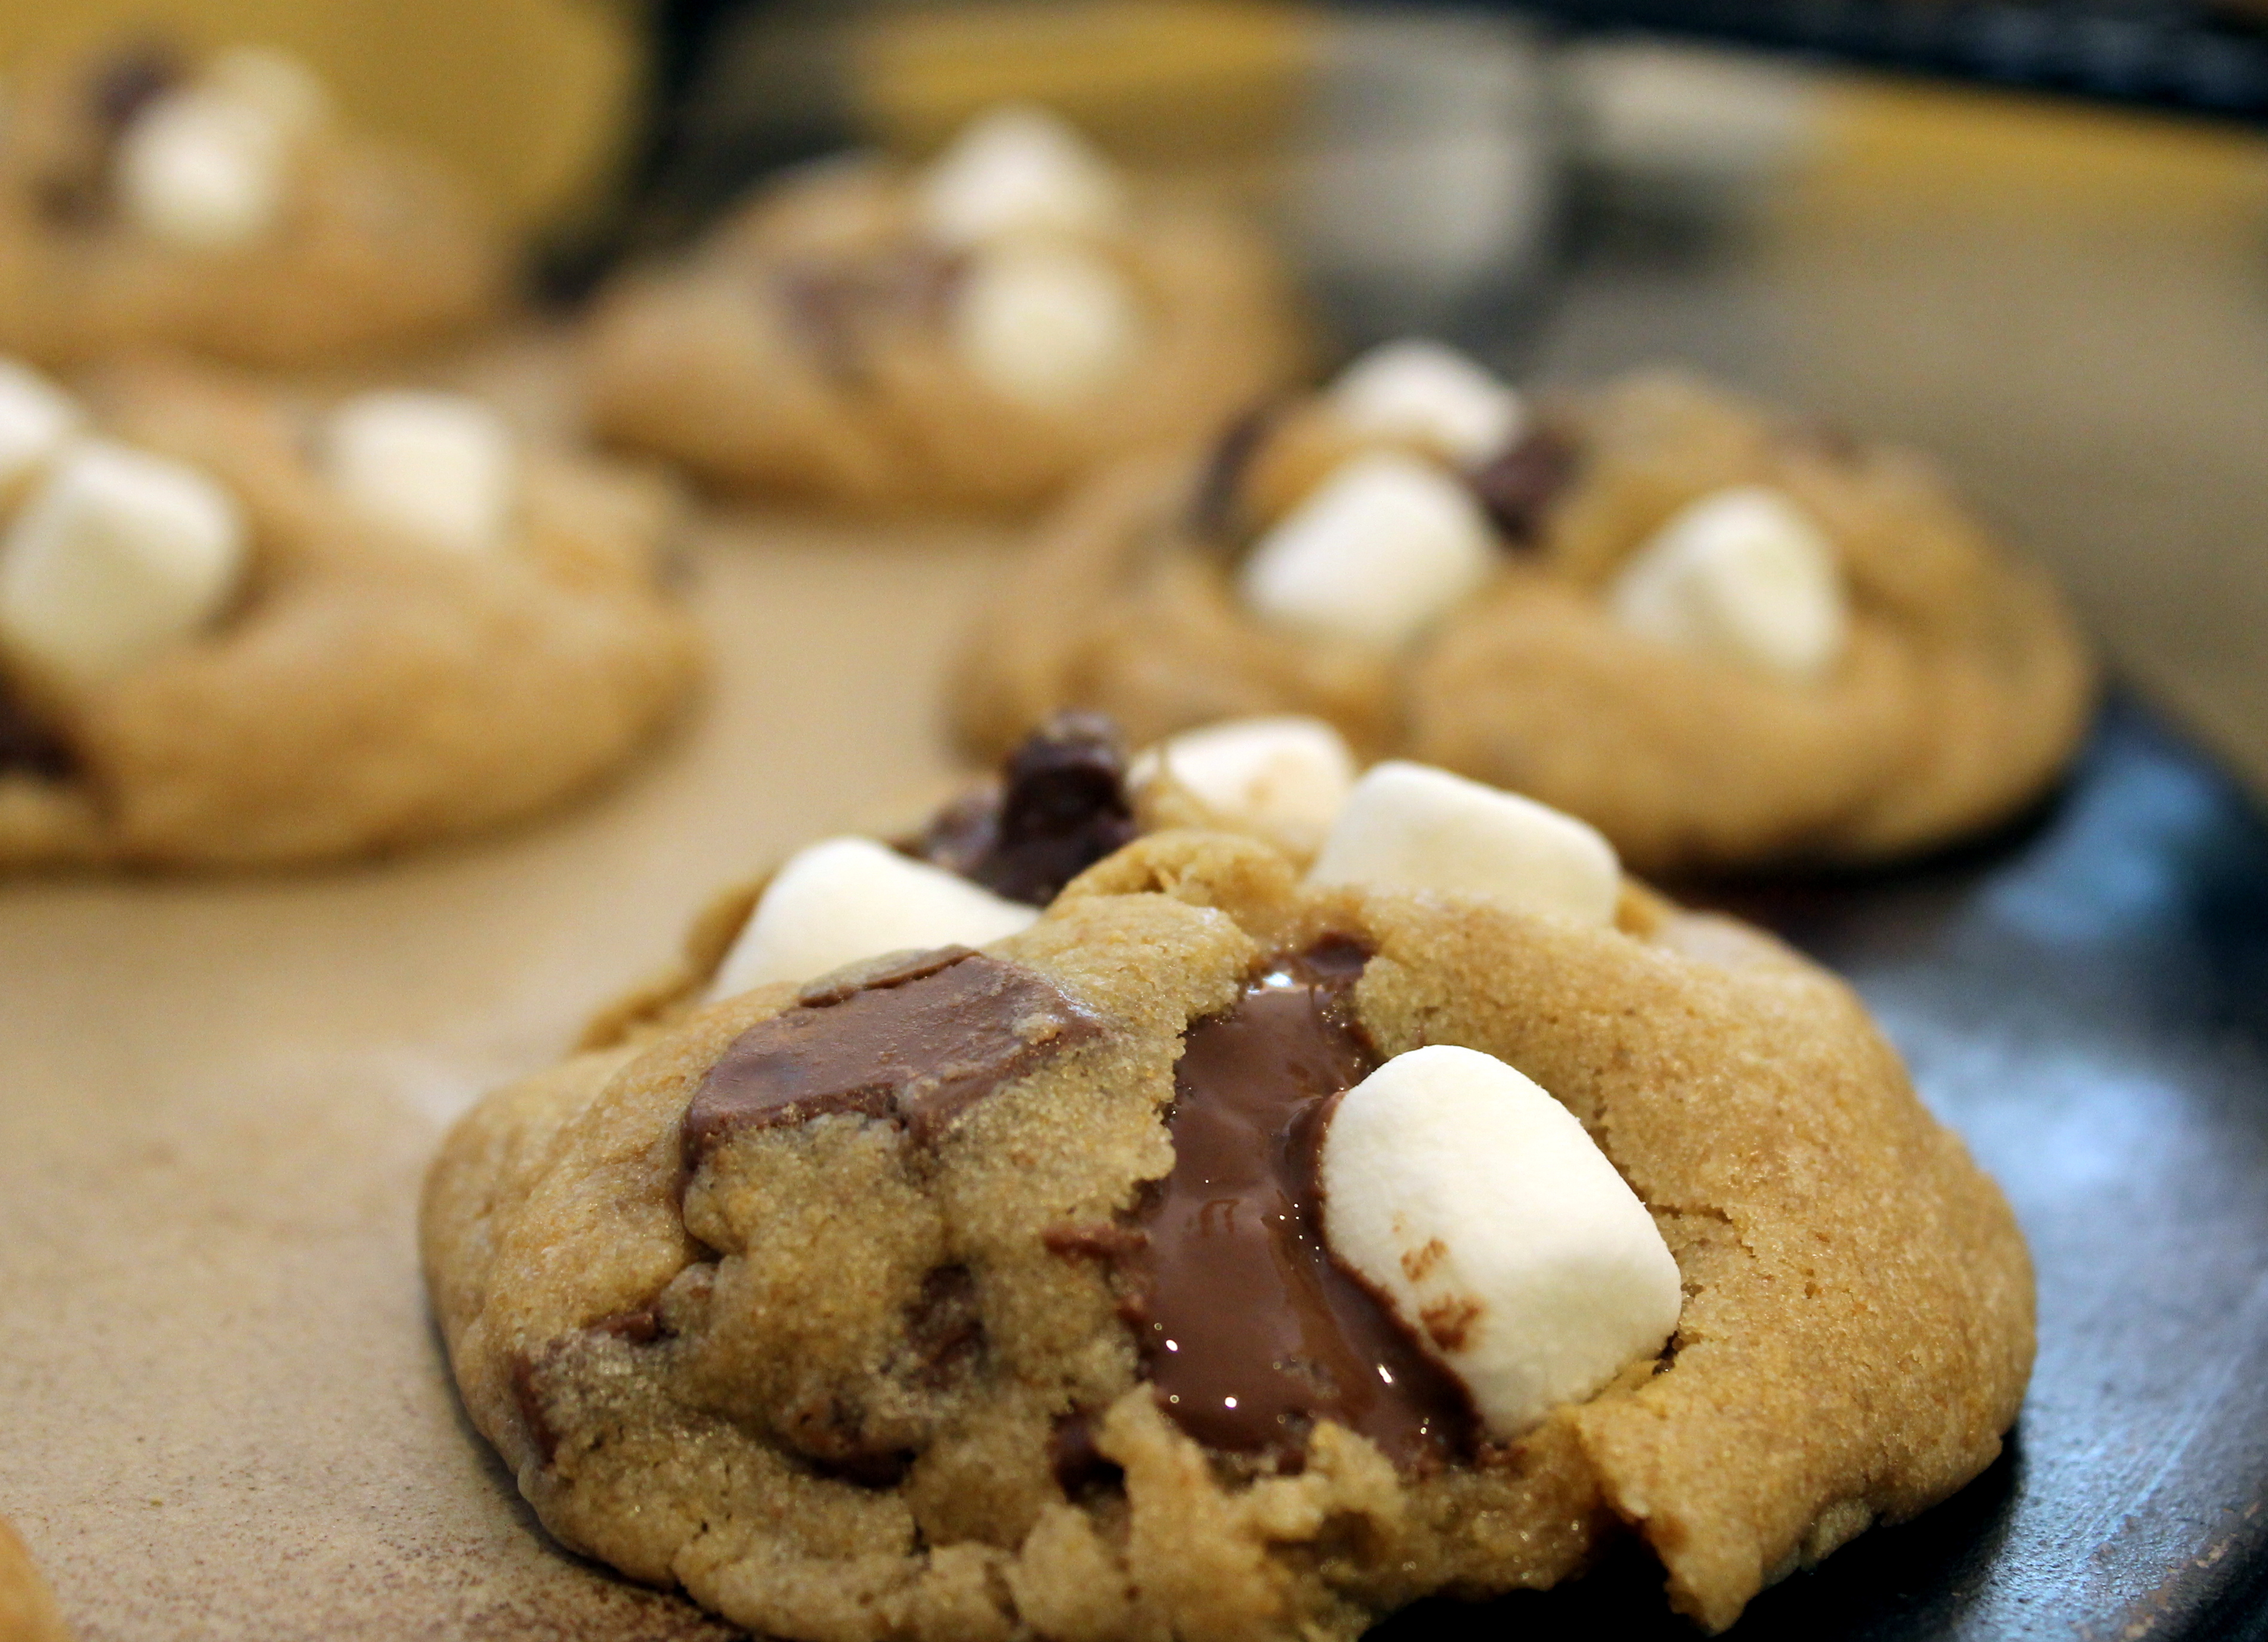
  5. Bake at 375 degrees for 8 minutes. Remove and quickly press marshmallows into cookies. Return to oven and cook until done, about 3-4 minutes

smore 4
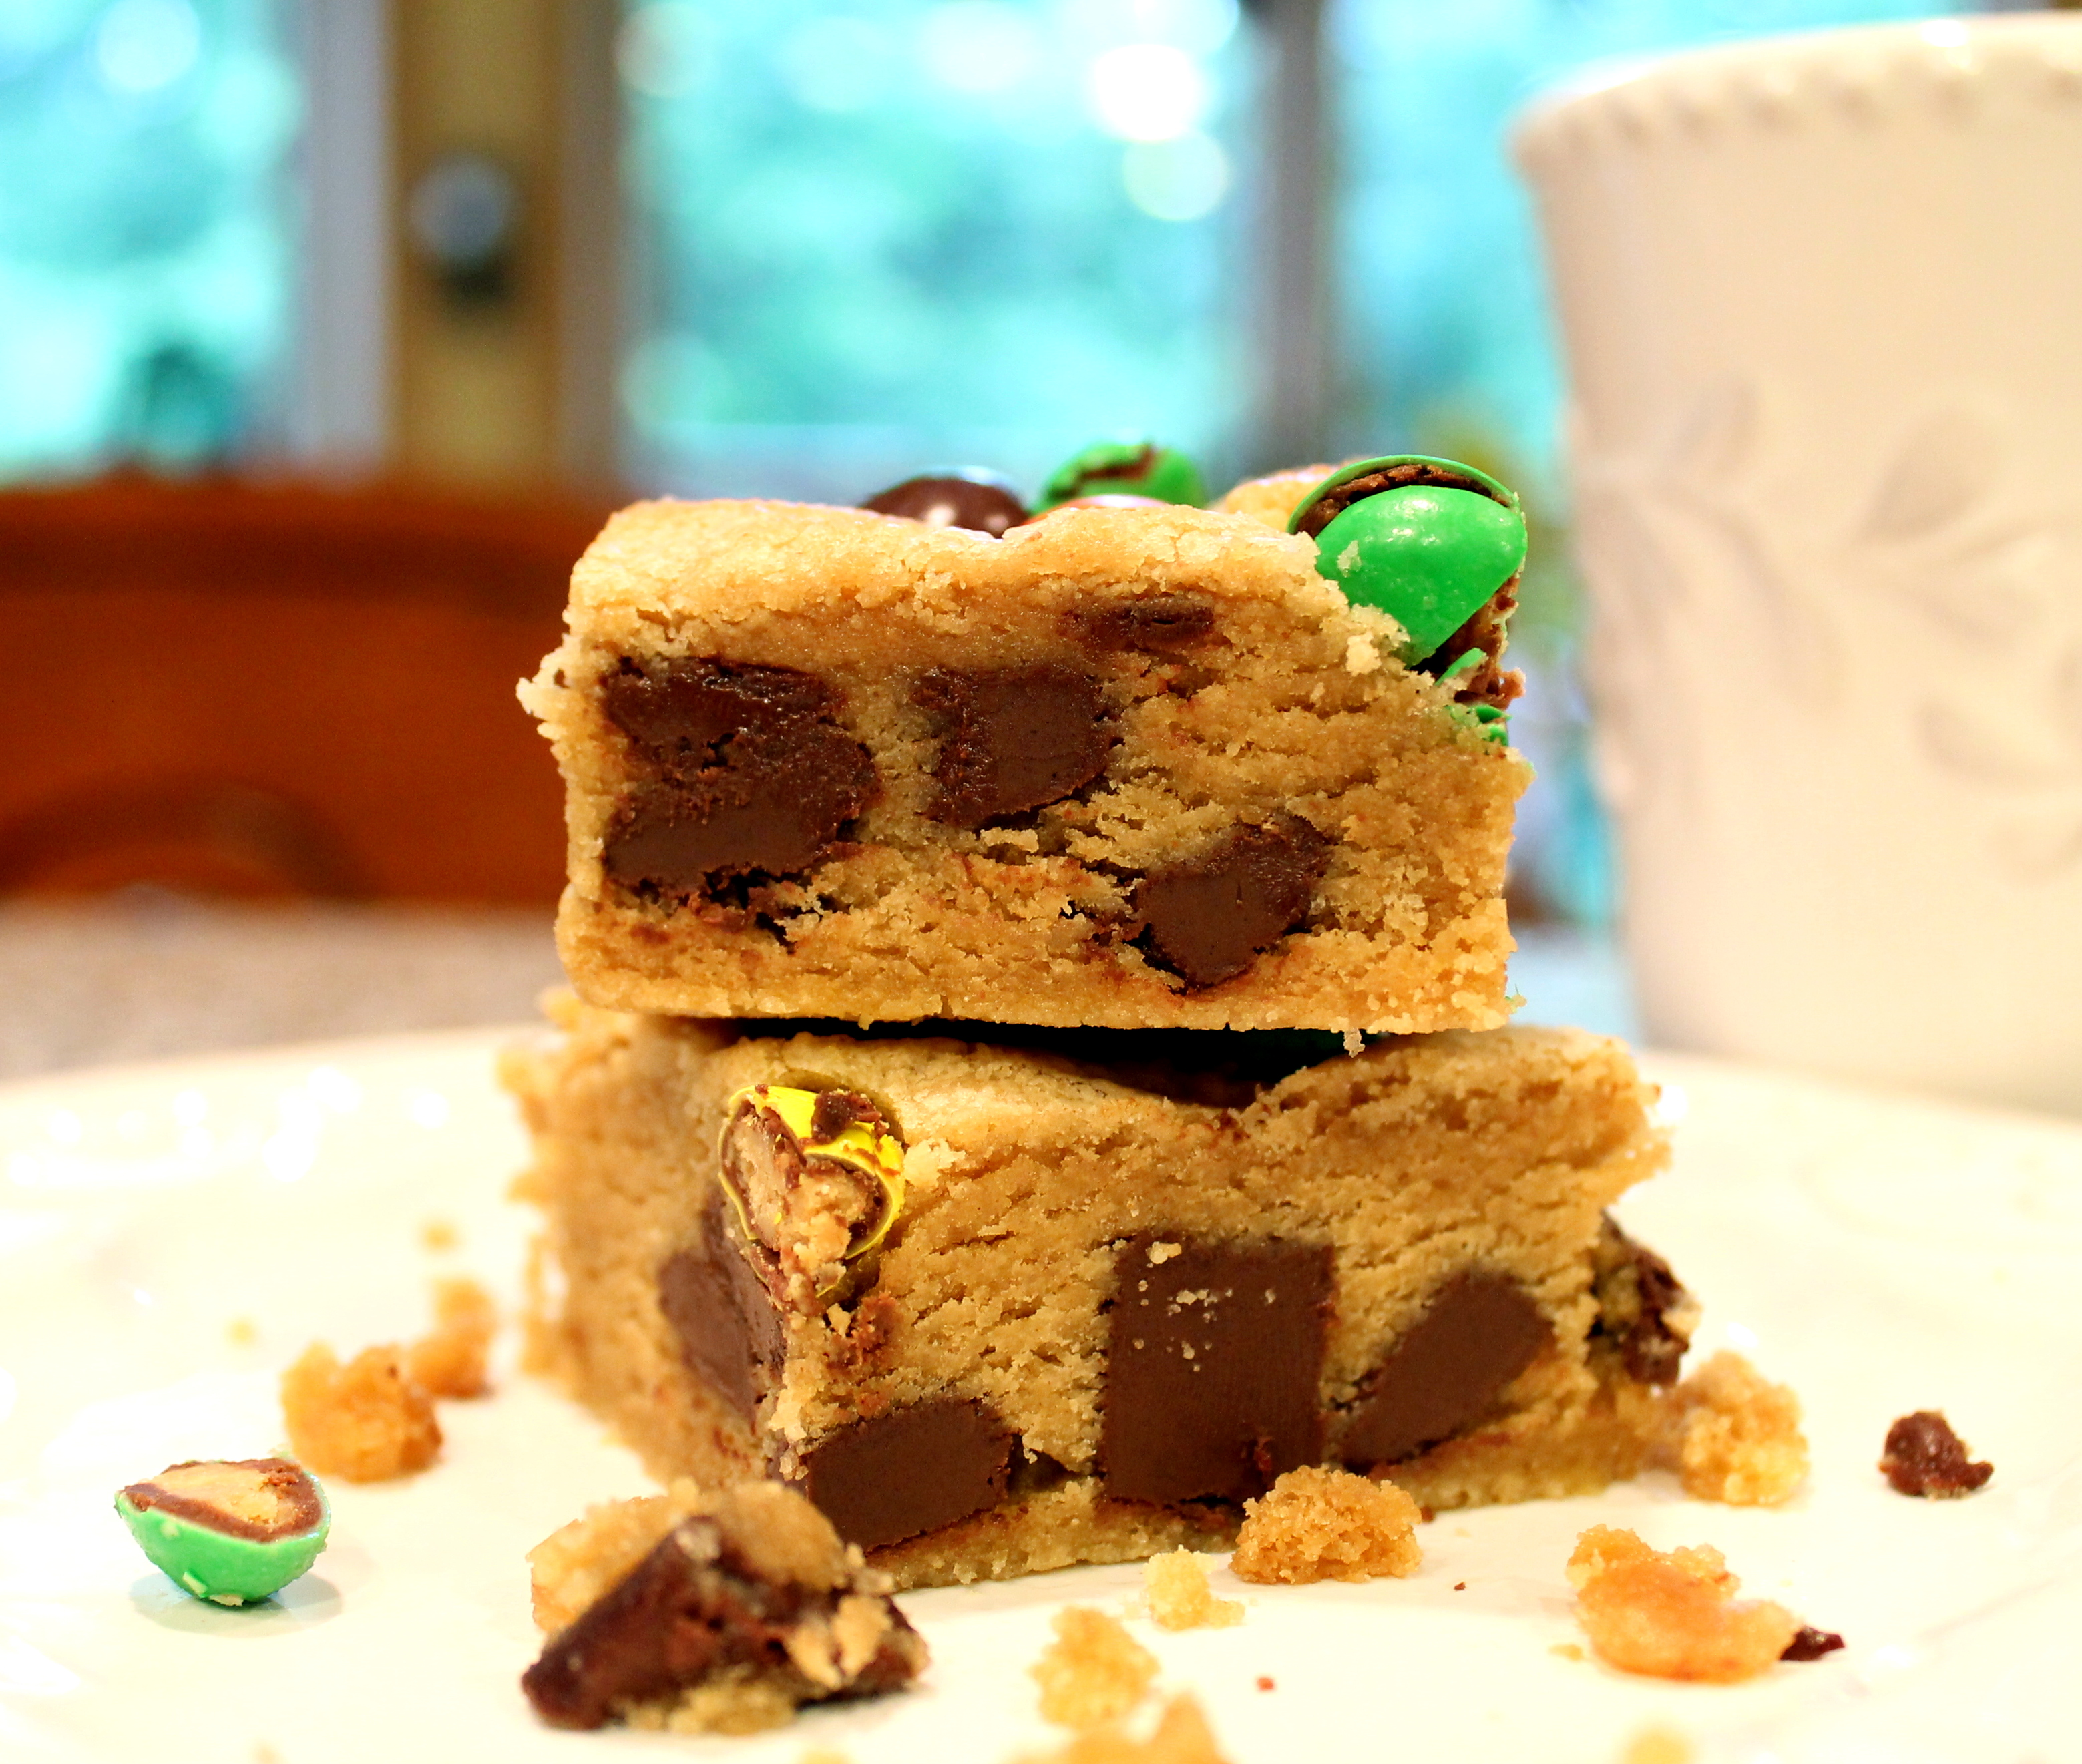
If you like s’mores, you will love these cookies.

I’ll be making these for Jackie’s wedding – most likely AGAIN – as I’m not sure these will last……

Cheers and Hugs,

Jodi

The BEST Ever Banana Bread

bbcoverI used to have the best banana bread recipe years ago from Aunt Francie.  (Aunt Francie is Marty’s 91 year old Aunt – who happens to be engaged and living with her 92 year old boyfriend – a random, but oh so cute piece of information 🙂 )

Somehow I seemed to have lost it, so I’ve been trying various banana bread recipes on the web every time I have a few over-ripe bananas to spare.

bb1

Sadly – none have even come close to comparing…

UNTIL NOW.

O… M… G…

I found a recipe for Extreme Banana Nut Bread and read the various comments and reviews.  Seemed everyone LOVED it, but tweaked it this way or that.

bb6

So I set out to put this extreme banana bread recipe to the test with my own little touches, and I have to say…  THIS IS IT!

Dare I say even better than Aunt Francie’s?!

I made it three different ways for my first experiment.

bb5

I divided the recipe into three separate batches.  I added pecans to one batch, cinnamon chips to another batch, and kept the last batch plain.  Then I made some loaves and some muffins.

bb3

This bread is dense and sweet with crispy edges and a buttery, rich banana taste like no other.

bb4

One of the new tricks I tried that made it even EXTRA AMAZING was  greasing the pans with shortening and then coating with cinnamon sugar instead of the usual flour dusting.

WOWSERS!  On top of the banany goodness, imagine a crust that taste like the cinnamon toast of our childhood days. OUTRAGEOUS!!

This bread doesn’t raise very high, and it isn’t fluffy or light in any way, shape or form.  It is more rustic looking as it stays dense and ooeey gooeey.  Some of mine ran over the edges and got extra crusty, but it only added to the awesomeness.

bb7

Not the most perfect loaves of bread to look at, but I dare you to try it and tell me if you’ve ever tasted better.

This is my new GO TO recipe for Banana Bread.

It is truly Extreme.

It is truly the BEST BANANA BREAD EVER.
—————-

Best Ever Banana Bread Recipe:

Ingredients:

1 cup white sugar
1 cup brown sugar
1 cup butter
4 eggs, beaten
1 Tbsp vanilla
2 cups flour
1 tsp salt
2 tsp baking soda
1 tsp baking powder
2 cups mashed over-ripe bananas
Optional: Pecans or Walnuts or Cinnamon Chips
Sugar and Cinnamon Mixture for coating pans

Preheat oven to 350 degrees F. Grease and cinnamon sugar coat pans (do the same way as you would with flour).

In mixer, beat together sugars and butter until creamy. Add beaten eggs and vanilla, and continue creaming until well beaten.

Combine flour, salt, baking soda and baking powder together, then add to creamed wet mixture, beating well with electric mixer.

Once that is all well combined, beat in the mashed bananas.

If using nuts or cinnamon chips, fold those gently in last.

Fill pans 3/4 full. Bake until toothpick inserted comes out clean. Let loaves cool in pan for about 5 mins, then remove to cooling rack to finish cooling.

Once cool, place in large Ziploc bag or wrap in aluminum foil and refrigerate.

BEST served if refrigerated for at least 2 hours first.

Large loaf pan needs to bake about an hour.
Mini loaf pans approximately 30 minutes.
Muffins approximately 20 mins.

WARNING             WARNING                 WARNING
This recipe is NOT low-fat and may become HABIT FORMING!

ENJOY!

Cheers and Hugs,

Jodi


Making Bagna Cauda with Oh Rob

Bagna Cauda

Sharing a Communal Pot of Warm Bagna Cauda, Crispy Vegetables and Homemade Chewy, Crusty, Ciabattaa with family and friends

Oh the fun we had this past weekend with family and friends; and as promised, I wanted to share a special treat with you today.

My buddy, “Oh Rob,” as I affectionately refer to him, was in the house, and we made some Bagna Cauda to take to a picnic.

I asked if I could photograph him making it to share on my blog, and in true Oh Rob fashion, he graciously obliged.

OR wine

Some of you might ask – “What the heck is Bagna Cauda?”

Others might say – “Ooooohhhh how I love that stuff!!!!”

Now don’t be scared off by the <ahem> low-calorie, low-cholesterol, low sodium ingredients…

You balance that by eating it with crisp, crunchy, healthy, fresh vegetables….

…..or crusty loaves of chewy bread (like the homemade Ciabatta we had!).

Now – Oh Rob is Italian – and oh how he loves being Italian!  So you guessed it, Bagna Cauda is an Italian recipe.

Bagna Cauda is a warm dip served and eaten similar to fondue.  It is made with garlic, olive oil, butter, anchovies, and Rob’s “secret” ingredient”  (making this recipe a silver medal winner in a local bagna cauda competition!).

Bagna Cauda is best served in a large pan in the center of the table for communal sharing.

Are you ready?

OR1To get in the mood, Rob first meticulously secures his Ivy Newsboy cap atop his head and spritzes himself with a bit of romantic, manly scented cologne.

OR1aHe then chooses his favorite Italian music selection from his iPhone…

OR2and pours a robust glass of dry red wine.

The mood is set.  Can you feel it?

OR Garlic1Now Rob begins the chopping of fresh garlic….

OR Garlic2Trying every sharp knife and the good old Pampered Chef Food Chopper, Oh Rob finely chops the garlic, and adds it to his electric skillet that has been coated with a thin layer of olive oil.

OR Garlic3After sautéing the garlic for a few minutes in the olive oil,

OR AnchoviesIt is time to test the anchovy filets.

OR Anchovies2Per Chef Oh Rob, Bagna Cauda cannot be made without first sampling an anchovy filet on a cracker…

OR Anchovies3Oh Delizioso!  We sampled on a sea salt flatbread cracker.

OR Anchovies5After passing our taste test, Oh Rob added two cans of anchovy filets with the olive oil they are packed in, smashing them and integrating and infusing them into the olive oil and garlic.

OR Anchovies 01

Per Oh Rob – “Roland” is the best.  Around here, these cans sell for about $7.95 a can.  And he gets them at our local Italian Store, Labriolas.

OR butter3Next we add a……. yep – I have to admit – a pound of butter.

OR butter2

As Oh Rob adds the butter, he repeats the words of his wise Momma over and over – “Do NOT burn the butter Bobby.    Do NOT burn the butter!”

Then it is time to add the Brugnoli family secret ingredient that Oh Rob gave me special permission to share.

OR Sour Cream12 – 3 heaping spoonfuls of sour cream get whisked in to finish this delicacy off.

OR VeggiesTime to chop the veggies.

Notice our special helper and floor cleaner-upper, Mikey, is standing guard ready to help while Oh Rob cuts up crunchy stalks of celery to make great scoopers of Bagna Cauda,

OR peppersAnd then some sweet red and orange and yellow peppers,

OR cabbageand chunks of cabbage.

Any firm, crisp vegetable you love tastes delicious dipped in bagna cauda.

Bagna CaudaAnd oh how wonderful it was communally sharing all this deliciousness with friends while sipping sangria.

Thanks for sharing Oh Rob, and thanks for a fun picnic Gary and Cindy.   Great to see you Kathleen and Jack, and so glad to finally meet you Sally!

Mangia bevi e sii felice!

Eat Drink and Be Merry!

at Life In Between.

Cheers and Hugs,

Jodi


Rhubarb Custard Pie (& Secrets to Successful Pie Crust)

rpcover

Rhubarb Custard Pie is not a common one in circles I’m in, but this was a favorite of Marty’s family, and has become a favorite of ours too.

The recipe is Marty’s mom’s.  She taught me how to make it – and how to make a simple, but tender and flaky pie crust.

Rhubarb Custard Pie was always one of Pap’s (and IS Nick’s) favorite pie I make.  For Marty, it is not complete without a scoop of vanilla ice cream on top.

rp slice

Many folks I know like to mix rhubarb with something else sweet, like strawberries.

Not here… sliced chunks of the tart, crimson, tangy rhubarb stalks

rp 1

are a perfect contrast to the creamy, sweet, simple custard to make this a dynamite summertime pie.

rp 11

We took it to a picnic this weekend, but of course I had to make one for home too.

Here is my recipe in its original form passed on and lovingly stained from my mother-in-law, who taught me so much about baking and cooking and canning… and how sometimes good things are messy.  🙂

rp 17The recipe is short and sweet.

I think it takes me longer to clean up than it does to make it.

You may notice the recipe does not include how to make the pie crust, so here is our “secret family recipe.”

Note that I was making 6 crusts in these photos (for 3 pies), but my recipe will be for one crust.  You simply double or triple or quadruple, etc. as necessary.

rp 2

For 1 pie crust, mix 1 cup flour, a heaping 1/3 cup Crisco shortening, and a dash of salt in a bowl blending with a pastry blender till crumbly.

rp 3Add enough cold water to just moisten and be able to form a ball (about 1/3 cup)

rp 4

and put on a floured surface to roll out.rp 5Important:  Do not overwork the dough.  This is NOT bread dough.  It shouldn’t be “kneaded.”  The more you work it, the tougher it will become.  The less you play with it, the more tender and flaky it will be.

rp 6If you are doing more than one crust, simply divide the dough into that number of balls and set aside all but one to roll out.

rp 7I like to use a heavy marble rolling pin to gently roll out the pie dough – working it as little as possible and turning over a few times to keep from sticking to the rolling pin and surface.

rp 8Lift it from the surface to your pie pan (I prefer baking stones) by folding it in quarters, placing in the pan,

rp 9then unfolding and pinching edges

rp 10and add filling.

For Rhubarb Custard Pie, I like to make a lattice crust, so simply roll out another ball of dough and cut into 8 strips.

rp 13Place 4 on the pie in one direction, then weave by lifting two alternating and place one the opposite direction, then lifting the other two, and repeating.

rp 14

A finishing touch is to brush with some cream (or melted butter)

rp 15and sprinkle with sugar.

rp 16

Lastly, cover the edges of the pie with strips of aluminum foil to prevent the edges from getting overbaked or burnt.

rp 18Bake and enjoy!

And with those leftover scraps of dough, Marty always loves with I brush them with a little cream or melted butter and sprinkle with cinnamon and sugar and bake into yummy cinnamon stick treats.

IMG_0061Hope you and yours will enjoy this pie as much as we do!

rp19Cheers and Hugs,

Jodi


Crock Pot Hawaiian BBQ Chicken Wraps with Pineapple Slaw

Hawaiin BBQ Chicken Tacos with Pineapple Slaw 2One day last week, I was surprised to get an email from Nick sending me a link to a recipe he saw on Host the Toast’s Blog for Crock Pot Hawaiian BBQ Chicken Tacos with Pineapple Slaw.  (Who knew he read recipe blogs?!?)

Anyway – he somehow charmingly hinted that it would make a great dinner sometime.

Well – woohoo!  Looked YUMMY to me, and I am always up for a new recipe.

I was excited that he wanted me to try something new and different.

So last night I made these yummy wraps (our version of the taco) – because – hey – Nick loves any meal that can be wrapped in a flour tortilla and eaten with one hand.

srirachaAnd we both love anything zipped up with spicy Sriracha sauce.  (In this case both the chicken and the slaw!)

For those unfamiliar with Sriracha – a little goes a long way – so BEWARE faint of spicy taste bud fans – and use sparingly if you are a bit wimpy about zippiness.

The chicken is so tender and juicy and spicy and sweet and yummy.

It could be eaten as is or on a bun or even over some steamed rice (I happened to make a yummy pan of Basmati Rice Pilaf as the “side” dish last night).

And the slaw – oh so yummy and bright and fresh – and such a perfect blend of crunchiness and sweet and zippy and tangy.  Placed atop the BBQ chicken on a flour tortilla with a generous sprinkling of shredded cheddar cheese – Oh my!

Pineapple SlawI’m guessing some of the more unusual ingredients from the original recipe  (like coconut milk and rice vinegar) can be omitted or substituted.  (In fact, I did purchase the coconut milk – for the first time – but substituted red wine vinegar for the rice vinegar).

Be creative – don’t worry if you don’t have all the ingredients – mix and match – plug and play – substitute – omit – follow your own taste buds.

So…

Happy to report that Nick LOVED it…

I loved it…

Marty liked it – a lot – (can’t give it a “LOVE” though –  he’s always been a little weird about fruit mixed with savory  – whatever – be boring then)

Here is the recipe for how I made it.

Enjoy!

Chicken:
3 lbs boneless skinless chicken breast
1½ cups pineapple juice
½ cup honey BBQ Sauce
1/4 cup honey
⅓ cup soy sauce
¼ cup red wine vinegar
¼ cup brown sugar
2 Tbsp minced garlic
1 tsp ginger
2 Tbsp sriracha sauce (this stuff is POTENT – so only use 1 Tbsp if you’re a sissy!)

Flour tortillas
Shredded Cheddar Cheese

Pineapple Slaw:
½ small purple cabbage, sliced thin
¼ medium green cabbage, sliced thin
¼ fresh pineapple, cored and diced
½ small red or Vidalia onion, diced
3 Tbsp chopped fresh cilantro
¼ cup coconut milk
1 lime
1 Tbsp sriracha
1 tsp brown sugar
Salt and Pepper to taste

Whisk together pineapple juice, soy sauce, BBQ sauce, vinegar, garlic, ginger, brown sugar, and sriracha.
Place chicken breasts in crock pot and cover with the sauce mixture.
Cook on low for 7-8 hours.

Combine and toss all of the slaw ingredients in a large bowl. Cover and refrigerate until ready to serve.

After the chicken is cooked for 7-8 hours in the crock pot, shred it with a fork and let it absorb the sauce for another 30 minutes or more.

To eat, place a serving of chicken on the flour tortilla, top with pineapple slaw and a generous sprinkle of shredded cheddar cheese. Roll it up, and enjoy!

Hawaiin BBQ Chicken Tacos with Pineapple Slaw 2Cheers and Hugs and a zippy Aloha!

Jodi

Peanut Butter & Chocolate Chunk Cookie Bars

Peanut butter chocolate chunk cookie bars

Does the name just say it ALL?!?!?

PEANUT BUTTER CHOCOLATE CHUNK Cookie Bars

Oh My!!!!    I first saw this simple recipe on the AverieCooks Blog.  Have you seen Averie’s blog yet?  It’s one of my faves.   I think she could take a picture of a piece of cardboard, and I would want to eat it!

Oh #AverieSunshine – I think you are my hero! (Check out her amazing BLOG here.)    I can only aspire to be like Averie Sunshine (sigh).

 I wonder if it would help if I had a cooler name…??!!  

Maybe I could use Marty’s “pet” name for me……  Do you think Gertrude PIA Wisenheimer has a cool ring to it??!!??  (and if you are wondering… PIA is an acronym for Pain in A$$). 

I guess that’s what I get for calling him Merv.  🙂

IMG_9346

Anyway – We were going to a barbeque picnic Saturday – one of those parties where everyone brings something to share.  (with our buddies from John’s Bar btw)
Marty suggested I make a dessert.   Seems I’m always the dessert lady.
Too bad I don’t L O V E baking!

So I remember these amazing looking cookie bars from AverieCooks, and decided that is what I was making.

But I had to somehow “Jodi – ize” them.   Hmmm…. ????  What could make a peanut butter chocolate chunk cookie bar any better??  I know!  A sprinkling of Peanut Butter M&Ms on top!  Am I a genius or what??!!

IMG_9336

This recipe is seriously so easy and basic.  You probably have all the ingredients on hand already (if your pantry looks anything like mine).  You really don’t even need a mixer, and they only take a few minutes to mix together and 20 minutes to bake.

IMG_9311Note how I measure my peanut butter….  teeheehee!

So here’s the recipe:

1 cup (2 sticks) butter, room temperature
2 eggs
1 1/2 cups packed light brown sugar
1/2 cup granulated sugar
2 Tbsp vanilla
1 Heaping cup creamy peanut butter
2 1/2 cups all purpose flour
1 tsp baking soda
Pinch of salt  (did you know a pinch is 6 shakes?  Trivial Pursuit Question!)
1 Bag Nestle Semi Sweet Chocolate Chunks

Garnish:  1 cup (ish) Peanut Butter M&Ms

Preheat oven to 350F. Line a 13×9 baking pan with aluminum foil, spray with cooking spray.

Mix butter, egg, sugars, vanilla.

Stir in the peanut butter.

Add the flour, baking soda, and salt and stir until just incorporated.

Stir in chocolate.

Turn batter out into prepared pan, smoothing it lightly with a spatula.

Bake for approximately 20 minutes, or until center is just set and golden.  (Underbaking is always better!)

Bars will firm up more in pan as they cool.

ENJOY!

IMG_9344Let me know if you make them and how you like them.

IMG_9340Cheers and Hugs,

Jodi

Crazy Addictive Homemade Caramel Corn

Caramel Corn bowl

Sometimes I like to fuss and make fancy schmansy appetizers and snacks for company or to take somewhere.

Other times, I rely on tried and true no-fail crowd pleasers like this A M A Z I N G  homemade Caramel Corn.

No matter when or where I serve it or what else is on the table, there is rarely, if ever, a kernel left.

I originally got this recipe from one of my very dear friends, Pam (aka Bubby or the Bubster as I affectionately like to call her – have you noticed a trend in nicknaming with me??!!…) who brought it to our house one holiday season years ago.

I have made this stuff (that is literally like CRACK it is so addicting!) to give as gifts, take to parties, or just serve when having a crowd over many, many times over the years since Bubby first brought it and got us all hooked.

You have got to try this.

And then you have to let me know if you have any leftover.

I dare you – even double dare you – to resist this stuff.

You start with 2 bags of Snyder’s Hulless Puff’n Corn Popcorn.  (You know – that melt in your mouth puffy kind that doesn’t have the kernels that get caught between your teeth).  Dump them in a large roaster pan, and turn your oven on 250 degrees to preheat.

Caramel Corn 1

Then you melt 2 sticks of BUTTER and 1 TBSP of peanut butter in a saucepan.

Add 2 cups of packed brown sugar and 1/2 cup Karo Light Corn Syrup, and boil for 5 minutes.

Caramel Corn 2

Remove from heat, and add 1 tsp vanilla and 1/2 tsp baking soda, and watch the crazy chemistry work.  (Not sure why – maybe some of you that paid a bit more attention in high school chemistry class know why – but it just completely grows and changes consistency after that little bit of baking soda.)  And if you didn’t start out with a large enough saucepan, you can easily overflow, so be prepared!

Caramel Corn 3

Pour this mixture over the popcorn in the roasting pan and stir well.

Caramel Corn 4

Then bake at 250 degrees for 1 hour (stirring every 15 minutes or so).

Caramel Corn 5

I made this along with about 10 zillion (ok I exaggerate) other things for our Father’s Day Picnic Celebration this past Sunday, and it is the only thing that I did NOT have any leftover of…..

Just saying……  You gotta try this stuff!

And let me know if you have any leftover…

Caramel Corn bowl

Cheers and hugs,

Jodi

Red Velvet Crinkle Cookies

rvThis weekend, I needed to whip up some cookies for Nick to take to a special someone’s birthday dinner.  Always happy to bake cookies, I wasn’t even fully unpacked from our weekend away before I was mixing up some dough to chill a bit before baking and getting done in time for him to take.

I always like to chill my cookie dough for at least an hour, if not a few, before baking.  It helps hold the cookie shape better, prevents them from spreading and flattening on the cookie sheet, and makes for a chewier cookie center while allowing for a bit of a crispy outside.

This recipe is a simple, but quite yummy cake mix cookie that has been getting raves.  The recipe is on the side of the box of Duncan Hines Red Velvet Cake Mix, and the ingredients are basic pantry stock items, so these make a great last-minute special treat.

rv1For 3 dozen cookies, I used:

2 boxes Duncan Hines Red Velvet Cake Mix, 2 sticks of softened butter, the zest of two lemons, and 4 eggs.

rv2After thoroughly blending and refrigerating for a bit, roll the dough into tablespoon-sized balls and then in powdered sugar.

rv3Place the powdery sugared balls of red velvety gooey goodness on a baking stone about 2 inches apart, and bake for about 8 minutes at 375 degrees.

rv4When they come out of the oven, they are a crinkly red and white delight.  Let them set on the baking stone to cool for at least 10-15 minutes, then remove to fully cool on a cooling rack.

rv5Your guests will be pleasantly surprised by the lemony “twist” to these red velvet cookies that makes them super delish.

Marty took what was left to a friend in the hospital whose wife and sister-in- law asked for the recipe.  I think that means they were good.  I actually didn’t even get to try one, but with rave reviews from Marty, Nick and friends, I think I will be making these again –

soon –

when I have some time –

at Life in Between.

Cheers and Hugs,

Jodi

Zippy Pepperoni Chicken

pepchknI could make chicken for dinner every night.

Marty, on the other hand, is like – “Where’s the Beef!”

But he puts up with it – at least twice a week for dinner.

Oh – there must be ten thousand gajillion ways to make chicken, and this is one of my FAVORITES!  Zippy Pepperoni Chicken!

And what makes it even better is it’s a crockpot recipe.

So throw it together in the morning, go to work, and come home to this deliciousness.

Start by throwing a 3 lb bag of frozen chicken breasts or tenderloins in the crock pot (no need to thaw) and sprinkle with a little salt and lots of coarsely ground pepper.

pepchkn1

Then sauté some garlic in olive oil for about 2 minutes.

pepchkn2While that is infusing, chop up a handful of pepperoni (no measurement needed – just add as much as you like) – I probably used about 3/4 of a cup chopped.

pepchkn3

and stir that into the garlic and olive oil to sauté for about another 2 minutes.

pepchkn4Add a jar of your favorite Marinara Sauce (I used Bertolli) – or you could certainly make fresh if you are so inclined, have time – or are a better cook than me!

pepchkn5and some dried and/or fresh herbs to your liking.  I used dried oregano and fresh basil (one of my faves!)

pepchkn6Then just pour all this yumminess over the chicken in the crockpot, set to low, go to work – or shop – or play – or whatever you do all day…..

pepchkn7and about 15 minutes before you are ready to eat – at least 6 hours or so later – lay some plump slices of fresh mozzarella on top and a smathering of freshly grated Parmigiano Reggiano cheese (ooooohhh  la la!)

pepchkn9And oh wait until you taste and smell this!  Party in your mouth!

Add some pasta if you like (I used Dreamfields Angel Hair – an itsy bit healthier with some extra grams of fiber – since this recipe is so – well (ahem) healthy…. (ok Yummy!)

pepchkn8pastaPretty dang delish!

pepchknBest enjoyed with some red wine and a great friend!  (Loved sharing it with you Jan!)

pepchkn10Until we cook again…

Cheers and Hugs,

Jodi

Birthday Cake Cookies with LOTS OF SPRINKLES

birthday cake cookies with sprinklesThere’s another birthday in the house this week!

Happy Birthday Liz!

Since I’m more of a cookie baker than a cake baker (at least currently) – thought I’d take the traditional SPRINKLY birthday cake mix and make some cookies with them.

EASY PEASY!

Start with just a box of your favorite sprinkly birthday cake mix (I used Betty Crocker Party Rainbow Chip), 1/3 cup oil, and 2 eggs.

bd cookies 1Then it NEVER hurts to add some MORE SPRINKLES!

bd cookies 2Refrigerate a bit to firm up, roll in tablespoon size balls, flatten with a flour-dipped cup, bake for about 8 mins, frost, add MORE sprinkles – and VOILA – Birthday Cake Cookies!

birthday cake cookies


Hope you’re having a sprinkly kind of day – at life in between.

Cheers and Hugs,

Jodi