Sprinkle Birthday Cake

sprinkle birthday cake

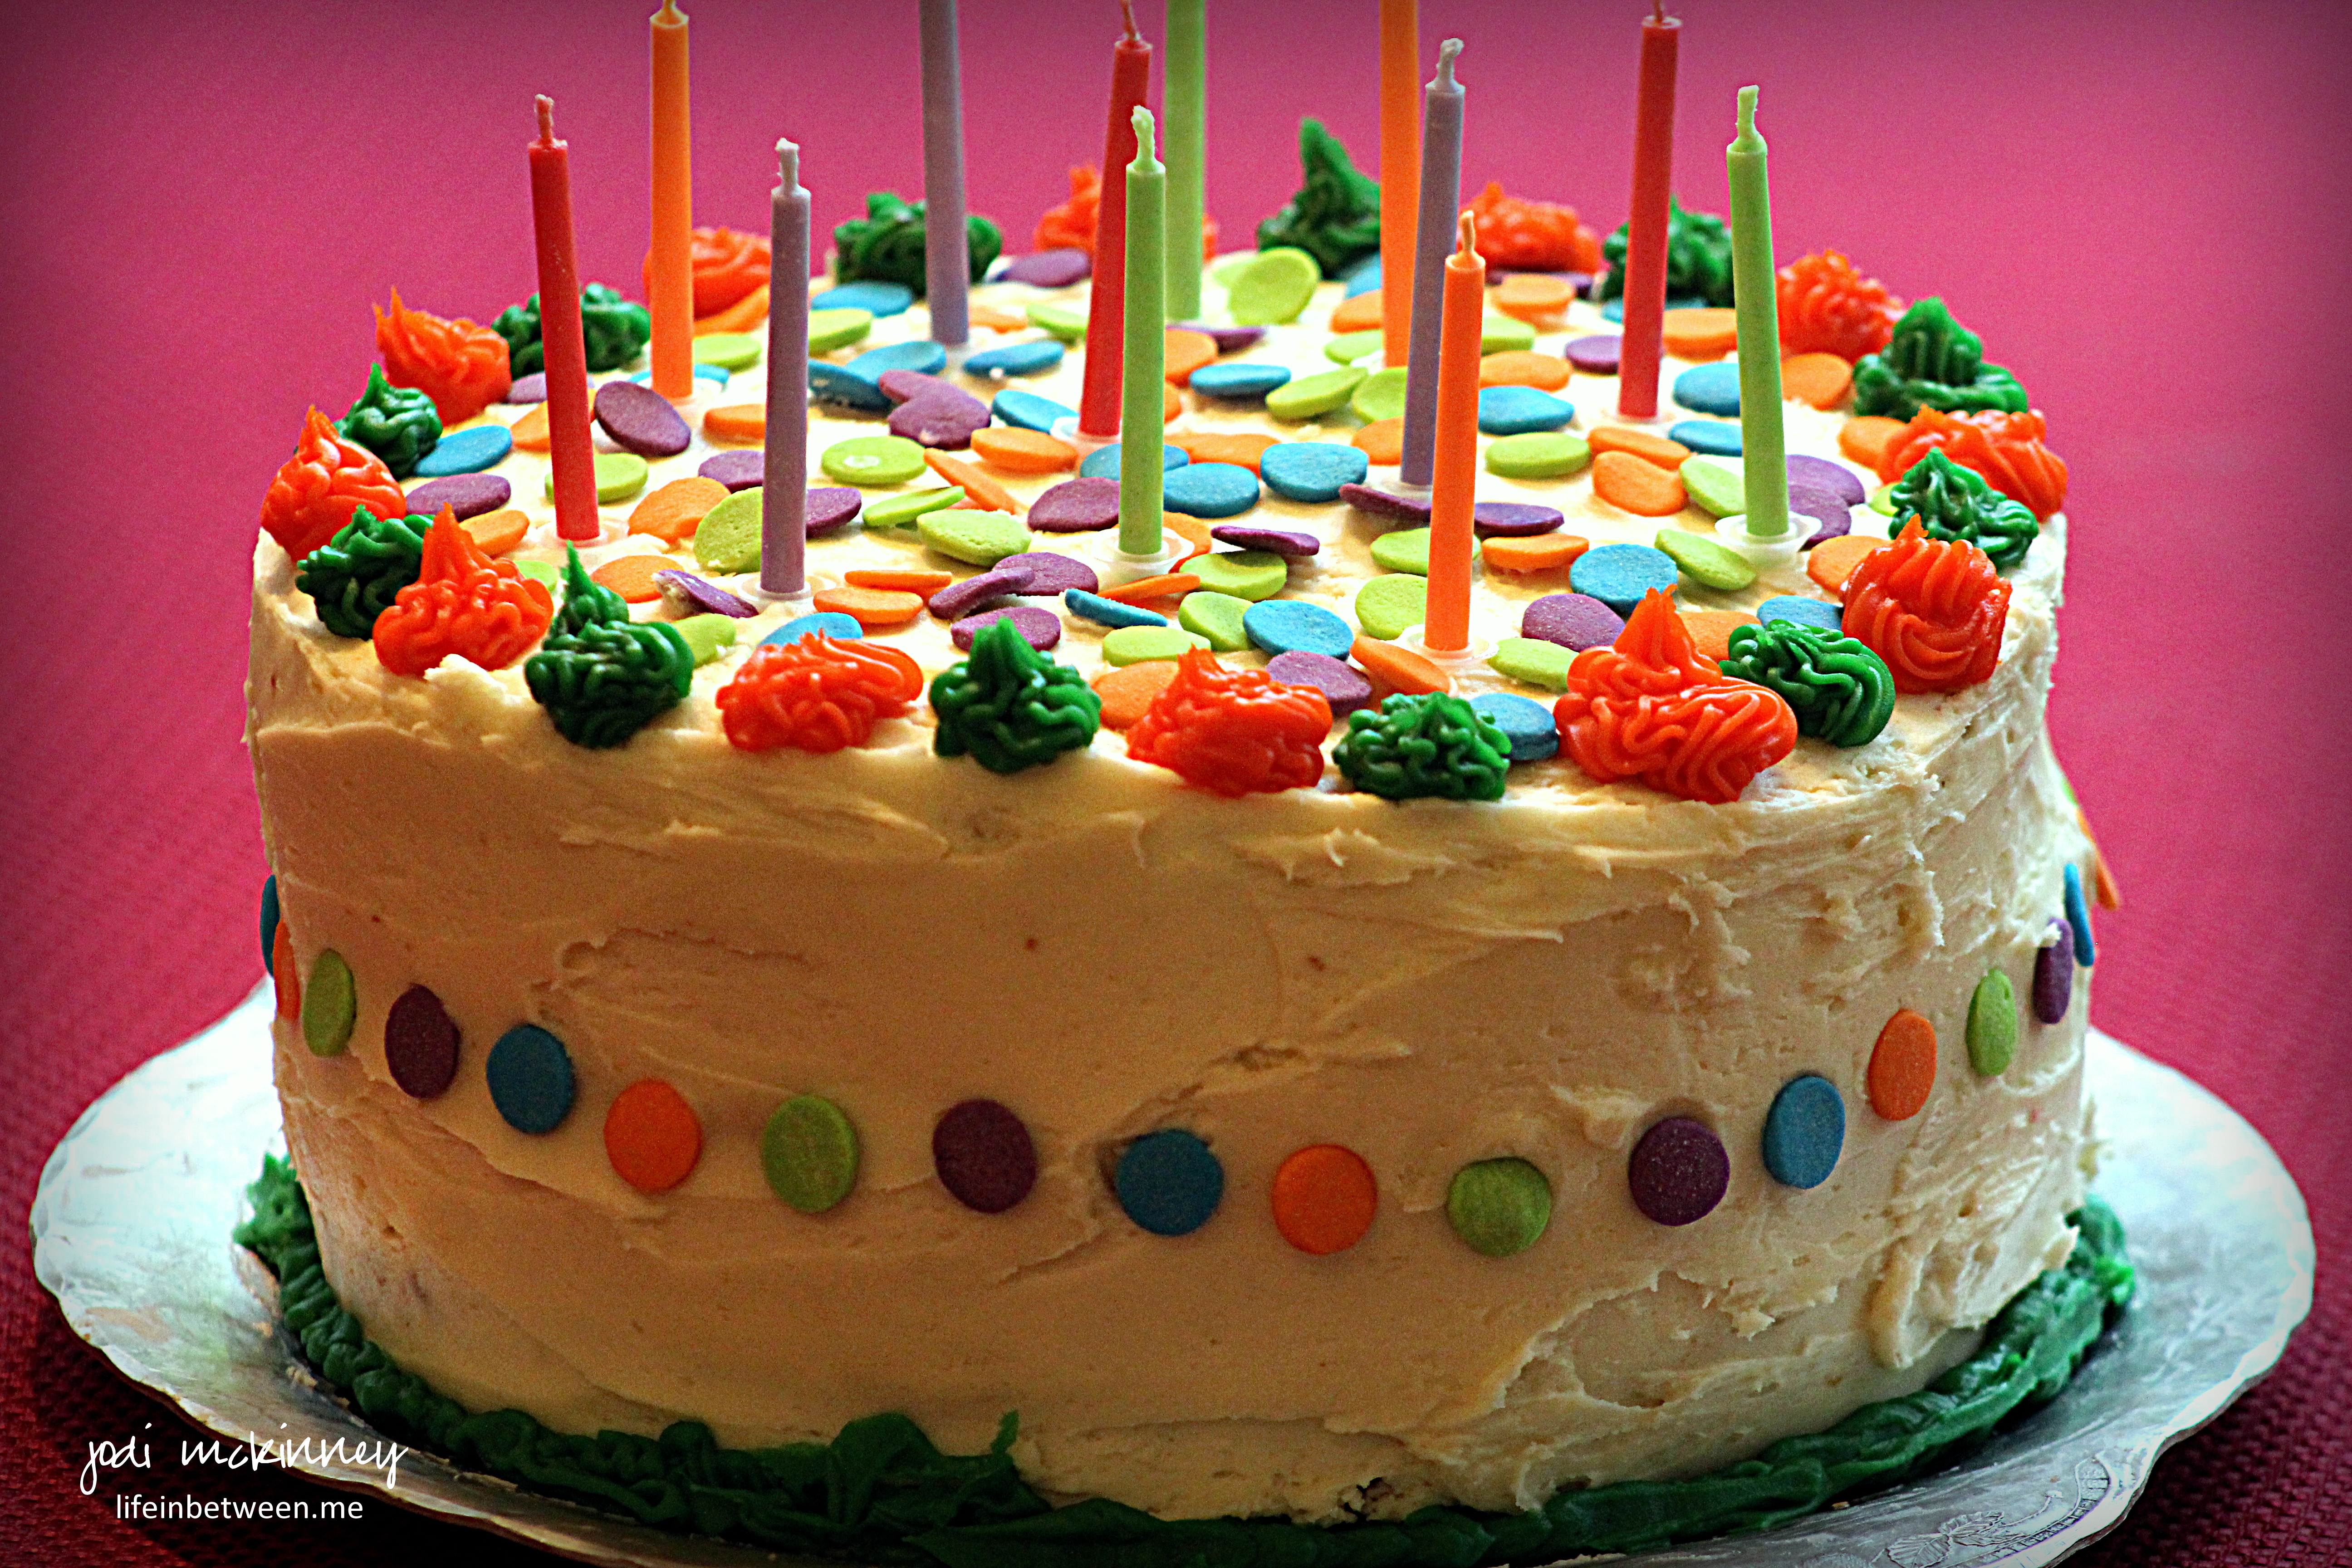
Oh the sprinkles were plentiful this past weekend as we celebrated our daughter-in-law, Colleen’s birthday.  Here is the wonky cake I made that I mentioned yesterday when I posted my sprinkle birthday cake watercolor card I made.

sprinkle birthday cake cut

It might have been a bit wonky, but it was soooo yummy!  This white, vanilla cake filled with colorful, celebratory sprinkles is really worth the extra effort to make from scratch!

sprinkle birthday cake slice

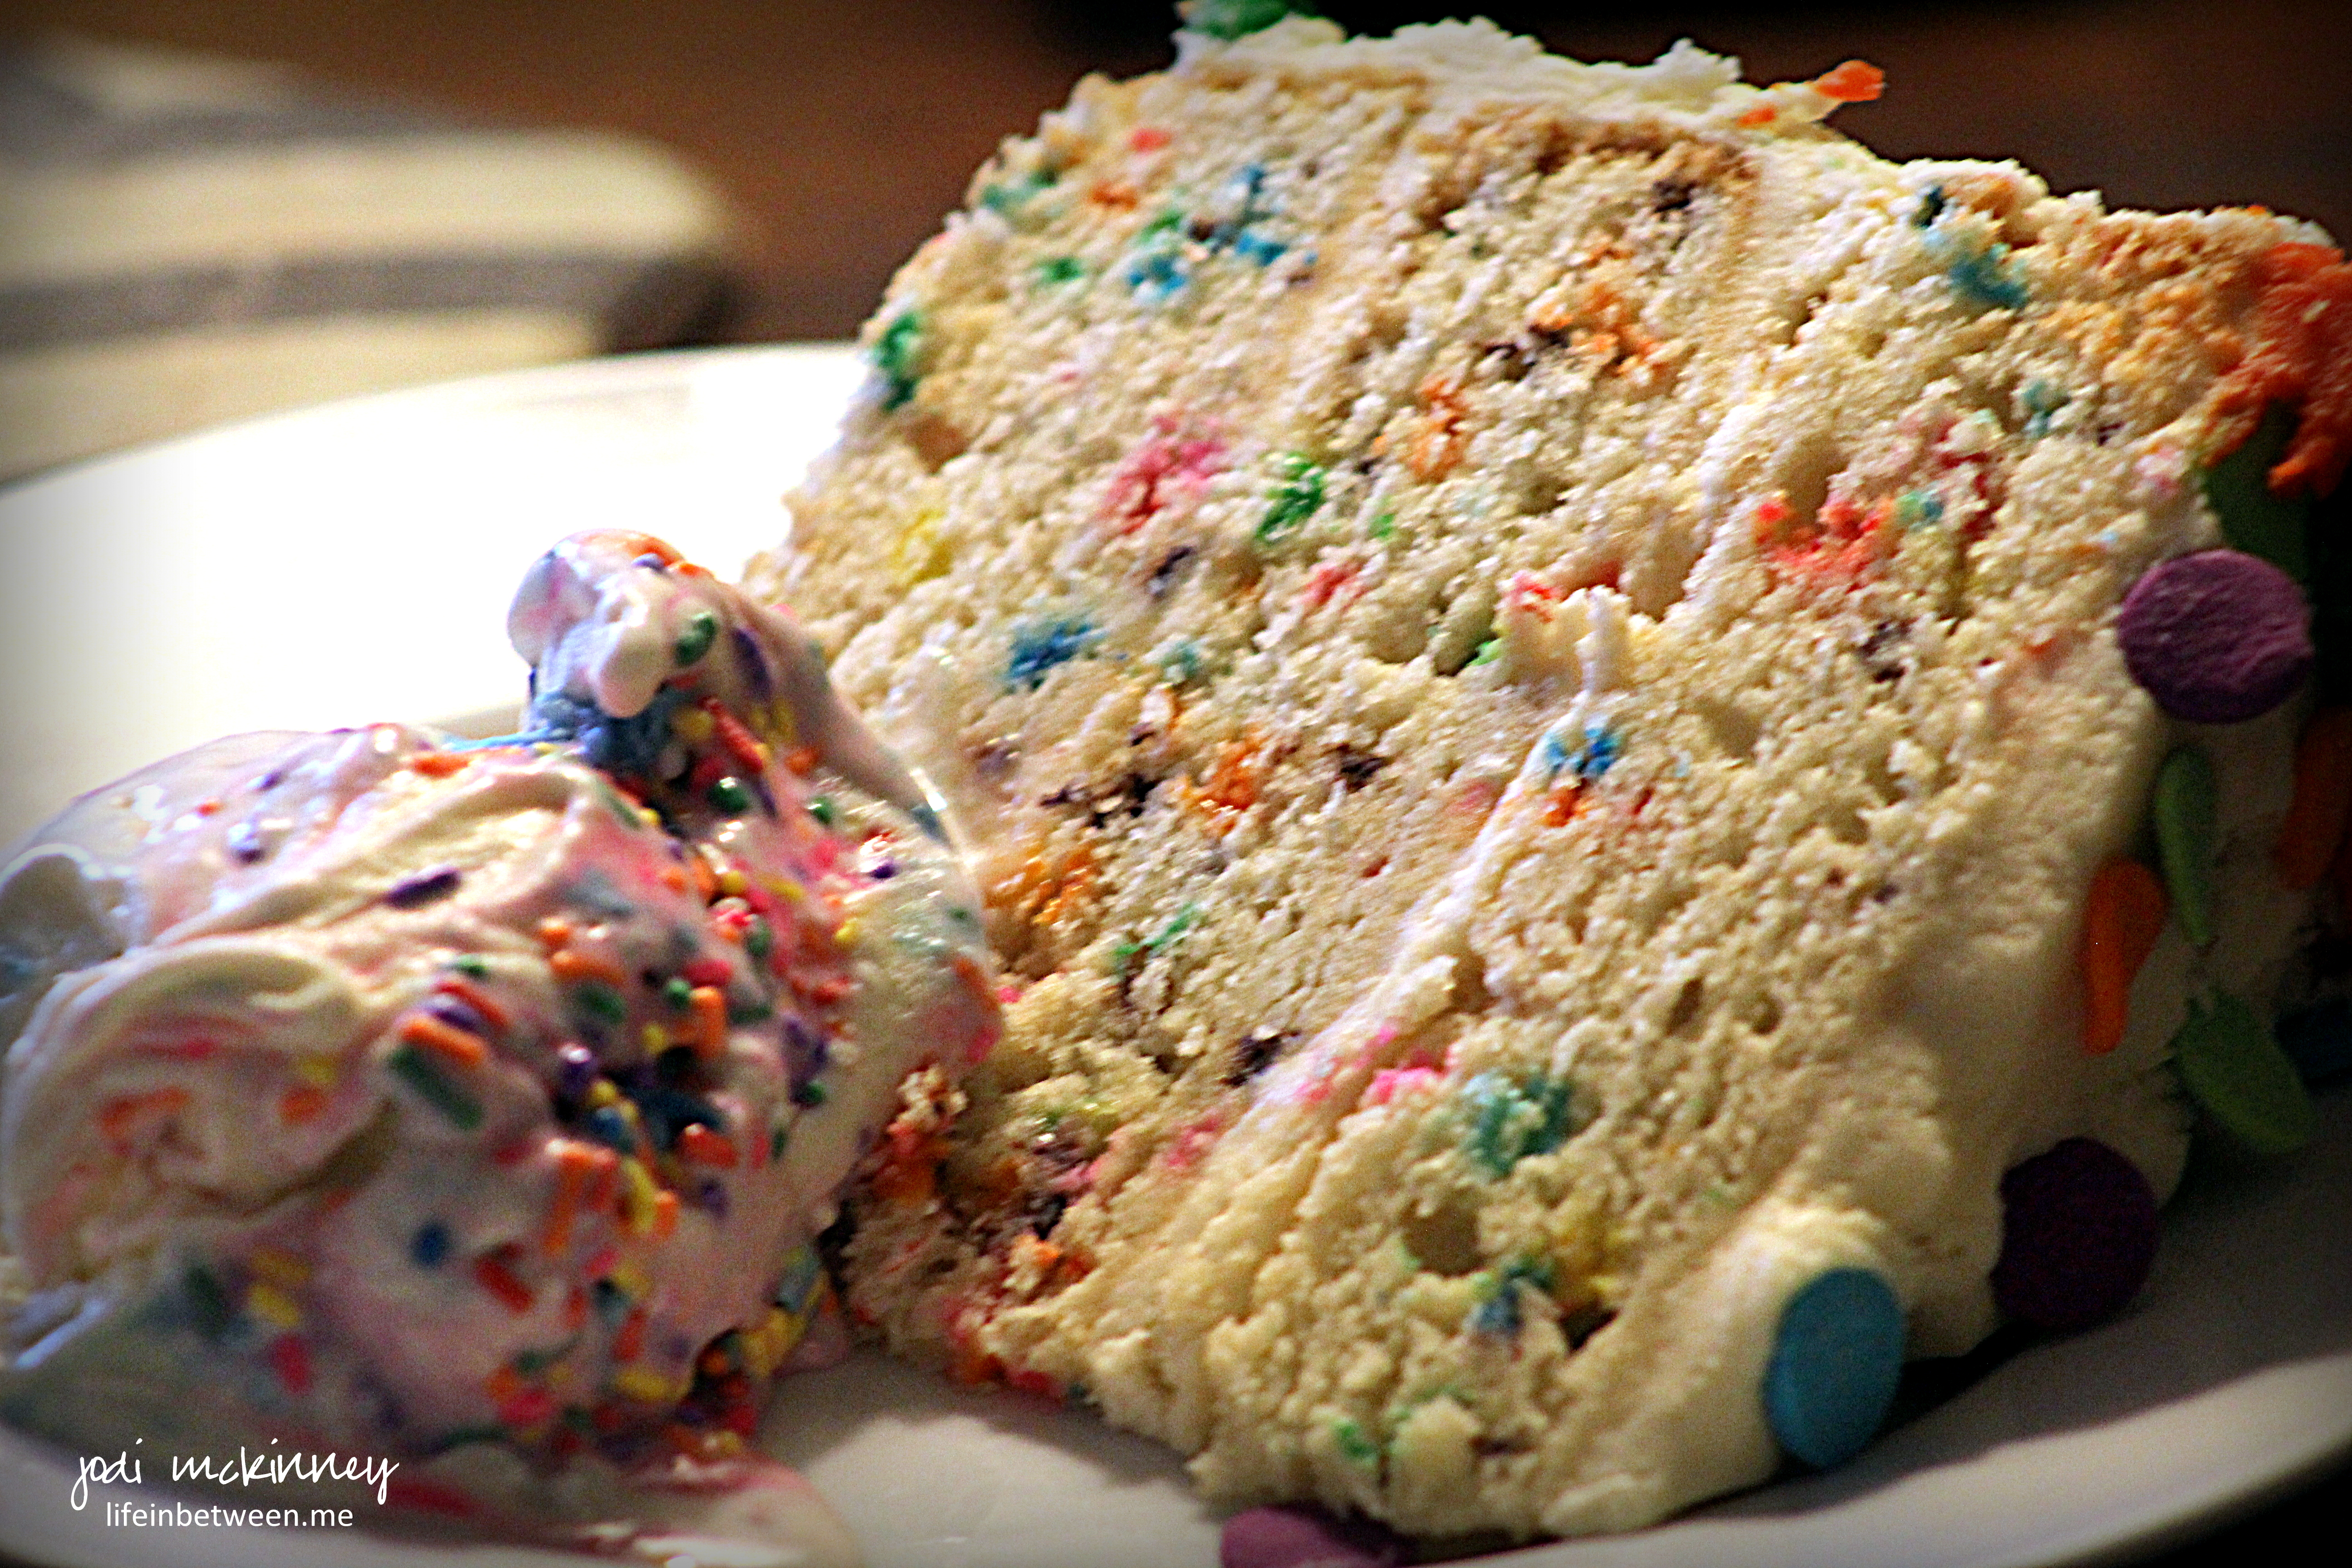
And serve it with some fresh churned birthday cake ice cream (like we can get around here from Bruster’s Ice Cream), and you will really be sparkling!

Sprinkle Birthday Cake*

Cake Ingredients:Sprinkle Birthday Cake thumbnail

  • 3 and 3/4 cups (431g) all-purpose flour
  • 3/4 tsp baking powder
  • 3/4 tsp baking soda
  • 1 tsp salt
  • 1 1/2 cups (3 sticks; 345g) butter, softened
  • 1 3/4 cups (350g) granulated sugar
  • 4 large eggs
  • 2 large egg whites
  • 3 tsp. (15ml) vanilla
  • 1 1/2 cups (360ml) buttermilk (or buttermilk substitute:  1 1/2 cups milk mixed with 1 1/2 Tbsp vinegar)
  • 3/4 cup (142g) rainbow sprinkles

Vanilla Frosting Ingredients:

  • 1 1/4 cups (2.5 sticks; 287g) butter, softened
  • 5 cups (580g) confectioners’ sugar
  • 1/3 cup (80ml) heavy cream or half and half or milk (all work)
  • 3 tsp (15ml) vanilla
  • 1/8 tsp salt
  • Additional sprinkles or other decorations

Directions:

  1. Preheat oven to 350°F (177°C). Grease and lightly flour three 9-inch cake pans.
  2. Whisk flour, baking powder, baking soda, and salt together in a large bowl. Set aside. Mix butter on high speed of mixer until smooth and creamy – about 1 minute. Add sugar and beat on high for 5 more minutes.  On medium-high speed, add 1 whole egg at a time, beating well after each addition until all 4 whole eggs are mixed in.   Beat in vanilla.
  3. With the mixer on low speed, add the dry ingredients in three additions alternating with the buttermilk, beginning and ending with the dry ingredients, and mixing each addition just until incorporated. Do not overmix. The batter will be smooth, velvety, and slightly thick.
  4. In a separate mixing bowl, beat the 2 additional egg whites until thick, foamy, and soft peaks form- about 3 minutes. Gently fold into the batter. Finally, gently fold sprinkles in.
  5. Pour batter evenly into each cake pan.  Bake for approximately 25 minutes or until a toothpick inserted in the center comes out clean.   Allow cakes to cool completely in the pans set on a wire rack.
  6. To make frosting, beat the butter on medium speed in mixer until creamy – about 2 minutes. Add confectioners’ sugar, cream, vanilla, and salt with the mixer on low. Increase to high and beat for 3 minutes. Add more confectioners’ sugar if frosting is too thin, more cream if frosting is too thick, or a pinch more of salt if frosting is too sweet.
  7. To assemble:  Place one cake layer on serving plate. Evenly cover the top with frosting. Top with second and third layers and repeat. Spread remaining frosting on sides.   You can tint small portions of the frosting to make decorations or use decorator frosting and decorate with additional sprinkles.  

Jodi’s Cake Tip:  If at all possible, I always try to bake my cake at least one day ahead of time or even the night before serving so that it can be frozen.  I bake the layers, cool, and then place each un-frosted layer in a large Ziploc bag and freeze.  For one thing, this makes the cake much easier to frost.  But secondly, and most importantly, freezing the cake, even if only for a few hours overnight, makes for a much moister cake.  I learned this by accident when I used to always make cakes fresh the day of serving thinking that was best, and then had to do ahead one time years ago because of time constraints.  It was the first time everyone ooooohhhed and awwwwhhed over the cake.  I’ve frozen ahead ever since.

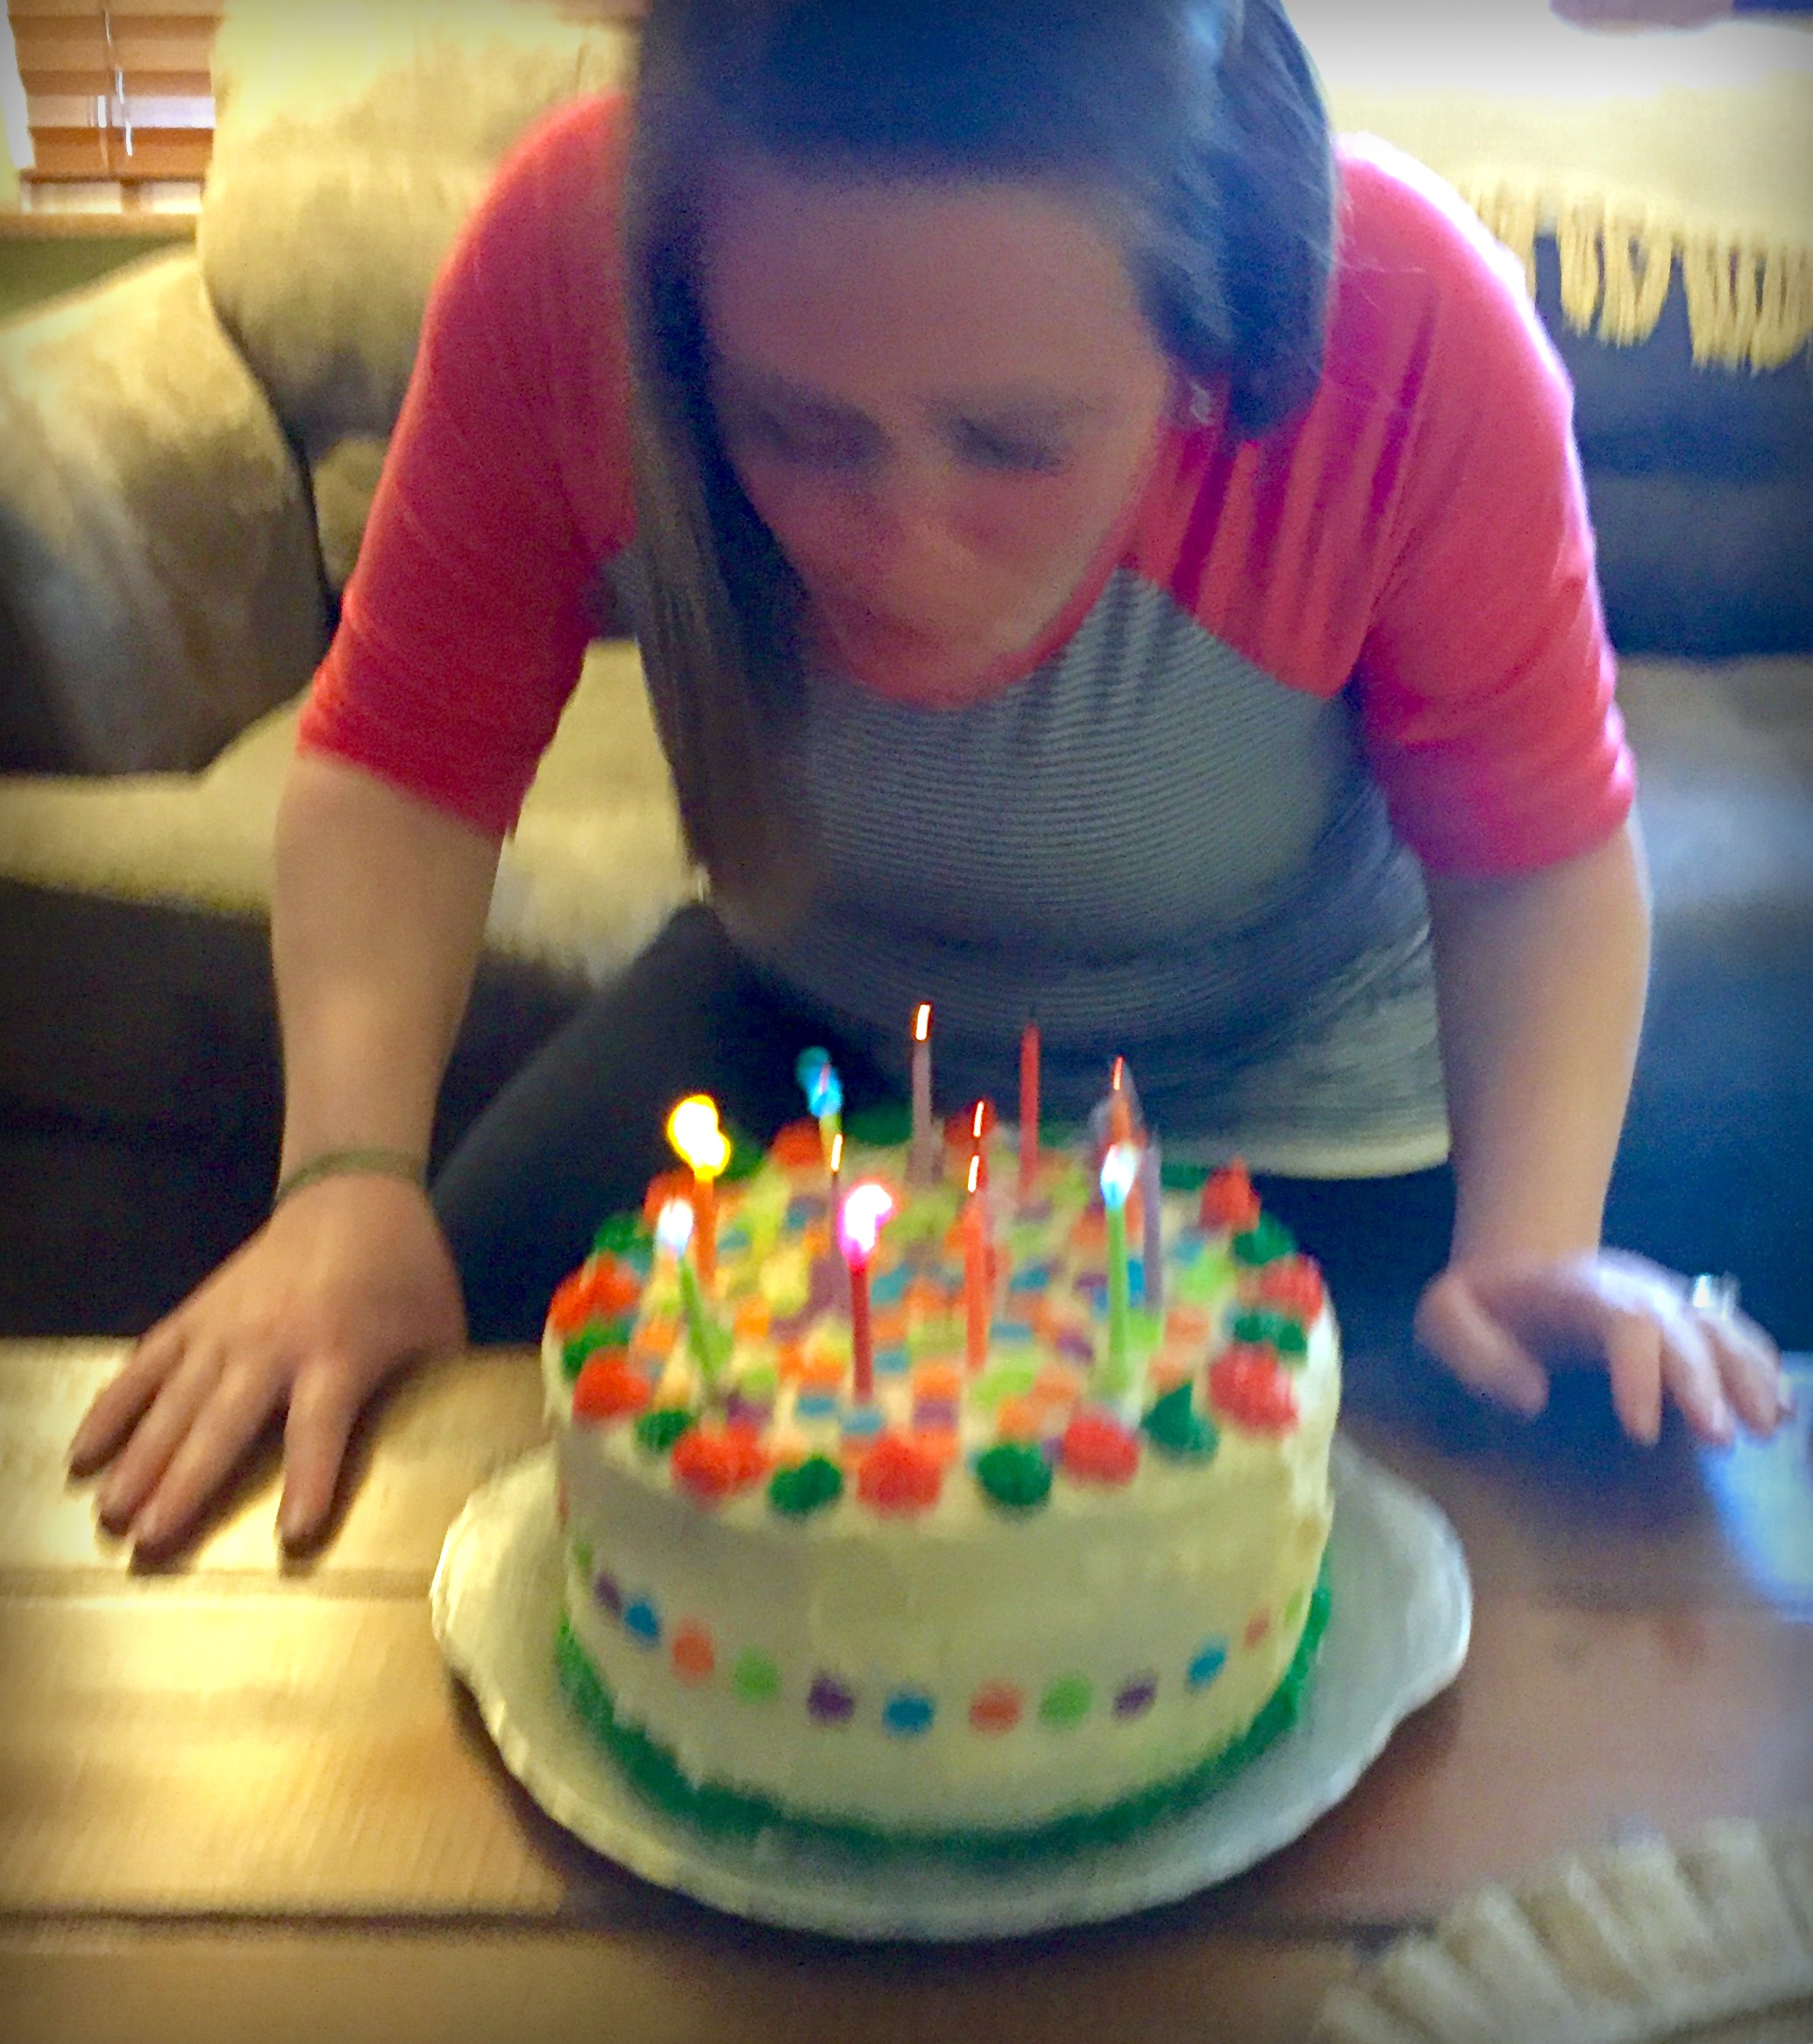
And here is the birthday girl blowing out the candles.  A bit blurry, but a quick snap with my iPhone after we sang.  I love doing special things for this special girl!

colleen sprinkle birthday cake

Cheers & Hugs,
Jodi

*FULL Credit for this recipe goes to Sally’s Baking Addiction Funfetti Cake.

Tuscan Chicken & Penne Pasta

Tuscan Chicken and Penne Pasta 2

I have another Winner Winner Chicken Dinner to share with you today.

This is a great, quick recipe that uses a rotisserie chicken or leftover grilled chicken.

Tuscan Chicken and Penne Pasta

It really is bursting with flavor, full of tomatoes and spinach and chicken, and pulled all together with a simple chicken stock based sauce and incorporated with pasta to make it a full meal deal!

Serve it with a salad and some crusty bread if you dare!

Tuscan Chicken & Penne Pasta*

Ingredients:Tuscan Chicken and Penne Pasta 2

  • 1 Tbsp olive oil
  • 4 cloves fresh minced garlic
  • 1 box frozen chopped spinach or 4 cups fresh chopped spinach
  • 1 small sweet onion, chopped
  • 1 tsp oregano
  • 1 tsp basil
  • 1 tsp black pepper
  • 1 tsp salt
  • 2 (14 oz ) cans diced tomatoes (or fresh if in season and plentiful)
  • 2 cups chicken stock
  • 1 rotisserie chicken chopped or 2-3 cups chopped leftover grilled chicken
  • 1/2 cup half and half or skim milk
  • 3 Tbsp flour
  • 1 lb penne pasta, cooked al dente
  • Garnish:  Fresh diced tomato, fresh chopped basil, shredded fresh parmesan cheese

Directions:

In a 6 qt dutch oven, saute the garlic, spinach, and onion in the olive oil.  Add the spices, salt and pepper, tomatoes and chicken stock.  Bring all to a boil.  Add chicken.

Whisk together half and half and flour until no clumps remain.  Stir into boiling pot until combined.

Allow all to simmer about 10 minutes.  Add the pasta and mix well.  Garnish and serve.

This recipe is super yummy fresh, and it is delicious reheated the next day too as leftovers for lunch or dinner as the flavors have had time to truly meld.

Hope you give it a try and enjoy!

Cheers & Hugs,
Jodi


*Recipe originally found and slightly adapted from http://www.galonamission.com.


Fresh Poppy Seed Vinaigrette Cole Slaw

Fresh Poppyseed Viniagrette Cole Slaw

If you are looking for a fresh, bright, colorful, crunchy salad, I hope you will give my favorite version of cabbage slaw or cole slaw a try.

I so prefer a bright, light vinaigrette on my cole slaw to the heavier mayonnaise-based version.  How about you?

Fresh Poppyseed Viniagrette Cole Slaw 2

This salad goes well with so many Spring and Summertime meals (and if you live in or near Pittsburgh like me – you can even use it as as an addition to your actual cheese steak or burger like our famous Primanti’s Brothers does!)

I made this last night as our salad with a kielbasa potato skillet hash and steamed broccoli, and we all had seconds!

Here’s my recipe if you’d like to give it a try.

Fresh Poppy Seed Vinaigrette Cole Slaw

Ingredients:Fresh Poppyseed Viniagrette Cole Slaw 2

  • 4 Tbsp. red wine vinegar
  • 4 Tbsp. canola oil
  • 3 Tbsp. white sugar
  • 1/2 tsp. dry mustard
  • 1 tsp. poppy seeds
  • 1 tsp. coarsely ground black pepper
  • 1/2  tsp. salt
  • 1/2 tsp. hot pepper sauce
  • 1/2 large head or 1 small head (approx. 4 cups) shredded green cabbage
  • 2 carrots, shredded
  • 2 stalks of celery,  minced
  • 2 green onions, sliced thinly
  • 1/2 cup diced sweet red, yellow, or orange peppers

Whisk vinegar,  oil, sugar, dry mustard, poppy seeds, black pepper, salt, and hot pepper sauce in a bowl, stirring until sugar has dissolved.

Mix cabbage and vegetables in a large salad bowl and pour dressing over slaw. Stir to coat. Refrigerate at least 2 hours before serving.

Enjoy!

Cheers & Hugs,
Jodi

Nick’s Chopped Chicken & Veggie Wraps

Nicks Chopped Chicken and Veggie Wraps 3

This past Sunday, my son Nick took over the kitchen for dinner and made us his amazing Chopped Chicken & Veggie Wraps.

Nicks Chopped Chicken and Veggie Wraps

Nick likes anything chicken and anything that can be wrapped up in a tortilla and eaten by hand.

This recipe requires a bit of chopping ahead of time, but throws together quick and easy and tastes so delish!

Nicks Chopped Chicken and Veggie Wraps 1

Starting with marinated grilled skinless, boneless chicken breasts and adding your favorite veggies makes for a healthy, quick, and oh so yummy dinner or lunch or anything in between!

Nicks Chopped Chicken and Veggie Wraps 2

The secret is in the double chopping.  Once you pile all the chopped ingredients together, you chop again.

Nicks Chopped Chicken and Veggie Wraps 4

And the thing that really kicks this wrap up for me is the Peach Mango Salsa!  OOOOO LAA LAA!

Throw in anything you like, but here is how Nick made these for us.

Nick's Chopped Chicken & Veggie Wraps

Ingredients:Nicks Chopped Chicken and Veggie Wraps 3

  • I lbs boneless skinless chicken breasts and/or thighs
  • 1/2 bottle Wishbone Italian Dressing (or your favorite marinade)
  • 1/2 lb bacon, crisped and chopped (option – but oh so yummy!)
  • Lettuce, chopped
  • 1 tomato, chopped
  • 1/2 seedless English cucumber
  • 1/2 chopped sweet red pepper
  • 4 green onions, chopped
  • 1/4 cup chopped hamburger dill pickles
  • 1/4 cup chopped pickled jalapeno slices
  • 1/4 cup chopped marinated artichoke hearts (or banana peppers)
  • 1/4 cup shredded cheddar cheese (or your favorite)
  • 1/3 cup Herr’s Peach Mango Salsa
  • 4-6 Large Burrito-Sized Flour Tortillas

Directions:

Marinade chicken in Italian salad dressing for approximately 24 hours in Ziploc bag in refrigerator.  When ready to eat, grill chicken and chop.  Chop all veggies and ingredients you plan to use.

To assemble, heat flour tortilla in microwave for 20 seconds to make more pliable for wrapping and prevent cracking.  Heat George Foreman Grill or Grill Pan.

Place all ingredients together for each wrap, top with a heaping spoon of salsa, and re-chop all together.  Mound in center of warmed tortilla and wrap tightly.

Place on grill to heat, crisp, and seal.

Hope you enjoy!

Cheers & Hugs,
Jodi

Fresh Red Raspberry Chocolate Chunk Bread

Fresh Red Raspberry Chocolate Chunk Bread

I obviously cannot get enough of the red raspberry and semi-sweet chocolate combination as evidenced by today’s AMAZING recipe – Fresh Red Raspberry & Chocolate Chunk Bread.

You may recall my “almost-famous” Fresh Red Raspberry and Chocolate Chunk Cookies.  If you haven’t tried these – you seriously do not know what you are missing.

I’ve also shared my recipe for Chocolate Chunk and Fresh Red Raspberry Muffins – TO DIE FOR!  And the outrageously extraordinary Chocolate and Raspberry Custard in a Jar that I copy-catted from Firebird’s Wood Fired Grill Restaurant for my son, Nick’s birthday recently.

But I must say – this bread is rocking my world right now.  I could not believe how awesome it turned out.  It is pretty much just like the cookies, but in the form of bread (which means you can more easily justify eating it for breakfast – if not any other time of the day!)

Fresh Red Raspberry Chocolate Chunk Bread 2

I sliced the end off for the photo thinking I would take a little taste to make sure it is edible and then just toss that tough old crusty end to avoid the calories – but…  I just couldn’t do it.  Even the crusty end was delicious beyond words!

Fresh Red Raspberry Chocolate Chunk Bread 3

I’m telling you friends – you really want to try this one!

For yourself – for the people you love – and for those that you want to love you!

I can’t wait to hear what you think.

Get baking!

Fresh Red Raspberry Chocolate Chunk Bread

Ingredients:Fresh Red Raspberry Chocolate Chunk Bread

2 cups plus 2 tablespoons all-purpose flour
3/4 cup light brown sugar, packed
1/4 cup granulated sugar
1 teaspoon baking soda
pinch of salt (6 shakes!)
1/4 cup butter, melted
1 large egg
3/4 cup buttermilk (to make easy buttermilk – mix 1 Tbsp vinegar with 1 cup milk and let set 5 min)
1/4 cup canola or vegetable oil
2 teaspoons vanilla extract
2 cups fresh red raspberries
2 tablespoons all-purpose flour
3/4 cup semi-sweet chocolate chunks or chips (I used Nestle Chunks)

Directions:

Preheat oven to 350F. Spray one 9×5-inch loaf pan with floured cooking spray, or grease and flour the pan; set aside.

In a large bowl, add flour, sugars, baking soda, salt, and whisk to combine; set aside.

In a medium microwave-safe bowl, melt butter about 45 seconds on high power. To the butter, add the egg, buttermilk, oil, vanilla, and whisk to combine.

Pour wet ingredients into dry and stir until just combined.  Do not over mix or dough will be “tough.” It is ok if batter is lumpy.

In a medium bowl, add the raspberries and 2 tablespoons flour.  Toss lightly to combine Coating the berries in flour helps to reduce their sinking while baking.

Add the raspberries to the batter and fold very lightly to combine.  Gently fold in chocolate chunks.

Pour batter into prepared pan and bake for approximately 1 hour.  You may want to cover halfway through with tented foil to prevent top from becoming too brown.  I did.

Allow bread to cool in pan for about 15 minutes before turning out on a wire rack to cool completely before slicing and serving.

*Original Recipe Found and Slightly Adapted from Averie Cooks

Enjoy!

Cheers & Hugs,
Jodi

Fresh Orange Date Walnut Bread

Orange Date Walnut Bread 3

I was looking for something new to try baking early yesterday morning before I settled into work for the day.

It was a cool, rainy day after a wonderful stretch of warmth and sunshine.  I was in the mood for a nut bread, but after traveling most of the week, I didn’t have a lot of fresh ingredients on hand.

Orange Date Walnut Bread 1

I found a bag of dates, but I wanted to “Springify” a date and nut bread recipe up a bit, so I thought fresh orange flavor might just do the trick.  Adding a bit of freshly squeezed orange juice and fresh orange zest was just the ticket to brighten up this lovely bread.

Orange Date Walnut Bread 2

It’s nice to have something like this on hand for a quick breakfast with coffee, a nice little treat for a guest or a late night or after dinner urge for something just a bit sweet, but not too.

I’m sure this would freeze well and be great to pull out when needed.

Hope you enjoy your weekend!

May it be bright and fresh and Springy, but a little nutty too!

Fresh Orange Date Walnut Bread

Ingredients:Orange Date Walnut Bread 3

3/4 cup sugar
1/2 cup butter, softened
1/2 cup sour cream
1/3 cup fresh orange juice
1 Tbsp freshly grated orange zest
2 eggs
1  3/4 cups all-purpose flour
3/4 tsp baking powder
 3/4 tsp baking soda
1 cup chopped dates
1 cup chopped walnuts


Directions:

Preheat oven to 350°F. Grease bottom only of 9×5-inch loaf pan. Set aside.

Beat sugar and butter at medium speed with mixer, scraping bowl often, until creamy. Add sour cream, orange juice, orange zest and eggs; continue beating until well mixed. Add flour, baking powder and baking soda; beat at low speed until well mixed. Gently stir in dates and walnuts.

Pour into prepared pan. Bake 45 minutes or until toothpick inserted in center comes out clean. Let stand 10 minutes; remove from pan. Cool completely.

*Adapted from LandoLakes Recipe

Cheers & Hugs,
Jodi