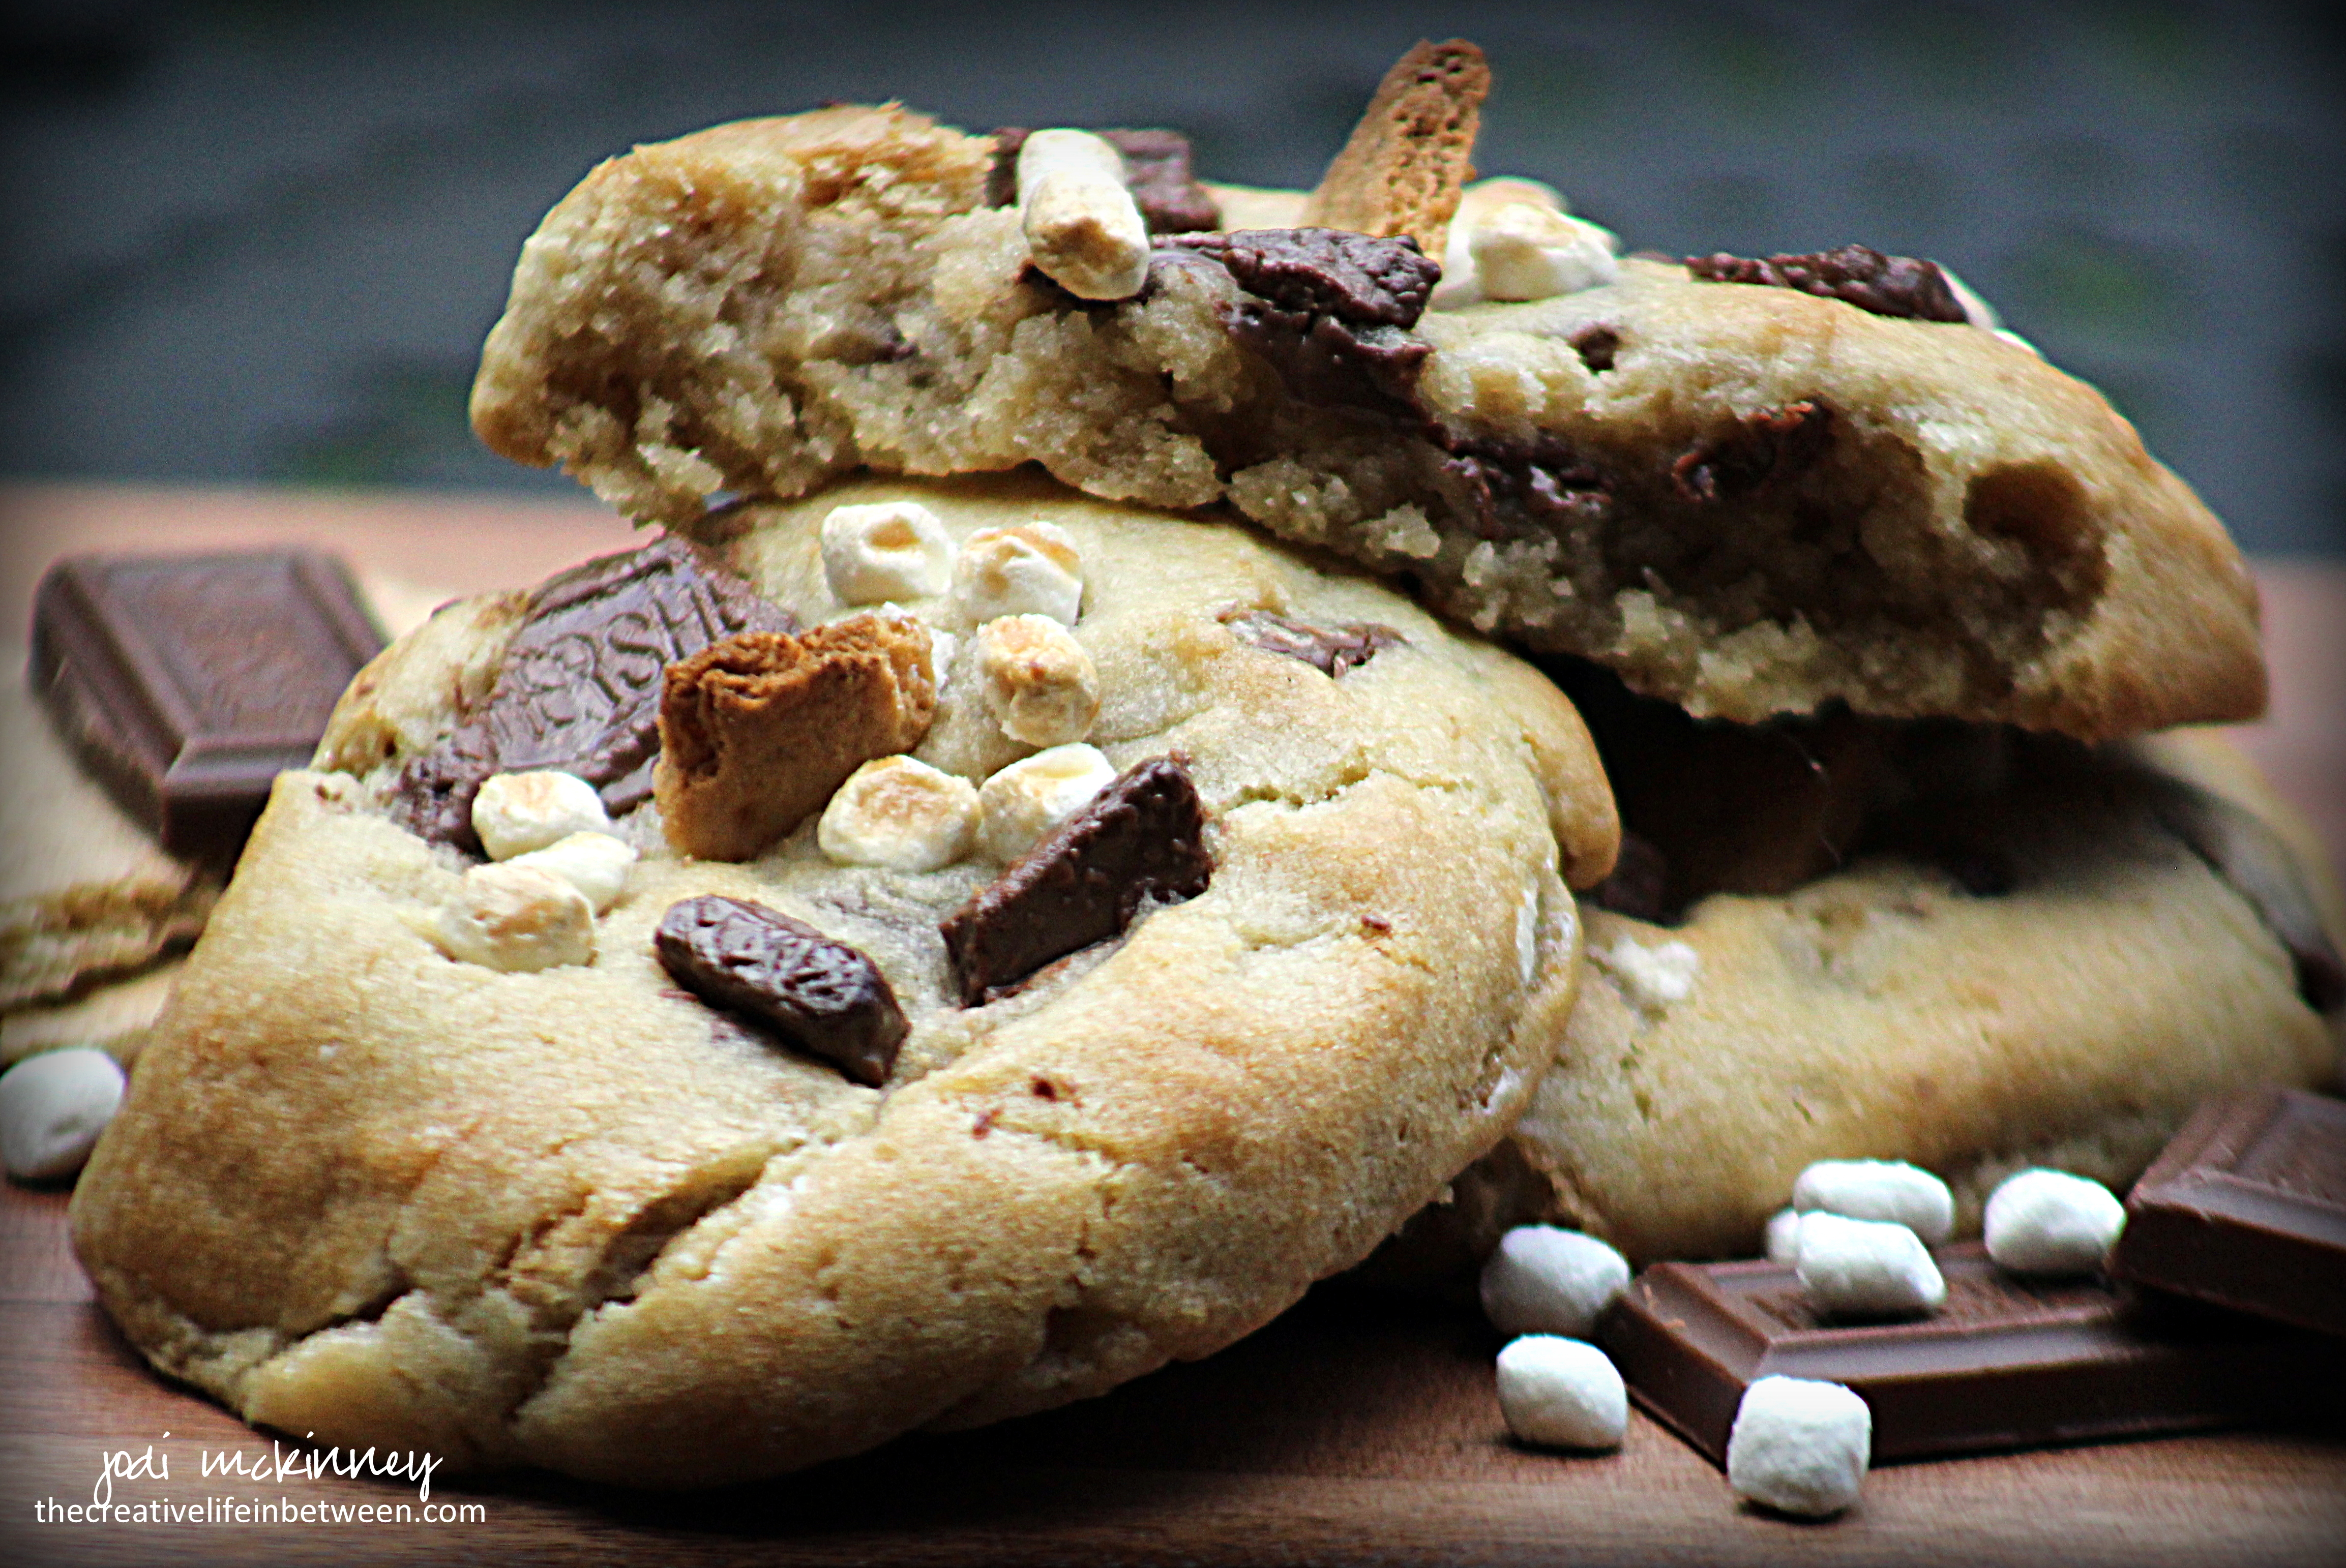
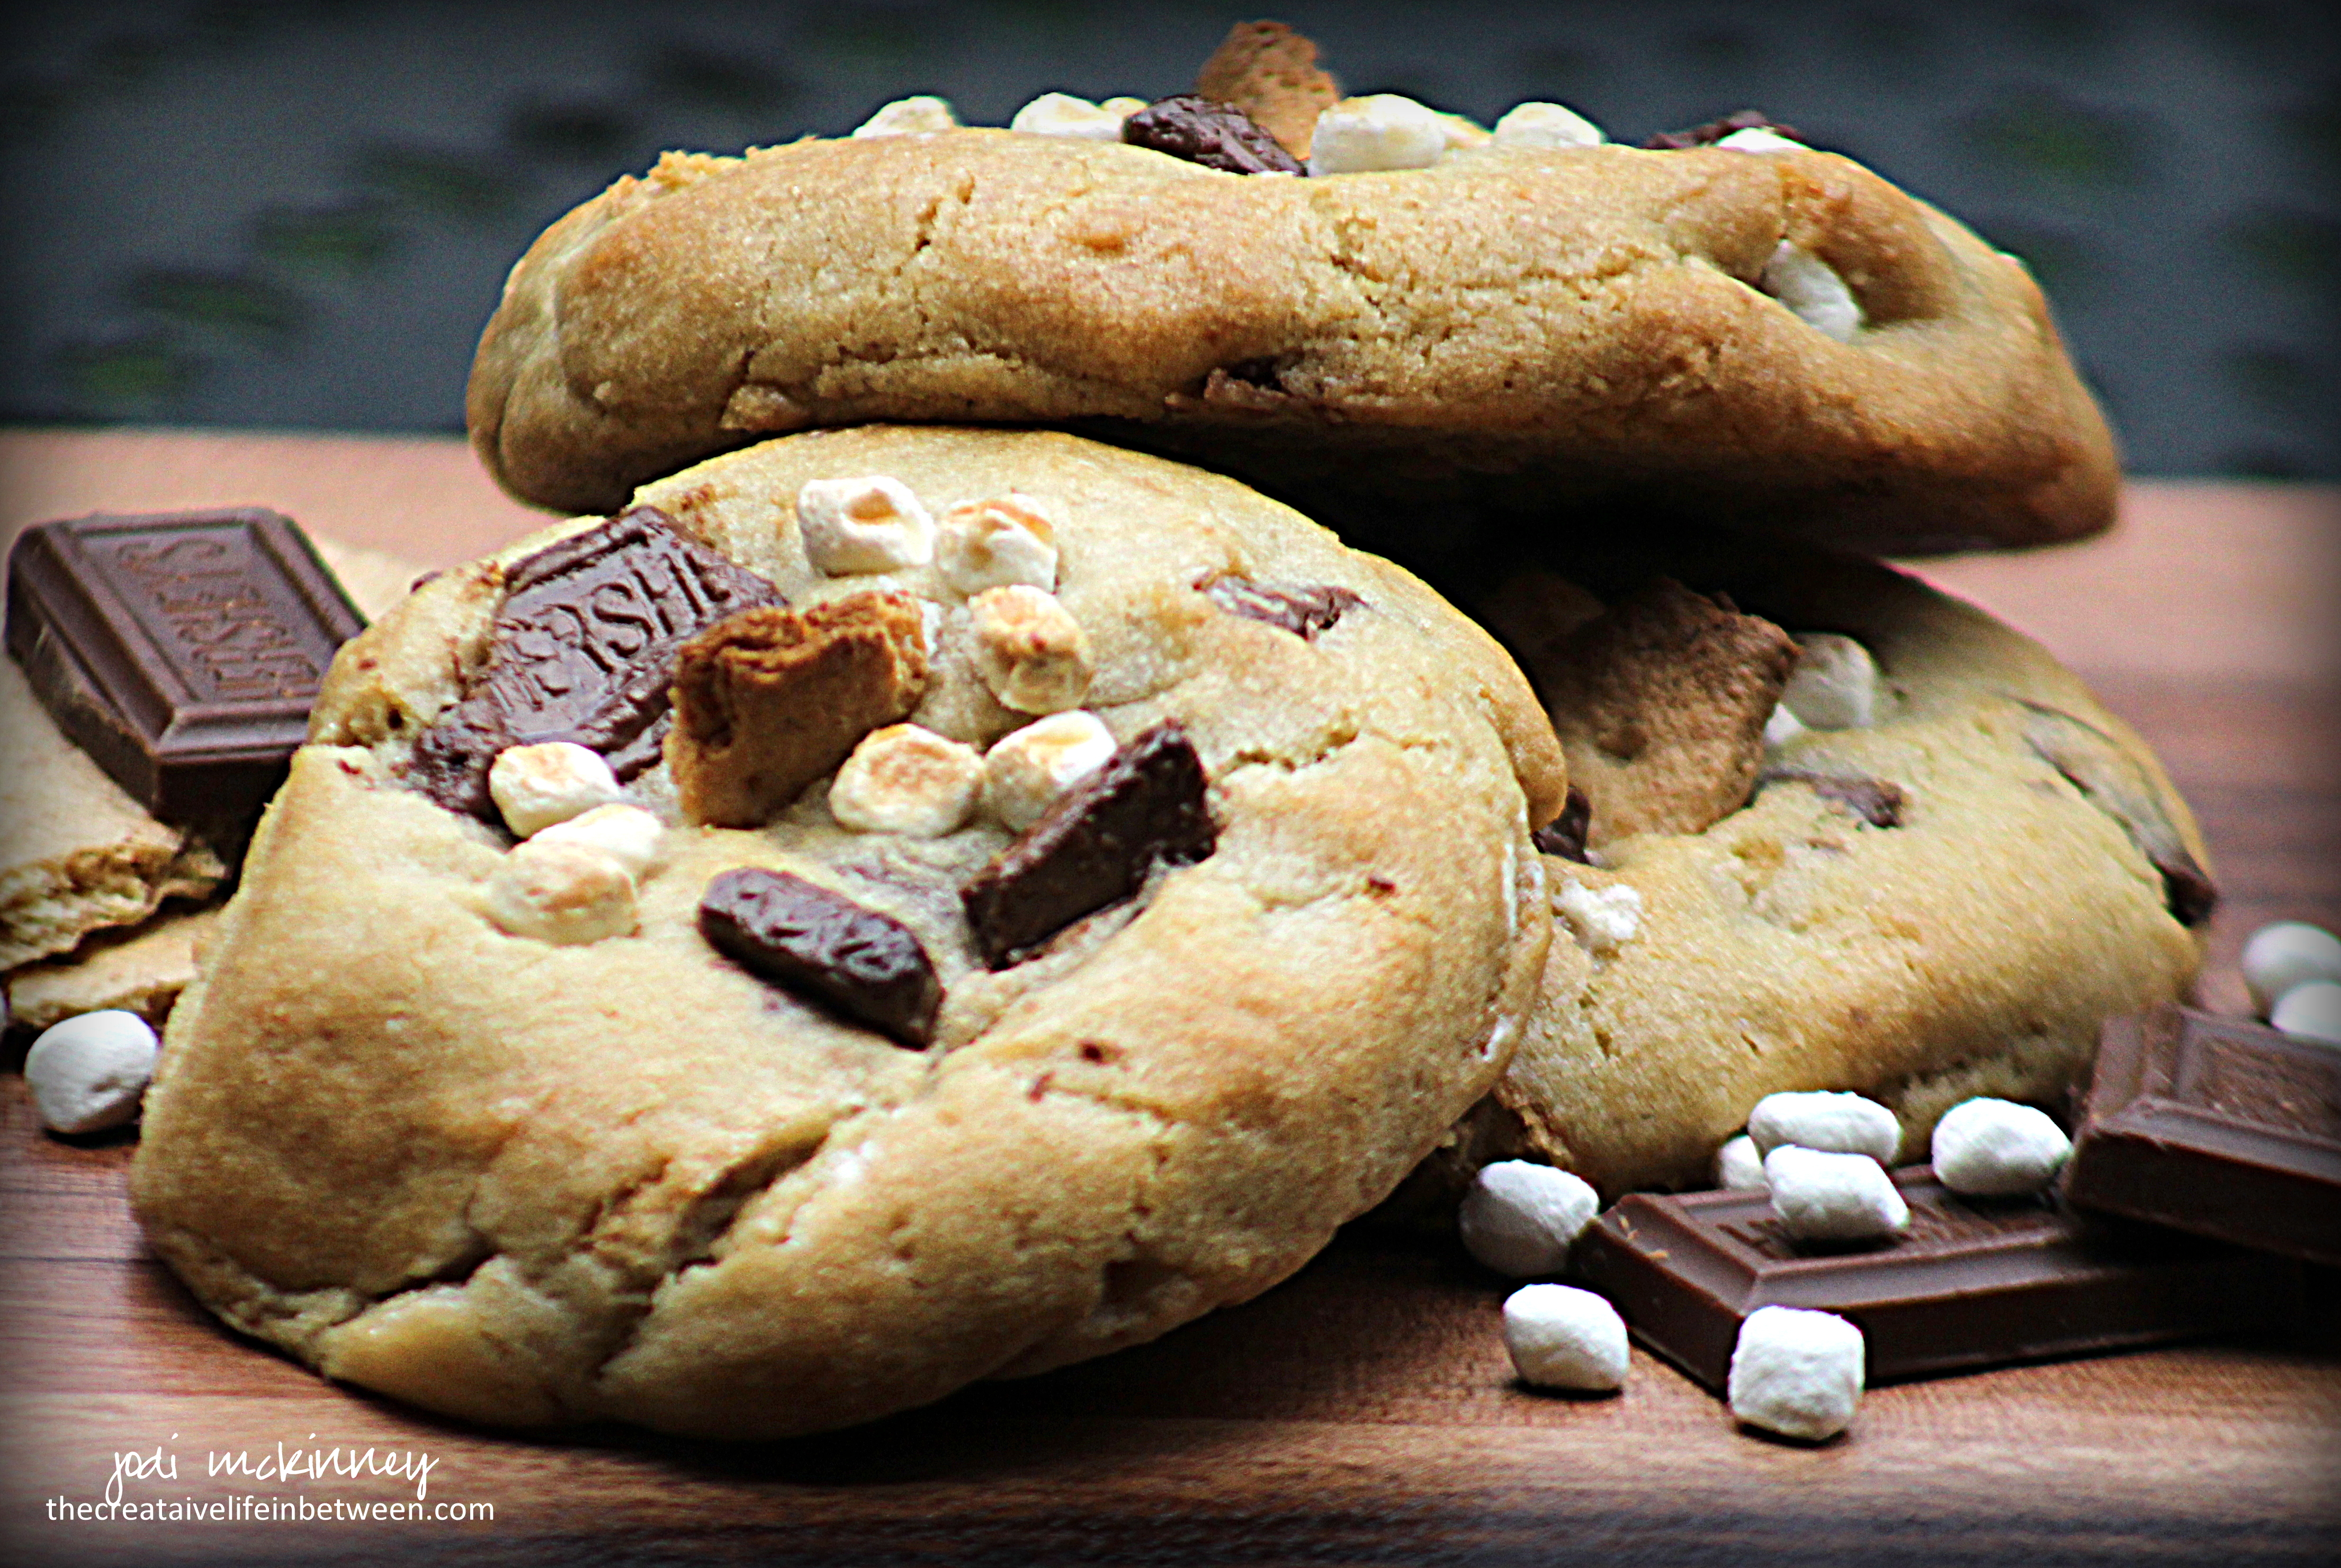
S’Mores Cookies

S’Mores Cookies.

It’s been a tough week.
Have you been feeling it too?

It’s time to have some fun!

And what s’more fun than homemade cookies?

Especially when they are loaded with milk chocolate and graham crackers and tiny bits of marshmallow yumminess?

It was s’more fun to take my go-to chocolate chip cookie recipe and give it a s’mores twist.

Are you going to make s’more?
Hope you think they are s’more fun and delicious!

S'Mores Cookies

Ingredients:

4 sticks (1 lb.) butter, softened
1 1/2 cups packed brown sugar
1 1/2 cups white granulated sugar
2 tsp vanilla
4 eggs
2 tsp baking soda
2 tsp salt
5 cups all purpose flour
6 1.55 oz Hershey’s milk chocolate candy bars, coarsely chopped
6 honey graham crackers, coarsely chopped
1 cup mini dehydrated marshmallows

Directions:

With electric mixer, beat butter and sugar together until completely incorporated. Add vanilla and eggs, and beat until light and fluffy. Add baking soda and salt, and mix another minute. Gradually add flour and beat until well incorporated, but do not overbeat.

Fold in 4 of the coarsely chopped Hershey’s bars, 4 of the coarsely chopped graham  crackers, and 3/4 cup of the mini dehydrated marshmallows.  Refrigerate dough for at least 2 hours or up to 2 days.

When ready to bake, preheat oven to 375 degrees F. With your hands, form a cookie dough ball about 1-1/2 inches in diameter.  Place on baking stone. Decorate tops of cookies with reserved candy, graham crackers, and marshmallows.  Bake for 8-10 minutes. Do not overbake. Allow to cool on baking stone for 5-6 minutes, then remove to cooling rack to cool completely.

S’more Cheers & Hugs,
Jodi


Avocado Toast

Avocado Toast with Spicy Pico de Gallo

Avocado Toast with Spicy Pico de Gallo

Avocado Toast.

My latest obsession.

Skip the butter.
Skip the jam.

A perfectly ripe,
creamy avocado half
spread on toast.

Topped with a spoonful
of fresh pico de gallo
with a slight kick
and a dash of salt.

O M Geee!

When only using a half of an avocado, I’ve found a way to keep the other half fresh until the next day.  Leave the pit in and cover tightly with plastic wrap to keep out any bit of air that could touch it and turn it brown, then refrigerate.  I don’t refrigerate avocado before they are cut, but if you only eat half, I think it best to refrigerate the cut one.

Leaving the pit in is key too.  A friend whose son works in a restaurant that makes fresh guacamole shared this life-changing tip with me recently.  When making fresh guacamole, throw one of the pits in.  It keeps the guac from turning brown.  It really works!

How do you like your avocado toast?

Cheers & Hugs,
Jodi

Zucchini & Broccoli Galette

Zucchini and Broccoli Galette.

So you know yesterday was #SneakSomeZucchiniIntoYourNeighborsPorchDay – right?

Of course you did!

So after picking three zucchinis from our garden, I snuck one to our neighbor on the right…

and one to our neighbor on the left.

Then I decided to use the third zucchini to make a revised version of Jenna from the Painted Apron’s recipe for Zucchini Galette.

Fresh zucchini, broccoli, caramelized onions, roasted garlic, and freshly grated Parmesan cheese all wrapped up in a golden, flaky crust……..

is surely a glorious way to celebrate this zucchini lover’s day!

How did you celebrate?

Zucchini & Broccoli Galette

Ingredients:

  • 1 medium zucchini, sliced
  • 1 sweet onion, sliced
  • 2 Tbsp butter, divided
  • 1 Tbsp olive oil
  • 2 cups fresh broccoli florets
  • 1 tube Pillsbury Crescent rolls
  • 1 head of garlic, roasted*
  • 4 oz freshly grated Parmesan cheese
  • 1 egg, beaten
  • Salt and Pepper

Lay zucchini slices out on a paper towel and sprinkle with salt.  Let sit for 15-30 minutes.  Pat dry, then turn over and repeat on new dry towels.  This will help remove some of the excess water that naturally occurs during cooking of zucchini.

Caramelize sliced onion by cooking over medium-high heat in 1 Tbsp butter and 1 Tbsp olive oil for 10-15 minutes, stirring occasionally, until soft and brown.  Add broccoli and  the other 1 Tbsp butter, and cook for 5 more minutes.  Lay out crescent roll triangles in a circle on a baking stone or baking sheet, pressing together and flattening with rolling pin. Squeeze out roasted garlic and spread over dough, leaving a 1 inch border.  Sprinkle with 1/3 of the cheese.  Top with 1/2 of onion and broccoli mixture and half of zucchini.  Repeat layers.  Top with cheese.  Fold dough up and over filling around the edge. Brush dough with an egg wash and bake at 375 degrees F for approximately 30 minutes or until golden and melted.  Cut into 6 wedges to serve.

*Roasted Garlic:  Cut top off top of garlic head exposing the cloves.  Place on a piece of foil and drizzle with olive oil.  Wrap up and bake at 400 degrees F for approximately 1 hour.  This can be done ahead of time and refrigerated.

Enjoy!

Cheers & Hugs,
Jodi

Fresh Blueberry, Pistachio, & Edamame Salad with Goat Cheese

Fresh Blueberry, Pistachio, & Edamame Salad with Goat Cheese.

Summer is such a glorious time of fresh bounty.

Salads become meals made from fresh fruits and vegetables.  Like this yummy salad I made for lunch one day with some plump sweet and tart blueberries, crunchy pistachios, protein and fiber-rich edamame, and creamy crumbled goat cheese piled on a bed of greens.

All of this drizzled with a honey red wine vinaigrette is heaven in a bowl!

What is your favorite summer salad?  There are so many wonderful combinations and possibilities!

Fresh Blueberry, Pistachio, & Edamame Salad with Goat Cheese

Ingredients:

  • Mixed Greens (Kale, Arugula, Spinach Swiss Chard – any of your faves)
  • Fresh Blueberries
  • Pistachio Nuts, shelled
  • Edamame, shelled
  • Goat Cheese, crumbled
  • Green Onions, chopped (optional)
  • Red Wine Vinaigrette Dressing (homemade or your fave – this is how I make mine – it will make more than you need for one salad) 
    • 1/4 cup Red Wine Vinegar
    • 1/2 cup Olive Oil
    •  Tbsp Honey
    • Salt & Pepper

Directions:

In a bowl, place a handful of mixed greens.  Top with fresh blueberries, pistachios, edamame, goat cheese, and green onions (if desired).  Drizzle with Red Wine Vinaigrette Dressing.

Enjoy!

Cheers & Hugs,
Jodi

Apricot Glazed Pork Tenderloin

Apricot Glazed Pork Tenderloin.

Pork lovers get ready to swooooon!  This might be the most delicious way I have ever prepared pork tenderloin!

I made this yummy recipe earlier this week to go with the Roasted Brussels Sprouts with Bacon and Apples I featured HERE.

It was like a match made in Yum Yum Heaven!  I have to admit I moaned a few times eating it!

Hope you give it a try!

Apricot Glazed Pork Tenderloin*

Ingredients

  • 1 pork tenderloin (approx. 1 1/2 lbs)
  • Salt and pepper
  • 1 Tbsp dried thyme
  • 2 Tbsp butter
  • Olive Oil
  • 1/2 cup white wine
  • 1/2 cup chicken broth/stock
  • 1 Tbsp minced fresh rosemary
  • 2 Tbsp apricot preserves (heaping)
  • 1 Tbsp Dijon mustard
  • 2 Tbsp low-sodium soy sauce (as much as I LOVE salt, I always recommend low-sodium soy sauce)
  • 1 Tbsp Worcestershire sauce

Directions:

Preheat oven to 350 degrees F.

Melt butter and a drizzle of olive oil in a large oven-safe skillet.  When hot, add tenderloin(s).  Liberally season pork with salt and pepper and dried thyme.   Sear the pork on all sides.

When pork is beautifully seared and browned all over, add wine and chicken broth/stock to the skillet.  Cover and place in preheated oven for 15-20 minutes or until internal temperature reaches 140 degrees F.

Remove pork and place on cutting board.  Cover with aluminum foil, and let rest for 5 minutes.

In skillet, add apricot jam, Dijon mustard, soy sauce, Worcestershire sauce and rosemary.  Cook over low heat for 4-5 minutes allowing the glaze to thicken.

Slice pork tenderloin and drizzle glaze over top.

Enjoy!

Cheers & Hugs,
Jodi

*Original recipe found at AGoudaLife.com.

Roasted Brussels Sprouts with Bacon and Apples

Roasted Brussels Sprouts with Bacon and Apples.

When my friend, Janet shared a recipe yesterday on Facebook for Roasted Brussels Sprouts with Bacon and Apples by Mary from BarefeetintheKitchen, I knew I was making this for dinner last night.

I had just bought some fresh tiny, tender brussels sprouts, and I had bacon in the freezer and apples in the crisper.

And oh am I glad I tried this!  It was absolutely amazing!  A veggie side dish easy enough for an every night dinner as well as being delicious and “special” enough to serve to guests for a special occasion is perfection in my book!

Here is how I made it!  Please let me know if you try and how you like it.

Roasted Brussels Sprouts with Bacon and Apples

Ingredients:

  • 6 slices bacon, cut into 1 inch pieces
  • 1 lb fresh Brussels sprouts, trimmed and cut in half
  • 1 apple, cut into bite-sized pieces
  • Salt and Pepper
  • 1 Tbsp. Red Wine Vinegar

Directions:

Preheat oven to 400 degrees F.

Place bacon in a single layer on stoneware baking pan or shallow baking sheet.  Roast 10 minutes.   Remove bacon from pan and set aside.

Place Brussels sprouts in pan and toss thoroughly in bacon drippings.  Sprinkle generously with salt and pepper.  Roast for 10 minutes.

Remove pan from oven, and add apple pieces and bacon to Brussels sprouts in pan.  Toss to incorporate.  Roast an additional 10 minutes or until Brussels are browned and apples become tender.

Remove from oven, and sprinkle red wine vinegar on top of all.  Toss, and serve immediately.

Enjoy!

Cheers & Hugs,
Jodi


Pittsburgh’s Picklesburgh 2017 is a Big Dill

Pittsburgh's Picklesburgh is a Big Dill! #Picklesburgh2017

Pittsburgh's Picklesburgh is a Big Dill!

Though I reside in a little town called Mars, our "big city" is Pittsburgh.  Just 30 minutes from Mars (hard to believe eh?!), Pittsburgh is really where all the "action" is.

This past weekend (July 28-29, 2017), one of Pittsburgh's 446 bridges (the Roberto Clemente or 6th Street Bridge) was closed down to automobile traffic and opened up for a dill-lightfully dill-licious celebration of all things pickle!  Picklesburgh 2017.

So what to do at "life in between?"  Why visit Picklesburgh of course!

Why Pickles?

Pittsburgh has a particularly popular pickle-loving history beginning almost 150 years ago when the H. J. Heinz Factory was built.  I remember going on a Heinz factory tour as a grade school field trip and receiving one of the now iconic pickle pins.  (My granddaughter now has one in her Grandma Memory Jar from our visit to Picklesburgh this past weekend.)

Picklesburgh celebrates EVERYthing pickled!  You could find pickle-flavored sodas, pickle beer and moonshine, and pickle-flavored cocktails.

Dill-acacies included pierogies with pickles, pickled funnel cakes, pickle-flavored custard, and deep-fried, bacon-wrapped pickles on a stick.  There were pickles and dip and grilled cheese sandwiches with pickles.  There was pickle fudge and pickle peanut butter cookies.

There were pickle balloons – small and large – including a giant flying Heinz pickle balloon, custom built by a team that also crafts balloons for Disney and the Macy’s Thanksgiving Day parade.

There were pickling food demonstrations

And pickle samples from local farm-to-table shop small vendors like Epic Pickles

and the Pittsburgh Pickle Company,

where I bought one of each flavor!

And if you don't have one yet, who could live without a dill pickle talk-to-text Linabag?

It sure was a dill-leriously dill-lectable way to spend a Saturday afternoon!

Thanks Picklesburgh!  Next year, I may just try that Pickle-flavored Italian Ice……

Maybe….

Cheers & Hugs,
Jodi


Honey Garlic Roasted Carrots

Honey Garlic Roasted Carrots.

Are you looking for a quick, easy, beautiful, AND delicious vegetable to prepare for an any-night dinner that is fit for company too?

These beautiful, colorful carrots are just the ticket.  They are as delicious and nutritious as they are beautiful.

Grab a bag of carrots and roast them up.

I hope you love them as much as we did!

Honey Garlic Roasted Carrots

Ingredients:

Directions:

Preheat oven to 400 degrees F.

Peel and cut carrots.  Place in shallow baking stone or pan.  Drizzle with olive oil.  Sprinkle with salt and pepper.  Drizzle with honey.  Top with rosemary and garlic.

Toss gently and roast for 20-30 minutes, stirring every 10 minutes.

Enjoy!

Cheers & Hugs,
Jodi

Funny Kitchen Towels – A Wedding Shower Gift Idea

Funny Kitchen Dish Towels – A Wedding Shower Gift Idea.

This past weekend, I went to a bridal shower for a sweet young lady who I wanted to get something special for.

Becky has been out on her own for a while, so she has most of the “basics” some brides need when starting out.

One thing she is known for is her an amazing sense of humor, so when I saw these adorable funny kitchen towels on ETSY at WorksOfHeartDesignCo., I just knew I had to get them for her.

In case you can’t read on the photo, they are each personalized with her name and have the following sayings:

  • I Like Big Bundts and I Cannot Lie (Bundt Pan)
  • This is How I Roll (Rolling Pin)
  • Don’t Go Baking My Heart (Pie)
  • Chop it Like its Hot (Knives)
  • Shake it Up Baby (Salt & Pepper Shakers)
  • I Say Whip It, and Whip it Good (Whisk)
  • You Spin Me Right Round Baby Right Round (Electric Mixer)

I added a few kitchen tools and gadgets, put it all in a fun basket and wrapped with clear cellophane tied with a big bow.

If you are looking for a cute and unique idea for a bridal shower, wedding gift, or someone who loves (or hates) the kitchen, I think these are so cute!  (and FYI – I have no relationship to Jess at WorksofHeartDesign Co., nor did I receive any compensation for promoting – I simply just love her products!)

Wishing Becky and Michael a lifetime of happiness and love!

Cheers & Hugs,
Jodi


Blueberry Streusel Coffee Cake

Blueberry Streusel Coffee Cake.

What is a girl to do when a bestie friend comes home after a long time away?!

Well…. run over and visit and hug as soon as possible!  Right?!

But you can’t go empty handed!

So – what to bake to take?  I needed something quick, but yummy, that my sweet friend Janet and her Mom and Dad would enjoy…

I had some amazing fresh blueberries in the fridge I had recently bought at a local farm market, so I decided to make a blueberry cake.

And OH was it yummy!  (I know because I kept half for hubby and me and took half to them.  She is that kind of friend!  The best kind – that you can take half a cake to – LOL!)

I arrived just in time to serve it to them for dessert!

Oh the joy of friendship!  Oh the joy of baking and sharing!

Make this for yourself!  Make this to give away!  But make this amazing Blueberry Streusel Coffee Cake today!  (oh dear – am I still rhyming?! )

Welcome home sweet Janet!  Looking forward to our time together.

Here is the recipe I made as I adapted from LifeLoveandSugar:

Blueberry Streusel Coffee Cake

Ingredients:

Streusel:

  • 3/4 cup flour
  • 3/4 cup packed brown sugar
  • 1 tsp. cinnamon
  • 6 Tbsp. salted butter, melted

Cake:

  • 1/2 cup white sugar
  • 6 Tbsp. salted butter, room temperature
  • 1/4 cup sour cream (light sour cream works fine)
  • 1/4 cup milk (I used Skim)
  • 1 large egg
  • 1 1/2 tsp. vanilla
  • 1 1/2 tsp. baking powder
  • 1 cup all-purpose flour
  • 2 cups fresh blueberries

Glaze:

  • 1/2 cup powdered sugar
  • 1 Tbsp. milk

Directions:

Preheat oven to 350 degrees F.

Prepare an 8-9 inch cake pan by greasing bottom and sides with shortening and then placing a circle of parchment paper in the bottom.

Prepare streusel by combining ingredients in a medium bowl with a fork.  Set aside.

Prepare cake batter by beating sugar and butter in electric mixer for 3-4 minutes until light and fluffy.  Add sour cream and milk  until well incorporated.  Add egg and vanilla.  Finally, add baking powder, then flour just until thoroughly combined.

Spread half of the batter in prepared pan.  Top with half of the streusel mixture, then  3/4 cup blueberries.  Repeat batter, streusel, then 1 cup blueberries.

Bake for approximately 35 minutes or until toothpick inserted comes out clean.

Cool in pan for 20 minutes, then remove from pan.

Prepare glaze by  by combining powdered sugar and milk until a glaze consistency is achieved.  Add more powdered sugar or milk as needed.

Drizzle cooled cake with glaze, and top with remaining 1/4 cup fresh blueberries.

Serve warm or cold – plain or with a scoop of ice cream or whipped cream!

Enjoy!

Cheers & Hugs,
Jodi