Fresh Strawberry & Lemon Poppy Seed Cake

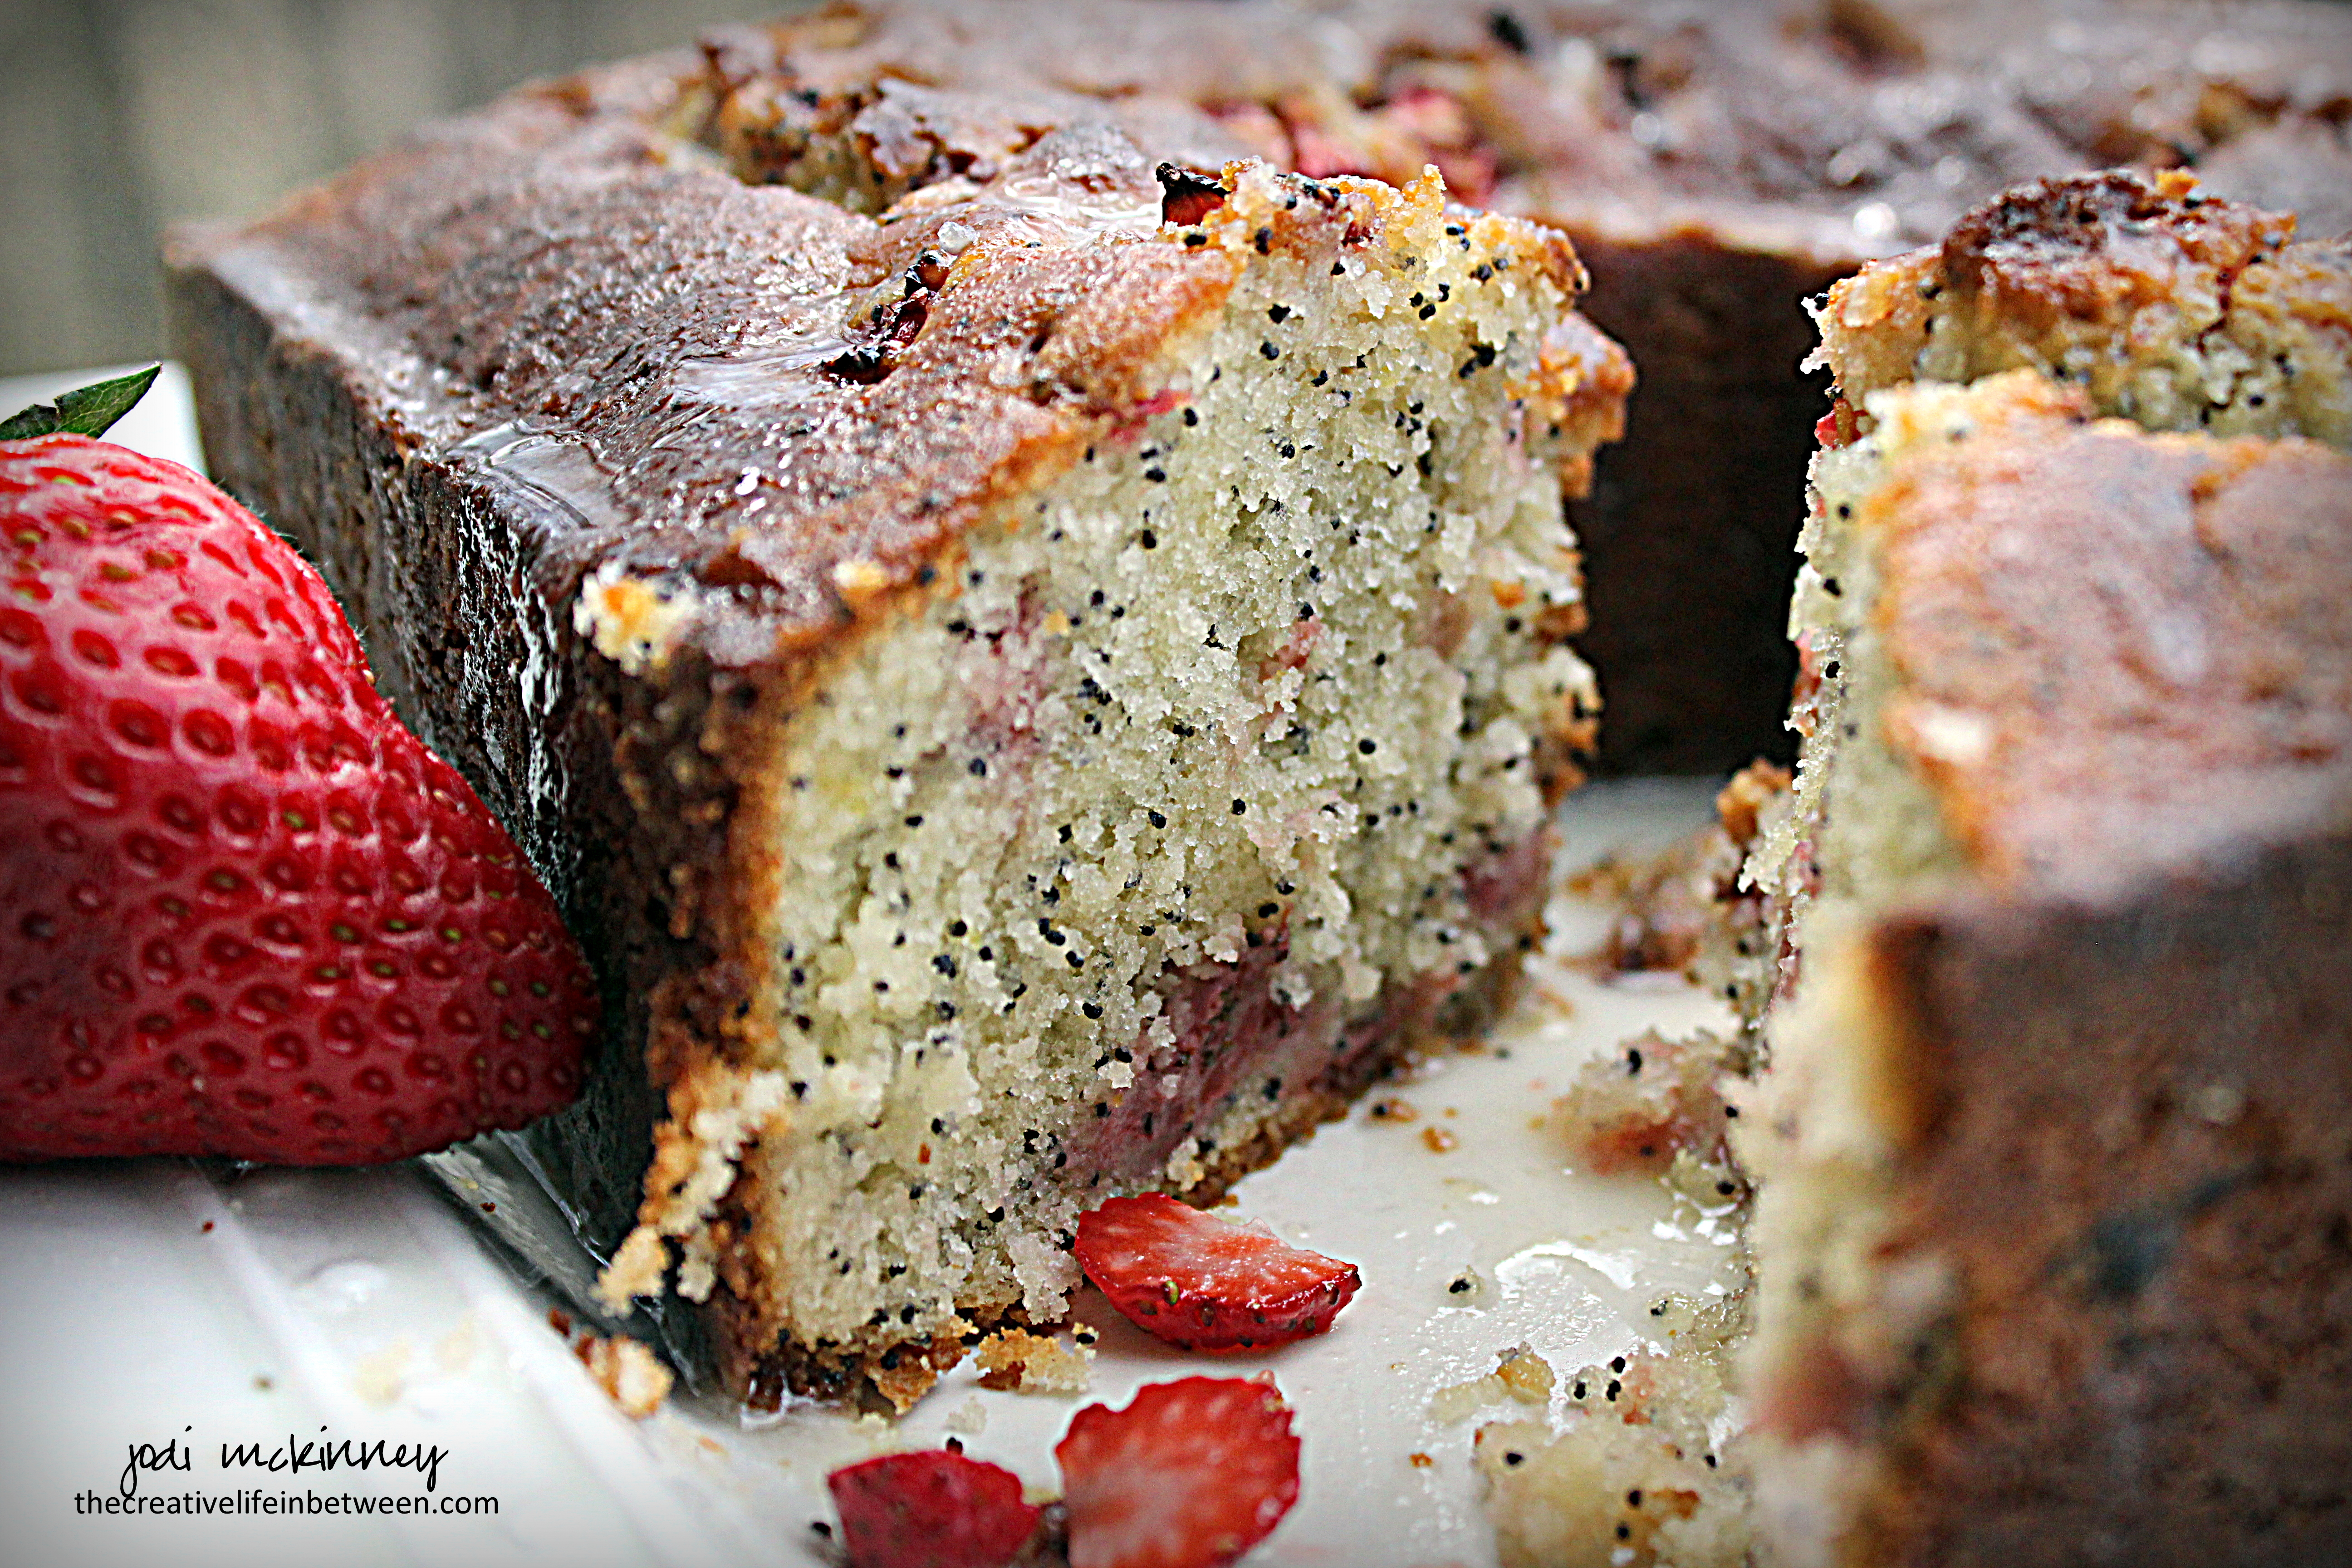
Fresh Strawberry & Lemon Poppy Seed Cake.

If you know me at all, you know Poppy Seed Cake is my favorite of all cakes.

Unusual to most I’m guessing, but most significant to me because my Grandma always made it for my birthday (New Year’s Eve) since everyone is just about over it with sweets by then after the holidays.

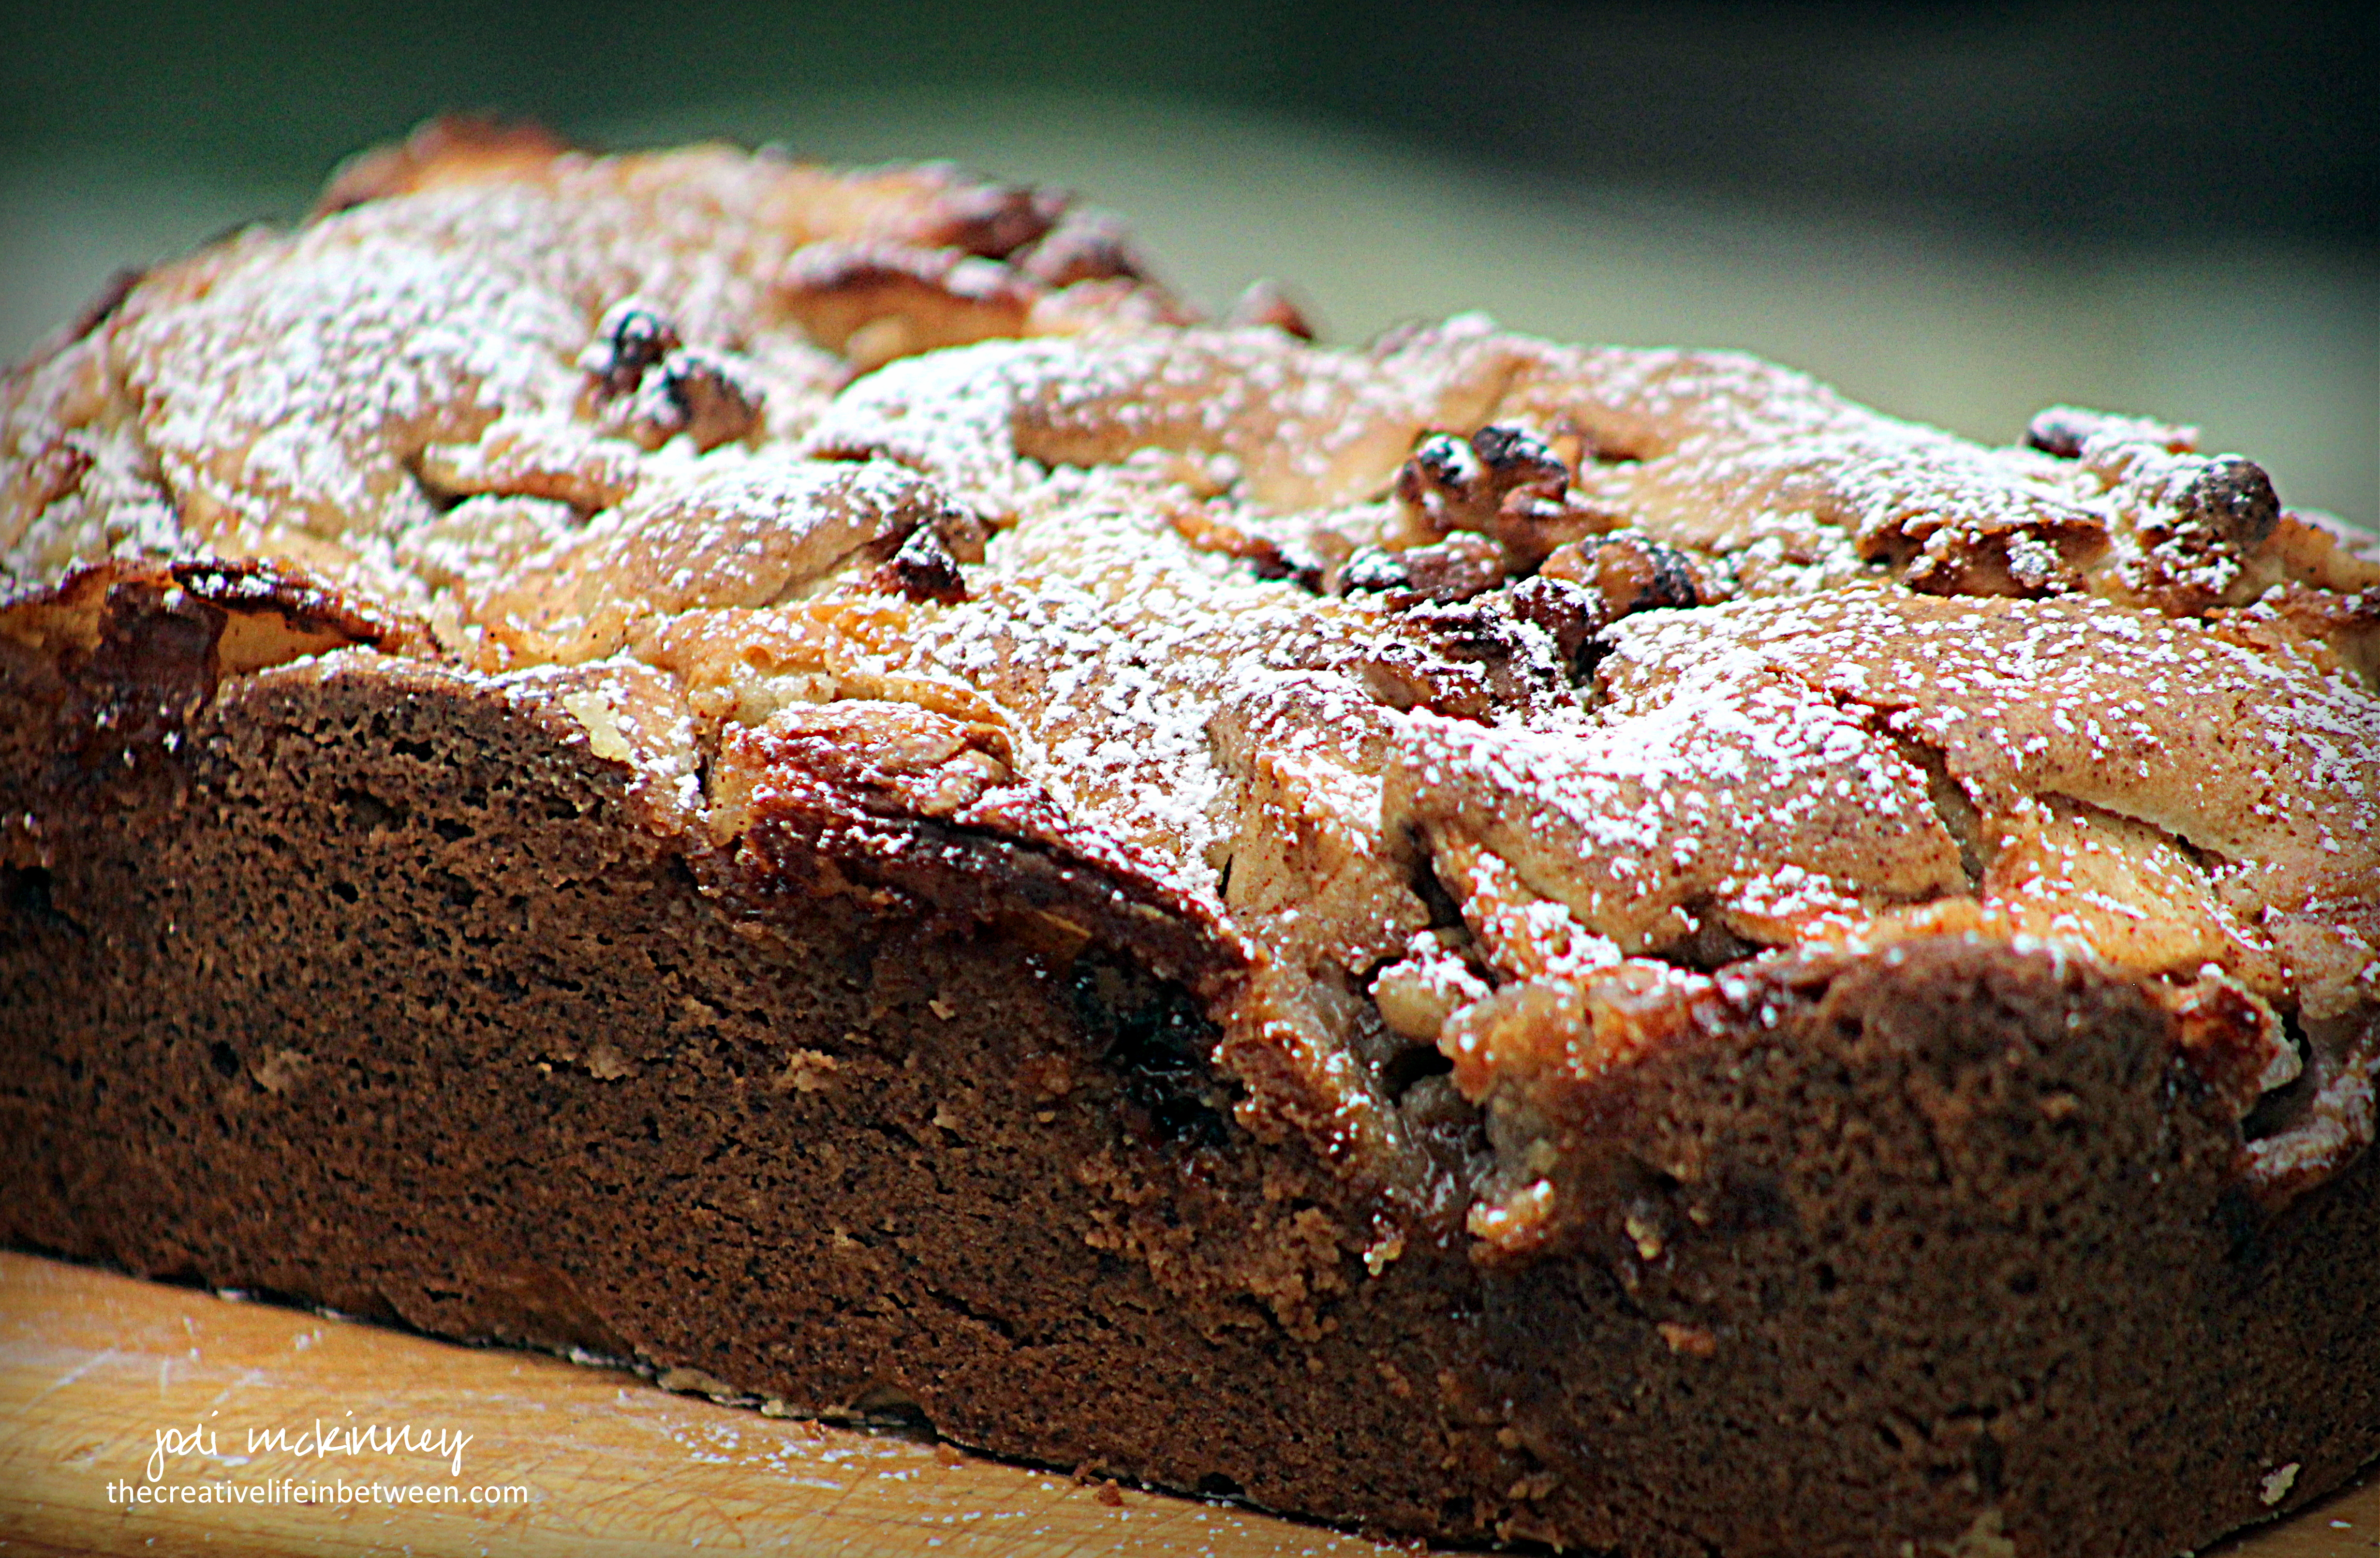
I had some fresh strawberries that were on the verge of going bad and lemon on the brain from a cookie I was making for the wedding cookie table, so I decided to whip up and “zip” up a poppy seed cake for Easter Sunday.

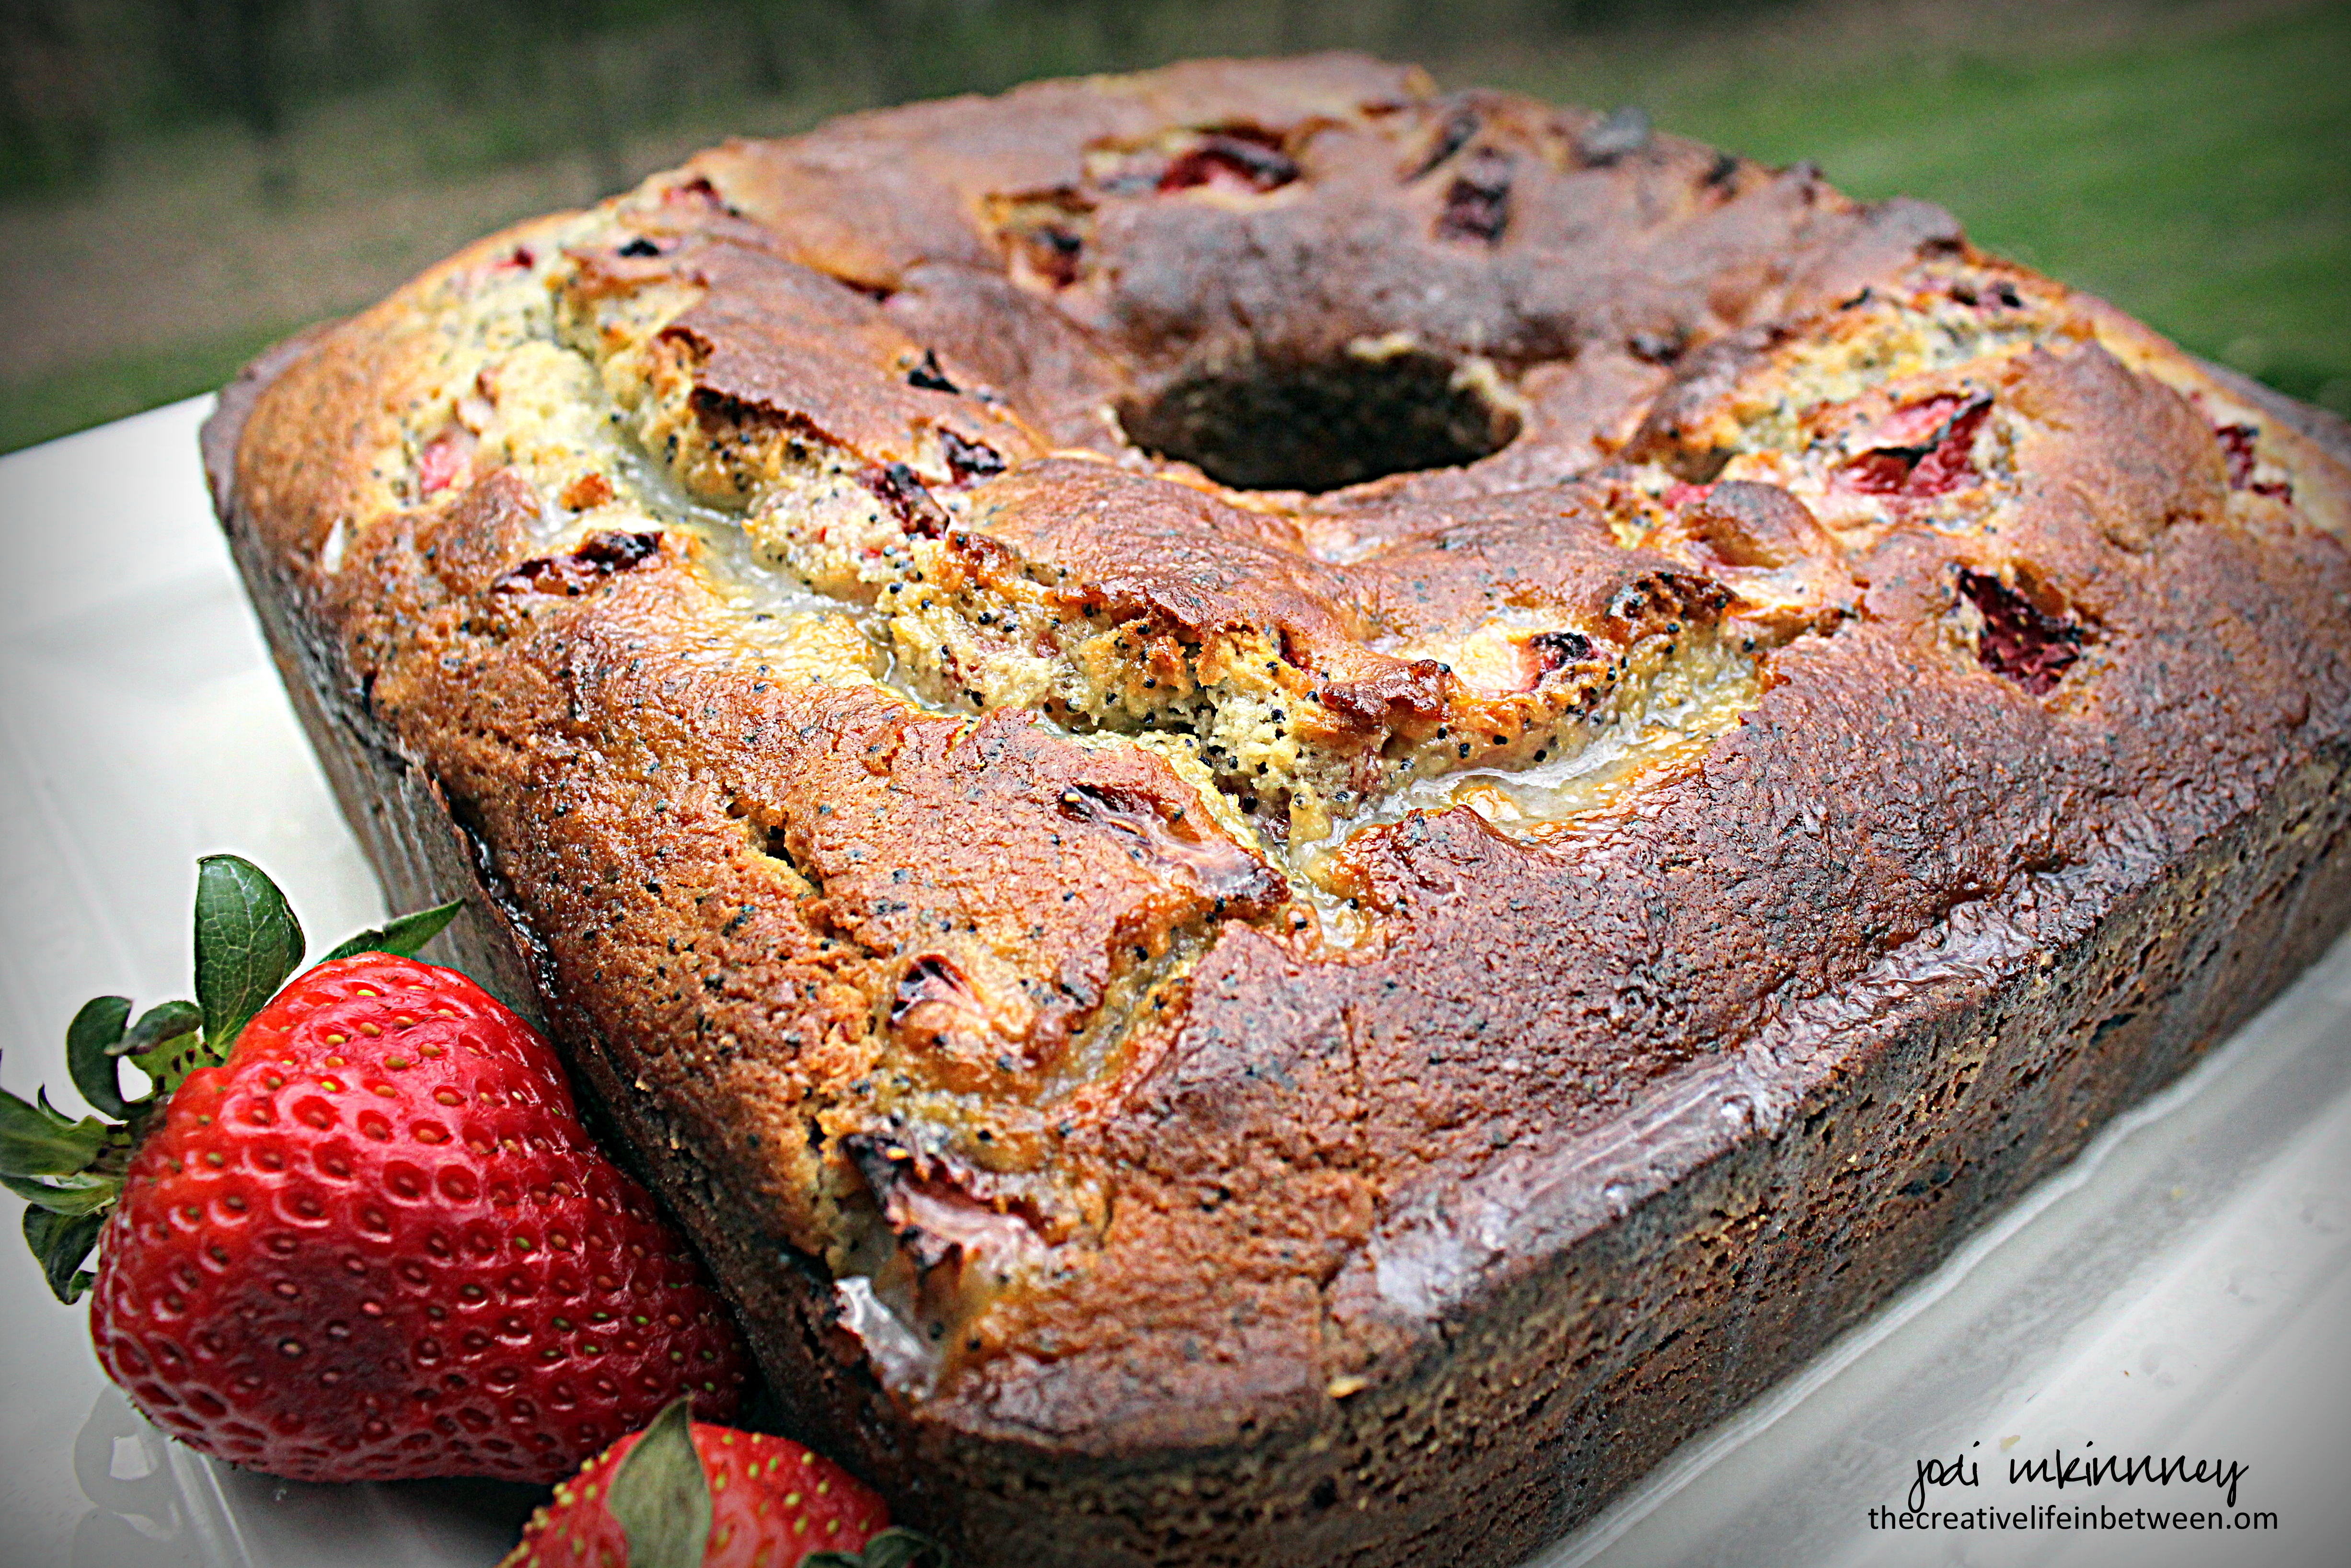
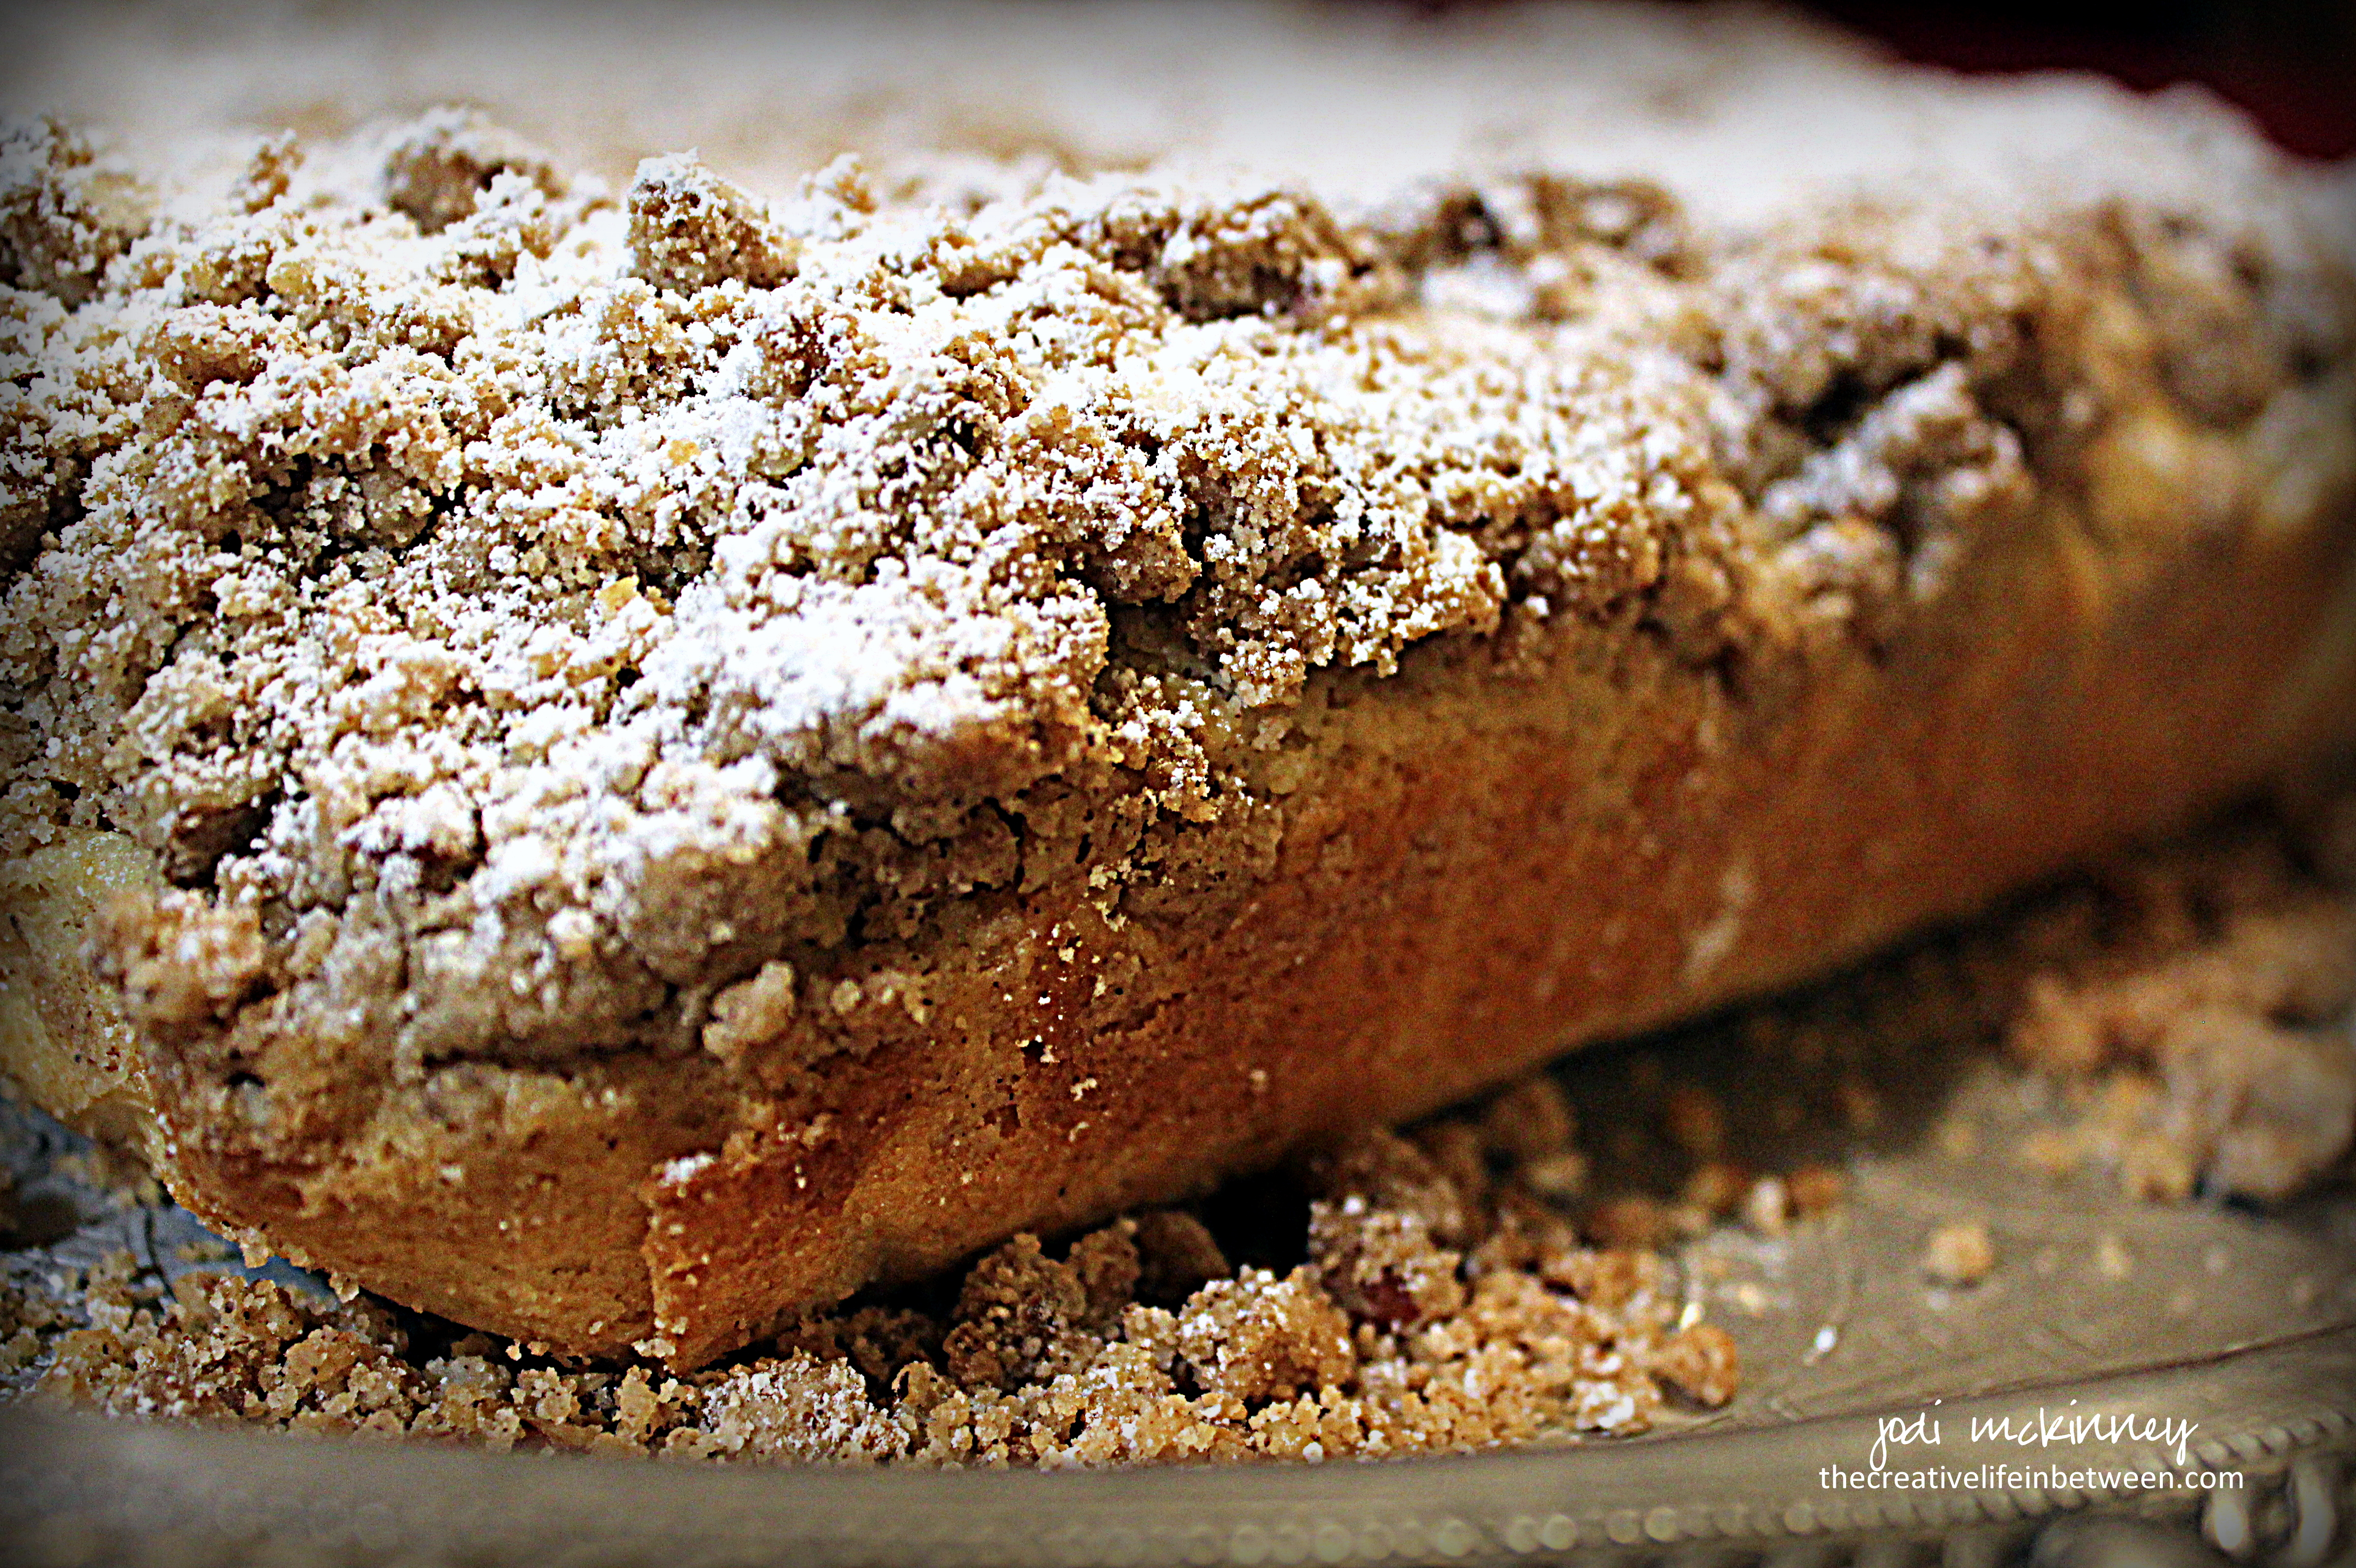
A bit of tart and sweet lemon zest in the batter along with chunks of juicy red-ripe strawberries and a thin lemon glaze really “Spring”ed up my usual wintertime poppy seed cake craving.

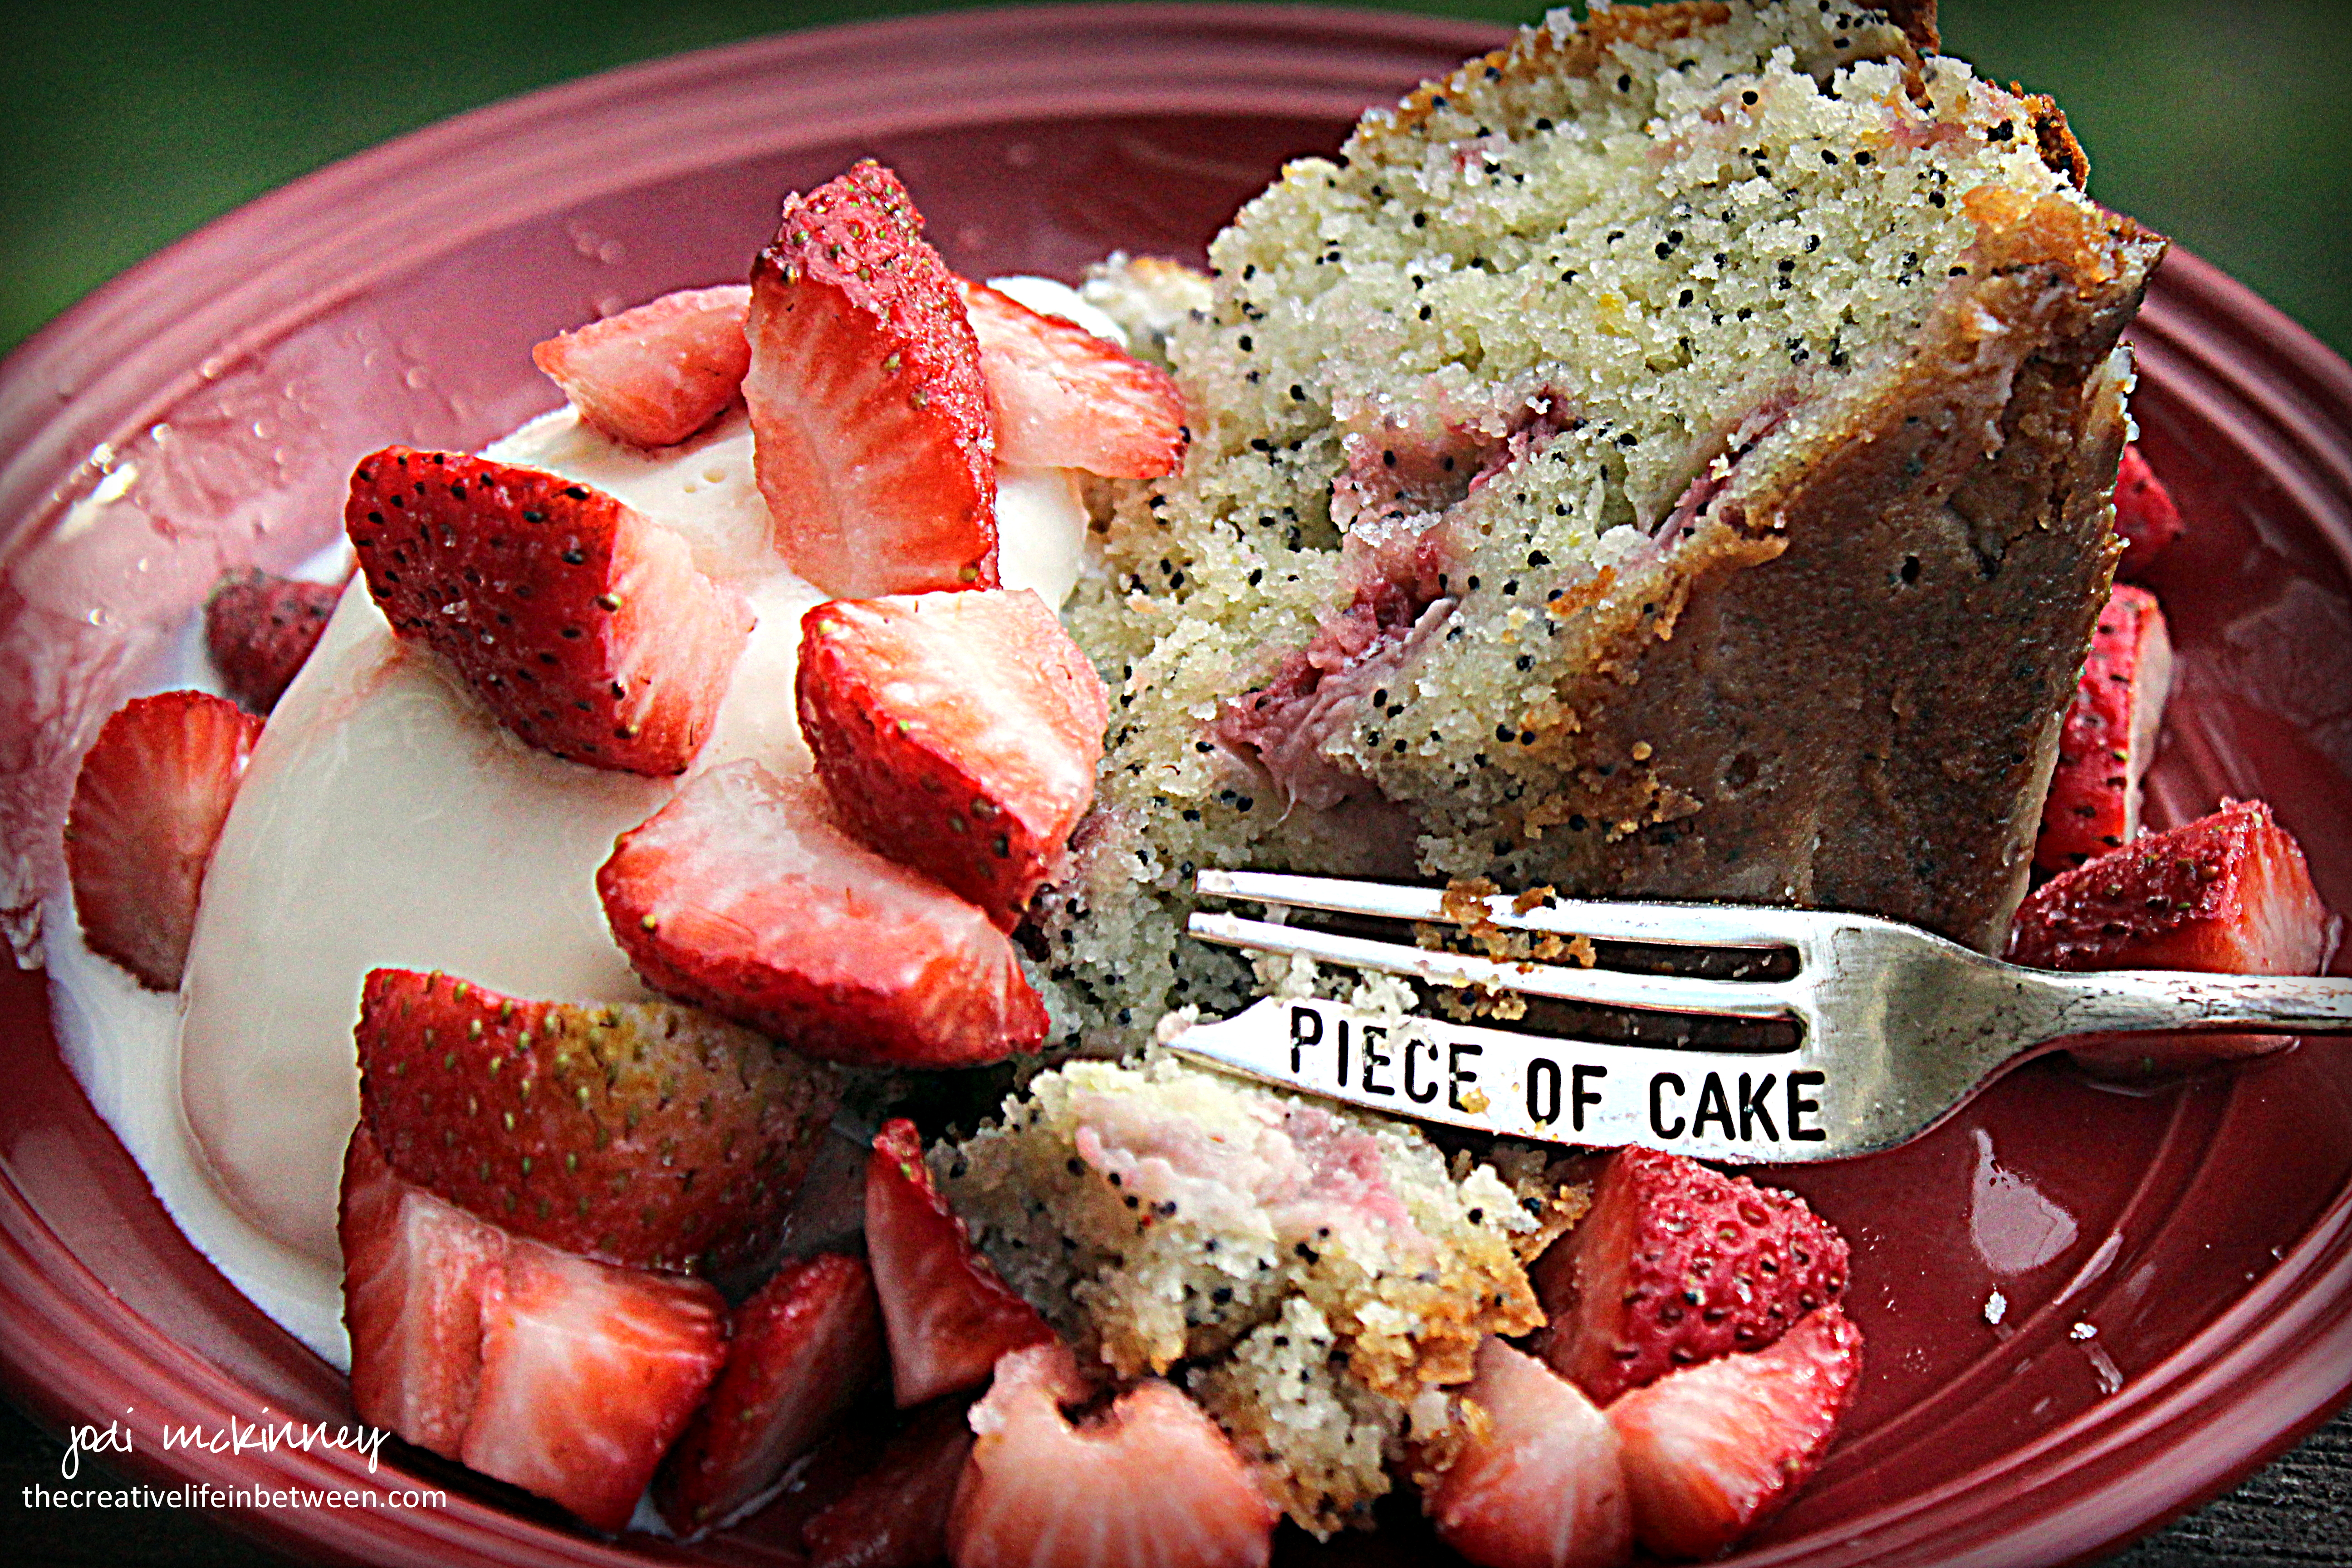
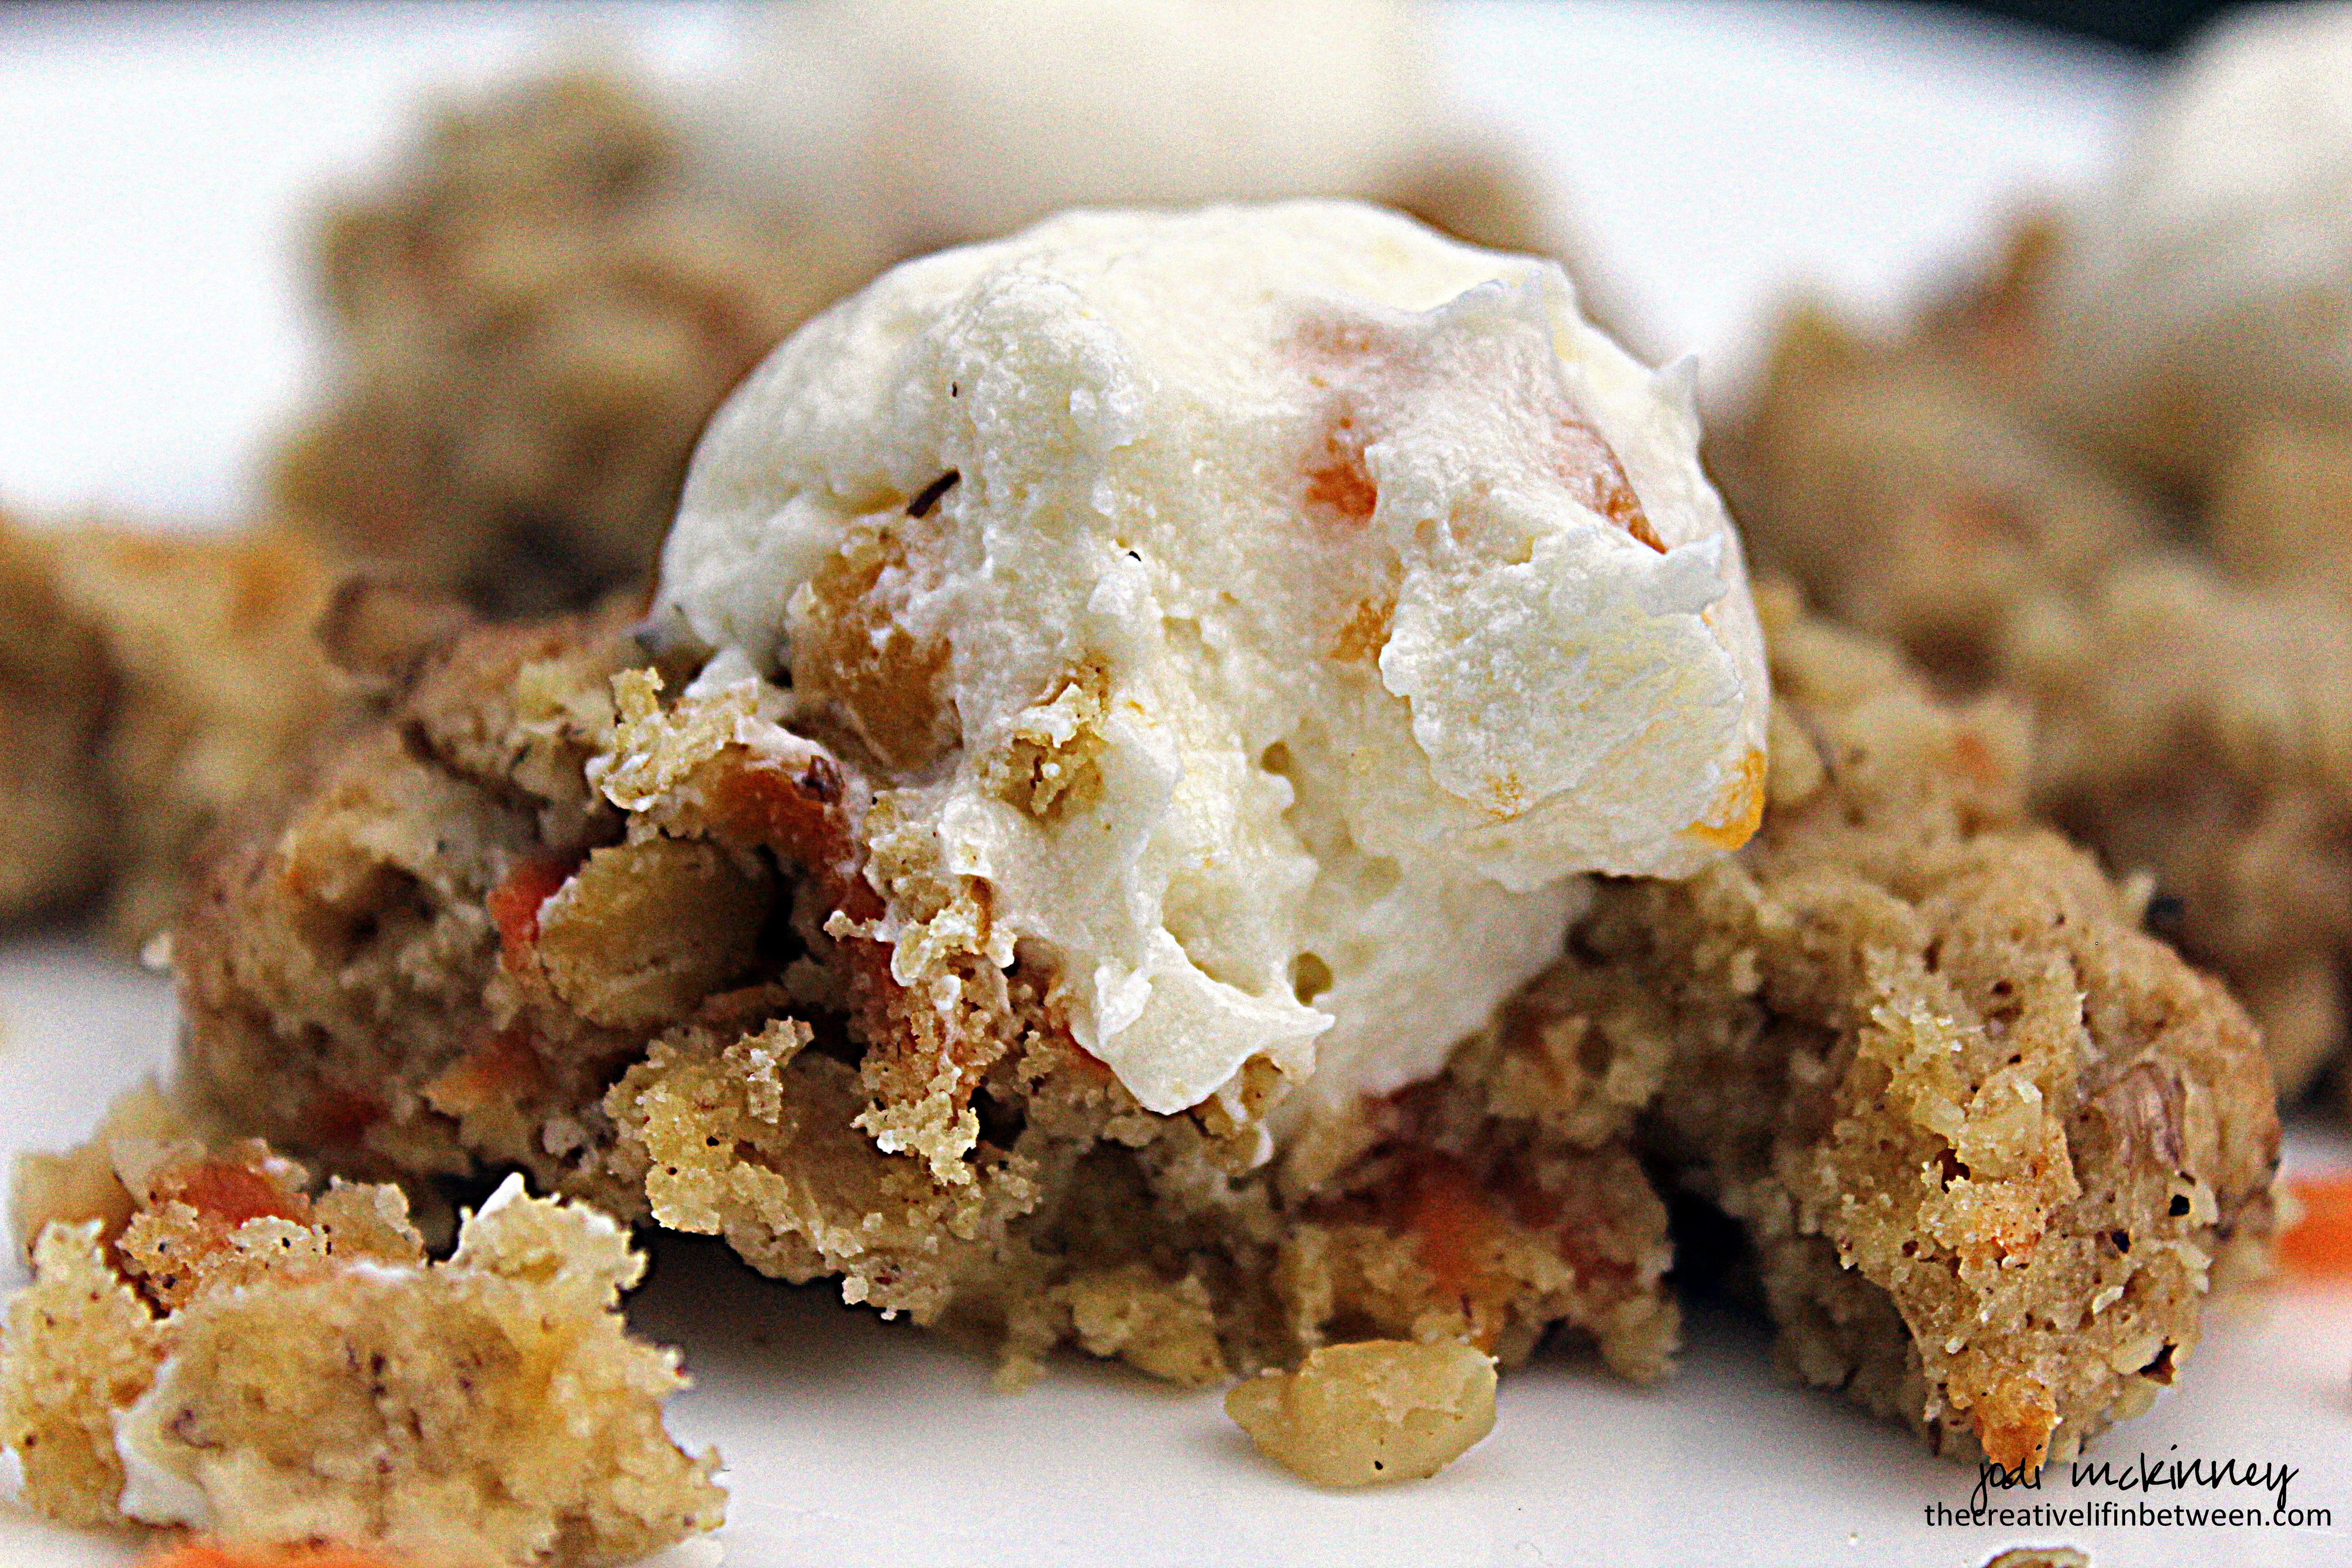
Hubby loved his with a scoop of vanilla ice cream and an extra handful of fresh strawberries on top.

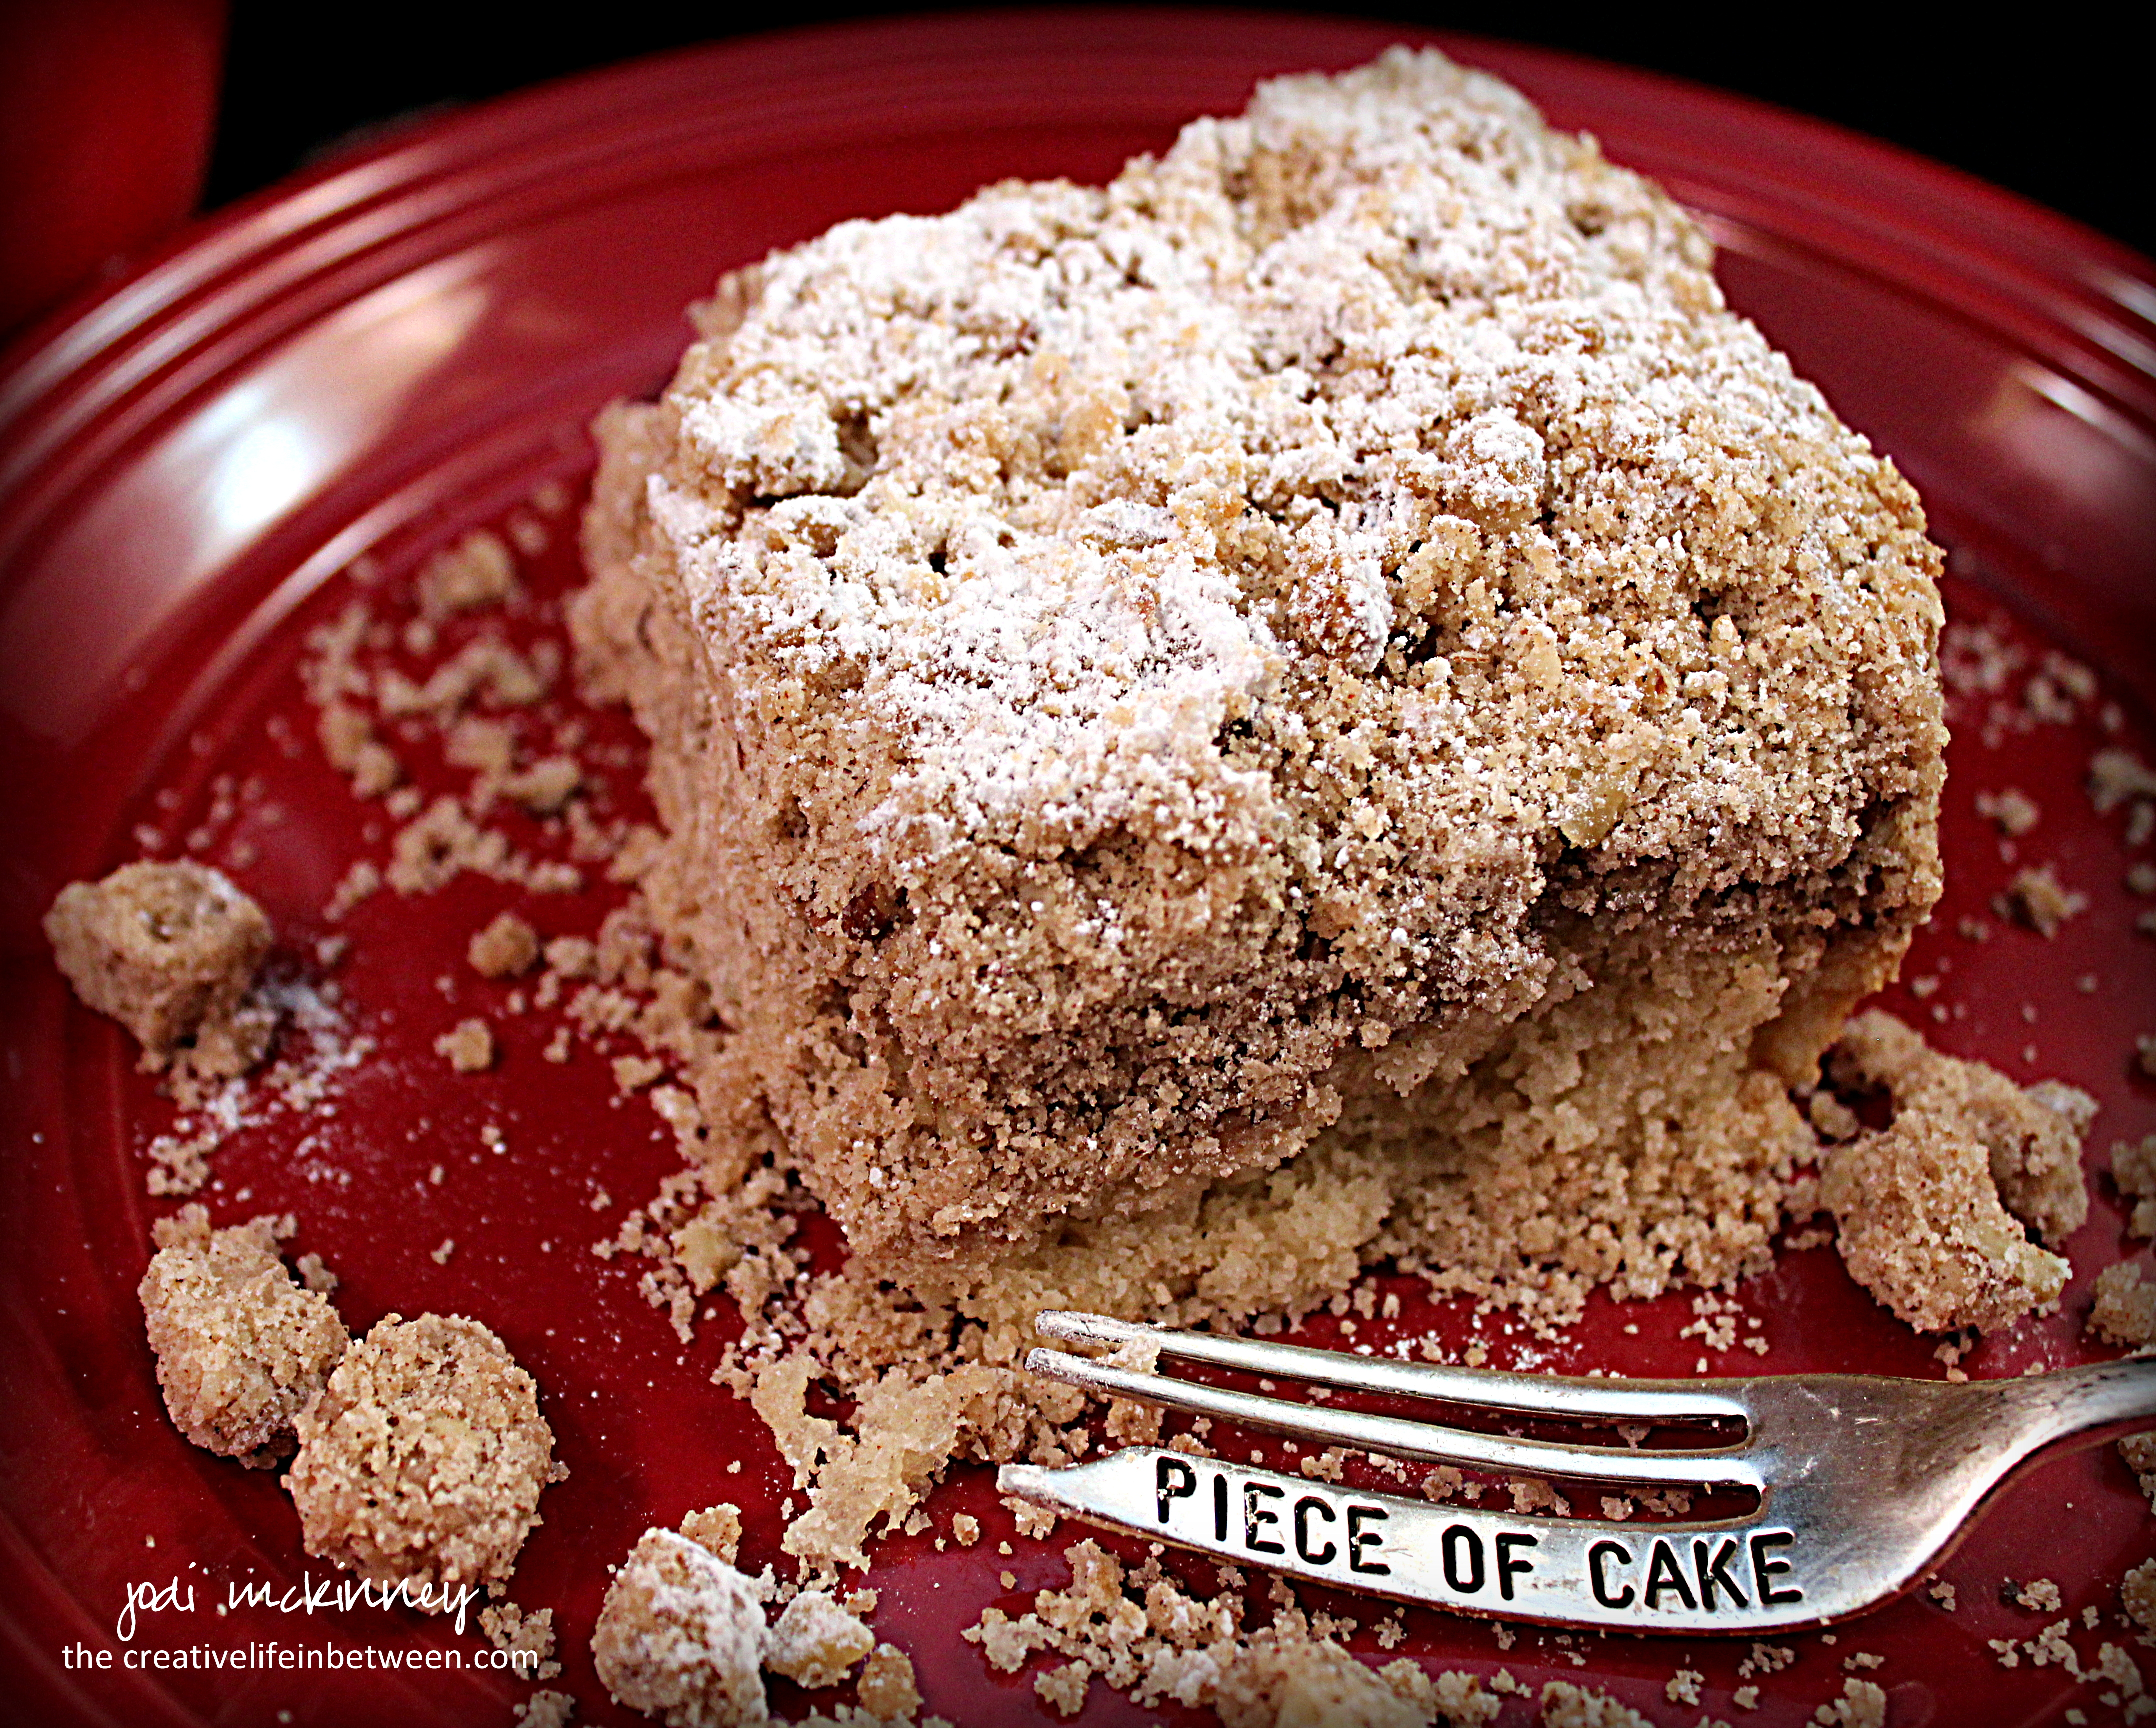
If you are looking for a fresh, not too sweet, but yummy Spring cake to serve, give this one a try.  It is truly delightful!

Fresh Strawberry & Lemon Poppy Seed Cake*

  • Servings: 1 marvelous cake
  • Print

Ingredients:

  • 1 cup butter, melted
  • 1 cup sugar
  • 1 tsp. lemon zest
  • 3 eggs
  • 1 cup milk
  • 1/3 cup vanilla Greek yogurt
  • 2 tsp. vanilla extract
  • 2 tsp. baking powder
  • 1/2 tsp salt
  • 2 1/2 cups flour
  • 1 1/2 cups fresh strawberries, chopped
  • 1/4  cup poppy seeds
  • Glaze:
    • 2 Tbsp. lemon juice
    • 1 cup powdered sugar
    • 2 Tbsp milk

Directions:

Preheat oven to 375 degrees F.  Grease and flour a fluted cake pan or your favorite.

In a large bowl, beat together the melted butter, sugar, and lemon zest.  Add eggs, one at a time, fully incorporating.  Add milk, yogurt and vanilla next.  Stir in dry ingredients until combined.  Gently stir in strawberries and poppy seeds.

Pour batter into prepared pan and bake for 50-60 minutes, or until cake test inserted comes out clean.

Prepare glaze by mixing lemon juice and powdered sugar until sugar is completely dissolved, then stir in milk until smooth.   Set aside.

Cool cake for at least 20 minutes before drizzling with glaze.

Serve with additional fresh strawberries and ice cream, if desired.  

Enjoy!

Cheers & Hugs,
Jodi

*Adapted from a recipe found on BakerbyNature.com

Carrot Cake Thumbprint Cookies

Carrot Cake Thumbprint Cookies.

I tried a new cookie recipe this weekend to add to the wedding cookie table.

And OMG – if you ever dreamed you could have your cake and eat it in a cookie too – well – your dream has come true with this recipe.  Seriously… carrot cake delightfulness in a cookie!

The frosting filling alone…… well…. all I can say is it makes me think of what a cloud might taste like in heaven….  sweet creamy, buttery, cream cheesey delight with a swirl of apricot.  Can you even imagine?!

A nutty, crunchy, shortbread-like cookie with a delightful apricot cream cheese filling.  If you are looking for a beautiful, sweet treat for a special occasion like perhaps – a wedding cookie table – these lovely little morsels are just the ticket!

Carrot Cake Thumbprint Cookies

Ingredients:

  • 4 sticks butter, melted, plus 2 sticks, room temperature, for frosting
  • 1 1/3 cup packed light brown sugar
  • 1 1/3 cup sugar
  • 4 large egg yolks
  • 4 cups all purpose flour
  • 2 tsp ground ginger
  • 2 tsp ground cinnamon
  • 2 tsp salt
  • 3 cups old-fashioned rolled oats
  • 3 cups finely grated carrots
  • 1 cup chopped dried apricots or golden raisins
  • 2 cups chopped walnuts or pecans
  • 1 cup confectioner’s sugar
  • 8 oz cream cheese, softened to room temperature
  • 6 tsp. apricot jam

Directions:

Preheat oven to 350 degrees F.

In a large mixing bowl, beat melted butter, sugars, and egg yolks until light and creamy.  Blend in ginger, cinnamon, and salt.  gradually beat in flour.  Mix in oats, carrots, and chopped apricots or raisins.  Cover and refrigerate for at least 30 minutes.

Roll dough into 1 1/2 inch balls.  Roll into chopped nuts.  Place on baking stone or cookie sheet, and bake for 8 minutes.  Remove from oven, and quickly press an indentation into center of each cookie ball.  Return to oven and bake for 8 more minutes until lightly golden brown.

Transfer to a cooking rack and cool completely.

In a mixing bowl, beat remaining 2 sticks of softened butter and confectioner’s sugar until light and fluffy.  Beat in cream cheese.  Gently swirl in apricot jam.

Place frosting in large Ziploc bag.  Snip corner and pipe into each cooled cookie.

Enjoy!

Cheers & Hugs,
Jodi

*Adapted from Martha Stewart


Cake Pops! Tips for Beginners


chocolate-dipped-german-chocolate-cake-pops

Cake Pops!  Tips for Beginners.

I adore cake pops!

Because… really…  what could be better than a bite-sized morsel of cake dunked in chocolate?  And then maybe adorned with sprinkles?!

They are delicious and pretty and cute; but until this past weekend, I had never tried to make them.

I wanted to practice for an upcoming event or two, so I read and researched and asked around and gave them a whirl this past weekend.

white-and-gold-elegant-cookie-pops

They are really not that difficult, but there are a few tricks to success.  I thought I would provide a few tips that helped make mine turn out delicious and beautiful!  At least that is the consensus I got from the party I took them to as “practice” pops.

cake-pops-german-chocolate-before-dipping

To make cake pops, bake a cake mix – whatever you favorite flavor is.  Then follow these tips for success.

  • Freeze cake – even if overnight.  It allows you to plan ahead and also adds to the moisture of the cake.  Simply place baked  cake – crumbled, broken pieces, or all in one piece – in a large Ziploc bag in the freezer.
  • 1 boxed cake mix  makes approximately 3 dozen cake balls.
  • When ready to assemble, defrost the cake and crumble to fine crumbs with your hands in the bag.
  • Add only enough frosting (ready made works perfect) to add a bit of “glue” for forming and holding balls together.  I used 1 heaping tablespoon – that is it!  This allows your cake balls to truly taste like cake.
  • Scoop crumb mixture with a small scoop to form uniformly-sized 1 inch balls.  Then roll with your hands to round ball.
  • Melt chocolate candy melts in microwave in a deep cup that is not too wide to allow for ease of dipping.  It only takes 1 1/2 – 2 minutes.
  • Dip tips of sticks into candy melts and insert into cake balls.
  • Refrigerate or freeze for at least a half hour or several hours.
  • Remelt chocolate at 30 second intervals until desired consistency.
  • Dip cake balls on sticks into chocolate candy melts.  Allow excess to drain.
  • Place on parchment paper if using with stick up, and sprinkle with jimmies or edible glitter.
  • Stick into styrofoam if using cake ball up and decorate as desired.
  • Make ahead up to 3-5 days if needed – no more than 7 days.  (there are horror stories of moldy cake balls made too far ahead of time)
  • I found this site – Heavenly Cake Pops – to be extremely informative.

Have fun and enjoy!

Cheers & Hugs,
Jodi

Cinnamon Pecan Crumb Cake

cinnamon-pecan-crumb-cake-piece

BEWARE:  This Cinnamon Pecan Crumb Cake is only for the most serious crumb cake lovers!  Are you one like me?  Do you love more buttery, sugary, nutty crumbs than cake?  If so, this is the cake for you!  And I dare say it should not be consumed without a large steaming cup of coffee to wash down the “crumby” goodness.  Be still my coffee crumb cake lovin’ heart!

Let’s take a closer look at all that “crumby” deliciousness…

cinnamon-pecan-crumb-cake-piece-2

Don’t say I didn’t warn you.  This is a seriously “crumby” cake!

cinnamon-pecan-crumb-cake-piece-3

With buttery, nutty, cinnamony wonderfulness, this cake is a serious indulgence justified as breakfast when served with coffee…. but Hubby discovered it works very well as an evening snack when topped with a scoop of Vanilla Caramel Gelato!

If you don’t like your cake quite so “crumby,” you could double the cake batter or half the crumb topping.  Also – be careful not to overbake and dry the cake out – –  unless you are eating it with vanilla caramel gelato or dunking it in coffee.  In that case – who cares!

Diet shmiet – this cake is worth the calories!  Enjoy!

Cinnamon Pecan Crumb Cake

Ingredients:cinnamon-pecan-crumb-cake-piece-2
  • Topping
    • 2 1/2 cups flour
    • 1 cup packed light brown sugar
    • 2 1/2 tsp ground cinnamon
    • 1/2 tsp freshly ground nutmeg
    • 2 sticks (1 cup) butter, melted
    • 1 cup finely chopped pecans (or walnuts)
  • Cake
    • 1 1/2 cups flour
    • 1/2 cup sugar
    • 2 1/2 tsp baking powder
    • 1/2 tsp salt
    • 2/3 cup milk
    • 1 large egg
    • 2 Tbsp canola or vegetable oil
    • 3 tsp vanilla extract

Directions:

Preheat oven to 325° F.  Prepare  8 or 9 inch square baking pan by spraying with vegetable spray and lining with parchment paper so it overhangs sides of pan. Spray the parchment paper with vegetable spray and set aside.

Make topping by combining flour, sugar, cinnamon, and nutmeg in a large bowl.  Make a well in the center of the mixture and add the melted butter. Stir to combine, then add the pecans using your hands to thoroughly mix. Topping should have a loose, crumbly consistency.  Set aside.

Prepare cake by whisking milk, oil, egg, and vanilla in medium bowl.  Add sugar, baking powder, salt, and flour.  Stir until just combined.

Pour the cake batter into prepared pan. Add all of the crumb topping evenly over the batter.

Bake approximately 30 mins.  The cake will rise, and the topping will bake into the cake batter.

Remove from oven and cool for 10 mins. in pan. Run a butter knife along the edges of the pan to loosen cake and lift it out to a cutting board. Cut into 9 squares. Sprinkle with powdered sugar to garnish if desired. 

Cheers & Hugs,
Jodi

*recipe adapted from Garlic&Zest

Jewish Apple Cake (Bread)

jewish-apple-cake-3

What better smell is there in Autumn than cinnamon and apples baking up in yummy cakes and pies and breads?

This recipe for Jewish Apple Cake is one I got from my BFF Jill, who doesn’t necessarily love to bake or cook, but when she does, she has some amazing recipes.  This is one of them.  The first time I tasted it, I had to have the recipe, and now I make it more than her.

In fact, she texted me yesterday morning, and I said, “Guess what I just took out of the oven?”  She mentioned she hasn’t made it in “forever.”  (That might be why she is thin, and I’m – well  – Not!)

jewish-apple-cake-1

I’m not sure why this is called “Jewish” Apple Cake, so I did a little Wiki research (and I’m going to look forward to hearing what my BFF Bubby has to say.)

Per Wikipedia:  Jewish apple cake is a kind of dense cake made with apples and sold mostly in Pennsylvania in the United States. It has limited known connections to Jewish cuisine. It is thought that this cake is actually a Pennsylvania Dutch culinary item that was erroneously attributed to Jews because it seemed “old world.”  It may also be considered Jewish because it contains no dairy, and it may therefore be eaten with meals containing meat, in accordance with Jewish laws of kashrut.

jewish-apple-cake-2

Seems most people make this in a bundt cake or springform cake pan, but Jill always made it in loaves of bread, so that is the way I do too!

Besides… when you do, you can keep one, and give two away… which is exactly what I plan on doing.

jewish-apple-cake-4

This cake/bread tastes delicious with coffee or tea for breakfast or a snack or dessert.  It is not too sweet, but cinnamony, and apply, and nutty enough to rock your world!

Hope you’ll give it a try.  Let me know if you do.

Jewish Apple Cake (Bread)

Ingredients:jewish-apple-cake-3

  • 4-5 pared apples, sliced thin (I used Honeycrisps)
  • 1 cup chopped walnuts
  • 2 1/2 cup sugar
  • 2 tsp. cinnamon
  • 4 eggs, beaten
  • 2 1/2 tsp vanilla
  • 1/2 cup orange juice
  • 1 cup oil
  • 3 cups flour
  • 2 tsp baking powder

Directions:

Preheat oven to 350 degrees F.  Grease and flour 3 bread loaf pans (approx. 8″x4″).

Mix together, apples, walnuts, 1/2 cup sugar, and cinnamon.  Set aside for sugar and cinnamon to soak into the apples and nuts.

Whisk together 2 cups sugar, eggs, vanilla, orange juice, and oil.  Add baking powder and flour, and stir just until batter is incorporated.

Alternate layering:  batter, apples, batter, apples, batter.

Bake 45 minutes or until toothpick inserted comes out clean.  Cool  in pan 10-15 mins.  Remove from pans and cool on wire rack.

Sprinkle with powdered sugar if desired.  Store in airtight bag.  Freezes well.

Enjoy!

Cheers & Hugs,
Jodi

Fresh Peach and Blueberry Greek Yogurt Cake

Peach Blueberry Greek Yogurt Cake 1

Sunday was a rather rainy, oppressively humid, relaxing, fabulous, lazy, stay-in-the-house kinda day.  What better kind of day to bake a beautiful treat like this Greek yogurt cake with fresh, juicy, ripe peaches…

Peach Blueberry Greek Yogurt Cake fresh peaches

and tart, tangy, locally-grown blueberries…

Peach Blueberry Greek Yogurt Cake fresh blueberries

for a lovely dessert!

Peach Blueberry Greek Yogurt Cake slice

OH How Yummy…

Peach Blueberry Greek Yogurt Cake

and OH How Beautiful!

Peach Blueberry Greek Yogurt Cake 2

Moist and sweet – but not too sweet, bursting with fresh summer fruit flavor, delicious warm or cold, amazing alone – and possibly even more amazing with a dollop of whipped cream or melting vanilla ice cream.

Hope you’ll give this a try.

Here is the recipe slightly adapted from JuliasAlbum.

Fresh Peach and Blueberry Greek Yogurt Cake

Ingredients:Peach Blueberry Greek Yogurt Cake 1

  • 1/2 stick (1/4 cup) butter, softened
  • 1 cup sugar
  • 2 eggs
  • 1 tsp vanilla
  • 1/2 cup Greek vanilla yogurt
  • 1 tsp baking powder
  • 1/2 tsp baking soda
  • 1 1/2 cups all-purpose flour
  • 3 fresh, ripe peaches, sliced into wedges
  • 1 cup fresh blueberries
  • 1 Tbsp raw or granulated sugar
  • 1/4 cup powdered sugar

Directions:

Preheat oven to 350°F. Spray the side and bottom of a 9″ springform pan with Pam cooking spray.  Line bottom with parchment paper, and spray it too.

Cream butter, sugar, and eggs until light and fluffy for approx. 2-3 minutes on high speed of an electric mixer.  Add vanilla and Greek yogurt, and continue beating for another minute.

With the mixer on low, add baking powder, baking soda, and then flour, and mix just until combined.

Pour batter into the prepared pan. Top with two of the peaches, sliced, and two-thirds of the blueberries in any design you like.  Sprinkle the fruit with sugar.

Bake for 30 minutes.  Pull cake out and add the third peach, sliced, and the remaining blueberries.  Return to oven, and continue baking for 15-20 more minutes until cake is golden, and a toothpick inserted into the center comes out clean.

Allow to cool in pan for about 40 minutes, and then release cake from the springform pan.   Sprinkle with powdered sugar, and serve warm or cold.  Enjoy!

Cheers & Hugs,
Jodi

Blueberry Shortbread Tart

blueberry shortbread tart 2

I thought it would be nice to make a sweet treat this past weekend for the guys since I had been away for awhile.  I didn’t have enough blueberries to make a pie, but I had a nice amount to make this yummy blueberry shortbread tart.

blueberry shortbread tart 1

What could be bad about a shortbread crust, some jam and blueberries, fresh lemon juice and zest, and a crumbly topping?!?!

blueberry shortbread tart 3

It went together easily, only took 30 minutes to make, and was a hit!  (Hubby said it reminded him of a toasted blueberry Pop-Tart (and that was meant as a compliment – lol!)

I can’t recall the last time I bought Pop-Tarts, but this is a tart, and it is filled with fruit, and it is baked, so I guess that pretty well qualifies it to taste a bit like it.  I can imagine this would also be great with many other fruit fillings (aka Pop-Tart flavors) –  Cherry, Raspberry, Blackberry, Peach, Apple & Cinnamon, Strawberry, or Peach – to name a few.

My guys topped theirs with a scoop of vanilla ice cream, because, well…. just because!

It was a great dessert to end a hot summer day and meal of grilled sausage sandwiches with onions and peppers on hard rolls, fresh sweet corn on the cob rolled in butter and sprinkled with Old Bay Seasoning, and a cucumber and tomato salad fresh from the garden drizzled with tangy red wine vinegar, salt and pepper.

Hungry yet?!

Blueberry Shortbread Tart

Ingredients:blueberry shortbread tart 2
  • 2 sticks butter,  room temperature
  • ½ cup sugar
  • ¼ cup brown sugar, packed
  • 1 Tbsp lemon juice
  • Zest of 1 lemon
  • 2⅓ cups all-purpose flour
  • ½ tsp salt
  • 1 cup blueberry preserves or jam
  • 1 cup fresh blueberries
Directions:

Preheat the oven to 350 degrees F.

Grease 9-inch tart pan.

Beat butter, sugars, lemon juice and zest with electric mixer approx. 3 mins until well incorporated.  Add flour and salt, and mix until well blended and forming clumps.

Press 2/3 of the mixture evenly into the prepared pan and going up sides.

Spread with the blueberry preserves or jam evenly over the dough, leaving a ¼-inch border.  Sprinkle with blueberries.

Crumble the remaining dough into large crumbs and  sprinkle evenly over filling.

Bake 30 – 40 mins. until lightly browned.


Cheers & Hugs,
Jodi

*recipe slightly adapted from Erren’s Kitchen

A Slice of Pineapple in Watercolor

pineapple slice

Watercolor Pineapple Slice 8 x 10 140# Hot Press Arches

I had so much fun painting my pineapple for my Be Like A Pineapple post about a week ago, that I wanted to do pineapple again.

This time I decided to do a juicy slice.

Pineapple is such a wonderful summertime fruit.   It is delicious to eat all by itself, but it also pairs well with so many things – like the Pineapple Blueberry Salsa recipe I shared last month that I made to go with Fish Tacos.  It’s delicious in rice and chicken dishes (like my Crock Pot Hawaiin BBQ Chicken Wraps with Pineapple Slaw), fruit salads, in upside down and Hummingbird Cake (oh do I love that!), and frozen in sorbet and sherbet.

What is your favorite way to eat pineapple?

I painted this pineapple slice on Arches Hot Press like I did the other as I love how fluid it allows the watercolor paint to flow when painting this luscious fruit.  The colors I used were Lemon Yellow, Azo Yellow, Cadmium Yellow, New Gamboge, Raw Sienna, Burnt Umber, Green Gold and Sap Green.

Have a sweet day!

Cheers & Hugs,
Jodi

#WorldWatercolorMonth

A Birthday Cake Card for Colleen

birthday cake abstract impressionistic birthday card

Abstract Impressionistic Watercolor Birthday Cake Card

Yesterday was our dear daughter-in-law, Colleen’s birthday, so along with the Sprinkle Cake I made for her, I thought I’d paint an abstract, impressionistic sprinkle birthday cake card in watercolor.

I’m not sure which one I had more fun doing… baking the cake or painting the card.

Hubby noticed my cake was a bit crooked, and it was a bit wonky…  that’s how you know it’s homemade – right?!  Well – I guess it’s an impressionistic cake too!

Not matter what – I enjoyed doing both because they were for a special young lady who I love a lot!

Cheers & Hugs,
Jodi

Bailey’s Irish Cream Chocolate Mud Cake

Baileys Irish Cream Chocolate Cake cutting

Do you every just get a “hankering” for something?  Something you don’t usually have, but you just get stuck in your mind that you really, really, really want?!

That’s how I was feeling this past week about chocolate cake.  And chocolate cake is not something I usually make/eat/crave.

Baileys Irish Cream Chocolate Cake unfrosted

But – there was no getting it out of my head, so what’s a girl to do?!  Bake cake!

And when I found this recipe for a “boozy” chocolate cake – well – even better!  But dang, it was in metric measurements, and try as I could to search for it in U.S. equivalents, no luck.  So I postponed doing it the first day I thought of it, but then just bit the bullet the next day and converted it myself.  I’m not sure if I converted exactly or correctly, but it turned out absolutely amazing!

Baileys Irish Cream Chocolate Cake adding ganache

Oh Dear Me!  This is a real treat for the hankering!  It is rich and dense and chocolately and smothered in a decadent Bailey’s chocolate ganache!   I only needed a few bites to satisfy.

Baileys Irish Cream Chocolate Cake sliced

Hubby loved it too!

After our couple of bites/slices, however, I decided to put it in the freezer to save for special occasions or special guests.  I’m guessing it will freeze well (as all cakes do), and be just the thing to pull out and slice when “needed!”

Baileys Irish Cream Chocolate Cake slice

So here it is – the Bailey’s Irish Cream Chocolate Mud Cake – converted for us U.S. bakers and also in Metric equivalents.

Are you craving chocolate cake yet?!  Grab that bottle of Bailey’s and get baking!

Baileys Chocolate Mud Cake

Ingredients:

Cake:Baileys Irish Cream Chocolate Cake adding ganache

  • 1 1/3 sticks butter (10.5 Tbsp) or 150 grams
  • 3.5 oz or 100 grams dark chocolate, chopped
  • 1/2 cup or 100 grams sugar
  • 1/2 cup or 100 grams brown sugar
  • 1/2 cup or 50 grams  cocoa powder
  • 3/4 cup or 180ml Baileys Irish Cream Whiskey
  • 1 1/3 cups or 170 grams all-purpose flour
  • 1 1/2 tsps baking powder
  • 1/2 tsp baking soda
  • 1/2 tsp salt
  • 3 eggs, room temperature

Baileys Ganache:

  • 7 oz or 200 grams good quality dark chocolate,  chopped
  • 3/4 – 1 cup or 200ml Baileys Irish Cream (you can also do 1/2 cream and 1/2 Bailey’s if you don’t want it quite so “boozy,” but what the heck?!)
  • pinch of salt
  • 1 – 1 1/2 Tbsp or 15 grams butter, softened

Directions:

Preheat oven to 325° F (160°C). In a pan over low heat, melt the butter, chocolate, sugars, cocoa powder and Baileys. When chocolate and butter has melted, whisk together to combine making sure to get rid of any lumps of sugar or cocoa powder. Remove from heat and leave cool for 5 minutes.

Meanwhile, grease and line an 8″ (20-21cm) round cake pan.

Mix together the flour, baking powder, baking soda and salt and set aside. Add the eggs to the slightly cooled chocolate mixture and whisk to combine. Gently fold in the sifted flour mix until free of lumps.

Scrape into cake pan and bake for about 25-30 minutes or until a skewer comes out clean (Be cautious, however, as this is one cake you don’t want to over-bake so better to be a little under than over). The top of the cake will have some beautiful cracks.  This is normal for a mud cake, and you will be covering it with a lovely and oh so concealing ganache anyway!

Remove cake from oven and cool in pan for 10 minutes before removing and cooling completely on wire rack.

To make the ganache, heat the Bailey’s and the salt to a simmer in a pan (be careful to not get the heat too high and catch the alcohol on fire like I did!).  Remove from heat and add the chocolate.  Stir until completely incorporated, and then stir in the butter.

Set aside at room temperature and cool until it is thick enough to spread over your cooled cake (or if you are as impatient as me, put in the freezer to cool more quickly).  Gently stir the ganache occasionally as it cools to keep the temperature even and the ganache smooth.

When it is cooled and thickened, spread the ganache on the top of your cake and let it drip down the sides.

Enjoy!

Recipe found at:   Runcible Eats (www.leaandjay.com)

Cheers & Hugs,
Jodi