Quick and Easy Peach Puff Pastry Tartlets

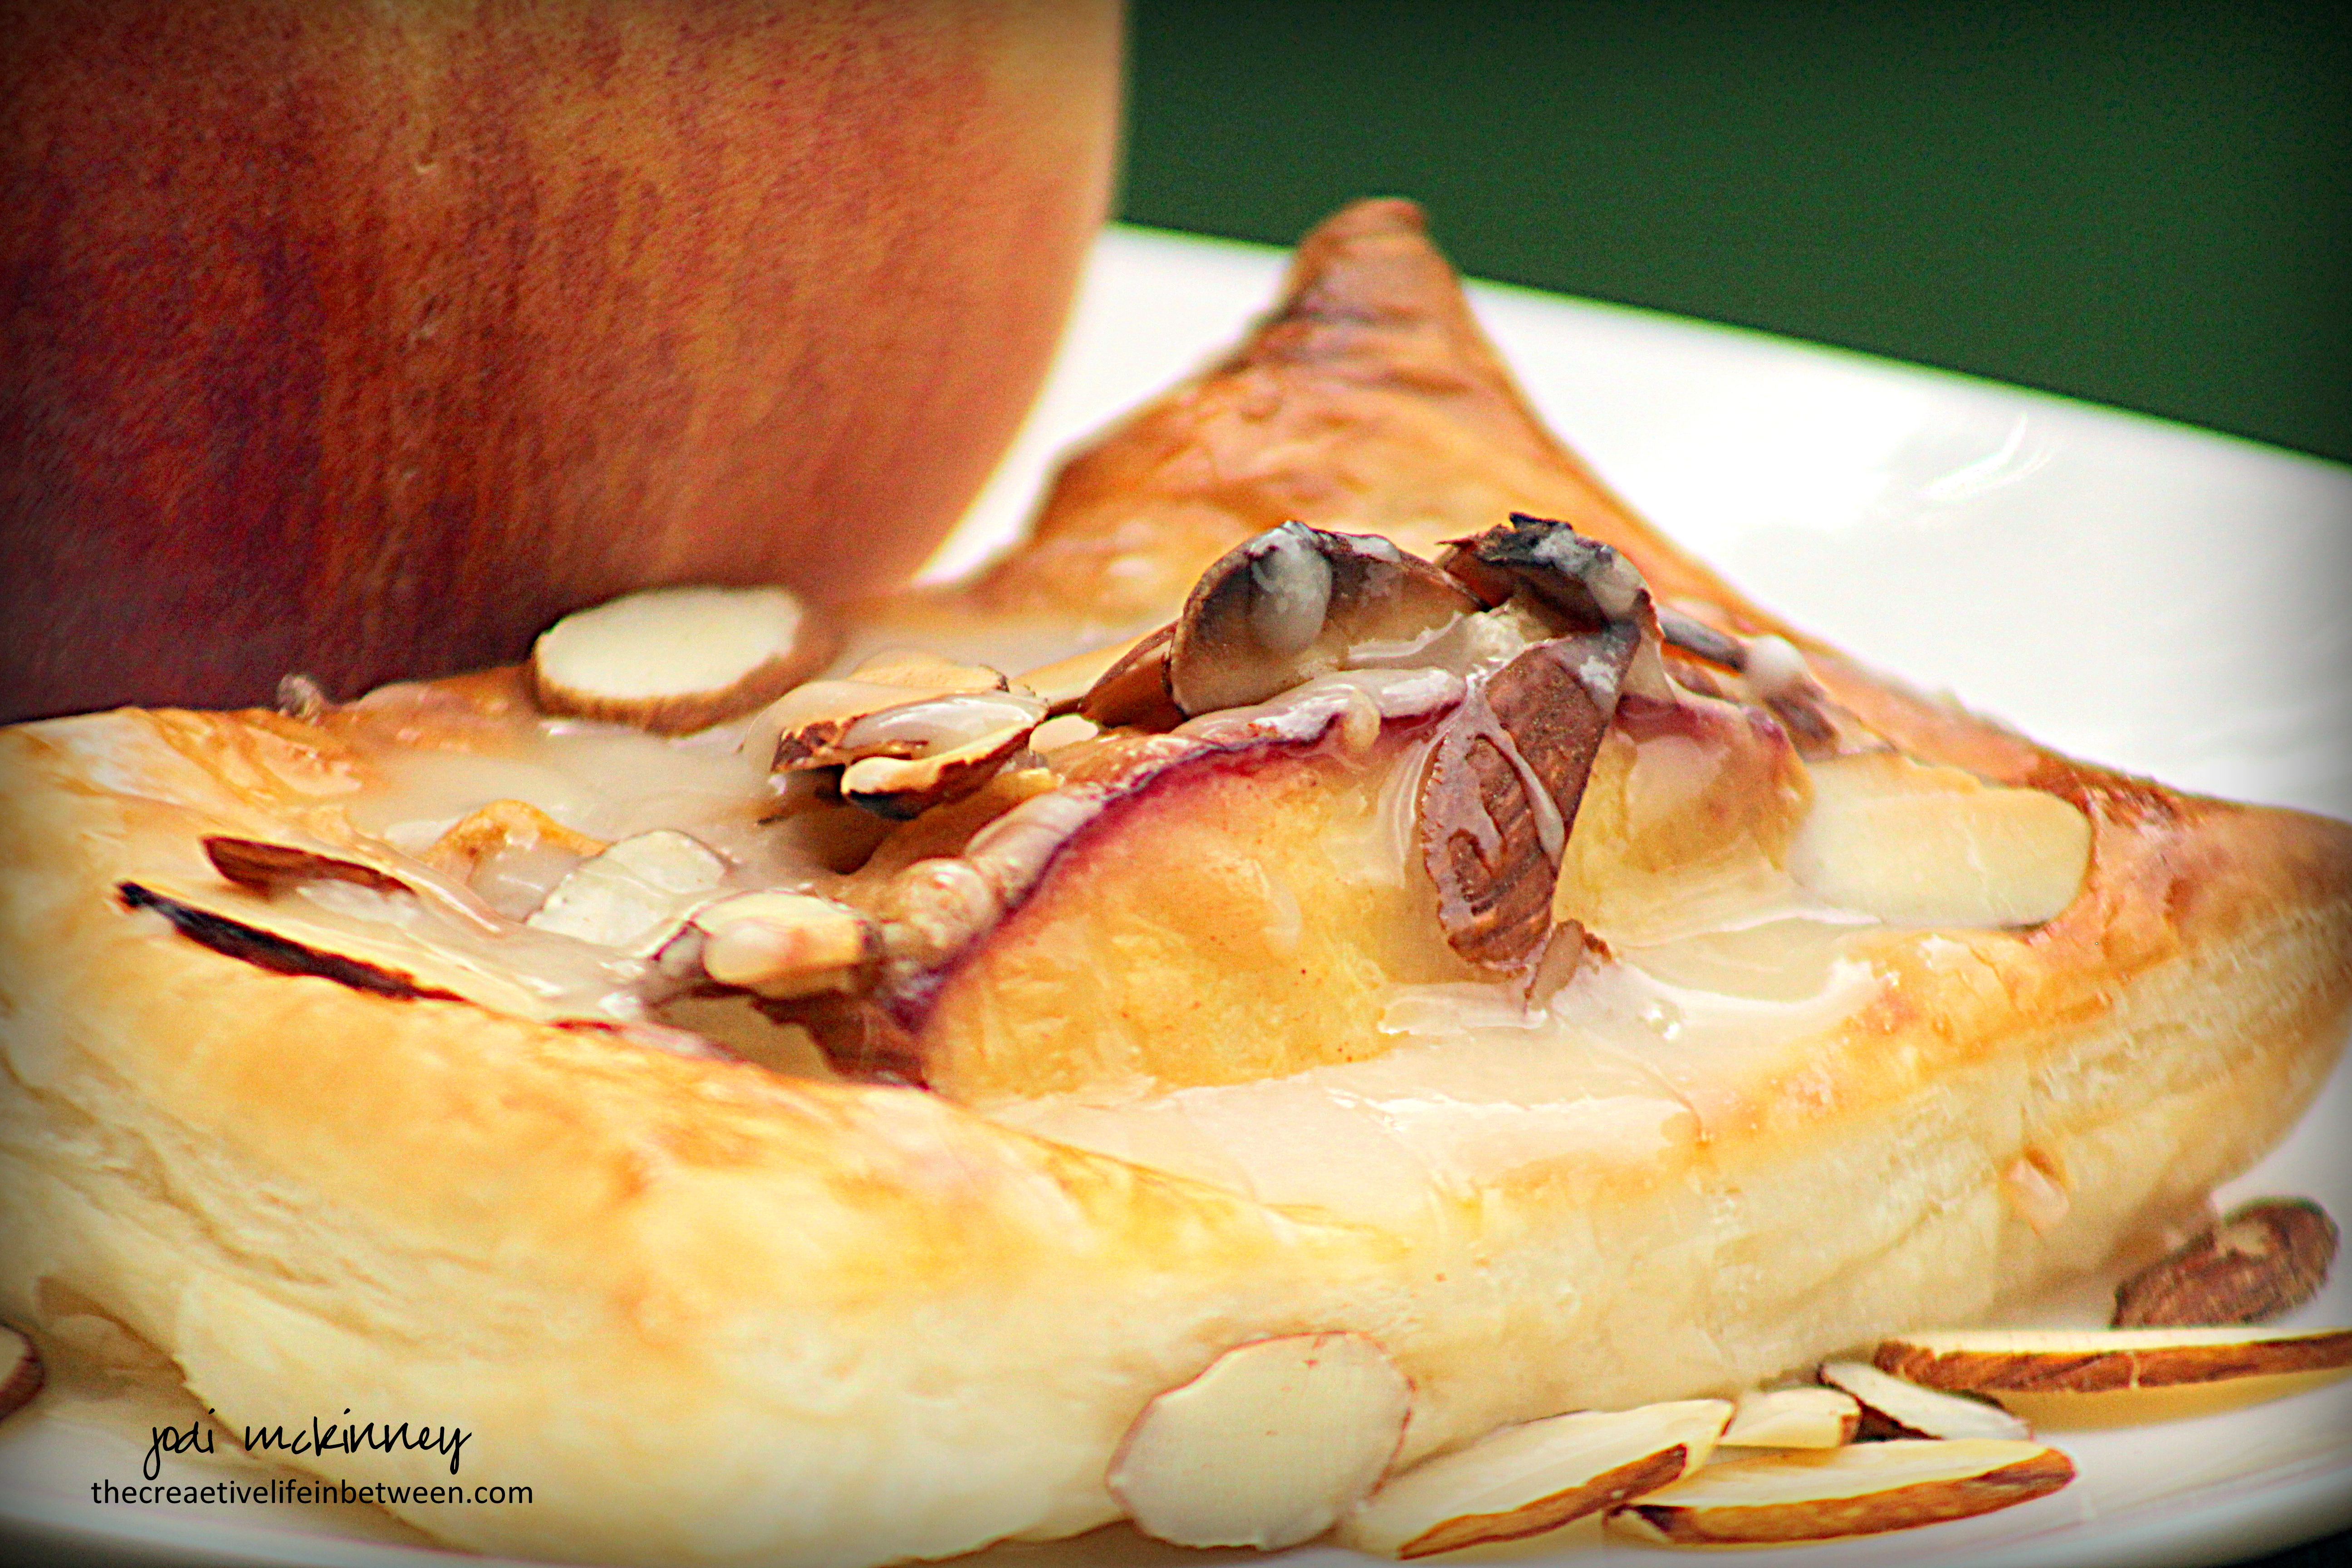
Quick and Easy Peach Puff Pastry Tartlets.

This Sunday, we had the family over for dinner.  Hubby made the most amazing BBQ spare ribs, which we served with grilled sweet corn on the cob, cowboy baked beans and a caprese salad.  A fresh peach dessert seemed the perfect ending for this BBQ, but I didn’t feel like fussing much.

Knowing I had a package of puff pastry in the freezer, I quickly googled “peaches and puff pastry” and found this wonderful recipe at Natasha’s Kitchen.

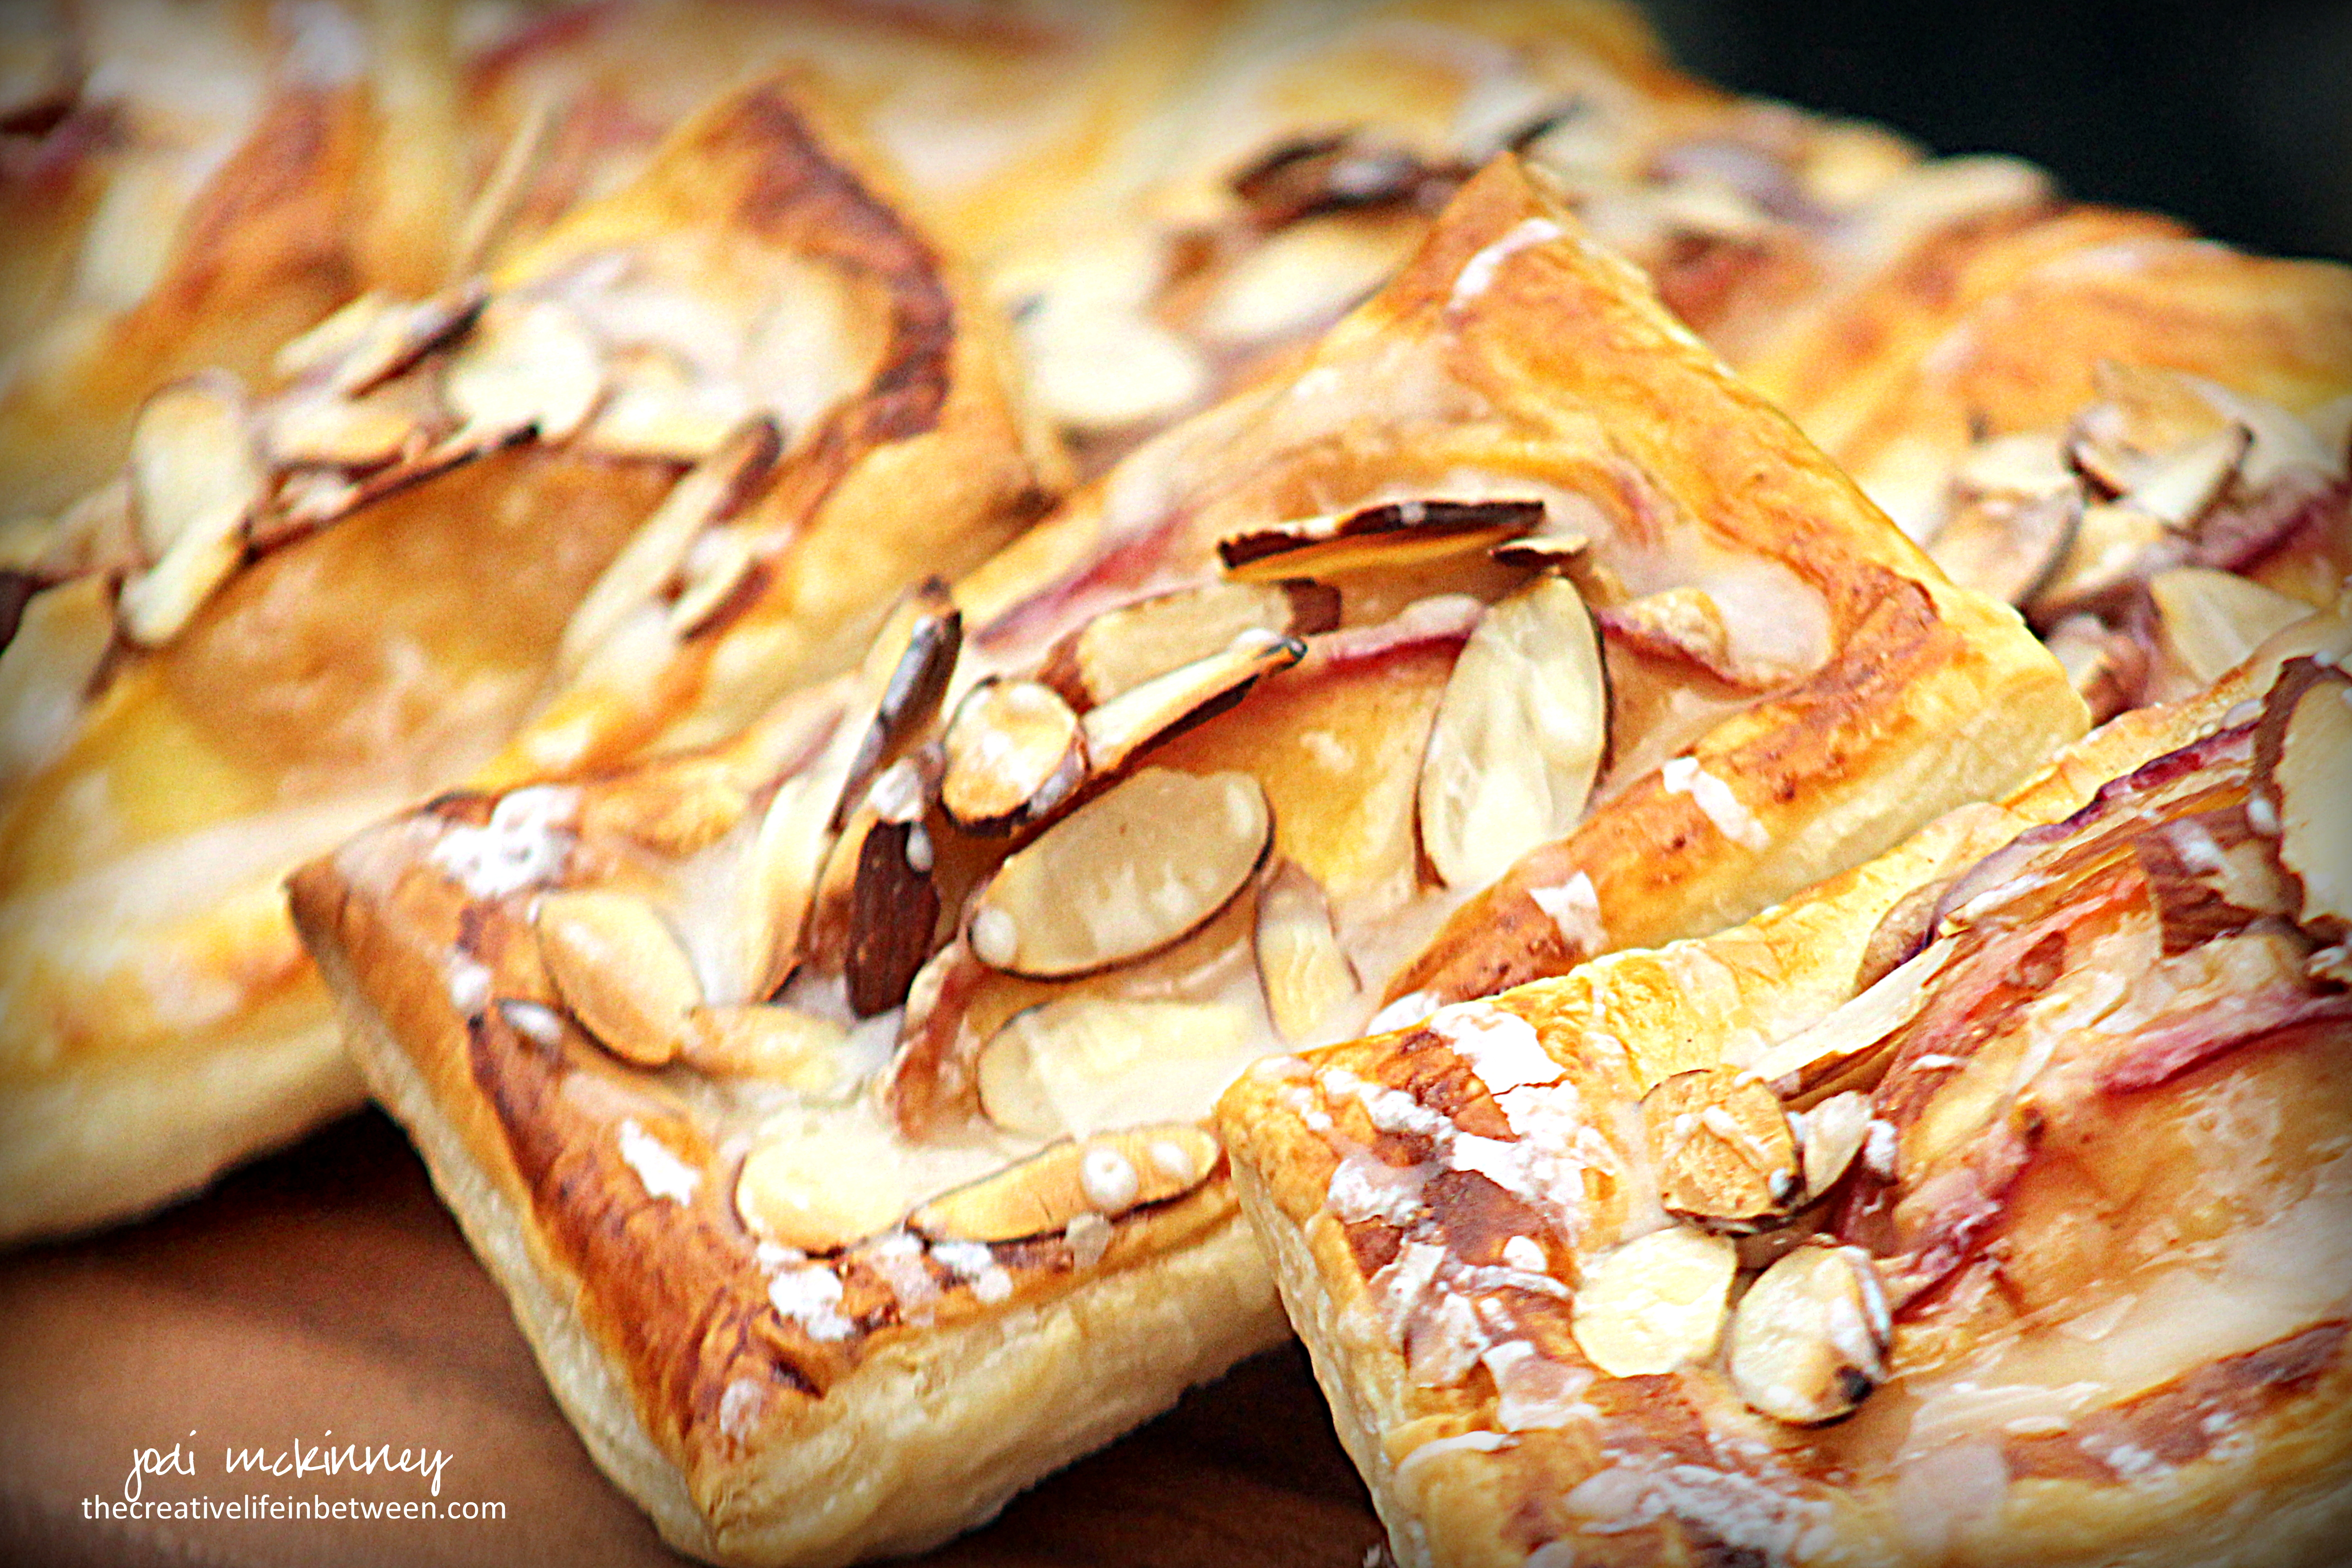
These only took about 10 minutes to throw together and 15 minutes to bake for a beautiful and super delicious dessert.

Well – at least that is what I hear…. You’ll have to take my family’s word for how delish they were as I didn’t get to try one.  They’re gone (which is always a good sign).

When your sons ask for a second (or a third), you happily feed them and drink a glass of wine instead <wink>!  I can make these anytime I want again, but feeding my guys and daughter-in-laws and granddaughter and a bestie – – – seeing smiles, hearing yums, and getting hugs – – – well – that’s all this momma needs.

I’m pretty sure I’ll be making these again!  I’m betting sliced apples and walnuts would be a wonderful Autumn version as well as loads of other fruit and nut combinations.

Here’s Natasha’s recipe as I made it.

Quick and Easy Peach Puff Pastry Tartlets

Ingredients:

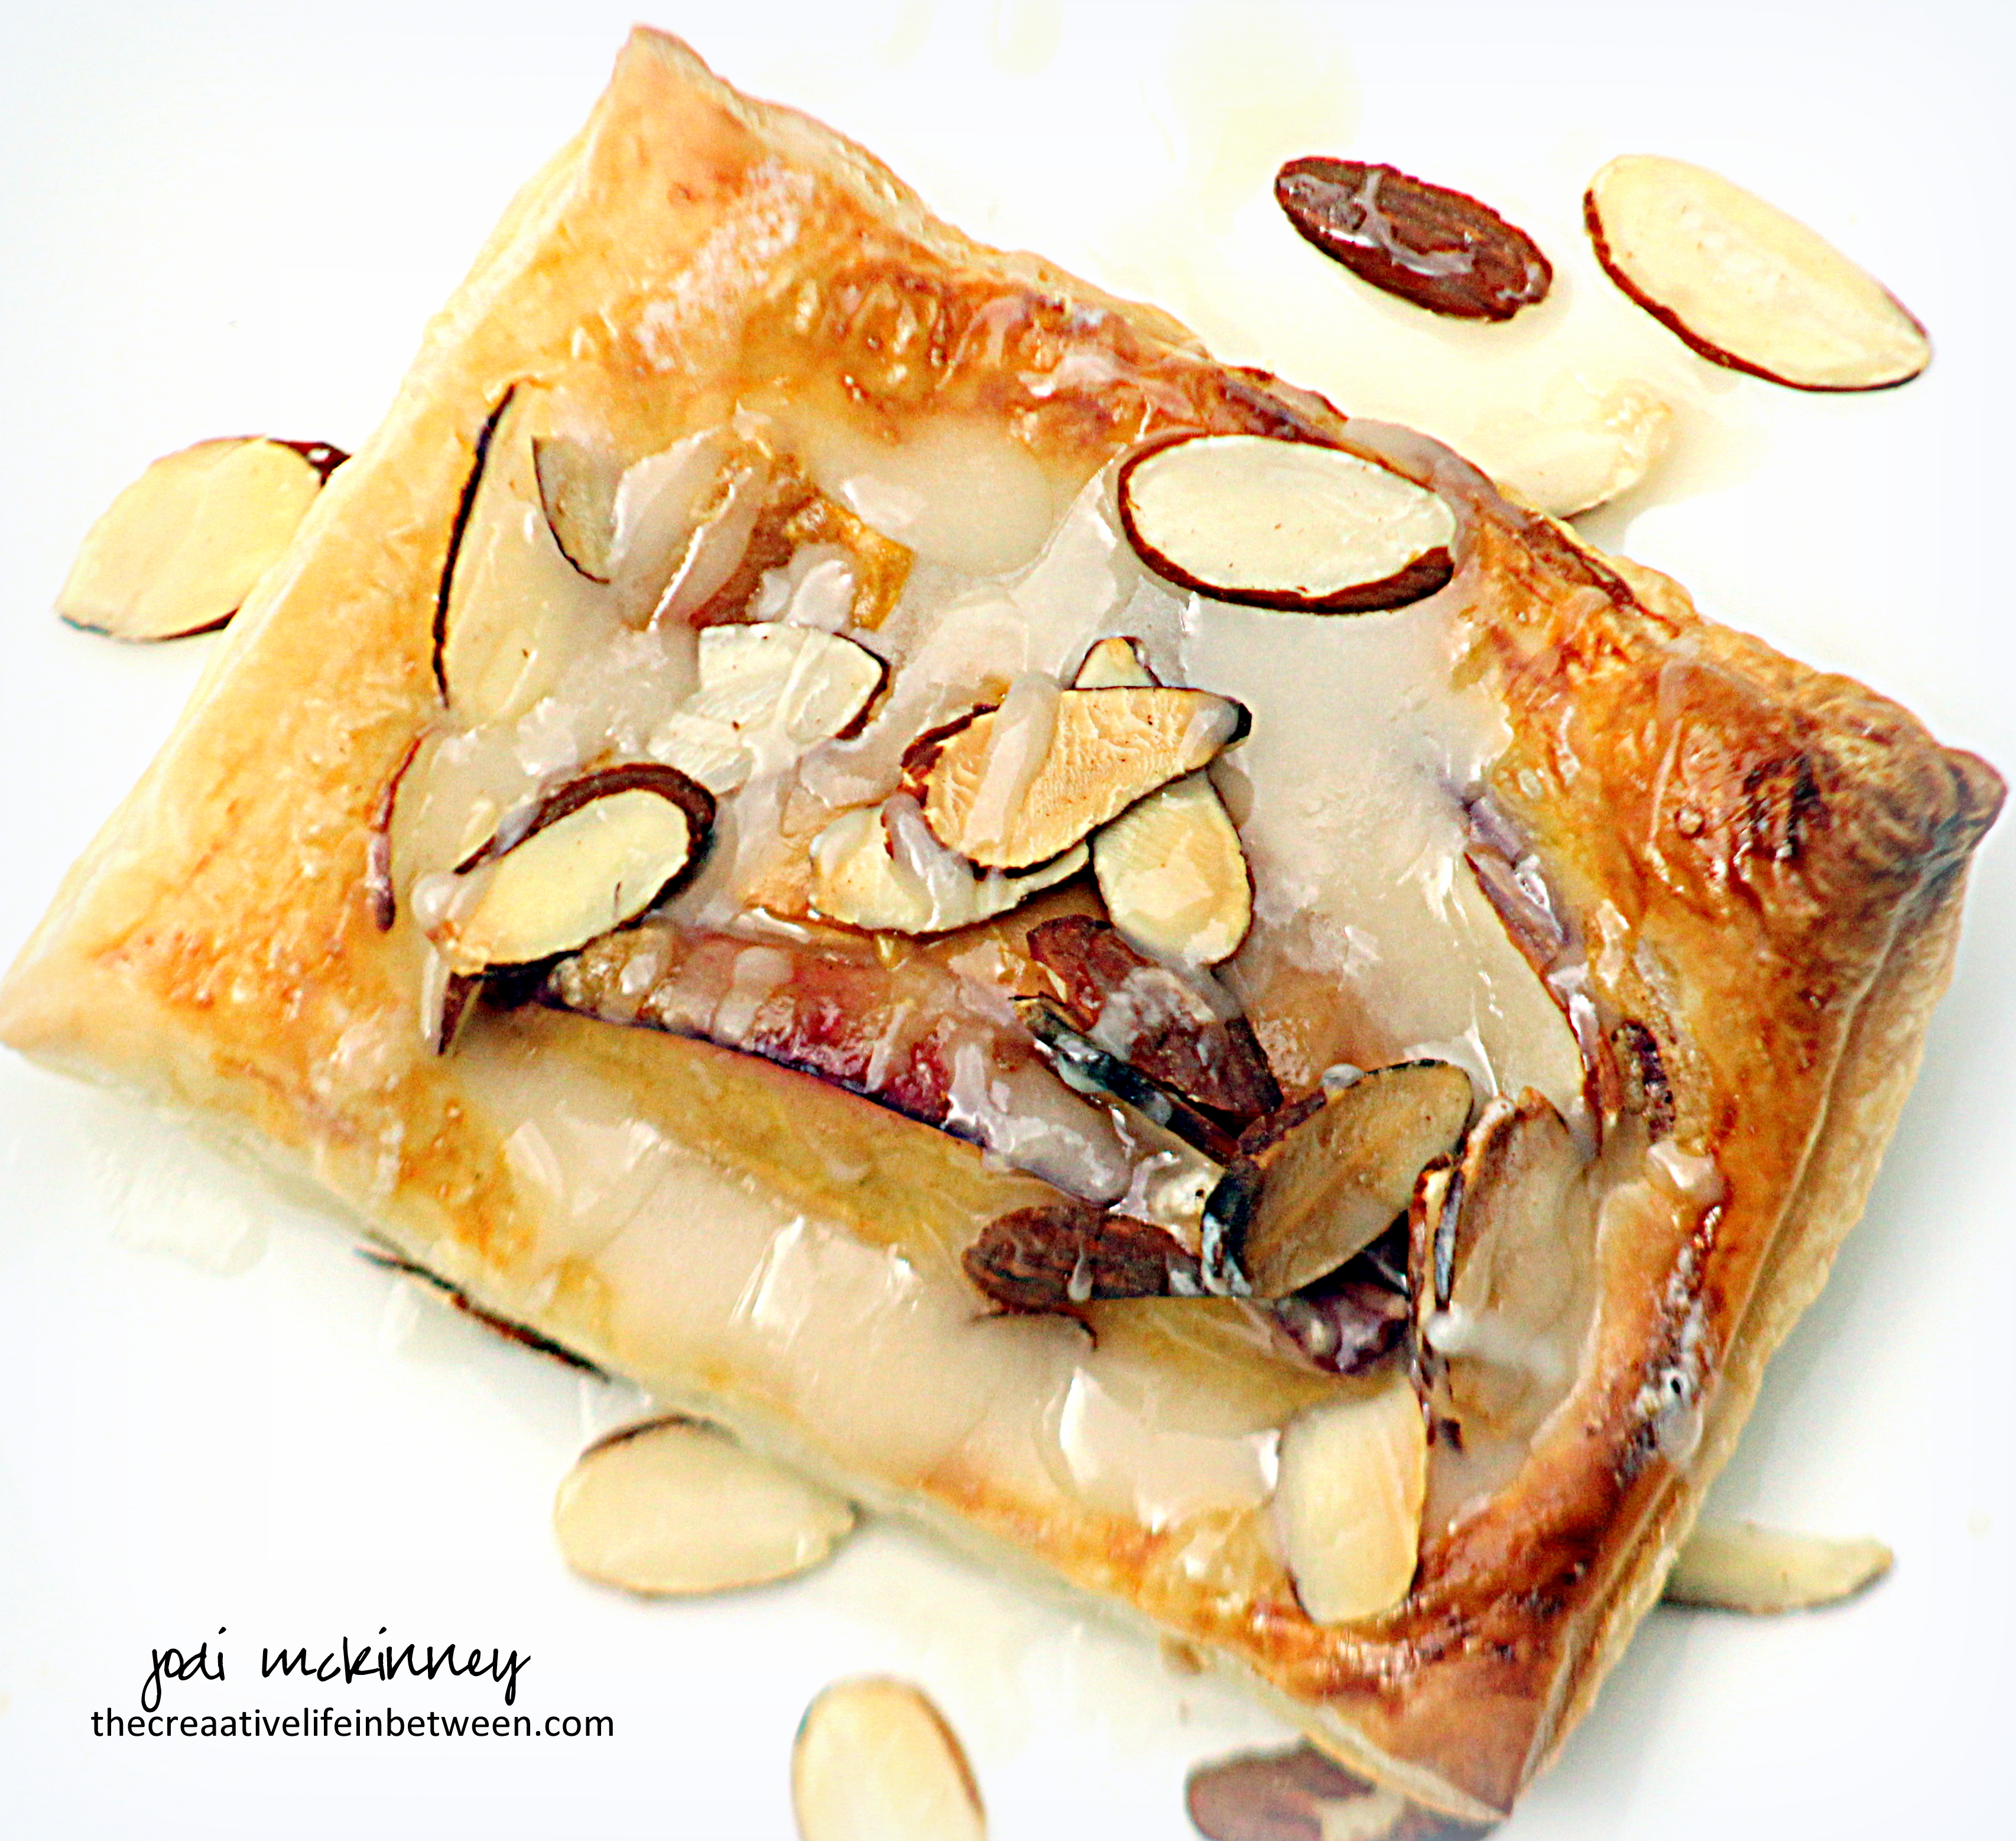
  • 1 sheet of frozen puff pastry, thawed 20-30 mins.
  • 1 egg
  • 2 large fresh peaches
  • 2 Tbsp sugar
  • 1 Tbsp flour
  • 1/2 tsp cinnamon
  • 1/2 tsp vanilla
  • 1/3 cup sliced almonds
  • 1/2 cup powdered sugar
  • 1 tsp vanilla extract
  • 1 Tbsp milk

Directions:

Preheat oven to 400˚F.

Cut thawed puff pastry into 9 equal sized squares and place on parchment lined baking sheet or baking stone.

Beat egg in a small bowl and set aside.

Slice peaches and place in a medium mixing bowl. Sprinkle with sugar,  flour, cinnamon, and vanilla.  Gently fold together.

Place 3 -4 peach slices in the center of each pastry square. Avoid getting peach juice on pastry edges. Brush edges generously with beaten egg. Sprinkle sliced almonds over pastry and peaches.

Bake at 400˚F for 15-18 minutes or until puffed and golden on the edges.  Remove from oven and let cool on baking sheet for 10 minutes.

While cooling, make the glaze by stirring together powdered sugar, vanilla and milk in a small bowl or measuring cup. Add more milk if needed to reach desired consistency.   Drizzle over cooled tartlets.

Enjoy!

Cheers & Hugs,
Jodi

#Natashaskitchen

Homemade Dark Sweet Cherry & Basil Sorbet

Homemade Dark Sweet Cherry and Basil Sorbet.

What could be more refreshing on a hot August day than deliciously creamy sorbet?!

And who knew how easy it is to make?

No special equipment needed.
Simple ingredients.
Gourmet flavor!

You simply make a simple syrup from water and sugar and blend with fresh fruit (and herbs if you like).

I made mine yesterday with fresh sweet dark cherries and a hint of fresh basil, but imagine all the possibilities!  Cantaloupe, Raspberry, Blackberry, Blueberry, Pear, Watermelon, Honeydew, Pineapple, Kiwi, Mango…….  Maybe a  leaf or two of mint instead of basil.  Maybe a sprig of rosemary.  Maybe no herbs.  A dash of fresh lemon or lime juice would add a lovely kick.

Here is the recipe for this simple, refreshing, indulgence.

Homemade Dark Sweet Cherry and Basil Sorbet

Ingredients:

  • 1 cup water
  • 1 cup sugar
  • 2 fresh basil leaves
  • 4 cups pitted dark sweet cherries

Directions:

Make simple syrup by boiling water and sugar for 2-3 minutes in small saucepan until sugar is dissolved.  Remove from heat, and add basil leaves.  Pour syrup into a small glass bowl or measuring cup and refrigerate approximately 1 hour until cooled.  Remove and discard basil leaves.

Place cherries in a blender.  Pour simple syrup over cherries.  Blend on high until cherries are fully blended into syrup and no chunks remain.  Pour into glass 9×13 dish and place in freezer.  After one hour, stir with spoon from outside edges to center and mash together.  Repeat after two hours.

Remove from freezer and place sorbet in blender again.  Blend on high until consistency is creamy.  Pour back into glass dish and place in freezer for another 2 hours or until ready to serve.  Scoop out with ice cream scoop or spoon.

Enjoy!

Cheers & Hugs,
Jodi

Blueberry Streusel Coffee Cake

Blueberry Streusel Coffee Cake.

What is a girl to do when a bestie friend comes home after a long time away?!

Well…. run over and visit and hug as soon as possible!  Right?!

But you can’t go empty handed!

So – what to bake to take?  I needed something quick, but yummy, that my sweet friend Janet and her Mom and Dad would enjoy…

I had some amazing fresh blueberries in the fridge I had recently bought at a local farm market, so I decided to make a blueberry cake.

And OH was it yummy!  (I know because I kept half for hubby and me and took half to them.  She is that kind of friend!  The best kind – that you can take half a cake to – LOL!)

I arrived just in time to serve it to them for dessert!

Oh the joy of friendship!  Oh the joy of baking and sharing!

Make this for yourself!  Make this to give away!  But make this amazing Blueberry Streusel Coffee Cake today!  (oh dear – am I still rhyming?! )

Welcome home sweet Janet!  Looking forward to our time together.

Here is the recipe I made as I adapted from LifeLoveandSugar:

Blueberry Streusel Coffee Cake

Ingredients:

Streusel:

  • 3/4 cup flour
  • 3/4 cup packed brown sugar
  • 1 tsp. cinnamon
  • 6 Tbsp. salted butter, melted

Cake:

  • 1/2 cup white sugar
  • 6 Tbsp. salted butter, room temperature
  • 1/4 cup sour cream (light sour cream works fine)
  • 1/4 cup milk (I used Skim)
  • 1 large egg
  • 1 1/2 tsp. vanilla
  • 1 1/2 tsp. baking powder
  • 1 cup all-purpose flour
  • 2 cups fresh blueberries

Glaze:

  • 1/2 cup powdered sugar
  • 1 Tbsp. milk

Directions:

Preheat oven to 350 degrees F.

Prepare an 8-9 inch cake pan by greasing bottom and sides with shortening and then placing a circle of parchment paper in the bottom.

Prepare streusel by combining ingredients in a medium bowl with a fork.  Set aside.

Prepare cake batter by beating sugar and butter in electric mixer for 3-4 minutes until light and fluffy.  Add sour cream and milk  until well incorporated.  Add egg and vanilla.  Finally, add baking powder, then flour just until thoroughly combined.

Spread half of the batter in prepared pan.  Top with half of the streusel mixture, then  3/4 cup blueberries.  Repeat batter, streusel, then 1 cup blueberries.

Bake for approximately 35 minutes or until toothpick inserted comes out clean.

Cool in pan for 20 minutes, then remove from pan.

Prepare glaze by  by combining powdered sugar and milk until a glaze consistency is achieved.  Add more powdered sugar or milk as needed.

Drizzle cooled cake with glaze, and top with remaining 1/4 cup fresh blueberries.

Serve warm or cold – plain or with a scoop of ice cream or whipped cream!

Enjoy!

Cheers & Hugs,
Jodi


Homemade Old-Fashioned Glazed Donuts

Homemade Old-Fashioned Glazed Donuts!

Seriously…….
could anything be more decadently delish?!

A tender ring of fried sweet dough
drenched in a glorious glaze?

I couldn’t resist making these,
and they did not disappoint.

Every once in a great while,
I allow myself to be treated to a donut….
a wickedly wonderful waste of calories.

But since it is only Hubby and me at home,
a dozen donuts AND holes
are way too much sugary goodness!

So after enjoying one each
(and a few holes – which are completely calorie free  – right?)
I shared the rest.

That really is my joy in baking…
giving it away.

Hopefully creating a brief smile…
a tiny treat or surprise for a loved one or friend.

These are soooooo worth making!
They are easy and quick to make.

I hope you will treat yourself and those you love!

Homemade Old-Fashioned Glazed Donuts

Ingredients:

  • 2 1/4 cup  cake flour  (no cake flour?  no problem!  make it easily by the cupful – take one level cup of all-purpose flour, remove two tablespoons, and then add two tablespoons of cornstarch back in)
  • 1 1/2 tsp. baking powder
  • 1 tsp. salt
  • 1/2 tsp. ground nutmeg
  • 1/2 cup  sugar
  • 2 Tbsp. butter, room temperature
  • 2 large egg yolks
  • 1/2 cup  sour cream or Greek yogurt
  • Canola oil, for frying

For the glaze:

  • 3 1/2 cup  powdered sugar
  • 1 1/2 tsp. corn syrup
  • 1/4 tsp. salt
  • 1/2 tsp. vanilla extract
  • 1/3 cup hot water

Directions:

In a bowl, combine flour, baking powder, salt, and nutmeg.

In the bowl of a stand mixer, beat butter and sugar together until sandy. Add egg yolks, and mix until light and thick. Add dry ingredients to the mixing bowl in 3 additions, alternating with the sour cream, ending with the flour.  Cover with plastic wrap and chill for 1 hour.

On a floured surface, roll dough out to about 1/2 inch thickness. Use a donut cutter to cut out approximately 12 donuts and holes.

Pour 2 inches of canola oil into a heavy bottomed pot with a thermometer attached. Heat to 325°F.  Fry donuts a few at a time, being careful not to overcrowd the pot. Fry on each side about 2 minutes, being careful not to let them burn. Let drain on a paper bag to soak up the excess grease.

For the glaze:

Mix all ingredients in a bowl with a whisk until smooth.  Dip each donut into the glaze. Place on a wire rack above a sheet of waxed paper to catch any excess glaze. Let sit for 20 minutes until glaze is set.

Best served the day they are made, but may be stored in an air tight container at room temperature for a few days.

Cheers & Sugary Sweet Hugs,
Jodi

Recipe found at:  Huffington Post’s “The Greatest Homemade Doughnut Recipes You’ll Ever Find.


Fresh Red Raspberry & Blueberry Pie

Fresh Red Raspberry & Blueberry Pie.

Are you looking for an amazing fruit pie that is tart and sweet and bursting full of fresh fruits of the season?

I haven’t baked a pie in a while, so I thought it was high time I treated hubby to something he would love being that it is Father’s Day weekend and all.

He would choose pie over cake or cookies approximately 99.5 times out of 100 – conservatively speaking.

I had some fresh red raspberries and some fresh blueberries in the fridge, but not enough of either to make a whole pie, so I decided to try combining the two into one pie.

I researched some recipes and then decided to combine things I liked about different ones into my own creation – including using tapioca instead of cornstarch as the thickening agent for this pie.  Grandma always used tapioca in her berry pies, so there is no other way in my book!

This pie turned out perfectly thickened and so full of fresh berry flavors.  It was a complete hit with Hubby – especially when topped with a melting scoop of vanilla bean ice cream.

If you are looking for a new twist on berry pie, I hope you’ll give this recipe a try!

Fresh Red Raspberry & Blueberry Pie

Ingredients:

  • Double recipe for Pie Crust
  • 2 cups fresh red raspberries
  • 2 cups fresh blueberries
  • 1 cup + 1 Tbsp. white sugar
  • 1/4 cup tapioca
  • 1 Tbsp. flour
  • 2 tsp. freshly grated lemon peel
  • 1 tsp. vanilla extract of paste
  • 1/2 tsp. cinnamon
  • 1 Tbsp butter
  • 1 Tbsp. milk or water

Directions:

Preheat oven to 400 degrees F.

Line a 9 inch pie plate with bottom pastry.

In a bowl, combine berries, 1 cup sugar, tapioca, flour, lemon peel, vanilla, and cinnamon.  Gently stir, and pour into pastry lined pie plate.

Top with remaining pie crust cut and wove into lattice.

Brush with milk or water, and sprinkle with remaining 1 Tbsp. sugar.

Bake at 400 degrees F for 45-50 minutes or until crust is golden brown and filling is bubbly.

Enjoy!

Cheers & Hugs,
Jodi

I’ve Fallen Madly in Love…. with Biscotti

I’ve fallen madly in love… with Biscotti!

I’m not sure why?  But all of the sudden, I can’t get enough of it.

It all started with an “impulse” purchase (dang hungry shopping!) – where I picked up a small package of almond flavored biscotti.

I’ve never really been drawn to biscotti – thinking it rather dry and bland tasting, but oh was I wrong!

Dry?  Maybe… but in an amazingly crispy, crunchy way.

Bland?  Far from it!  So full of flavor and texture.

And when served with coffee (or red wine) 🙂 – and dunked – Wowza!

The word “biscotto” means “biscuit” or “cookie.” Biscotti are named according to their method of baking. The root words “bis” and “cotto” literally mean “twice” and “baked.” When Italians first created biscotti in the region of Tuscany many centuries ago, they were careful to bake the cookies twice, in order to form their unique shape and allow the cookies to develop their signature crisp texture.

So after purchasing the almond…… and then the orange pecan…… I decided it was time I try to bake my own biscotti.

I considered what I had on hand and chose to try a Starbucks Copycat recipe of Dried Tart Cherry and Walnut.

I’m not sure I achieved the correct shape, but I’m pretty sure I nailed the flavor!

Hubby, who would normally not choose biscotti…. well – let’s just say he definitely liked them.  We won’t talk about how many he ate when he found them cooling, but suffice it to say, they were a hit!

Here’s the recipe I tried, and I cannot wait to try more flavors.

This could be a very dangerous love affair!

Cherry Walnut Biscotti

Ingredients:

1 stick  butter, softened
3/4 cup sugar
2 eggs
2 tsp vanilla
1/2 tsp baking powder
1/2 tsp cinnamon
1/4 tsp salt
1 3/4 cups all-purpose flour
1 cup chopped walnuts
1/2 cup dried cherries
1 teaspoon grated orange zest

Preheat oven to 350 degrees F.

Beat butter in electric mixer on high speed until fluffy. Add sugar and continue beating for about 2 minutes. Reduce the speed to low and add eggs, one at a time, beating well after each addition. Beat in vanilla.

Add baking powder, cinnamon, and salt, and mix.  Add flour just until blended.

Mix in walnuts, cherries and  orange zest by hand.

Turn the batter out onto a floured work surface and divide in half.  Shape each half into a log 12 inches long and 1 1/2 inches in diameter.  Transfer to baking sheet.

Bake 20-25 minutes until golden brown. Place baking sheet on wire rack and let logs cool for 10 minutes. Using a serrated knife, cut the logs into 1/2 inch wide slices, and carefully place the slices back onto the baking sheet.  Bake for another 10 minutes. Let the biscotti cool completely on the baking sheet. Store in airtight container.

Enjoy!

Cheers & Hugs,
Jodi


Oreo Cookies ‘n Cream Cookies

I may have saved the best for last….

For my last cookie recipe for the Wedding cookie table, who is in the mood for a Cookies ‘n Cream cookie created with coarsely crushed Oreo cookies and creamy white chocolate chips?

Oh…. My…. Yumminess!

These are SERIOUSLY divine!  The photos may not do justice to the ecstasy your taste buds are going to experience.

Here’s the recipe I found at The Recipe Critic.  Hope you will give them a try!

Oreo Cookies 'n Cream Cookies

  • Servings: approx. 5 doz.
  • Print

Ingredients:

  • 1 1/2 cups butter, softened
  • 1 1/2 cups brown sugar, packed
  • 1 1/2 cups sugar
  • 4 eggs
  • 2 tsp. vanilla
  • 2 tsp. baking soda
  • 1 tsp. baking powder
  • 2 tsp. salt
  • 5 cups flour
  • 28 Oreo Cookies, coarsely crushed
  • 3 1/2 cups white chocolate chips

Directions:

In a large mixing bowl, beat together butter and sugars about 2 minutes until light and fluffy.  Beat in eggs and vanilla.  Slowly beat in baking soda, baking powder, salt, and finally flour just until incorporated.  Gently fold in coarsely-crushed Oreo cookies and white chocolate chips.

Refrigerate dough at least 2 hours or overnight.

Preheat oven to 350 degrees F.  Roll dough into 1 1/2 inch balls and place 2 inches apart on baking stone or cookie sheet.  Bake for 7-9 minutes or until just lightly browned.  Let cool on baking stone/cookie sheet 5 minutes, then completely cool cooling racks.

Enjoy!

Cheers & Hugs,
Jodi

Fresh Strawberry & Lemon Poppy Seed Cake

Fresh Strawberry & Lemon Poppy Seed Cake.

If you know me at all, you know Poppy Seed Cake is my favorite of all cakes.

Unusual to most I’m guessing, but most significant to me because my Grandma always made it for my birthday (New Year’s Eve) since everyone is just about over it with sweets by then after the holidays.

I had some fresh strawberries that were on the verge of going bad and lemon on the brain from a cookie I was making for the wedding cookie table, so I decided to whip up and “zip” up a poppy seed cake for Easter Sunday.

A bit of tart and sweet lemon zest in the batter along with chunks of juicy red-ripe strawberries and a thin lemon glaze really “Spring”ed up my usual wintertime poppy seed cake craving.

Hubby loved his with a scoop of vanilla ice cream and an extra handful of fresh strawberries on top.

If you are looking for a fresh, not too sweet, but yummy Spring cake to serve, give this one a try.  It is truly delightful!

Fresh Strawberry & Lemon Poppy Seed Cake*

  • Servings: 1 marvelous cake
  • Print

Ingredients:

  • 1 cup butter, melted
  • 1 cup sugar
  • 1 tsp. lemon zest
  • 3 eggs
  • 1 cup milk
  • 1/3 cup vanilla Greek yogurt
  • 2 tsp. vanilla extract
  • 2 tsp. baking powder
  • 1/2 tsp salt
  • 2 1/2 cups flour
  • 1 1/2 cups fresh strawberries, chopped
  • 1/4  cup poppy seeds
  • Glaze:
    • 2 Tbsp. lemon juice
    • 1 cup powdered sugar
    • 2 Tbsp milk

Directions:

Preheat oven to 375 degrees F.  Grease and flour a fluted cake pan or your favorite.

In a large bowl, beat together the melted butter, sugar, and lemon zest.  Add eggs, one at a time, fully incorporating.  Add milk, yogurt and vanilla next.  Stir in dry ingredients until combined.  Gently stir in strawberries and poppy seeds.

Pour batter into prepared pan and bake for 50-60 minutes, or until cake test inserted comes out clean.

Prepare glaze by mixing lemon juice and powdered sugar until sugar is completely dissolved, then stir in milk until smooth.   Set aside.

Cool cake for at least 20 minutes before drizzling with glaze.

Serve with additional fresh strawberries and ice cream, if desired.  

Enjoy!

Cheers & Hugs,
Jodi

*Adapted from a recipe found on BakerbyNature.com

Buckeye Balls

Buckeye Balls.

Calling all chocolate and peanut butter lovers!  Another must-have “staple” at any Pittsburgh wedding cookie table is the Buckeye Ball!

These delectable little creamy peanut butter delights coated in dark chocolate are called Buckeye Balls because they look like Buckeye nuts and originated in Ohio – the Buckeye state.

Simple, but absolutely delish, this is cookie #9 on my wedding cookie table list.   The freezer is filling up fast, and the wedding date is closing in on us!  Cookie baking continues.

Here’s the recipe.  Hope you will give them a try.

Buckeye Balls

  • Servings: approx. 6 doz.
  • Print

Ingredients:

  • 1 1/2 cups creamy peanut butter
  • 1/2 cup butter, softened
  • 2 tsp. vanilla
  • 4 cups powdered sugar
  • 1 lb. dark chocolate, melted

Directions:

Mix peanut butter and butter in a bowl with wooden spoon until creamy.  Blend in vanilla.  Add powdered sugar, and stir until incorporated and a stiff mixture forms.

Roll teaspoon-sized pieces into balls, and place on wax paper lined cookie sheet or cutting board.  Refrigerate for several hours or overnight.

Melt chocolate in narrow deep container in microwave for 1 minute and then at 30 second intervals until smooth.  Using a wooden skewer, dip balls into chocolate all but for a bit at top.  Place on waxed paper lined cookie sheet.  Allow to cool completely and chocolate to harden.  Smooth over hole created by skewer with a small spatula or your clean finger.

Enjoy!

Cheers & Hugs,
Jodi

Wedding Cookie List Baking so far:

  1. Jodi’s Best Ever Chocolate Chip Cookies
  2. Hershey Kiss Brownie Bites
  3. Pecan Tassies
  4. Peanut Butter Cup Cookies
  5. Pecan Sandies
  6. Carrot Cake Thumbprints
  7. Raspberry Dark Chocolate Shortbread Cookies
  8. Apricot Kolaches
  9. Buckeye Balls


Hershey’s Kiss Brownie Bites

Hershey’s Kiss Brownie Bites
might just be the ultimate  little treat
for the inner chocoholic in
all of us (well – 99.999999% of us… Hard as it is to believe – there is an itsy bitsy, teeny tiny  population of people on this earth who do not like chocolate!)

But for the rest of us….
Imagine a bite-sized scoop of Ghiradelli Double Chocolate Brownie mix
baked to perfection of fudgy center with slightly hardened and cracked outside
in a mini muffin baking pan (be sure to line) and topped off with a smooth, creamy milk chocolate Hershey’s Kiss.

Not only are they sheer decadent delight, they are about as easy to make as desserts come.

I have started baking for my son’s wedding next month.  We have a unique tradition in our little part of the world that requires an overflowing cookie table at weddings.  The cookies are eaten for appetizers, dessert (along with wedding cake), and supplied to take home in to-go boxes.  I’m happily in charge of the cookie table for the wedding, so a baking I will go.

I started with these little brownie bites and will be stocking the freezer with chocolate chips and apricot kolaches and lots more in the coming weeks!

Wedding cookie table or not, you are going to want to try these.  Your friends and family will thank you, and you won’t be sorry!

Hershey's Kiss Brownie Bites

Ingredients:

Directions:

Preheat oven to 325 degrees F.

Line mini-muffin baking pan with foil mini-muffin liners.

Prepare brownie mix according to package directions by combining mix, water, oil, and egg.  Scoop batter into foil liners to 3/4 full.

Bake for approximately 12 minutes.  While brownie bites are baking, unwrap Hershey’s kisses.  Remove from oven and immediately insert a Hershey’s kiss into the center of each brownie bite.  Press gently.  Allow to cool.  The kisses take a while to set, so be careful.

Enjoy!

Cheers & Chocolate Kisses,
Jodi