What Would You Be?

Bumble Bee in Red Petunia Flower Basket – Mars, PA – July 2018

What Would You Be?

What would you be
if you could be
anything you wanted to be?

Would you be
Kind?

Would you be
Loving?

Would you be
Compassionate?

Would you be
Understanding?

Would you be
Generous?

So many wonderful things we can be…
What would you be?
What are you being?

Cheers & Hugs,
Jodi

Another Day

Starting a New Day in Mars, PA – June 29, 2018

Another Day.

Another sunrise.
Another beginning.

Another chance to smile
and make someone else smile.

Another chance to give
and also to receive.

Another chance to win,
but also learn to lose.

Another chance to change
something you didn’t do well yesterday.

Another chance to speak kindness
to someone who is lost.

Another chance to do something for the first time,
or maybe for the last.

Another chance to see and smell
and listen and taste and touch.

Another chance to hug
and say, “I love you.”

Another day.
Another chance to embrace the beauty of this life.

Cheers & Hugs,
Jodi

PS – It is July 1st, which means World Watercolor Month begins today!  I haven’t had a chance this past week to do any watercolor painting, but sure plan to do some this month (and hopefully today!) to share.  Don’t forget you can support #WorldWatercolorMonth and The Dreaming Zebra Foundation by purchasing one of these Limited Edition WWM Souvenier Zippered Pouches with My “Terry’s” Yellow Canary Watercolor Design on it.  100%  of proceeds on this product goes to The Dreaming Zebra Foundation! These flat pouches vary from small to large and can be used for pretty much anything.  I’d like to give one of these away to one of my faithful followers and friends here at The Creative Life in Between.  If you’ve read this far and would like entered in the random drawing, which I’ll announce the winner of next Sunday, just add a comment saying “Enter Me in the Drawing!”  If you’d like to purchase one, simply click on the photo below.

Baking Lady Locks Cookies

Baking Lady Locks Cookies

We’ve talked about it before…. the Pittsburgh Wedding Cookie Table.

As we say around here, “It’s a ‘Burgh Thing.”

And no respectable wedding cookie table would be without Lady Locks.

As much as I love baking cookies, I have never truly mastered the esteemed Lady Lock.

But one of my best buddies has….

She baked them for my first son’s wedding, and she baked them for my second son’s wedding.  So when I offered to help bake some cookies for my oldest daughter-in-law’s sister’s upcoming wedding, I asked Tracy if I could pay her to bake some Lady Locks.

Her reply…

“How about I teach you?”

When I told my daughter-in-law we were going to make them this past Sunday, she was so excited.  She had been googling the recipe to give them a try, but was a bit hesitant to tackle these, so she wanted to join in the lady lock baking lesson too.

Now my grandma made these every year for Christmas and for special occassions like family weddings.  I tried her cryptic recipe a few times years ago, but they never came out quite right.  At one point in time I had her special lady lock pins, but somehow they are nowhere to be found.  (I likely tossed them out of frustration after trying several times!)

Fortunately, Tracy still has her grandma’s, which were handed down to her mom and then her.  I found a local store in the Strip District of Pittsburgh, In the Kitchen, that carries them and sells them online for anyone interested in purchasing (which I did).  It’s important you get the correct kind.  Expert old-time bakers were able to make these on clothespins (and some people still call them clothespin cookies), but I can’t even imagine!

Baking these are not for the light of heart or spirit.  Though they are made from just a few simple ingredients you likely have in your pantry, these tasty little buggers are a bit tedious to make.  (Especially when you double the recipe and have a 1-1/2 year-old helping!)

Tracy generously allowed me to share her Mom’s recipe here, which was a COMPLETE success!  (Probably because she did most of the hard work….. after all…. my granddaughter did need to take a few breaks to swing and play in the pool and eat lunch and join Pap Pap for a tractor ride during the 5-hour bake-a-thon!).  Colleen, her mommy, was a trooper rolling and tapping and filling the whole time – even while 8 3/4 months pregnant (this girl never ceases to amaze me!).

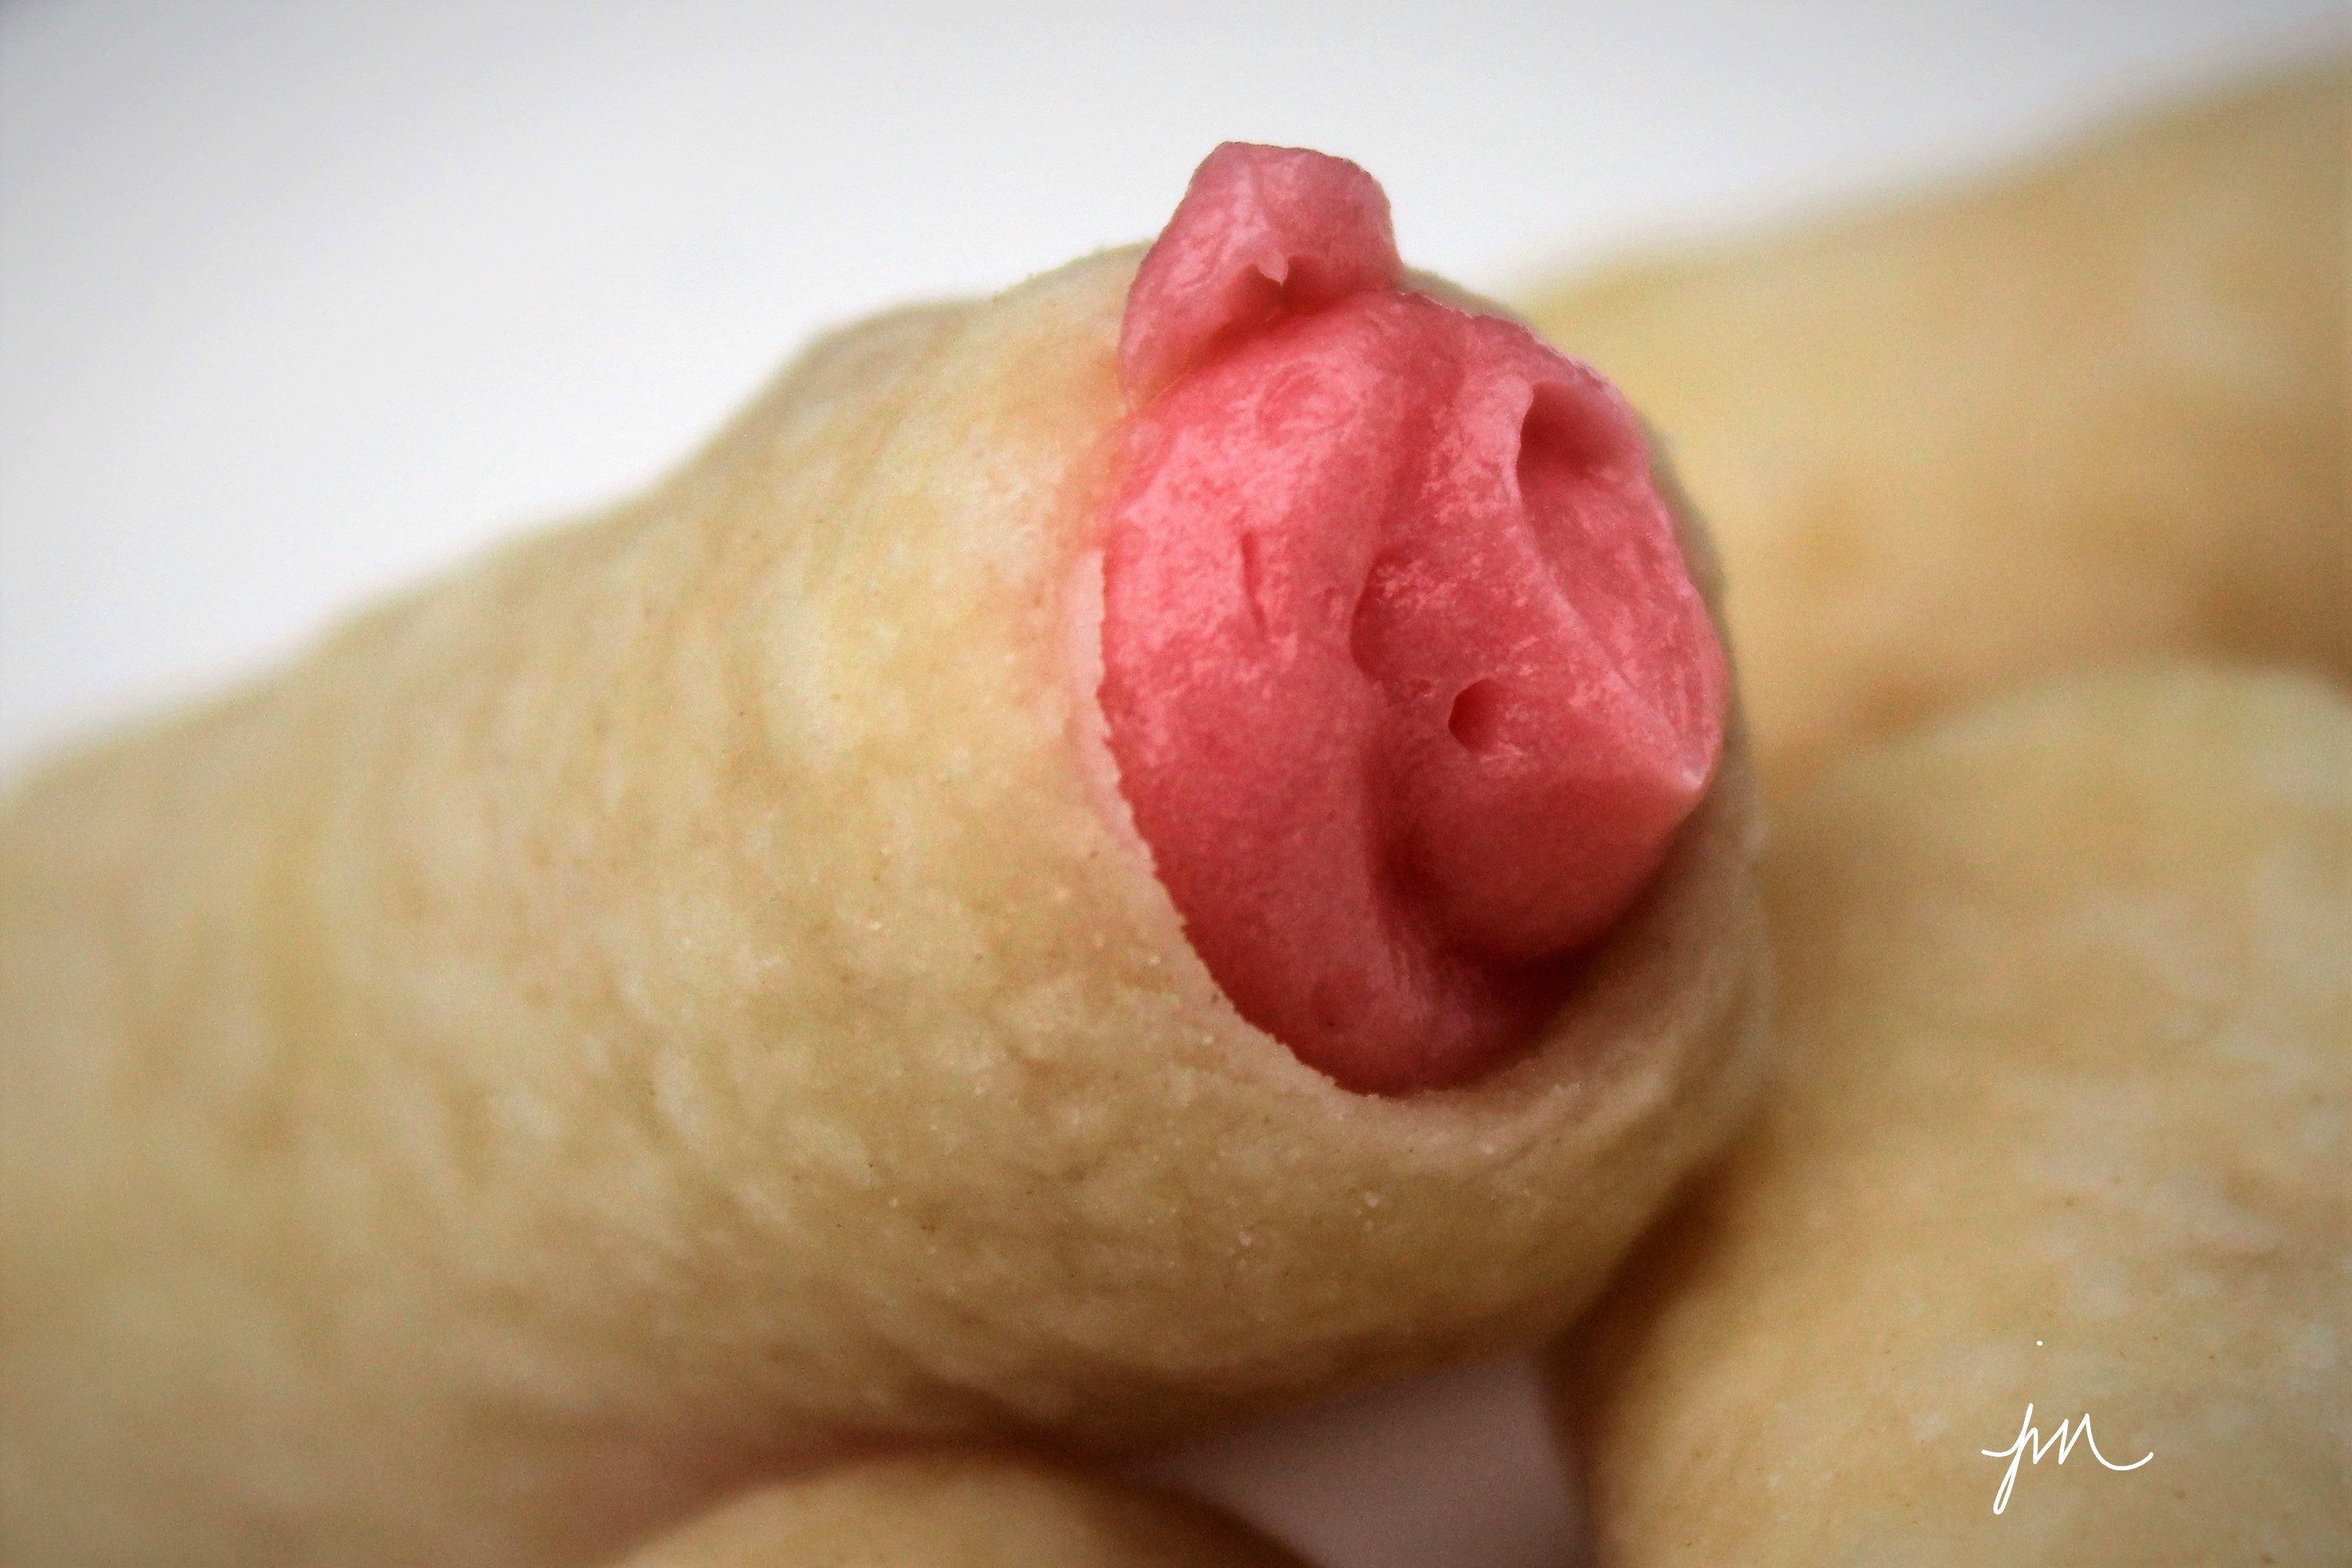
We filled half of our 200 lady locks with pink-tinted vanilla filling and the other half with white almond-flavored filling.  They both are melt-in-your-mouth divine.

Here is the recipe.  The best ever, full-proof success lady locks recipe.  Thanks Tracy!

Lady Locks Cookies

  • Servings: approximately 100
  • Print

Cookie Shell Ingredients:

  • 3 cups flour
  • 1 lb butter
  • 1 cup water

Filling:

  • 1 1/2 cups Crisco
  • 3 1/2 cups Powdered Sugar
  • 3/4 cup canned Evaporated Milk
  • 4 1/2 Tbsp. flour
  • 3/4 tsp. salt
  • 1 1/2 tsp vanilla

Directions:

Mix flour and butter with pastry blender like when making pie crust to form crumbly mixture.  Stir in water until dough forms.  Shape dough into 2 balls, cover with saran wrap, and refrigerate for one hour.

When ready to bake, preheat oven to 350 degrees F.

Prepare the Lady Locks Pins by rubbing your hands with Crisco and then rolling the pins in your hands to grease them.  (You only have to do this for the first batch – they will be greased enough after that from each subsequent baking.)

Roll out dough to 1/8″ thick on floured surface.  Cut dough into 2″ x 1-1/2″ rectangles.  Wrap each rectangle of dough around Lady Locks Pin pinching edges well to seal.  To do this is a bit tricky.  You must pinch the dough together, then roll it in your hands and/or on a lightly flour-dusted counter (or both!) to get them smooth and even. Then take a butter knife and cut through the center of the dough on the pin to create two evenly-sized pieces – pushing  them apart about 1/8″.  (You will get two cookies from each pin).

Fill a cookie tray or baking stone with dough-wrapped pins about 1/4 inch apart.  Bake approximately 10 minutes until just lightly browned.

When they come out of the oven, you can allow them to cool a minute or so, then you need to tap the ends of the pin on the counter to loosen the baked dough and slide off the pin on the narrowest tapered side.  (It’s a bit like playing hot potato, but necessary to remove the shells from the pins.  Tracy says if you leave them cool too long on the pin, the will likely stick to them and break in the process of removing.)

Once you have baked all of your shells, and they have cooled, prepare the filling.

With an electric mixer, beat the Crisco.  Add 1-1/2 cups powdered sugar, and beat again.  Add 1/4 cup canned milk, and beat again.  Add flour.   Beat again.  Add salt.     Beat again.  Add 1 1/2 cups powdered sugar.  Beat again.  Add 1/2 cup canned milk.  Beat again.  Add vanilla (or almond extract).  Beat again.  If you are going to tint your filling, add food color, and beat one final time until incorporated.

Using a pastry tube or decorator with small tip, fill shells with filling.

These cookies freeze well, and actually taste phenomenal straight out of the freezer.

Do you have another favorite Lady Locks recipe?  I’d love to hear how you make them.

Enjoy!

Cheers & Hugs,
Jodi

A Blue Pineapple for a Baby Girl Nursery

Blue Pineapple Watercolor 11X14

A Blue Pineapple for a Baby Girl Nursery.

I had a commissioned request to do a turquoisey-blue pineapple to go with a pink flamingo for a baby girl’s nursery.

Pink Flamingo Watercolor 11×14

Sweet new mommy-to-be, Sarah, reached out to me through our McKinneyX2Designs Etsy shop and asked if I could do my pineapple in blues and paint her an original pink flamingo – with a couple dabs of gold in each if possible.

I have been having so much fun pouring acrylic abstracts lately, it was a mind-shift to gently and neatly “splash” in watercolor, but it came back like riding a bike, and I truly enjoyed creating these original pieces in 11×14 for a sweet baby girl’s nursery.

I love the fun, creative ways new parents are decorating nurseries now, and this nursery is sure to be adorable.

Wishing you a day that is colored with turquoisey-blue pineapples, bright pink flamingoes, and dabs of gold!

Cheers & Hugs,
Jodi

Pouring Creativity

My art room lately

Pouring Creativity.

In case you’ve wondered what I’ve been doing in my spare time……..

I’ve been mixing…

and pouring…

and twisting…

and turning…

and splashing color…

and creating….

and exploring imagination…

and learning new ways…

to create and express…

and stretching to larger sizes….

and bigger messes that are worth the paint in my finger nails and on my clothes!


and these special pieces for a sweet granddaughter’s room….


and another coming soon.

Yep – I’ve been painting and having so much fun exploring this abstract medium.

And I can’t wait to make more!

Cheers & Hugs,
Jodi

PS  If you are interested in purchasing any of these except for the last two, they are for sale in our McKinneyX2Designs ETSY shop.

Unfurl

Young Fern in Spring, Mars, PA – May 2018

Unfurl.

Spread out your arms
and show your true beauty.

Open up your heart
and show your true love.

Unwind your mind
and show your creativity.

Unpack your burdens
and feel the lightness of hope.

Uncover your inhibitations
and welcome the unknown.

Reach beyond the tightness
and ease into peace.

Unfurl.


Cheers & Hugs,
Jodi

Be a Mermaid

Be a Mermaid
Makes Waves!

A friend recently asked if I could paint a mermaid for her for a baby shower she is going to where the baby girl’s nursery theme is mermaids.

What fun it was to paint this in watercolor!  What a fun nursery theme too!

This painting makes cute cards, so I added prints and cards to our McKinneyX2Designs Etsy shop.  I thought the prints might be fun for little one’s rooms or nurseries and the cards for birthdays or just “under the sea” fun!

And why not be like a mermaid, and make waves!

Cheers & Hugs,
Jodi

My New Yellow Rubber Boots

My New Yellow Rubber Boots Watercolor 8×10

My New Yellow Rubber Boots.

It was great to get to spend some time in my art studio this weekend after getting through a handful of “have-to-do” tasks.

After recently painting some loose portrait-type figure paintings like this and this, I felt inspired to try some more “character” type illustrative work.  I was inspired by some beautiful work I found on Instagram done by an artist in the Netherlands, Marleen Kleiberg.

My granddaughter got her first little pair of yellow rubber boots from the Easter Bunny last week, and even though they were two sizes too big, she fell in love with them.   Her Mommy sent a picture on Easter morning of her wearing her new boots.  She was decked out in a denim ruffle-bottomed top and peach/orange knit leggings with a matching bow in her hair (and a mouthful of jelly beans!).

I used some artistic liberty to create this painting, but Pap Pap and Mommy and Daddy knew just who it was when I showed them, and got a kick out of it.

A little over a year ago, I painted this little portrait of her.  I can’t believe how much she has grown and changed in a year!

Oh the joy this little one brings to my world!  And what a fun subject to inspire paintings.

Cheers & Hugs,
Jodi

Don’t Stop Working for It

Pine Squirrel in the Spring Snow – Mars, PA – April 7, 2018

If you
can’t stop
thinking
about it,
Don’t stop
working
for it.

This little cutie is an American Red (Pine) Squirrel that hangs out in our back yard with the birds and other bigger squirrels (and chipmunks and turkey and deer and Charlie of course).  These little squirrels only stand about 6 inches tall, being just a bit bigger than a chipmunk, and weigh about a half of a pound (200-250 g).

Saturday morning, we awoke to another Spring snow with two or three inches on the deck railing.  This little bugger was not giving up on his quest to get to the (ahem) “bird” feeder for breakfast.  I caught him burrowing full force through the snow that was taller than him when on all fours, but he was determined…. and he got there.

He reminded me not to give up and not to stop working on what we want and where we want to go.

Thanks little buddy!

Cheers & Hugs,
Jodi

Coconut Dark Chocolate Dream Cookies

Coconut Dark Chocolate Dream Cookies.

Are you a coconut lover?
Is dark chocolate your chocolate choice?

Would you choose a Mounds bar even if you are a little nutty?!

Then these cookies are definitely your dream come true!

They didn’t last long in our house.

I used Moser Roth 70% Cocoa Dark Chocolate I purchased at Aldi.  YUM!

Not a coconut fan?
Make them for someone who is…
You just might earn Betty Crocker Baking Super Star status .

Just sayin’…

Coconut Dark Chocolate Dream Cookies*

Ingredients:

  • 1 cup solid coconut oil
  • 1 1/2 cups sugar
  • 2 eggs
  • 2 tsp vanilla extract
  • 1 tsp baking powder
  • 1 tsp salt
  • 2 cups flour
  • 1 1/2 cups coarsely chopped dark chocolate
  • 2 cups sweetened coconut flakes

Directions:

Preheat oven to 325 degrees F.

Cream coconut oil and sugar with electric mixer until light and fluffy.  Add in egg and vanilla, followed by baking powder, salt, and flour.

Stir in chopped chocolate and coconut.

Drop dough by tablespoonfuls onto baking stone or cookie sheet.  Bake for 12-15 minutes until lightly browned and set.  Cool completely.

Enjoy!

Cheers & Hugs,
Jodi

* Original recipe slightly adapted from Add a Pinch.