Twix Chocolate Caramel Shortbread Thumbprint Cookies

twix cookies 1

It’s Christmas cookie baking time, and I always like to try cookies that are a little different, a little more decadent, a little fancier, a bit more festive than usual for holiday baking.

I think I am on a chocolate caramel kick (Rolo Hot Chocolate Recipe Monday)!

I found a ton of different cookies with these ingredients, but ended up trying one posted by The Recipe Critic and tweaking it very slightly.

Twix Cookies

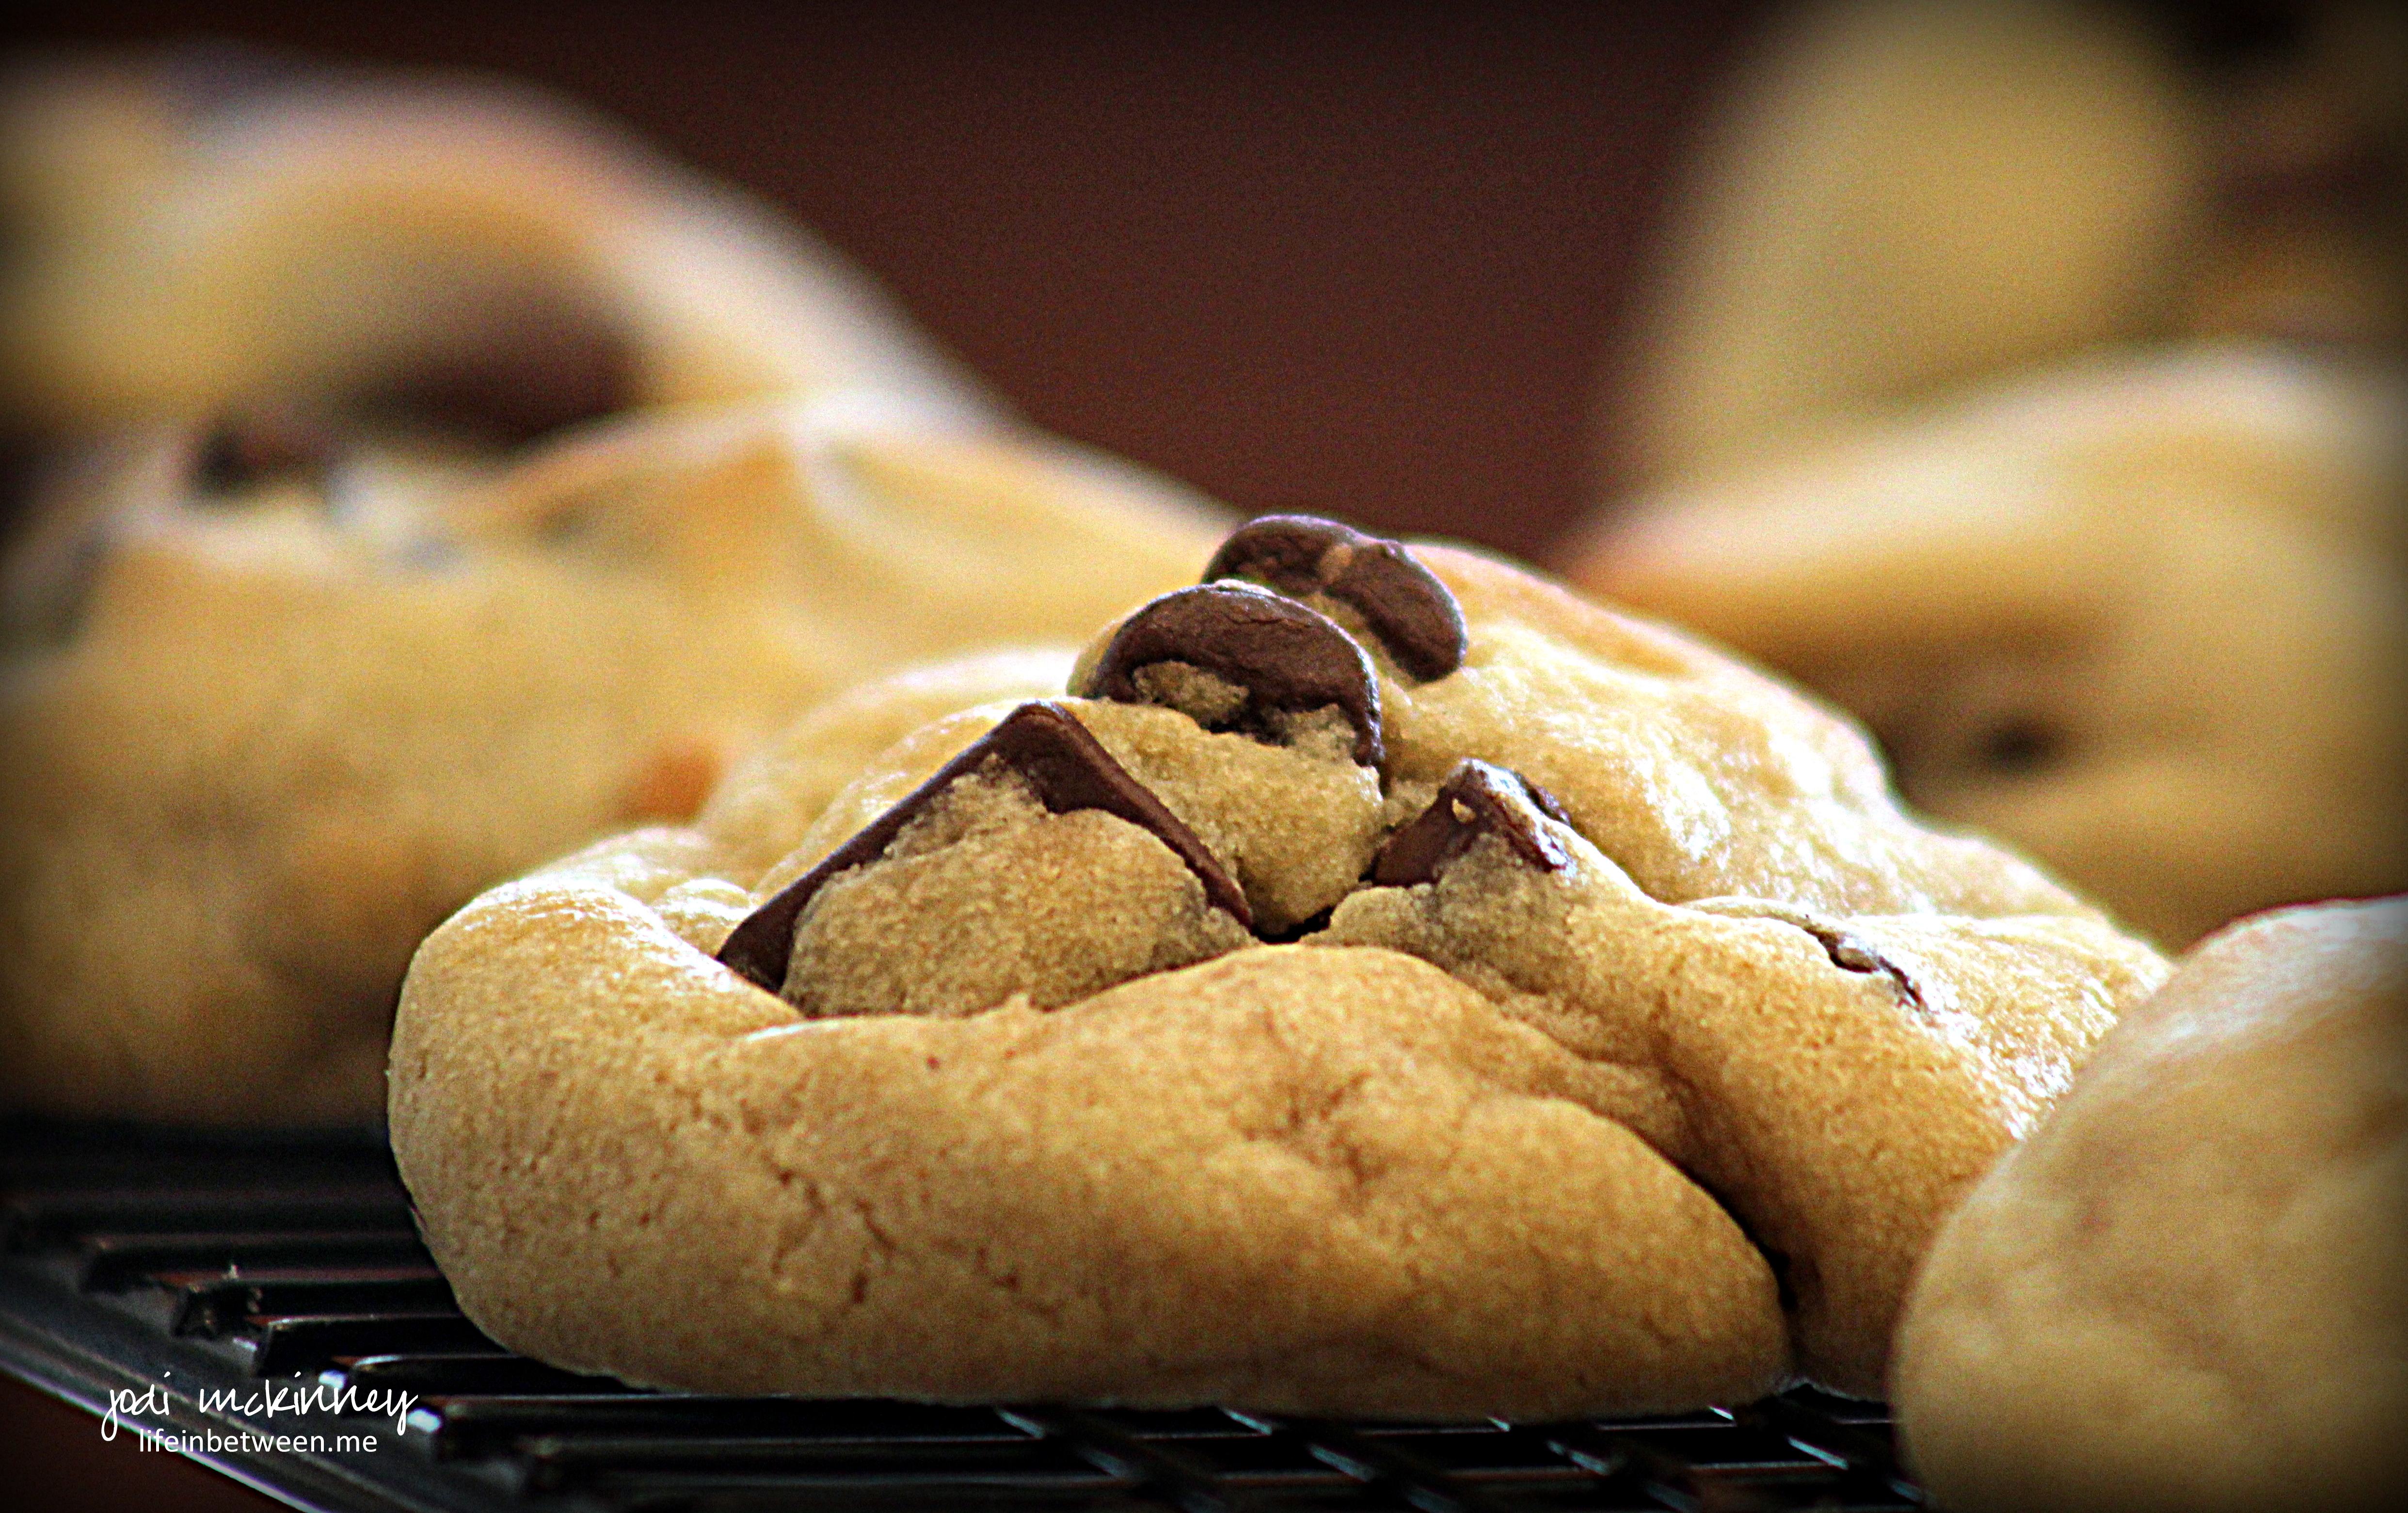
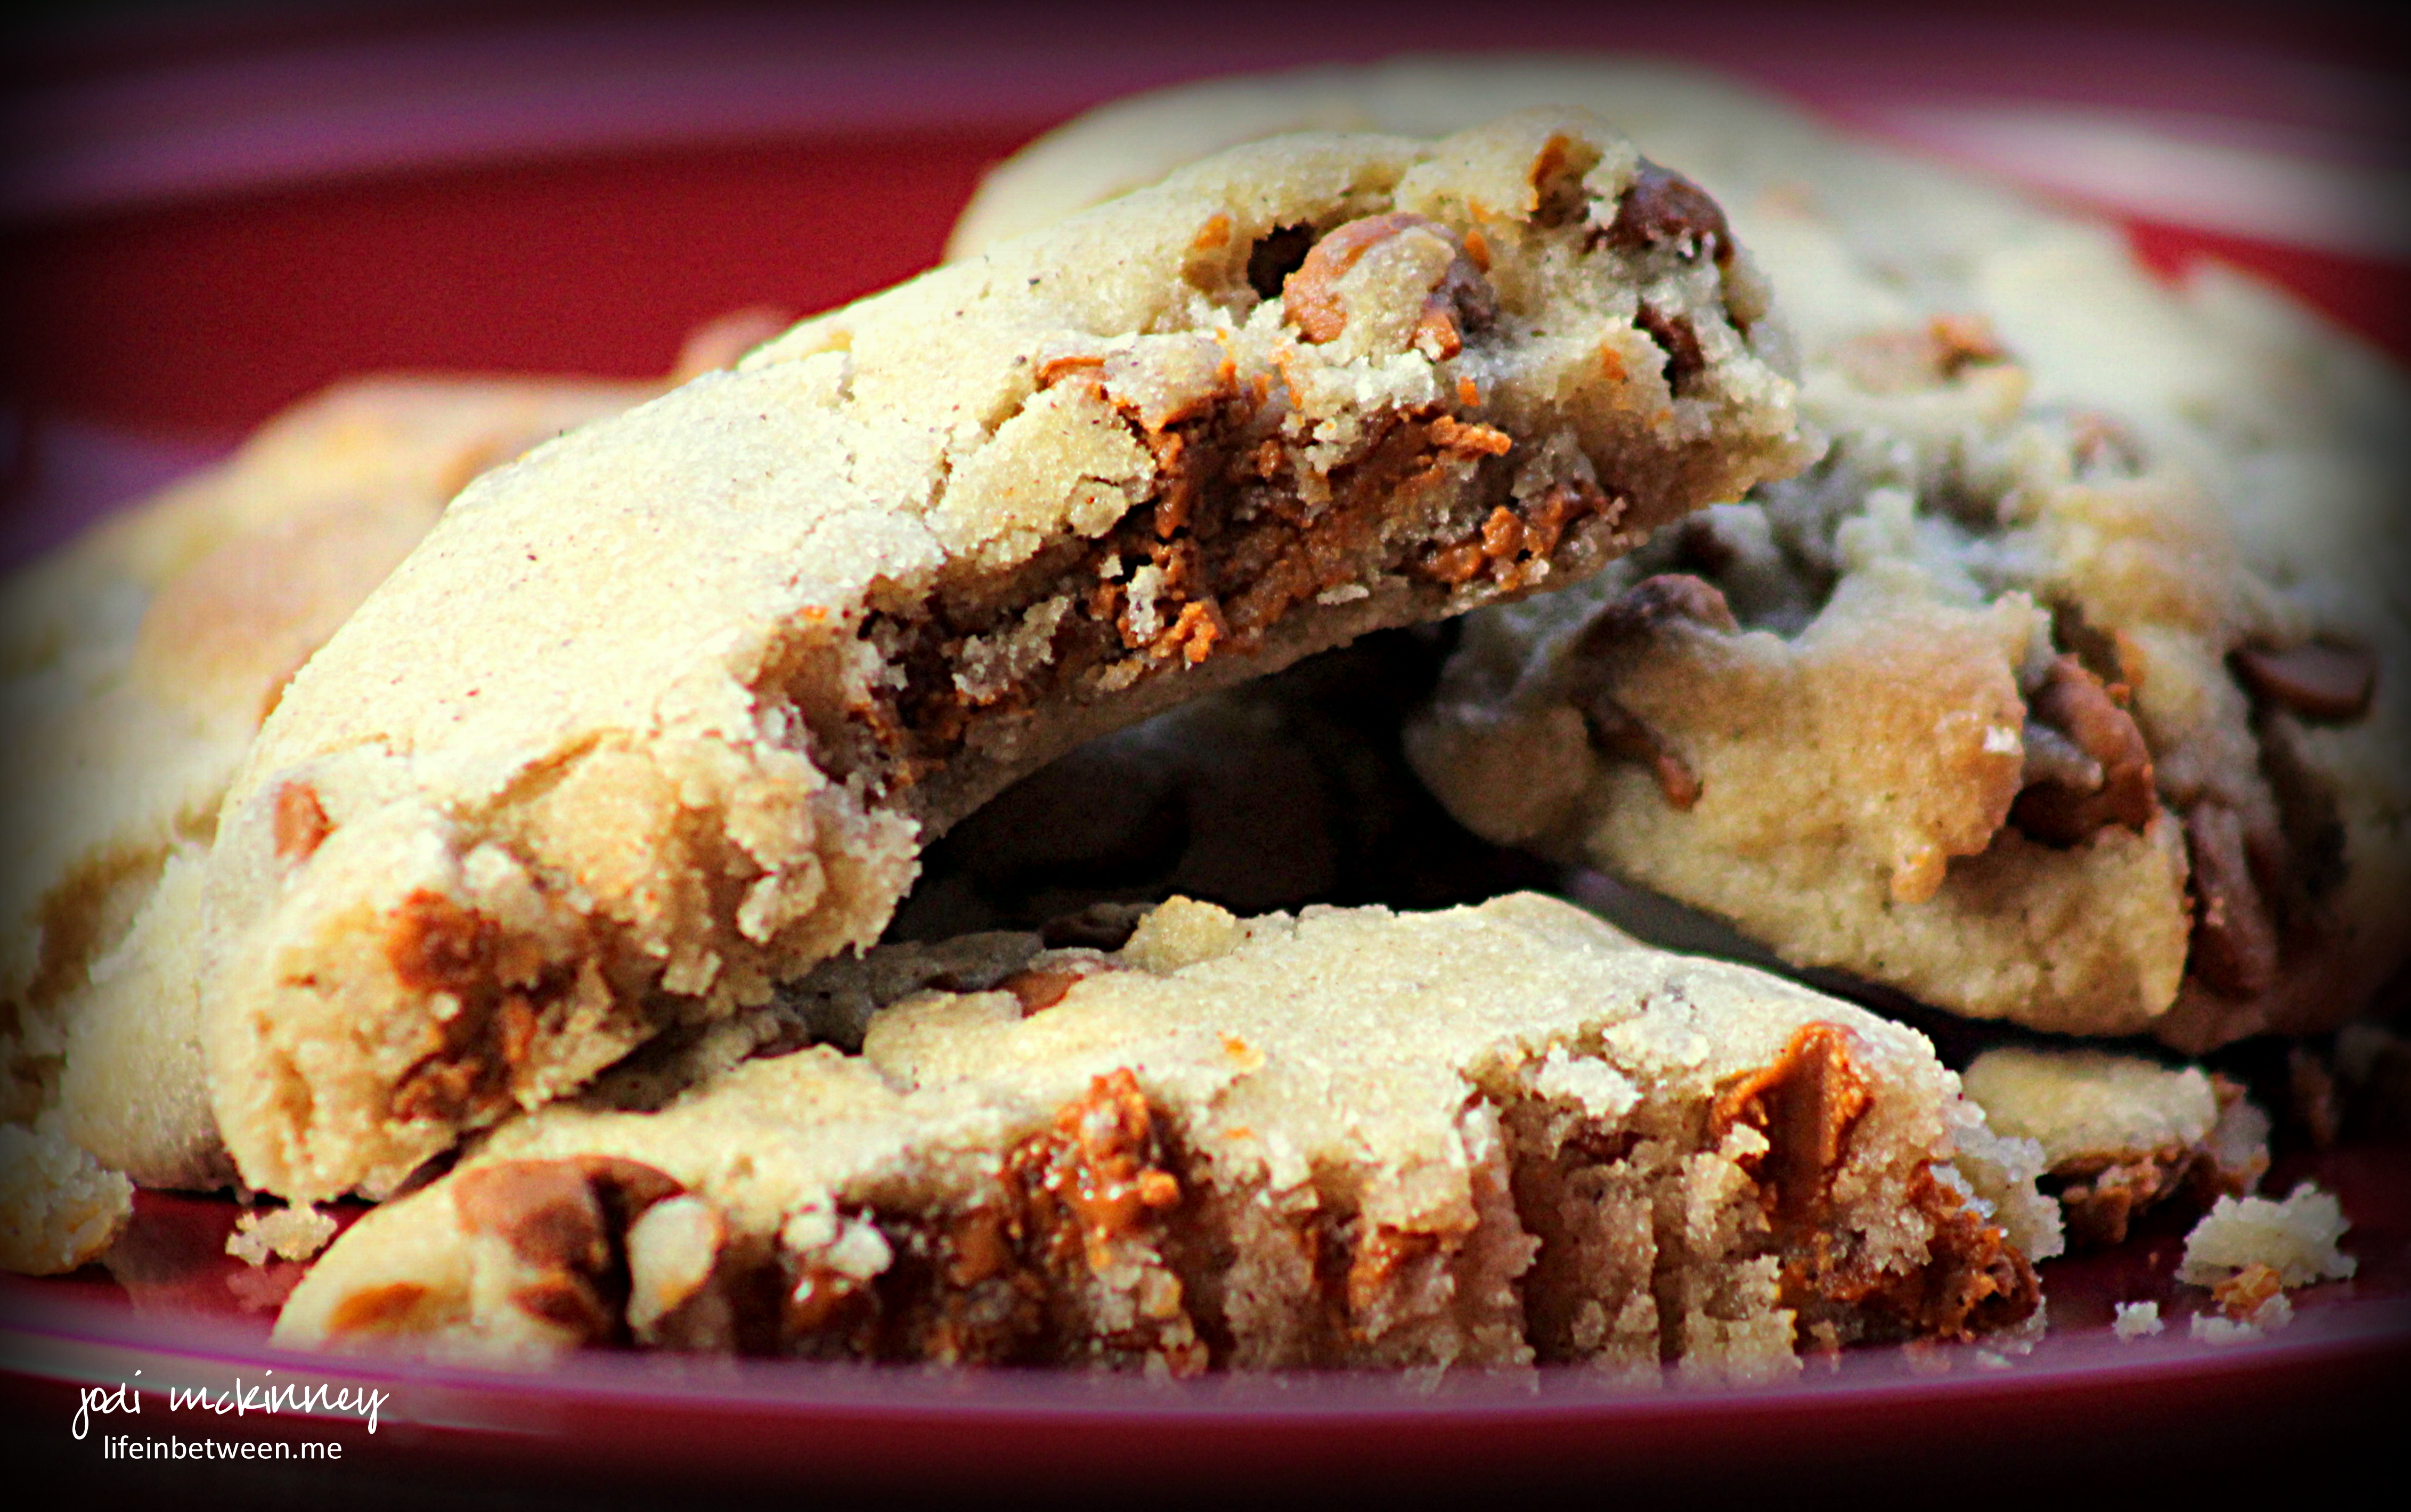
If you are a fan of Twix Candy Bars, you are going to go BONKERS over these awesome thumbprint cookies.

Twix Chocolate Caramel Shortbread Thumbprint Cookies

  • Servings: Approx. 4 dozen
  • Print
Ingredients:twix cookies 1
Shortbread Layer:
  • 4 sticks (1 lb) Butter, softened
  • 1 1/2 cups sugar
  • 6 Eggs (yolks only)
  • 3 tsp vanilla
  • 4 1/2 cups all-purpose flour

Caramel Filling:

Chocolate Topping:

Directions:

  • Shortbread Cookies:  With electric mixer, combine butter, sugar, egg yolks and vanilla. Beat at medium speed until creamy.   Add flour, and beat at low speed until well mixed. Cover and refrigerate at least 1 hour or until firm.
  • After dough has chilled, shape into 1-inch balls. Place 2 inches apart onto ungreased cookie sheets or baking stone. Make indentation in center of each cookie with thumb or end of wooden spoon handle. Bake at 375 degrees F for approximately 8 minutes or until edges begin to brown. Cool completely.
  • Caramel filling: Melt the caramel and cream in the microwave stirring every 30 seconds until fully melted. Using a teaspoon fill each indentation with the caramel.
  • Chocolate: Melt the chocolate in the microwave stirring 30 seconds at a time until smooth.  Spoon into a ziploc bag.  Cut a tiny snip in the corner of the baggie to pipe the chocolate onto the cookies.

I bet these would taste wonderful with a steaming mug of Rolo Hot Chocolate!   Can you even imagine!?!  ‘Tis the season!

Cheers & Holiday Hugs,

Jodi

Rolo Hot Chocolate

rolo hot chocolate 2

Rolo Hot Chocolate

I may have discovered the most amazing, best ever homemade hot chocolate in the entire universe.

And it is EASY!

Rolo hot chocolate

I discovered it on The Country Chic Cottage, but (believe it or not) found I could reduce the sugar content a bit over what Angie recommended in her blog.

This is the perfect warmer-upper comfort drink to enjoy by a crackling fire with your holiday lights on reading a book or watching a holiday movie.

I am sure the little ones that live in or come to your home would love this as a special treat too!

rolo hot chocolate 3

Ready for this cinchy pinchy, two-ingredient, ultra yummy, rich and creamy hot chocolate recipe?  (enough adjectives?)

Here it is!  ENJOY!

Rolo Hot Chocolate

Ingredients:rolo hot chocolate 2

  • 5 Hershey’s Rolo Chocolate Caramel Candies (Angie recommends 7, but I felt 5 was plenty.  Feel free to adjust to your liking.)
  • 1 Cup (or as much as fills your mug) Skim Milk (I used Skim, but you can use 2% or Whole Milk if you want it even richer.  I would rather eat another Rolo and go with the Skim Milk myself!)

Directions:

  • Unwrap Rolo Candies and put in your mug.
  • Microwave for 20 seconds, then stir.
  • Add Skim Milk and stir.
  • Microwave for an additional 1 1/2 minutes.
  • Stir until completely melted.
  • Garnish with mini marshmallows if desired.

Thanks for the inspiration, Angie!

Cheers & Hugs,
Jodi

Old-Fashioned Hard Tack Christmas Candy

Old Fashioned Hard Tack Christmas Candy

Making Old-Fashioned Hard Tack Christmas Candy is more than just “making candy.”

It is an opportunity to pass down family holiday traditions.

It is an opportunity to create memories.

A chance to spend time with those you love,

and a way to make a homemade Christmas gift.

hard tack candy flavors

So when my daughter-in-law, Colleen asked if we could make hard tack candy this year, I was so excited!

It has been quite a few years since the days when I was about her age and my mother-in-law taught me.

My sister-in-laws and I got together every year with my mother-in-law to make hard tack candy around this time (Thanksgiving weekend), so that the guys could take a bagful in their pockets for their annual deer-hunting trip, which always opens the Monday after Thanksgiving in our neck of the woods, and we would have plenty to enjoy and share as a special homemade gift.

hard tack christmas candy boiling

The recipe is quite simple, but also a bit messy, so we were very fortunate to have an extra helper this year in Charlie, who kept the floor lickety-split clean from any powdered sugar, butter or flying candy that hit it!

charlie christmas 2015

Colleen and her sweet sister, Katie, caught on amazingly quick, and we ended up making 10 batches to split between the three of us.

colleen hard tack christmas candy

katie hard tack christmas candy


hard tack jodi colleen katie 2015 christmas candy

We were happy with our results, and now the tradition has been started for the next generation.

hard tack christmas candy 2015

I hope you will give it a try!

Old Fashioned Hard Tack Christmas Candy 2

There is still plenty of time to make this sweet treat and create some memories with a new family tradition.

Here’s our recipe:

Old-Fashioned Hard Tack Christmas Candy

  • Servings: approx. 2 cups
  • Print

Ingredients:Old Fashioned Hard Tack Christmas Candy 2

  • 1 cup water
  • 3 3/4 cup white sugar
  • 1 1/4 cup Karo Corn Syrup
  • Food Coloring
  • 1 dram (tsp) LorAnn Oil & Candy Flavoring of your choice (we used Cherry, Lemon, Strawberry, Raspberry, Watermelon, Orange, Butterscotch, Spearmint, Peppermint, and Cinnamon)
  • 2 cups powdered sugar
  • Butter (room temperature)

Mix water, sugar, and corn syrup in a saucepan.  Heat to boiling and boil until it reaches 300 degrees F (hard tack) on a candy thermometer (takes about 20 mins).

While that is cooking, prepare your cutting station.  Cover counter or table with an old tablecloth.  Pour powdered sugar directly onto the tablecloth and spread around. Amply butter three dinner plates and place on table amidst the powdered sugar.  Sterilize scissors or kitchen shears in a pot of boiling water.

When the mixture reaches 300 degrees F, remove from heat and add food coloring and oil flavoring.  Stir until combined.

Pour onto prepared buttered dishes, dividing evenly between the three.  Let it cool for up to a minute, then begin gently pulling with scissors to edge of plate.  With buttered hands, begin to pull and cut it off into the powdered sugar.  You can snip a little at a time, or pour off large dollops into the powdered sugar.  Let cool slightly and turn over to assure both sides have powdered sugar on them, but do not allow the powdered sugar to mix INTO the candy.  Snip with shears into bite-sized pieces.  Place in a colander and shake off excess powdered sugar.  Spread out on a platter to cool completely.   Store in air-tight containers, mason jars, or Ziploc baggies.

A couple of pointers:

  • I can’t even imagine making this by myself.  I think a minimum of three people are needed to keep it moving as you need to work fast once you pour it as it cools quickly.  Plus – it is so much more fun doing it together!
  • It is HOT!  Be prepared!  Butter your hands and plate liberally to be able to deal with it, and work quickly.
  • Be careful when pouring in the oil flavorings as some are very potent – cinnamon and the mints especially.  Be sure not to breathe in directly over the pot, and have the room well ventilated – open the door or window if necessary and have your exhaust fan on.
  • Some people pour the hot liquid into a pan, let it cool, and then crack it by banging the pan on the counter or table or using a gentle small hammer or tool to pound and crack.  I think that makes it very sharp, but you can do that if you prefer.
  • If you make cinnamon and mint along with fruit flavors – store separately until you put together to gift or serve as the cinnamon and mint flavors can overpower all others.

I hope this was helpful.  Any questions, let me know.

What is your favorite flavor?

Do you have a favorite holiday cooking or baking or crafting tradition?

Cheers & Hugs,

Jodi

Reese’s Peanut Butter Thanksgiving Turkey Treats

Reeses Peanut Butter Chocolate Thanksgiving Turkey Treats 1

Whether you are a white turkey breast lover or a dark turkey leg, thigh or wing lover, you have to love these adorable Reese’s Peanut Butter Cup Chocolate Thanksgiving Turkeys!

When I saw these cute little treats on Pinterest made by MomonTimeOut,  I knew I had to make these for a couple of little sweeties we will be spending Thanksgiving with.  (And I’m guessing even a few of the big “sweeties” might love them too!)

A Reese’s lover’s dream come true using full size, miniature size, and Reese’s pieces all in one amazing treat!

I had some colorful candy-coated chocolate sunflower seeds I picked up at Trader Joe’s that I used for the noses, but you could use a Reese’s Piece turned sideways too.  I melted some Wilton’s Light Cocoa Candy Melts for the “glue,” but you could use chocolate chips if that is what you have on hand.  For me, it’s all about improvising and using what you have on hand or can get locally.  And these go together super quick!  (Believe it or not, I keep a few sizes of candy eyes on hand!  I know – I have issues!  But I’m betting you can find them at your local craft store like Michael’s or Joann’s or a candy or bake shop – and of course there is always Amazon!)

Reeses Peanut Butter Chocolate Thanksgiving Turkey Treats

There’s still plenty of time to throw these together for your Thanksgiving festivities.

I made 12, and it only took about a half hour.

Reeses Peanut Butter Chocolate Thanksgiving Turkey Treats 2

Reese's Peanut Butter Cup Chocolate Thanksgiving Turkeys

Ingredients:Reeses Peanut Butter Chocolate Thanksgiving Turkey Treats 1

Directions

  • Melt Candy Melts or Chocolate Chips by heating in microwave for 1 minute, stir, then heat 30 more seconds, and stir again.
  • Spoon into a zipper sandwich baggie, push to one corner, seal, and then snip a tiny corner to allow you to squeeze chocolate out for “gluing” chocolate pieces together.
  • “Glue” Miniature Reese’s Cup to Full-Size Reese’s Cup with a dab of chocolate.
  • “Glue” on Reese’s Pieces Feathers using a strip of chocolate squeezed across top of full-size Reese’s Cup.
  • “Glue” on eyes and nose.

Enjoy!

Cheers & Hugs,

Jodi

Heavenly Hot Cocoa Brownies

Heavenly Hot Cocoa Brownies 1

Chocolate lovers look out!

Heavenly Hot Cocoa Brownies 2

Brownie lovers beware!

Heavenly Hot Cocoa Brownies 3

If you are still baking boxed brownie mixes, get ready to rock your world.

I have discovered the ultimate homemade brownie recipe that is not only easy, but has an amazingly crispy, crinkly, chewy cracked crust floating atop a rich fudgy center that is going to cause you to hear angels rejoicing from your taste buds singing.

Heavenly Hot Cocoa Brownies 4

I wanted to create a brownie that was like taking a bite of a sip of hot cocoa.

So tweaking this amazing recipe (originally from Taste of Home) up just a bit made a real winner.

Get ready to bake and taste and share and treat those you love with a brownie that is simply beyond anything you have ever tasted before.  I dare you!

Heavenly Hot Cocoa Brownies

  • 3/4 cup cocoa (I used Hershey’s)Heavenly Hot Cocoa Brownies 1
  • 1/2 tsp. baking soda
  • 2/3 cup melted butter, divided
  • 1/2 cup boiling water
  • 2 cups sugar
  • 2 large eggs
  • 1 1/3 cups flour
  • 1 1/2 tsp pure vanilla extract
  • 1/4 teaspoon salt
  • 12 oz. package semi-sweet chocolate chips (I used Trader Joe’s, which I found delightful, but I often use Nestle’s also)
  • 3/4  cup miniature marshmallows

Directions:

  • Preheat oven to 350 degrees F.
  • In a large bowl, combine cocoa and baking soda.
  • Blend in half (1/3 cup) of the melted butter.
  • Add boiling water and stir until well blended.
  • Stir in sugar, eggs and remaining 1/3 cup melted butter.  Mix until well incorporated
  • Add flour, vanilla, and salt.
  • Stir in chocolate chips and 1/2 cup marshmallows.
  • Pour into a greased 9×13 pan and bake for 30-35 mins. until top begins to crack
  • After removing from oven, top with remaining 1/4 cup mini marshmallows and lightly brown tops with Chef’s Torch (optional)

Cheers & Chocoately Brownie Hugs,

Jodi

Warm Caramel Apple Cider

Warm Caramel Apple Cider

A friend who reads my blog asked me a few weeks ago to post a yummy warm drink recipe.  Well – when I recently tasted a warm caramel apple cider drink at a restaurant with my buddy, Janet after our Autumn Weekend Wandering trip, I knew it is what I would be trying.  And try we did, again!

Warm Caramel Apple Cider 2

You could certainly make this with fresh apple cider, but I had a box of Alpine Sugar-Free Spiced Apple Cider packets in the pantry that I thought would work great, and they did!

When there is a nip in the air and you have time to sit under a warm blanket by a crackling fire with a good book or while watching a favorite movie in your fuzzy slippers or enjoying some catch up time on the phone or in person with a good friend, make a mug or two of this warm cocktail that tastes like drinking warm apple pie or a gooey caramel apple.  (sigh…)

Here’s your yummy warm drink recipe, Melissa! Hope you enjoy!

Warm Caramel Apple Cider

Combine 1 packet Alpine Sugar-Free Spiced Apple Cider with 1 cup of hot water.

Add 1 shot (or as much as you like) Buttershots Butterscotch Schnapps.

If you want to “fancy it up” and make it special, you can garnish with a cinnamon sugar rim on your mug (simply dampen the rim of your mug with water and dip in cinnamon sugar), add a cinnamon stick and a fresh slice of apple.

Cheers & Hugs,
Jodi

Best Ever Dry Rub Mix for Ribs and Pork

dry rub seasoning mix

I recently mixed up a batch of seasonings for a dry rub mix that has rocked our world (well – that might be a teensy bit of an exaggeration… but I really wanted to catch your attention.)  

But seriously – who knew mixing spices could be so exciting…  Pack so much punch…. add such “zip” to what would otherwise be so … ordinary?!

And once you make a batch of this, you will have it for a while…  But you will want to use it often!

I’ve used it so far for slow roasted oven baked ribs where I rubbed it on and baked them for 8 hours on a low heat in the oven.  O. M. G!

I’ve also rubbed it all over a couple of pork tenderloins and marinated all day in the refrigerator, then grilled.  YUM!

Both ways turned out amazing.

I’m looking forward to trying it on more things… Maybe chicken?  Beef?  I’ll bet it would even be a nice seasoning for roasted potatoes.

This mix smells so amazing, that we sometimes just open the jar and breathe it in!

I am sure you can mix and match the ingredients as you see fit or as you have on hand, but I believe the two most key ingredients are the SMOKEY paprika (oh how I wish we had smell-a-blog or scratch and sniff photos on our phones and computers so you could experience this smell if you never have – it is very different from “regular” or Spanish paprika) and cinnamon (the smell and bit of sweet bite that you don’t quite expect takes it over the top!).

dry rub seasoning on ribs

Here is the recipe.  I hope you will give it a try.  If you do, let me know how you liked it.

Best Ever Dry Rub Seasoning Mix for Ribs and Pork

  • 3 Tbsp paprika
  • 2 Tbsp Penzey’s smoked paprika (I think this is one of the KEY ingredients)
  • 3 Tbsp chili powder
  • 3 Tbsp coarse salt
  • 1 Tbsp coarsely ground black pepper
  • 1 Tbsp ground ginger
  • 6 Tbsp brown sugar
  • 1 Tbsp freshly micro-planed nutmeg (or ground)
  • 1 Tbsp ground oregano
  • 1 Tbsp ground thyme
  • 1 Tbsp curry powder
  • 2 Tbsp dry mustard powder
  • 2 Tbsp garlic powder
  • 3 Tbsp dried onion flakes
  • 1 tsp ground cumin
  • 1 tsp cinnamon (another KEY ingredient)

Mix all together and store in airtight jar.

To use, sprinkle and rub liberally over all sides of ribs, pork tenderloin, pork chops, or anything you like.  Let marinade for several hours or overnight.  Bake or grill to your liking.

This really is an amazing seasoning mix to kick up your pork tenderloin and ribs.
It would also make a great gift to give in pint size jars for the holidays for gourmet cooking friends on your holiday gift list.

The guys we had over for dinner this past Saturday evening loved it.  I think you will too!

Cheers & Hugs,
Jodi

My Happy Place

Nick Winston CJ Zach

Nick, Winston, CJ, Zach

Look at these handsome guys!

Could I be any happier than to have the opportunity to have them over and cook for them?

Does that make me a little strange?… unusual?…. old-fashioned….?

I was really looking forward to – and totally enjoyed – the opportunity to cook and bake for my youngest son, Nick (far left in the photo above) and a group of his old college buddies (Winston, Zach, and CJ – two of whom are married already!), who decided to get together for a Saturday afternoon of basketball and an evening of pool and poker, with a short break in between to be nourished by Momma ME!

In talking with my friend, Tracy, on our Sunday morning walk yesterday, I remarked upon reflection that it is good to be 52 and not so worried about what is the right or wrong way to be a woman today.

For a while, I tried to be a “modern” business woman – one who enjoys working as much as the rest of “the guys” and has no time for such silliness as cooking and baking….

But I can’t help it….

It is my happy place.

It is in my DNA.

When I was a young girl, if asked what I wanted to be when I grow up, I most often would say, “A Mom.”

Being a mom is a job that should be as equally admired as those that serve as doctors and lawyers and teachers and executives.

It really is a tough job.  Little training is provided.  Little recognition is provided.  The monetary rewards are quite minimal.  The days are long.  Then nights are short.  The worries are many.

But the rewards…..

especially when looking back and knowing you raised your kids to become amazing adults….

well – there really is nothing greater.

So the chance to cherish moments with my “kids” (who aren’t really kids anymore)…

is pretty darn great.

I am most happy when I am cooking or baking or having guests in my home.

I TRULY love my work too.  Don’t get me wrong.

I am extremely fortunate to have a work-life balance that allows me to work as passionately at my job in corporate communications for home health and hospice and enjoy it as much as I do my “life in between” activities.

I also truly and equally admire women who don’t choose to be mothers, but dedicate their lives to noble careers because that is their passion.

But put me behind the kitchen counter with pots steaming and cookies cooling and bread kneading…..

kitchen

with Charlie by my side napping as the Autumn sunshine streams in the window…

charlie sleeping in the sun

and life is perfect.

I baked some classic chocolate chips cookies,

chocolate chip cookie

and made Zach’s favorite – good old-fashioned peasant food – Haluski.

halushki cabbage

I made some yummy rosemary roasted butternut squash that they all surprisingly LOVED, some freshly baked rustic crusty bread, and some dry rubbed pork tenderloin (recipe in tomorrow’s blog!), as well as some mini pumpkin pies….

mini pumpkin pies

served up with a side of dreamy, creamy whipped cream.

single mini pumpkin pie bite

In the midst of it all, with dishes piled high in the sink…

flour all over the counter….

dough in my hair…

Nick asked,

“Do you REALLY ENJOY doing this?”

“Oh YES!,” I didn’t even hesitate when I replied…

“This is my happy place.”

Thanks, guys, for the wine!
Thanks, girls, for the surprise visit!
Thanks, Merv, for being the grill master and my “partner in crime” through it all.
Thanks for allowing me to nourish your bellies as much as you nourish my heart! ❤

Cheers & Hugs,
Jodi

Lemon Strawberry Pound Cake

lemon strawberry pound cake photo

Lemons and strawberries in November?  (A time when we are usually baking with pumpkin and cinnamon and apples….?)

Well – we are experiencing some amazing Indian Summer weather here in Mars – with temperatures in the 70’s, the sun shining brightly, and the sky a vibrant shade of blue – so why not – right?

lemon strawberry pound cake 3

Well – the truth be told – that same cute little bugger who requested the Royal Flush Halloween t-shirts recently found a photo on Reddit that struck his fancy a few days ago of a freshly baked loaf of lemon pound cake with strawberries.  He texted me the photo saying, “Please make.”

Well…. how could I resist?  (I know….. pushover! – but really…. I live for this stuff!)

Turns out the sweet young lady who posted the photo stating “this just came out of the oven” did not post the recipe!  How dare she??!!  More than one reader called her “evil” for not posting the recipe!

I did some digging, however, and found the source and the recipe… Score!!  (I know – I have issues!)

Turns out Bianca Davies, the “evil” baker/Reddit poster, is a trained chef from Cape Town, South Africa, who attended Le Cordon Bleu in Paris, but is equally inspired by her Granny and Granny’s lemon trees.

Per Bianca, Granny likes a cake that is “rich, moist, light, airy and slightly fudgy.”   This little pound cake amazingly delivers on all of that – and more!

lemon strawberry pound cake 4

So before we get seriously into Autumn and Winter baking and cooking, you might want to enjoy one last taste of summer!  You will not regret it!

Lemon Strawberry Pound Cake

Ingredients:lemon strawberry pound cake photo

  • 3 eggs
  • 1 ½ cups powdered sugar, sifted
  • 2 tsp vanilla extract
  • 1 ½ cups plain flour
  • ¾ tsp baking powder
  • ¾ cup salted butter
  • zest of 2 large lemons
  • 8-10 fresh strawberries

 Directions:

  • Preheat oven to 350˚F.
  • Grease a loaf pan well with butter.
  • Whisk eggs, sifted powdered sugar and vanilla together in a bowl.
  • In a separate bowl whisk flour and baking powder together.
  • Place butter in a small saucepan. Zest lemons into your butter and place on a low heat to melt. (Do not boil)
  • Combine all three mixes together a little at a time. Do not over mix.
  • Pour into your prepared loaf pan.
  • Chop your strawberries into quarters and arrange evenly on top of the batter.
  • Bake in the middle of the oven for approximately 40 minutes. (The cake should be golden brown and ‘just’ done with your knife or cake tester not coming out completely clean. Do not over bake.)
  • Let cool slightly in the pan, turn out gently and leave to cool on a wire rack.
  • Dust with powdered sugar and try not to eat the whole cake in one go!

Converted recipe from http://thesecretlifeofbee.co.za/ (Bianca Davies, Cape Town, South Africa)

Cheers & Hugs,

Jodi

Cinnamon Chip Brown Sugar Cookies

cinnamon chip cookie stack

I’ve been bursting with excitement to share this recipe that is bursting with cinnamon flavor!

cinnamon chip cookies

I daresay this is my absolute FAVORITE new cookie recipe. So cinnamony perfect and delicious for this time of year!

cinnamon chip cookies 2

If you are a fan of cinnamon, this cookie is going to ROCK your WORLD!

I found this recipe on LemonsforLulu’s blog and couldn’t wait to try.

All I can say is – STOP reading right now… preheat your oven…. get out your mixer… “Do Not Pass Go,” “Do Not Collect $200.”

Thank me later…
I’ll be waiting to hear!

Cinnamon Chip Brown Sugar Cookies

  • Servings: 4 dozen large cookies
  • Print

Ingredients:cinnamon chip cookie stack

  • 2 cups butter (at room temperature or you can slightly melt in microwave)
  • 3 cups brown sugar
  • 2 eggs
  • 4 1/2 cups flour
  • 4 tsps baking soda
  • 1 tsp salt
  • 1 1/2 tsps cinnamon
  • 2 10 oz bags Hershey’s Cinnamon Chips

Directions:

Preheat oven to 375 degrees F.

In a bowl of a mixer, combine butter and sugar and beat until creamy. Add the egg and mix well. Add baking soda, salt and cinnamon, and combine.   Carefully add flour and combine until soft dough forms.  Stir in cinnamon chips.

Drop dough by tablespoons onto baking stone or cookie sheet. Bake just until edges are set, about 8­-9 minutes. Do not overbake.  Let cookies cool for another minute or two on the stone or baking sheet before removing to cooling rack to cool completely.

These are absolutely the most amazing cinnamony luvin’ from the oven cookies ever!

Cheers & Hugs,
Jodi