Biscoff Crunch Banana Bread

Biscoff banana bread 1

I thought I had discovered the best ever banana bread recipe (which is ULTRA amazing!) – but then…. I discovered…

are you ready??…..

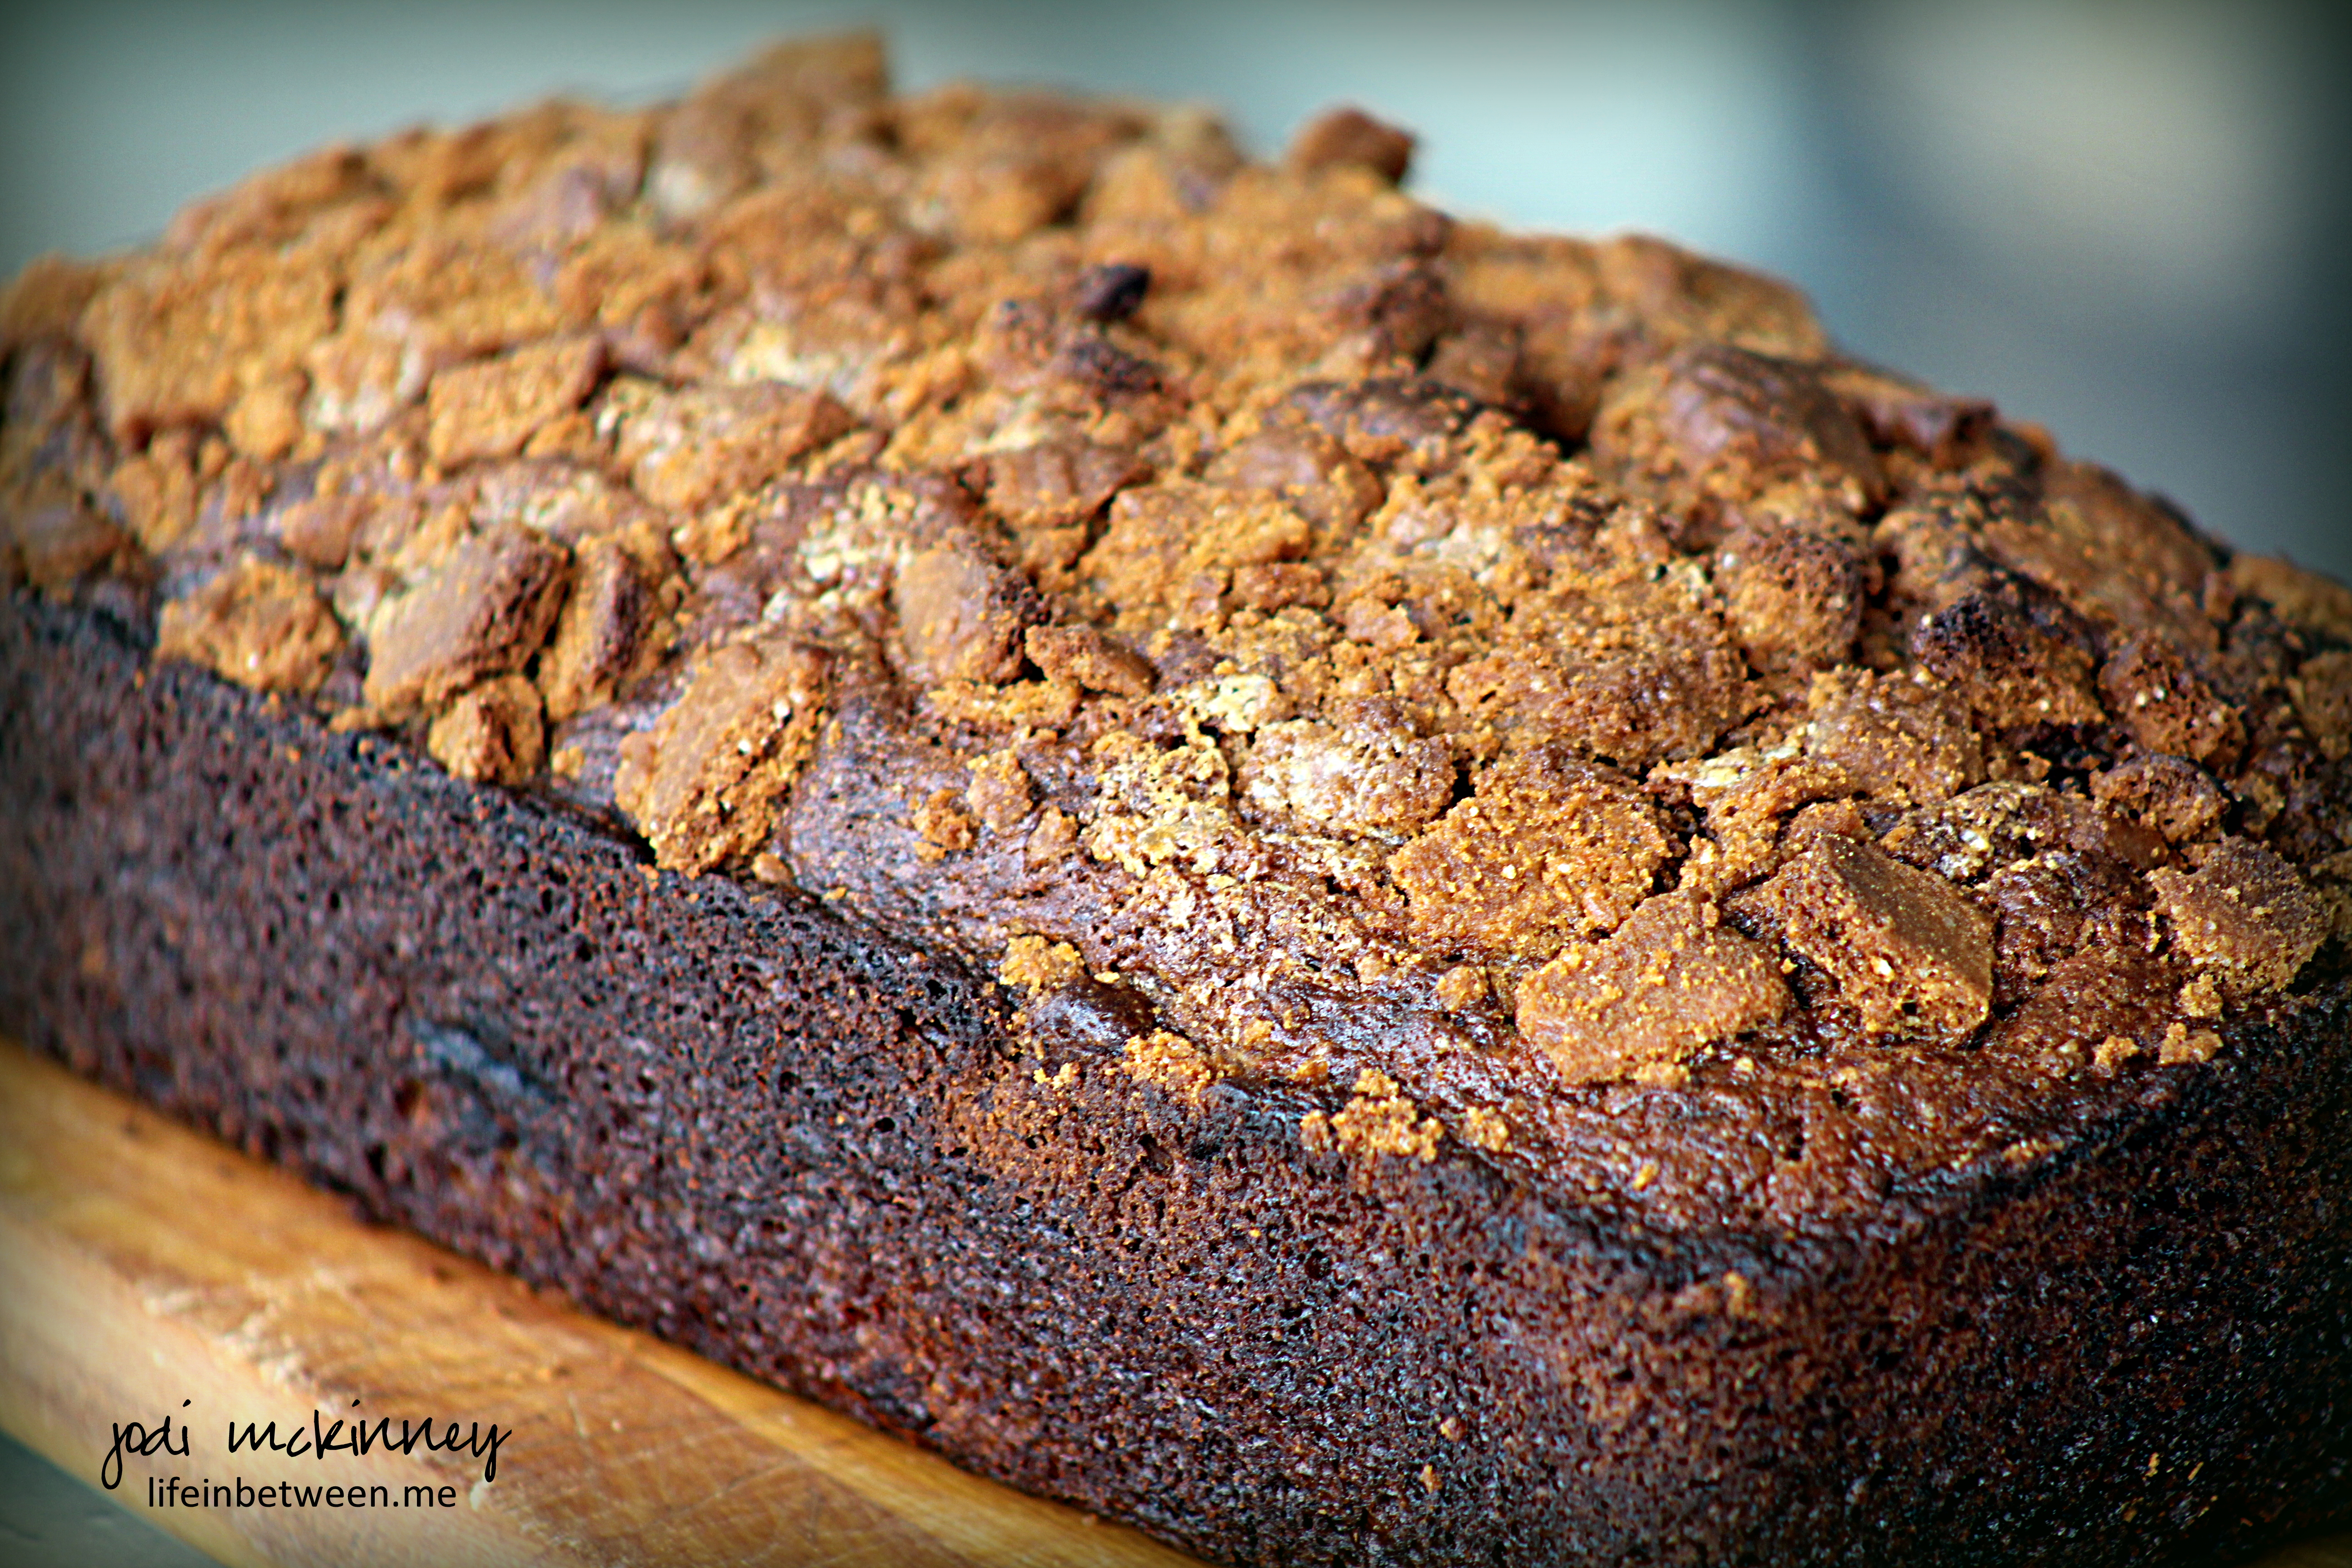
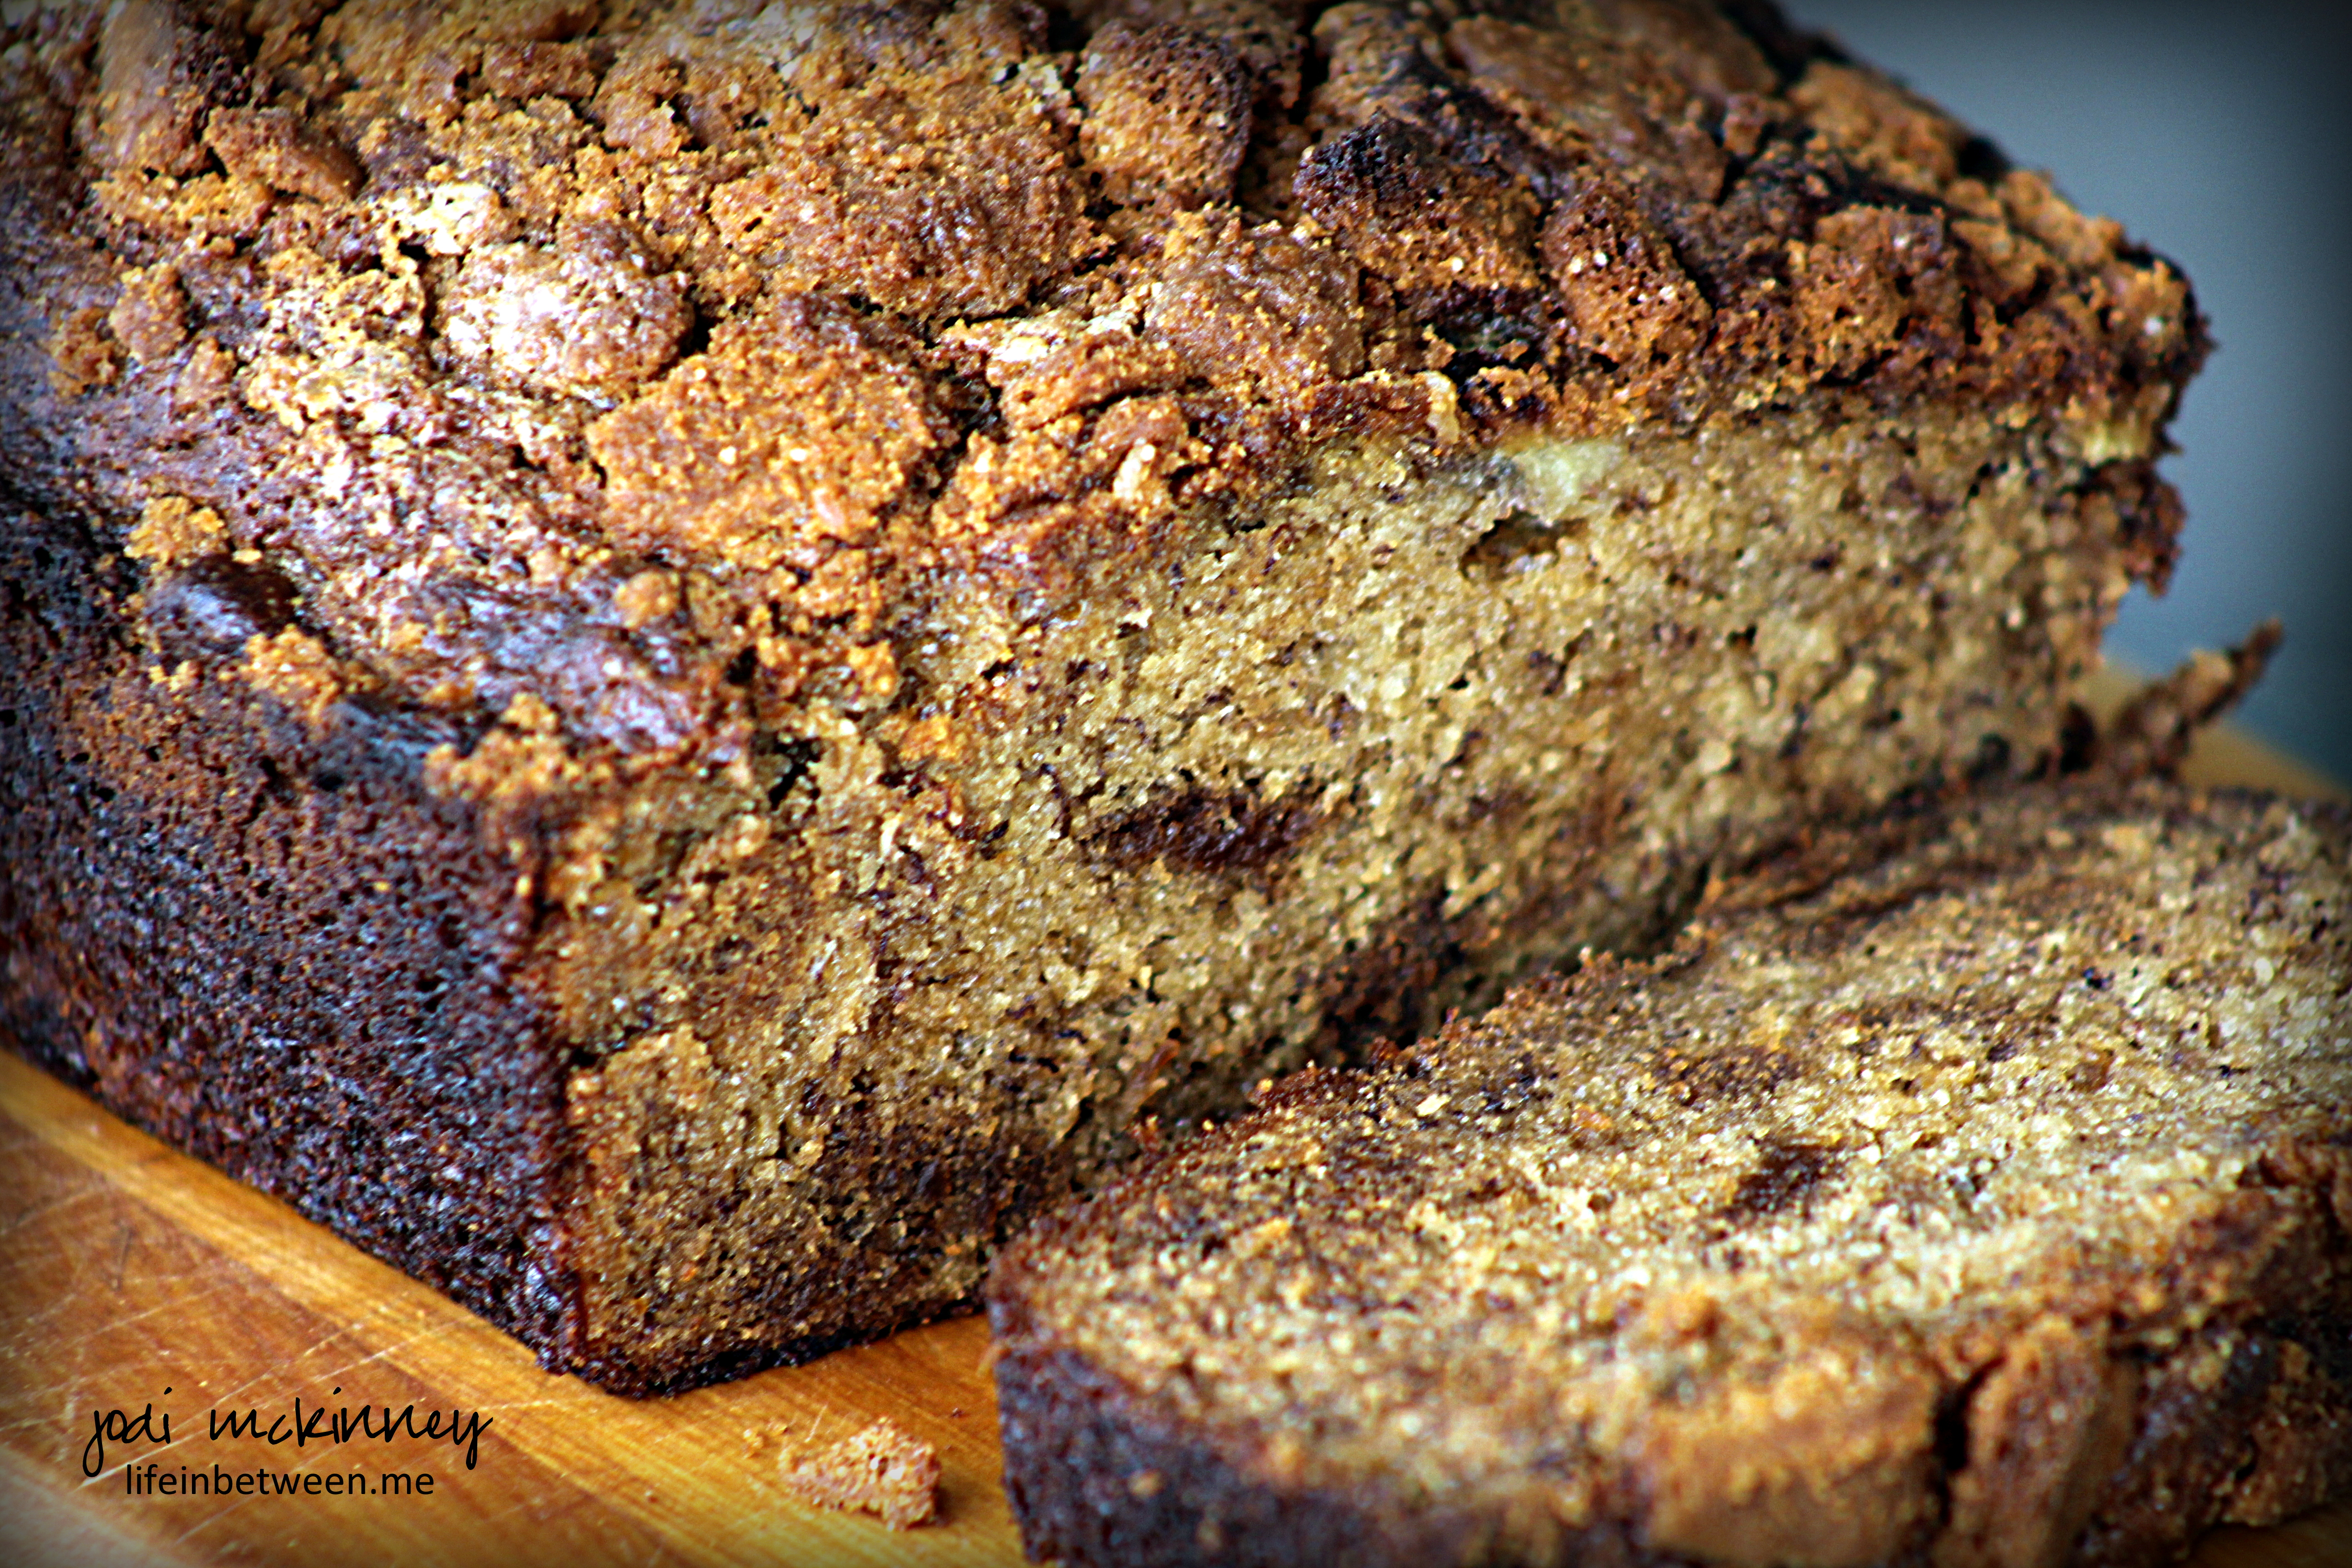
BISCOFF BANANA BREAD!

biscoff banana bread 2

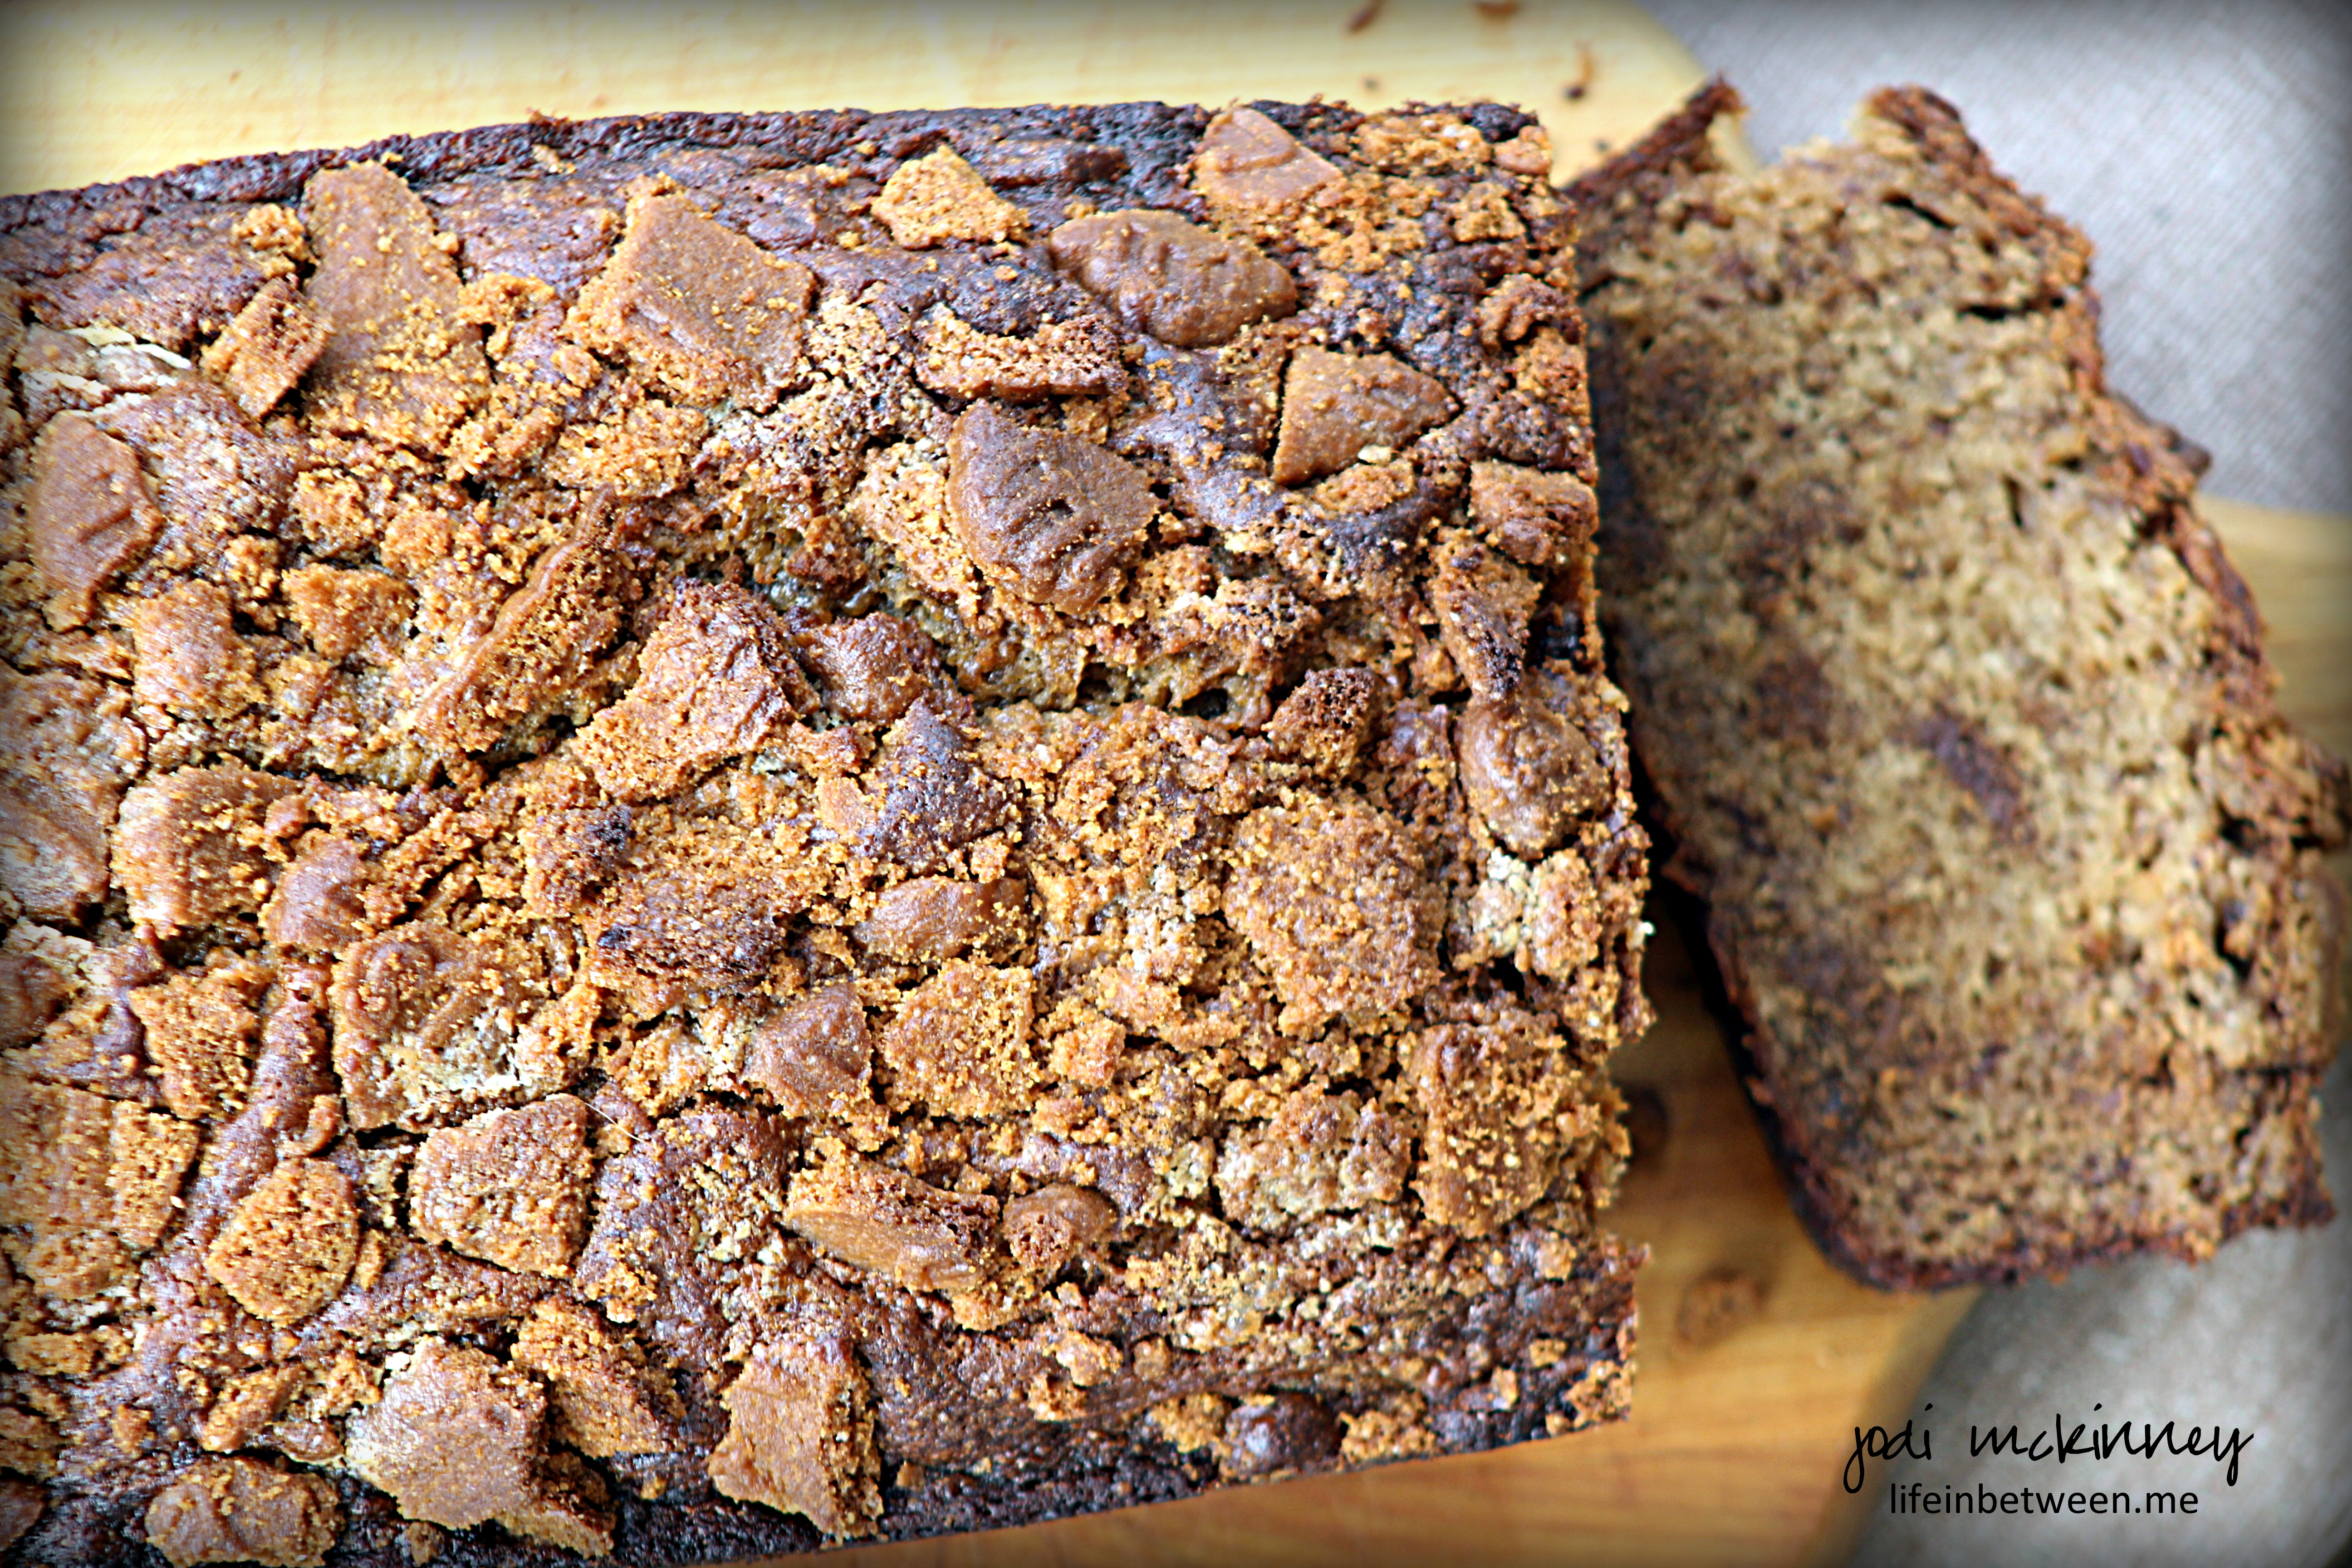
Oh Goodness Gracious – the YUMMMMiness of Biscoff Spread, crunchy Biscoff cookies, and sweet, moist banana bread.  It is pretty much the ultimate deliciousness – especially for this time of year when we just crave comforting foods!

biscoff banana bread 3

My guys loved it!

In fact, when I gave Nick his “sample,” I asked if it was a thumbs up.

His reply:

“2”

Score!

No oil in this bread either.  It is made with Greek yogurt.

The original recipe, which I have shared below from Table for Two, calls for plain Greek yogurt.

I used vanilla.

Yum!

And I added about one more tablespoon of butter, which I added in dabbles on top of the crushed up Biscoff cookies on top, just to make them a bit crisper and crunchier.   (I can never just leave well enough alone!)

Biscoff Banana Bread


From: Table for Two

3 ripened bananas, peeled and mashedBiscoff banana bread 1
1/3 cup plain Greek yogurt
1/2 cup Biscoff spread
3 tbsp. butter, melted
2 eggs
1/2 cup granulated sugar
3/4 cup all purpose flour
3/4 tsp. baking soda
1/2 tsp. salt
1/2 tsp. ground cinnamon
18 Biscoff cookies, crushed

1. Preheat oven to 350 degrees. Grease a 9×5 loaf pan and set aside.

2. Combine the first five ingredients and mix until well blended.

3. In a large bowl, combine the sugar, flour, baking soda, salt, and cinnamon.

4. Add the dry ingredients to the wet ingredients and mix until combined.

5. Gently fold in 3/4 of the crushed Biscoff cookies with a spatula.

6. Pour the batter into loaf pan and top with the remaining 1/4 crushed Biscoff cookies.

7. Bake for 1 hour or until toothpick inserted in the middle comes out clean.

8. Let cool completely before removing from pan and slicing.

ENJOY!

Cheers & Hugs,

Jodi


Spicy Dr. Pepper Pulled Pork

Spicy Dr Pepper Pulled Pork

Are you ready for a party in your mouth?

Looking for a versatile recipe that can be a main course, a sandwich, serve a crowd, be made into a great nacho platter?

Look no further!

I present:

Spicy Dr. Pepper Pulled Pork

ENJOY!  (We sure did)

Spicy Dr. Pepper Pulled Pork

Ingredients:Spicy Dr Pepper Pulled Pork

  • 5 lb boneless pork loin (or your favorite pork roast)
  • 1 large onion, chopped
  • Half of a 16-oz. jar sliced banana peppers rings with juice
  • 1 10-oz. can Rotel Diced Tomatoes with Green Chilis
  • 2 12-oz cans Dr. Pepper soda
  • 2 Tbsp. brown sugar

Place all in crockpot and cook on High for 6 hours.  Remove pork and shred with fork.  Place back in juices and let set at least a half hour.  Even better the next day when the juices and meat all mix and mingle even more!

Serve on Hard Rolls, over mashed or fried potatoes, with rice, in a tortilla wrap with your favorite fillings or over tortilla chips with queso and shredded cheese and pickled jalapenos for the most amazing Pulled Pork Nachos!

Wouldn’t you be the hit of the party serving these nachos for the Super Bowl or a Playoff party this weekend?

Spicy Dr Pepper Pulled Pork nachos

Want to see a little closer?!

Spicy Dr Pepper Pulled Pork nachos 2

This recipe might be fun to try with beef or chicken too.

Have some fun in the kitchen.  Creativity is everywhere!

Cheers & Hugs,

Jodi

*Inspired by The Pioneer Woman’s recipe.

Goji Berry Energy Bars – A Super Food Snack

Goji Berry Energy Bars 3

So this is pretty out of character for this cookie-baking, haluski and halupki making – lover of all comfort foods – but it IS the new year –

and we ALL seem to go off on little kicks….

Well, my son, Nick has been making healthy breakfast smoothies lately, so we bought him a Super Food Smoothie cookbook to go with his new Ninja for Christmas, and we’ve been discussing super foods.

We decided to try some new things like Goji Berries and Chia Seeds, and Cacao Nibs and Maqui Berry Powder.

I’m not really big on drinking my breakfast.

I like something I can sink my teeth into.

So I found and tweaked a recipe for these healthy, tasty, energy bars that make a great breakfast or mid-morning or mid-afternoon pick-me-up snack.

Goji Berry Energy Bars 2

I love all the ingredients in them – almonds and walnuts and sunflower seeds with a bit of sweetness from the cacao and goji berries and dates.

Goji Berry Energy Bars

Who says healthy and good for you can’t be tasty and comforting!?

Give them a try.  Throw them in a ziploc in the freezer and grab when on the go!  Let me know what you think about them if you try.   And keep in mind, this recipe can be tweaked and improvised in many ways.  Change up the nuts or berries.  Use local honey instead of agave, whole wheat or coconut flour, raisins instead of dates.  The possibilities are endless.  Just like the taste!

Goji Berry Energy Bars a Super Food Snack

Ingredients:Goji Berry Energy Bars 3

  • 1 cup walnuts
  • 1 cup almonds
  • 1 cup pumpkin seeds
  • 12 dates
  • ½ teaspoon sea salt
  • 1 teaspoon vanilla
  • 2 Tablespoons almond flour
  • ½ cup agave
  • ½ cups cocoa nibs
  • 1 cup goji berries

Directions:

Preheat oven to 350 F.  Grind walnuts, almonds and pumpkin seeds in a food processor or Ninja or blender. Add the dates and pulse, making sure not to pulverize, but leaving some texture.

Pour into a mixing bowl, and add the rest of the ingredients.  Mix well.

Spread into an 8×8 baking dish, and bake for 20 minutes.

Cut into squares, and serve.  Freeze in Ziploc bag to maintain freshness and have on hand for snacks on the go.

Cheers & Hugs,

Jodi

Chocolate Orange Crinkle Cookies (with Terry’s Chocolate Orange)

Chocolate Orange Crinkle Cookies 1

If you haven’t finished your holiday cookie baking yet – you are in luck!  I have discovered an amazing new recipe for Chocolate Orange Crinkle Cookies using Terry’s Chocolate Oranges that is TO DIE FOR!

Chocolate Orange Crinkle Cookies 2

Terry’s Chocolate Oranges are sometimes only available around this time of year, so drop what you are doing and get to the store and stock up on these so you can make them now and throughout the year!  ( You can always order from Amazon too!)

Chocolate Orange Crinkle Cookies 3

I found this recipe on a lovely blog called, What Jessica Baked Next, and I’m looking forward to continuing to see what Jessica bakes next!   In Jessica’s recipe, she calls for using EITHER Terry’s Chocolate Oranges OR chocolate chips with fresh orange zest.  I, however, used both Terry’s Chocolate Oranges AND fresh orange zest!  OH MY MY MY!

I also decided to dust them with a sprinkle of powdered sugar to make them look a bit more festive.

This cookie is like a brownie and a cookie all in one.  Crispy on the outside, gooey on the inside and just that right amount of fresh orange taste to compliment the chocolate in such a divine way!

Here is the recipe.  ENJOY!

Chocolate Orange Crinkle Cookies

Ingredients:Chocolate Orange Crinkle Cookies 2

  • 1 cup butter, softened
  • 2 cups packed light brown sugar
  • 2 large eggs
  • 2 tsp vanilla extract
  • 2 1/4 cups all-purpose flour
  • Dash of salt
  • 1 tsp baking powder
  • 1 tsp baking soda
  • 4 Tbsp cocoa powder
  • 2 (6.17 oz) Terry’s chocolate oranges, chunked (I used the DARK chocolate)
  • 1 tsp fresh orange zest
  • Powdered Sugar for dusting, optional

Directions:

  • Preheat oven to 375 F.
  • Cream butter, brown sugar and vanilla together with electric mixer until light and fluffy. Add egg and beat until incorporated.
  • Add flour, salt, baking powder, baking soda and cocoa powder, and mix until dough comes together.
  • Add the chocolate chunks and orange zest and gently mix to combine.
  • Make heaping tablespoon sized balls and place on baking stone or baking sheet.  Bake for 10 minutes until crackling occurs on top.
  • Allow cookies to cool on stones/baking sheets for 5 minutes, then sprinkle with powdered sugar.
  • Cool 5 more minutes on stone/baking sheet, then remove to cooling rack to completely cool.

Cheers & Hugs,

Jodi

Christmas Pittsburgh-Style Thumbprint Cookies

Christmas Pittsburgh Thumbprint Cookies 2

Christmas baking time is in full swing around here.

Christmas Pittsburgh Thumbprint Cookies 3

And those of us that live in and around Pittsburgh make thumbprints our own special way.  With icing!  and Sprinkles!

Christmas Pittsburgh Thumbprint Cookies

So for my Cookie Swap Party this coming weekend, Christmas Pittsburgh Thumbprints it is!

If you’d like to give them a try and share something different with your family and friends, try a few new thumbprints – like last week’s Twix Chocolate Caramel Shortbread version and these tasty Pittsburgh favorites.

Christmas Pittsburgh Thumbprint Cookies

Cookie Ingredients:

  • 5 cups all-purpose flour
  • 1 teaspoon salt
  • 2 cups butter, at room temperature
  • 2 cups powdered sugar
  • 4 tsp vanilla extract
  • Sprinkles

Directions:

  1. Preheat oven to 350 degrees F.
  2. Using an electric mixer on medium-high speed, cream together the butter, powdered sugar and vanilla extract until light and fluffy, about 3 minutes. Reduce the mixer speed to low and add the flour and salt. Once it is mostly incorporated, slowly increase the speed back to medium-high and beat for another minute or so until a dough forms.
  3. Form tablespoons of dough into balls and roll in the sprinkles.  If dough is a bit dry, you can add a little bit of milk or cream or put on your hands when rolling the balls to allow sprinkles to stick.
  4. Place on baking stone about 1 – 1/2  inches apart. Make a slight indentation with your thumb or finger on the tops of all the cookies.
  5. Bake for 8 minutes, then make a deeper indentation in the middle, and bake for an additional 7-8 minutes. The cookies should not brown much at all around the edges. Transfer the cookies to a wire rack to cool completely.

Icing:

  • 1 1/2 cup powdered sugar
  • 2 Tbsp corn syrup
  • 3 Tbsp milk or cream
  • Pinch salt
  • 1/2 tsp vanilla
  • 2 tsp butter, room temperature
  • Food coloring

Stir together all ingredients until smooth, then drop a spoonful into each cooled cookie.

Enjoy!

Cheers & Hugs,

Jodi


Twix Chocolate Caramel Shortbread Thumbprint Cookies

twix cookies 1

It’s Christmas cookie baking time, and I always like to try cookies that are a little different, a little more decadent, a little fancier, a bit more festive than usual for holiday baking.

I think I am on a chocolate caramel kick (Rolo Hot Chocolate Recipe Monday)!

I found a ton of different cookies with these ingredients, but ended up trying one posted by The Recipe Critic and tweaking it very slightly.

Twix Cookies

If you are a fan of Twix Candy Bars, you are going to go BONKERS over these awesome thumbprint cookies.

Twix Chocolate Caramel Shortbread Thumbprint Cookies

  • Servings: Approx. 4 dozen
  • Print
Ingredients:twix cookies 1
Shortbread Layer:
  • 4 sticks (1 lb) Butter, softened
  • 1 1/2 cups sugar
  • 6 Eggs (yolks only)
  • 3 tsp vanilla
  • 4 1/2 cups all-purpose flour

Caramel Filling:

Chocolate Topping:

Directions:

  • Shortbread Cookies:  With electric mixer, combine butter, sugar, egg yolks and vanilla. Beat at medium speed until creamy.   Add flour, and beat at low speed until well mixed. Cover and refrigerate at least 1 hour or until firm.
  • After dough has chilled, shape into 1-inch balls. Place 2 inches apart onto ungreased cookie sheets or baking stone. Make indentation in center of each cookie with thumb or end of wooden spoon handle. Bake at 375 degrees F for approximately 8 minutes or until edges begin to brown. Cool completely.
  • Caramel filling: Melt the caramel and cream in the microwave stirring every 30 seconds until fully melted. Using a teaspoon fill each indentation with the caramel.
  • Chocolate: Melt the chocolate in the microwave stirring 30 seconds at a time until smooth.  Spoon into a ziploc bag.  Cut a tiny snip in the corner of the baggie to pipe the chocolate onto the cookies.

I bet these would taste wonderful with a steaming mug of Rolo Hot Chocolate!   Can you even imagine!?!  ‘Tis the season!

Cheers & Holiday Hugs,

Jodi

Rolo Hot Chocolate

rolo hot chocolate 2

Rolo Hot Chocolate

I may have discovered the most amazing, best ever homemade hot chocolate in the entire universe.

And it is EASY!

Rolo hot chocolate

I discovered it on The Country Chic Cottage, but (believe it or not) found I could reduce the sugar content a bit over what Angie recommended in her blog.

This is the perfect warmer-upper comfort drink to enjoy by a crackling fire with your holiday lights on reading a book or watching a holiday movie.

I am sure the little ones that live in or come to your home would love this as a special treat too!

rolo hot chocolate 3

Ready for this cinchy pinchy, two-ingredient, ultra yummy, rich and creamy hot chocolate recipe?  (enough adjectives?)

Here it is!  ENJOY!

Rolo Hot Chocolate

Ingredients:rolo hot chocolate 2

  • 5 Hershey’s Rolo Chocolate Caramel Candies (Angie recommends 7, but I felt 5 was plenty.  Feel free to adjust to your liking.)
  • 1 Cup (or as much as fills your mug) Skim Milk (I used Skim, but you can use 2% or Whole Milk if you want it even richer.  I would rather eat another Rolo and go with the Skim Milk myself!)

Directions:

  • Unwrap Rolo Candies and put in your mug.
  • Microwave for 20 seconds, then stir.
  • Add Skim Milk and stir.
  • Microwave for an additional 1 1/2 minutes.
  • Stir until completely melted.
  • Garnish with mini marshmallows if desired.

Thanks for the inspiration, Angie!

Cheers & Hugs,
Jodi

Homemade Old-Fashioned Coconut Cream Pie

coconut cream pie slice

One of the ways I express love is through my baking.  And amidst all of the darkness and sadness of the past few days, I thought it time to share some love.

coconut cream pie

When my dear “Oh Rob” sweetly requested an old-fashioned coconut cream pie for Thanksgiving this year, I was so happy to oblige.

coconut cream pie slice2

As it turns out, his mom always made a coconut cream pie (or two) for Thanksgiving.  Coconut Cream is also one of hubby’s faves and our dear 92-year old Aunt Francie’s too, who joined us this year to celebrate.

coconut cream pie2

This pie was a huge hit – even with the kiddos.

Made with lots of love and dreamy, creamy awesomeness.

Delicious, nostalgic, and oh so yummy!

Old-Fashioned Coconut Cream Pie

Ingredients:coconut cream pie slice

For the crust:

  • 1 cup flour
  • 1/3 cup Crisco shortening
  • Dash of salt
  • Approximately 1/2 cup cold water

Coconut Cream Filling:

  • 3 cups Half and Half (or whole milk)
  • 1/3 cup flour
  • 2/3 cup white sugar
  • pinch of salt
  • 1 cup sweetened shredded coconut
  • 3 large egg yolks, beaten
  • 4 Tbsp butter
  • 2 tsp vanilla extract
  • 1/2 tsp almond extract

Whipped Cream Topping:

  • 1 cup heavy whipping cream
  • 1 1/2 tsp vanilla extract
  • 3 Tbsp powdered sugar

Directions:

  • Prepare pie crust by blending flour, shortening, and salt with a pastry blender until mixture resembles coarse crumbs.
  • Gently blend in water until dough forms.  Do not overwork.
  • Roll dough out into approximately 12 inch circle, and place into a  9 inch pie plate.  Flute edges and poke bottom of crust with a fork 6-8 times.
  • Bake at 400 degrees for 12-15 minutes.
  • Cool completely before adding the filling.
  • For the filling, scald the milk in the microwave or on stove top to almost boiling.
  • Combine flour, sugar, salt and coconut into a saucepan.
  • Over medium heat, whisk 1 cup of the scalded milk into the flour/sugar mixture.
  • As this mixture begins to thicken, add another cup of scalded milk and continue whisking until it begins to thicken again.
  • Add the final cup of milk, and cook over medium heat until mixture  begins to thicken.
  • Remove from heat, and pour 1/2 cup of thickened mixture into the beaten egg yolks, continuing to whisk.
  • Pour this mixture back into the pot and continue to whisk.
  • Cook for an additional 2-3 minutes until mixture reaches pudding consistency.
  • Remove from heat, and stir in butter, vanilla and almond extract.
  • Cool for 15-20 minutes.
  • Pour into baked pie shell.
  • Chill completely before adding vanilla whipped cream.
  • For whipped cream, combine heavy whipping cream, powdered sugar, and vanilla.  Beat until soft peaks form.
  • Spread on top of cooled coconut cream filling.
  • Garnish with toasted coconut

Enjoy!

Cheers & Hugs,

Jodi


Heavenly Hot Cocoa Brownies

Heavenly Hot Cocoa Brownies 1

Chocolate lovers look out!

Heavenly Hot Cocoa Brownies 2

Brownie lovers beware!

Heavenly Hot Cocoa Brownies 3

If you are still baking boxed brownie mixes, get ready to rock your world.

I have discovered the ultimate homemade brownie recipe that is not only easy, but has an amazingly crispy, crinkly, chewy cracked crust floating atop a rich fudgy center that is going to cause you to hear angels rejoicing from your taste buds singing.

Heavenly Hot Cocoa Brownies 4

I wanted to create a brownie that was like taking a bite of a sip of hot cocoa.

So tweaking this amazing recipe (originally from Taste of Home) up just a bit made a real winner.

Get ready to bake and taste and share and treat those you love with a brownie that is simply beyond anything you have ever tasted before.  I dare you!

Heavenly Hot Cocoa Brownies

  • 3/4 cup cocoa (I used Hershey’s)Heavenly Hot Cocoa Brownies 1
  • 1/2 tsp. baking soda
  • 2/3 cup melted butter, divided
  • 1/2 cup boiling water
  • 2 cups sugar
  • 2 large eggs
  • 1 1/3 cups flour
  • 1 1/2 tsp pure vanilla extract
  • 1/4 teaspoon salt
  • 12 oz. package semi-sweet chocolate chips (I used Trader Joe’s, which I found delightful, but I often use Nestle’s also)
  • 3/4  cup miniature marshmallows

Directions:

  • Preheat oven to 350 degrees F.
  • In a large bowl, combine cocoa and baking soda.
  • Blend in half (1/3 cup) of the melted butter.
  • Add boiling water and stir until well blended.
  • Stir in sugar, eggs and remaining 1/3 cup melted butter.  Mix until well incorporated
  • Add flour, vanilla, and salt.
  • Stir in chocolate chips and 1/2 cup marshmallows.
  • Pour into a greased 9×13 pan and bake for 30-35 mins. until top begins to crack
  • After removing from oven, top with remaining 1/4 cup mini marshmallows and lightly brown tops with Chef’s Torch (optional)

Cheers & Chocoately Brownie Hugs,

Jodi

Lemon Strawberry Pound Cake

lemon strawberry pound cake photo

Lemons and strawberries in November?  (A time when we are usually baking with pumpkin and cinnamon and apples….?)

Well – we are experiencing some amazing Indian Summer weather here in Mars – with temperatures in the 70’s, the sun shining brightly, and the sky a vibrant shade of blue – so why not – right?

lemon strawberry pound cake 3

Well – the truth be told – that same cute little bugger who requested the Royal Flush Halloween t-shirts recently found a photo on Reddit that struck his fancy a few days ago of a freshly baked loaf of lemon pound cake with strawberries.  He texted me the photo saying, “Please make.”

Well…. how could I resist?  (I know….. pushover! – but really…. I live for this stuff!)

Turns out the sweet young lady who posted the photo stating “this just came out of the oven” did not post the recipe!  How dare she??!!  More than one reader called her “evil” for not posting the recipe!

I did some digging, however, and found the source and the recipe… Score!!  (I know – I have issues!)

Turns out Bianca Davies, the “evil” baker/Reddit poster, is a trained chef from Cape Town, South Africa, who attended Le Cordon Bleu in Paris, but is equally inspired by her Granny and Granny’s lemon trees.

Per Bianca, Granny likes a cake that is “rich, moist, light, airy and slightly fudgy.”   This little pound cake amazingly delivers on all of that – and more!

lemon strawberry pound cake 4

So before we get seriously into Autumn and Winter baking and cooking, you might want to enjoy one last taste of summer!  You will not regret it!

Lemon Strawberry Pound Cake

Ingredients:lemon strawberry pound cake photo

  • 3 eggs
  • 1 ½ cups powdered sugar, sifted
  • 2 tsp vanilla extract
  • 1 ½ cups plain flour
  • ¾ tsp baking powder
  • ¾ cup salted butter
  • zest of 2 large lemons
  • 8-10 fresh strawberries

 Directions:

  • Preheat oven to 350˚F.
  • Grease a loaf pan well with butter.
  • Whisk eggs, sifted powdered sugar and vanilla together in a bowl.
  • In a separate bowl whisk flour and baking powder together.
  • Place butter in a small saucepan. Zest lemons into your butter and place on a low heat to melt. (Do not boil)
  • Combine all three mixes together a little at a time. Do not over mix.
  • Pour into your prepared loaf pan.
  • Chop your strawberries into quarters and arrange evenly on top of the batter.
  • Bake in the middle of the oven for approximately 40 minutes. (The cake should be golden brown and ‘just’ done with your knife or cake tester not coming out completely clean. Do not over bake.)
  • Let cool slightly in the pan, turn out gently and leave to cool on a wire rack.
  • Dust with powdered sugar and try not to eat the whole cake in one go!

Converted recipe from http://thesecretlifeofbee.co.za/ (Bianca Davies, Cape Town, South Africa)

Cheers & Hugs,

Jodi